

Words Lester Perry
Images Thomas Falconer
“Take a sad song and make it better” – Hey Jude, the Beatles. If they’d been mountain bikers, they may well have called
the song “take a new thing and make it better”.
It’s only natural that in times of rising living costs and high inflation, the tools we use for our hobby will also increase in cost – and they have! The price of new bikes continues to climb, and the cheapest way to get an improved ride is not necessarily to buy a completely new bike, but perhaps upgrade key parts on what you’re already riding, although, those too are getting more expensive.
Regardless of whether you’re looking to upgrade an aging bike or make some changes to a new but low-spec ride, we’ll take a look at some ways to get better performance by making incremental, meaningful upgrades without blowing a massive wedge of cash in one hit.
Frame
Beginning with the most expensive single part, and heart of the bike, the frame. Unless the bike is a couple of generations old, the most significant change that platform has undergone is likely a change of colour, or at best a minor tweak in geometry. Most brands run on a 3-year development cycle so, unless they’ve recently made a fundamental change to their lineup or a particular model, chances are the bike you’re riding (unless it’s over six years old or slightly unusual) then it’s likely that, with some tweaks, it could be made to ride similarly to that shiny, front-page-of-Pinkbike, rig you’ve been gawking at the price tag of.
Perhaps the frame you’re on is just not up to the task any more, but its components are still OK. If it’s time for a change, an alloy frame could be the ticket to modern geometry and tech without the price tag of an otherwise identical carbon frame. Although the most obvious difference between an alloy and a carbon frame is the price tag, there are other differences too. The weight can’t be overlooked; an alloy frame is generally at least 500g heavier than a carbon equivalent, although often that figure can be closer to 1-1.5kg. Depending on what sort of riding you’re doing, that extra weight may or may not make much of a difference. In other words, the more pedal-focused a ride, the more the weight counts. It’s worth noting that, in general, the alloy frame sits at the lower end of their range, meaning less development and construction tech goes into it. These things keep the price down, but they do impact the weight and ride quality. Frames from brands that’ve adopted an ‘alloy only’ philosophy, like Commencal, differ slightly in that they’ve put more time into tuning the bike’s feel and flex through more advanced tubing, so arguably these offer a better ride quality. These will usually cost more than a basic alloy frame, but still less than a carbon one.
There’s another glaring advantage with an alloy frame. Once the bike has been through its lifecycle and it’s been thrashed beyond recognition, the frame can be recycled, not just turfed on the scrap heap. Carbon frames aren’t recyclable in NZ, or in most of the world. Although factories have made their manufacturing processes as green as possible, the fact remains that broken or old carbon bikes don’t break down, and instead last forever at their final resting place.
Say, for example, you have an older, but still current enough, carbon frame that’s perhaps sustained some damage – for argument’s sake let’s say it has cracked around a shock mount. If the frame is under warranty, it’s worth beginning with that process as soon as possible; however, if not, all is not lost. A good carbon repair specialist, in many cases, can repair a cracked frame to be as good as new, getting you back on your bike, preventing a carbon frame from ending up in the landfill, and saving you some head scratching as to how you’ll afford a new frame. A carbon repair will almost certainly void the warranty of a frame unless it’s approved by the brand, so be sure to explore your options before committing to a repair if the frame is still in a warranty period.
Let’s say you’re happy with your frame, or you’ve saved some money by purchasing a bike with a decent frame that’s got a low spec on it, aiming to upgrade parts over a longer term. Which upgrades are worthwhile adding to your ride experience, rather than just being a change for the sake of it?
Frame Bearings
Even the latest frame from a reputable brand could have dodgy bearings, limiting how supple its suspension is after just a few rides. Rough or sticky bearings drastically affect not only the levels of grip at the tyres, but also the overall bike feel and enjoyment, as more bumps will be transmitted to the rider.
Staying on top of frame pivot axle and bearing health is key to keeping the suspension running optimally. There’s no point working on tuning or servicing a rear shock if the frame bearings aren’t running freely. A good place to start is to remove your shock and cycle the rear end through its travel. If it’s anything other than completely smooth, we’d recommend removing all pivot bolts and axles to inspect them and the bearings. Hopefully, a simple clean and grease of axles and bearings may remedy the issues. Simply use a small pick and carefully lever off the outer bearing seal. Using a degreaser on a brush or from a pressurised can, can help clean existing grease from inside a bearing if it’s not looking fresh. Pack the bearing full with a bike-specific bearing grease before pressing the seal back into place. If you’ve found a seized bearing or popped a seal off to find rust within one, then it’s time for replacement. A clean and regrease can easily be done at home if you have tools, a little know-how, and some time to watch YouTube tutorials. Bearing replacements are best undertaken by a bike mechanic, although if you have the correct bearing press already, then chances are you know what you’re doing already.
Free-running frame bearings are a simple way to help renew a frame and make the bike feel like a million bucks again.
Brakes
Effective brakes are an integral part of a ride experience, and as they can degrade slowly over time, you may not even realise how bad they’ve become. A good set of brakes with consistent power, feel, and modulation will do their job without you even thinking about them. If you have doubts about the effectiveness of your brakes, this is a great place to consider an overhaul or replacement.
New pads and larger, or unworn, rotors should provide better stopping power than you currently have. If fitting either, it’s worth bleeding the brakes at the same time. A brake bleed ensures your braking isn’t hampered by old fluid or air in the brake lines. If a bleed, fresh pads and new rotors aren’t going to be enough to resurrect a pair of brakes to their former glory, and a full service isn’t likely to help them (a good bike mechanic will know), then new brakes could be in order.
Some brakes have a limited lifespan, particularly some models that use DOT fluid, as their seals swell and degrade over time. Although they can be repaired, it’s usually more cost- effective to replace the entire brake. Don’t stress about needing top-of-the-line brakes; Often, the internals of a brake lever and calliper are identical, or close to it, across a range and in most cases, the only difference between the top level of a range and the bottom is a different finish and a small amount of weight – this of course is reflected in the price.
Fork
As with brakes, the differences between various levels of the same model are few. Weight is generally quite close between the levels, but it’s the internals where the most obvious performance differences are.
The simplest way to rejuvenate an existing fork is to give it a service and, depending on how long it has been since its last service, this could be a simple procedure or a complete tear-down. If you’re chasing performance above what the fork was capable of when it was new, a damper upgrade could be just the ticket.
A damper upgrade on a low to mid-range fork is the most significant performance gain available to a fork. In most cases, a low-end chassis can fit the top-end damper from a given model, meaning you could end up with a low-end chassis with high-end internals and performance.
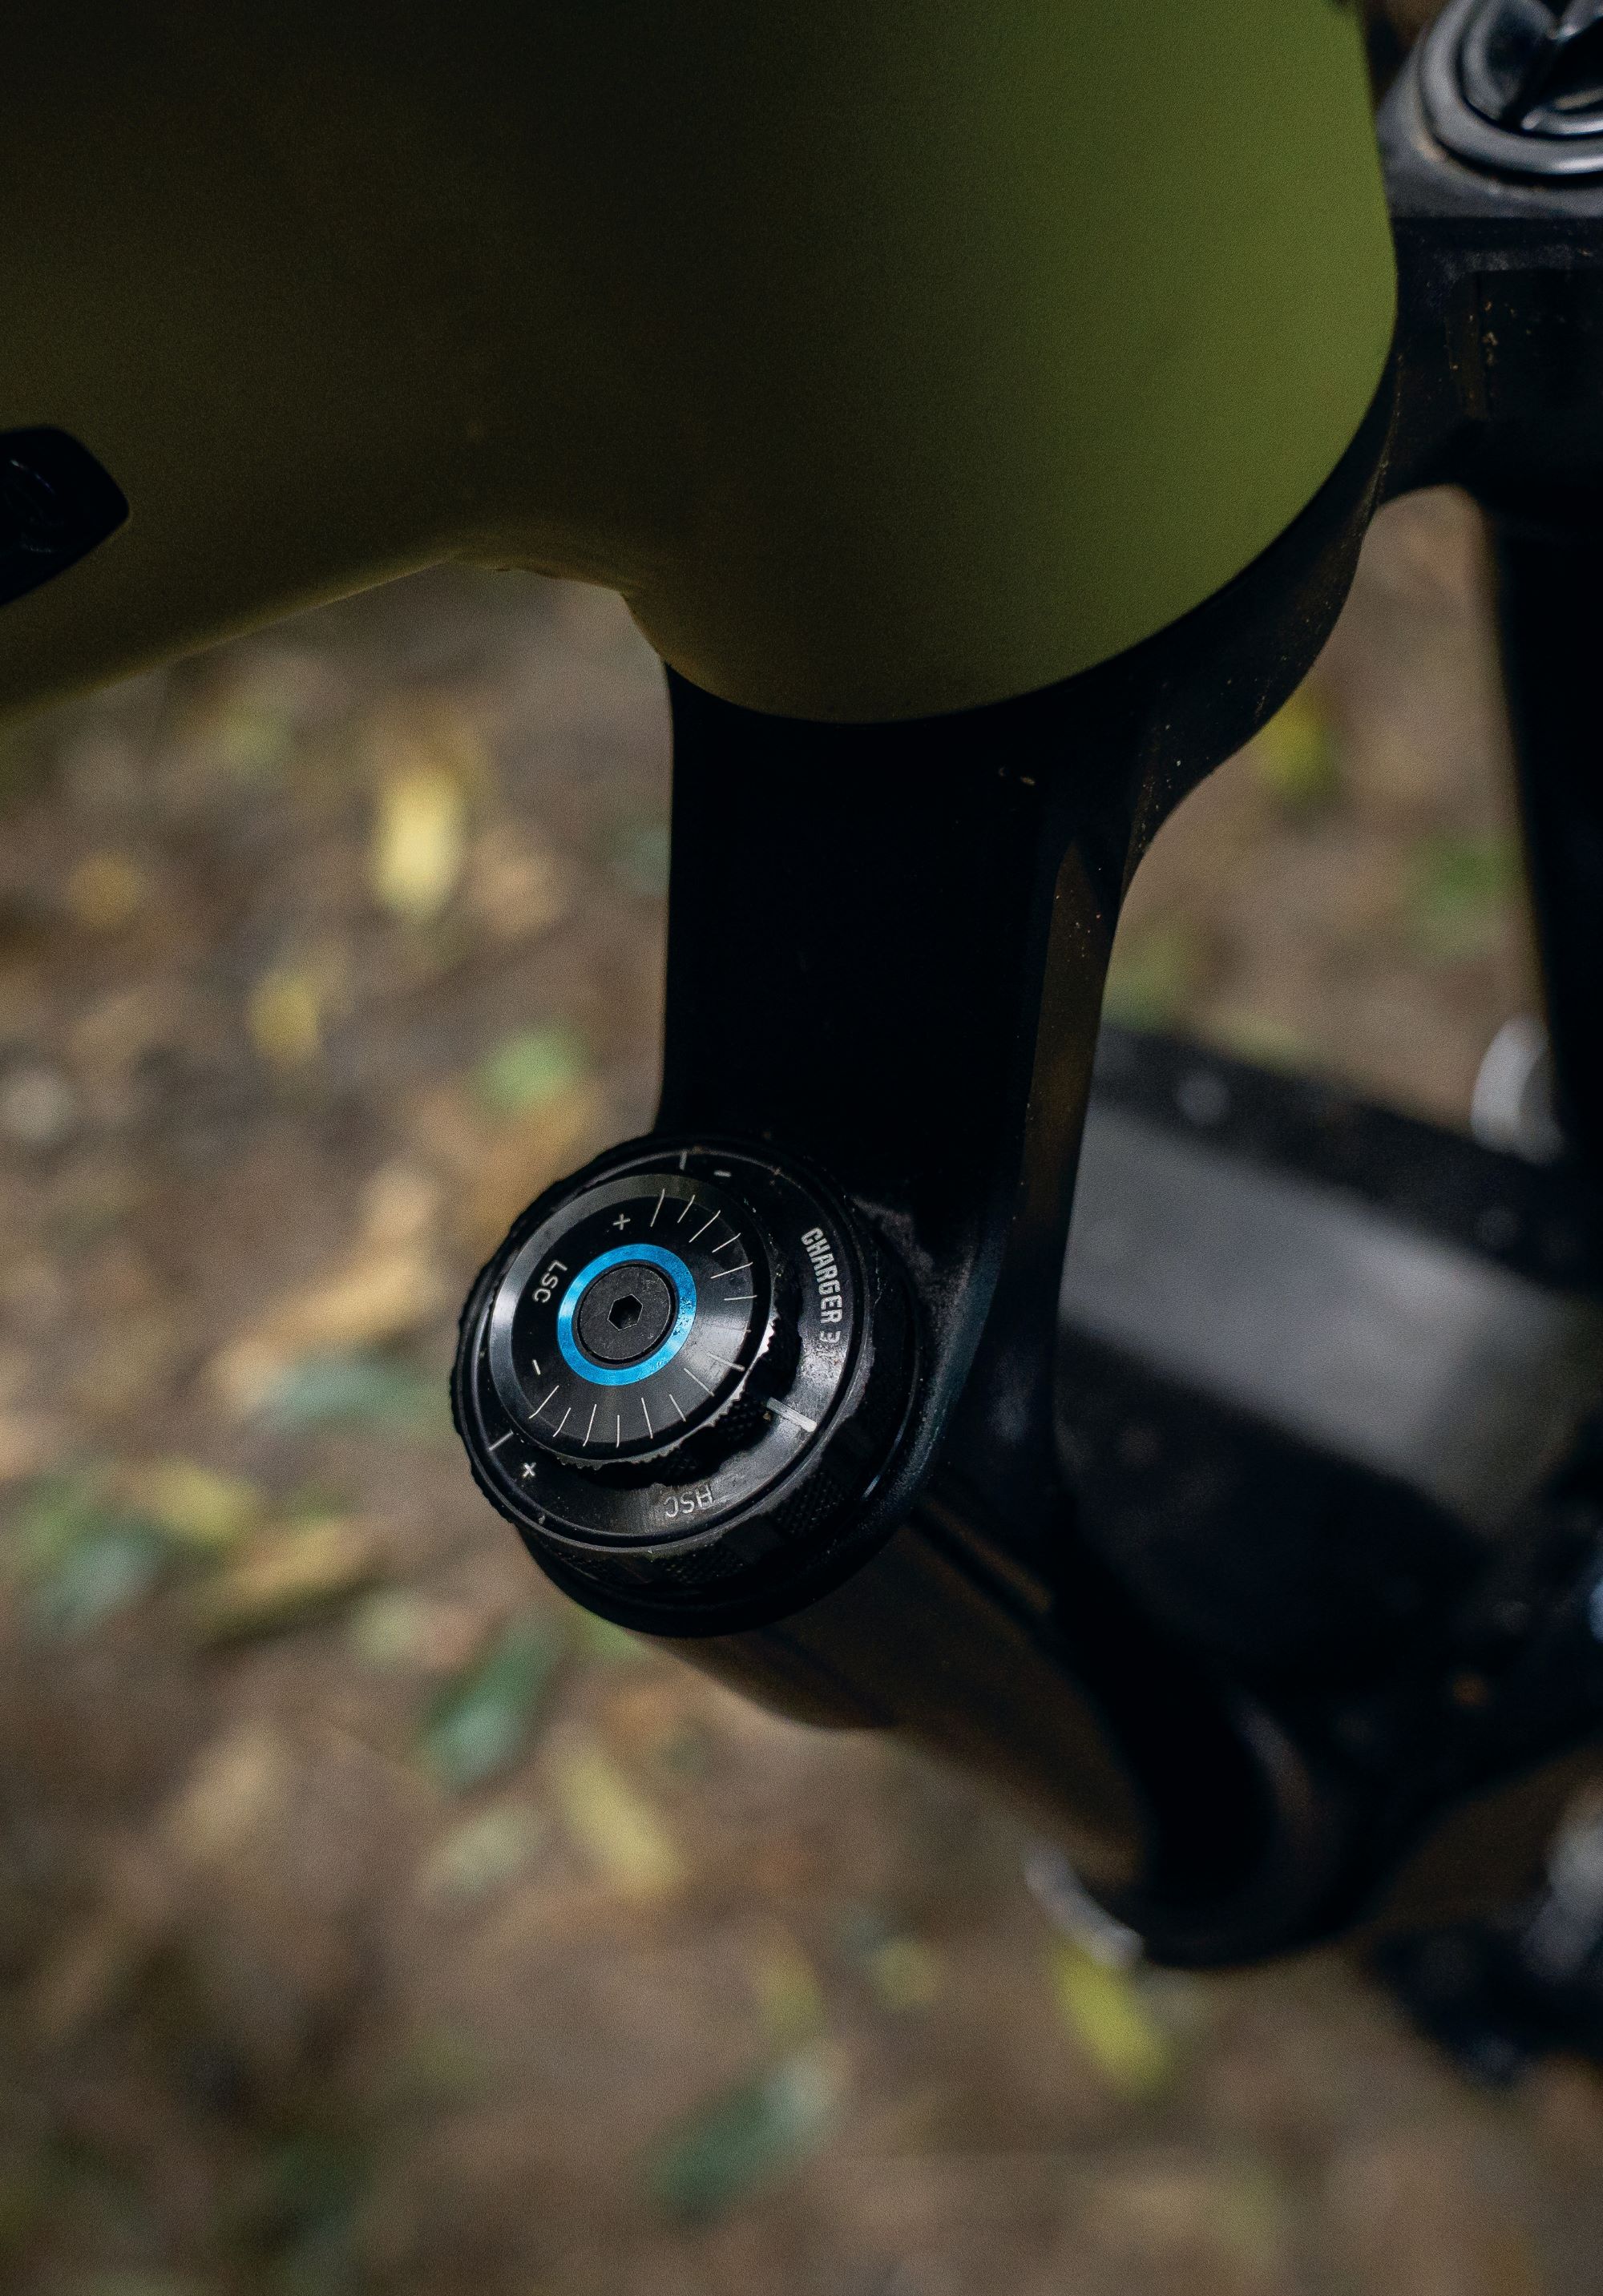
One example where a damper upgrade is better than a replacement fork is on the front of a frame we’ve been using as a review mule. The fork is a couple of years old – a Rock Shox Lyrik Ultimate—and by no means a low-end offering, but technology has moved on from when this model was in the market. During a service, while the fork was in parts, a new Charger 3.1 damper was fitted. The upgrade offers wider, more useful adjustability, better small-bump compliance, and less harshness – what’s not to love? For a fraction of the price of the most recently released model, this fork was upgraded to perform identically to the new model.
Similar upgrades can be made to most brands’ forks. Although there are limitations that dictate the extent of the upgrade and the advantages gained, if your existing fork is in good condition and you’re looking for a better experience, fork upgrades are a great option.
Tyres
For under $200, you could make your bike feel completely different. Fresh tyres enhance all aspects of how a bike rides through by providing increased and more consistent traction. Depending on where you ride, a faster tyre with lower knobs than you currently have could be much quicker and still offer an acceptable level of grip for your local trails. If you’re running some OEM (original) tyres supplied on a new bike, the change to something similar but with better sidewalls and rubber compound could mean a huge step up in handling and confidence, although visually they may not look too different.
If you’re not already running a tubeless setup, this is a worthy investment, although it will likely require a new set of tyres if yours aren’t designed to run without tubes. Tubeless offers better traction, improved puncture resistance and the ability to run lower pressures for better handling and traction.
There’s a lot of subtlety with tyres, and what’s ideal for you depends on how and where you ride, as well as a certain amount of personal preference. New tyres are a great place to look for performance gains. Just be sure to spend some time experimenting with tyre pressures to find what’s optimal for you.
Wheels
Don’t overlook wheels as a place to get some simple performance advantages. Much like frame bearings, new or freshly serviced wheel bearings make a surprising difference to how a bike rolls and maintains speed. Beyond servicing what you already have, if the wheels are overly heavy or beyond repair, a fresh pair could be in order.
OEM wheelsets are continually improving and, generally, now offer a decent build quality and weight for a price point. If your wheels are reasonable, but rolling on cheap hubs, simply stepping up the bearings to something faster rolling will make a difference. Often to shave dollars, OEM hubs are spec’d with sub-par and short-lived bearings, while the rest of the wheel is pretty reasonable, so replacing them gives great bang for buck.
Depending on the style of riding you do, where you’re riding, and how much budget you have to spend, there are a lot of options available for complete wheel replacements. Lighter weight means a bike will be more nimble, but different rims and builds also have different stiffness characteristics, so there’s a bit to consider. Much of the time, it’s going to come down to a balance of price, weight, and overall quality. Don’t overlook some of the large bike companies’ aftermarket offerings when it comes to an outstanding balance of these three qualities. Particularly Specialized’s Roval or Trek’s Bontrager complete wheel sets, which offer fantastic value and are legitimately good wheels.
Dropper Post
Most bikes come out of a factory with a dropper post that is suited to the middle of the bell curve of what height rider is likely to be riding it. Unfortunately, this can mean you may end up with a post that has either too much or too little drop. Too much, and it’s too high at maximum height when extended. Too little drop and the post won’t drop the saddle as low as would be ideal.
There are multiple dropper heights available, ranging from 80mm to 240mm, so you’ll likely find one that suits you, regardless of your height. However, you may need to try a few options to find the optimal one.
There are limitations, particularly with older frames, as to what length dropper they can handle due to shaped seat tubes or hardware interfering with insertions. With a bit of research and a tape measure, you should be right. It’s not the cheapest upgrade, but the optimal length dropper is an ideal place to spend some money, particularly for those who are battling with what they’re currently running. Particularly if your current dropper needs some love, a new and better optimised unit would be money well spent.
