

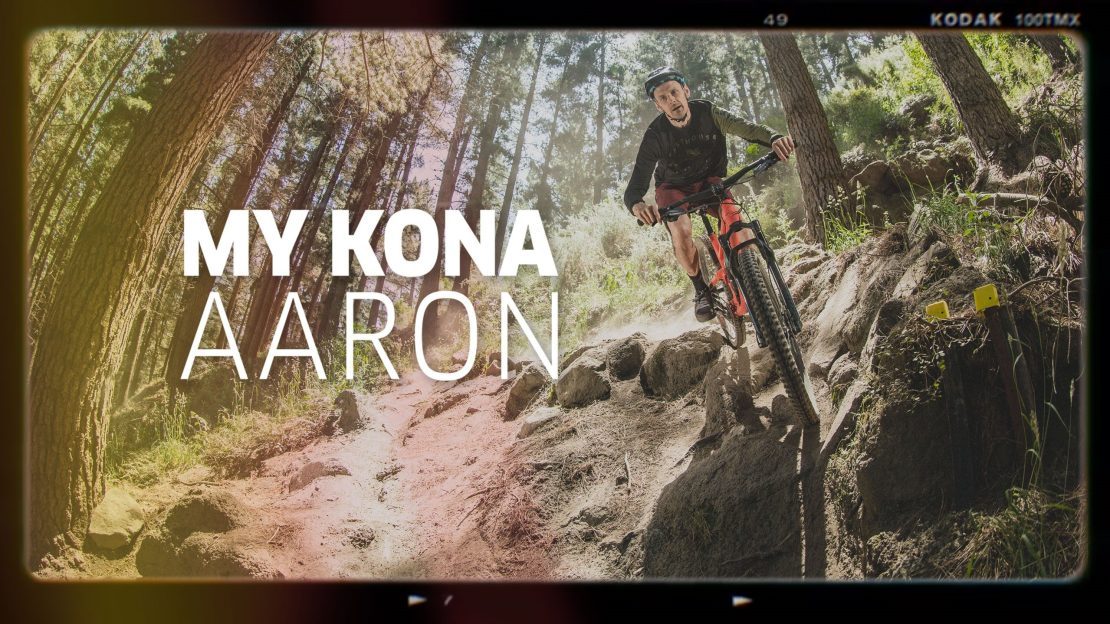
News: My Kona: Aaron Hogg
Aaron Hogg is a senior graphic designer at Kona and you might be surprised to find out that Kona actually have a couple of employees based out of New Zealand. If you're a Christchurch local, you may already know Aaron. If not, watch the video and get to know him.
News: Commencal Media Crew: Chapter #1 - JB Liautard
If you follow our sport, you'll notice that Commencal leans heavily towards competition. In particular DH racing, the Formula 1 of MTB! This is the most demanding practice, not only for the rider, but, also on the gear and equipment. Through both performance and reliability, it's our way of developing the best bikes and proving it to the world.
In addition to the energy we devote to performance we also spend an enormous amount of time producing images. Throughout the year there’s loads of photo and video shoots going on all over the world. Sometimes product oriented, sometimes rider oriented. We are constantly posting content.
For several years now, in order to carry out these shoots, we have our own media department. Today it's made up of 4 artists. Artists who live the brand from the inside, who know our riders better than anyone and who participate in the genesis of the evolution of new bikes and new ranges.
We decided to take advantage of this period of relative calm to put a spotlight on their talents.
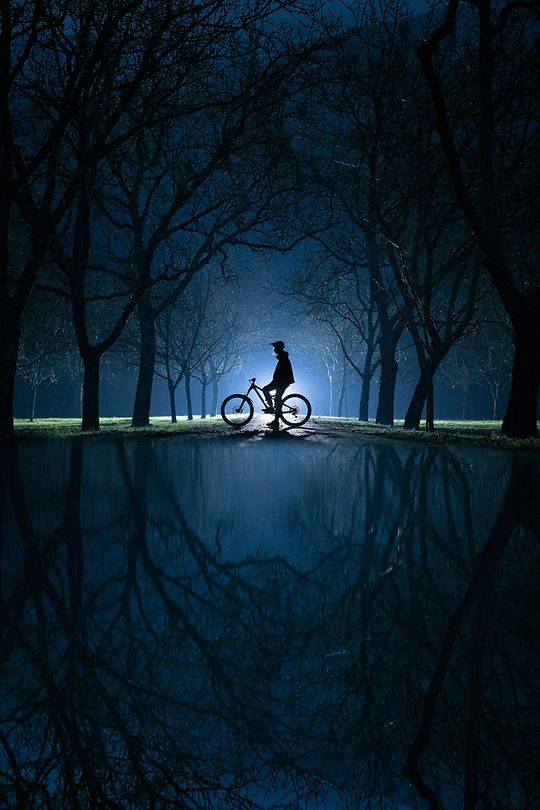
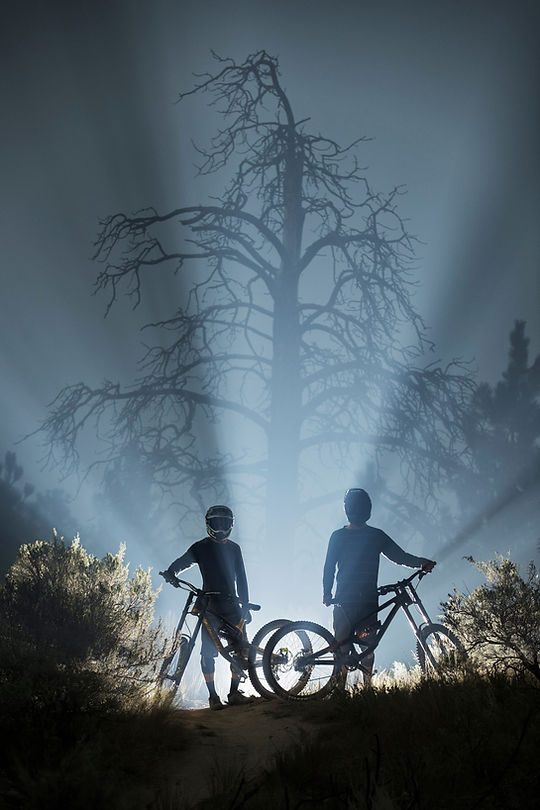
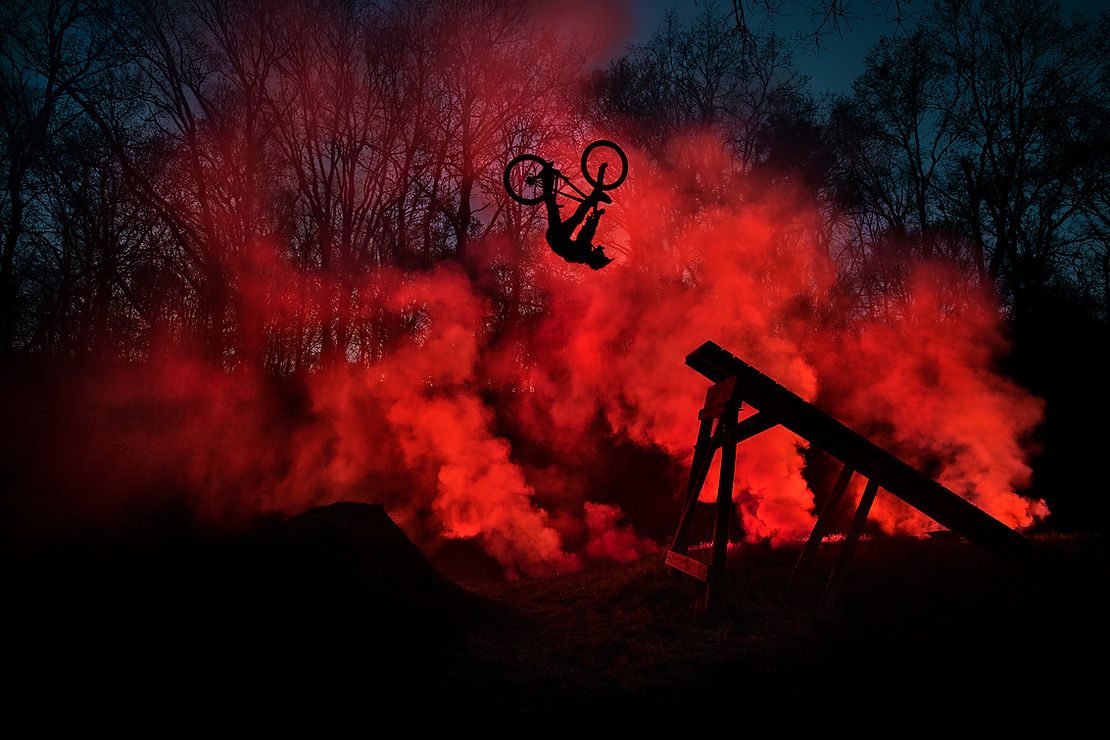
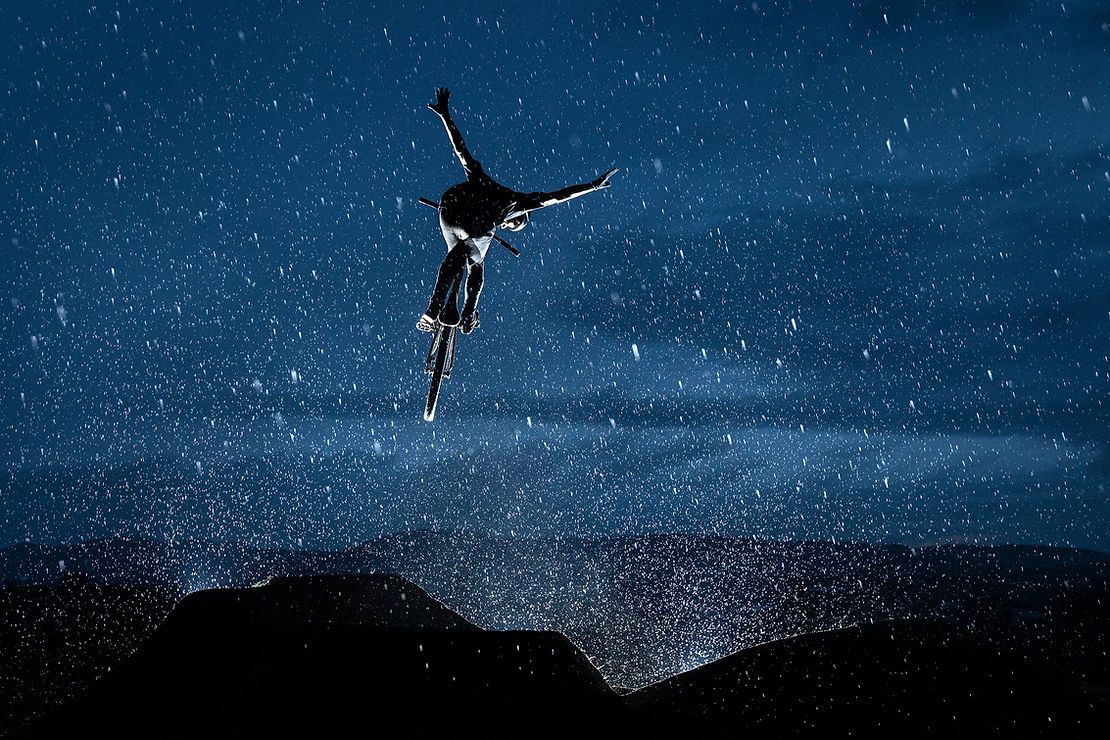
This first chapter is devoted to JB. Capable of making incredible videos too, photography remains his favourite field. Rewarded at RedBull Illume, winner of Photo of the Year on Pinkbike, his talent is undeniable. We asked him to select his 25 favourite shots from the last three years and to tell us the story behind each of them.
I've been working closely with Commencal for the last 3 years, travelling around the world to shoot new bikes, adventures and documenting some rider's lives. During these years, I took a countless number of photos and even narrowing them down to 25 was pretty hard. So here are my favourite images that I've shot during this time.
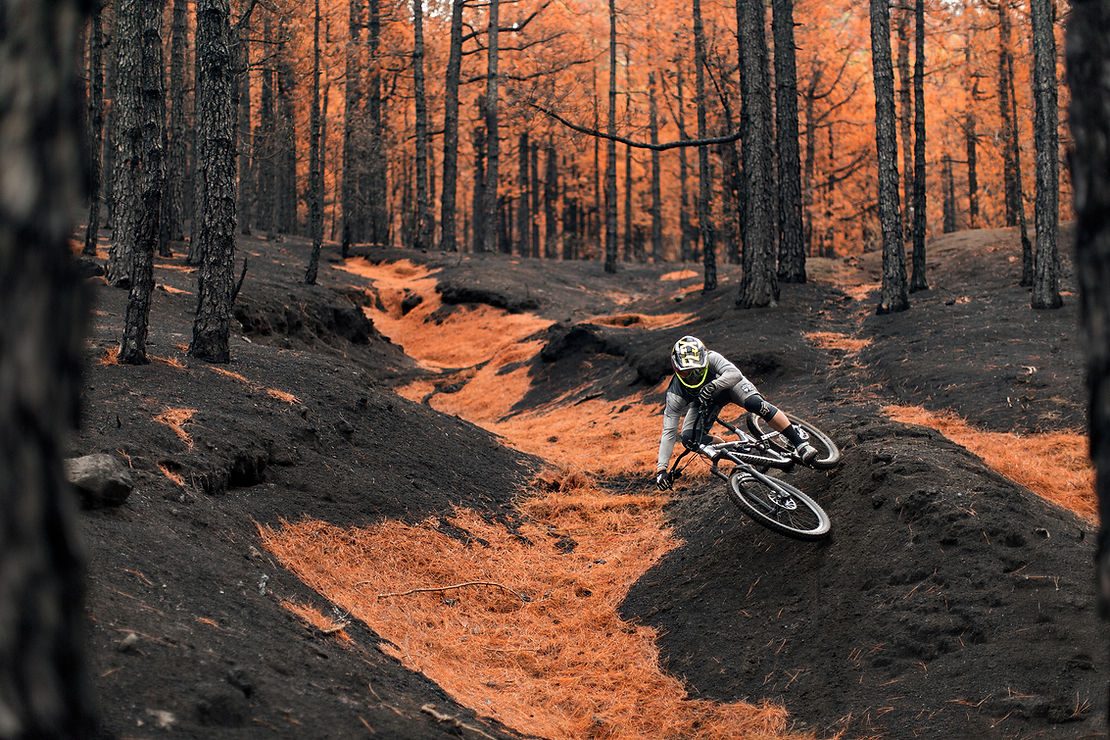
Rémi Thirion - La Palma
I took this photo during my first assignment for Commencal Bicycles on La Palma Island in 2016. We spent our first day there exploring the island as we didn't know anything about it. Luckily we had a guide and he told us there has been a huge forest fire in the area a few months before and the zone was still burnt to ashes. We decided to go there and scout the zone to see how it looked. The forest was totally burnt and black for most of it but some zones were covered with these orange needles. This was some kind of unexpected and surreal landscape, right in front of us! There wasn’t any trail in the forest so we had to find our own lines to shoot. I remember I put so much pressure on myself as I knew I had to take a good photo in this unique and ephemeral landscape but I had no idea about how to make it. I think Rémi did all the magic when he started riding this gully and scrubbing this little dome. I wanted to keep the natural color contrast of the area so I didn’t use any artificial light and we just waited for the sun to disappear behind the clouds to shoot.
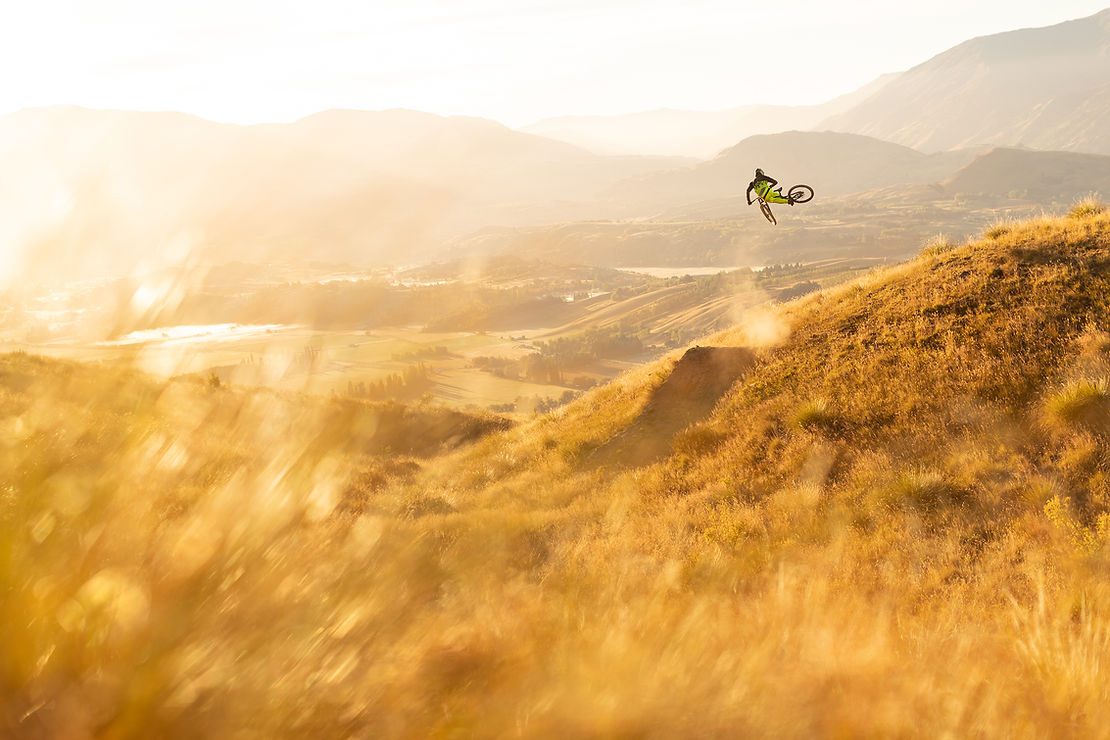
Louis Hamilton - Coronet Peak
Coronet Peak might be one of the most beautiful places I've ever been to. We travelled to New Zealand to shoot the new edition of the Furious back in 2017. It was my first time there and the first thing we wanted to shoot was this hip, hidden somewhere on the side of Coronet Peak's famous trail near Queenstown. Louis flew from the North Island and he'd never hit this jump before, but the goal was to start the shoot at sunrise. We woke up really early and started roaming in the area with our headlamps to finally find this hip. We thought the struggle was over but after a few whips, Louis crashed and broke his saddle right before the sun peaked over the mountains. That was definitely not ideal and after 5 minutes of reflection, we headed back to the car thinking the day was over. On our way back, we crossed paths with 2 other guys going to the jump. They kindly accepted to lend us a saddle, and even if the tube was too small, we made it bigger with tape and finished our morning shoot thanks to these guys.
Cécile Ravanel - Tasmania
This was the worst shooting / riding day ever for a lot of people. In 2017, the second round of the EWS happened in Derby, Tasmania, and after ten days of perfect weather, the finals day might have been the worst in a long time. A big storm hit the area and it was pouring rain the whole day, until the very last stage. While I was trying to cover all my gear with my umbrella, I had the idea to use my flashes under the rain during the race run. I had to build the setup under the rain and ran to a tree in the middle of the track to hang my flashes together under a plastic bag. Luckily, everything went well and they didn't die. I waited for Cecile and took the photo while she was hiding the flashes in the background.
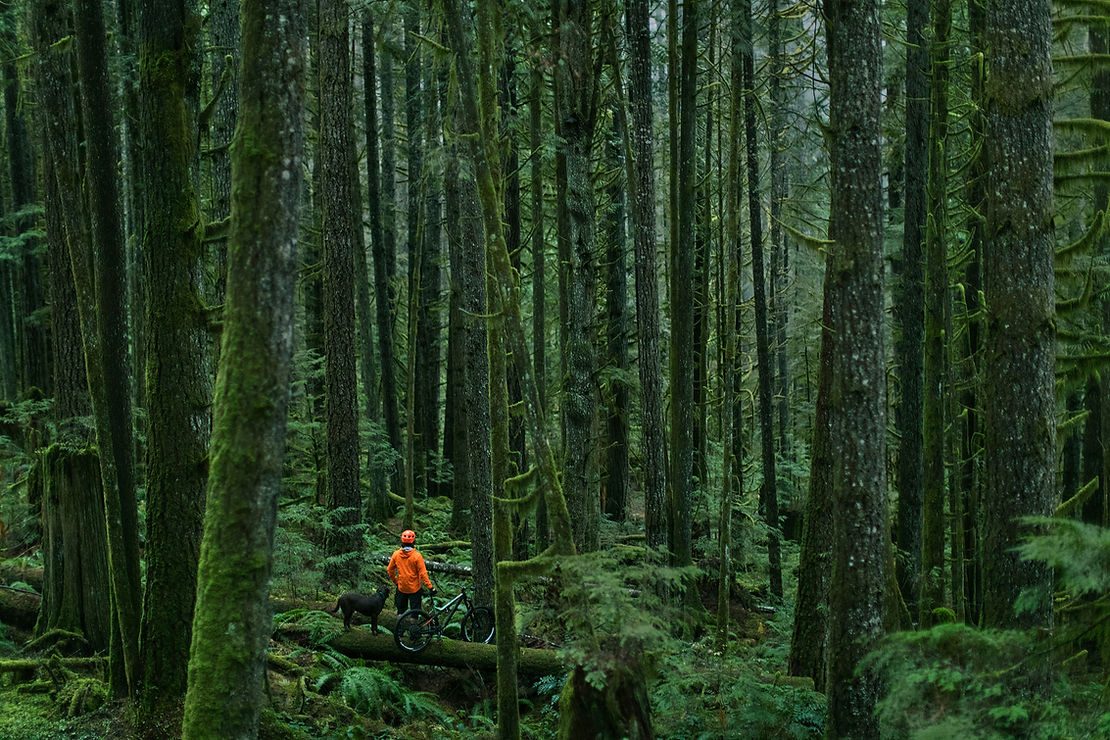
Yoann Barelli - Squamish
The Canadian west coast hides some of the most beautiful forest I've seen. But you know the reason why everything is so green if you've ever been there during fall, winter and spring. It's raining most of the time. I took this photo in Squamish in 2017 I think, we were coming back from a shooting day in the forest with Yoann and his dog, Jackson. This was shot just on the side of the shuttle road, just before we headed back home. British Columbia is really alive at this time of the year, salmon head up river and you can easily see hundreds of eagles fishing for them.
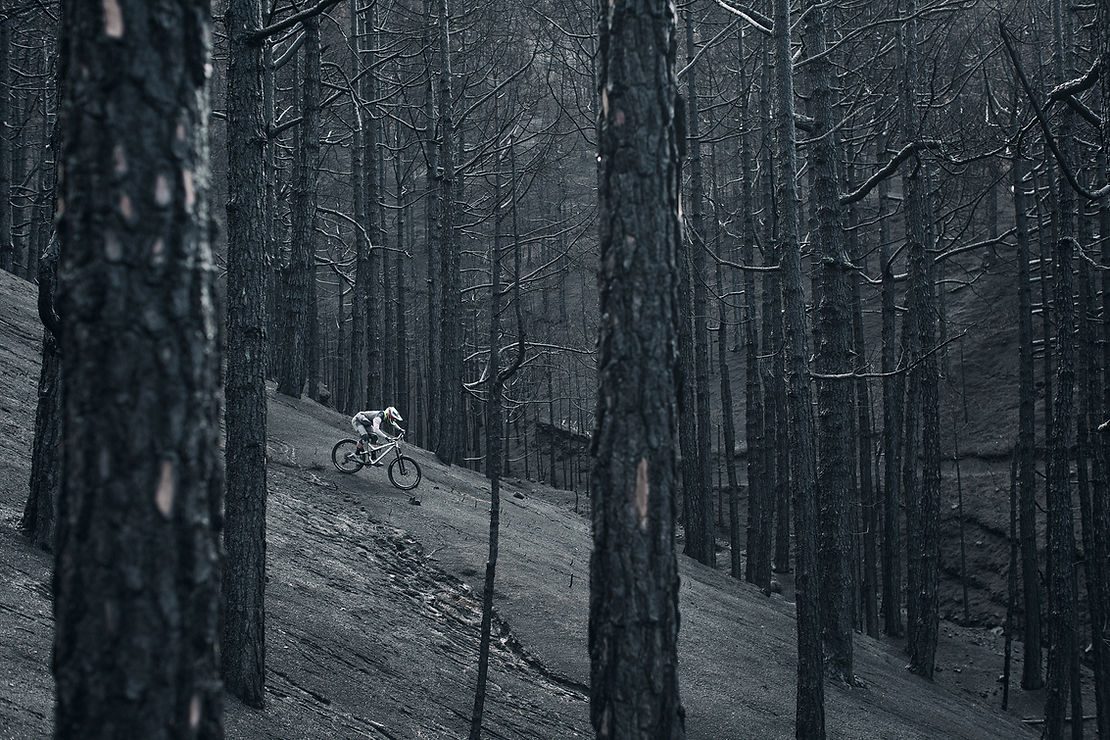
Rémi Thirion - La Palma
Forest fires are one of the worst things that can happen to nature, but amongst all their bad sides, they leave behind them a blank canvas. The colors are gone and ashes cover everything, which makes the zone really photogenic. I took this photo on La Palma Island, shooting for the new META V4.2 back in 2016, in the same forest as the first shot of this article, just a couple hundred meters away. Our bike was grey and so was Rémi's outfit, which made the whole scene almost look like a black and white picture.
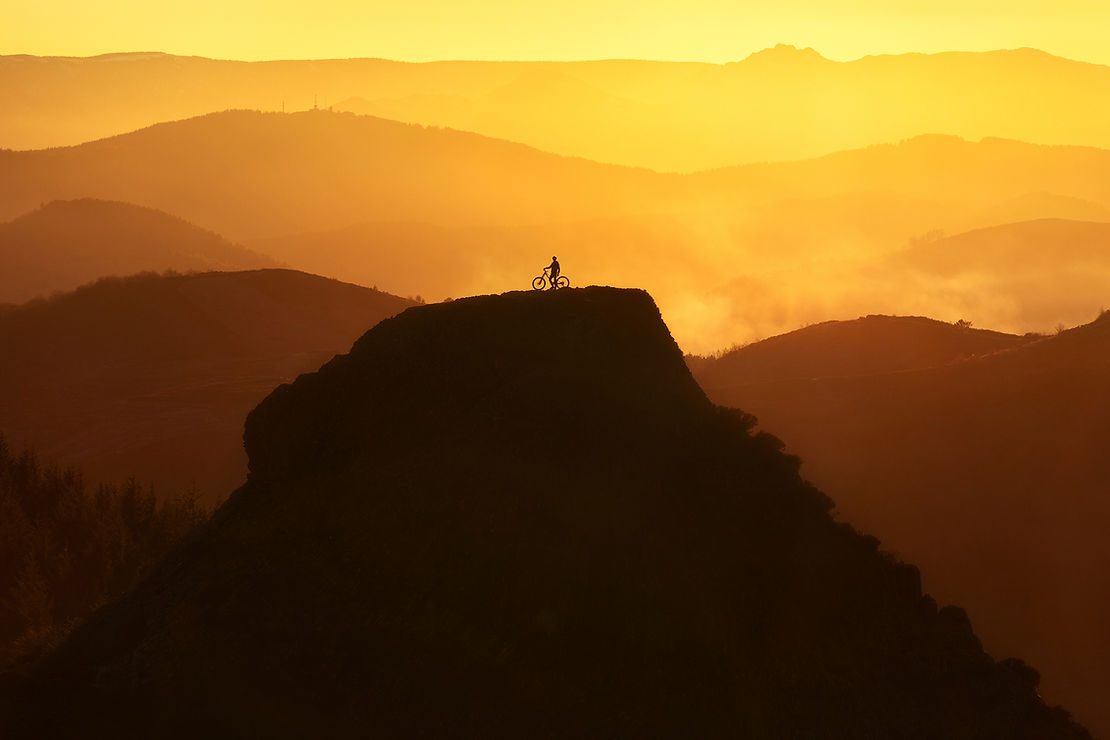
Antoine Clément - Ardèche
I spend a lot of time in my car, driving to shooting, riding or camping spots and I saw this rock during one of those trips. After many times passing in front of it, I realised that the sun was going down in a perfect position from my point of view but only during the winter. So I called my friend and we decided to go their with our bikes and check this out. I had to be really far away and use a long lens to make the backdrop look closer. We were lucky with the weather as the sun set exactly where I imagined, giving this warm look to the picture and only showing shadows and mountain layers.
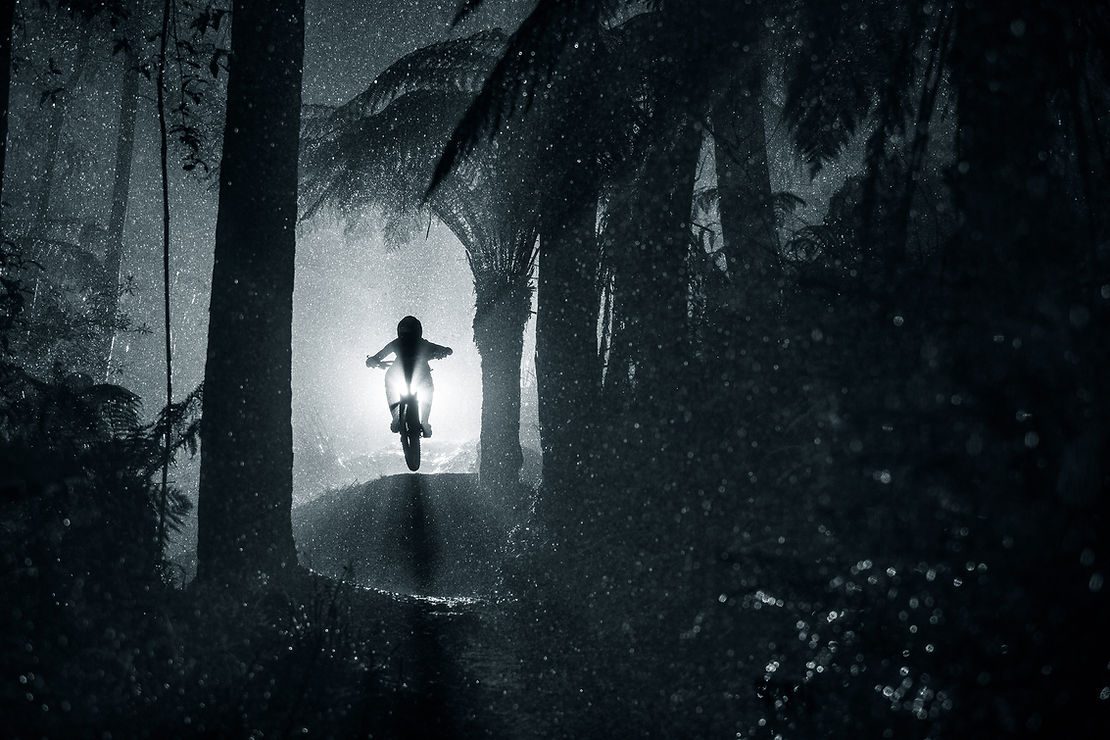
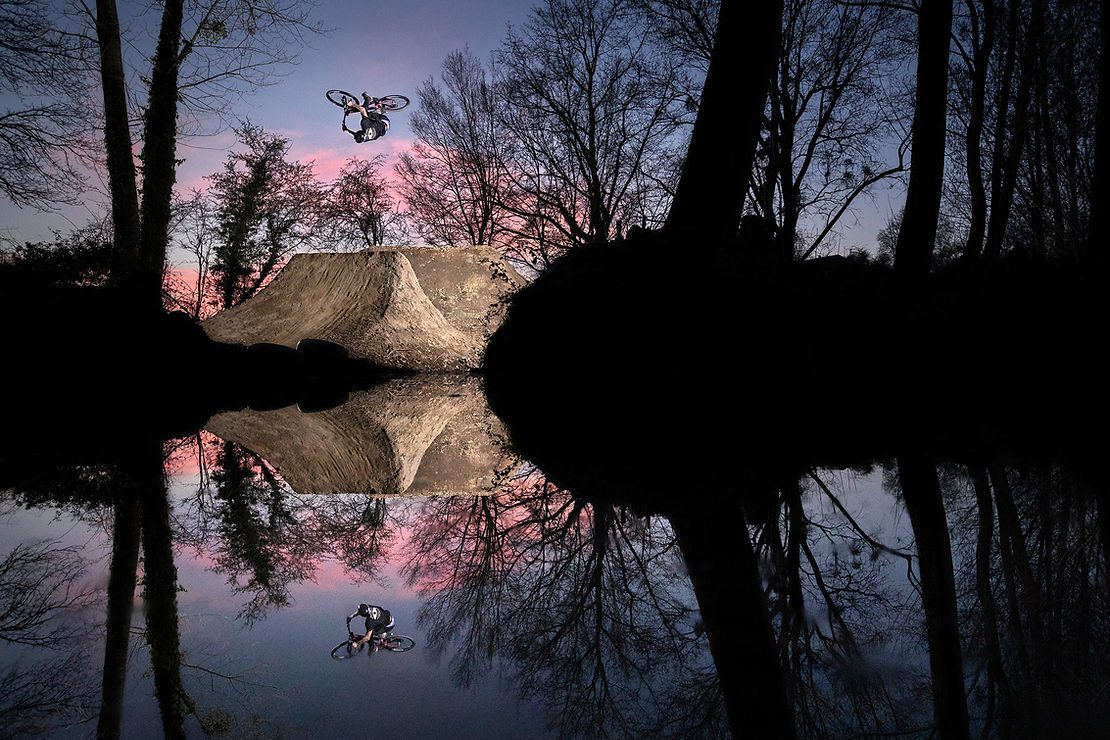
Jeremy Berthier - Bourgoin
Two things that I love when it comes to photography are silhouettes and reflections and I wanted to use both in a single frame for a long time. After a lot of drawings, I knew what I wanted but it took me six months to get the perfect conditions and final ideas. Jeremy‘s trail is a piece of art and this jump is definitely a highlight. I knew I wanted to shoot it from the side and get that reflection but it was really dry at this time of the year and of course there was no water around. When I saw a wheelbarrow hanging around by the jumps, I had the idea to fill it up with water to create a mirror. We didn‘t have any water hose that day, so I had to do round trips with water cans to a little ditch by the road. After spending a lot of time adjusting the wheelbarrow and cleaning the water in the afternoon, my mirror was finally ready for the evening shoot. We were lucky enough to have a few friends helping us with the fire that night and adjusting the smoke just as we needed. The hardest job was Jeremy‘s as he had to ride the trail almost blind. Riding bikes at night is so scary and I can‘t thank the athletes enough when they are in these kinds of conditions. After a few attempts, we got this one, just as I imagined it at the very beginning, and it was a great feeling to finally see the image I had in my head for months, displayed on the back of my camera.
William Robert - Green River
Utah is probably one of the most iconic places in Freeride history. When you're driving on the highway through this state, it seems to always be the same landscape on the side of the road, but the desert keeps changing the further you go, the color of the dirt is different, the shape of the rocks is not the same and the weather is different almost every mile. I've seen so many images from Green River over the years and as a photographer it has always been on my go to list. We had the chance to do a trip there last spring with William Robert and we were all impressed by those brown rocks standing on top of big piles of black dirt. The one in the picture was maybe the most beautiful as it looked like a meteor. There was nothing really rideable or fitting the framing I wanted around it so the only way was to shoot from the bottom with a very long lens, and William was riding a ridge a few dozen meters in front of the rock.
Jéremy Berthier - Lyon
When I found this forest not too far from my place, I immediately wanted to take a riding picture in there, but I also wanted to preserve it as it’s not the usual landscape in France. That's why Jeremy built a special wooden kicker for this shot, so we didn't have to dig in the forest. It was really hard to find the perfect run in for the jump and the timing was tight. The weather wasn't on our side at first as it was supposed to be really foggy in the morning. We waited under the clouds for maybe an hour and a half before the fog barely came in and stayed for 10 minutes.
Andreu Lacondeguy - Barcelona
I've known Andreu for a few years now, but this was the first time we had the chance to properly meet as he signed with Commencal earlier this year. We went to Catalonia to shoot a welcome edit and some photos in March and after spending a day in Osor at Pure Riding Bike Park, we moved to his house, closer to Barcelona. This photo was shot in his yard at the end of the day. I asked Andreu if he could hit that jump which is at the very bottom of his line, while he was shooting some video clips at the top. The trick wasn't hard to choose as Andreu might have some of the best superman in the game. There are usually insane sunsets there but we were not that lucky with the weather on this trip so a cloudy sky had to do the trick, which wasn't too bad in the end.
Kilian Bron - Lipari Island
This image makes me smile every time I look at it, probably because we were all laughing during the whole ride to our shooting spot. We were in the Aeolian Islands with Kilian Bron last December, and our only transportation and hotel was a sailboat. This meant we didn't have any transport to the shooting zones, so we had to walk, call taxis or even better, rent scooters. The trail we were about to shoot at sunset was on the other side of the island. We were running a bit late, so the only way to be there on time was to pull Kilian with one of the scooters, which was already pretty heavy with 2 guys carrying a photo bag each. We weren't as fast as it looks!
Jéremy Berthier - Bourgoin
There are some places where you've been so many times that you think you're done with shooting them. That's what I was more or less thinking after spending hours and hours at Jéremy's jumps looking for new ideas over the last 3 years. I never shot this jump before as it's the last one of the trail and it's not in an area directly hit by the evening sun. But this time there was a really big puddle on its side. Jéremy forgot to turn off the water the night before so it filled this big hole made by the rain. There was a lot of dead leaves on the surface though, so I spent a good part of the afternoon removing the leaves, and we started shooting at the end of the day with a small group of riders. The sky wasn't looking that great right after sunset so we waited a little and it suddenly turned pink. I asked the riders to do a few more tries in the dark. In the end, this one was the best image.
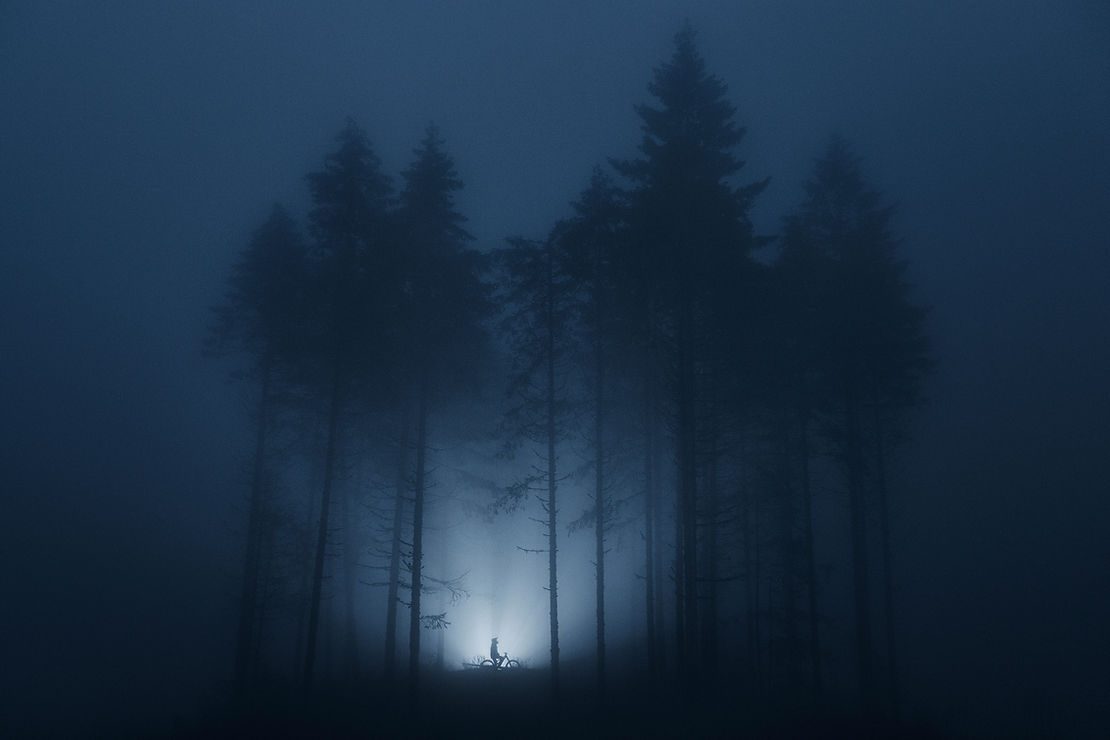
Daniel Fleury - Vancouver Island
My relationship with fog and flashes is pretty strong I would say. I shot this image during a trip to Vancouver Island with Brendan Howey and Daniel Fleury as we were shooting the new Furious BC edition. At the end of the day, we decided to shoot a trail in a clear cut. The weather was so foggy we couldn't even see 15 metres in front of us, I remember Brendan and Daniel had to remove their goggle lens’ to shoot because of the rain. Once we were done with the riding, I saw those trees, standing in the middle of nowhere so I asked Daniel to sit there for a second. I used a flash to illuminate the whole scene, as we couldn't see much without it.
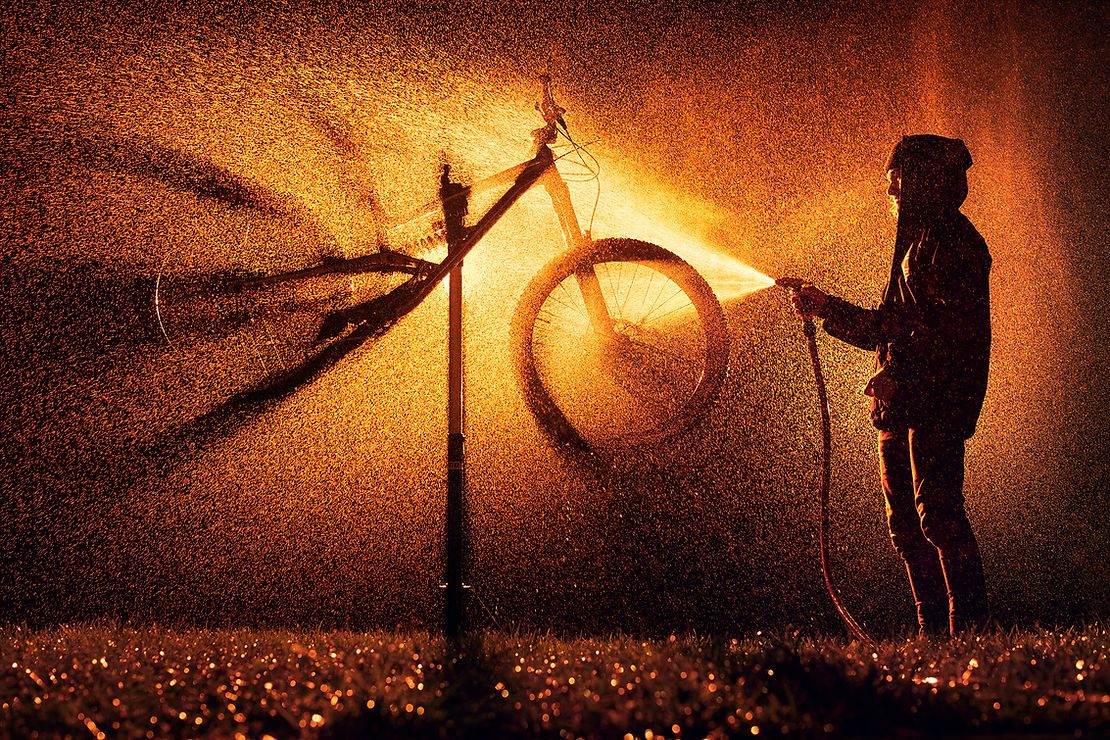
Paul Couderc - Figeac
When we talk about mountain biking photography, we often see action pictures. While action is great to shoot, I love documenting what's happening before and after the ride as well. In this photo, Paul was washing his bike under the rain in front of his house. We all know that feeling, when you're tired from your day of riding in bad weather conditions, and you still have to clean your bike before you can even take a shower yourself. I used two flashes with orange gels to create this back-light effect and colour.
Paul Couderc - Figeac
I've been trying a few concepts with Paul over the last year and this was one of the last things we tried. We had the idea of using flour on the kicker to add some texture to a classic jump shot. After a few tries, we noticed that the flour on the kicker wasn't enough and Paul's brother, Adrien, helped us by throwing some flour in the air just before the jump. We did a few tries and we got this one on the last try with the end of the flour.
Jéremy Berthier - Bougoin
The moments before sunrise are often as good as the sunrise itself. We decided to try a morning shoot at Jéremy's jumps but we didn't really know what kind of weather to expect as his trail is at the bottom of a valley. I live half an hour away from his place and during the whole drive, I couldn't see anything because of thick fog. It suddenly cleared up when I arrived on location, but there was still some low fog banks over the fields surrounding the jumps so we tried a few shots there before the sun came up.

Myriam Nicole - Morzine
Fall season is my favorite. I never had the chance to shoot in Chile or Colorado at this time of the year, but the Alps aren't bad either. We decided to go to Morzine with Myriam for a week last October. With the world cup season, it's really hard to find time to shoot with downhill racers during the year, and it was only my second time shooting with Myriam outside the tape. The bike park was obviously closed but we still managed to get a few photos on the main lines. Those are not the easiest to shoot as the track is most of the time pretty wide, but at least it's fast and we didn't have to build anything. The orange trees all around the place made a classic trail look kind of special.
Paul Couderc - Figeac
Some jumps are perfect for riding but hard to shoot. This one is at the bottom of a field, with a forest on its side hiding the sunset light. The are not a lot of ways to get good light on it, that's why I chose to shoot it after sunset with a few flashes. I wanted to use smoke again to hide the dark background but covering such a large frame with smoke is not easy at all. We had to set up a good number of big fires all lined up on the side of the jump and then Paul's brother helped us creating the smoke by throwing some green grass on the fires.
William Robert - Les 2 Alpes
We worked on this project for 2 years. I've dreamt of a big hip jump in the mountains, with perfect evening light. This is pretty much the dream set up for any mountain bike photographer, but it's definitely not easy to make it happen. Thanks to Les 2 Alpes, we were able to dig a line on a perfectly exposed field up in the mountains. Due to some technical and logistic issues, William and two friends only had 4 days to dig the whole line and they didn't have time to make the hip as big as we wanted but in the end, it wasn't too bad anyway. A few days later, we went up there with William and the other guys from the media team for a week of shooting. A dream line, perfect light and William Robert, everything was in place to produce beautiful content. We had a whole line to shoot and to ride but we couldn't get enough of shooting this hip, which was obviously the highlight of the build.
Nicolas Mazzoleni - Grenoble
I've passed by these big walnut fields so many times and I always thought they were potentially interesting for a photo shoot. After spending some time on a map to find the perfect spot, I found this small and straight road right in the middle of a field. Then I asked one of my friends to meet at this place on a winter morning to see what was possible or not. I brought a big mirror with me to get this reflection at the bottom of the frame. This was just more or less a scouting mission, but in the end I like this photo and I never came back to shoot some action there.
Quinn Hanley & William Robert - Kamloops
In 2018, right after Crankworx Whistler, we went on a 7 day trip in BC between Spences Bridge and Kamloops. There was a huge number of forest fires all around the place, leading to a smoky atmosphere in a huge area. I remember landing in Vancouver without being able to see the ground from the plane until the very end. The smoke was so thick it blocked the sunlight and the only thing we could see in the sky was a red sphere. At least the smoke in the air was good for photos and that's why we went to Kamloops bike ranch on the last evening of the trip to shoot a little bit in those conditions.
Paul Couderc - Figeac
It took us 3 evenings to get this photo because we didn't calculate how hard it would be. The timing of a shot like this one has to be really precise as Paul had to hit the jump when it was getting really dark, but he could still see a little bit. Our first struggle was the smoke, even if there was no wind at all, we noticed that the smoke was going up the hill for the first ten minutes, and then in the other direction. It was super hard to control and the smoke was staying way too low on the ground. The next day we made bigger fires so the heat would push the smoke higher. Unfortunately the wind was blowing sideways towards the camera and it was impossible for Paul to see anything. On the third evening, we were lucky and as we learned from our previous errors, everything went smoothly.
Jéremy Berthier - Lyon
What I love when it comes to photography is uncertainty. Earlier in the afternoon, I had asked Jéremy Berthier and Nicolas Terrier if they were up for a sunset shoot on their home trail. We all thought it was a good idea as the sunsets are often crazy up there, with golden hour sun facing directly at the jumps. Once I arrived, I started to look for one or two photo ideas but in the end, none of them worked as big clouds arrived and we knew the sunset wasn't going to happen. I was a bit lost but just before the night, it started to rain and we focused on a single hip. I love shooting under the rain with speed lights but it's always challenging for my gear and the athletes. One of my flashes, the one on the right side, wasn't firing for most of the tries for no reason, but I couldn't loose time and solve the problem. I got lucky as it suddenly started to work again just for this photo. It wasn't an easy one for the riders but they know how I like to work in bad weather conditions so I guess they're used to it now.
Kilian Bron - Lipari Island
After a 5am alarm call on our sailboat, we had to reach the top of this hill for sunrise. Going up a sand pit 100m high at night and in the rain wasn't the best commute to a riding spot, especially when you're expecting good light for a morning shoot. Once we reached the top of this pumice quarry, we had a few minutes to breathe before the sun finally peaked under the clouds. It was still raining and rainbows started to appear in the background. The blue sea in the background is not a lagoon, but its color is due to the white pumice sand going down the quarry into the sea. I shot this photo after Kilian's first run down the hill, as he was going up for another one, out of breath, on uneven ground that could collapse at anytime.
Hugo Frixtalon - Sunshine Coast
This was for sure my favorite shooting day from last year. We were lucky enough to witness an entire day of thick fog on the Canadian Sunshine Coast. It was hard to pick a single photo from this shoot but as this one scored Pinkbike Photo of the Year, I thought it deserved its place here. We went down this trail during the whole day while shooting and this was pretty much the last section because the light was fading away. It was getting too dark to film so I tried to shoot this shark fin with flashes and we came up with this result after a few tries.
Words & Images: JB Liautard
Story: Outta' the Shed - Radic Brakes
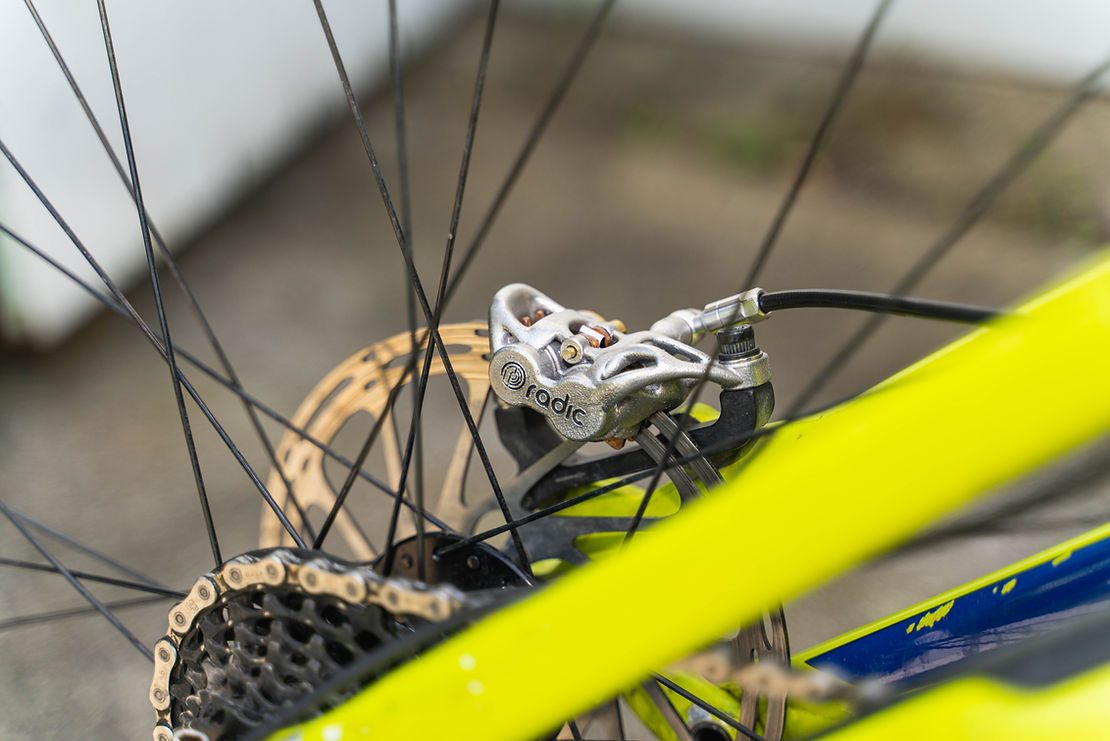
The mountain bike industry is thriving and, thanks to social media, it’s getting easier and easier for those with an idea, to push those ideas to market. At the same time, it almost makes it harder to gain any meaningful traction, because there’s so much more noise to try and cut through to make yourself heard. I love hearing about all the small, passion-driven businesses and I get emails and Instagram DMs all the time, from people telling me about their garden-shed-based-passion-projects. While I’d love to be able to tell all of their stories, it’s a little harsh to say but there’s not a ton of them who are doing anything different. I can’t have stories on small clothing brands filling up each issue! One brand that is doing something different though, is Auckland’s Radic Performance.
One of the things I love about this job is being able to see things before anyone else does and I used this to my full advantage to get in with the boys over at Radic Performance. I wanted to catch up with the Radic team for a couple of reasons. One, because I love new tech and two, because I love hearing about Kiwis doing things differently. There are a few small suspension operations out there now, and companies like Box Components have slowly being vying for some of the drivetrain market that’s been largely sewn up by the two Big S’s for the last forever but the brake market has been pretty much uncontested. You have the likes of Trickstuff, but you’re looking at upwards of $1,400 and a 6-month plus wait for your brakes to be manufactured; a timeframe I could bear for a custom frame, but probably not for a pair of brakes!
Radic Performance was founded by Taylor Grey and Jake Powell, who met as students on the University of Auckland’s Engineering program. Taylor is a long-time mountain biker, having raced downhill and the like over the years. Radic came from nothing more than Taylor wanting to create a set of custom brakes for his mountain bike. Jake, who you could probably describe as a casual mountain biker (for the time being, at least), caught wind of the idea and wanted to be involved -purely because it sounded like an interesting project to be involved with. With Jake’s interest and a few other people commenting on how rad it would be to see someone make mountain bike brakes, Radic Performance was born. Since then, Taylor and Jake have been chipping away, designing, testing and figuring out how to push their brakes to market.
Like so many other Kiwi businesses, Radic started in, and is currently based out of, half of Taylor’s garage (his flatmates would only give up half) – which I’d argue is closer to a shed - and his bedroom. I rolled up to a nice old villa in Mt Eden, Auckland and was met by Taylor and Jake in the driveway before being taken to the Radic shed. The shed is pretty unassuming – nicely painted on the outside but a little dark and weathered inside, it’s definitely seen it’s fair share of projects. On one side a few mountain bikes and commuter bikes are stacked up, on another is a Trek calling out for a new front wheel and on yet another, you’ll find the Radic work bench, covered in prototypes, brakes from other brands and some testing equipment that I probably won’t ever understand. The setup is typically Kiwi and, as we talk, Taylor tells me about his bleed kit consisting of hose from Bunnings and syringes from the local chemist. How good? PSA: If you’re thinking about doing this, please soak your hose in whichever brake fluid you choose to use beforehand, to make sure it doesn’t react. Alternatively, just take the safe option and buy a real bleed kit or get your local bike shop to do it!
After a tour of the shed, Taylor showed me Radic’s office, which serves dual-purpose as his bedroom. His computer sits on a desk in front of a window that overlooks the Radic shed, and it’s from here that the boys work on designs, answer emails and do all the things that come with starting a company. Approaching the house upon arrival, you’d have no idea that inside two fairly fresh university graduates were pioneering an industry-first concept. Humble beginnings, huh. I’d say it’s pretty fair to assume that no one’s played in the market of manufacturing brakes because to manufacture them using any of the traditional methods we’ve seen, you’d be looking at a high cost of entry. Realistically, you’d be better off pursuing a CNC-manufactured product but, unfortunately, CNC machines don’t come cheap, tooling for CNC machining doesn’t come cheap and if you don’t have access to either, paying someone to do it for you also isn’t cheap. That’s before you even take into account all the other jobs your machinist has in their queue before they get onto yours. No matter which route you choose, you’ll be ripping through your capital faster than you can say “I think I want to make a brake!”.
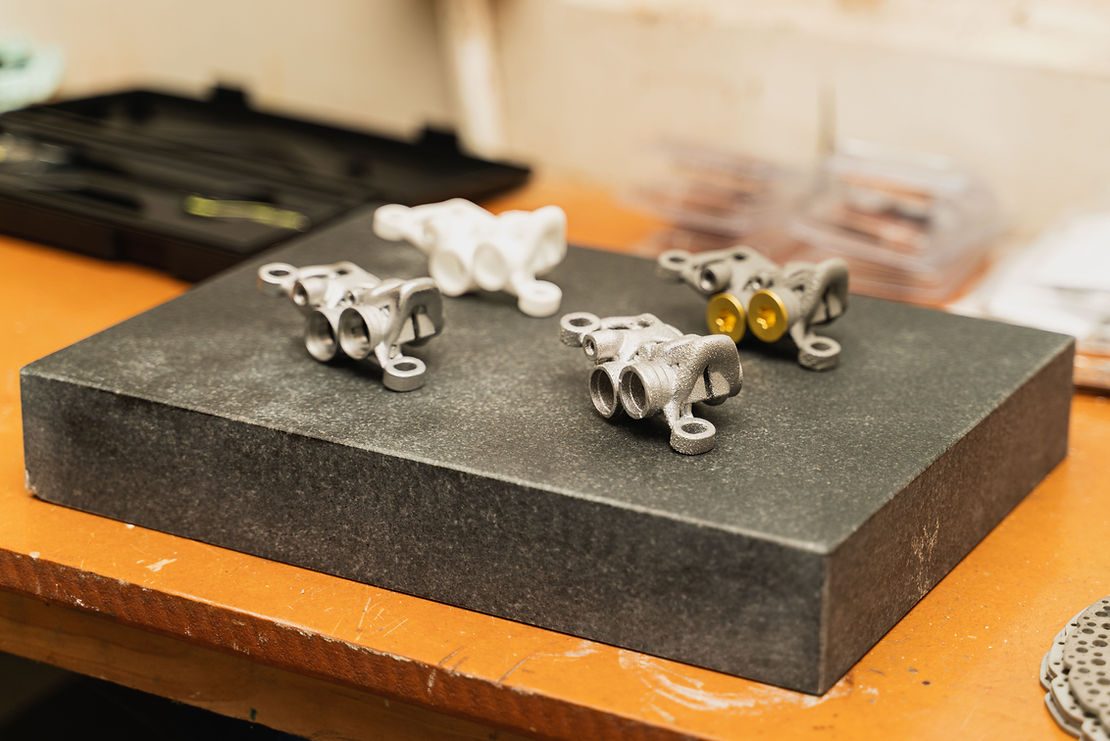
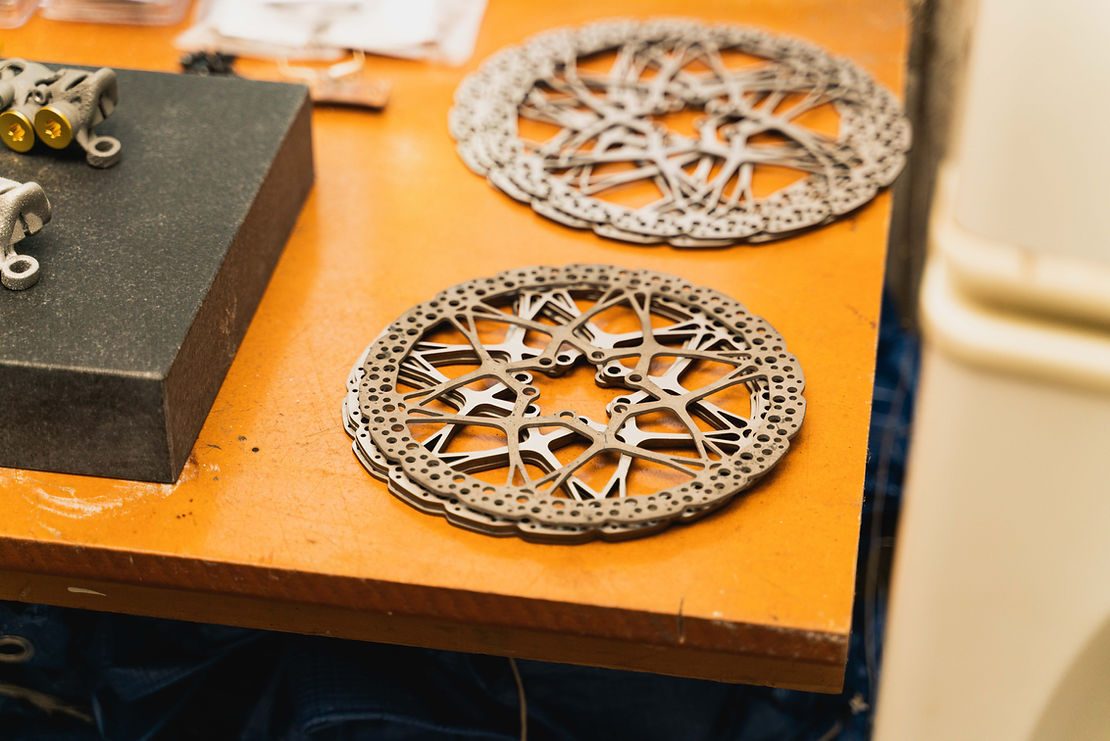
When you’re a small, start-up company operating out of a bedroom and garage with very little capital to rip through, additive manufacturing, or 3D Printing as it’s more commonly known, is your way around this. 3D Printing comes with other benefits, too. Typically, disc brakes are constructed in two halves that are then bolted together to become a complete calliper. As you can imagine, most manufacturers are pretty hush-hush about how they make their brakes, but what I can gather - from hands-on experience and a bit of Googling - is that most are cast or forged into shape before having holes for pistons and fittings machined in, as well as channels for brake fluid to flow through. When manufacturing using the above method, or methods close to the above, you’re limited to what your machinery is capable of. It’s difficult to machine intricate passages and you also have to accommodate additional seals and bolts to join the two halves of the calliper.
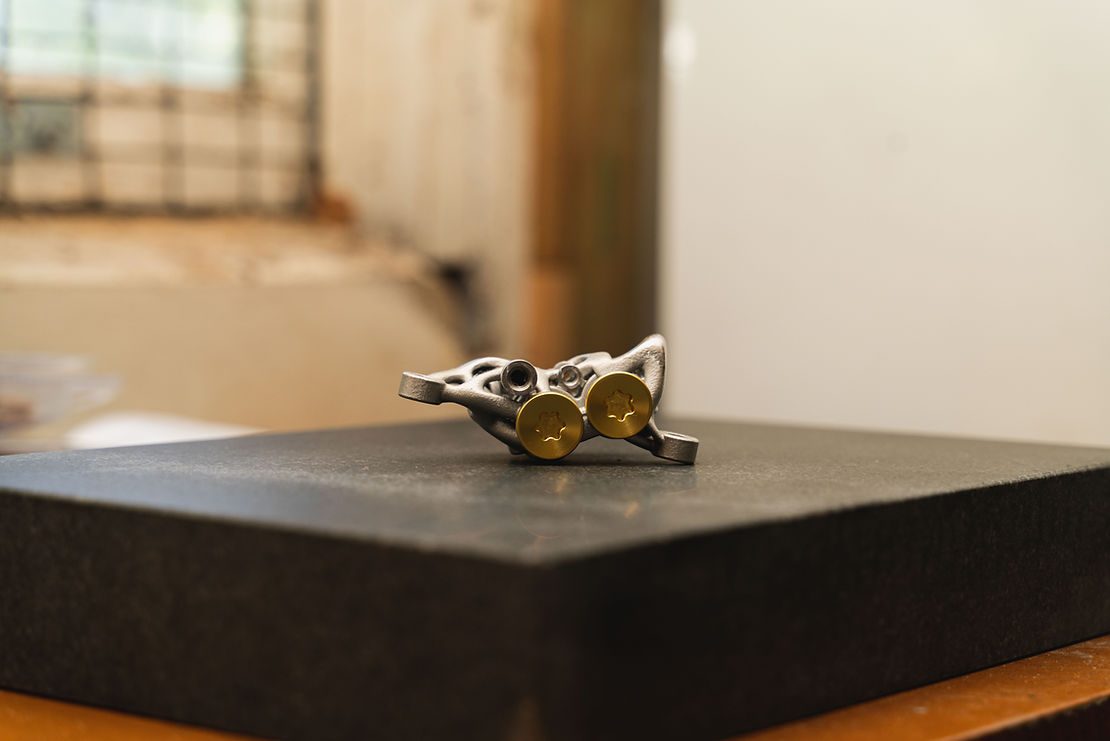
With 3D printing, material is added layer by layer, giving the freedom to create things that simply couldn’t be replicated via traditional manufacturing methods. To break it down super simply, a thin layer of powdered metal is laid on a build platform before being scanned with a high-powered laser that fuses the powdered metal into one, solid metal sheet. After that the next layer of dust is laid and fused, with the process repeated until you eventually have a finished product. Like anything, though, 3D printing with metal has its own challenges that need to be addressed in the manufacturing process. Each time another layer of dust is fused, the entire piece heats up, before cooling again while the next layer of dust is deposited. Thermal stress can lead to cracks and warping, so support material needs to be worked into your design to ensure this is minimised.
Certain materials are also harder to work with than others. Radic have opted to use aluminium for their brakes, which is one of the hardest materials to work with when it comes to 3D printing. There was talk of using titanium – which is a much easier material to work with - to manufacture the brakes, but anyone who knows anything about metal will know that titanium is anything but cheap!
As the conversation moved on from manufacturing, we began to talk about the future of Radic. At present, there is one functioning Radic brake that’s getting put through its paces on Taylor’s bike. There’s a few different prototypes scattered around their garage that were all used to help lock in their printing process but now, the big push is on sourcing and designing packaging while they continue to test the brake and manufacture a few more to get other people testing them as well. With any luck, the first batch of brakes will be available in the first few months of 2020. Initially, only a calliper will be available with an option for both DOT and mineral oil. Levers and rotors will follow down the line.
Before Radic fully-fledged takes off, there’s still a couple of things to figure out; namely, how to support customers overseas. The mountain biking market simply isn’t big enough in New Zealand to support niche component manufacturers like Radic, so being available to customers that live overseas is a necessity and that’s where things get difficult. Shipping internationally can be ludicrously expensive (a problem we’re all too aware of!) so Radic are looking to setup a few international service centres, but the problem – again - is that it takes a lot of stock and requires staff to be trained. The great news is that most of you won’t be affected!
We’re made a little differently, down these ways in little ol’ New Zealand. With a special combination of ‘she’ll be right’, ‘how hard can it be?’ and perhaps a touch of naivety, we bite off more than we can chew and lead ourselves down the garden path. Is this uniquely Kiwi? I’d say probably not, but I’d say the whole ‘we’ve come this far, may as well see this out’ mindset once you’ve led yourself astray is - and Radic is a prime example of this. What was originally meant to be a project for some custom brakes to go on Taylor’s bike, quickly spiralled into what is now Radic Performance. It’s been exciting to watch Radic’s journey so far, and I’m excited to watch it continue over the years to come. I’ll have to do a catch up piece with the Radic boys in a year or two but, in the meantime, with any luck some brakes will soon make their way to my desk…
Words & Images: Cam Baker
Tech Tips: Contact Points
Preface: I wrote this last summer, but given that most of us have more time now than ever, I thought it'd be a good time to share it again with you all
I ride more in the summer than I do any other time of the year and because I usually have a bit of time off, I like to spend my riding time trying out different things on my bike to get it set up for the year ahead while I’ve got the time to stack up consecutive ride days. With that said, there’s no better time than now to talk you over some of the components on your bike that you can experiment with, and how they’ll change your riding experience.
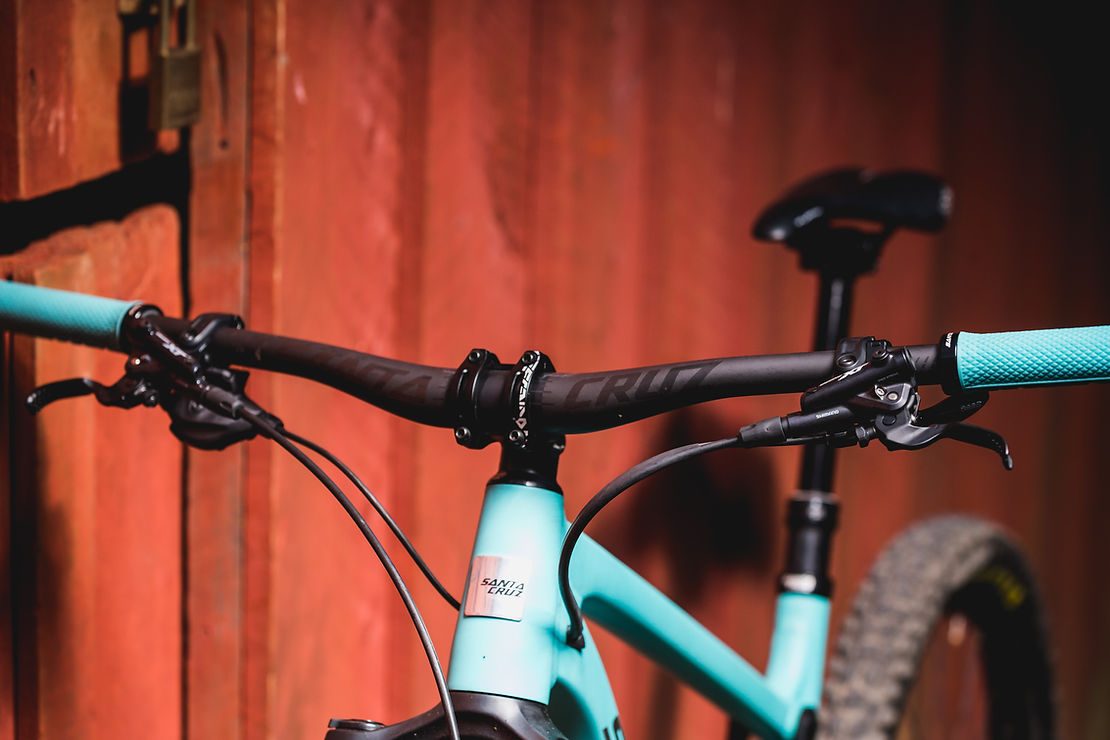
STEM
Your stem is a fairly vital component to your bike. It’s responsible not only for transferring your bike handling inputs from the handlebars to your front wheel, but also for transferring feedback from your wheel to your handlebars. Stems come in varying lengths, each having a different effect on your ride. If you feel like your steering is a little twitchy and that your front wheel picks up a little easy when you're climbing, try a longer stem – this will slow down your steering and shift your weight forwards a little. If you feel like your steering is a little slow and sluggish, try a shorter stem. For reference, I typically settle on a 40-50mm stem dependant on the bike. You can also raise or lower your stem if you've got extra space on your steerer tube, but we'll save that for another article...
HANDLEBARS
Handlebars are a somewhat controversial topic. Carbon or aluminium? Wide or narrow? Changing handlebar width is something that immediately impacts your ride. The wider you go, the more stable you are, but the slower your steering. The narrower you go, the less stable you are but the faster your steering. Something to bear in mind though, is the wider you go the harder it is to squeeze between trees. For reference, I’m 6’1 and fairly broad across the shoulders and ride 780mm bars. If you’ve never tried narrower bars, you can try sliding your grips and levers in 5-10mm per side - just make sure to plug your bar ends with bar caps or plugs to avoid kebabbing yourself should you come off! This is an easy way to try before you commit to cutting them down! I haven't touched on handlebar rise or tilt, but stay tuned.
GRIPS
Like seats, I’ve found grips typically take a few rides to break in. Grips are easy to change so, while you’ve got time off, why not try something new? I’ve been riding lock-on grips for the last few years so this summer I think I’ll try slip-ons again. I’ll probably make a mess of it and end up gluing myself to something, but the comfort that comes with the extra-thick slip-on grips is pretty appealing. I’ll update you sometime in the future with how I fared…
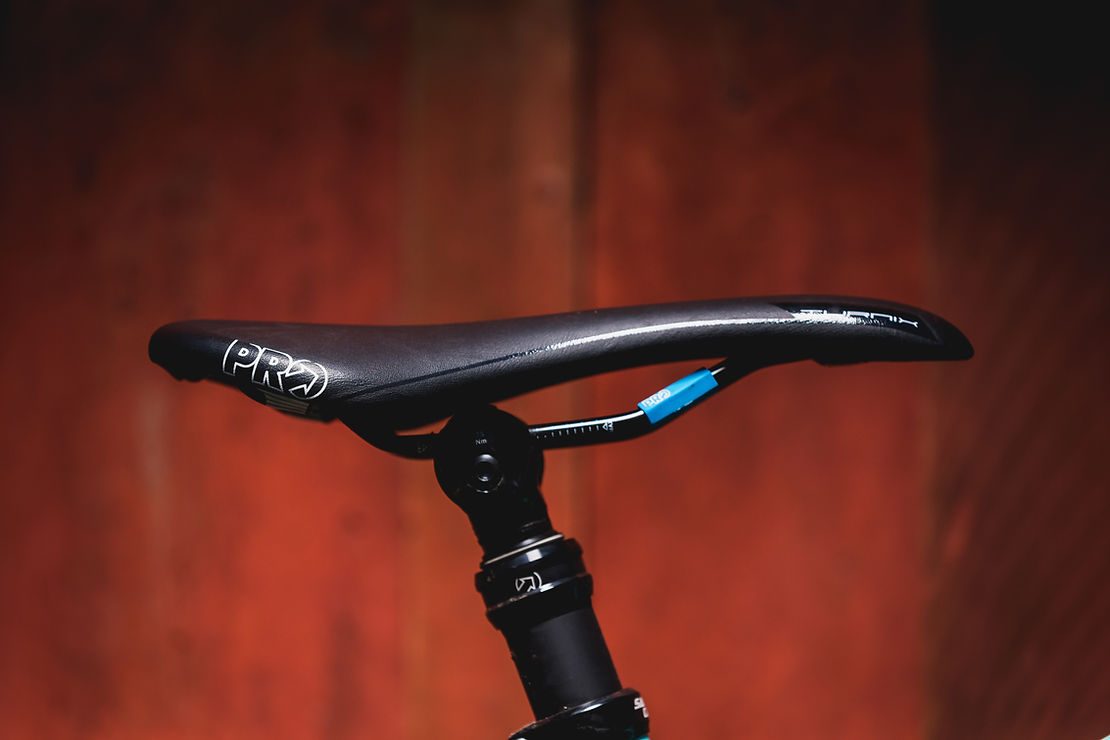
SADDLE
Saddles are one of those things that can make or break a ride for you. I can usually tolerate average shifting or brakes that are subpar, but give me a seat that I don’t gel with and you won’t hear the end of it. The tricky thing with seats, is that they usually need to break in before you can really tell what they’re like. I’ve had seats that I loved on Day One and hated after a few weeks, and seats that I hated on Day One but have come to love once they were broken in. While you’ve got plenty of time to ride, try a new seat if you’re not stoking on your current seat. Comfy seat = quality ride.
PEDALS
Clips or flats? Everyone has their own preference. Mine is flats, at the moment. The main reason? The shoes are comfier, I've been crashing lots and I'm liking the bigger platform. You’ve got some time to kill so why not swap systems for a few weeks? The whole foot-out-flat-out thing is pretty fun in the summer’s dust and if you normally ride flats, no matter how good your technique is, it’s way easier to dance your rear wheel around accurately with clips.
If you haven’t already noticed, all of the above are contact points. Contact points are our source of feedback. We use that feedback to make decisions on the trail; when to brake, how hard to break, how much faster you can ride that section of trail. We also use that feedback to make decisions on what components to upgrade and what settings we need to change. Unlike the pros, we don’t have suspension telemetry and GPS data to tell us what’s working for us and what isn’t so, I think before anything else, we need to have our contact points dialled. Even if you aren’t interested in going as fast as possible, dialled contact points means a comfier ride - and who doesn’t want that?!
Words: Cam Baker
Images: Cameron Mackenzie
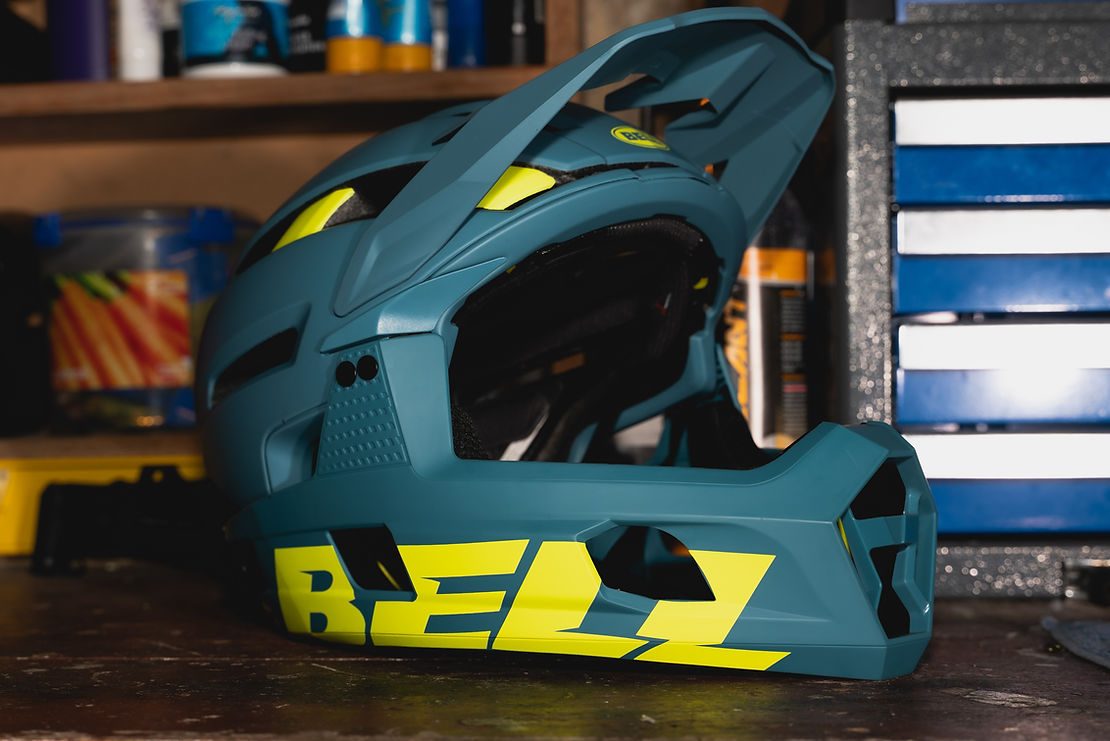
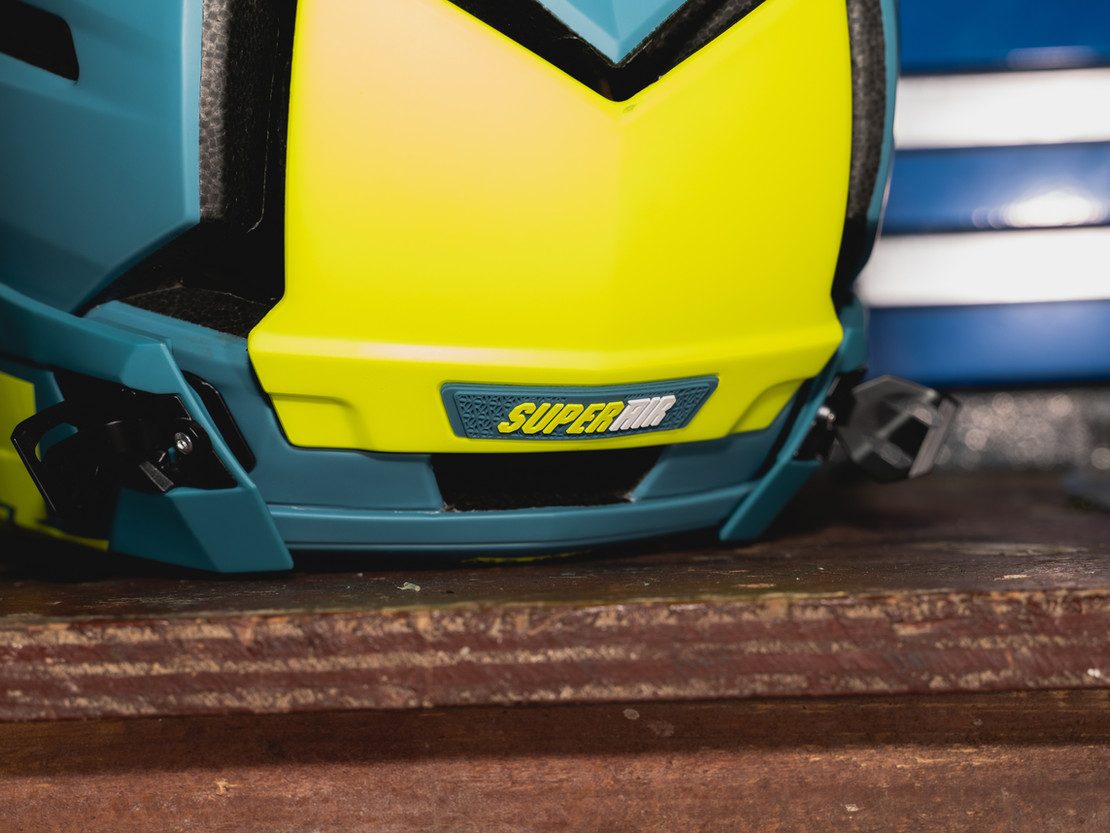
Review: Bell Super Air R MIPS Helmet
Bell helmets have been my go-to since the first Super was released back in 2013. After the OG Super, I bought a Super 2R, then went back to using the original Super because it fit a little better. I then bought the 3 because it didn’t crush my temples like the 2 did - and now, I’ve added the new Super Air R to my line up.
“I haven’t crashed in the helmet, so I haven’t been able to really test it!” - is a line thrown around in almost every helmet review. Classic! The same is true here; I haven’t crashed in the Super Air but let’s be honest - most people are way more interested in how well the helmet vents and how compatible it is with goggles, because #enduro.
The helmet does a pretty good job of staying cool, with 26 vents (18 in the helmet, 8 in the chin-bar). I was a little sceptical at first, given the solid patch of helmet without vents on the back of your head, but Bell’s done a good job of directing the air around your head. I had the new Specialized Levo SL under review for part of the time I was reviewing this helmet so I thought, what better time to cut some full-face laps? And even with the chin-bar, the helmet doesn’t get too hot climbing (granted, it was assisted climbing). You do definitely heat up more though with the chin pads, so if I was embarking on a longer climb I’d probably opt to remove the chin-bar.
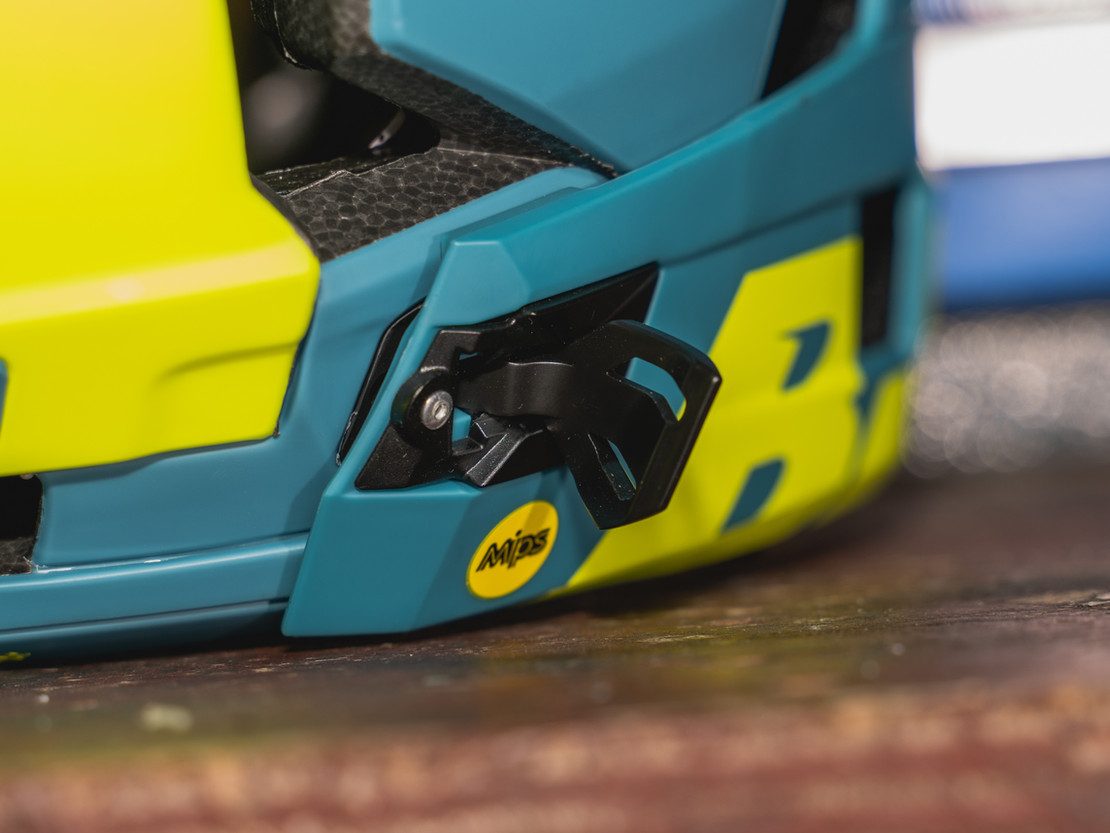

Goggles and glasses fit well in both open and full-face modes, and while it was a little bit of a squeeze to get my 100% Armegas to fit under the visor, they’d stay put for the most part. and besides, I’m more of a goggle-round-the-neck kinda guy anyway. The fit was great and easy to adjust with Bell’s Float Fit system. But helmet fit is subjective and everyone’s head is different, so if you wanna be safe - try before you buy!
So, what are my overall thoughts on the Super Air R? For most of my riding up here in Auckland, where there’s not a ton that’s super rough or steep, it’s perfect. In open-face it’s comfy, breathable and for the most part I completely forgot about it. If I wanted to go ride laps at 440 or a local shuttle day, the chin-bar is perfect and adds extra protection, while giving me the option to take it off and ride open-face if it gets super-hot or if I want to do some pedalling later on. If I spent more time racing Enduro, or lived somewhere with a lift, I’d lean towards the Super DH or a dedicated full-face.
Words & Images: Cam Baker
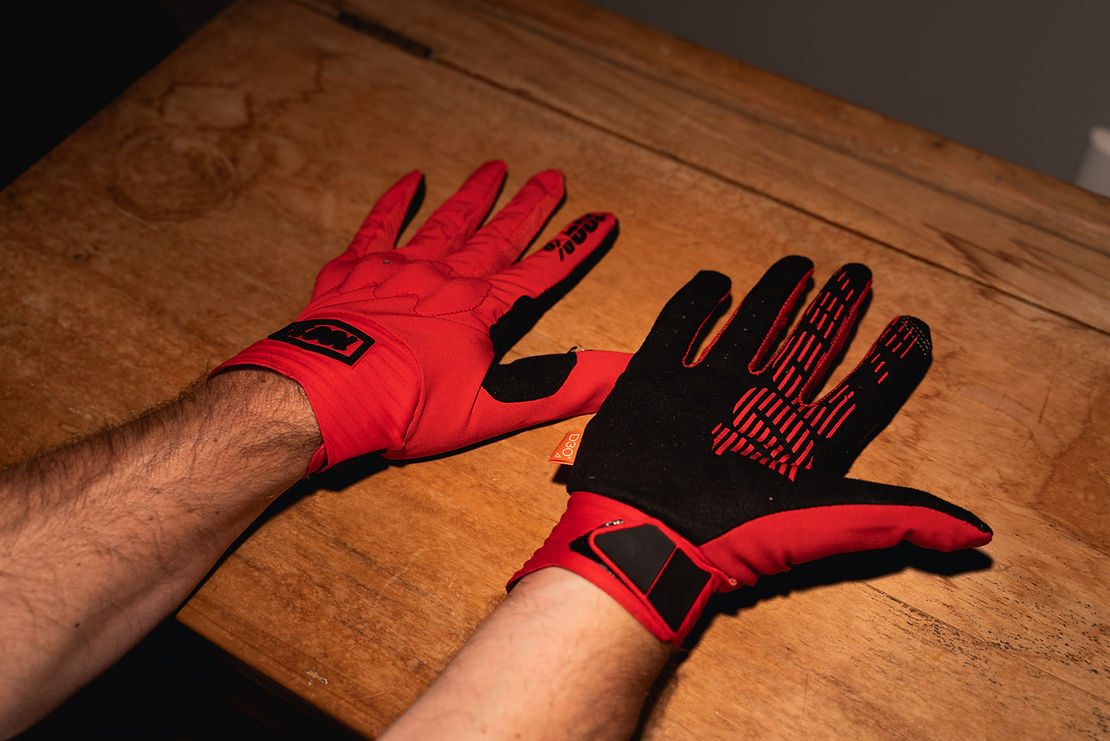
Review: 100% Cognito Gloves
Before I begin this review, I need to make it known that I hate riding in gloves. I don’t know what it is about them, I’ve just never meshed with them. Call me crazy, but I’d rather ride without them - and risk cheese-grating my hands should I crash - than ride with them and spend the entire ride questioning why I put myself through wearing gloves. I really only ride in gloves if it’s next-level rainy, icy cold or super-hot and dusty and, because I pretend they don’t offer any protection benefits, I usually find myself reaching for the most minimal pair of gloves I can find. Enter the 100% Cognito glove.
The Cognito glove is, for all intents and purposes, a minimalist glove. Featuring a thin, perforated palm, the glove rides pretty cool. The gloves are made up of a durable material that’s stretchy enough to keep movement free, with additional material between your thumb and index finger, right where your handlebars sit, to offer a little more comfort on long rides. The thing that makes these gloves different to every other pair I own, is that they offer protection against more than just abrasion. The Cognito’s feature D30 knuckles. You might have heard of D30 kneepads? If you’re not sure what D30 is, it’s a soft foam that firms up under impact, meaning you can absorb higher impacts with less material, versus traditional foams. I’m not a fan of the rubber some gloves place over the fingers to offer protection, so this was a welcome addition.
When 100% reached out and asked if I wanted to test a pair of Cognitos, I jumped at it and asked for a pair in L. It wasn’t until I got the dispatch notice that I realised they suggested going a size up a size from what you usually ride in. The gloves arrived and sure enough, the cuff was super tight when going over my palm. What surprised me, though, was that once I got the gloves on, the cuff sat as it should around my wrist and the rest of the glove fit well too. A few months in, the cuff is still super tight around my palm but once the glove is on, it’s super comfy. And the D30 is great: you don’t notice it at all when riding, but it’s nice to know there’s something there for you if you do come off. I haven’t, yet, so can’t attest to its ability to protect.
Durability wise, the gloves have been great. They’ve stood up to wet rides where I’ve spent the whole time death-gripping the bars, a little bit of patchwork at the local trails and a spin through the washing machine. I was expecting the silicone grip on the palms and fingers to come off pretty fast, but they’ve also lasted! Speaking of fingers - the gloves feature special material on the fingertips and thumbs so you can use your devices whilst wearing them…. but that’s one of the last things I care about.
No matter how nice a pair of gloves, I’ll never wear gloves on every ride. However, if I went riding somewhere and had to ride with them (say Wairoa Gorge for example) the Cognitos would be the gloves I reach for. They’re just as comfy as all of the minimalist gloves I currently own, while offering more protection than every other pair I own and that’s about as good as it gets…. from someone doing his best to channel his inner Blenki.
Words & Image: Cam Baker
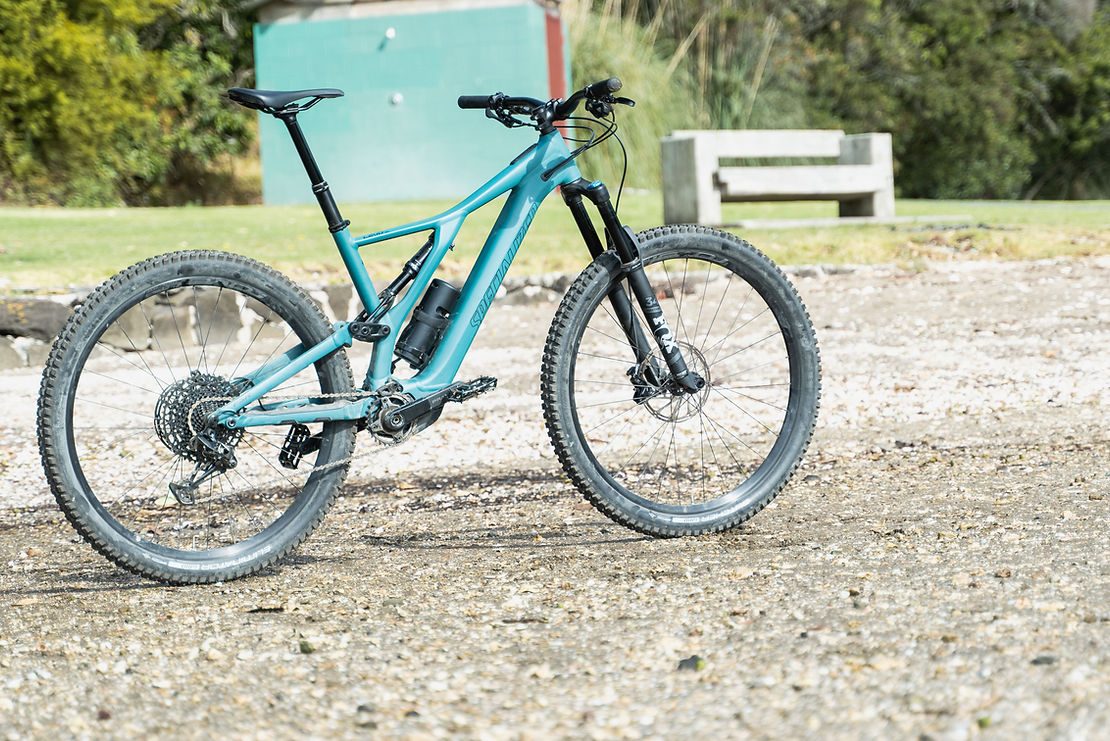
Review: Specialized Turbo Levo SL
I bounce between bikes a fair bit. My stable is a bit of a revolving door, with a constant flow of review bikes passing through. Getting to try new bikes? It’s great, don’t get me wrong - but it doesn’t take long to realise that marketing shit-talk like ‘game-changing’ and ‘ground-breaking’ get thrown around a lot, and that more often than not, these terms are exactly that: marketing shit-talk.
Every so often, though, we get a bike that genuinely piques my interest with marketing shit-talk. One that I could see myself buying into. Specialized’s new Turbo Levo SL was one such bike. The Press Kit showed up in my inbox making statements like “this changes everything” and “so light you’ll forget it’s electric” and, after a quick read to learn a bit more about it, I was electrified (I’ll see myself out) - especially when Specialized said I could take one for a week. I’ll say it now: a week is definitely not enough time to put together a comprehensive review on this bike, but that’s okay, because the experience this Levo SL offers is completely different to anything else on the market, that I’ve ridden. And a week is plenty of time to fall in love with that experience.
I’ve always been pro eMTB, and whilst I don’t think they’ll ever replace pedal bikes, they’ve definitely established a place in the market. Climbs become fun, they’re capable descending and you can fit in double the laps. They’ve always been substantially heavier than acoustic bikes, though, and that becomes abundantly clear once the trails start to open up. The added weight definitely helps keep things stable and gets your centre of gravity a little lower, but for the most part you can assume the word ‘playful’ won’t be used to describe an eBike - if you’re comparing it directly against a pedal bike. This is where the Levo SL is a little different.
Specialized already have two eMTBs in their line-up: the 150mm travelled Turbo Levo and the 180mm travelled Turbo Kenevo. Both multiply your power by about four times, giving you the ability to blast up hills faster than you ever dreamed of without a motor, but to get all that power there’s also a lot more weight. The S-Works Turbo Levo comes in at around 21kgs and the Turbo Kenevo comes in at around 24kgs. The Turbo Levo SL falls into a whole new category of eBike; prioritising weight over power output. The Turbo Levo SL Comp I got to ride comes in at just under 20kgs with pedals, a bottle cage and the SWAT Steerer tool, but instead of quadrupling your power like its big brothers, the Levo SL only doubles your power.
One of the biggest advantages that Specialized have when it comes to eBikes, is that they don’t rely on third-party manufacturers for the drive systems. Instead, Specialized manufacture their motors in Switzerland, giving them the ability to design their drive systems specifically around their bikes, versus manufacturing their bikes around a drive system by someone else. At the heart of the Levo SL, you’ll find Specialized’s new SL1.1 motor. Launched on Specialized’s Turbo Creo SL eRoad bike, the SL1.1 motor weighs 1.1kg less than the 2.1 motor that features on the Turbo Levo and the Kenevo and, unlike the 2.1 motor - which was designed to maximise power output - the 1.1 was designed to maximise weight savings. The Levo SL also features a 320Wh battery, versus the 500Wh or 700Wh batteries you’ll find in the Levo and Kenevo, to save a little more weight.
I picked up the Levo SL from Specialized’s Auckland office. After a quick walk-around the bike, they sent me on my way with the bike, as well as a 160Wh Range Extender. The first thing I was stoked on was being able to put the bike straight onto my roof rack. Usually, with eBikes, I have to lay the seats down in the back of my wagon and carry the bike that way. When you take the usual 22kg-plus weights into account, the swing towards 29” wheels and the whole longer and lower geometry thing into account, getting an eBike into the back of the car is never easy! This time around, it was onto the roof and straight out to my usual spot to cut a few laps and dial in the bike. I set the bike up with 25% sag front and rear, and headed for the up-track.
Right off the bat, you notice the Levo SL’s power isn’t overwhelming and in your face like its bigger siblings, but it’s for sure noticeable. It’s not point-and-shoot climbing like a more powerful eBike - where you can crank the power all the way up and ride over almost anything at 25km/h - but it’s enough power that you can still tackle the tougher lines you’d potentially shy away from without the assistance, and more than enough to get you motoring along on shallower gradients. Something I learnt pretty quickly (and that was pointed out by the staff at Specialized) is that because the SL1.1 motor only puts out 35Nm of torque, versus the SL2.1’s 90Nm, you really need to make sure to keep your cadence up to stay in the power range. The range is super wide, with optimal power delivery between 50 – 90rpm, but that does mean you can’t just pick a mid-range gear, turn the power up and point the bike up the side of a mountain knowing it will carry you up. I tackled the climb as I would on a pedal bike, taking the same lines and shifting gears at the same points - albeit a couple of gears further down the cassette than usual - and didn’t have any trouble keeping the power on. Compared to a more traditional drive system, I’d say the Levo SL’s maximum power rating is comparable to most brands’ Eco modes. With that said, the lighter Levo SL is much easier to climb on max power, than climbing on Eco on a heavier eBike.
As far as power delivery goes, I think Specialized’s SL motor series offers the best power delivery of any eBike Drive System I’ve ridden, currently on the market. The power comes on and off super smoothly, with none of the sudden ‘joltiness’ (technical term) I’ve experienced with some of the other systems. Something I loved about the SL1.1 was that when the motor is off, or you’re travelling faster than the maximum assisted speed, it adds hardly any noticeable drag to your pedal stroke. This makes that one-last-lap climb, where your battery dies midway, just a little bit nicer - although you do notice the extra 5-odd kilos the Levo SL Comp has on your average 150mm trail bike. While we’re talking batteries, the 320Wh battery offered up plenty of life for rides up to two hours long. In two hours, I managed just under 1,100m of vertical gain over 30kms and used up 88% of the battery without riding super battery-conscious. Something to bear in mind, though, is that you can’t expect to ride the Levo SL like an eBike. To make the most of it, you’ll still need to get your heartrate up and put in some work. Rather than thinking of the Levo as an eMTB, you’re probably better off thinking of it as an assisted mountain bike, with the motor giving you a firm push up the hill versus giving you the ability to rail uphill berms. On the highest power setting, the bike will winch you up the hill to an extent, but you’ll chew through battery a ton faster. If you want more battery life out of the bike, Specialized make a 160Wh Range Extender that fits inside your bottle cage and tidily connects up to the charge port – a really nice tidy option to milk some extra kilometres out of your ride.
Before we get into my feedback on how the bike rides, we may as well touch on the Mission Control app Specialized have created. The Mission Control app grants you full control of your Levo SL, allowing you to customise motor modes and bike settings, record rides, diagnose problems, check the health status of the drive system and, amongst other things, utilise Smart Control. Smart Control automatically adjusts motor power based off your remaining ride distance, to make sure you don’t run out of battery. All you need to do is enter a few parameters (ride distance, how much battery you have left etc) and the Mission Control app will figure out the rest using an algorithm that’s based on data gathered over thousands of rides. It’s worth noting that the bike rides completely fine without hooking it up to the Mission Control app, something I can confirm as I forgot to pair it up more times than I remembered.
Now onto the build. As mentioned earlier, I tested the Levo SL Comp, which comes spec’d with SRAM Guide R brakes, a SRAM NX drivetrain, a 150mm Fox 34 with the GRIP damper, a Fox Float DPS Performance rear shock, a Xfusion 150mm dropper and Roval Traverse 29 wheels - all bolted to an aluminium frame. Considering the bike has an RRP of $10,500, this spec isn’t even close to what you’d hope to get from a pedal bike, for that money. For reference, $20 more will get you an S-Works Stumpy with AXS, and $1,500 or so more will get you an S-Works Turbo Levo. The price for the Levo SL sounds high, and I’d agree that it is but if someone was to give me $12,000 to buy either the Levo SL or the standard Levo, I’d still have a hard time deciding - and here’s why…


The Levo SL rides really well and leans much closer to the handling characteristics of a standard mountain bike, than an eBike. I had high hopes for this bike and it’s safe to say Specialized delivered. As mentioned, I started with 25% sag front and rear. On climbs the bike feels great, but I did find the front wheel a little light, which was amplified when I dropped a little pressure out of the rear shock. That’s not to say it was an issue, though, because once you’re aware of the light front wheel, it’s easy to manage without having to take any extreme measures. I never struggled to keep it down when it got steep, and it wasn’t ever difficult to get the front wheel to hook in on turns. I’d call it a handling characteristic rather than a problem. For the other 95% of climbs though, the bike did exactly what it should do: climb. The extra power helps tow you up the hills and because the bike is light and you’re not always charging up hills at the same speeds some descend at (as per other eBikes) the experience is way closer to that of a standard mountain bike, leaving you with a feeling of satisfaction at the top because you still feel like you’ve done something. The bike is light enough to be pretty manoeuvrable in tight ‘n techies, but you won’t be hopping your back wheel around with ease. Technical climbs are where the SL1.1 motor really shines. The smooth power delivery makes it a ton easier to work the bike around tight corners and over rocks and roots, somewhere I’ve struggled on other eBikes due to the initial surge of power.
It really becomes clear how good this bike is on the descents. Even with the Fox 34, something I personally would spec on a 150mm bike, the bike eats up trails. The bike hits a nice sweet spot between benefiting from the stability a few extra kilos gives you, and shaving off enough kilos to make the bike feel light and playful downhill. Thanks to our long, hot summer all of my local riding spots are bone-dry and dusty. The playful nature of the Levo SL meant my back wheel was skipping around a fair bit at 25% sag, but by dropping to 30% the back end was a little more planted and composed, especially on the way into corners.
It’s easy to feel like a bit of a passenger on eBikes once the trail points downhill, but that’s not the case with the Levo SL. Once again, the Levo SL feels much closer to an acoustic bike than it does an eBike, and it’s super easy to hold it wide-open and pin it. Regardless of how much speed you build up, the bike is eager to skip around the trail and go wherever you point the front wheel. On steeper riding, it’s much the same – the bike just wants to go fast and bounce around the trail. When I say bounce around the trail, I mean it in the best possible way: the bike encourages playful riding and I’d imagine that as you go up in spec, and therefore down in weight, this encouragement only grows.
I think the 29” wheels really help out here. I’ve found eBikes with 27.5” wheels tend to struggle a bit with sitting on top of roots and rougher sections of trail, due to the extra weight of eBikes. The 29” wheels deal with the added weight a bit better and skip across trail features a little nicer. You do find the limitations of the 34, especially if you’re out slapping berms and riding steep trails. The best way to think about the forks is probably the following: if I were to own a Levo SL I’d eventually upgrade to 36s or similar, but I wouldn’t be in a huge rush to do so. The same could be said for the rear shock - it does heat up and start to feel a little more ‘basic’ on longer descents and for some will definitely be under-shocked, but suspension is pretty difficult to spec when you consider riders’ ability, their local trails and other factors.
Overall, my thoughts? I love the Levo SL.
It’s the first eBike I’ve ridden that I’d happily own as my only bike. I’ve been describing it as the ‘mountain biker’s eBike’. That’s not to discredit other eBikes on the market, they’re great for plenty out there, whether it be due to lack of fitness, injury or just the desire to pin it up and down hills. I think where the Levo SL really shines, is by taking all of the feelings we associate with mountain biking – from slogging up climbs, to skipping and bouncing down hills to bunny hopping logs - and putting together a package that emulates those feelings whilst still offering enough of an e-vantage (I’m coining that term) to get in more riding and go further.
Words: Cam Baker
Images: Cam Baker & Cameron Mackenzie
Story: More Than ya Local
It’s not often I make the trip down to my local bike shop (LBS) but when I do, I don’t come back empty handed. These days, it’s usually only a spare tube or chain link that I walk away with and, very occasionally, my bike - if I’ve neglected it a little too much and can’t be bothered dealing with it myself but, that doesn’t stop them firing up the coffee machine and filling my cup for a caffeine-charged conversation comprising of bikes, life and general bike shop shit talk.
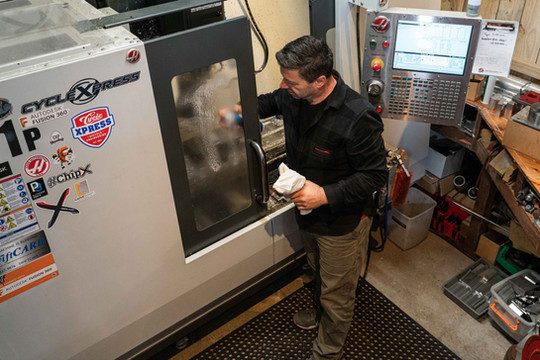
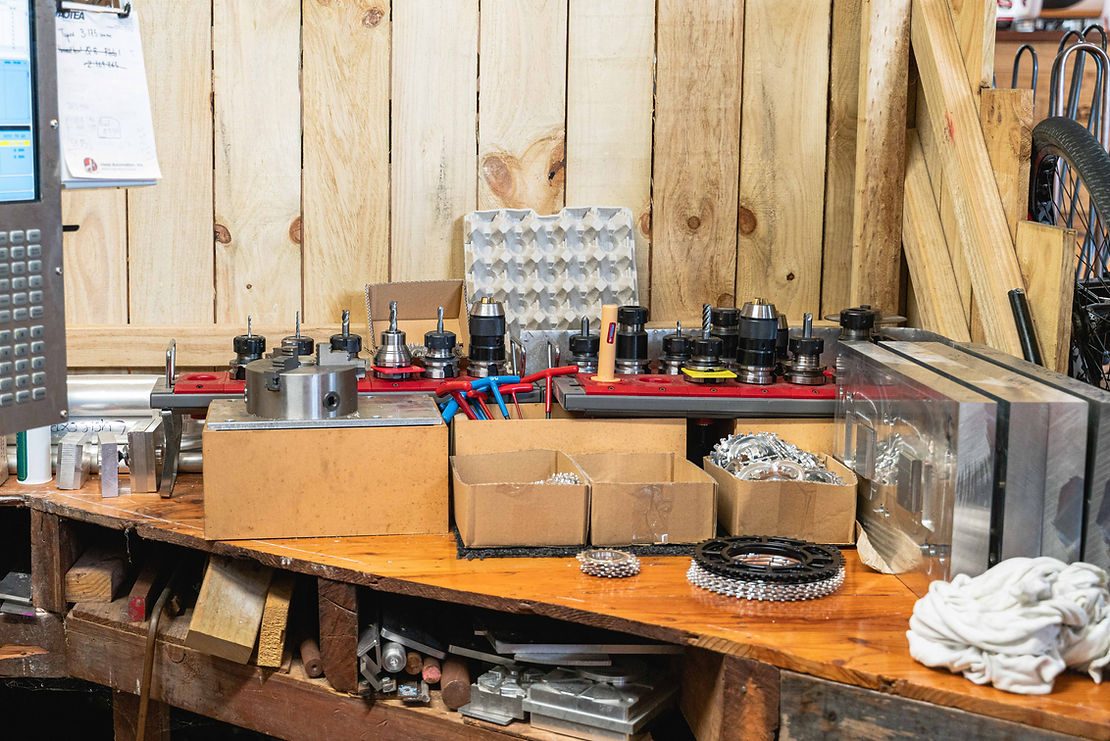
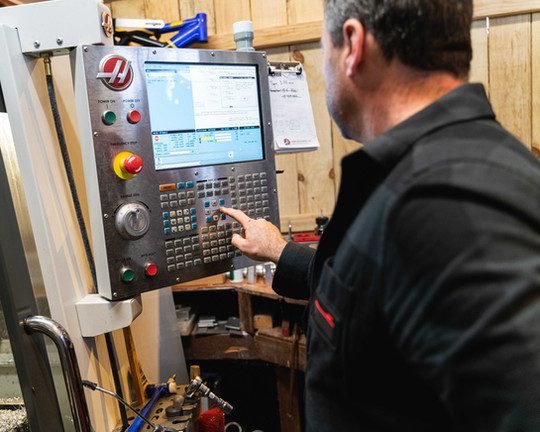
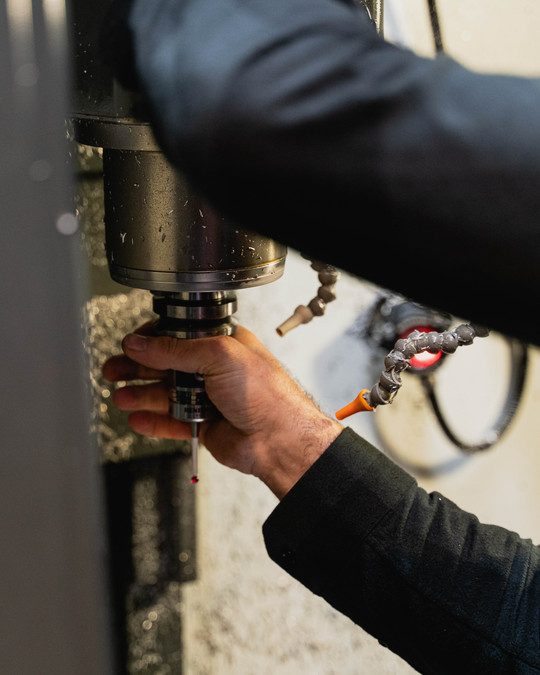
I feel like no matter how deep your loyalty runs to your LBS of choice, there’s always another shop that entices you, catches your eye and tries to draw you in. They have exotic brands you’ve only ever heard of, they have a beer fridge AND a coffee machine and, in the case of Cyclexpress in Howick, Auckland, they have a HAAS CNC Machine, a laser engraver and just about every other tool/machine you’d expect to find in a small engineering shop. And that’s before you get started on the collection of vintage mountain bike frames and all the little things around the shop that make you stop and stare.
Cyclexpress has been that shop for me for as long as I remember. Right around the time I arrived back in Auckland after a stint down south, I was wrenching in another Auckland store and caught wind of how Cyclexpress had just taken delivery of their new CNC machine. I’d known of Cyclexpress for a while and had always heard about how good their servicing was and that if you wanted suspension serviced locally, they were the ones with the tools and the know-how to get it done. The name Bruno kept popping up and, eventually, I managed to piece together that Bruno was the man behind the shop. This was a few years back now and it brings me a little bit of shame to admit that it wasn’t until this year that I satisfied my curiosity and went in to meet Bruno and lust over his setup.
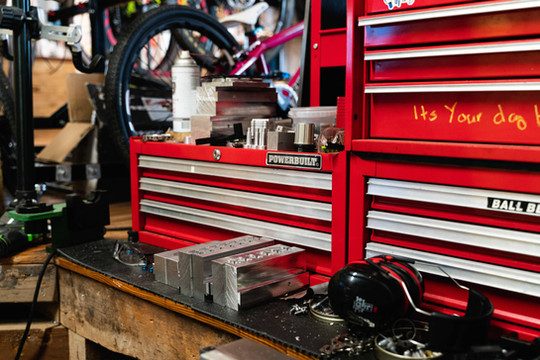
The first thing you should know about Bruno is that he’s Swiss. With this in mind, it’s safe to assume you’re in safe hands with anything mechanical and that’s before you take his tool-making heritage into account. Over the past twenty years, he’s built up a reputation as one of Auckland’s best mechanics. Not only is this thanks to his tireless work ethic and constant pursuit of improvement, but also down to his active involvement in, and support for, both the mountain bike and BMX communities on a national level (prime example: he’s supported NZMTBR since Day 1). Over the years he’s evolved from a bike shop with a workshop, into a workshop with a bike shop. Bruno’s passion is working on bikes and problem solving and as he’s built his brand up over the years, he’s been able to put more and more into developing the workshop and rely less and less on the retail side of Cyclexpress. With his knowledge and ability to breakdown products from a manufacturers point of view, Bruno and his staff have been able to educate riders on what brands and products will work best for them. Because of this, Cyclexpress doesn’t hold a huge range of products, but you know that anything they do carry, they carry because it works. With some parts, however, you can’t always find something that works and as a result, Bruno’s been slowly upping his manufacturing capabilities over the past few years…
I’m a self-confessed tool nerd. In my bike shop days, I’d always supply my own tools - not because any of the shops I worked in requested me to, but because I couldn’t stop buying them. If you got ‘em, you may as well make some money off ‘em, right? Considering this, the first time I visited Cyclexpress it was a bit like walking into a dream. As I stepped out from the entrance corridor and into the open-plan space that makes up Cyclexpress, Bruno greeted me at their coffee-bar-come-counter and immediately had the espresso machine fired up to brew me a long black. Good start. We took a seat at their big shop table and the first thing I noticed was how established the rustic space felt. Cyclexpress has only been in their current space for a couple of years, but you wouldn’t know it and I wouldn’t blame you for thinking they’d been there forever. Culture is one of the reasons many of us support our locals and why we’re happy to wait a couple of extra days for servicing, or pay an extra dollar here and there for product. Cyclexpress have nailed the culture aspect, with knowledgeable staff who are always keen to chat, and a low-key atmosphere. Both Bruno and Dan, his mechanic, knew all of the customers who visited during my time there by name, and were more than accommodating.
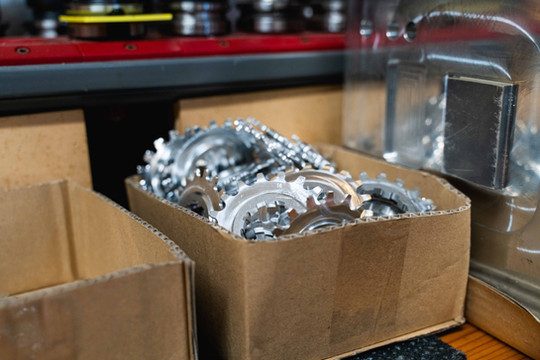
The first thing I asked about was, of course, the thing that interested me most about Cyclexpress: their HAAS CNC Machine. The only other bike shop I’d ever heard of with a CNC machine is located in Canada and, from what I’ve gathered, they use theirs to manufacture derailleur hangers in a high-volume, busy workshop so, I was interested to find out why one worked its way into a small Auckland bike shop. Cyclexpress manufactures to find solutions, for two main reasons: the first being that we’re located really, really far from most of the rest of the world (something I hope you’d know). Even for big industries, this can make sourcing parts difficult, so for niche industries like mountain biking, it can be even harder to get our hands on products. If you’re cashed up, you can get anything here but even so, there’s nothing rad about spending the same amount on freight as you spent on the product itself, just to get it here. The second reason is to fill holes in the market - which really describes itself. Sometimes Bruno and the team identify ways products could be made better, or come across problems that they could solve by manufacturing a unique part, such as their GT Dogbone Upgrade Kit.
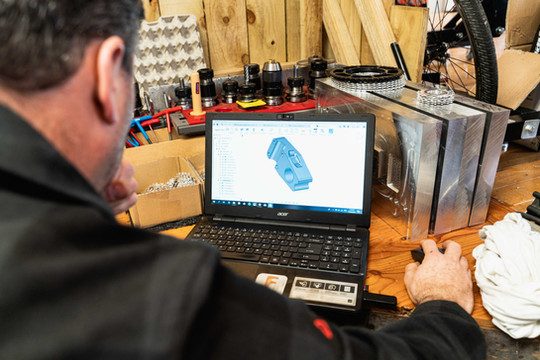
The CNC machine is located in what’s probably best described as a ladder-accessed pit, alongside the workshop. As Bruno set up the machine to CNC one of the faces of a stem he was working on, we got talking about the products he’s manufactured under his CXP Racing brand so far. From BMX crank sets and prototype mountain bike stems, to suspension top-cap tools and narrow-wide chainrings, they are all things that Cyclexpress either had a need for and weren’t able to locally (or easily) source, or thought they could do better. Cyclexpress has the unique advantage of also being a bike shop. Because they service bikes, they not only get to engage with their target consumer face-to-face but also, get to see and track the performance of not only their products but also, other manufacturers products. With this unique insight, Cyclexpress can tweak their products to make up for where other manufacturers products may have let consumers down. This is before you even consider the fact that CXP Racing have the ability to get product tested by real-world riders as well as athletes.
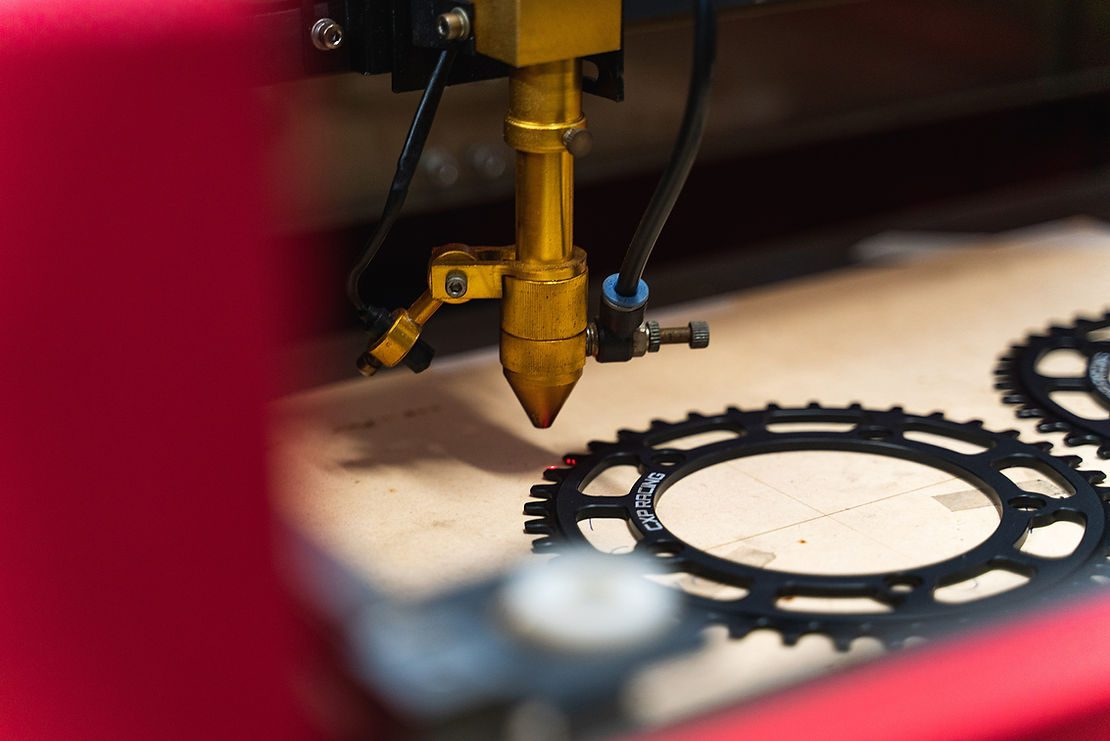
With an instore laser-engraver, Cyclexpress are able to brand all of their products in-house too, meaning the only thing they can’t do is anodize but, there’s plenty of local companies that can handle that part of their process. As Kiwis, we take pride in anything that comes out of New Zealand; be it athletes, products or television stars, so it’s pretty rad to see New Zealand designed and made products coming out of a humble old local bike shop.
Even with the fancy machinery, standard servicing is still a big part of Cyclexpress. A combination of mountain bikes, BMX bikes and even a Cannondale commuter bike, were all in queue to pass through the work stand and, to me, that plays a huge part in making the shop what it is today. Call this ex-mechanic bias, but to me a shop’s culture stems from the workshop and is built upon the unparalleled shit talking that takes place in said workshop. Mechanics dictate a shop’s vibe. If they do a good job, the customer stokes because they know they’re going to be able to ride all weekend, worry free, and that’s exactly what Cyclexpress does; a good job. Not everyone benefits from CXP’s CNC machine, but everyone benefits from a good service - and I think that’s ultimately what Cyclexpress’ success comes down to, they’re simply good people doing good things.
If you’re ever passing through Auckland, make the visit to Cyclexpress and have a look around. Bruno and the team are flat out, but they’ll always take time out for a chat and to show off whatever it is they’re working on at the time. If you’re super nice, they might even offer you a coffee…
Words & Images: Cam Baker
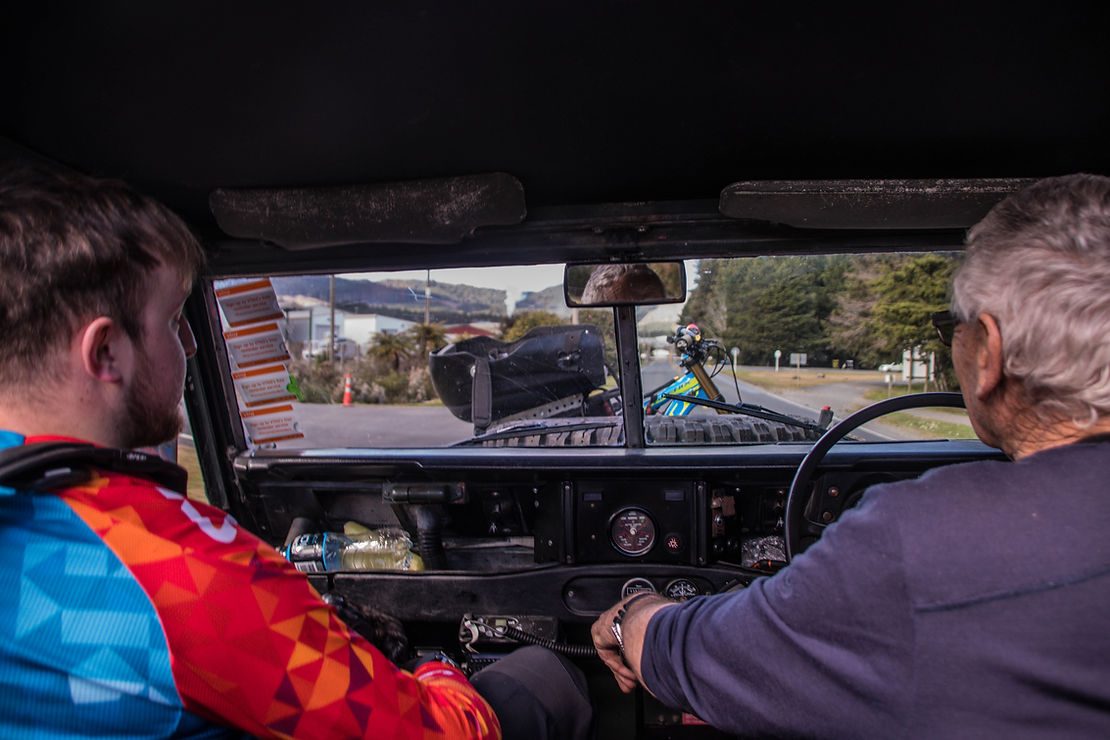
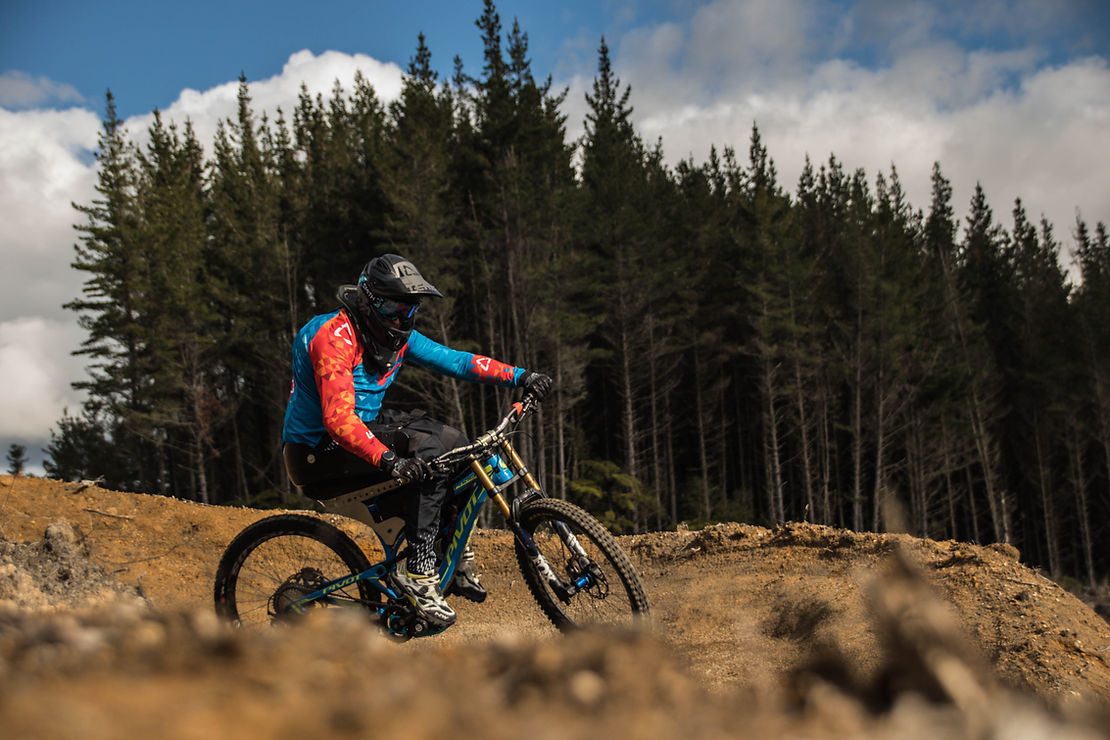
Story: Liam Keenan's Journey
Mountain biking is a lifestyle. There are obvious health benefits that come alongside riding, but to most these are considered added value; with the satisfaction of rhythmically flowing down your favourite trails and the sense of adventure that comes alongside exploring backcountry canyons and dense forests that attracts us long before the thought of getting in a good workout does. Once you’ve had a taste, more often than not you end up hooked and mountain biking is all you think about and all you want to do. The sport is unique and there’s not many others that will take over your life in quite the same way.
Like any pursuit, each come with their risks and for us, crashes are an unfortunate necessity in our pursuit of adventure. If all that’s bad, goes well, a brush of the hands is all it takes to get you back up and pedalling. If all that’s bad, goes bad, it often takes much more than a simple brush of the hands to get back on the bike. We all have that one crash, the one that we think back on when we’re about to push our limits, the one that keeps us humble and asking is the risk worth the reward. That one crash for Liam Keenan, however, left him asking where to next.
I’ve known Liam for a while now and the one thing that’s remained constant throughout our friendship is how stoked he is on bikes. I see him all over mountain biking Facebook groups and naturally, pretty much every time I see him it’s at something bike related. I remember the first time we met, he was down in Queenstown riding and came by the store I was working in looking for a part that he’d just broken on the first or second day of his trip. I, for the life of me, can’t remember what said part was but I do remember that I couldn’t supply one, so I sent him on his way. I’m pretty sure he was also looking for employment – something I also couldn’t offer. We kept in touch over the years and as I was coming back to Auckland, he’d just lined up work in Queenstown and was making his way down the line. Swapsies!
Queenstown life is pretty rad and, almost exactly what you’d imagine – work your nine to five, then take to the hills after work and ride until the sun goes down. If you’re into snow sports, the winter is much the same. There aren’t many better places to be if you’re into both! Liam managed to take things to another level though and had found a job at Cardrona Bike Park taking care of their rental fleet. Lunch time laps? No worries. It’s about now in the story that things take an unfortunate turn. That one crash I was talking about earlier; Liam had it.
For those not familiar with Skyline Queenstown, as you exit the gondola you roll down a shared, fenced gravel path towards the trail head. The path is, as you’d expect, pretty loose and being that it’s a shared area, if you don’t take things slow you can end up hitting walkers or, in Liam’s case, a fence post. As Liam joined the path, his front wheel washed out and sent him over the handlebars and head-first into a fence post. He saw the path was clear and came in a little fast, ignoring the slow down signs. It was a stupid crash that should never have happened, as he puts it. While knowing it’s a stupid crash doesn’t necessarily add to the story, I feel like it’s a good reminder that even the easiest sections of trail can lead to crashes with big consequences so if you see signs telling you to take it slow, do just that. Anyway, trail wisdom aside…
Liam knew immediately that something wasn’t right and, after being assessed by the team at Skyline was evacuated to Queenstown Hospital where it was discovered that he’d fractured two vertebrate and had lost all sensation from the chest down. He’d also done a lot of damage to his shoulder but as you can likely imagine, that was the last of Liam’s concerns. From Queenstown he was transferred to the Burwood Spinal Unit in Christchurch, where Liam was told he would likely never regain sensation from the chest down. His first thoughts were “how can I ride again?” and so, once he began rehab he also began researching adaptive mountain biking, a niche sub-genre of mountain biking where bikes are modified to suit riders disabilities. The obvious option was a bucket bike, as per the bike Martyn Ashton now rides.
Bucket bikes, as you can imagine, aren’t terribly common so Liam had a lot of work in front of him to get a bike together. He started with a Pivot Phoenix – a 200mm travel downhill bike. The first, and most obvious, problem to address was having no use of his legs. With the rise of eBikes, Liam opted to run the bike with a Paradox Kinetics electric motor that can be controlled via a thumb throttle. All in all, a relatively easy process. The rest of the bike, however, was, and still is, a constant work in progress.
As able-bodied mountain bikers, we’re able to control our weight distribution and let the bike move around underneath us. If you watch a side-on video of someone riding over rough ground whilst out of the saddle, for example, you’ll notice that their chin and hips stay at a fairly constant height from the ground as they can allow the bike to move up and down underneath their body. Liam on the other hand, is strapped into a seat, meaning his weight moves with the bike and that the suspension system is constantly loaded supporting not only Liam’s full weight, but also the weight of Liam’s adaptive chair and the battery for his drive system, making for an absolute nightmare as far as suspension setup is concerned. Mountain bike suspension is typically setup with a dynamic load in mind, as your average mountain biker will work in conjunction with the suspension system to absorb impacts. Liam’s weight is more or less static once it’s on the bike and as a result, it’s been difficult to dial in settings that suit. Because of the extra weight of the seat and battery, Liam needs to run a higher spring rate but because he can’t absorb impacts with his body, he also needs a really slow rebound rate to control the bucking he’d otherwise face with more typical rebound settings. The problem with this though, is that the rear shock packs out because it can’t rebound fast enough on repeated impacts, like braking bumps. He has similar issues with the fork, but they’re far less exaggerated than the problems he has with the rear.
The seat is another component that’s given Liam issues. Liam’s adaptive seat does more than just give him somewhere to sit. It also holds him upright as he no longer has use of his core. As a result, it’s a lot bigger than your typical mountain bike seat. This is where adaptive bikes really start to get tricky. Because you’re adapting a standard mountain bike frame to work with someone who, ultimately, wasn’t even considered a user in the design process, there’s certain elements that are trickier to work with than others and the mounting of an adaptive seat is the prime example for this. Liam’s adaptive seat has to mount to a standard seatpost which to be frank, is simply not up to the task. This has resulted in multiple re-designs of the mount, with some iterations lasting a mere day.
While the bucket bike is about as close as Liam can currently get to replicating riding a mountain bike, the other big issue is that he can’t ride by himself. His feet are clipped in with standard SPD pedals and because it’s a two wheeled bike, Liam needs people to send him off, catch him and pick him up if he falls. Many of us have the luxury of throwing the bike on the car and going, but unfortunately Liam needs to convince at least two people to go with him.
Well, needed to, I should say…
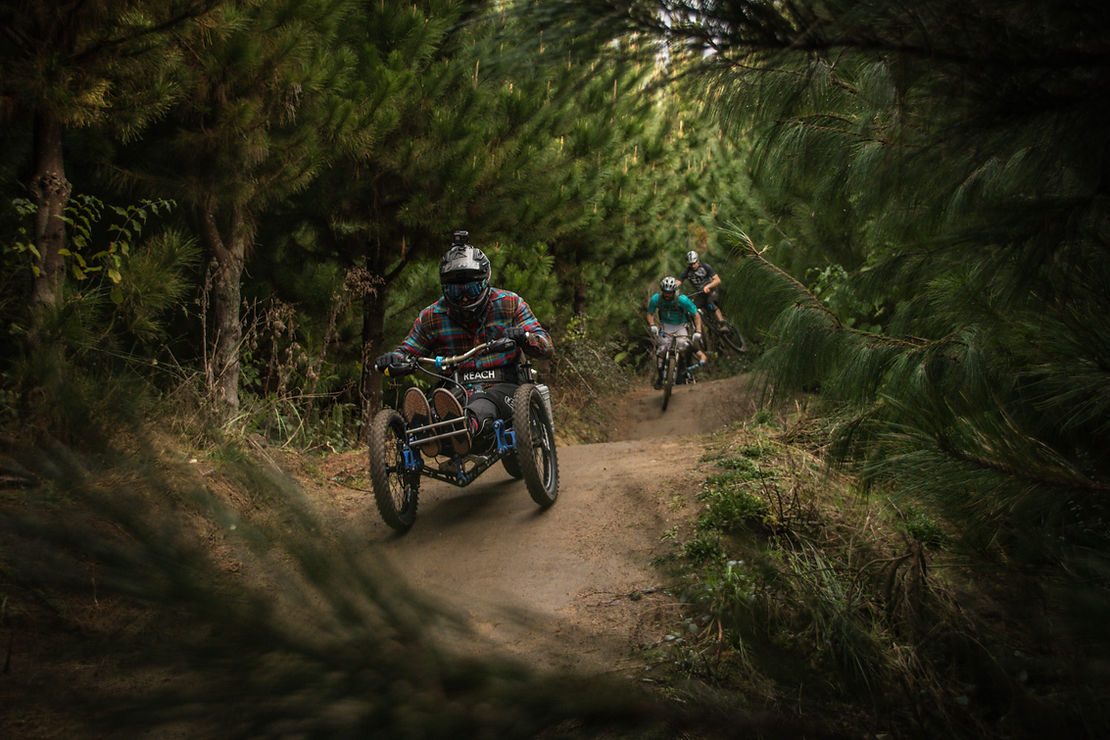
Liam’s recently picked up one of the raddest things I’ve ever seen: a Bowhead Reach Adventure Cycle. The Bowhead is basically an all-out off-road trike designed to get people adventuring outdoors again. Using mostly mountain bike components and being designed to fit down mountain bike trails, it was the obvious choice for Liam. Being a trike, he can set off by himself and stop mid-ride without having to worry about having someone on hand to catch him. He can also load, and unload it, from his car without assistance, giving him back the option to go ride by himself. As Liam put it: “it doesn’t give me the sensation of two wheels that the bucket bike gives me, but it gives me the freedom to ride whenever I want and to go so many more places.” And, he plans on going to plenty of places. There’s already talks of an Old Ghost Road trip, with Liam even offering to tow my gear aboard a trailer that attaches to the Bowhead. Sign me up! With the Bowhead completing Liam’s fleet of adaptive bikes, he can experience the flow that comes with riding two wheels aboard the bucket bike, with the freedom of exploration aboard the Bowhead – the two main aspects of mountain biking we all chase.
When one of the things that you love most, takes away something massively from important to you it’s easy to see why you’d give up. Especially when, there’s no conventional method to carry on doing that thing you love – such as mountain biking. Liam’s attitude, though, has been nothing but inspiring and it’s humbling to watch him continue to chase the lifestyle mountain biking brings us. Having found ways to feel the flow, explore beyond where anyone else would reach and to ultimately, have a rad time enjoying trails with his buddies.
Words: Cam Baker
Images: Todd Wallace