

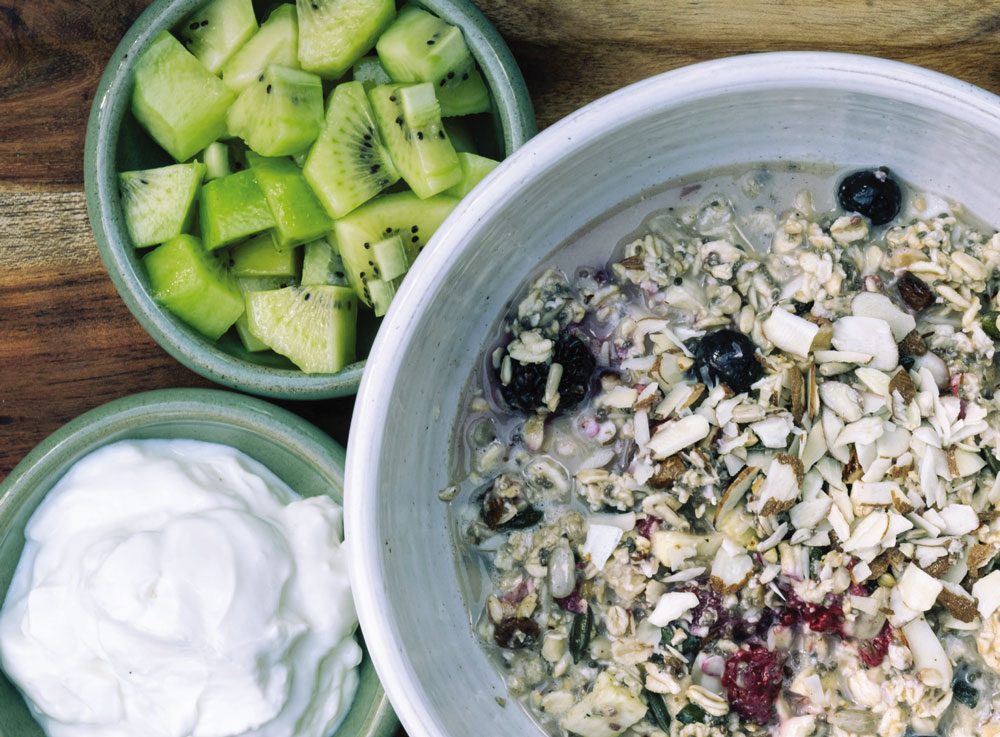
The Kitchen: Overnight Oats
Words: Liss Wallis
Photography: Liam Friary

Make the night before and enjoy for breakfast before or after your ride the following day.
Ingredients –
¾ cup rolled oats
1 tsp of cinnamon
1 Tbsp of chia seeds
1 Tbsp sliced almonds
½ cup frozen blueberries
or boysenberries
½ cup of milk – soy, almond, coconut or dairy – your choice
¼ cup water
1 serving of vanilla protein powder
Method –
-
- Add oats, cinnamon, chia seeds, almonds and half of the frozen berries (¼ cup) to a glass jar or Tupperware container.
-
- In a blender cup, add the remaining frozen berries, milk, water and protein powder and blend for 10 seconds.
-
- Pour the wet ingredients on top of the oat mixture and mix well.
-
- Store in fridge and enjoy the next day for breakfast. Top with any fruit, or peanut butter, if you wish.
Total time to make: 10 minutes. Oats will keep in the fridge for two days.


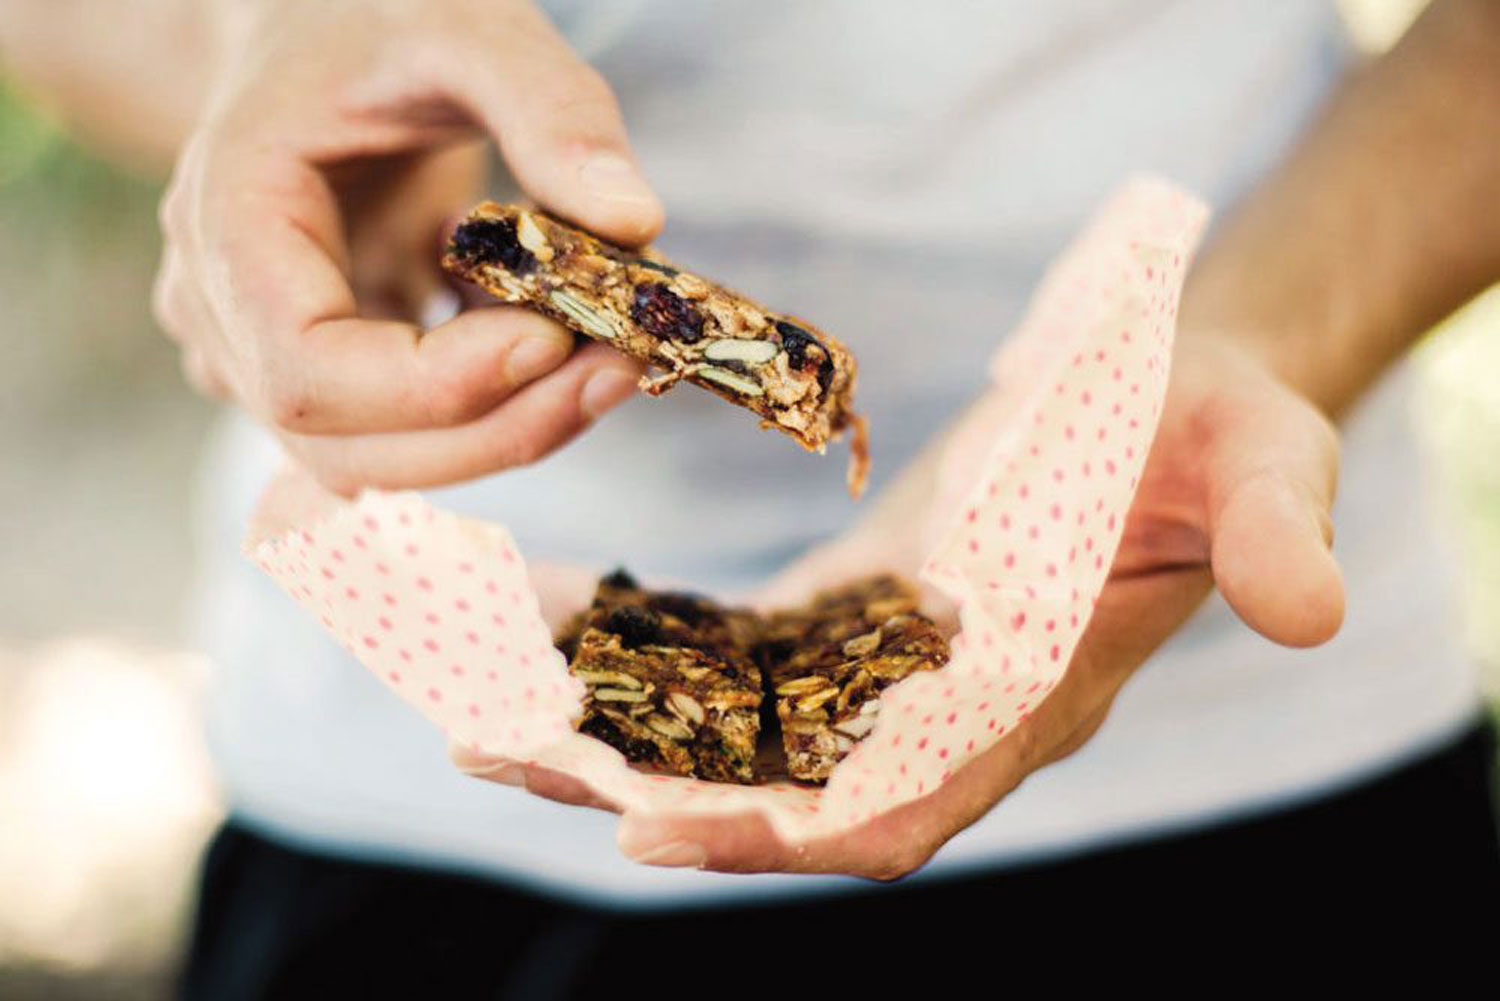
The Kitchen: Homemade Granola Bar
Words: Liam Friary
Hesitant to buy another expensive, sugar-packed, individually wrapped energy bar? This homemade granola bar is a snack that tastes great and is built to survive being bashed around in your pocket or hip bag. Without further ado, here’s the recipe:
Ingredients – (makes 10 – 12 bars)
3 cups (300g) rolled oats
½ cup (50g) chopped raw almonds
½ cup (100g) butter
3 tablespoons honey
1 ½ cup (300g) dates
⅛ cup (15g) pumpkin seeds
⅛ cup (15g) dried cranberries
Method –
- Preheat the oven to 160°C.
- Spread the oats onto a baking tray and toast them in the oven for about 15min.
- In the meantime, simmer the dates (pits removed) in a pot with ½ cup of water for ten minutes, or until soft. Let the dates cool down for a bit, then blend them to a smooth puree.
- Combine all the ingredients in a large mixing bowl and stir until all ingredients are covered.
- Spread the mixture onto a baking tray lined with baking paper and put it in the oven at 160°C for about 25 min.
- Remove the tray from the oven, let it cool down before placing another baking parchment on top then adding another baking tray (or flat object) on top with some weight to hold it down (I used water bottles).
- Let it cool fully overnight, cut the bars, and enjoy.


The kitchen: Rice Cakes
Words: Liam Friary
Yes, these are rice cakes. They are a super simple staple that will keep you fuelled during long days on the bike. Bonus — they are easily made ahead and carried on a ride. This recipe is just a starting point; depending on preferences, what foods are in season and what’s available in your pantry, additions can be made. Add anything from maple and bacon to blueberries and chunks of dark chocolate. Get creative with what you like and what you have on hand, wherever it is you’re cooking and riding.
Ingredients –
4 cups tap water
2 ¼ cups white short grain rice
2 ½ cups full fat cream cheese
2 Tablespoons granulated white sugar
2 Tablespoons melted coconut oil
1 teaspoon vanilla extract
Method –
- In a rice cooker, combine your water, rice, sugar, and coconut oil. Turn it on (white rice setting, if your rice cooker specifies) and let cook. Once cooked, mix cream cheese and vanilla into rice. Note: this is also the time to throw in any spices, fruit, chocolate, nuts, etc that you’d like to add to your rice cake.
- Spoon into a large zip-closure freezer bag. Flatten, smooth the air out and leave to cool on a flat tray. Once cool, transfer to the refrigerator to chill overnight. In the morning, slide your tasty slab of rice onto a cutting board. Cut into approximately 20 squares. You can either keep them all together in an airtight container, or individually wrap them in foil. Either way, they should be stored in the fridge until needed. Refrigerated, they will keep for about four days.

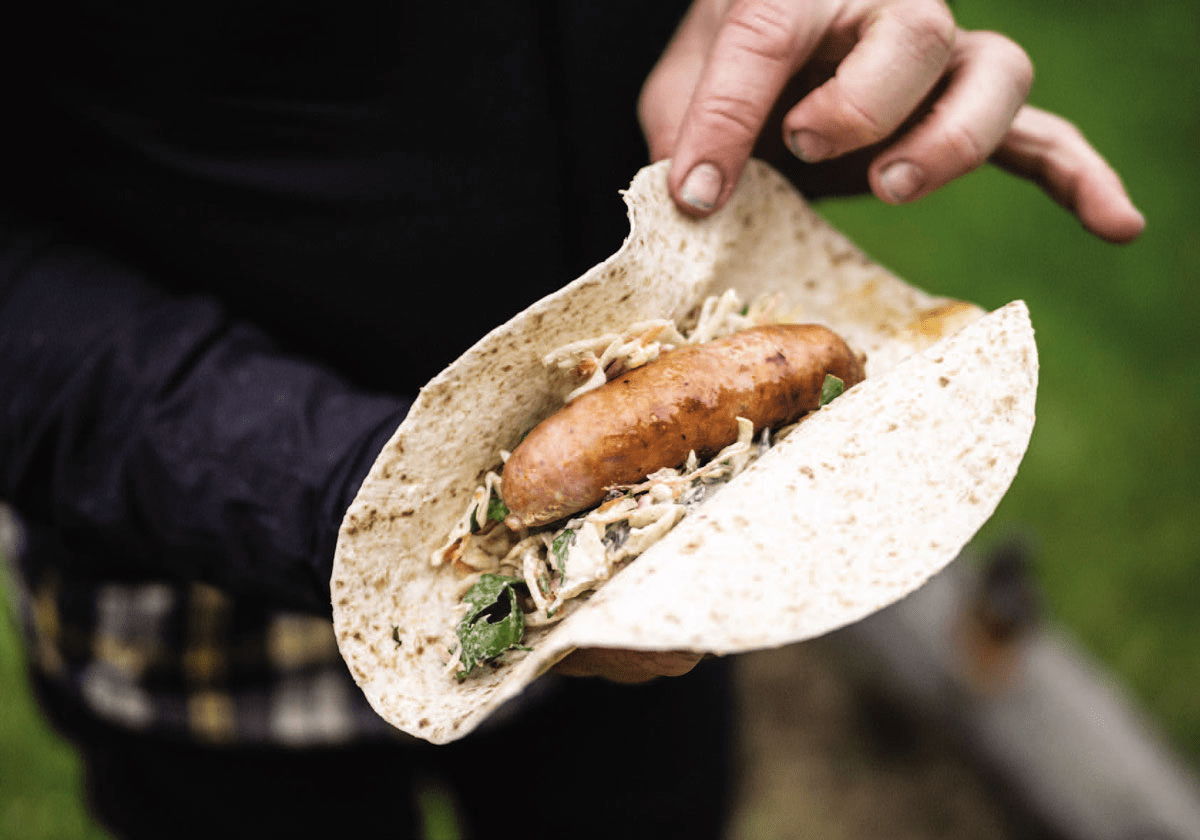
The Kitchen: Tortillas
If you’re thinking about escaping into the backcountry on a riding or multiday bikepacking trip, you’ll need to think about grub. As they say, food is fuel. When you finally reach camp, nothing beats fresh food. There’s a tonne of freeze dried meals out there and they work well, but sometimes it’s good to mix it up. Over the past few years, I’ve found tortillas a staple for riding and bikepacking missions.
Tortillas are so good, readily available and offer minimal bulk. You can pack them just about anywhere on your rig: simply fold ‘em down and stash them for later. I’ve used these, and peanut butter slugs from Pic’s Peanut Butter, for a light lunch on the road. If you want to add a little something extra, sprinkle some wholegrain crackers through the middle.
For the evening, campside burritos are easy to prepare. For the filling, throw in some cheese or avocado to add some extra jazz. My favorite tortillas by the fire are slaw, sausage and a light drizzle of mayo or something similar over the top. You can pack most of these ingredients down quite well, and they taste bloody good!
Remember to save small sachets of mayo/ketchup when eating out in your normal life, as they come in super handy when pushing the pedals.
No-cook options for riding and bikepacking trips are great and that’s where tortillas shine. Fill ‘em with fresh vegetables, dried meats or anything you like really. Heck, if you want to make your night away from the bustle boujee, rip them into smaller bits and dunk into hummus. •
Words: Liam Friary
Photography: Marcus Enno