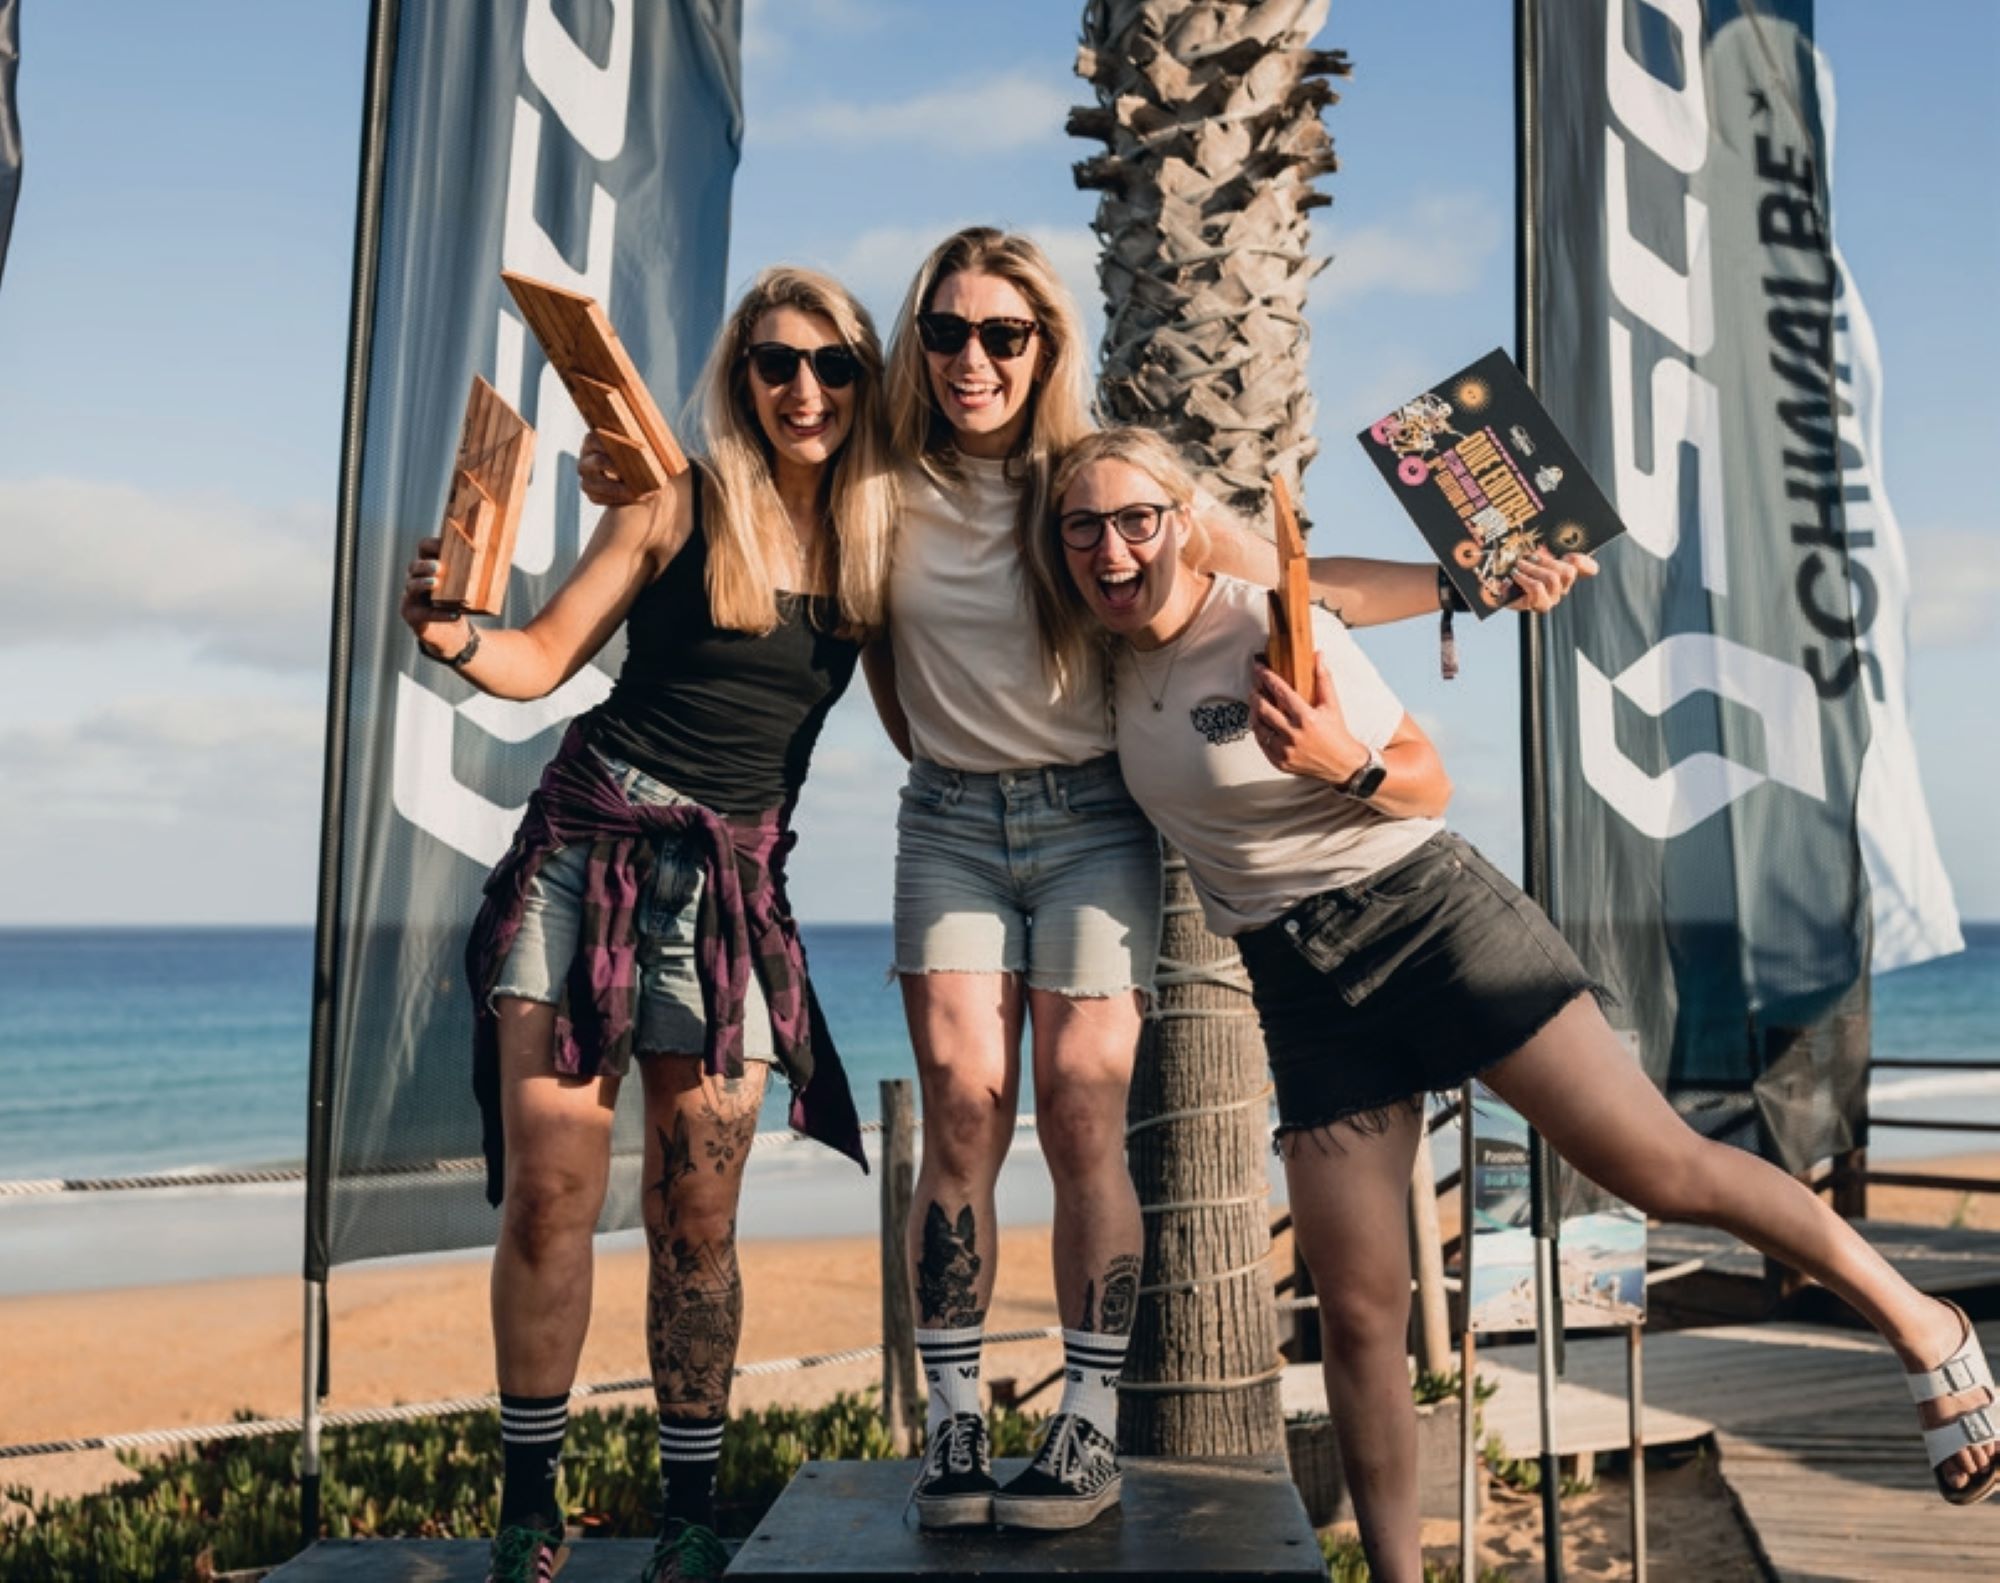
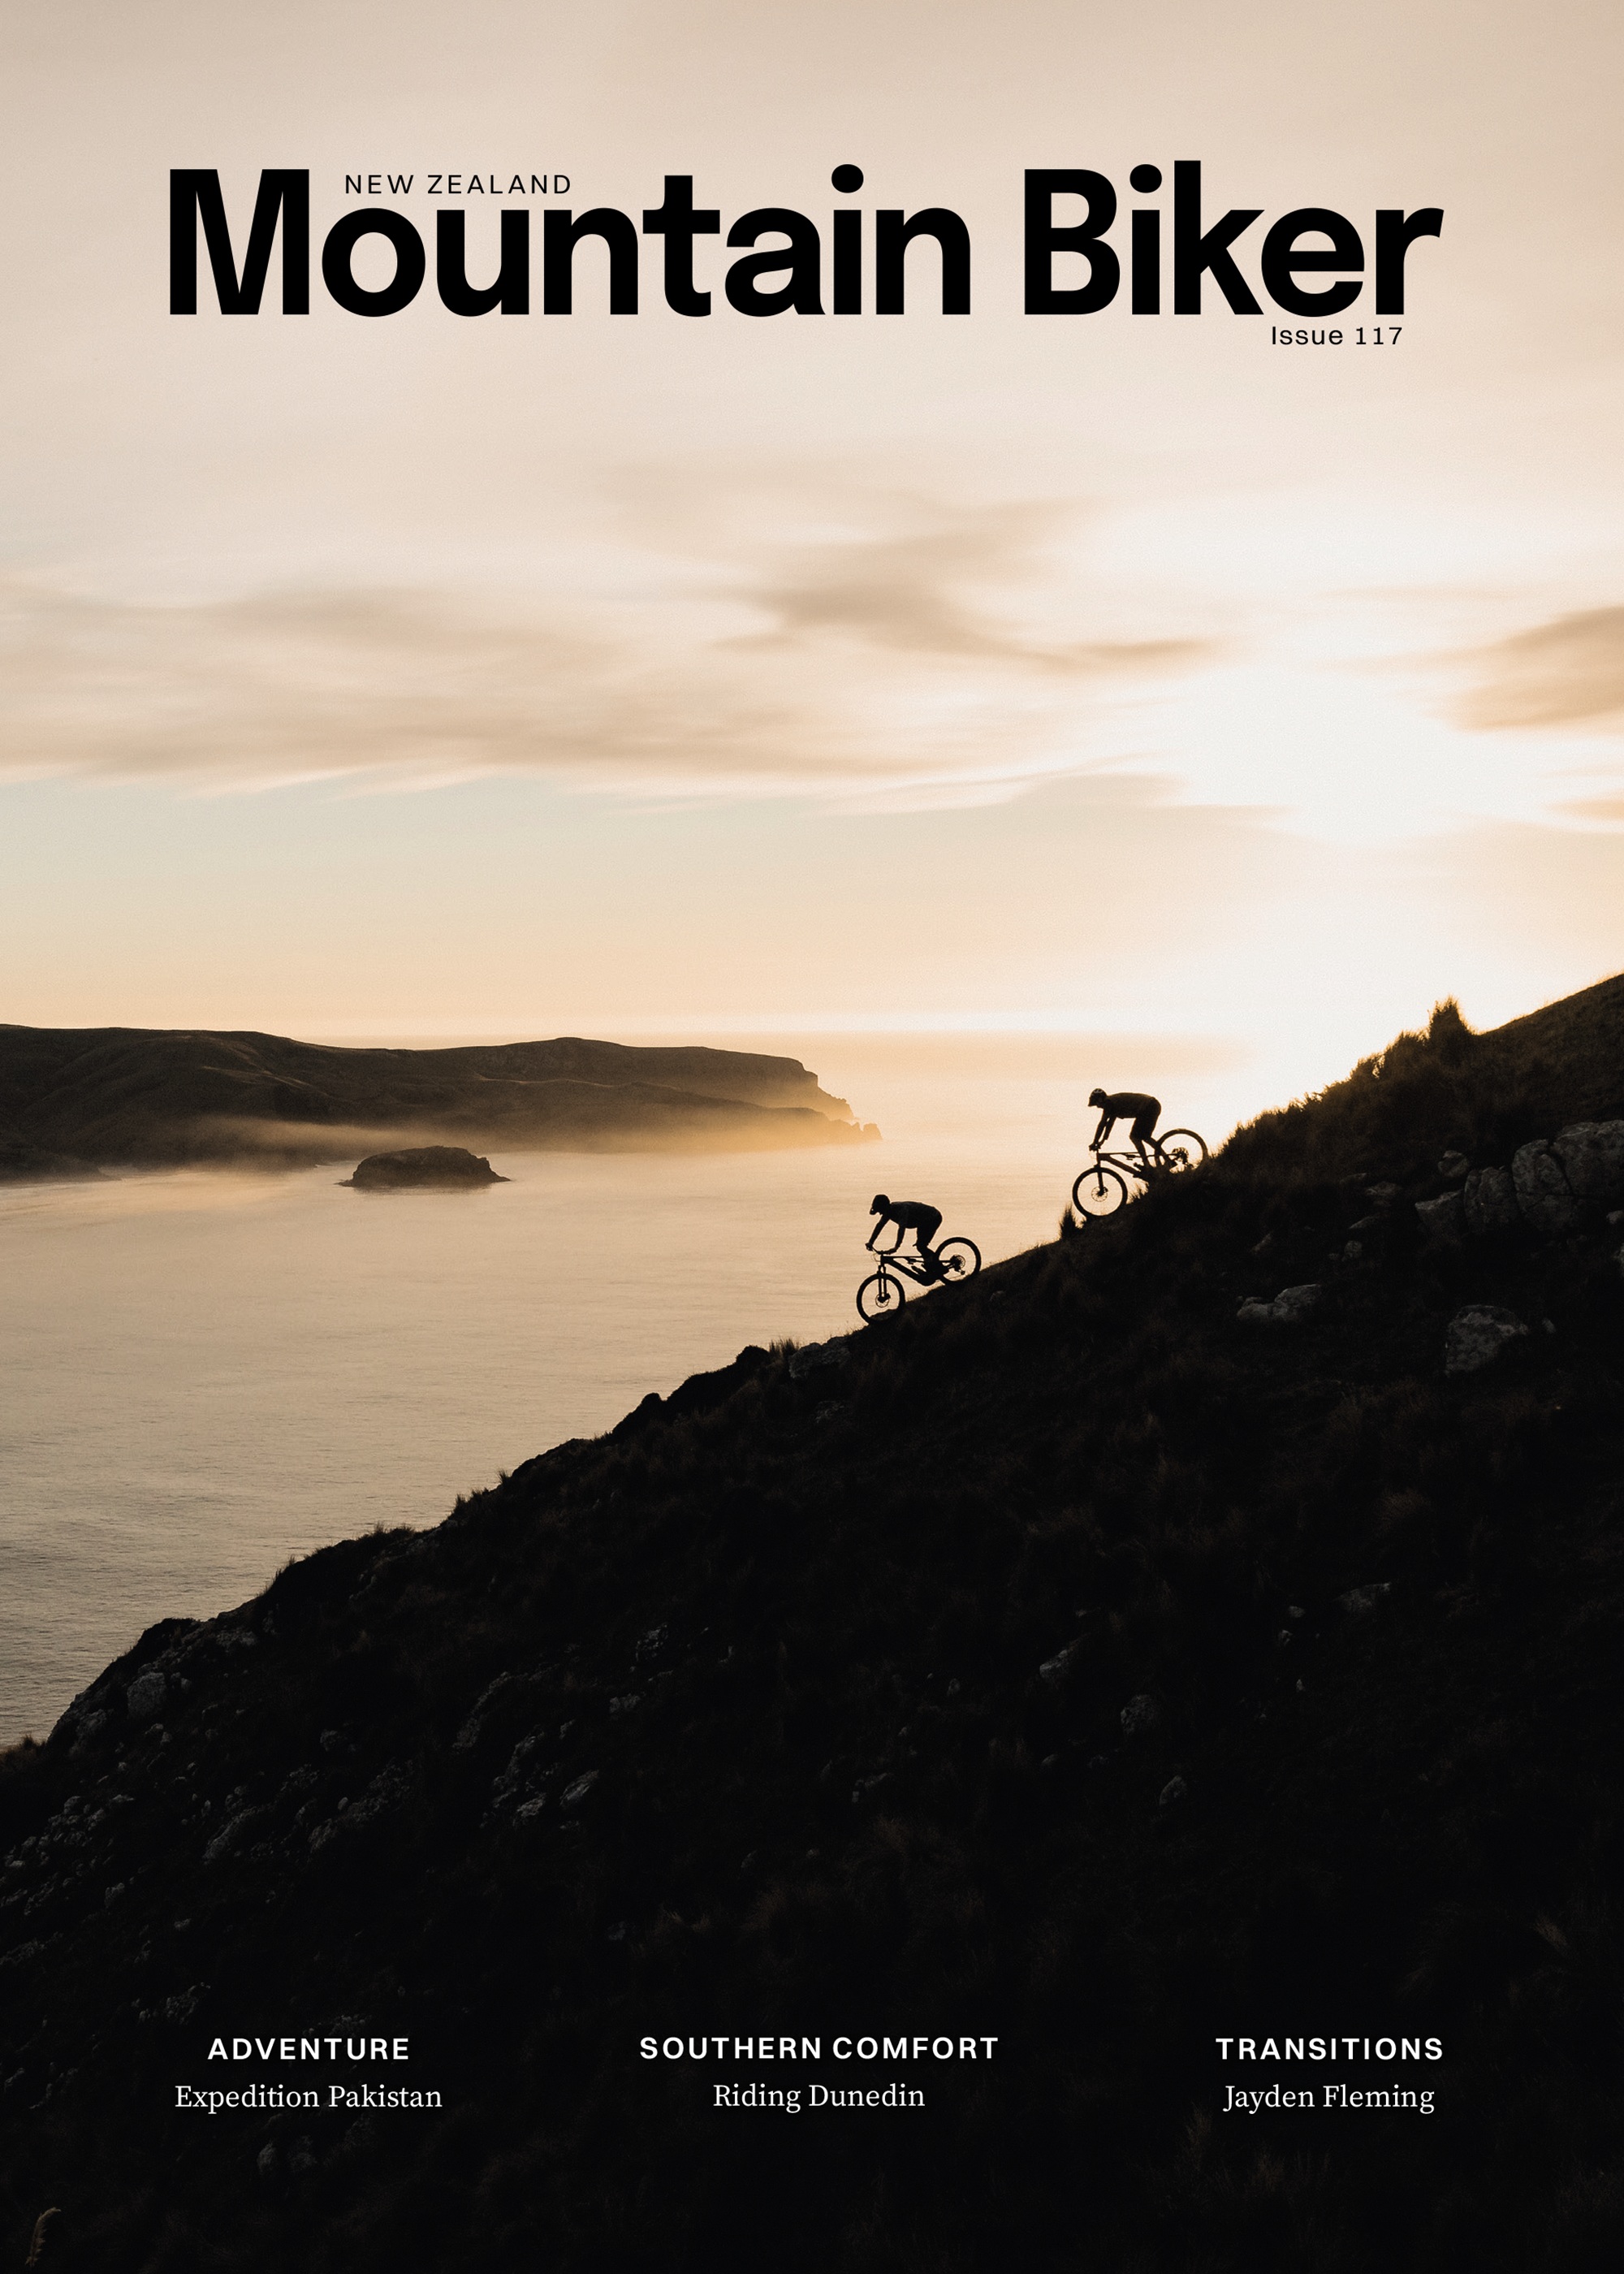
Touring the Island of Eternal Spring
Words by Georgia Petrie
Images by Cameron MacKenzie
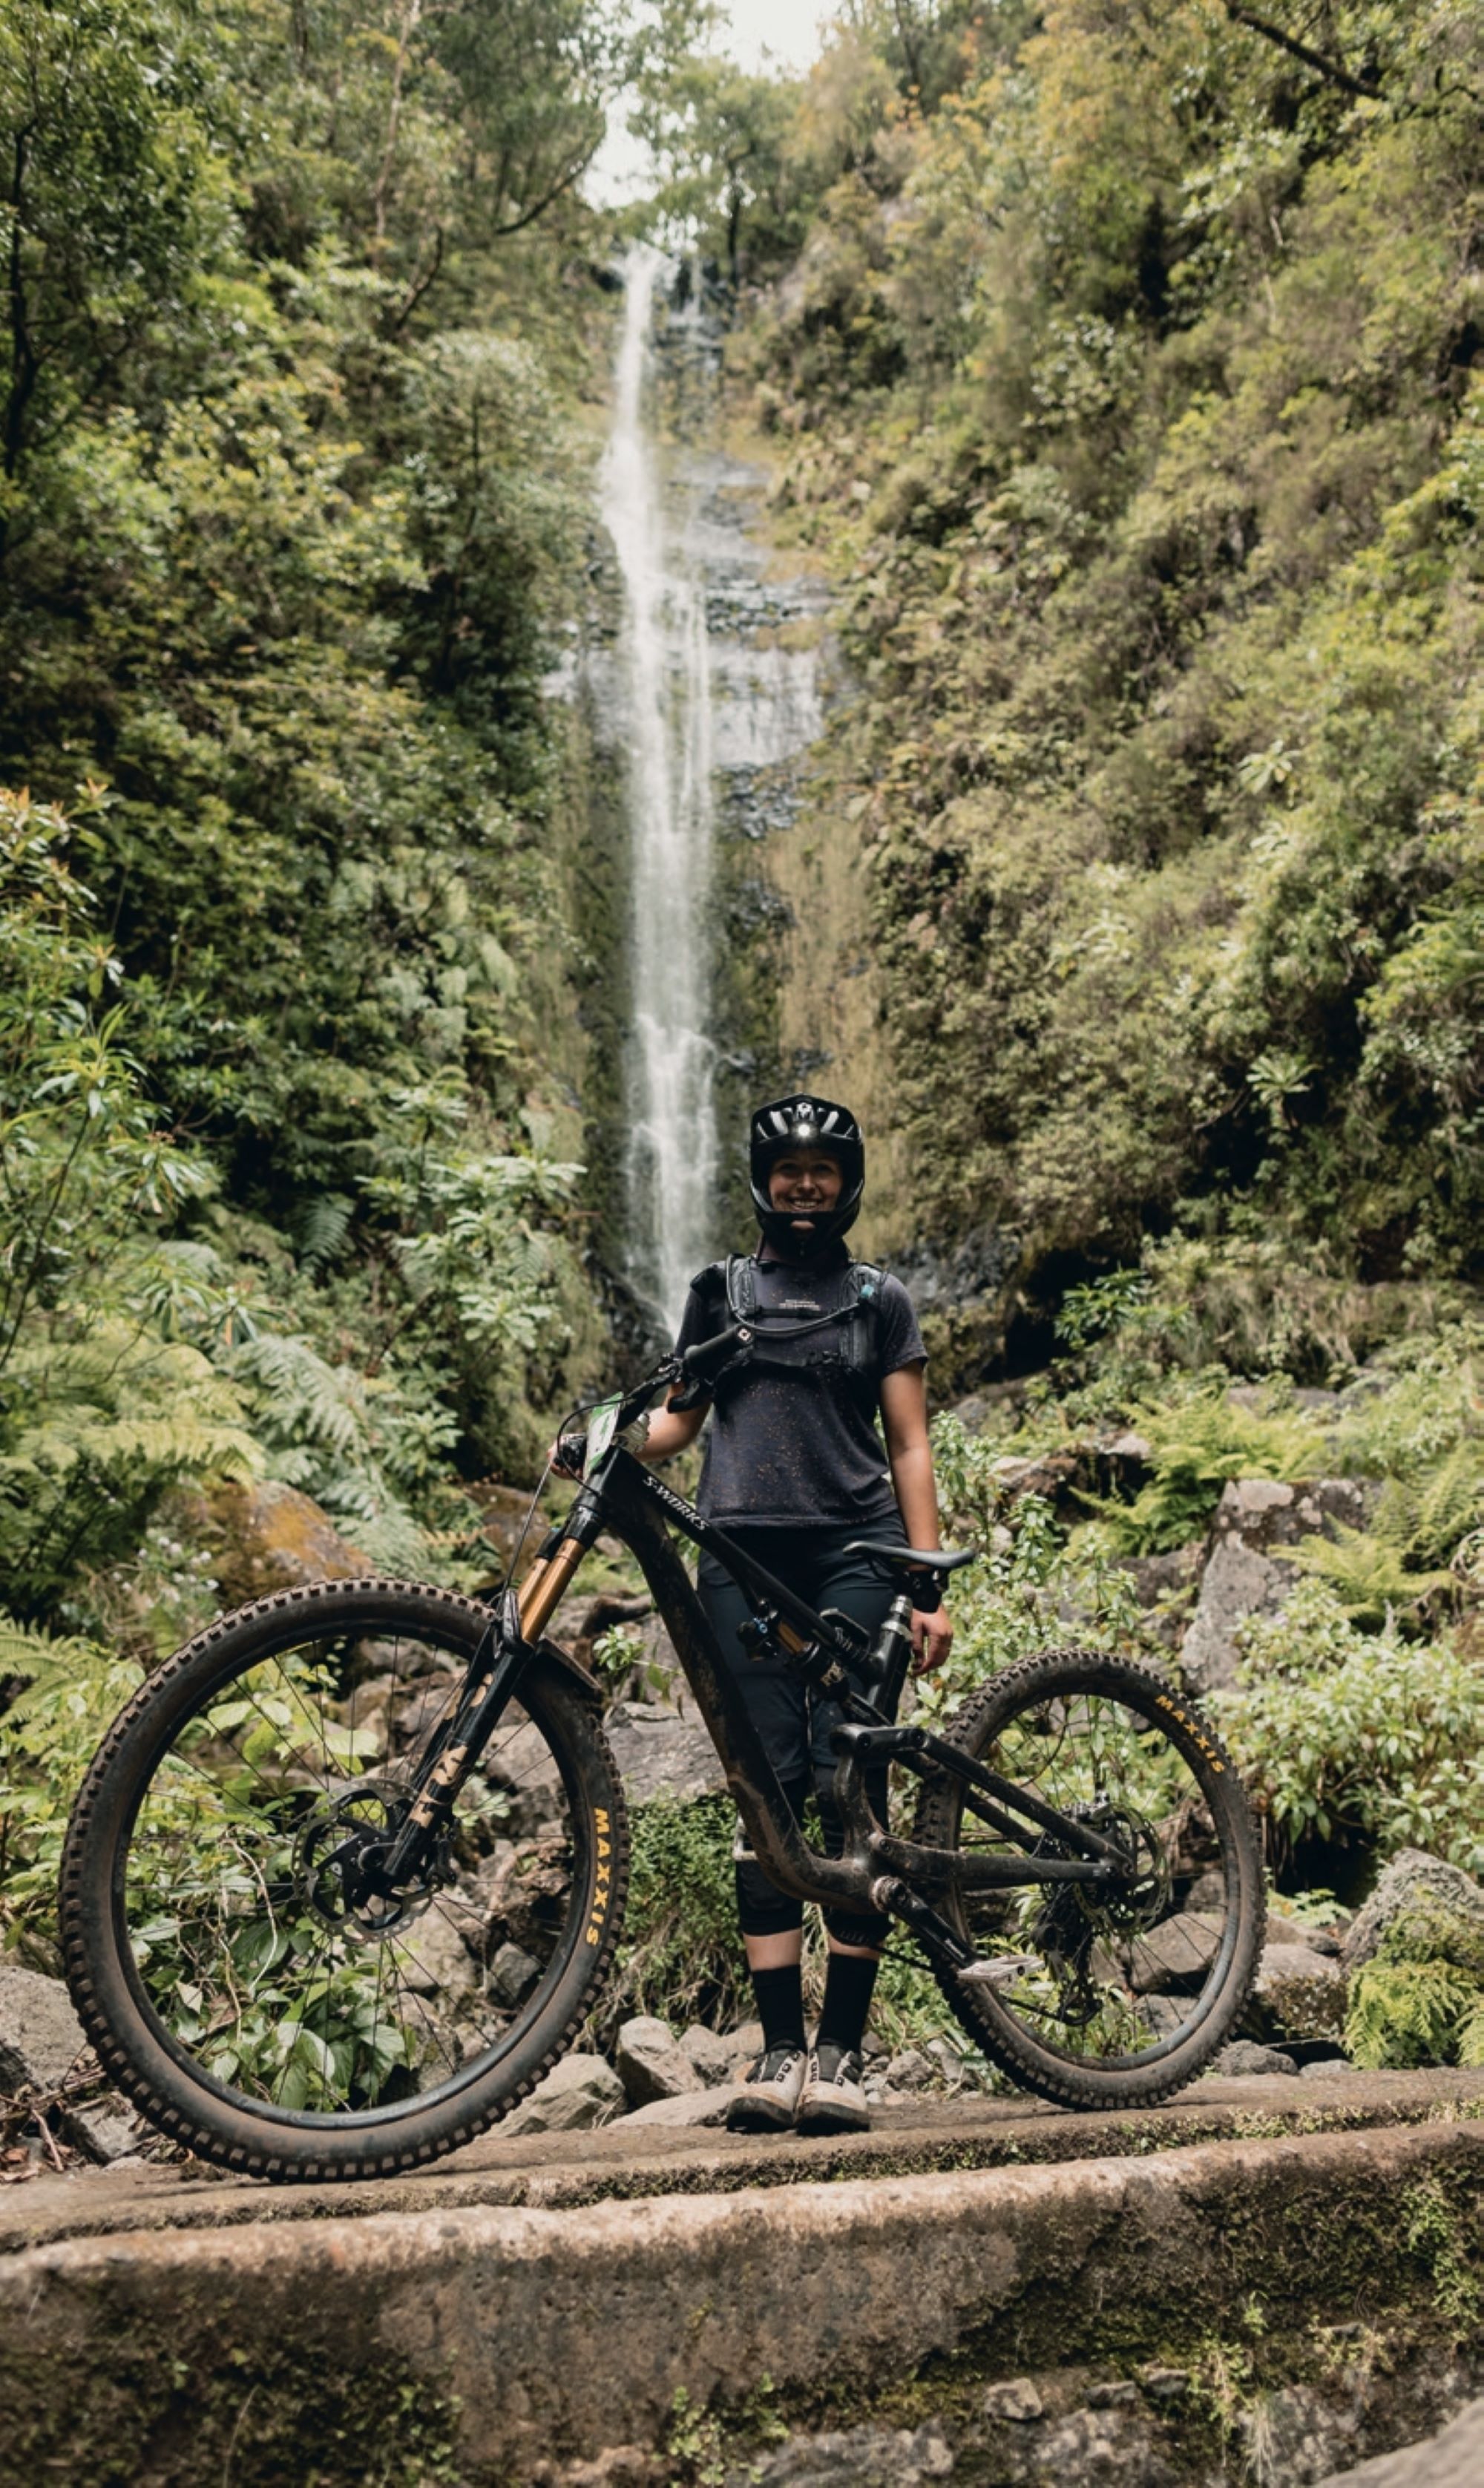
When you tell people you’re going to do a bike race in Madeira, the first thing they ask is; “where’s that?”. To which I say; “It’s a random island that’s kinda part of Portugal, but it’s its own thing…”. The follow-up question is often: “What’s it like?” – and to that I can’t find enough descriptive words in the dictionary to articulate just what makes it the island paradise that it is. It’s an all-encompassing place; it draws you in from the moment you approach the airport’s precariously positioned runway, which requires a last-minute 180 degree turn to land, and often rounds out the top 10 “world’s most dangerous airports to land at”.
Once you’re on the ground, Madeira’s namesake “The Island of Eternal Spring” starts to make sense – beautiful, century-old streets are dotted with flora and fauna unique to it’s mild climate, where the concept of “winter” doesn’t exist; strikingly green and rugged terraced hills dating back to the 15th century envelop the island’s capital, Funchal, while the island’s dramatic volcanic peaks create postcard-perfect views in every corner.
Oh, and how could I forget the fact that it’s home to some of the best mountain biking trails in the world? Factor that in, and you’ve got the perfect concoction for a bucket list riding destination.
The seed for racing Trans Madeira was planted when I was lucky enough to visit the island in 2024, to take part in a photoshoot. Other than being familiar with the name, because it had hosted the Enduro World Series rounds in 2017 and 2019—and more so, the Deathgrip Movie—I was going in blind. I knew nothing about its landscape, very little about its proximity (or lack thereof) to anything and certainly not that it would take 45 hours and five flights to get there… of course I said yes! We ended up traversing the entire island, a never-ending, sensory overloading, treasure map courtesy of Freeride Madeira—not only are John and his team the premiere shuttle and touring company on the island, but they also build and maintain Madeira’s 200km+ trail network. I also discovered they were the masterminds behind Trans Madeira, a 6-day, 200km Enduro stage race that circumnavigated the island’s extensive trail network across 35 special stages. After being so impressed at the operation Freeride Madeira had built, I knew that any event run by John and the team would be nothing short of well-oiled, packed to the brim with goodness, and that anything you could possibly think of would “just be sorted”. Bucket list item added!
I am fortunate enough to be able to ride from my doorstep, which helped immensely with squeezing in training rides. However, an important caveat to this is the fact that due to that pesky thing called work—a day job coupled with freelance commitments (one of them being designing this magazine, among other things, in my spare time)—the majority of my rides now barely exceeded one hour in duration (two hours maybe, in summer, if you include the post-ride commute to the pub), and whilst I’d completed Enduro World Series events previously, building my fitness to a level that could survive six days of racing was unfamiliar territory. I spent the summer squeezing in 1000m rides as much as possible, coupled with my usual gym work and the odd sanity run and eBike ride for downhill training. I wanted to challenge myself in a totally different way and if I could finish all six days, I’d be happy!
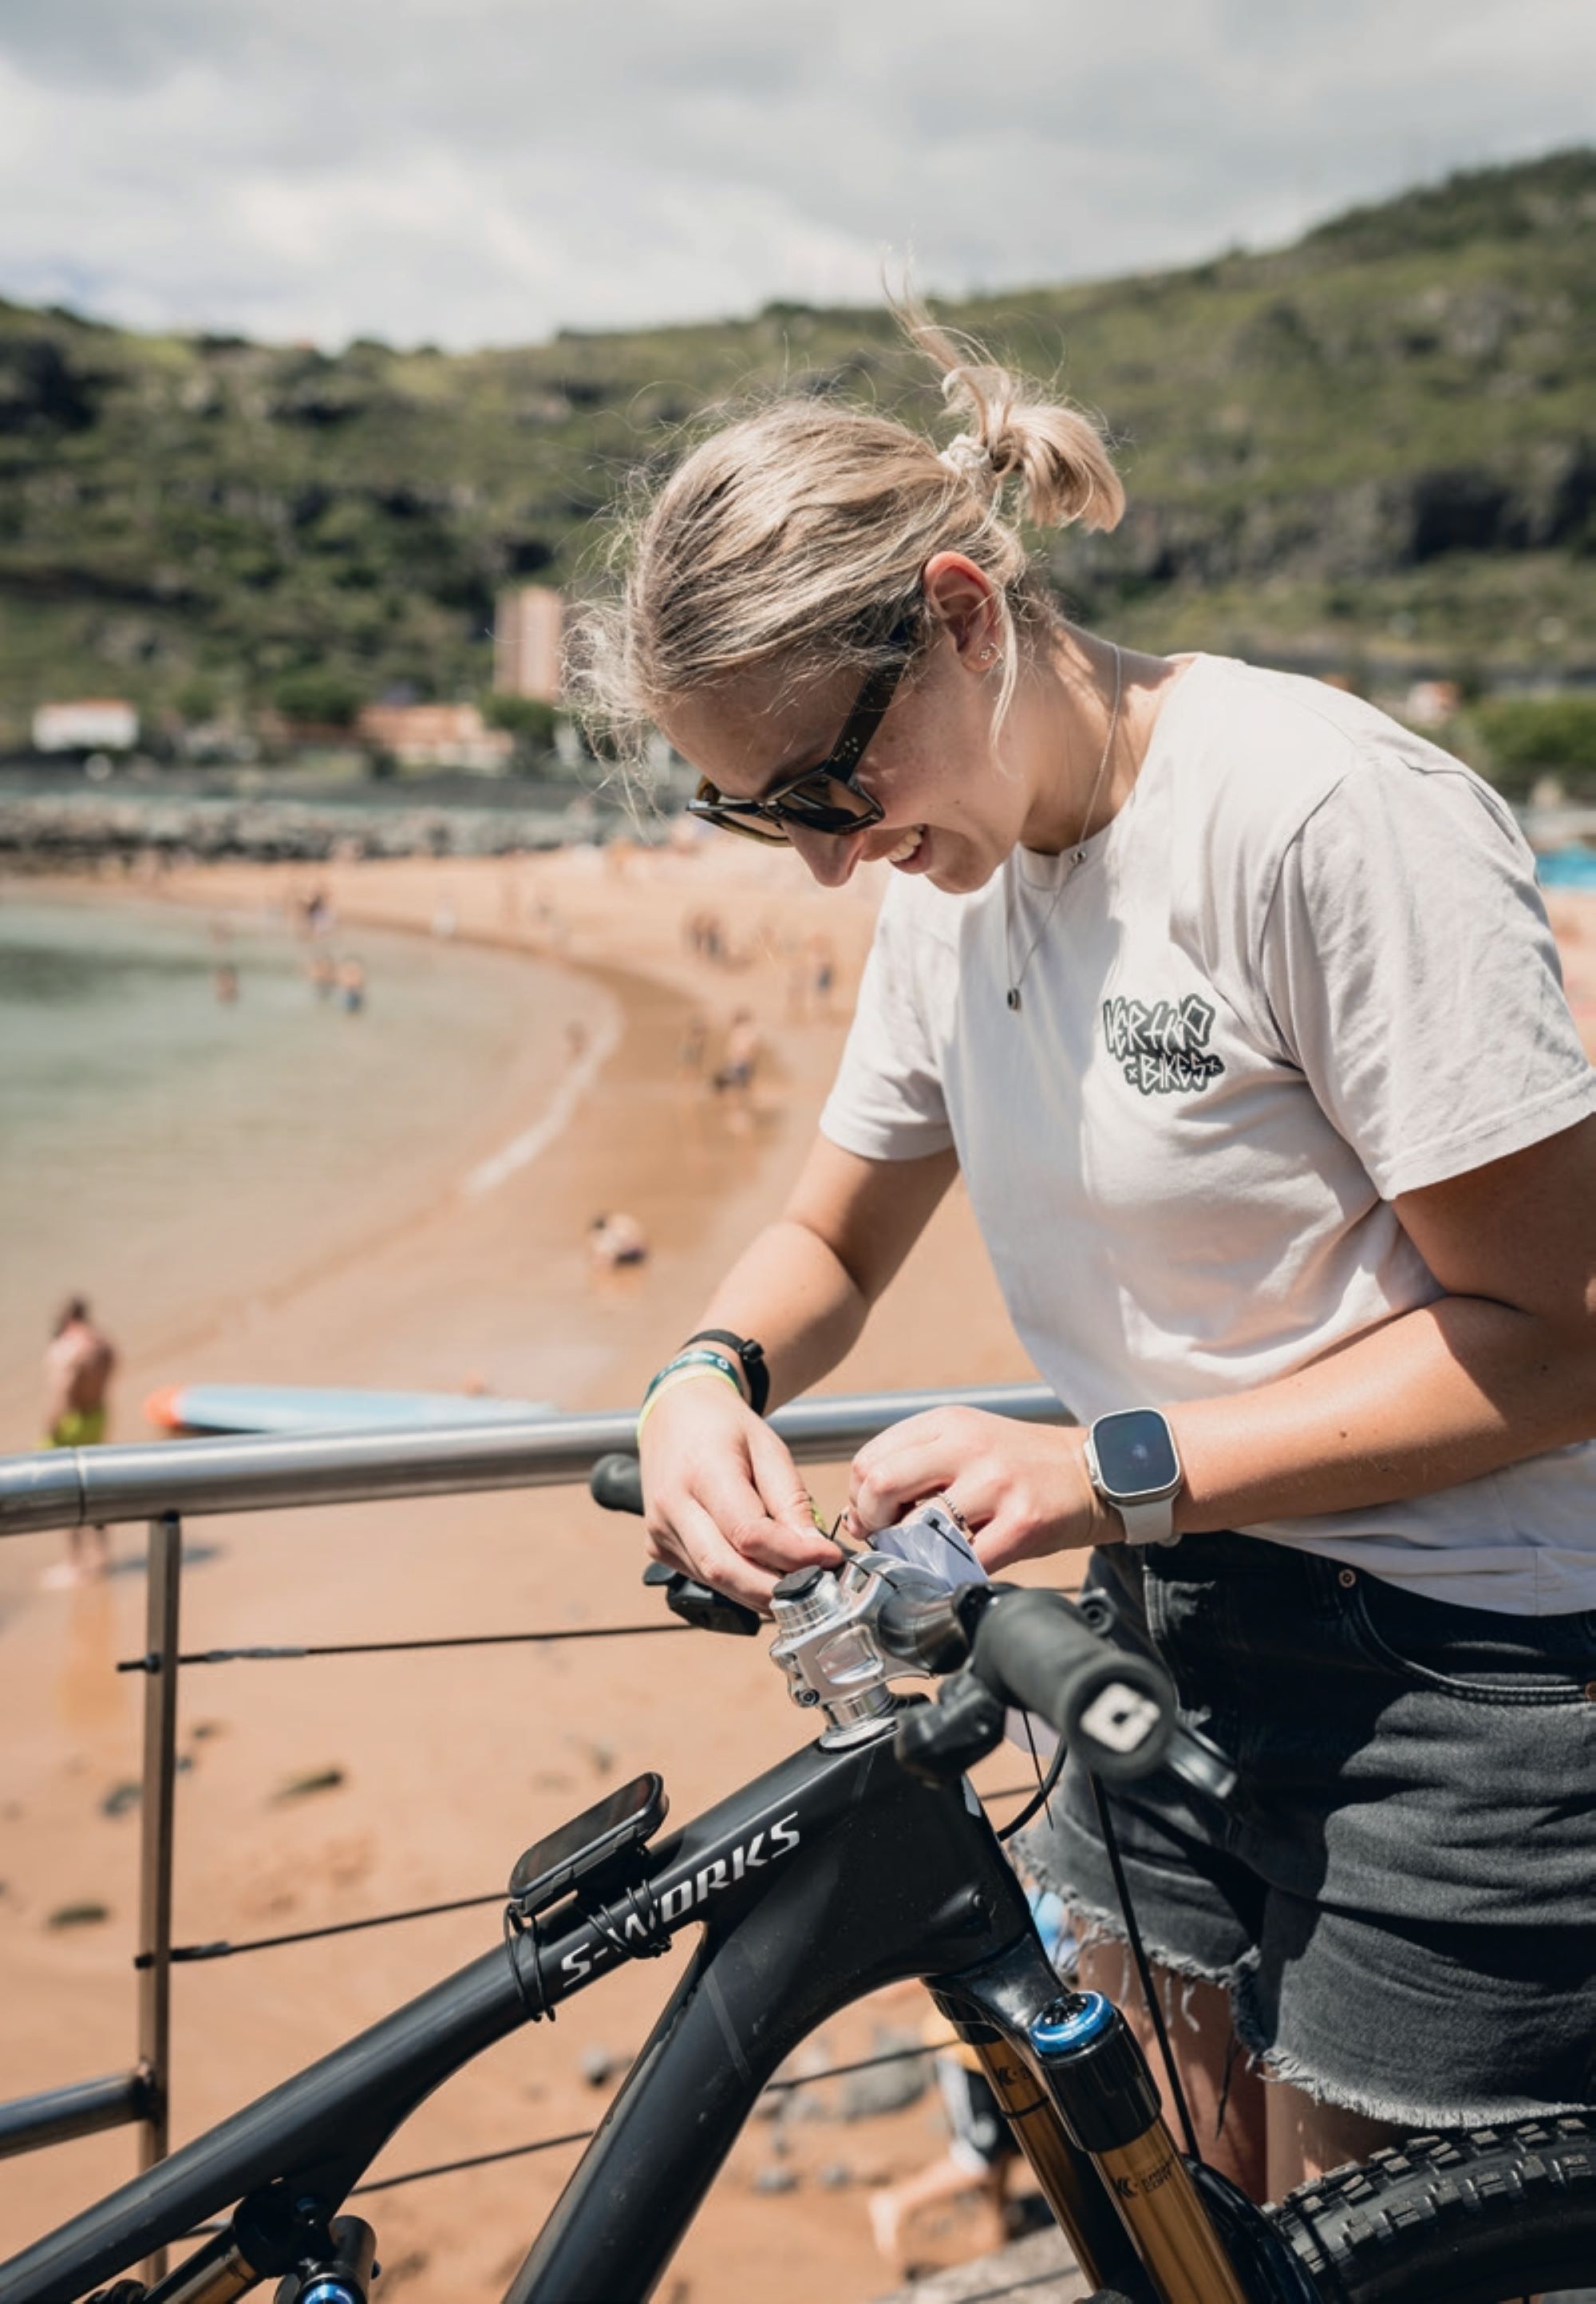
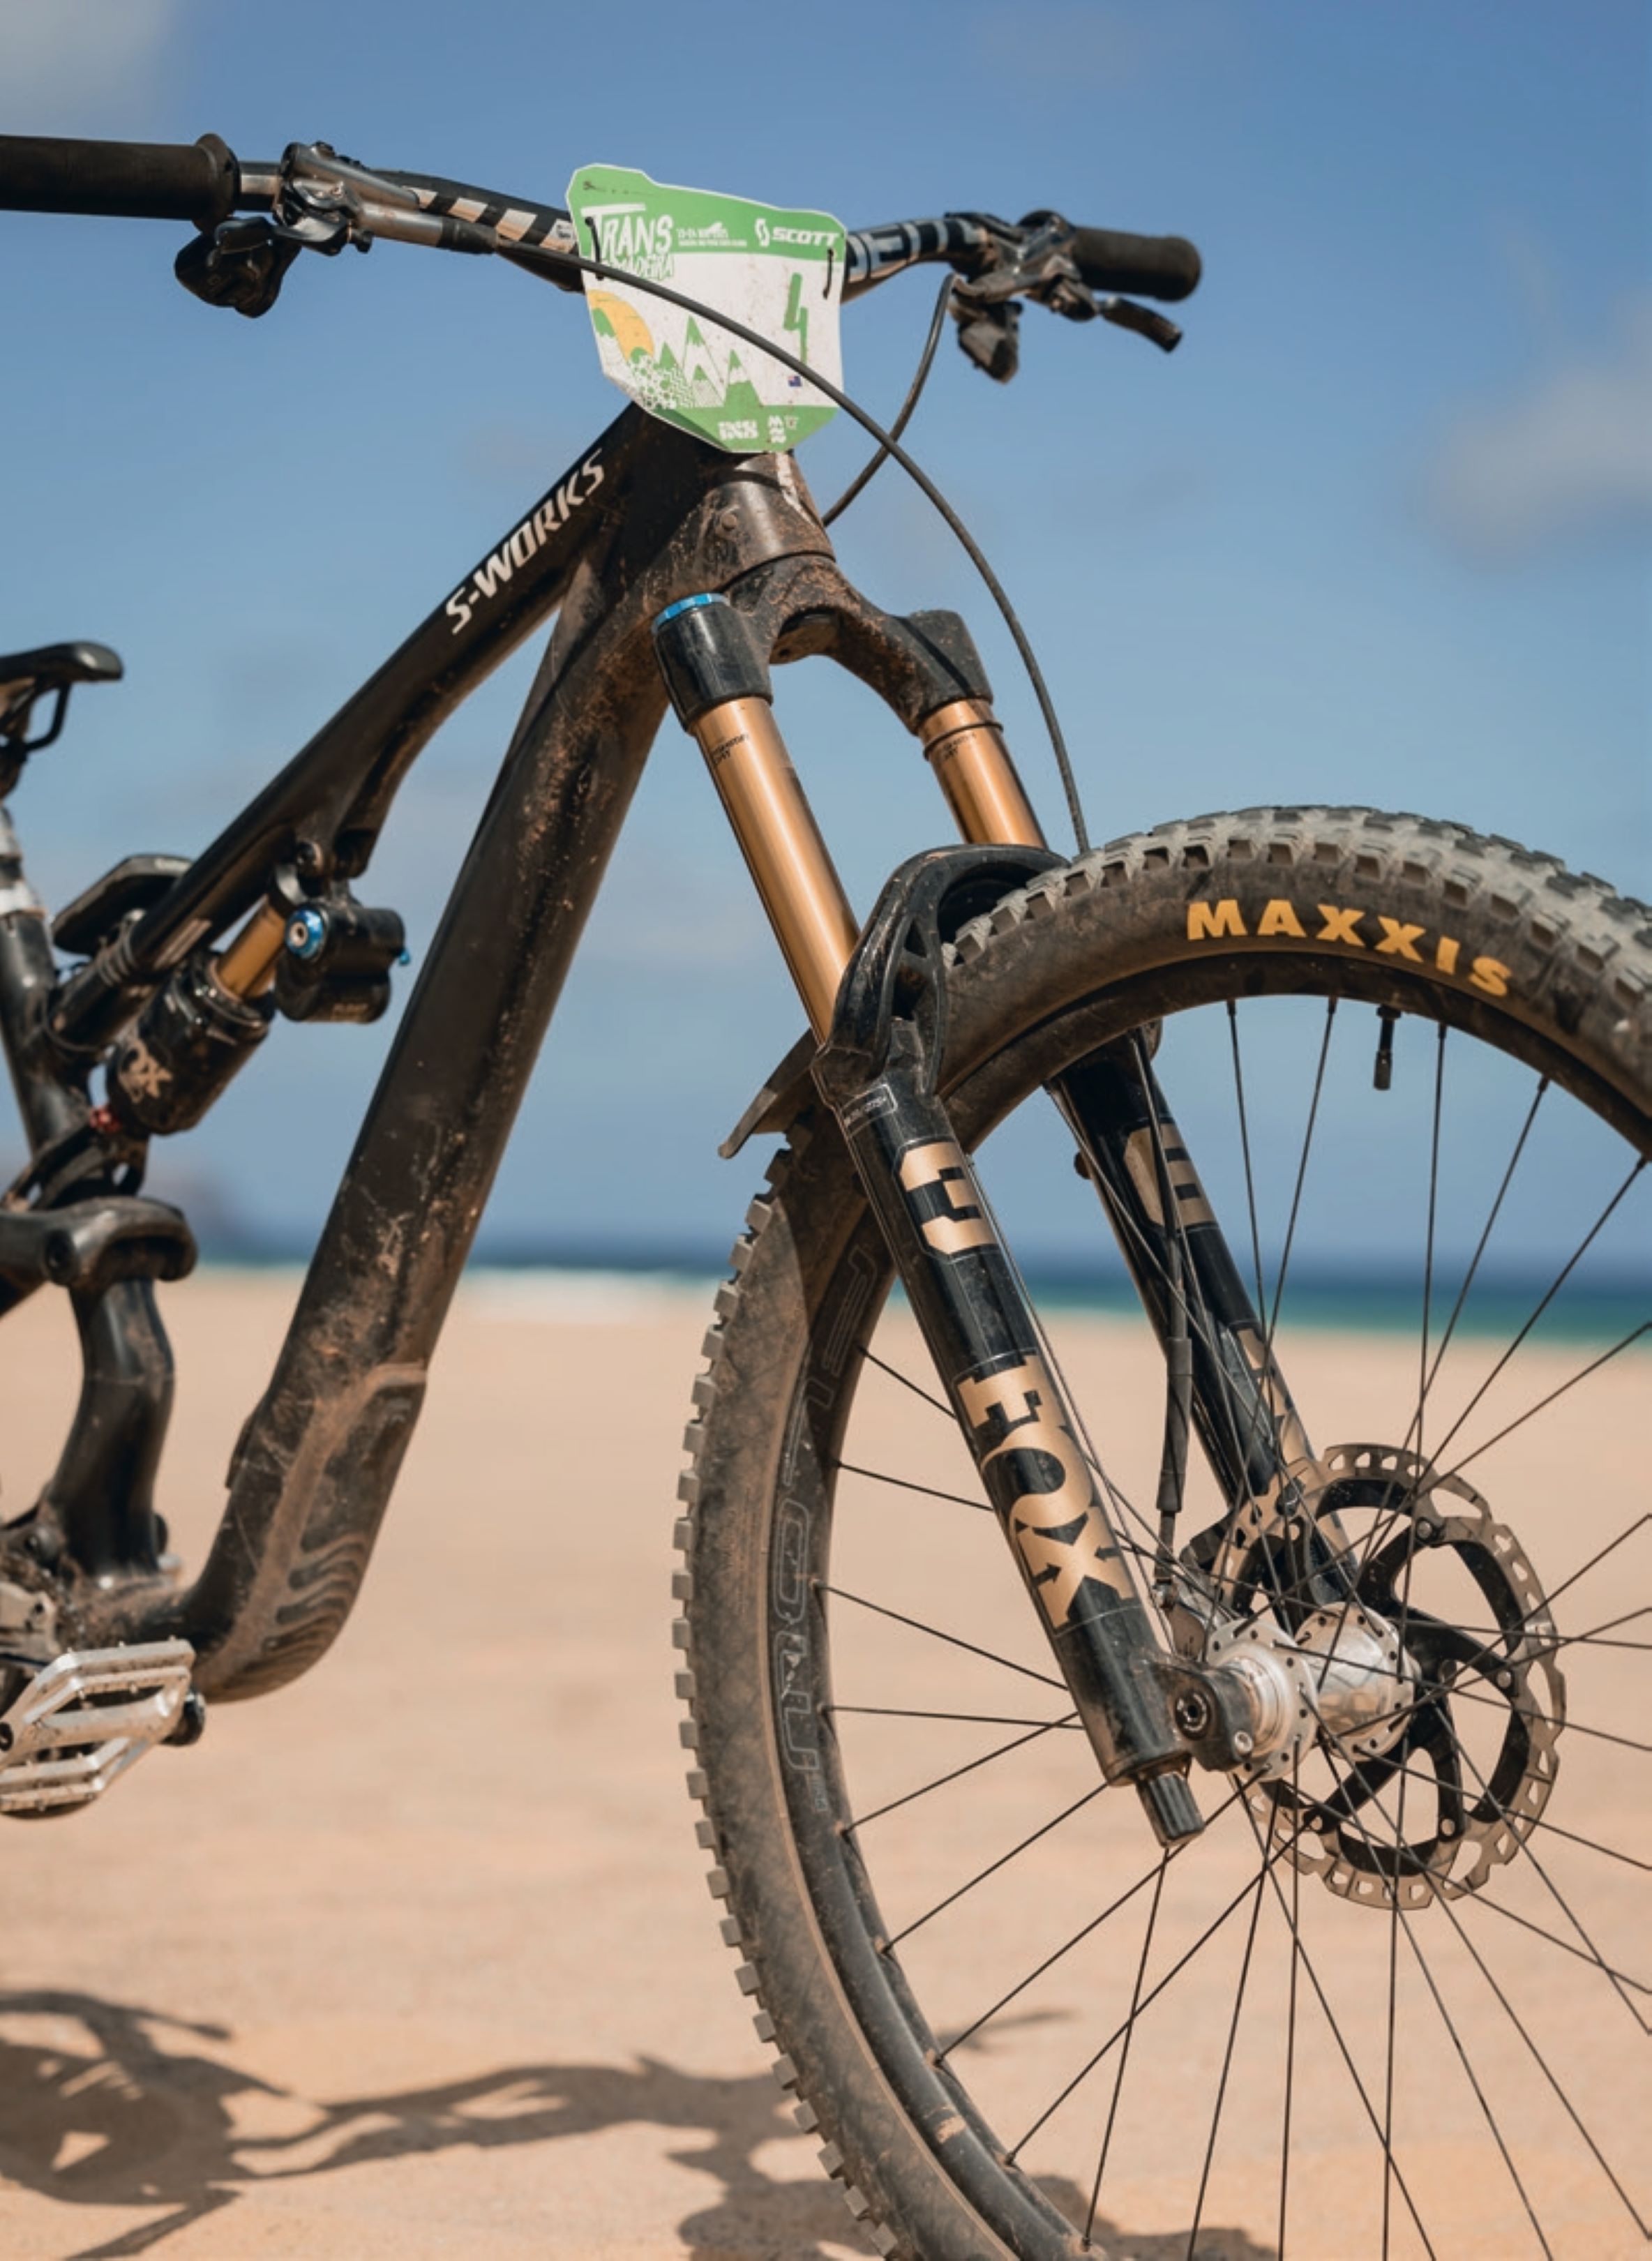
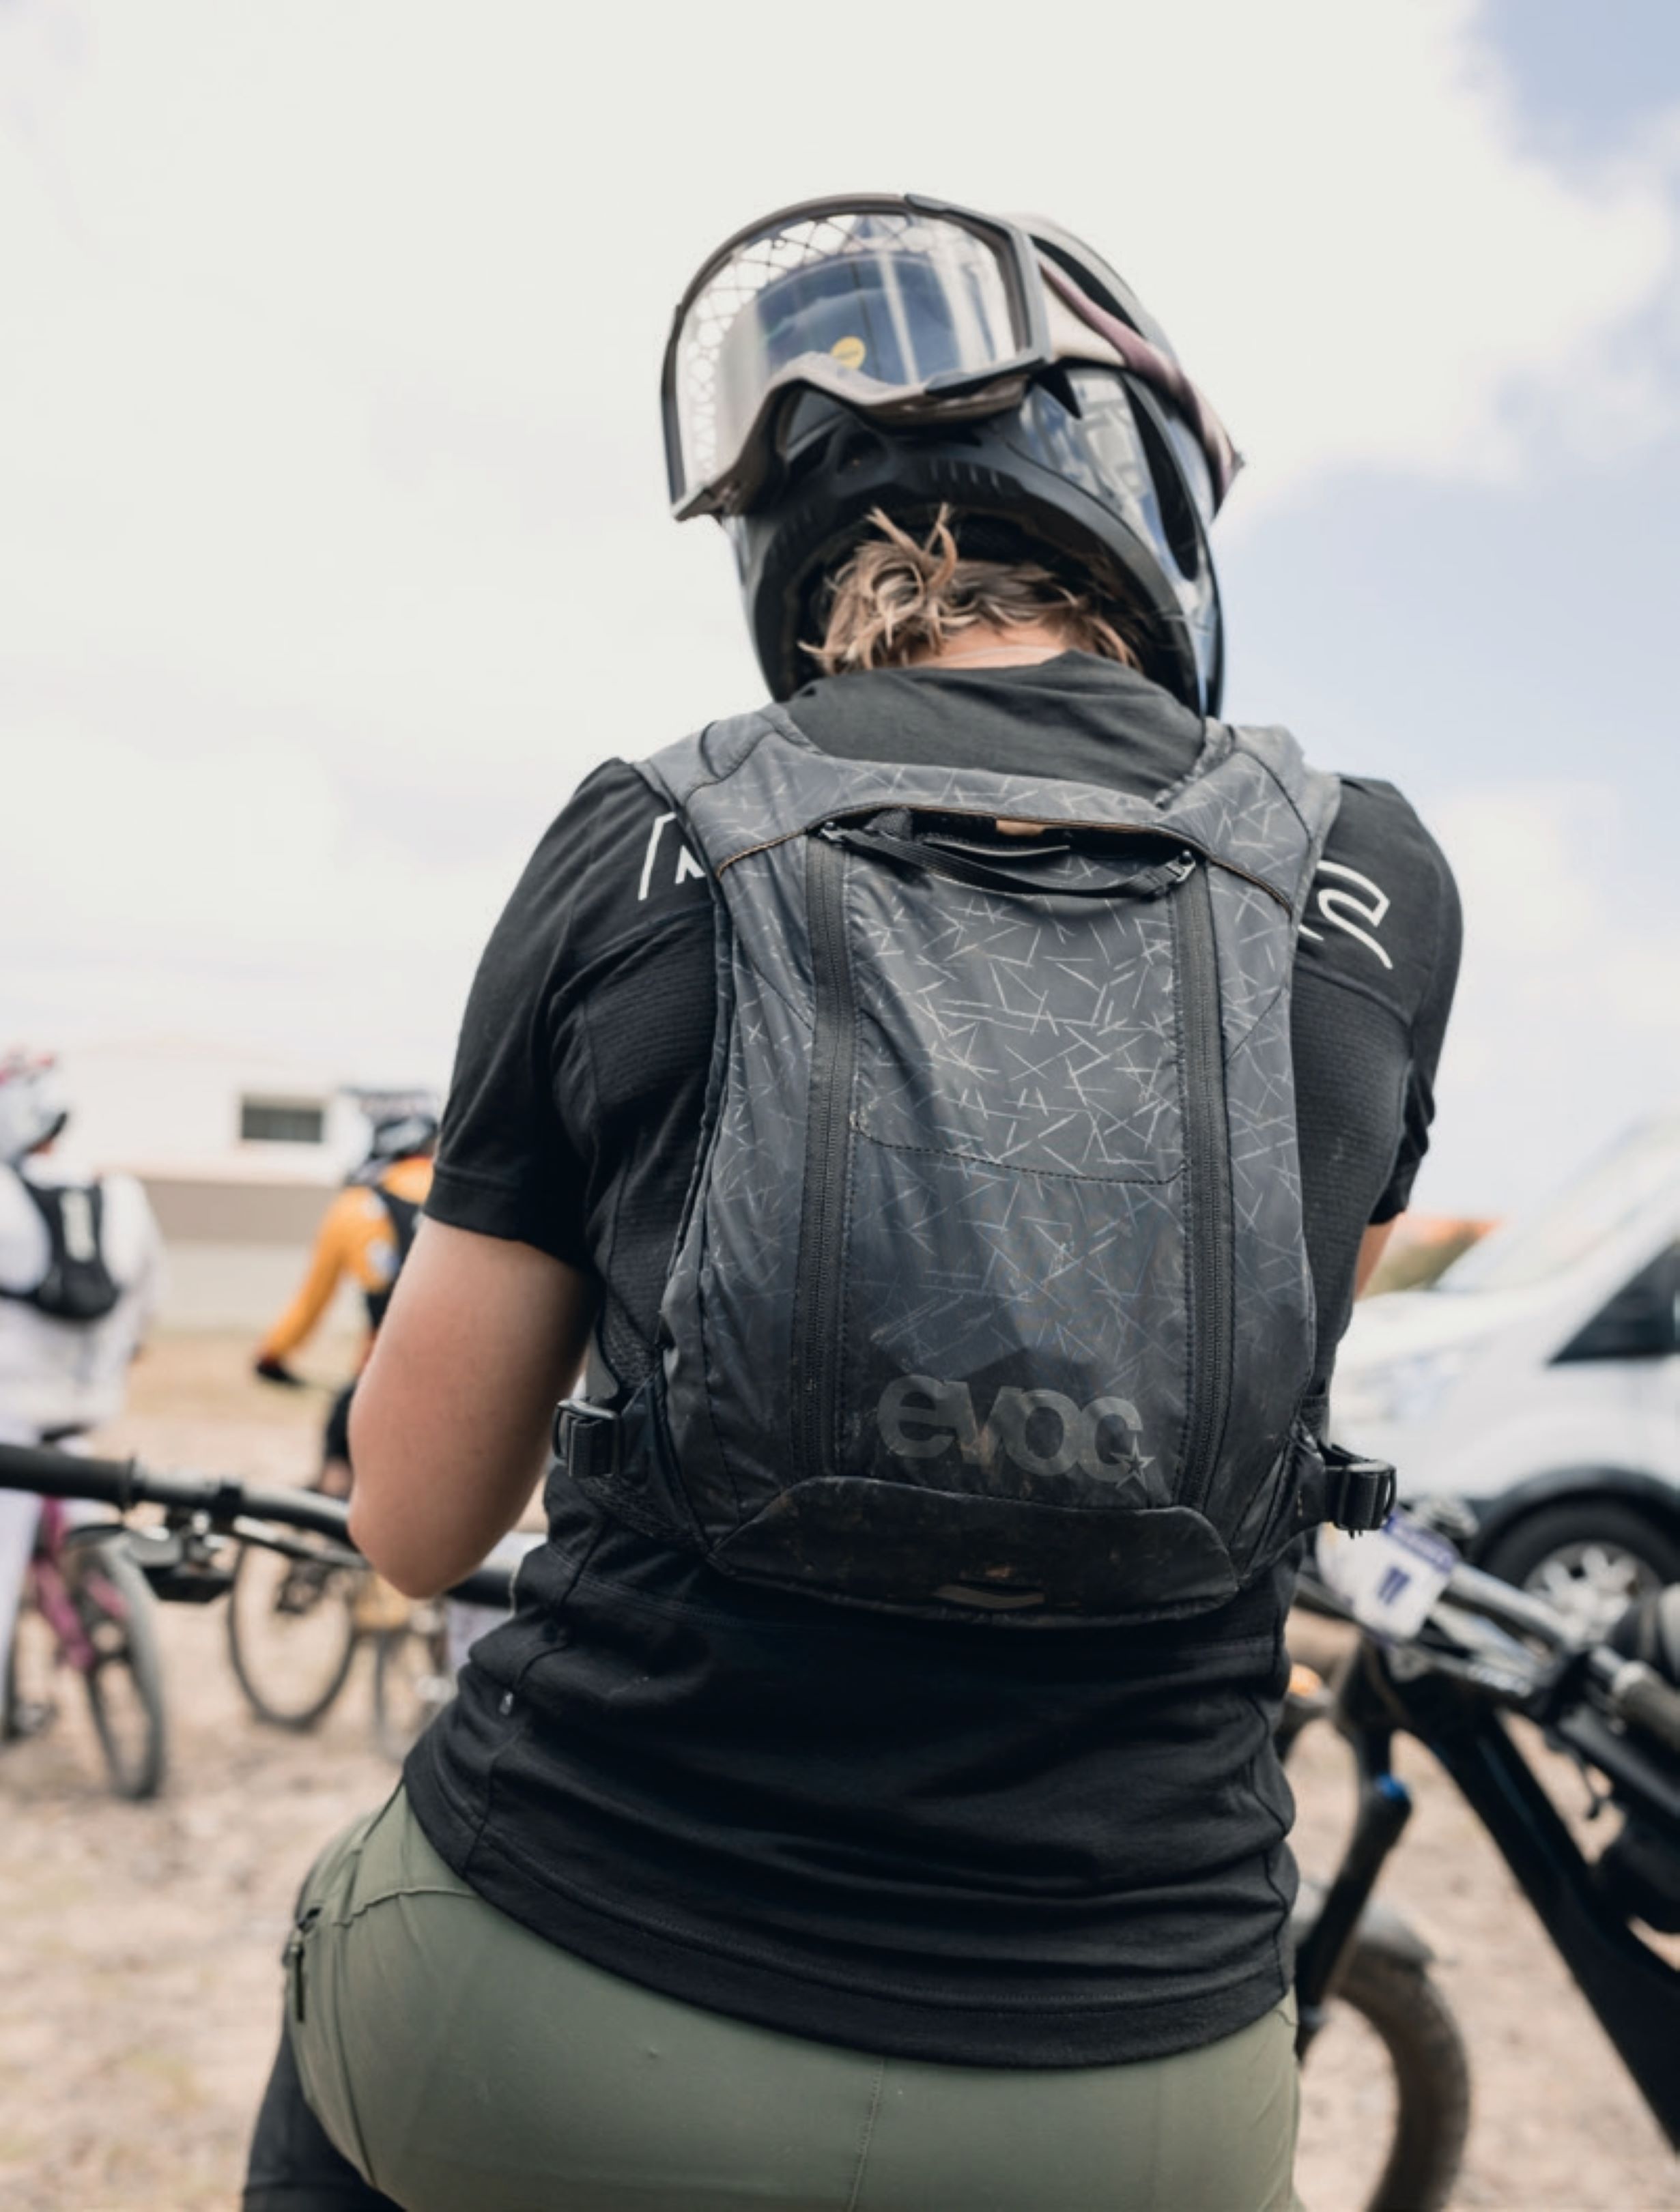
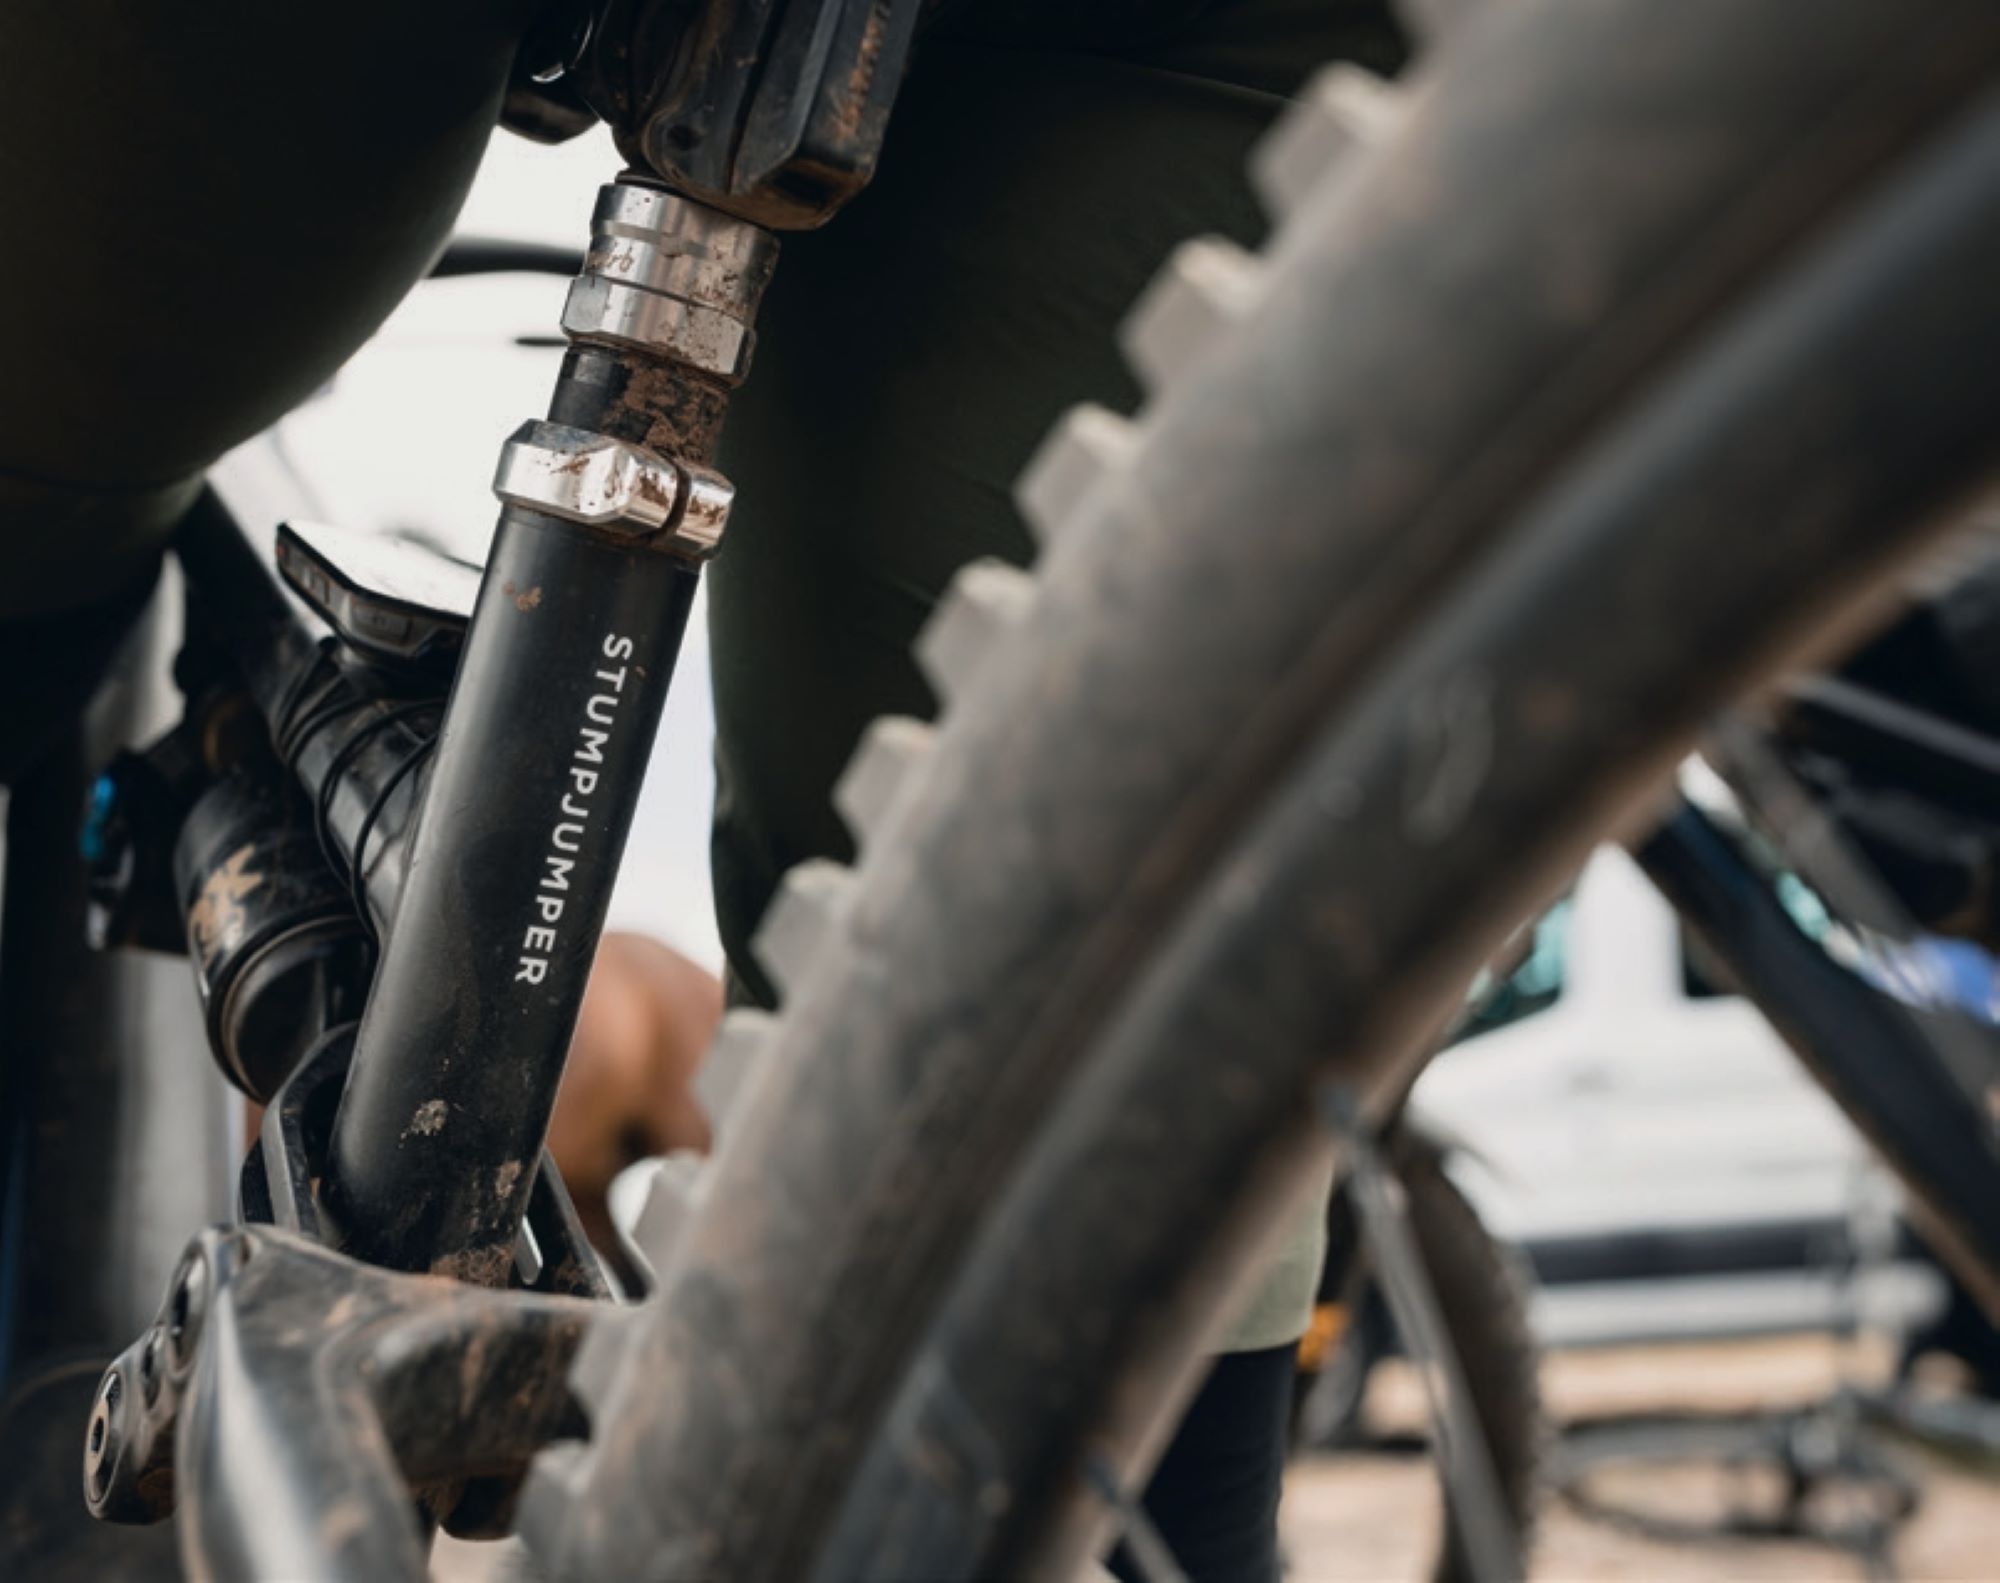
My weapon of choice was the Specialized Stumpjumper 15. This is a comfortable all-day climber in a light-yet-punchy 145mm package, paired with a beefed up 160mm fork for added stability and a mullet setup for a touch of agility. I stocked up on 6x days worth of kit packed into separate packing cubes, ready for each day—I’m a chronic overthinker when it comes to choosing my OOTD (outfit of the day)—as well as 6x days’ worth of snack kits—NZ Natural Confectionary snakes, Bumper Bars, and PURE nutrition gels and electrolyte packs. While I knew there would be feed zones each day, I wanted to be prepared for any hangry emergencies with food I was familiar with.
On a frosty May morning, we departed Christchurch on what was a simple journey…. until our final Lisbon > Funchal leg. Being unable to land in Madeira meant we flew back to Lisbon, only to get straight back on the plane to attempt the journey again—a total of almost six hours to complete a 1h40 journey, ultimately arriving at our accommodation at 2am. No time for jetlag!
Day 1 – 48 km – 1000m up – 2950m down – 7 special stages
Not being much of a tent girlie under usual circumstances, I decided to splash out on comfortable sleeping gear—a Sea2Summit mat of decent thickness, summer weight sleeping bag and adhesive pillow—all of which were worth their weight (excuse the pun) in gold. Waking up to a beautiful sunrise in Machico, the precarious challenge of attempting to put on full riding kit without dragging 10 tonnes of sand into my tent began. I quickly realised that finding a way to keep 6x days’ worth of riding kit contained within the tent, and avoiding a luggage blowout, was going to be paramount in wasting precious mental energy at the beginning and end of each day—especially as each night was spent in a different location.
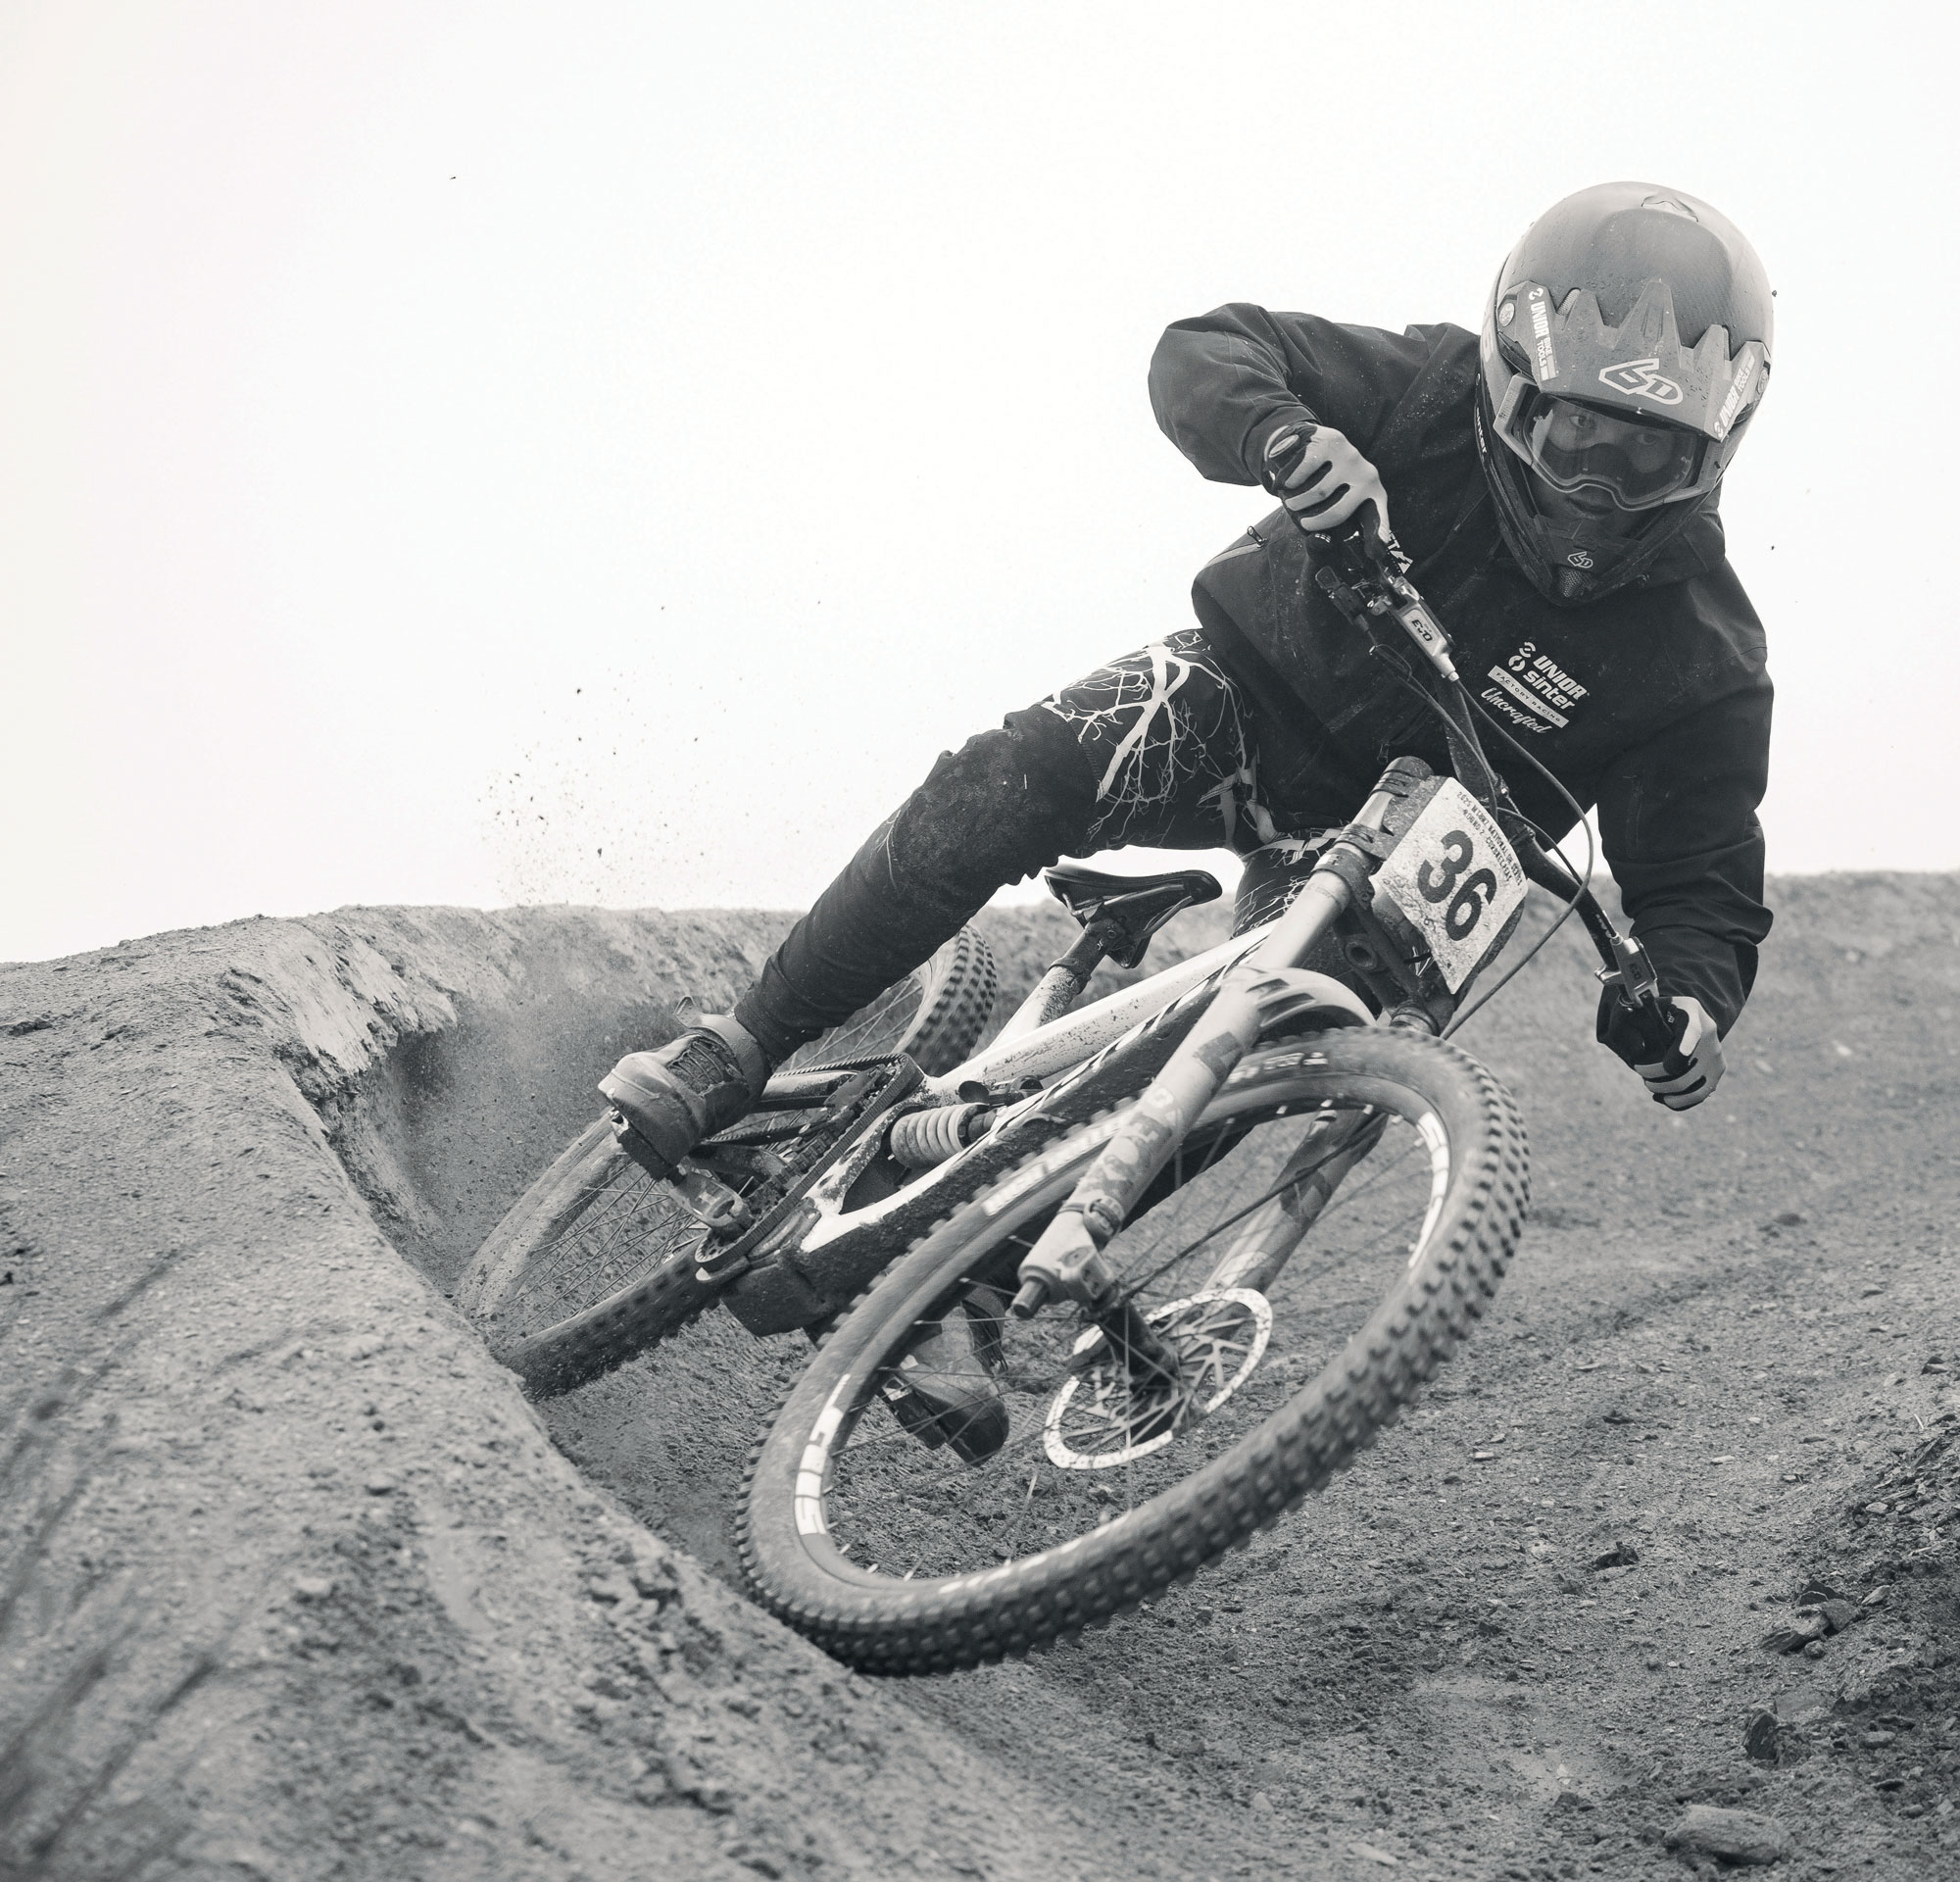
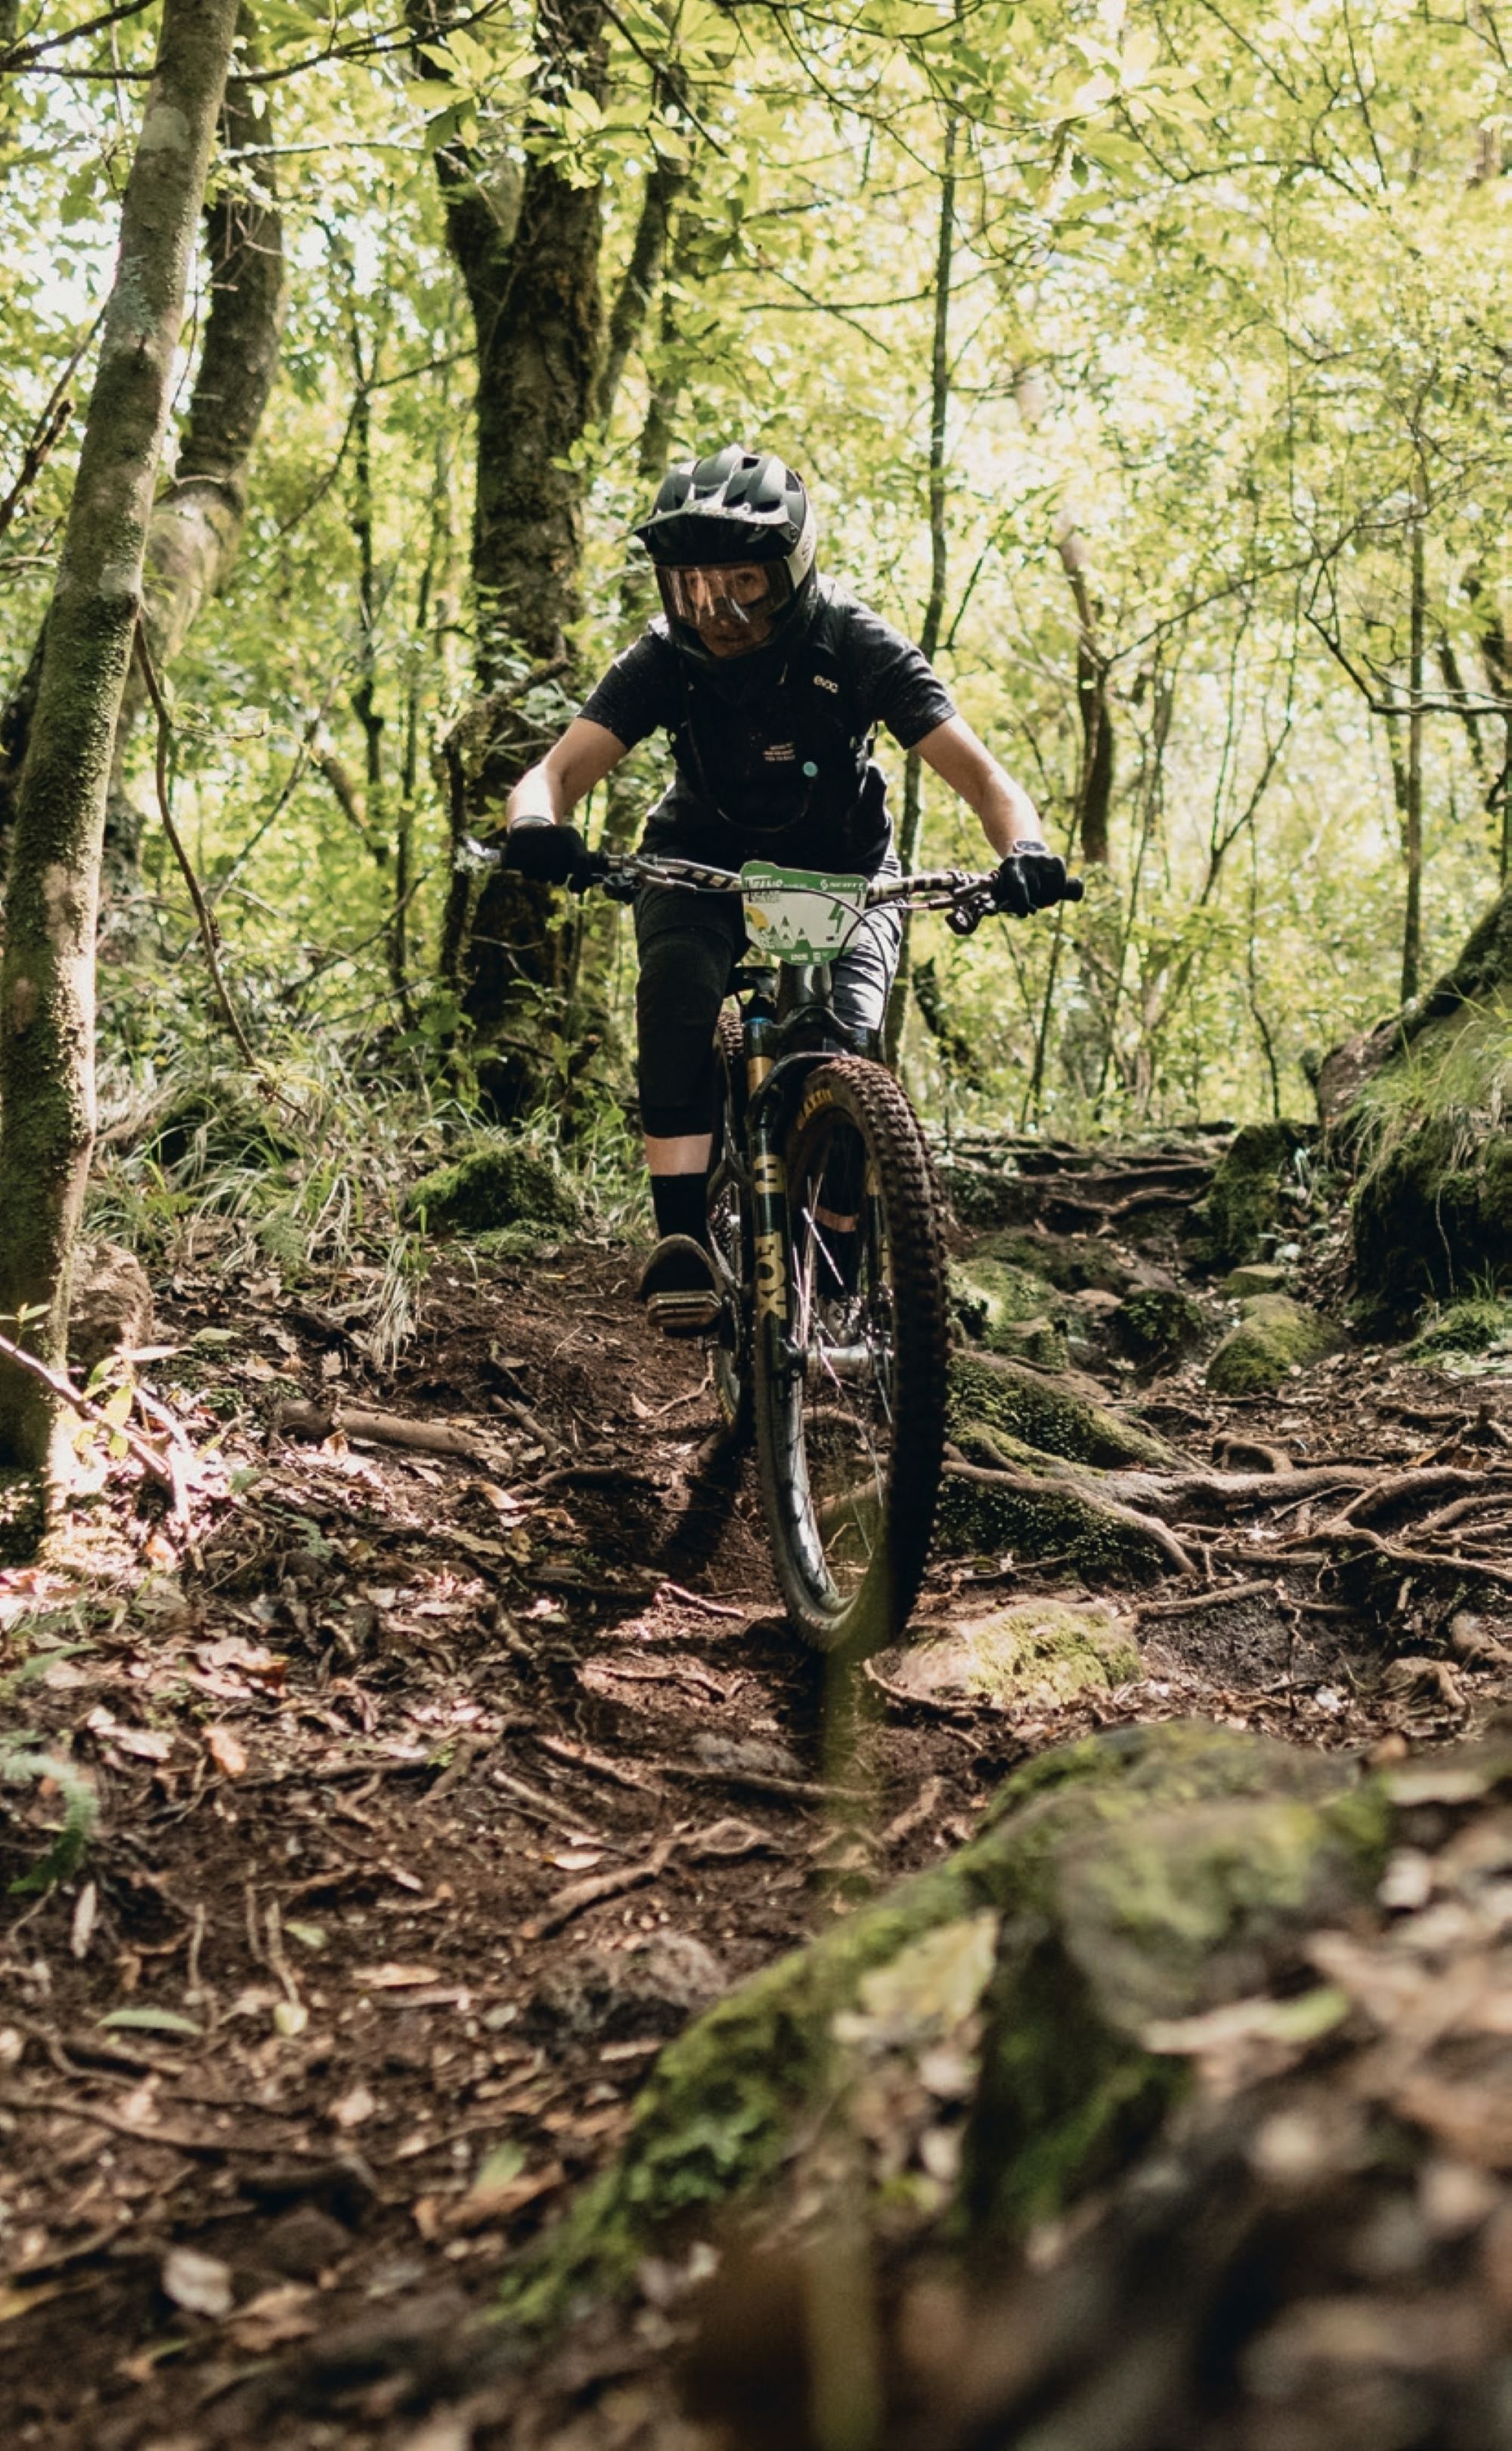
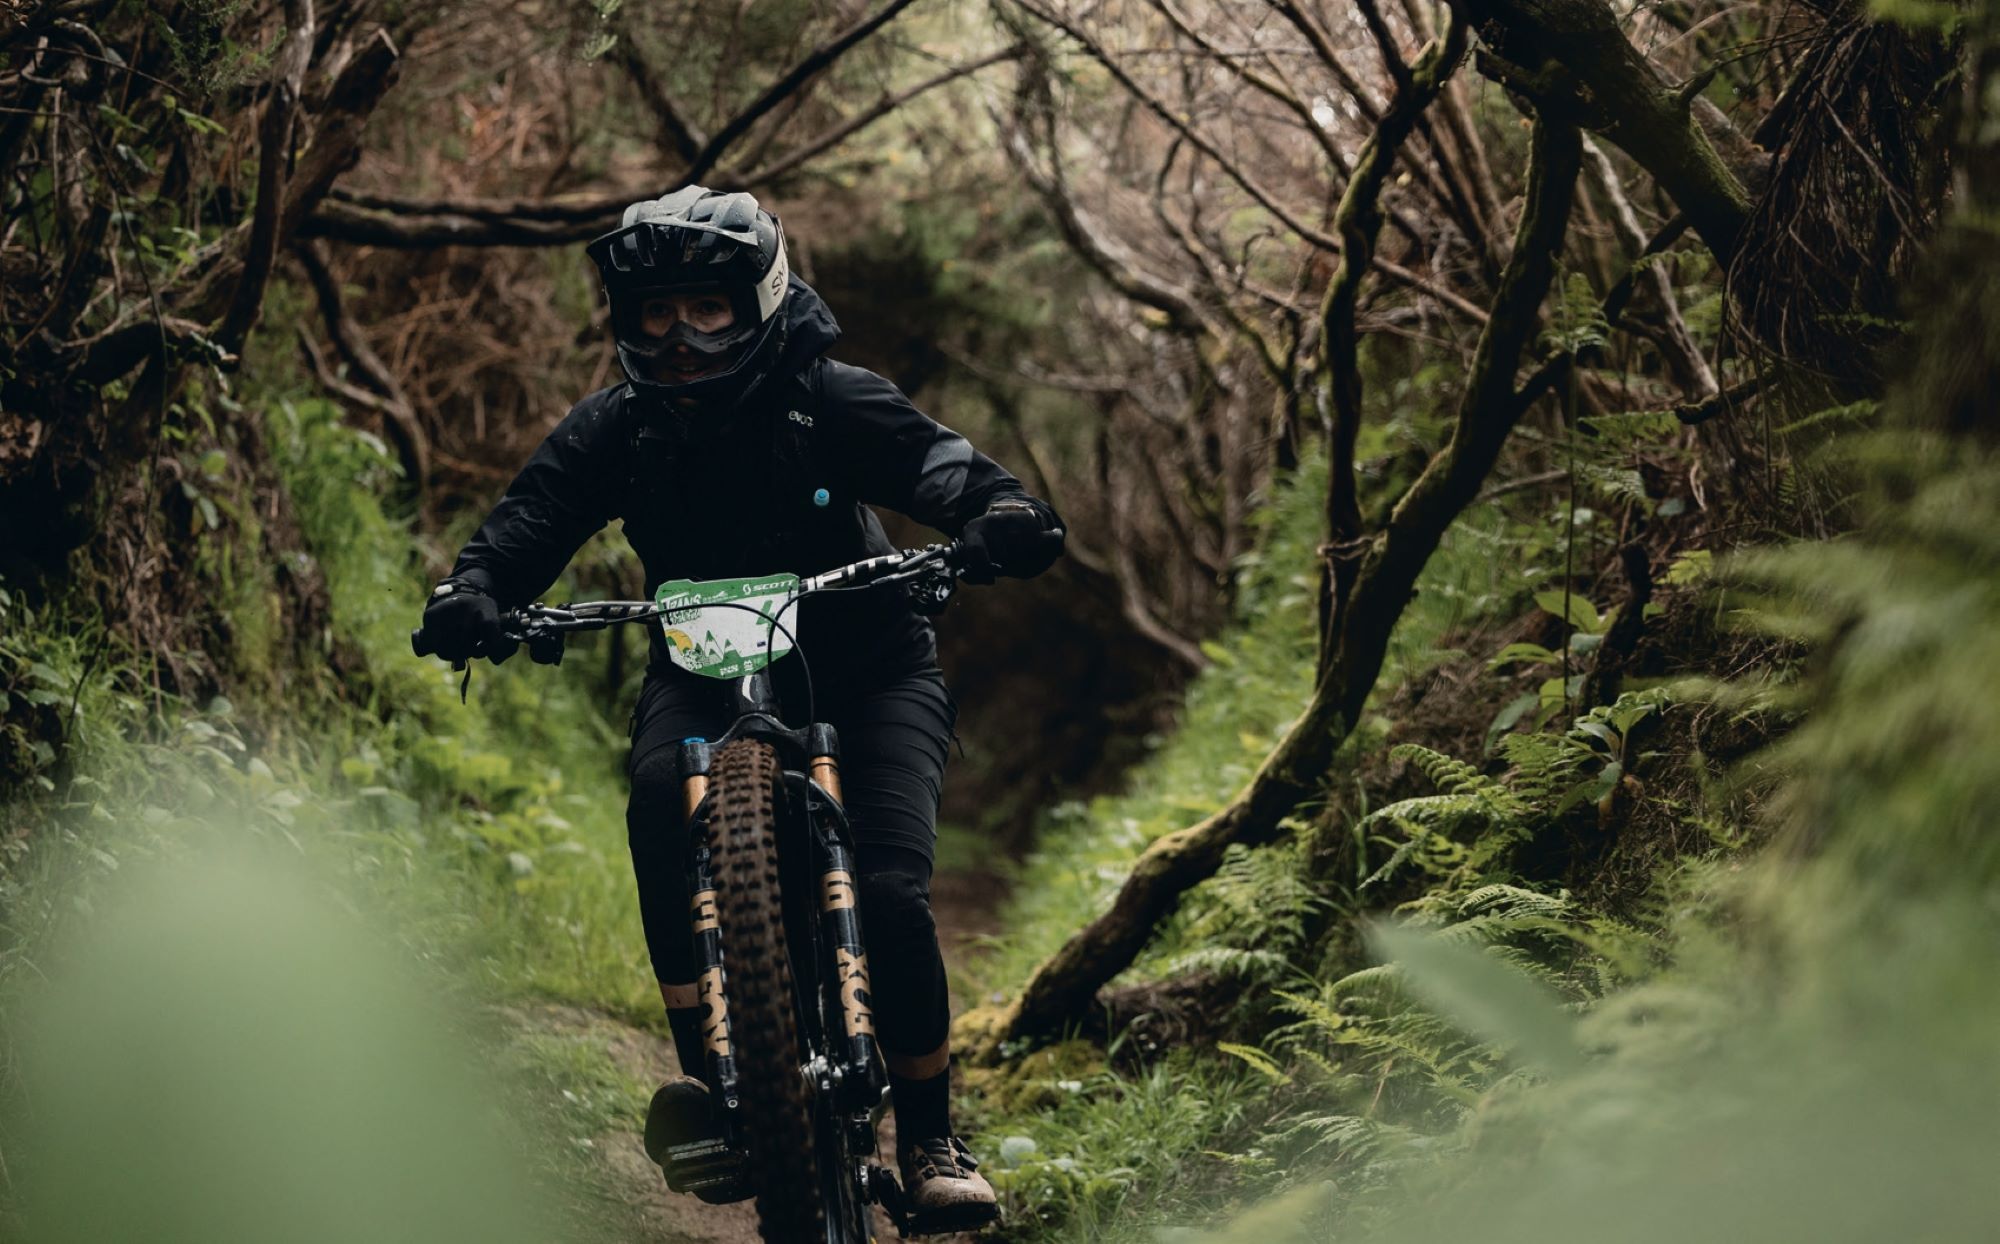
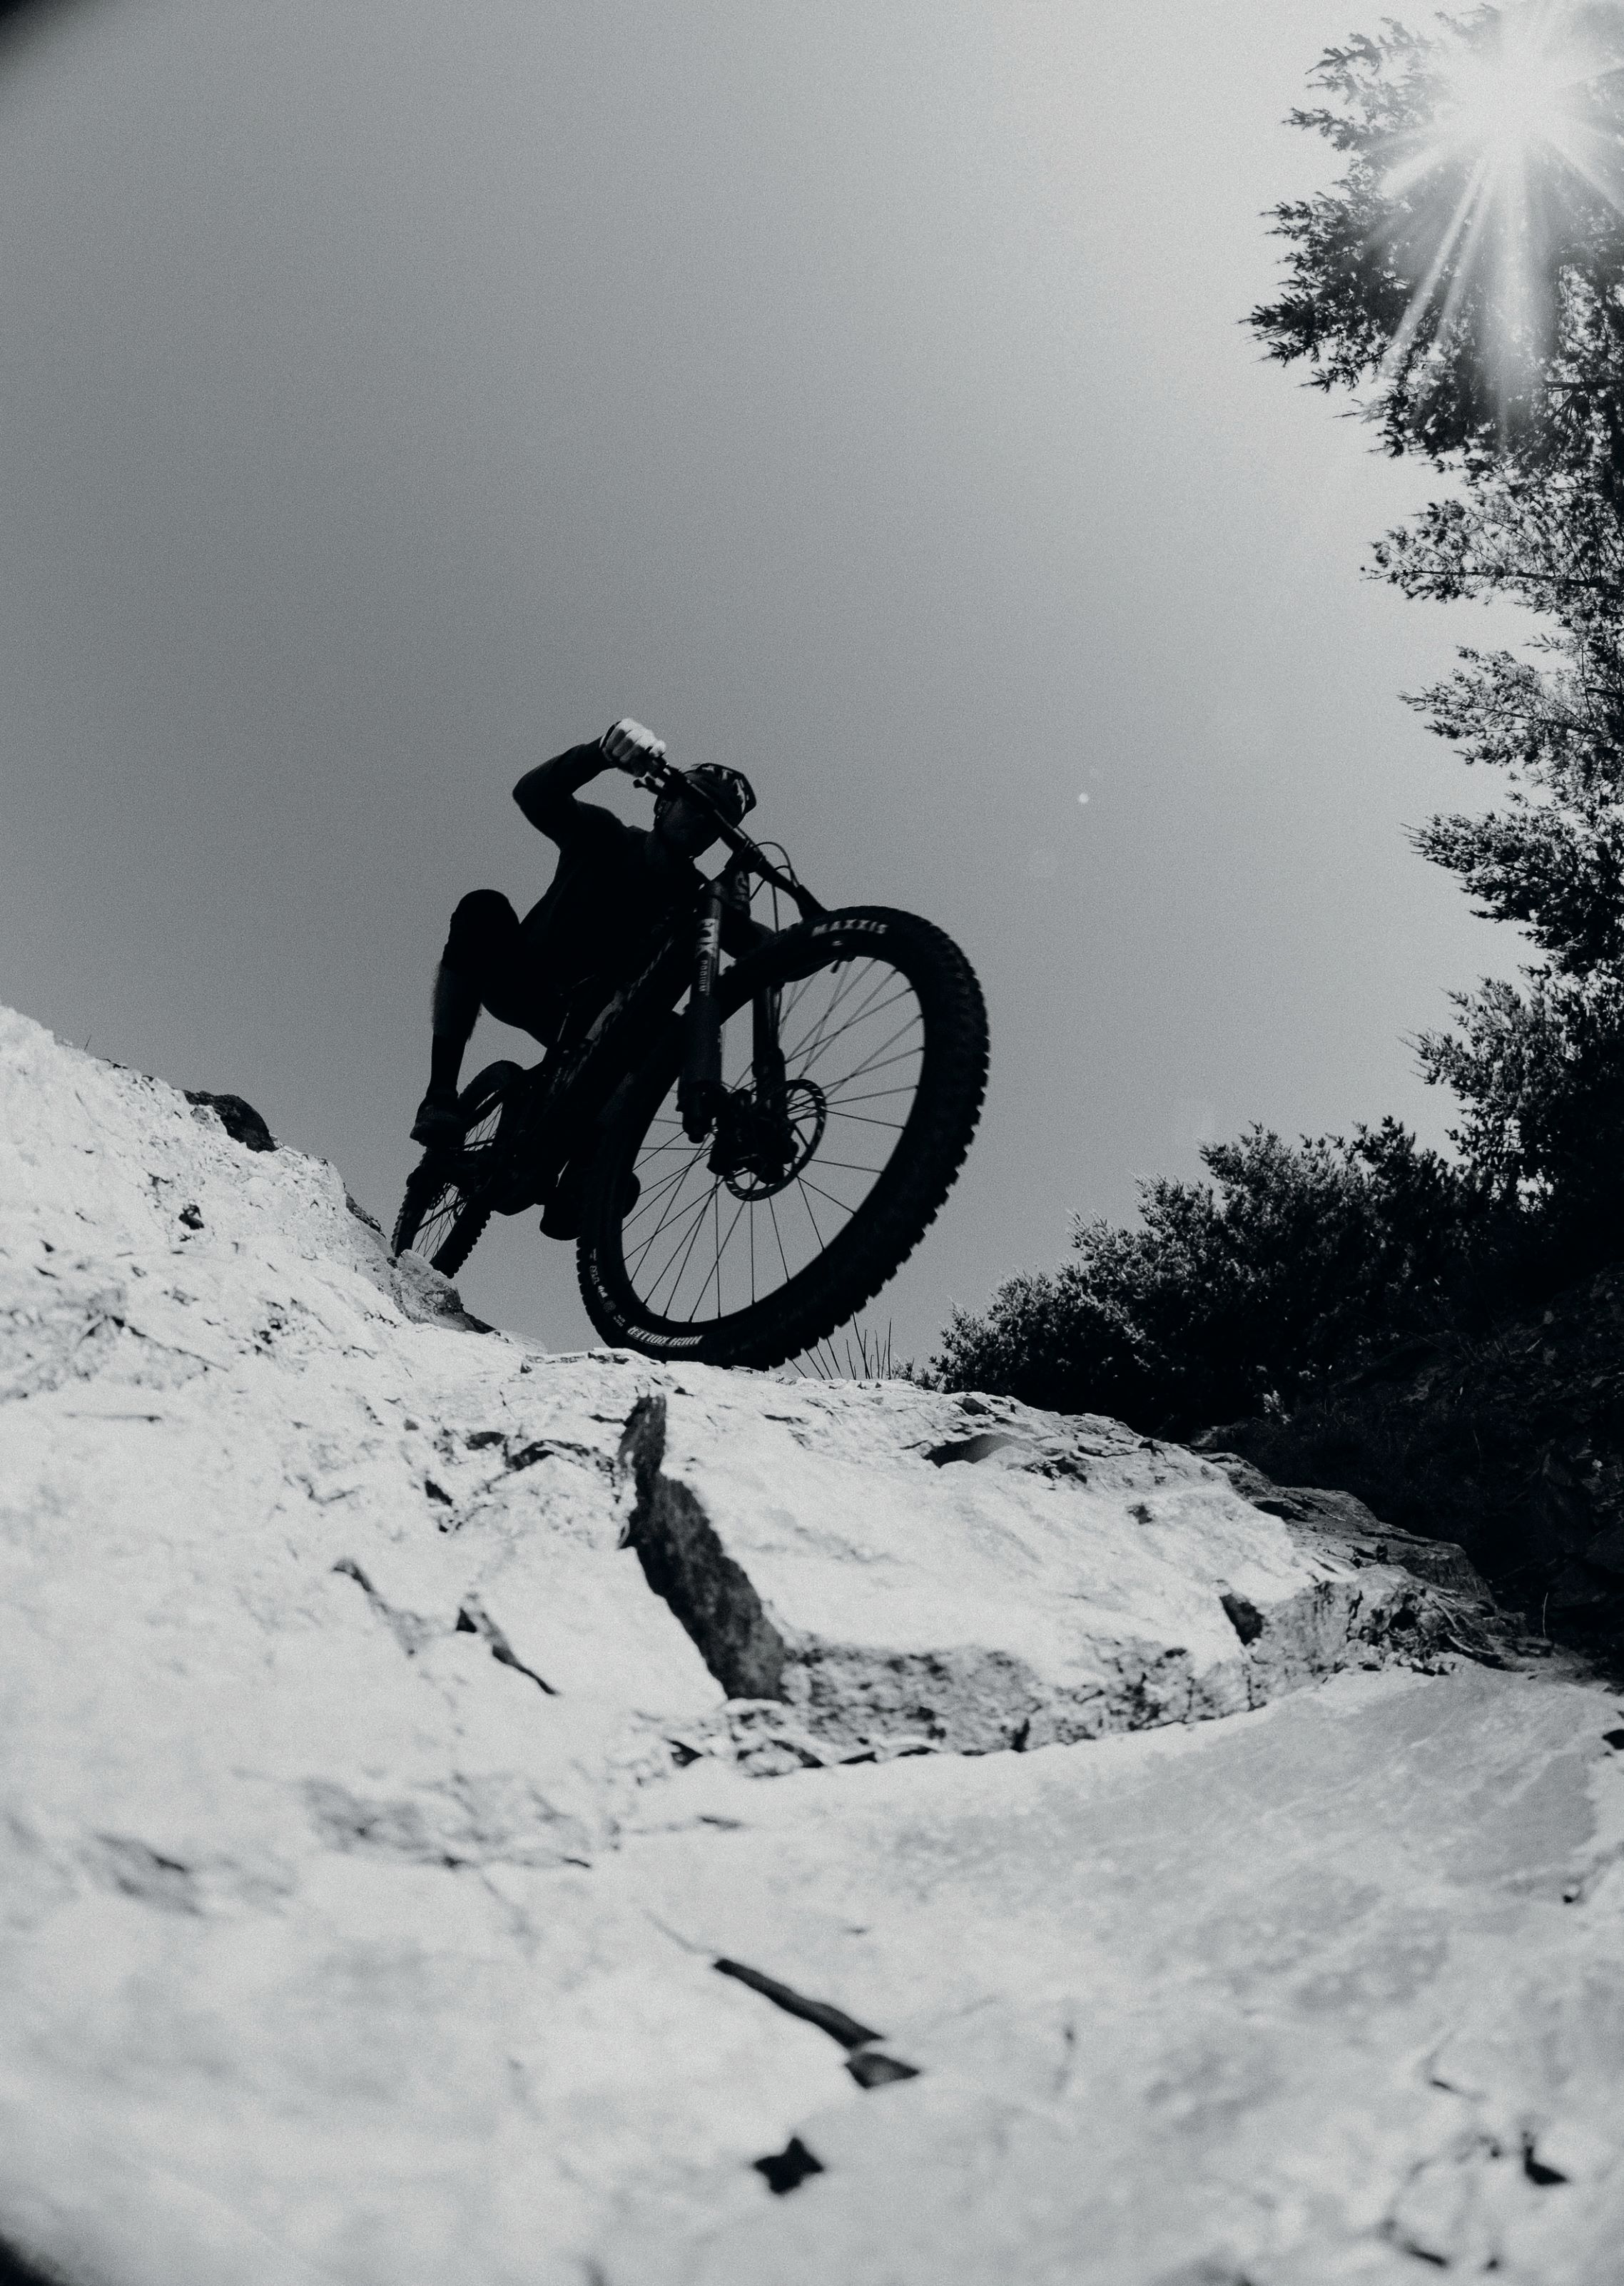
Day one took us to the East Side of the island, where we’d be starting the day with Stage 1— Boca Do Risco—a previous nominee for EWS trail of the year, that winds its way down beneath luscious canopies of Jurrasic Park-esque bush until shooting riders out precariously close to the cliff’s edge. When I think of Madeira, this trail is exactly what comes to mind; exceptional hand-built, flowing singletrack that’s the perfect blend of fast and technical, all enveloped by endless mountain-meets-ocean panoramas. After shaking the Stage 1 nerves I’d been long anticipating, and despite my immense preference to do basically anything other than carry a bike on my back up a hill, the endless ribbons of coastline and peaks we were treated to en route to Stage 2 was enough to put a smile on the face of even the most dubious hike-a-biker (me). Stage 2—Into the Mystic—took me straight back to the dustbowl of Christchurch, and was another one of Madeira’s gems that I’d been lucky enough to get a taste of previously. Fast and loose with dust-filled corners and off-camber drifting, staying upright was an uphill battle. The liaison to Stage 4 hit, and every doubt I had about being over prepared with my carefully curated selection of snacks quickly dissipated as I munched down a Bumper Trail Bar. The four bags of Natural Confectionary Co. snakes (if you know, you know) paid for itself instantly—especially the positive reception from my UK and Canadian counterparts!
Stage 4—Natal—down into the feed zone at Porto da Cruz, was full on—basically a rock garden for 5 minutes—and my body was starting to feel the fatigue of needing a substantial refuel. These were longer downhill runs than I was used to and, in hindsight, I had insane jet lag that I was subconsciously suppressing (it’s not real unless you say it is, right?!). The PURE nutrition gel I smashed before dropping in was the real MVP, giving me just enough beans to hang on until the most boujee food zone spread I’d ever seen. I rolled up and uttered something that resembled a “thank f*ck for that” and smashed a Red Bull along with a freshly baked filled roll, a pastel de nata and cup of roast potatoes. No, I’d never seen potatoes at a feed zone before (nor pickles for that matter), but yes, I was absolutely here for it. Reaching Stage 7—Hole in One—the view down into Machico was all-time. A little slick at the top, my tired legs and subsequently lazy riding position caused my foot to blow off my pedal, and I was on the ground before I knew it. Weirdly relieved to get a crash out of the way, I fumbled my way down the final rock gardens of the day and straight into a beach swim, finishing the day in 4th overall.
Day 2 – 46 km – 1182m up – 3700m down – 7 special stages
Generous doesn’t quite cut it for the incredible breakfast spread put on by Chefs Robert and Nuno—these guys haven’t missed an edition of the event since 2018, and it’s clear they’ve got mobile catering for 200 people down to a fine art, and that’s no small feat. The beauty of Trans Madeira is that you don’t have to worry about anything—the smallest of details you can think of are all sorted for you, meaning you can focus on your race and truly take in the paradise that surrounds you for the duration of the week. The fact that these guys can move 180 luggage bags from one side of the island to the other, all while managing to feed 200+ humans, are some serious logistical goals—these guys know what they’re doing.
After exchanging some very tired good morning’s and “body’s a bit sore today eh!”, I settled into my routine of porridge with lashings of Nutella and peanut butter paired with a side of scrambled eggs, sprinkled with dribs and drabs of pastel de natas, beautifully baked fresh rolls, cheeses and pastries. Fresh and so well managed—these guys are goals when it comes to logistics. I learnt quickly that I needed to eat as much as possible for breakfast—by the time we’d roll out and hop on the shuttle and reach the start of the day’s stages, a couple of hours would often pass and I was glad to have some sustenance behind me.
We started the day off with Stage 8—the infamous Gamble line—which was a treacherous mix of slick berms, aptly referred to as ‘Madeira Ice’ when wet, and hero dirt. An island favourite, I was a little too cautious and finished the stage wanting more from my riding—though after seeing how many crashes were had, I was pleased to reach the bottom with clean kit! Kept company by my riding buddy Lizzie, who’d made the journey all the way from Pemberton, BC so could share my jetlag woes, I settled into the chunky sealed road climb that was our Stage 9 liaison to Truta’s Trail. A total contrast to Gamble, this stage had it all, including sketchy wet rock gardens—they did warn us this trail does suffer from the impacts of wet weather, and would be changed should there be too much rain. My fatigued arms were holding on for dear life, trying to maintain both speed and grip through chunky rock sections. After catching three riders at various points throughout the stage, and thanking them profusely for precariously allowing me to pass in the most awkward technical sections imaginable, we were relieved—and for some reason oddly confused at just how technical parts of the stage were (perhaps it was the fatigue skewing our perception)—to make it the bottom of the stage.
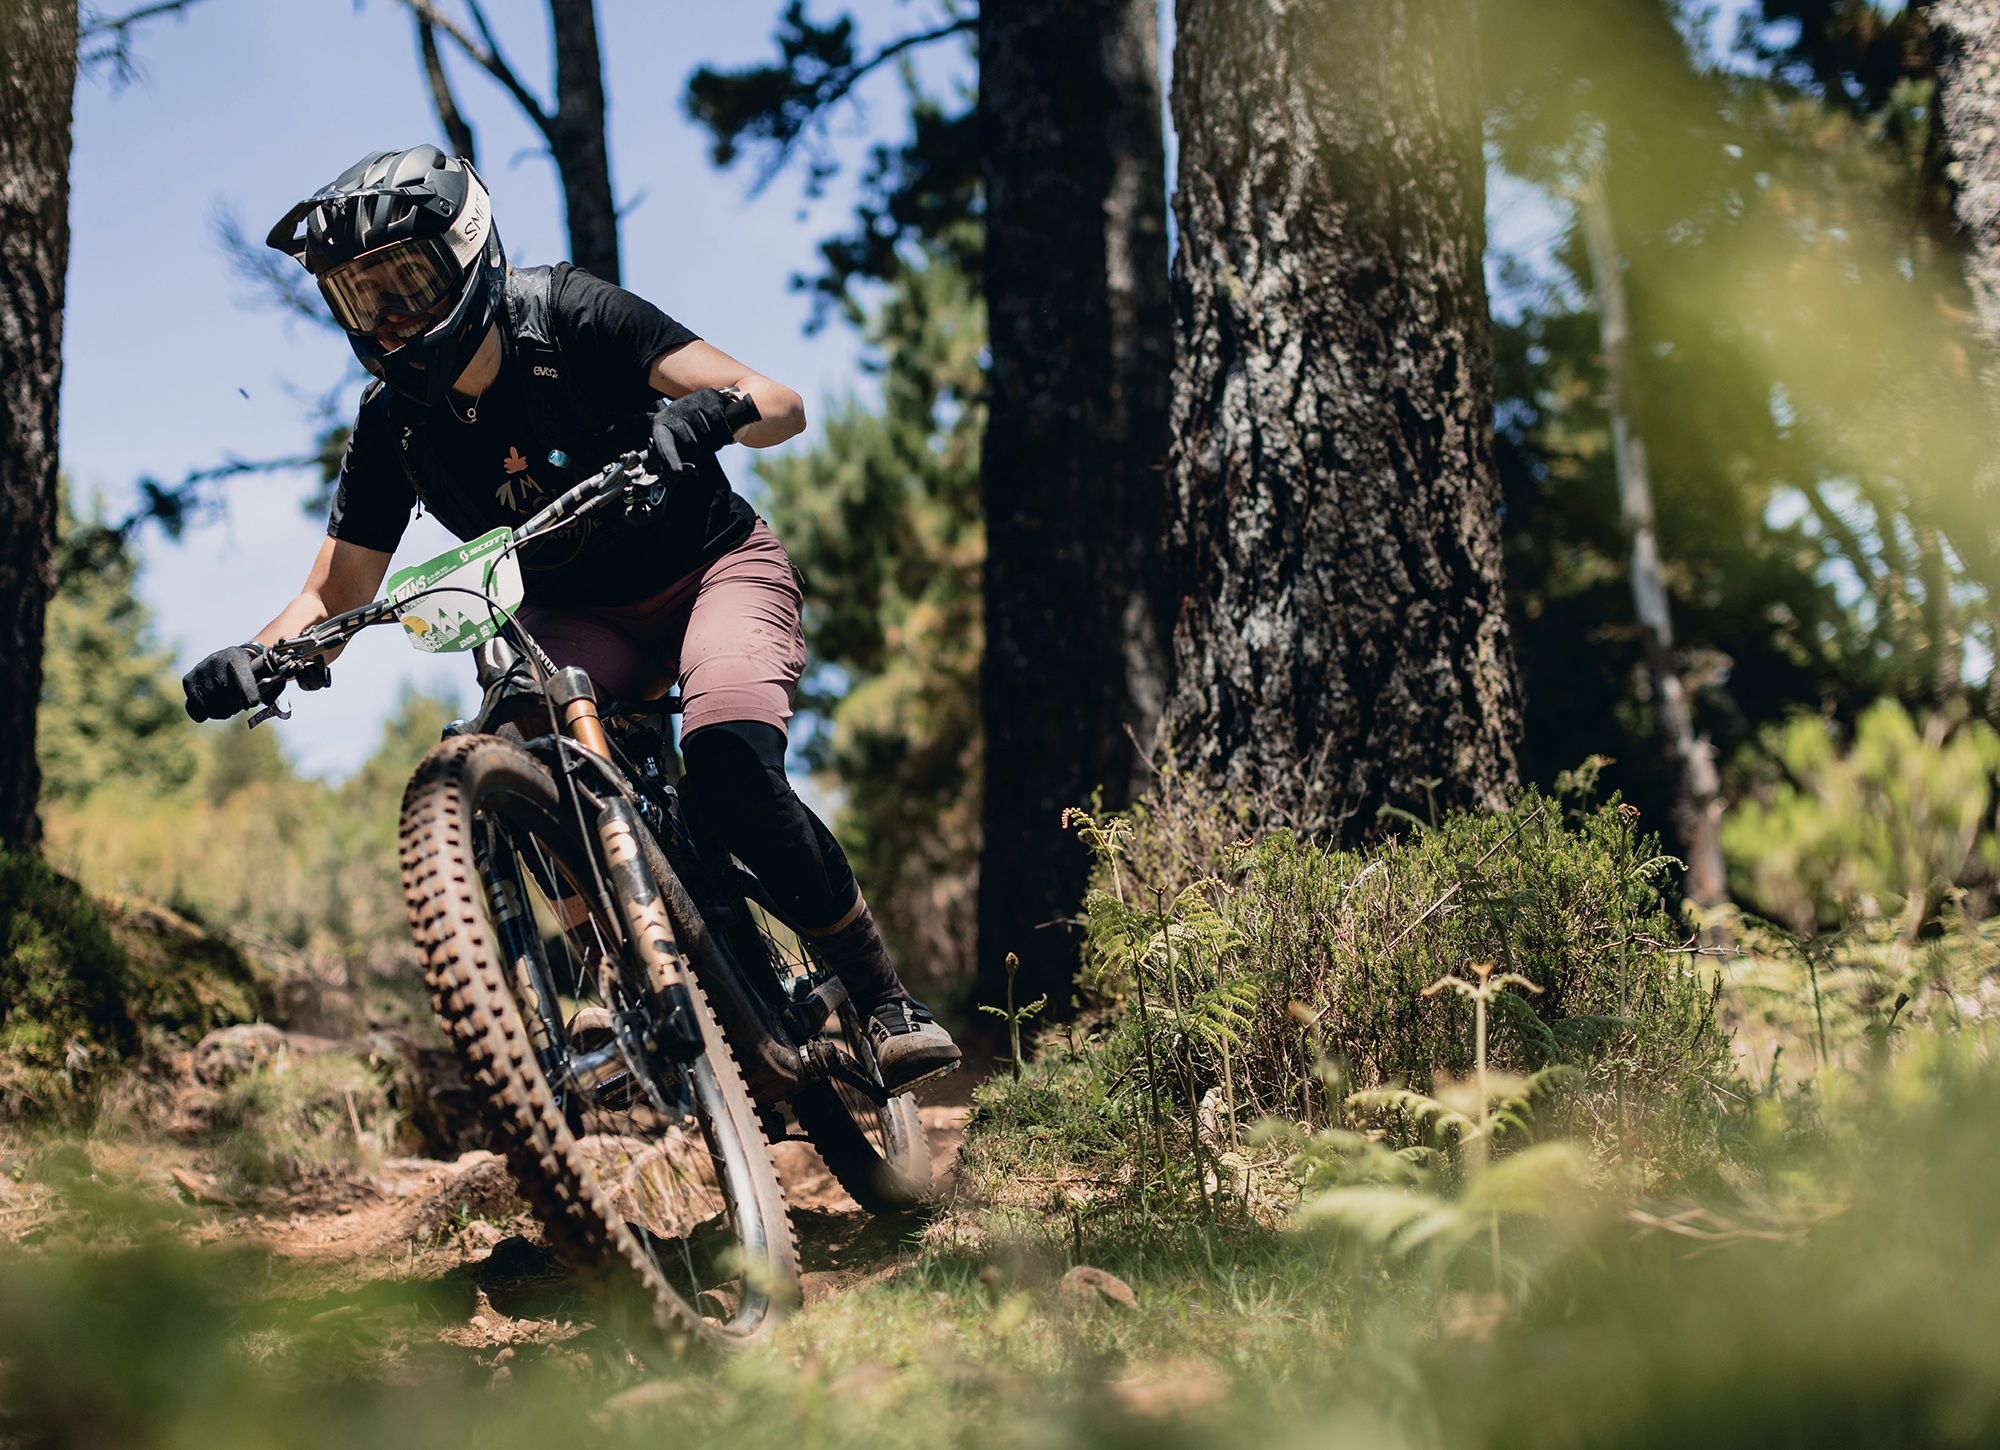
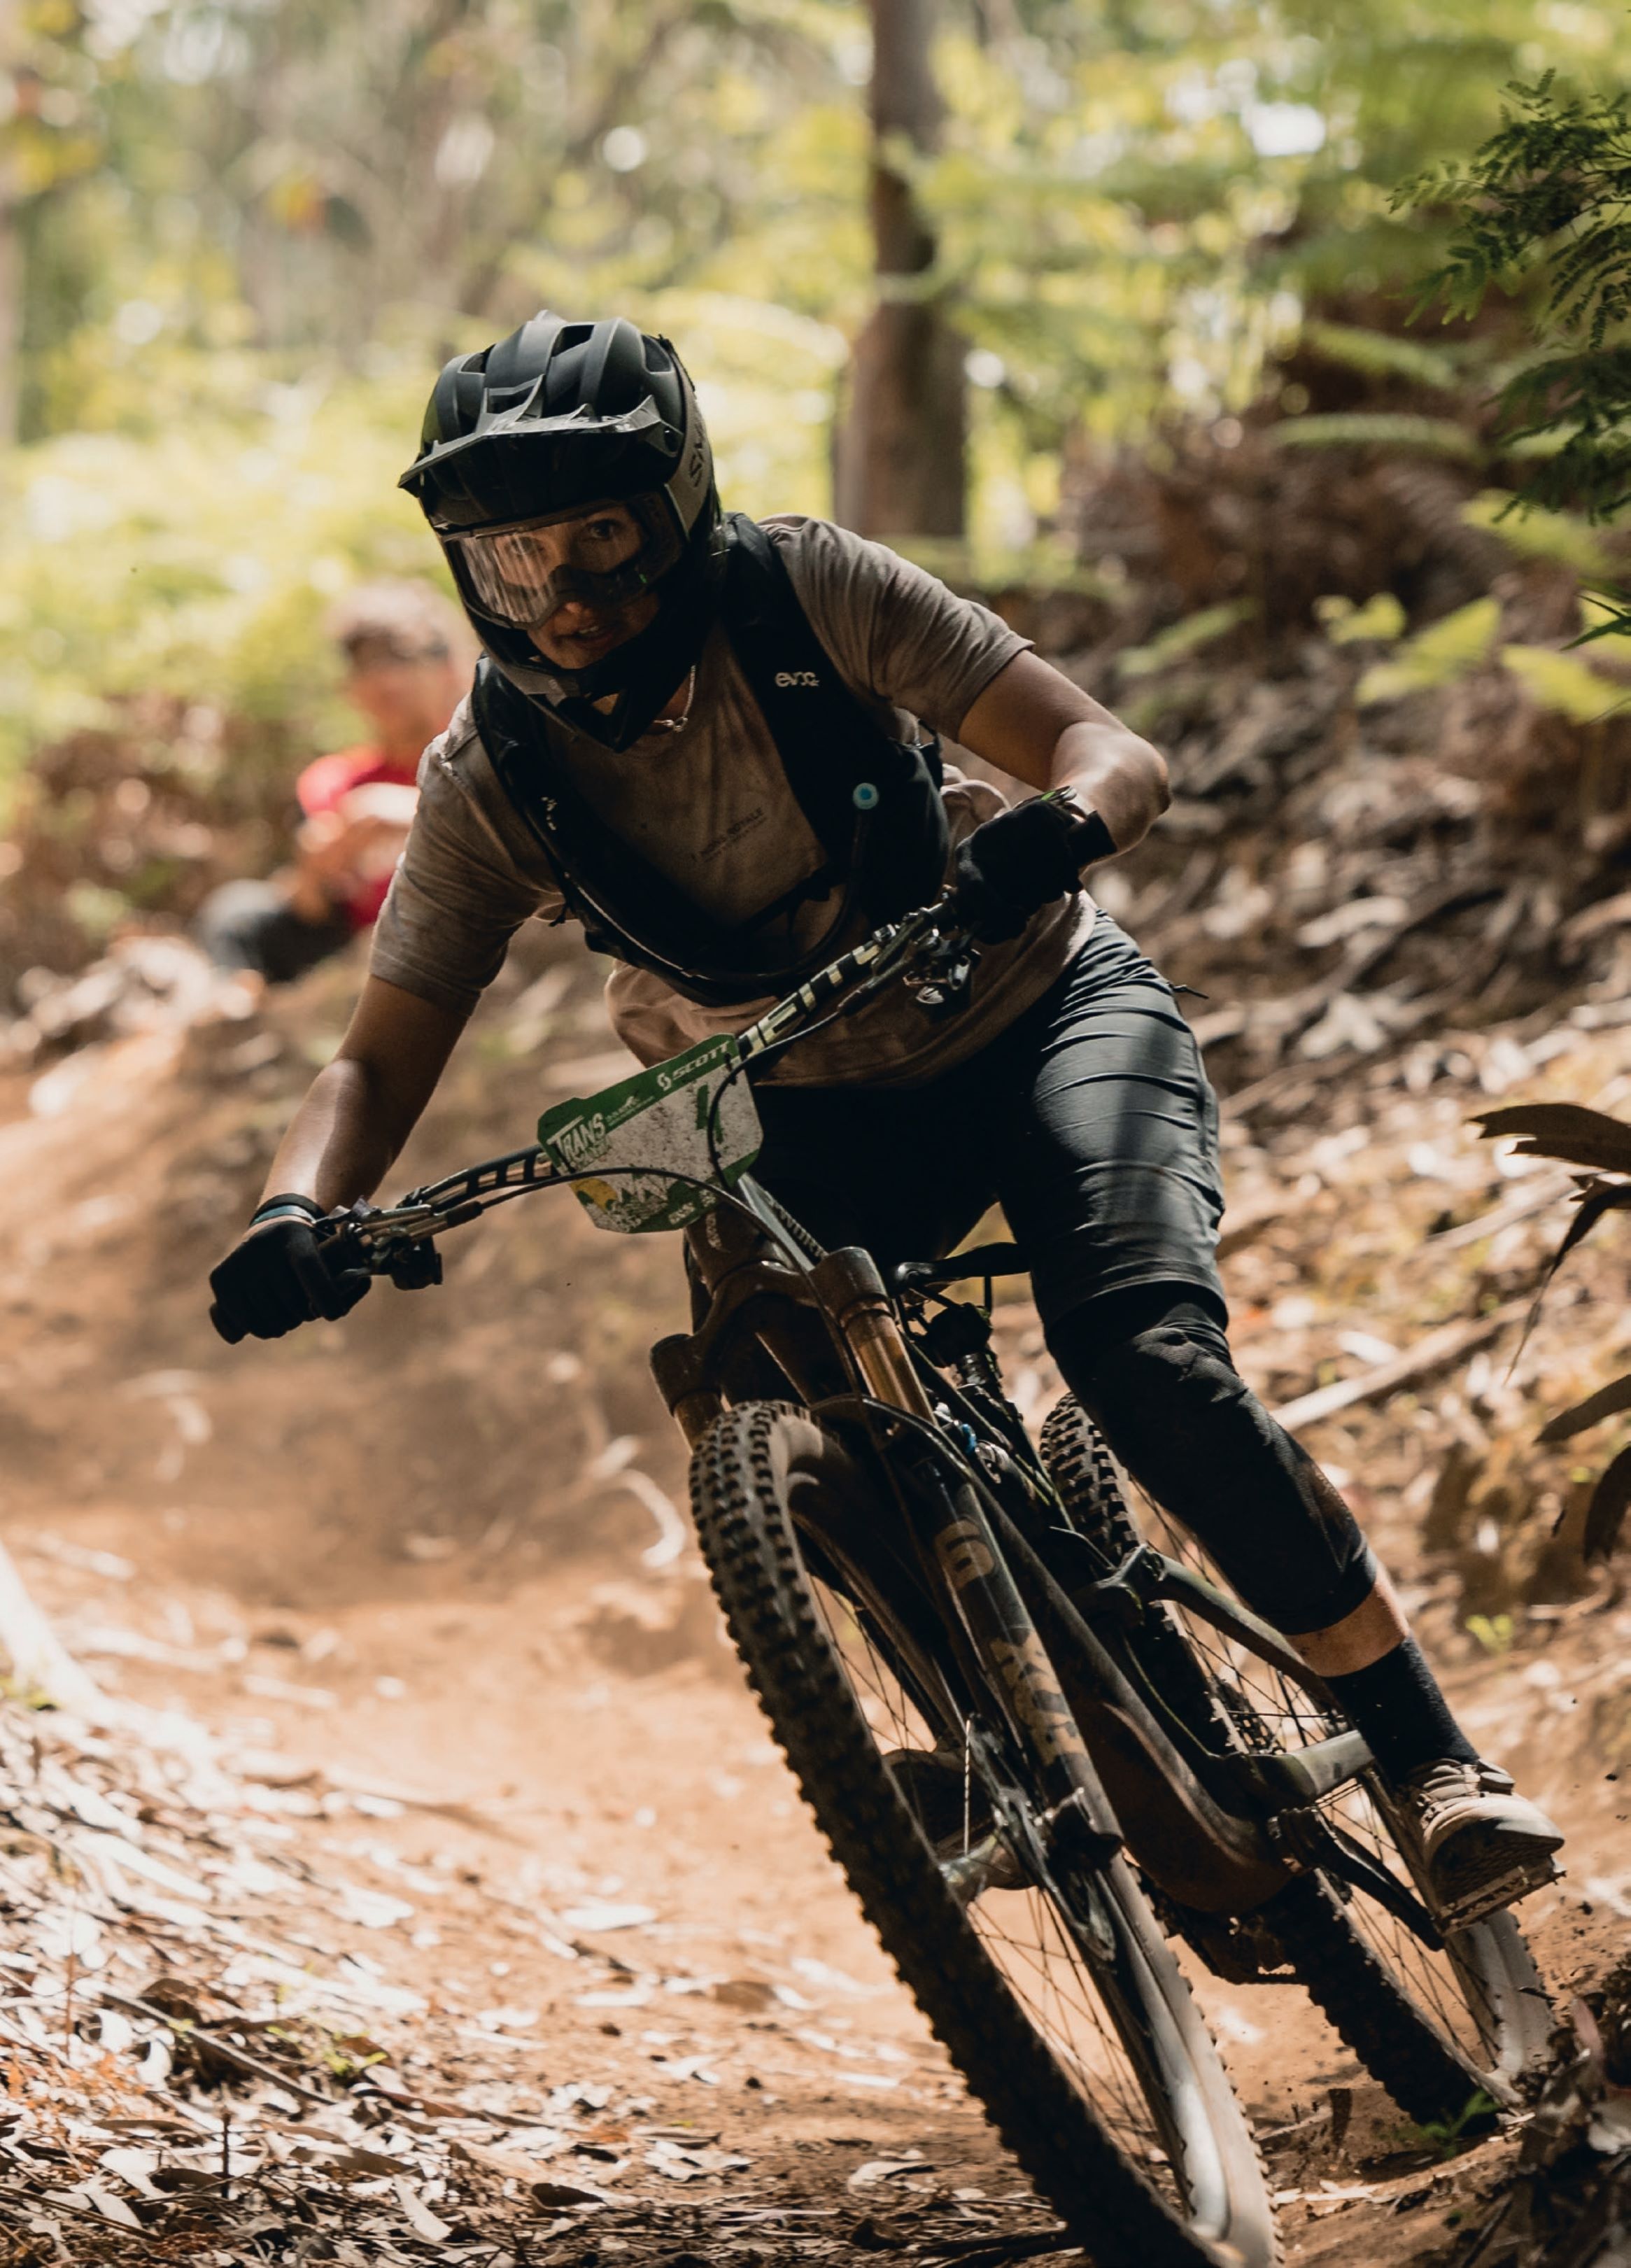
In contrast, we were treated to absolute loam- filled bliss for stages 10, 11 and 12. As the trails became drier, the day became hotter, and soon we were baking in the sun at the day’s food zone in Porto da Cruz, the infamous Penha d’Águia rock feature perched above us. Stage 14—Santo Antonio—was a personal favourite of mine and suited me well: rocky, fast, technical enough to be challenging and require careful line consideration, but “not too technical to be scary”, and bonus points for no pedally sections. The stage starts in the open, with mind-blowing views of Funchal below.
The ocean seemed like a lifetime away, and hard to believe that ultimately we’d be riding to our new campsite on the shores beneath—I vividly remembered riding this on my last trip to Madeira, and what a privilege it was to have a chance to enjoy it once again. I tried to carry as much speed as possible through the rocky chutes up top before the trail snaked its way into the eucalyptus trees for its second half, Redline, where endless switchbacks meant you could really dial up your pace. I let the bike do the work and focused on enjoying myself. We finished the day off with the aptly known “Madeira massage”—absolutely bombing it down the beautiful, winding streets of Funchal, precariously perched on the hilltop. There’s something particularly magical about riding through town here—whether it was the residents yelling “go girl!” from their driveways, the beautiful ancient buildings or the blooming flora and fauna, it’s a sensory overload. One of the best days on a bike I’ve ever had, and what a treat to finish with a Stage 7 win and a bump up to second place overall.
Day 3 – 40 km – 1174m up – 2600m down – 4 special stages
Day three truly encompassed the diverse beauty Madeira has to offer; a true reflection of the postcard that I so often describe to people when they ask me what the island is like. Seemingly endless breathtaking landscapes paired with some of the best technical flow trails I’ve ever ridden, all in the company of humans that can only recharge your social battery—THIS is Trans Madeira manifested. Starting Stage 15 on the alpine trail, Pico Cedro, the now fatigued arms were given a wake-up call with exposed rocky chutes, with infamous “Madeira Ice” thrown in. The final stint of our Stage 15 liaison was a short hike-a-bike which highlighted the severity of the blisters I’d sustained in Day 1’s beautiful Ridgeline liaison. After battling with blisters in many hike- a-bike’s prior, this was a key concern of mine that, despite all my preventative attempts, had come to fruition—nonetheless, after only two days. Thankfully, it was short and sweet, and we were rewarded with stunning alpine vistas with all of the day’s stages situated above 1000m, enveloped by striking volcanic-rock cliff faces and panoramic vistas of the island below.
While you’d expect the downhill stages to be the day’s highlight, the liaisons were simply breathtaking—that’s what makes this race such an all-encompassing experience— everywhere you look, whether its descending or ascending, is simply breathtaking. This truly is an all-encompassing experience—being able to descend down some of the world’s best trails is just the cherry on top. The liaison into Nun’s Valley is nothing short of spectacular/ breathtaking/once in a lifetime. Situated in a now-extinct volcano, this world-renowned corner of Madeira originates from the 16th century and is a bucket list item for riders and non-riders alike—enveloped by mountains layered with century-old terraces, it’s hard to know where to look first. Although steep in spots and timed at the precarious point in the day, right before the feed zone, the endless views, easy yapping and descent down the infamous “nun’s path” made any fatigue I was feeling somewhat forgettable.
So far, I’d managed to get into a routine when it came to feed zones and hydration, yet for some reason—perhaps led by belief that today would be a “shorter day” (I quickly learnt that such statements should be taken with a grain of salt!)—I opted to omit my usual bread roll, instead fuelling solely on lollies, a Red Bull and some nuts. Our historic tour of Madeira continued as we worked our way through the next liaison which followed the infamous Levadas—irrigation channels built in the 16th century to bring large amounts of water from the west and northwest of the island to the drier southeast—again, a surreal experience for anybody, with or without an appetite for riding bikes. All was going well until I was perched precariously on the edge of a Levadas and lost my footing, tumbling down into the green mass below, only to be stopped by the crevasse between my middle and ring fingers getting caught abruptly on a rock.
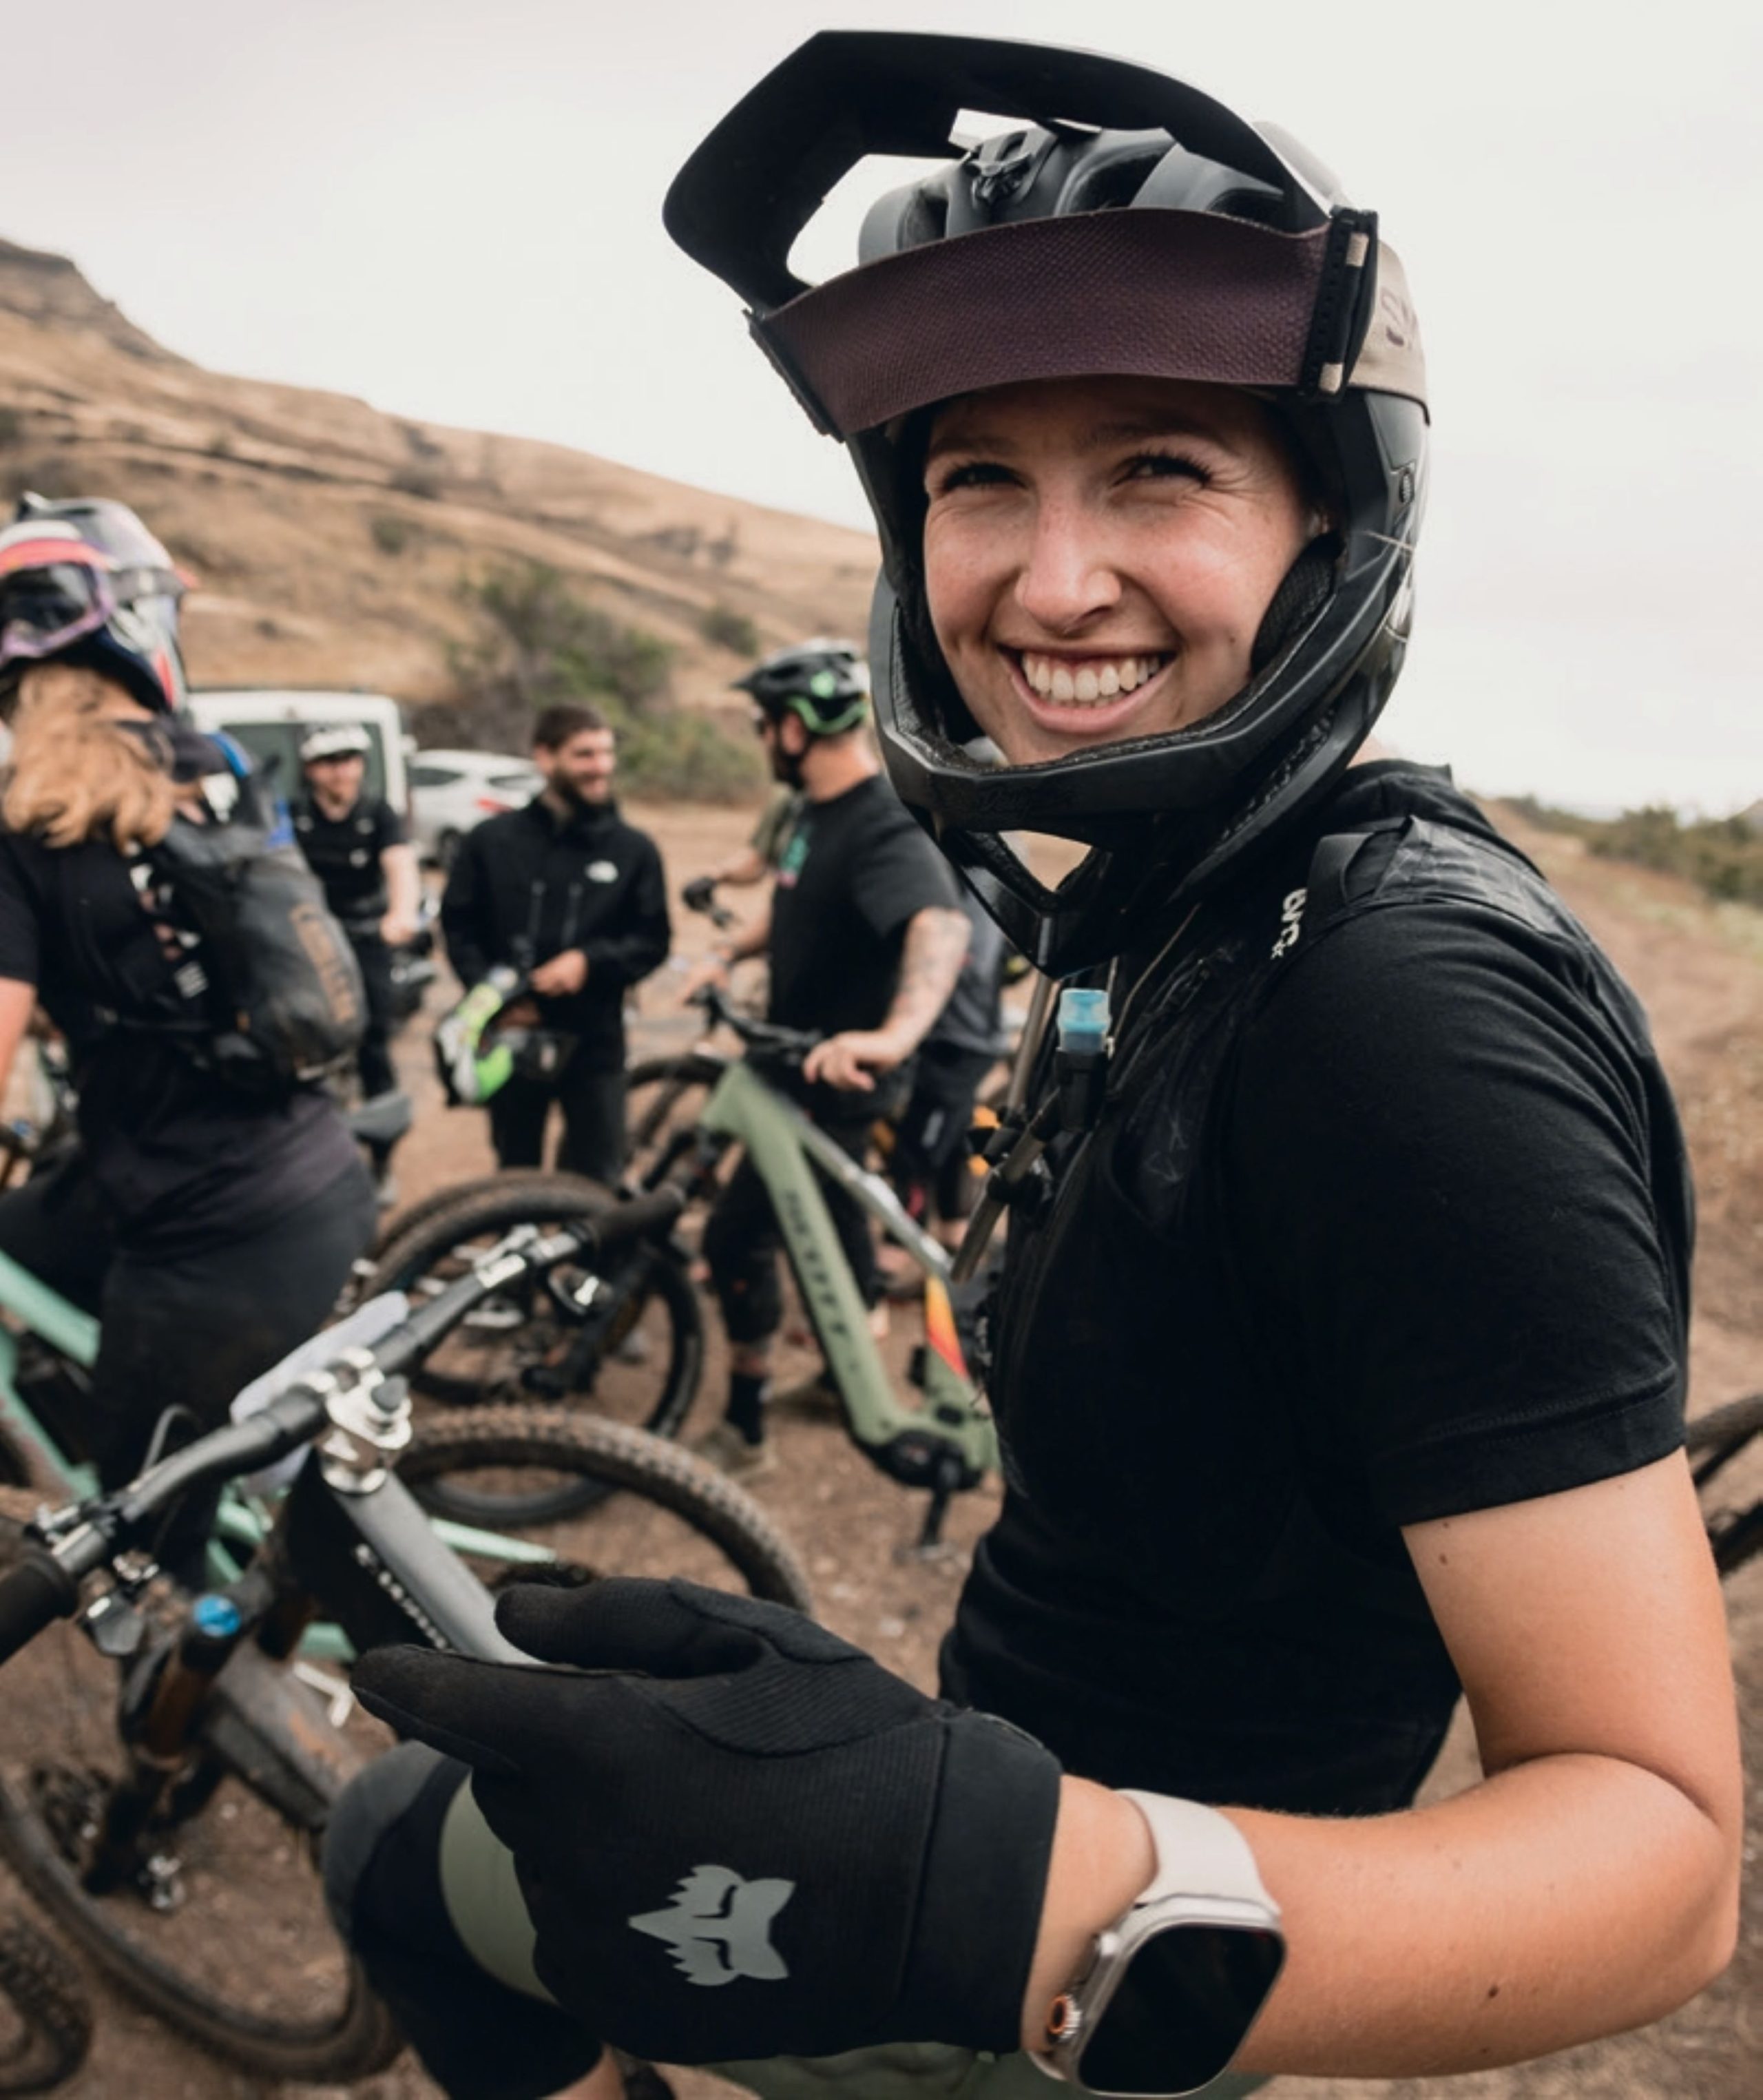
I’ve always found the comeraderie between women at bike races to be something special, and let’s just say—when you’re riding for eight hours per day for six days straight, you see people at their most vulnerable, and anything goes when you’re delusional and fatigued. We’d joked that everybody has to have their “tears day”, and today was going to be my day—I was tired, I’d ripped a sock, my finger (and ego) hurt from my tumble, I’d forgotten my headlamp for the [kilometre-long] tunnel, and my decision not to have a bread roll at lunch was biting me (excuse the pun) in the ass. I was over it, and looking down at my Garmin to see that we’d surpassed 1000m of climbing still (after expecting ~850m) with no-end in sight was the straw that broke the camels back. Those moments on the bike where the revolutions are turning, but you’re slogging away on a road to nowhere. Oh, and suppressing three days of jetlag might have had something to do with it, too! After a few tears, some profanities and a few “I’m fine—today is just a day” moments with the other ladies, I was relieved to finally see the top of Ginjas, which constituted Stage 18—and what an absolutely magical stage this was. Only accessible via the Levada tunnel traverse through the mountains, the trail is only opened twice a year for the race—what a privilege. “Best trail in the world” was a common sentiment among riders at the bottom, echoed by myself also! Luscious, loamy sweeping berms that’d make anybody feel like a hero, rock gardens you could float over and roots to pop off for days—all nestled within an incredible green canopy. We were met by an ice-cold Coral, smiling faces and a picturesque descent down into Sao Vincente. Bad day WHO?!
Day 4 – 51 km – 1287m up – 3300m down – 7 special stages
Being awoken by the classic camping sounds of neighbouring tents unzipping, I quickly realised that the footsteps walking past my tent were squelching, which could only mean one thing… wet ground = rain! The camp rumour mill started in the lineup for breakfast—like kids on school camp—“apparently its sunny on the other side of the island” mixed with “I’m going to sh*t my pants if the dirt is wet out west”. After umm’ing and ahh’ing over how to best kit up, a last minute swap from shorts to pants and my Goretex rain jacket stuffed in my frame, we were loaded onto the shuttles in the hope the windscreen wipers would slow down the closer we got to the start of Stage #19.
I feel this is a good opportunity to give a shoutout to the bus drivers of Madeira—it should be noted that Trans Madeira is a mix of pedal- and shuttle-assisted climbing; most days are around ~1200m of spinning pedals, with the remainder being shuttles. While parts of some stages had me whispering a few profanities to myself, the shuttles aren’t for the faint hearted either—a mixture of being precariously perched on the edge of a road that’s a handful of metres in width whilst dodging tourist cars in-between, all whilst winding for endless kilometres—think driving in the tight hilly streets of Wellington…. but on steroids! I looked across to see a fellow competitor hanging on for dear life—any apprehension about the incoming stage be damned, avoiding motion sickness was a challenge in itself!
Dropping into Stage 19—Pargos—we were greeted with a howling wind, drizzle and what felt like a 10+ degree temperature drop with no shelter other than an abandoned cattle shed. Riders set off each day depending on their current overall standing, with two minute intervals in between—you’d be surprised at how many days in a row you manage to be seeded with exactly the same person! You do the math: 140 riders, two minute intervals… if you’re in the front half of the pack, it’s a long wait and, when it’s raining, it’s a cold start with already fatigued muscles.
Fortunately, for the last three days of racing I was seeded with an absolutely epic UK bunch who provided excellent chat, laughs and some reassurance when I felt genuinely concerned I was about to get blown off my bike into a rock garden at the top of a 1500m hill. Many competitors I spoke to had done the event multiple times, with this group having completed three editions, whilst others had done five or six. After completing one edition, I’ll be buying lotto tickets for the rest of my life to have every chance of coming back for more—I’d have to turn off all social media for a month to have any chance of overcoming FOMO should I not be fortunate enough to be part of the chaos again!
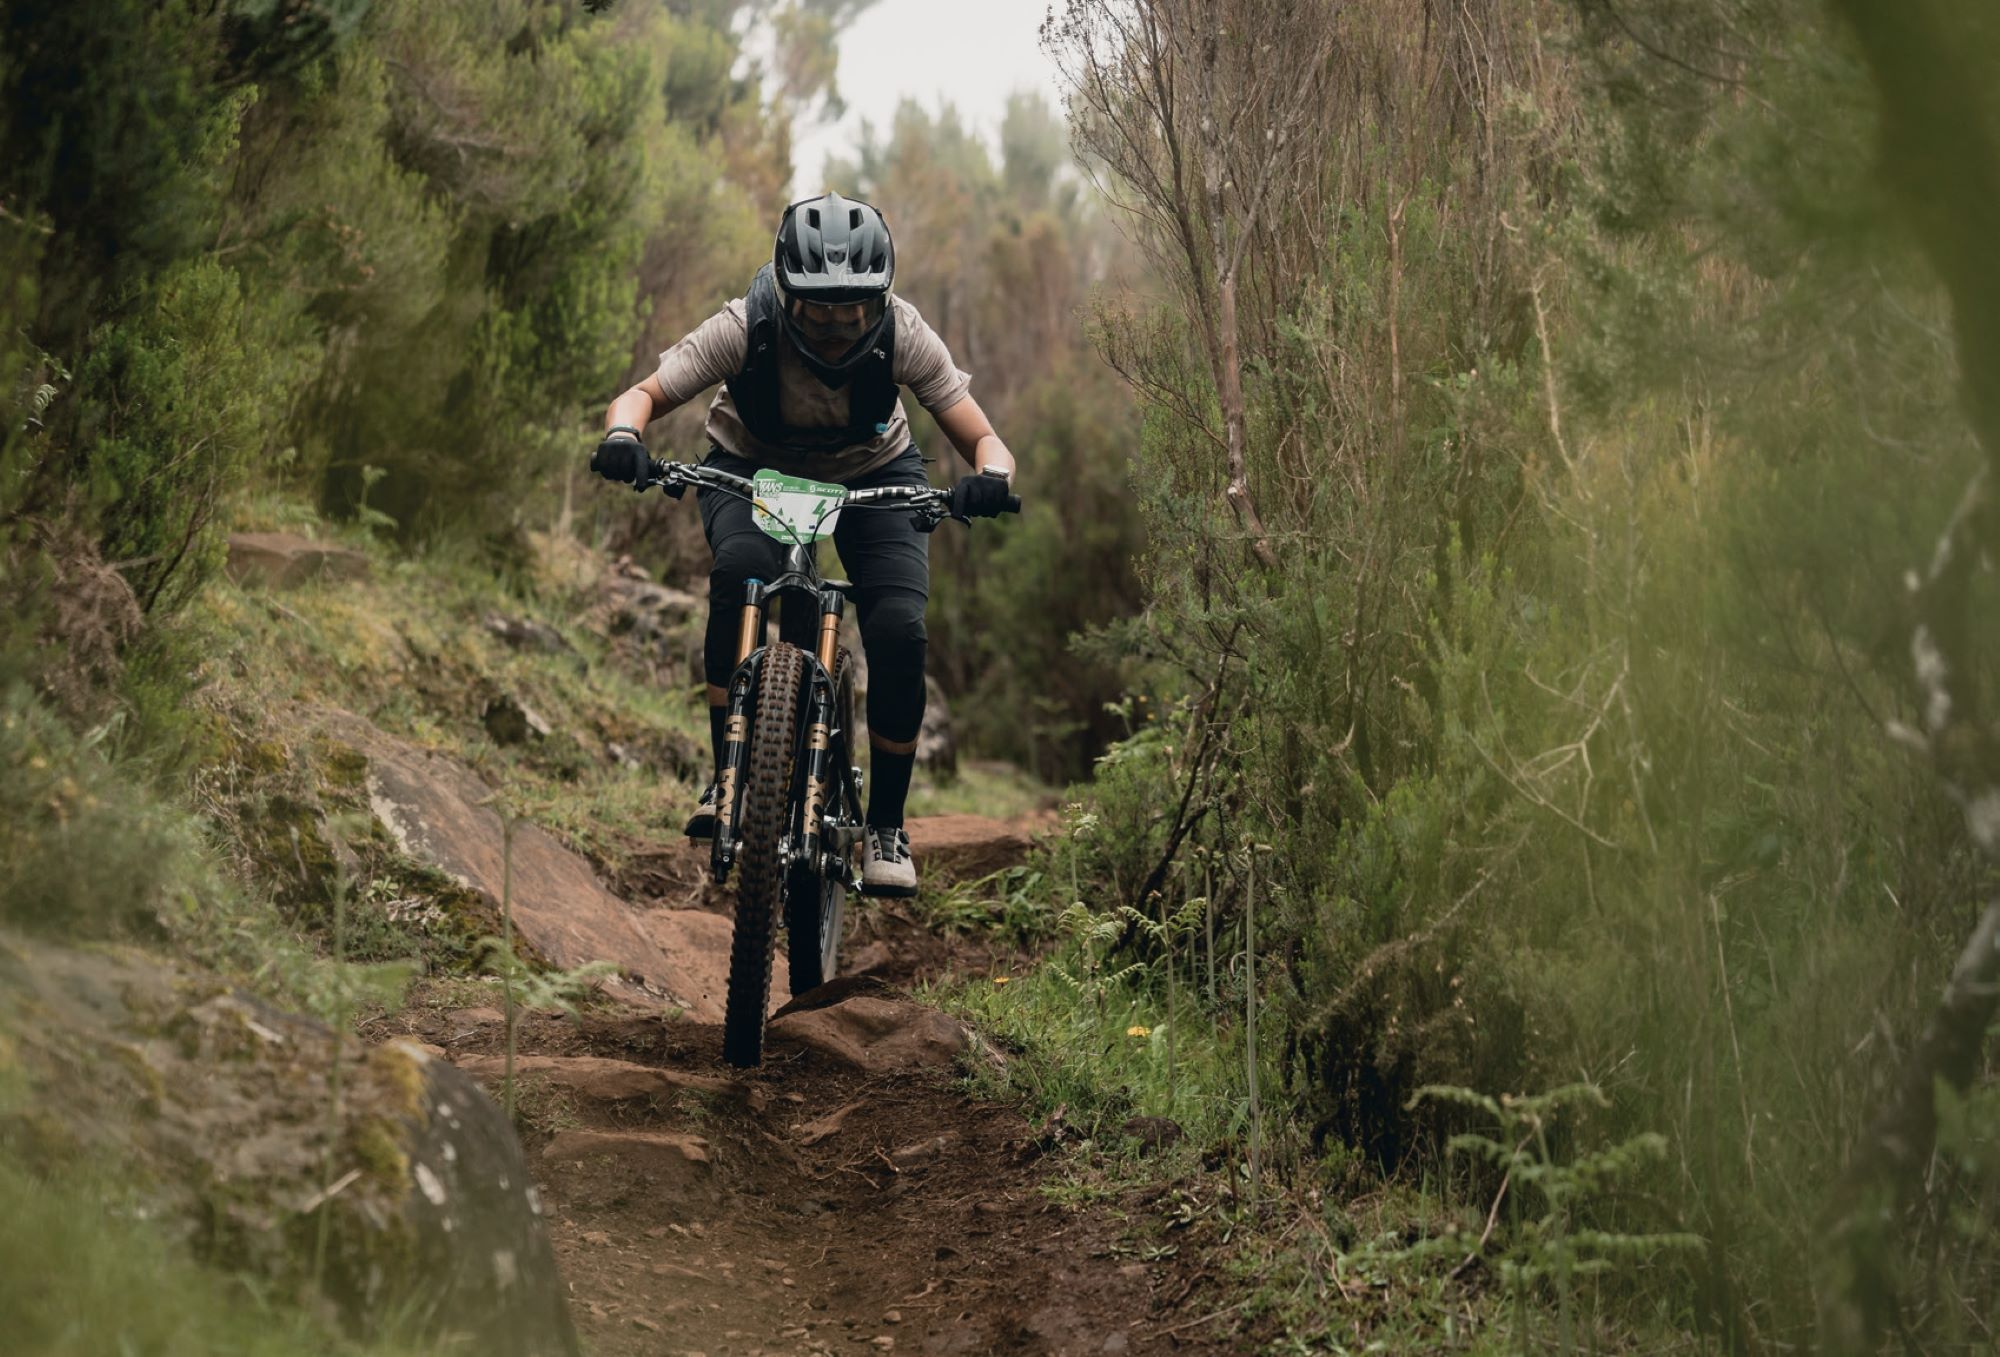
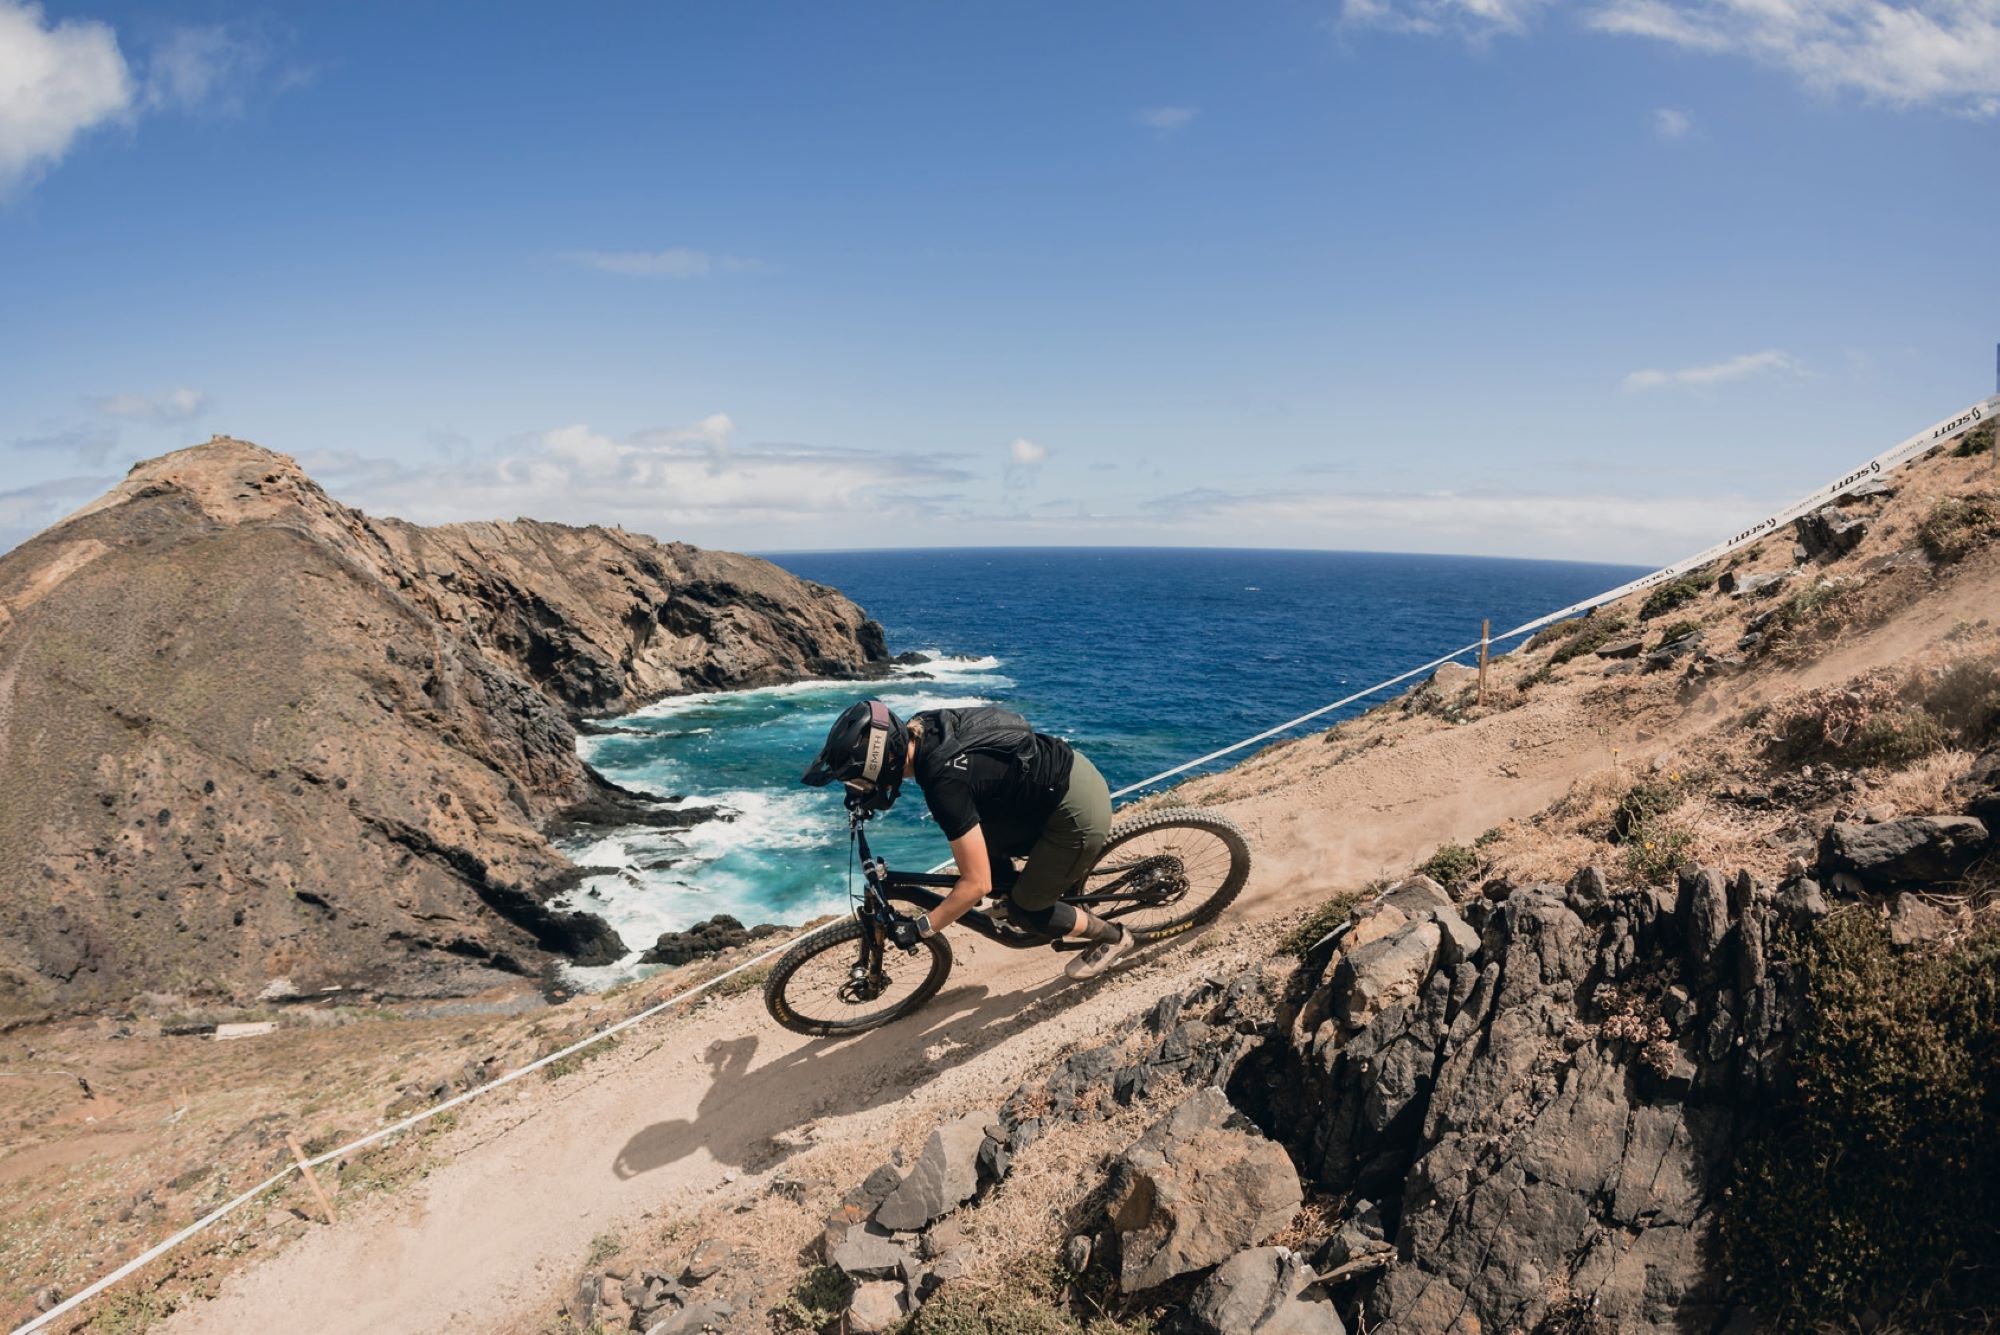
Some say, ‘the West Side is the best side’, and I can’t argue with that! Nestled on the faces of Ponta do Pargo and Prazeres, Stages 19-25 were among the best trails I’ve ever ridden—anywhere. Words can’t capture the pure elation of reaching the bottom of each stage, so I’ll borrow the most common sentiment of the day: *that was f**king sick*. I’d been fortunate enough to experience this side of the island previously, but it quickly became clear that I’d only had a small sample, when in reality there was a full smorgasbord of luscious trails. Natural rock gardens kept me on my toes amidst red-dirt singletrack, lined with luscious Madeira greenery that created a strikingly beautiful contrast, so much so that it was easy to forget you were even racing.
Liaisons were hard that day—grassy 4×4 tracks made for slow going on the climbs, and my blisters were such that I found it more comfortable to pedal at a ridiculously slow RPM vs. pushing my bike like the majority of those around me. The sun gods blessed us with their presence in the afternoon, and we were treated to high-speed, loamy goodness with some dustbowls thrown in—four seasons in one day! I found myself in a comfortable spinning rhythm on the final liaison, and sent a quick Snapchat to my wonderful cheerleading friends and family at home, wondering how I was going—I remember none of what I said other than; “it’s really f**cking hard but this is the best thing ever”.
Now, I’m never one to decline a mojito and, upon reaching the sandy shores of our camp in Calheta, I couldn’t say yes quick enough to the offer of a sit down and a cold bevy! After being politely told “GP, you look like you need a sit down”, I handed in my timing chip and parked up on a sun lounger overlooking the shoreline. I wasn’t surprised to see I’d finished the day in 4th—I was riding tidily, safely, but definitely had more raw speed in the tank, especially with the knowledge of a Day 2 stage win in my mind. While I wanted to slot back into 3rd overall, the elation of simply reaching the pointy end of the race was an achievement in itself, and with two days of racing to go, anything can happen—that’s the beauty of multi-day racing!
Day 5 – 38 km – 930m up – 2900m down – 6 special stages
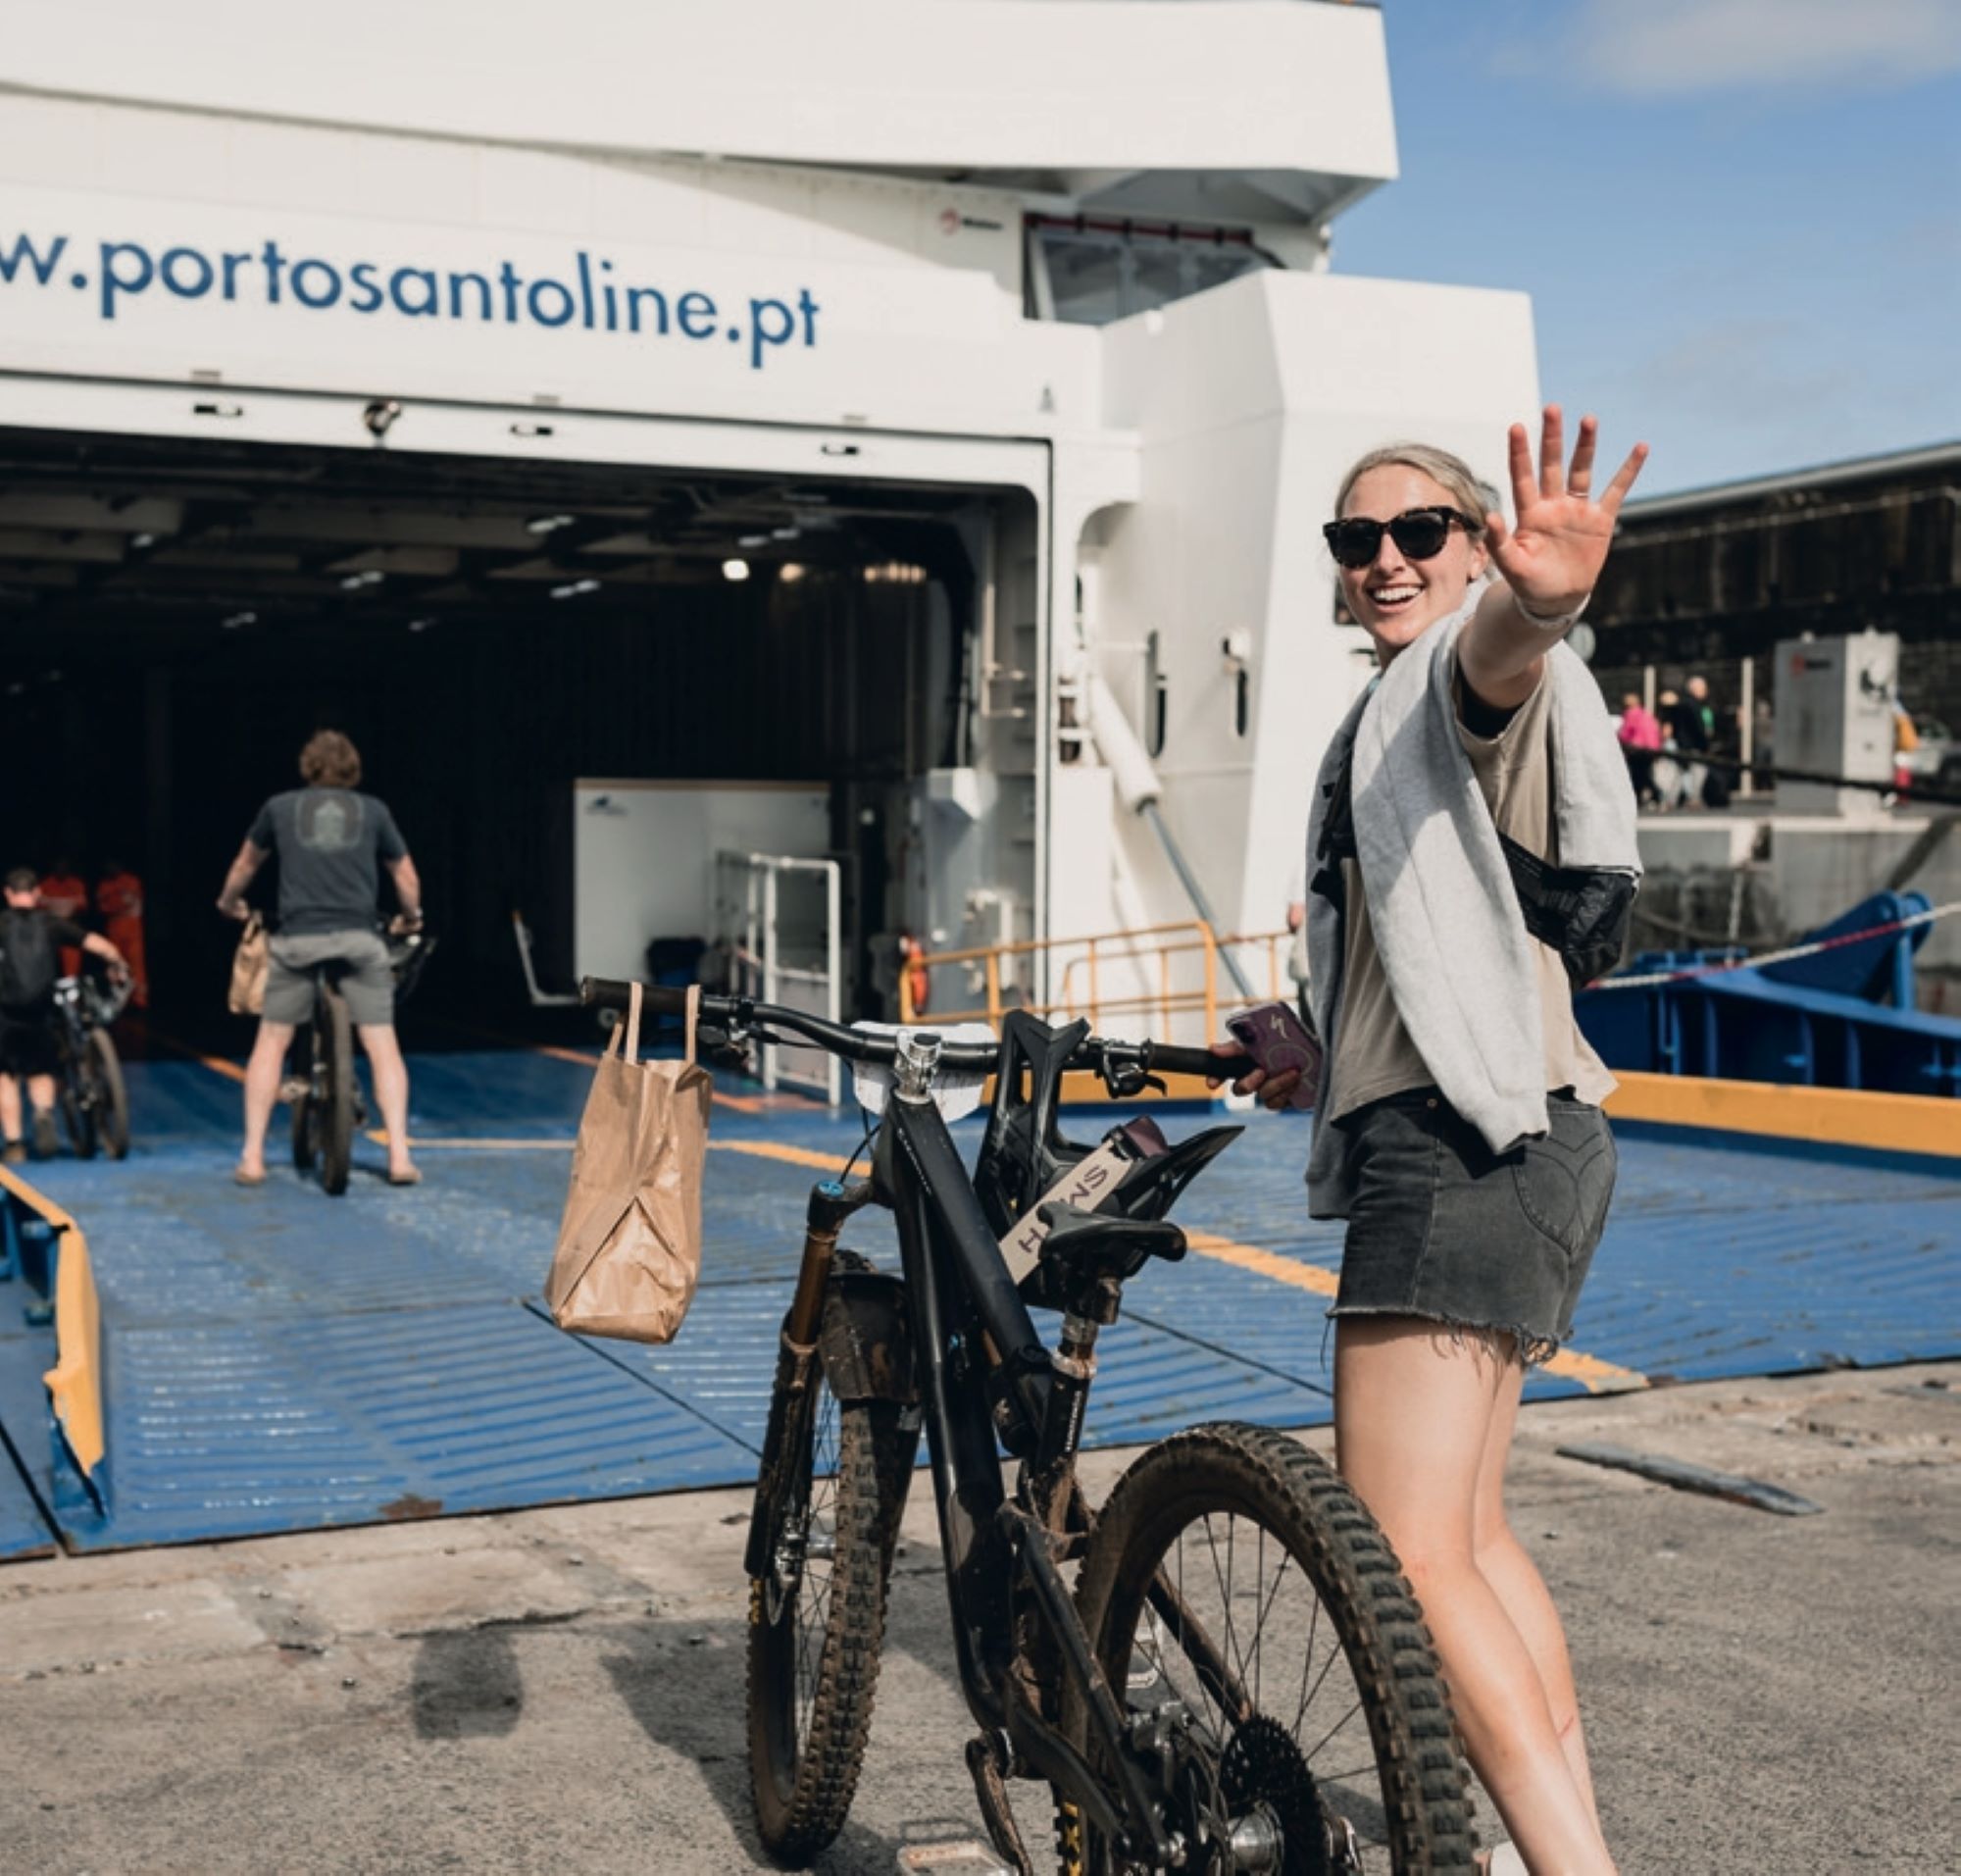
Day 5 was a much shorter day, again dominating the west side of the island, with just five stages and no feed zone as we were scheduled to board the ferry to Porto Santo at 7pm. Once loaded onto the party bus again—and when you’re sitting with the Irish crew on the floor of an overcrowded bus, there really is no truer descriptor—the rolling circus made its way to Galhano, where we witnessed the most impressive clifftop three point turn we’d ever seen upon drop-off. Unfortunately, we left the sun down in Calheta, along with the Aperol Spritz and mojitos, and were once again faced with gale force winds, heavy drizzle and hydration mix that my tastebuds could’ve done without after five days of consumption. Stages 26-28 were exposed along the ridge-tops and my fatigued brain was working overtime to keep both wheels on the ground and my eyes on the trail ahead, especially as this was narrower singletrack than the days prior.
By this point in the race, the arm and hand pump was unreal—I had anticipated this being the case as I’m certainly not used to riding a bike for six days straight (I wish!), let alone descending thousands of metres, but I had underestimated just how much it would impact the rest of my riding form. I was compensating for my tired arms but stiffening up the rest of body, which meant I was getting pinballed around and pushed off-line easily when hitting big roots, rocks and holes. I’m a flat pedal rider, and I was getting sloppy with my weight distribution—I was blowing my feet off the pedals left, right and centre. I know when I’m riding slow and when I’m riding fast, and at the end of each stage I felt that I had so much more speed in me, but I also knew that I was at the limits of my fatigued body’s capacity to ride safely, and I was riding with a consistency that had me in 3rd overall, which well exceeded my personal goal of simply finishing the event.
I was being well and truly tested, and my mentality was playing a crucial role in ensuring my mindset was in check. I spent much of the stages talking to myself and focusing on remaining composed, especially through chunky sections, as I knew that any drastic line mishaps could result in a mid-stage lie down. Yes, I was sore, cold, tired and my blisters were hurting; yes, I was a little frustrated at my riding; and yes, I knew I wasn’t riding my best. On the flip side, each stage finish brought us closer to the end of the race. I was surrounded by great people, in a beautiful island paradise, living a bucket-list dream I’d worked so hard to prepare for in the months leading up to that moment.
Any misgivings I’d have about how I’d ridden a stage were gone in the 30 seconds it took for the crew I was riding with to reach the finish line, drowned in a sea of collective excitement and relief that we’d survived! Yes, the physical component of a multi-day event is crucial, but keeping yourself in check mentally is equally important. The highlight of the day was Stage 29—Mamma Mia—where we broke through the cloud, and dirt sliding was replaced with dirt surfing upon being treated to delightful loamy goodness.
Day 6 – 35 km – 1350m up – 1350m down – 4 special stages
You’d think that after five nights of tent life, I’d be looking forward to sleeping in an actual bed at our hotel on the island of Porto Santo. Whilst this was true, there simply aren’t enough positive phrases in the dictionary to describe how excited I was at the concept of emptying my entire bag onto the floor, as well as having a bathroom to myself, and all the space in the world to battle with getting my knee pads on in the morning. I can’t even begin to describe the relief I felt walking out the hotel room door on day six—my mindset was focused on finishing, and all I was visualising was reaching the bottom of Stage 35.
The blisters on each of my heels were now the size of Ritz crackers, and we were in for a 1350m climb day, most of which would be hike-a-bike. I was lucky enough to ride these stages in a girl’s train with Becci Skelton and Amy Watts, with Becci aptly describing the overarching sensation associated with any hike-a-bike as being “irrational irritation”—a sentiment that couldn’t be more accurate, and characterised my feelings toward the entire day. I’m not sure if it was to our benefit or detriment that we could see the entire hike-a-bike distance from the bottom to the start of Stage 32—we were midway through the pack on our way up, watching the riders wind their way up the hill face, little ants in the distance. I toggled between my bike on back and pushing it up the hill and, funnily enough, neither provided any degree of comfort.
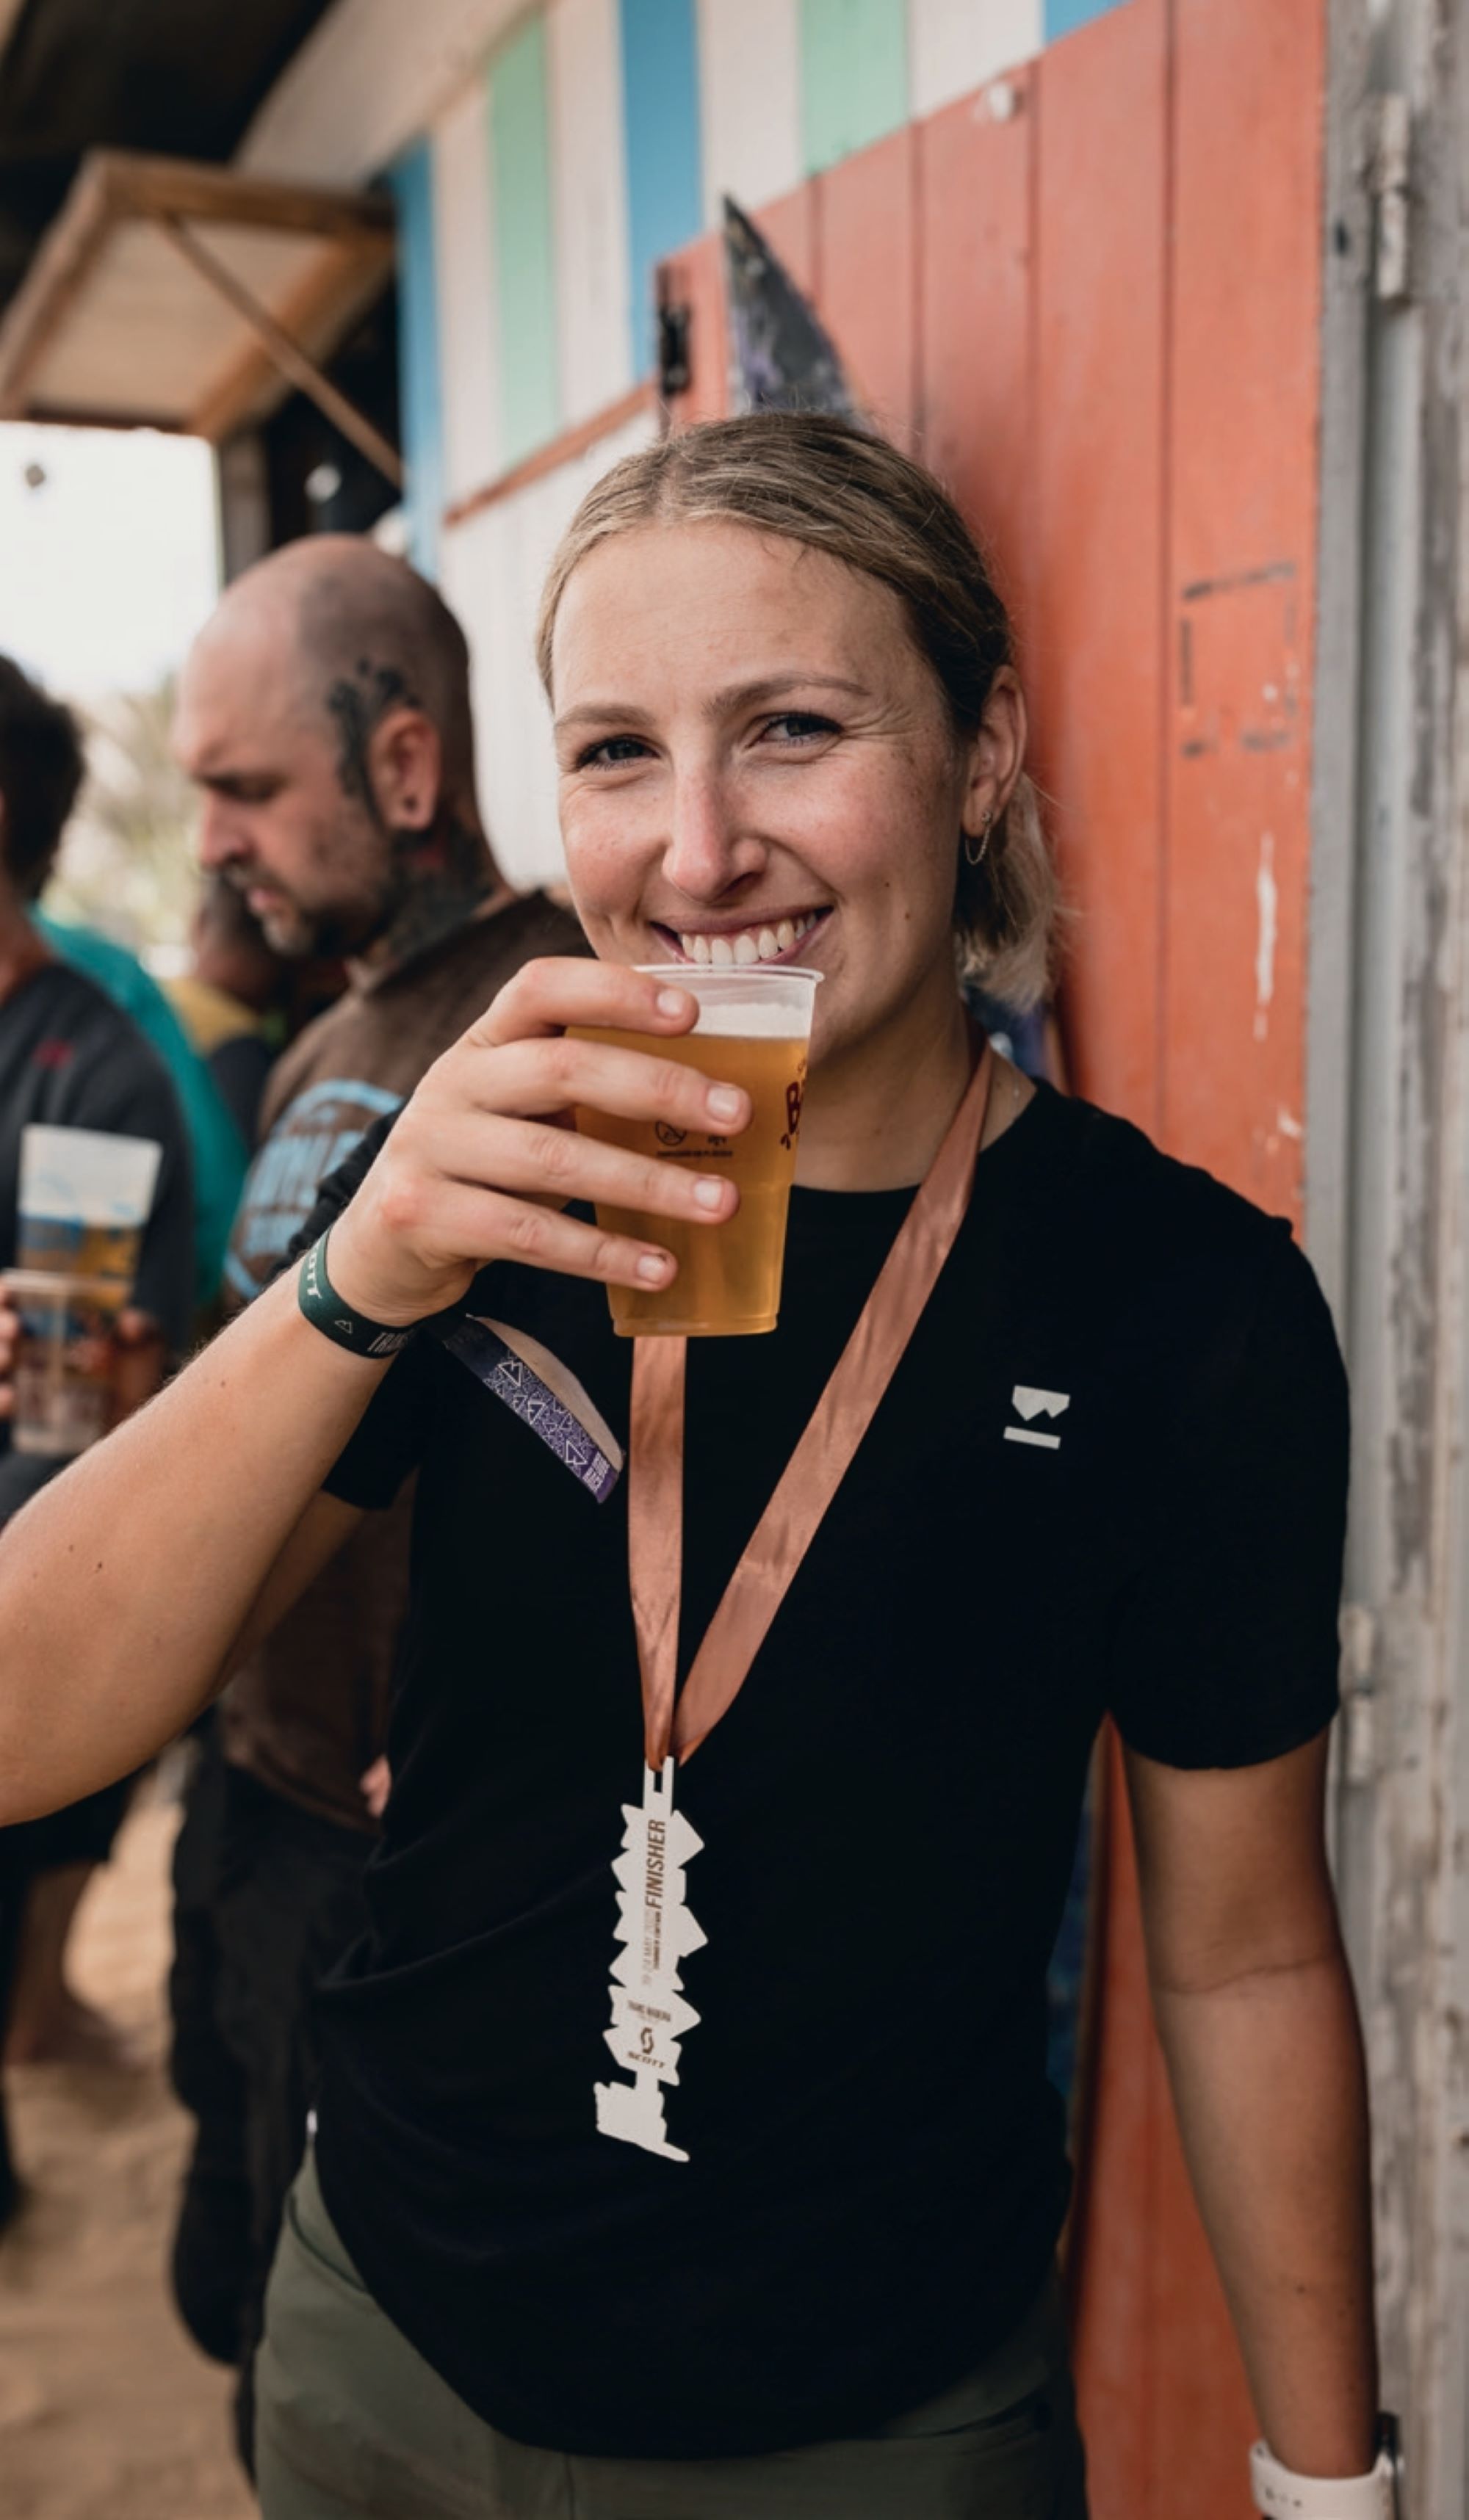
Across all four stages, we were treated to fresh, never-raced trails enveloped by all-consuming rugged coastal vistas, in some cases barren in a way likened to no-man’s land, or Mars (whichever way you’re inclined). After girl party training our way down stages 33 and 34, the relief of reaching the start of Stage 35 after six days of riding was inexplicably good. Honestly—the rest of the day was a blur. I’m not sure if I erased the hike-a- bikes that followed from my mind or if it was the post-race beers on the beach after completely depleting myself of energy and fluids, topped off with copious poncha’s (a Madeiran speciality) that followed, but I was satisfyingly knackered. I ended up finishing 3rd overall in the women’s category— as if completing a bucket list item wasn’t enough of a treat! For the next three days I felt hungover—not from the ponchas, but from finally standing still after six days of nonstop movement.
All in all, this was an absolutely incredible journey from race sign up to the final post stage high- five’s in Porto Santo. If this isn’t on your riding bucket list, make some room and add it now.

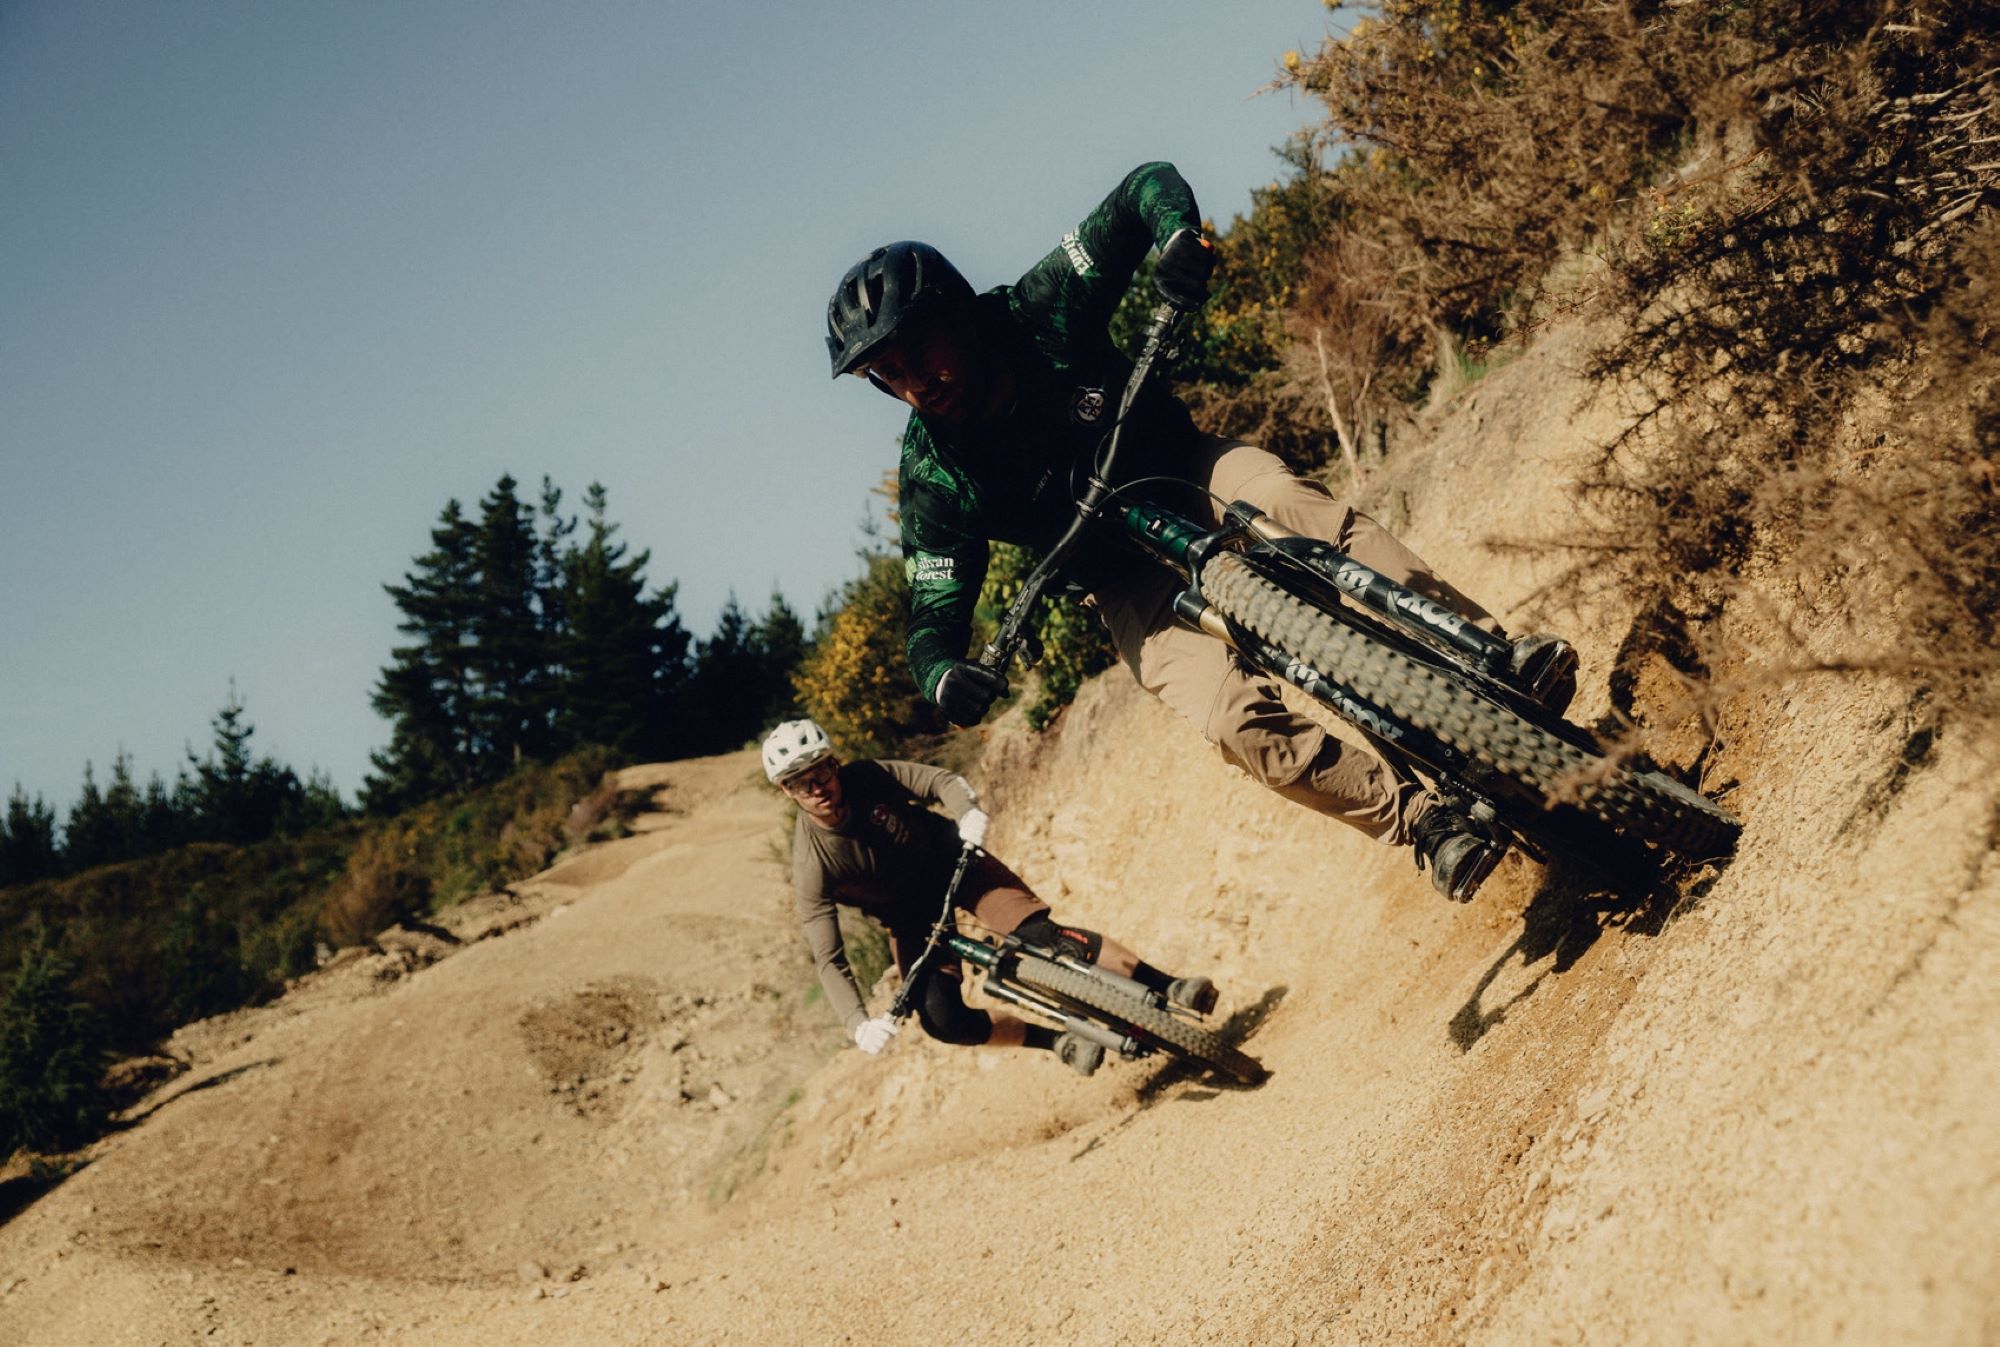
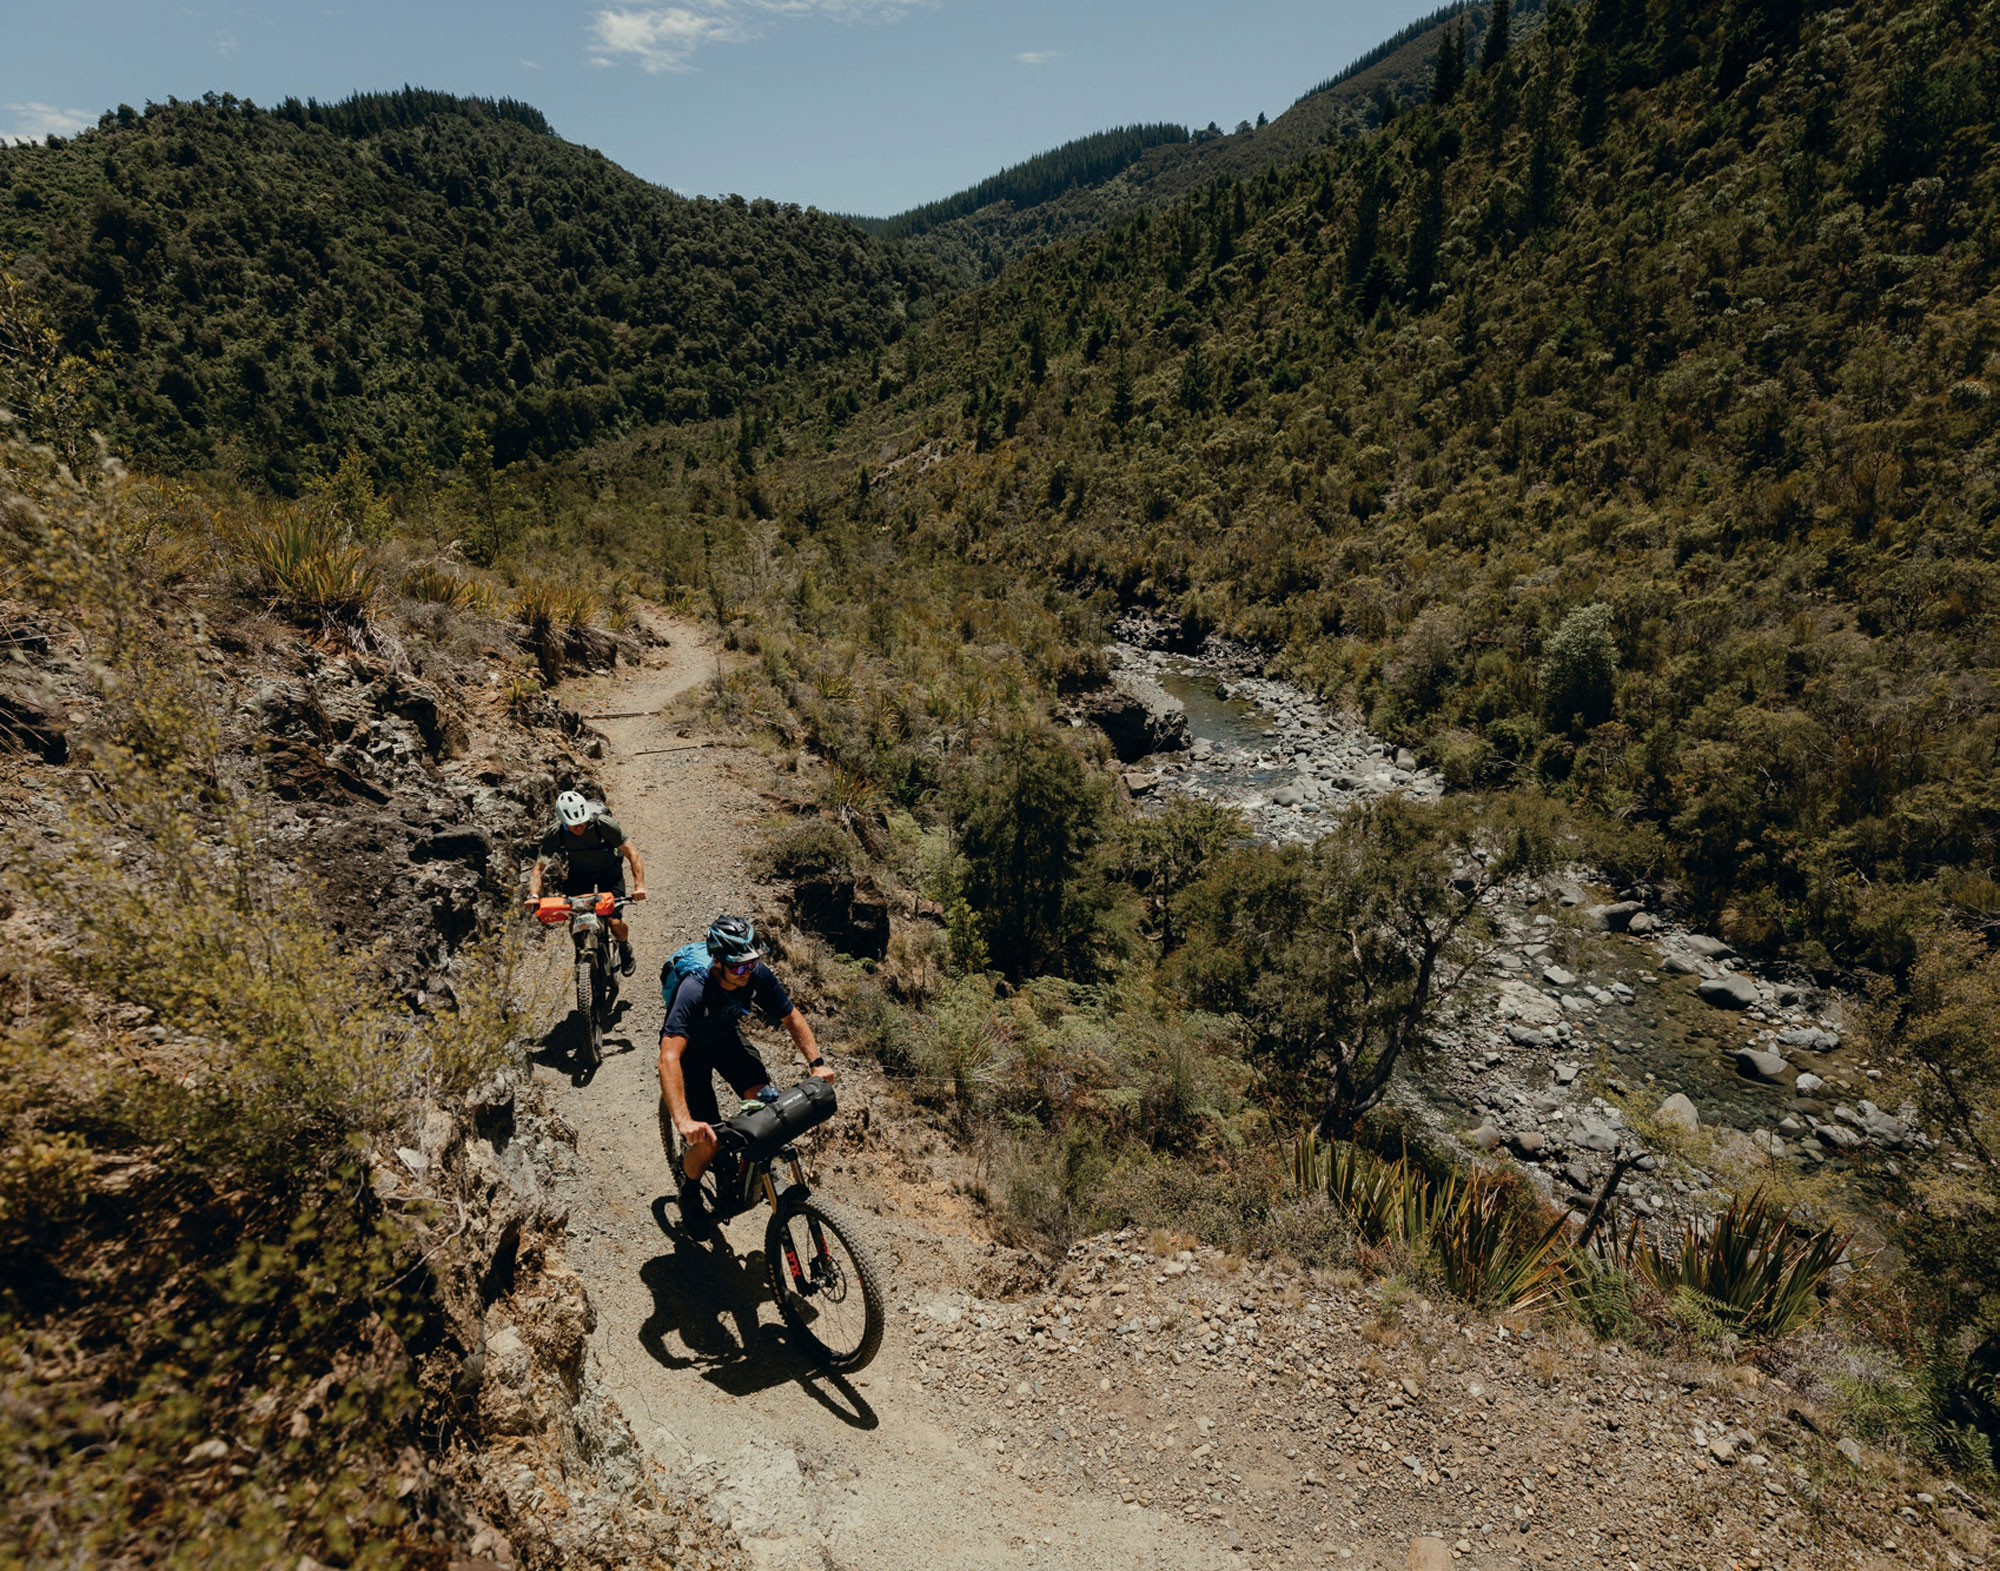
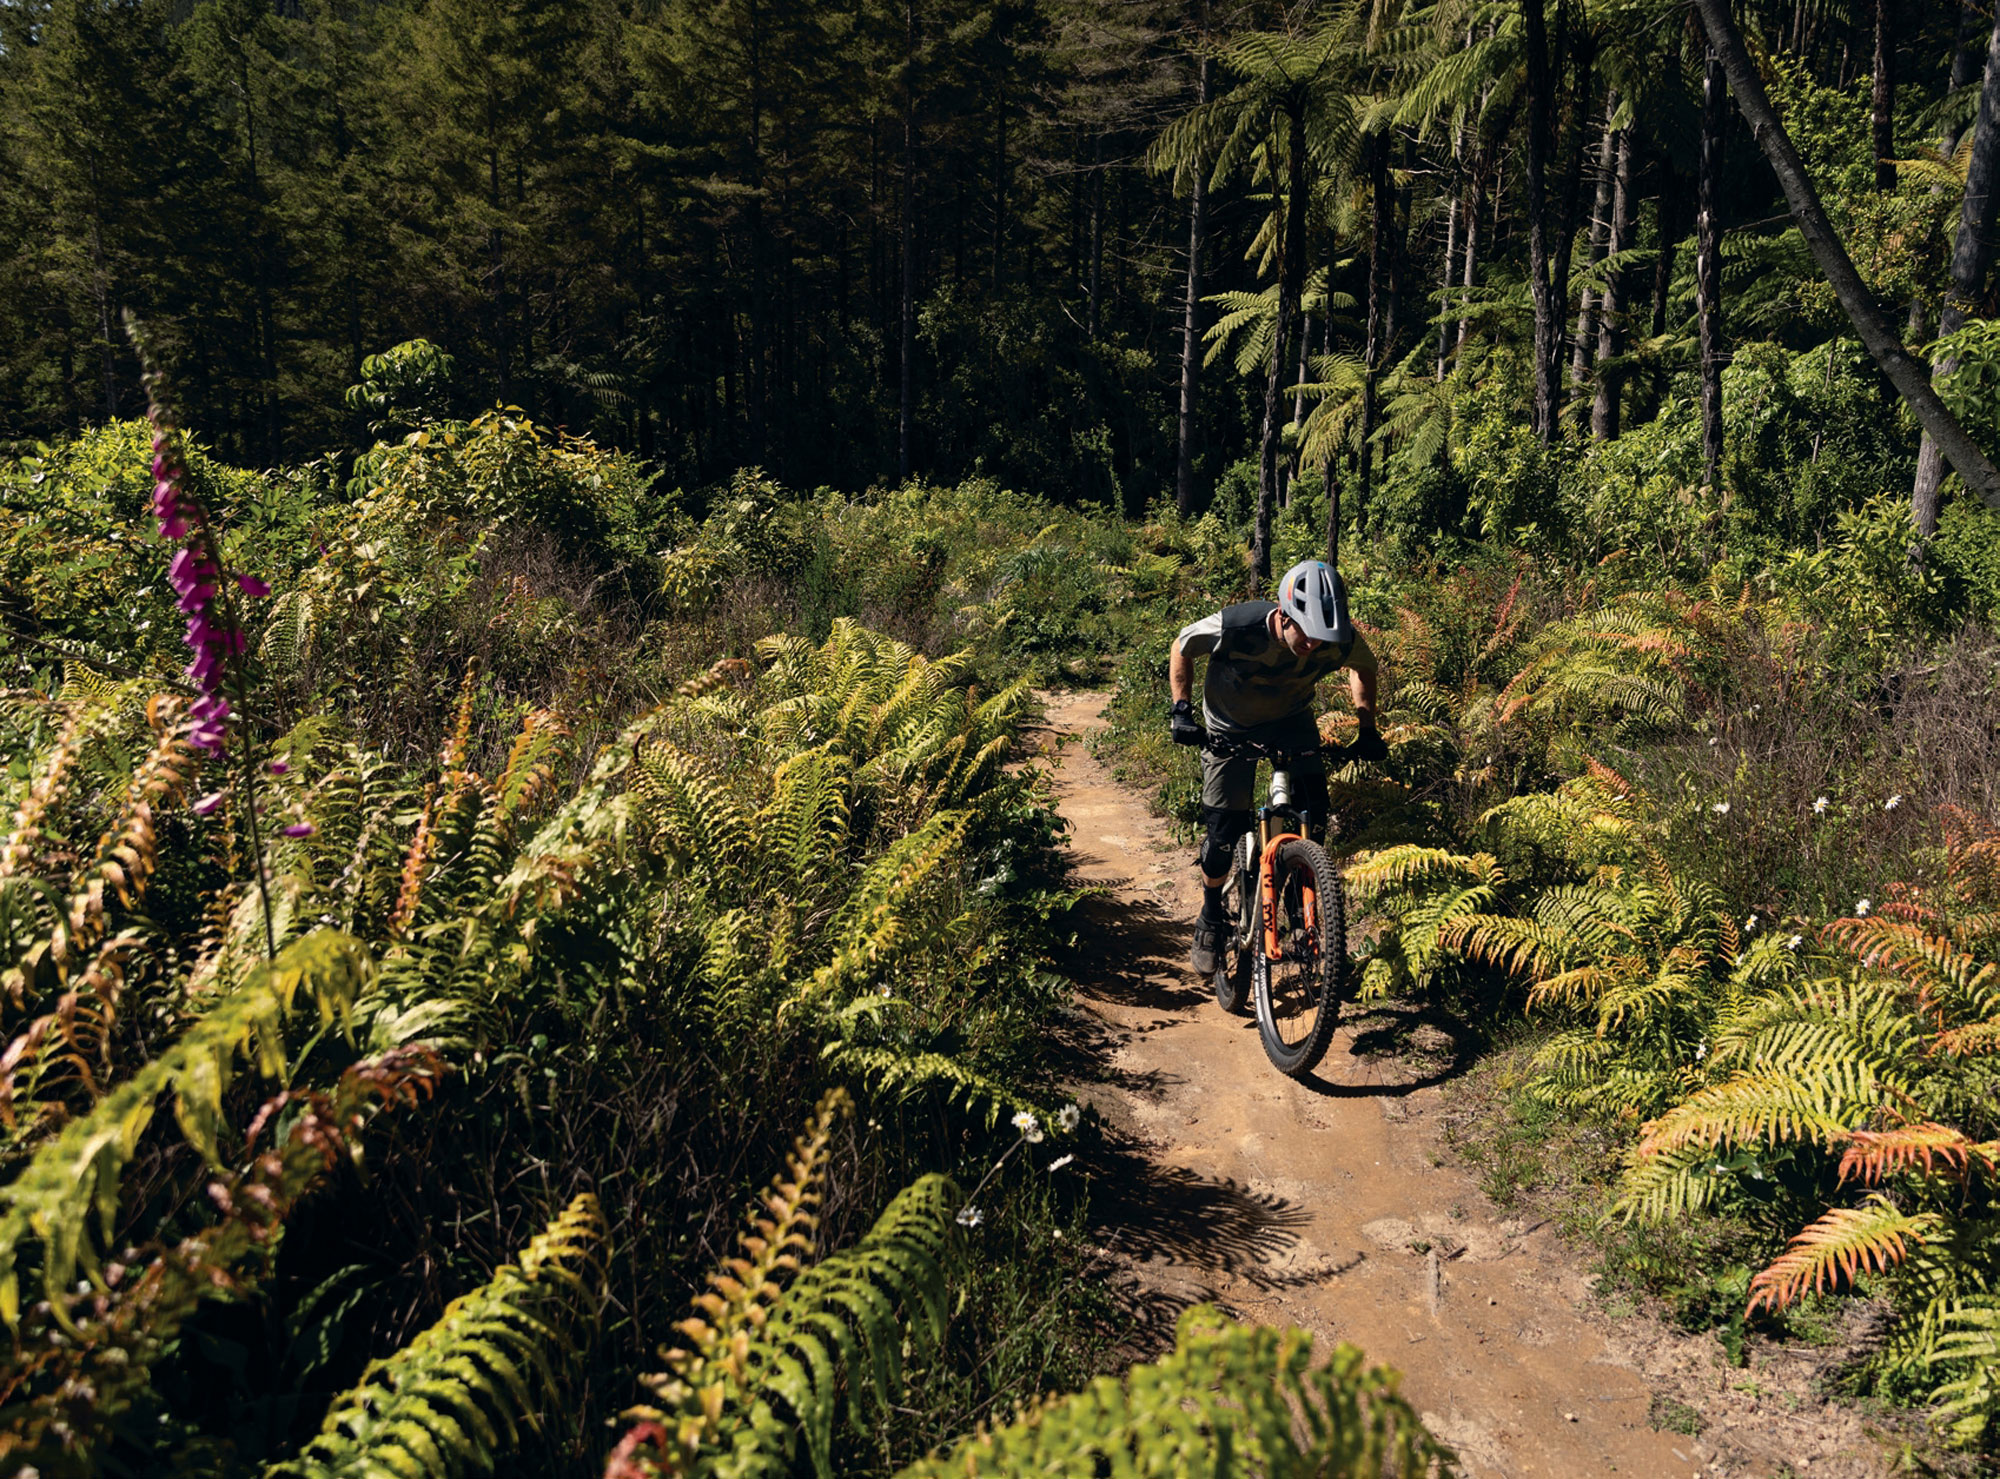
Destination: Silvan
Words Liam Friary
Images Henry Jaine
The history of this land stretches back to the early days, when farmers burned the native bush to clear it for farming, with scrub burning remaining a regular practice until the 1980’s. In the 90’s, the Griffin family purchased the property and after one rotation of radiata pine, began transforming it from a commercial forestry operation into something special for the community.
Trail development began in earnest in 2014 through a partnership with the MTB Trails Trust, with the first stage network completed by 2018. After the final pine harvest in 2019, the Griffin family made the pivotal decision to retire the forest from commercial production and focus entirely on recreational use, amenity and environmental restoration.
Post-harvest, the Silvan Forest team moved into hands-on management, investing in rebuilding and expanding the trail network, with support from local volunteers and sponsors. Their vision extends far beyond just mountain biking—they are intending to create an industry-leading example of native regeneration, seed source enhancement, and strategic placement of exotic species to create a unique and enduring forest and recreation asset for the wider community. Today, Silvan Forest MTB Park boasts over 40 kilometres of single-track trails designed for riders of grades 3 to 6, all of which are accessible year-round and completely free to the public. The forest now features a diverse mix of macrocarpa, blackwood, eucalyptus, and wonderful patches of original old- growth native bush—along with the new plantings and naturally regenerating bush, creating riding surfaces and experiences quite different from anything else in the Nelson Tasman area.

Since those initial trails, significant progress has been made with permanent forest plantings, an expanded trail network featuring several new Grade 5 options that showcase the steeper terrain and original native gullies, creating more seamless linkages between the Silvan and the adjacent Kingsland Forest trail network, and the establishment of new facilities including the ‘Silvan Steps’ amphitheatre as an events venue.
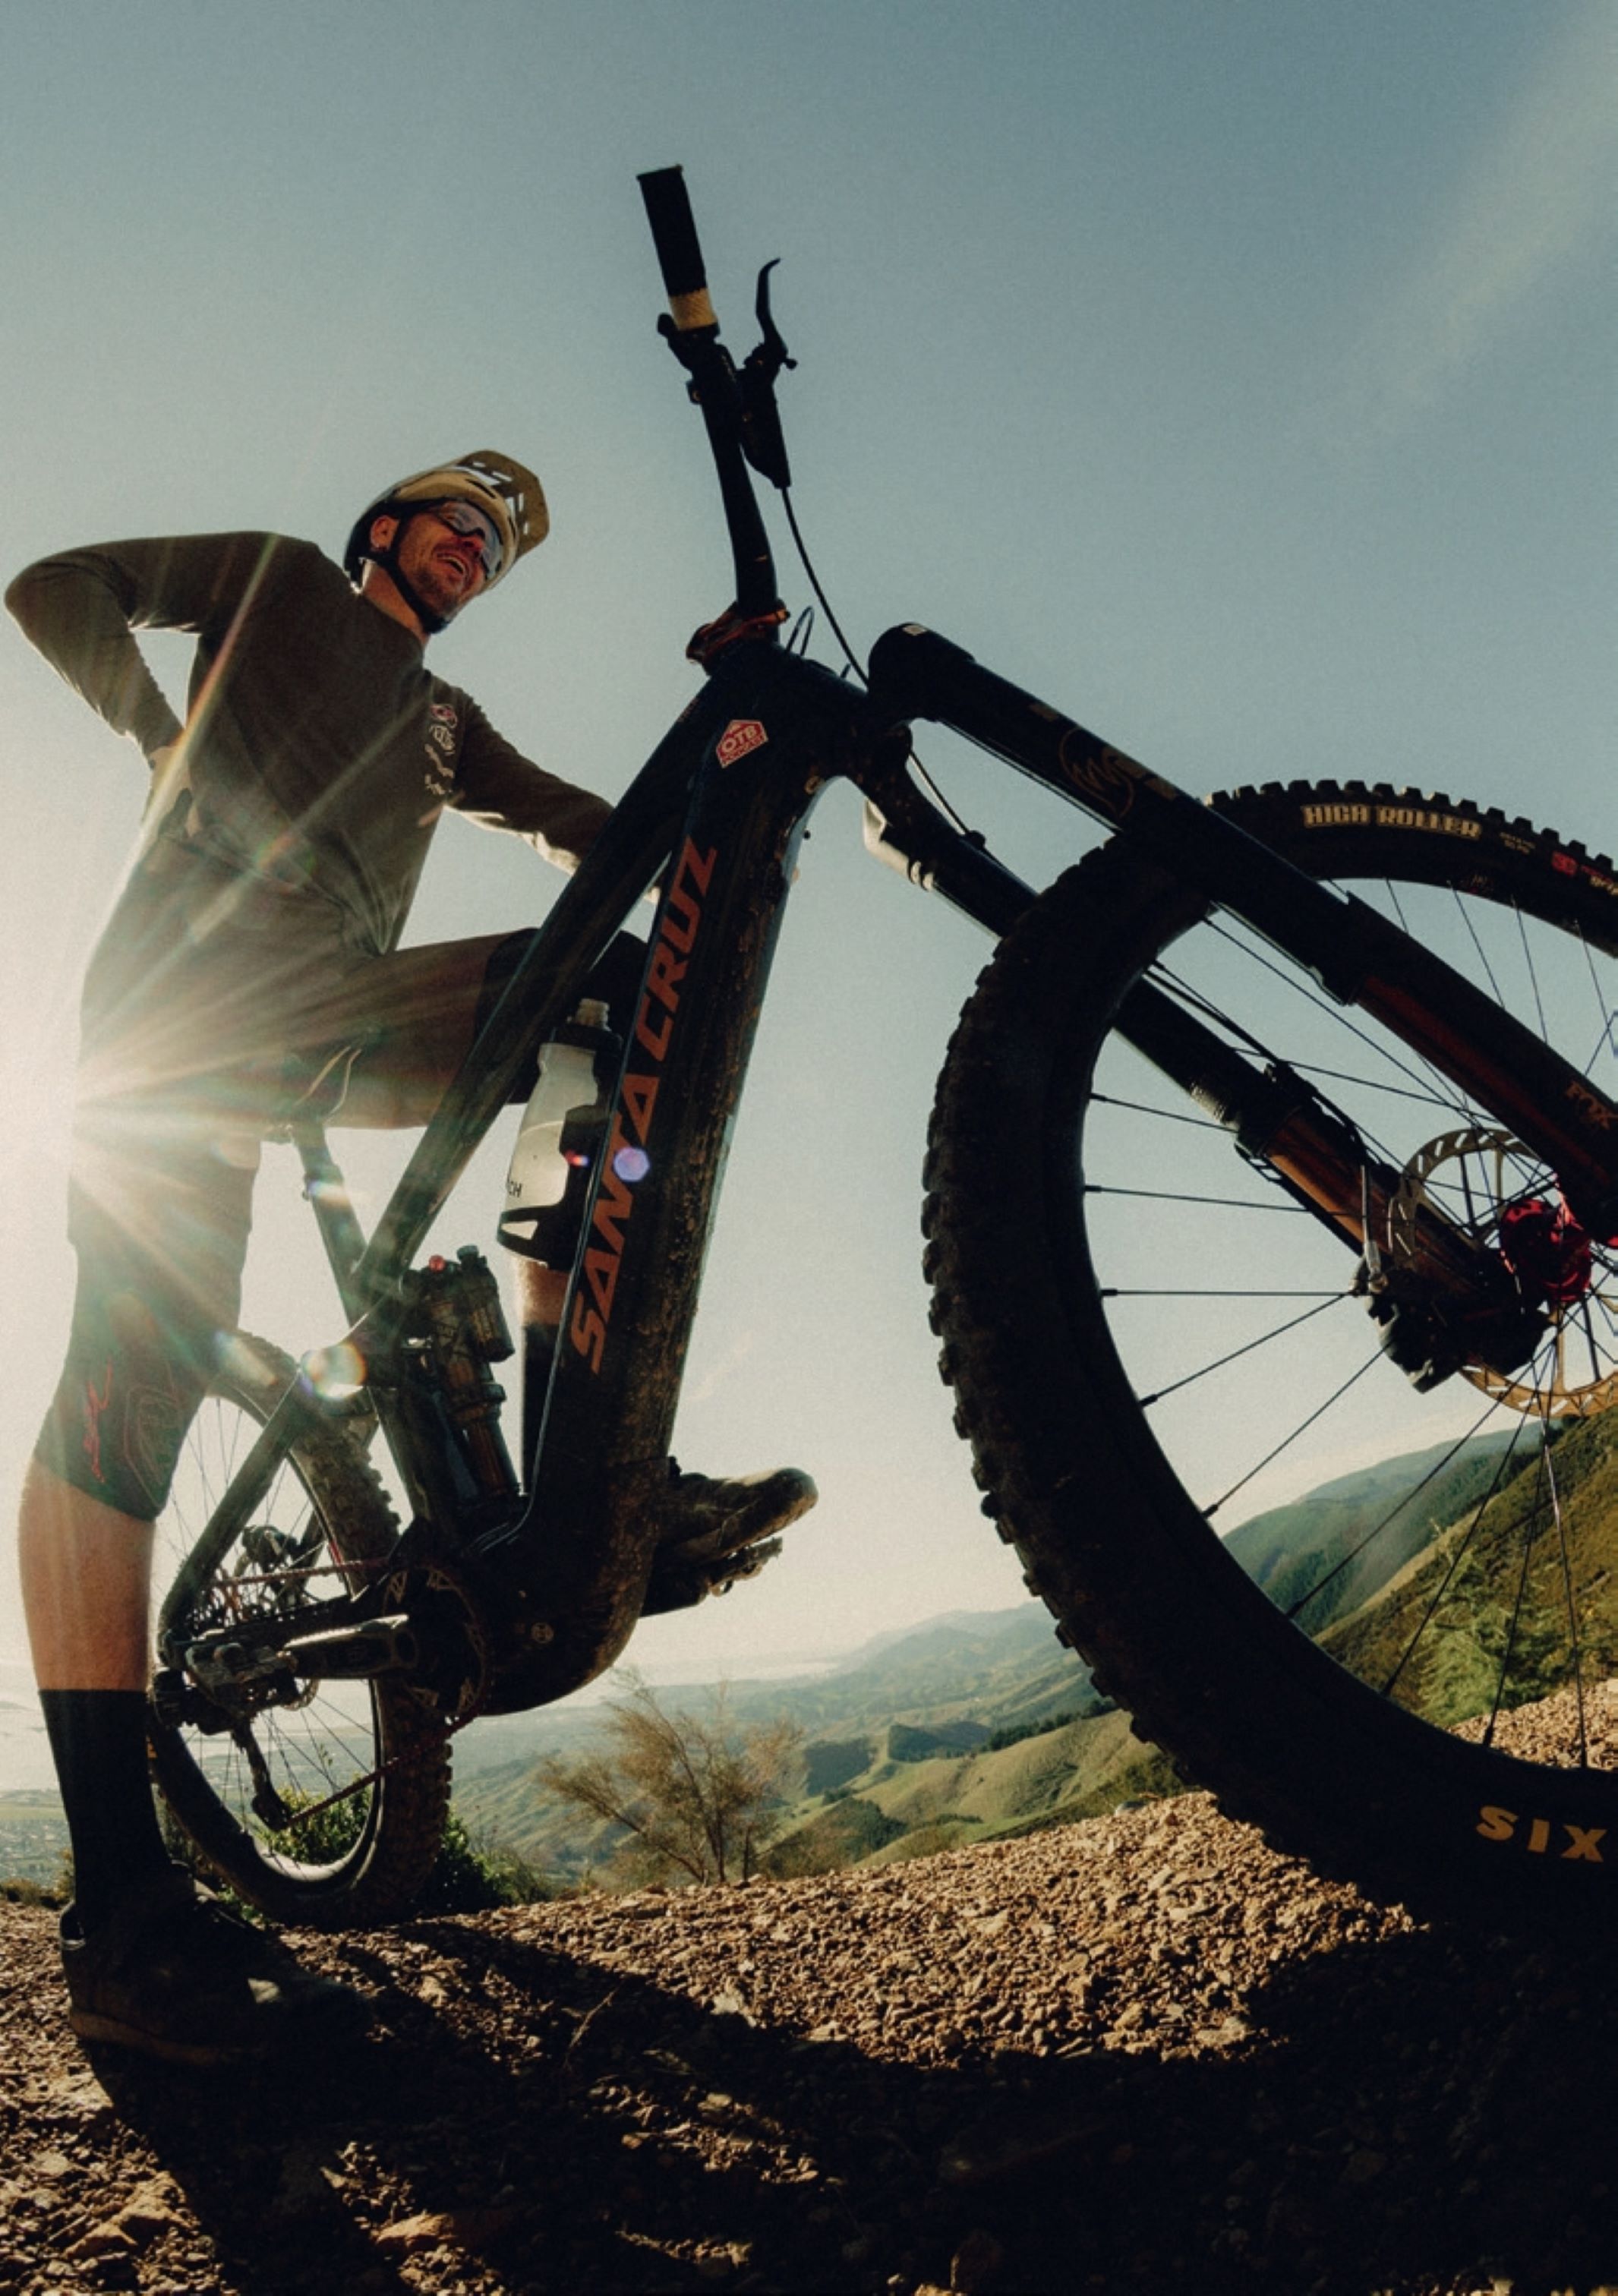
Matt Griffin, alongside his father Rick, has been at the helm of plans to transition the forest and significantly expand the trail network in the coming years. Matt welcomed us down to experience their trails. I was eager to ride this location, which started as a working pine forest and is evolving into a solid destination for biking in Nelson Tasman—aiming to emulate the huge success of other unique local destinations like Cable Bay Adventure Park and the Wairoa Gorge.
I had to dodge floods, and some of the terrible weather patterns the top of the South Island has been battered by, just to get there. This meant our original plans had to be scrapped, and I had to find new dates on the calendar and refresh the weather apps to find a good window. It wasn’t easy in the middle of winter! Luckily, some clear and cold weather was forecasted, so I jumped on the opportunity to make this trip happen. The main crew would consist of Matt Griffin, Kieran Bennett, and myself. Amanda Pearce and Chris Mildon would also join us for one morning, to ride their hand-dug trail, De La Luna—which I’ll expand on later in the piece.


The Riding
The trail network at Silvan Forest showcases remarkable diversity, featuring mixed terrain and carefully crafted trails that cater to all riders’ abilities. The main climbing route—Alpha trail and its various sections—proved efficient and enjoyable thanks to the Santa Cruz Vala I was testing (see the full review in this issue). As the trail winds its way up the hillside, it offers expansive views across Tasman Bay. What sets Silvan apart is its strategic positioning on predominantly north-facing slopes that receive generous sunlight throughout the day. This geographic advantage makes it an exceptional year-round destination, particularly during the shorter winter months when other trails might be shrouded in the shadows and are often damp. The open canopy allows the sun’s rays to dry out the trails creating pleasant riding conditions even in the depths of winter. Even after a week of significant rainfall leading up to our visit, the trails remained in good condition. I particularly welcomed this after a rather wet winter in the North Island.
From the elevated sections, riders can choose their descent based on appetite and ability. The Santa Cruz Vala allowed me to navigate Silvan’s approximately 40 kilometres of singletrack efficiently. The driving trail development philosophy from 2014 has been ‘most of the trails for most of the riders’, so while the core trail network was built around intermediate-grade trails, recent developments have pushed the boundaries to include more challenging options spanning grades 4-6, ensuring progression pathways for advancing riders. The dedicated team at Silvan Forest, led by Matt Griffin and Chris Mildon, alongside the dedicated and unruly volunteer trail builders from the Richmond Hills Trail Carvers, have ambitious plans to add another 30 kilometres of trail within the next five to ten years. Many of these future additions will wind through areas of stunning original native bush, which will add further diversity to the trail network. As the replanted hillsides mature, they will provide a contrast to today’s open, fast- flowing trails, offering riders entirely different perspectives on the same landscape. I believe the diversification of this once-cleared then commercially forested, and now regenerated, piece of land for recreational purposes is a real gem for us and future generations.
Silvan Forest MTB Park delivers a compact yet remarkably diverse riding experience across varied terrain. During our visit, we sampled many of the park’s signature trails, including People’s Choice, Ari Mahoe, Exodus, Goliath, Spittrock, CrankYanker, De La Luna and Jericho, among many others. The trails encountered everything from fast and flowing descents to technical jump lines and tighter, rockier sections. Some trails are gnarly hand-cut from top to bottom, creating that classic, hard, techy riding that is so unique to Nelson. Despite the terrain’s natural steepness, most trails offer a good fall line. You can tell the trails have benefitted from the thoughtful planning of features, corners which ensure speed is maintained and elevation loss is good without being ultra rapid. Nearly all trails maintain those stunning bay views, making even the most challenging sections rewarding. The quality of trail construction and ongoing maintenance reflects the serious dedication that Matt, Chris and the Trail Carvers invest in the park. Several super fun and accessible freestyle sections have also been added over the last 12 months, by Kurt Lancaster and the team from Living Trails, which have ensured even more diversity to the Silvan network, and see scores of kids heading into the park each day after school.
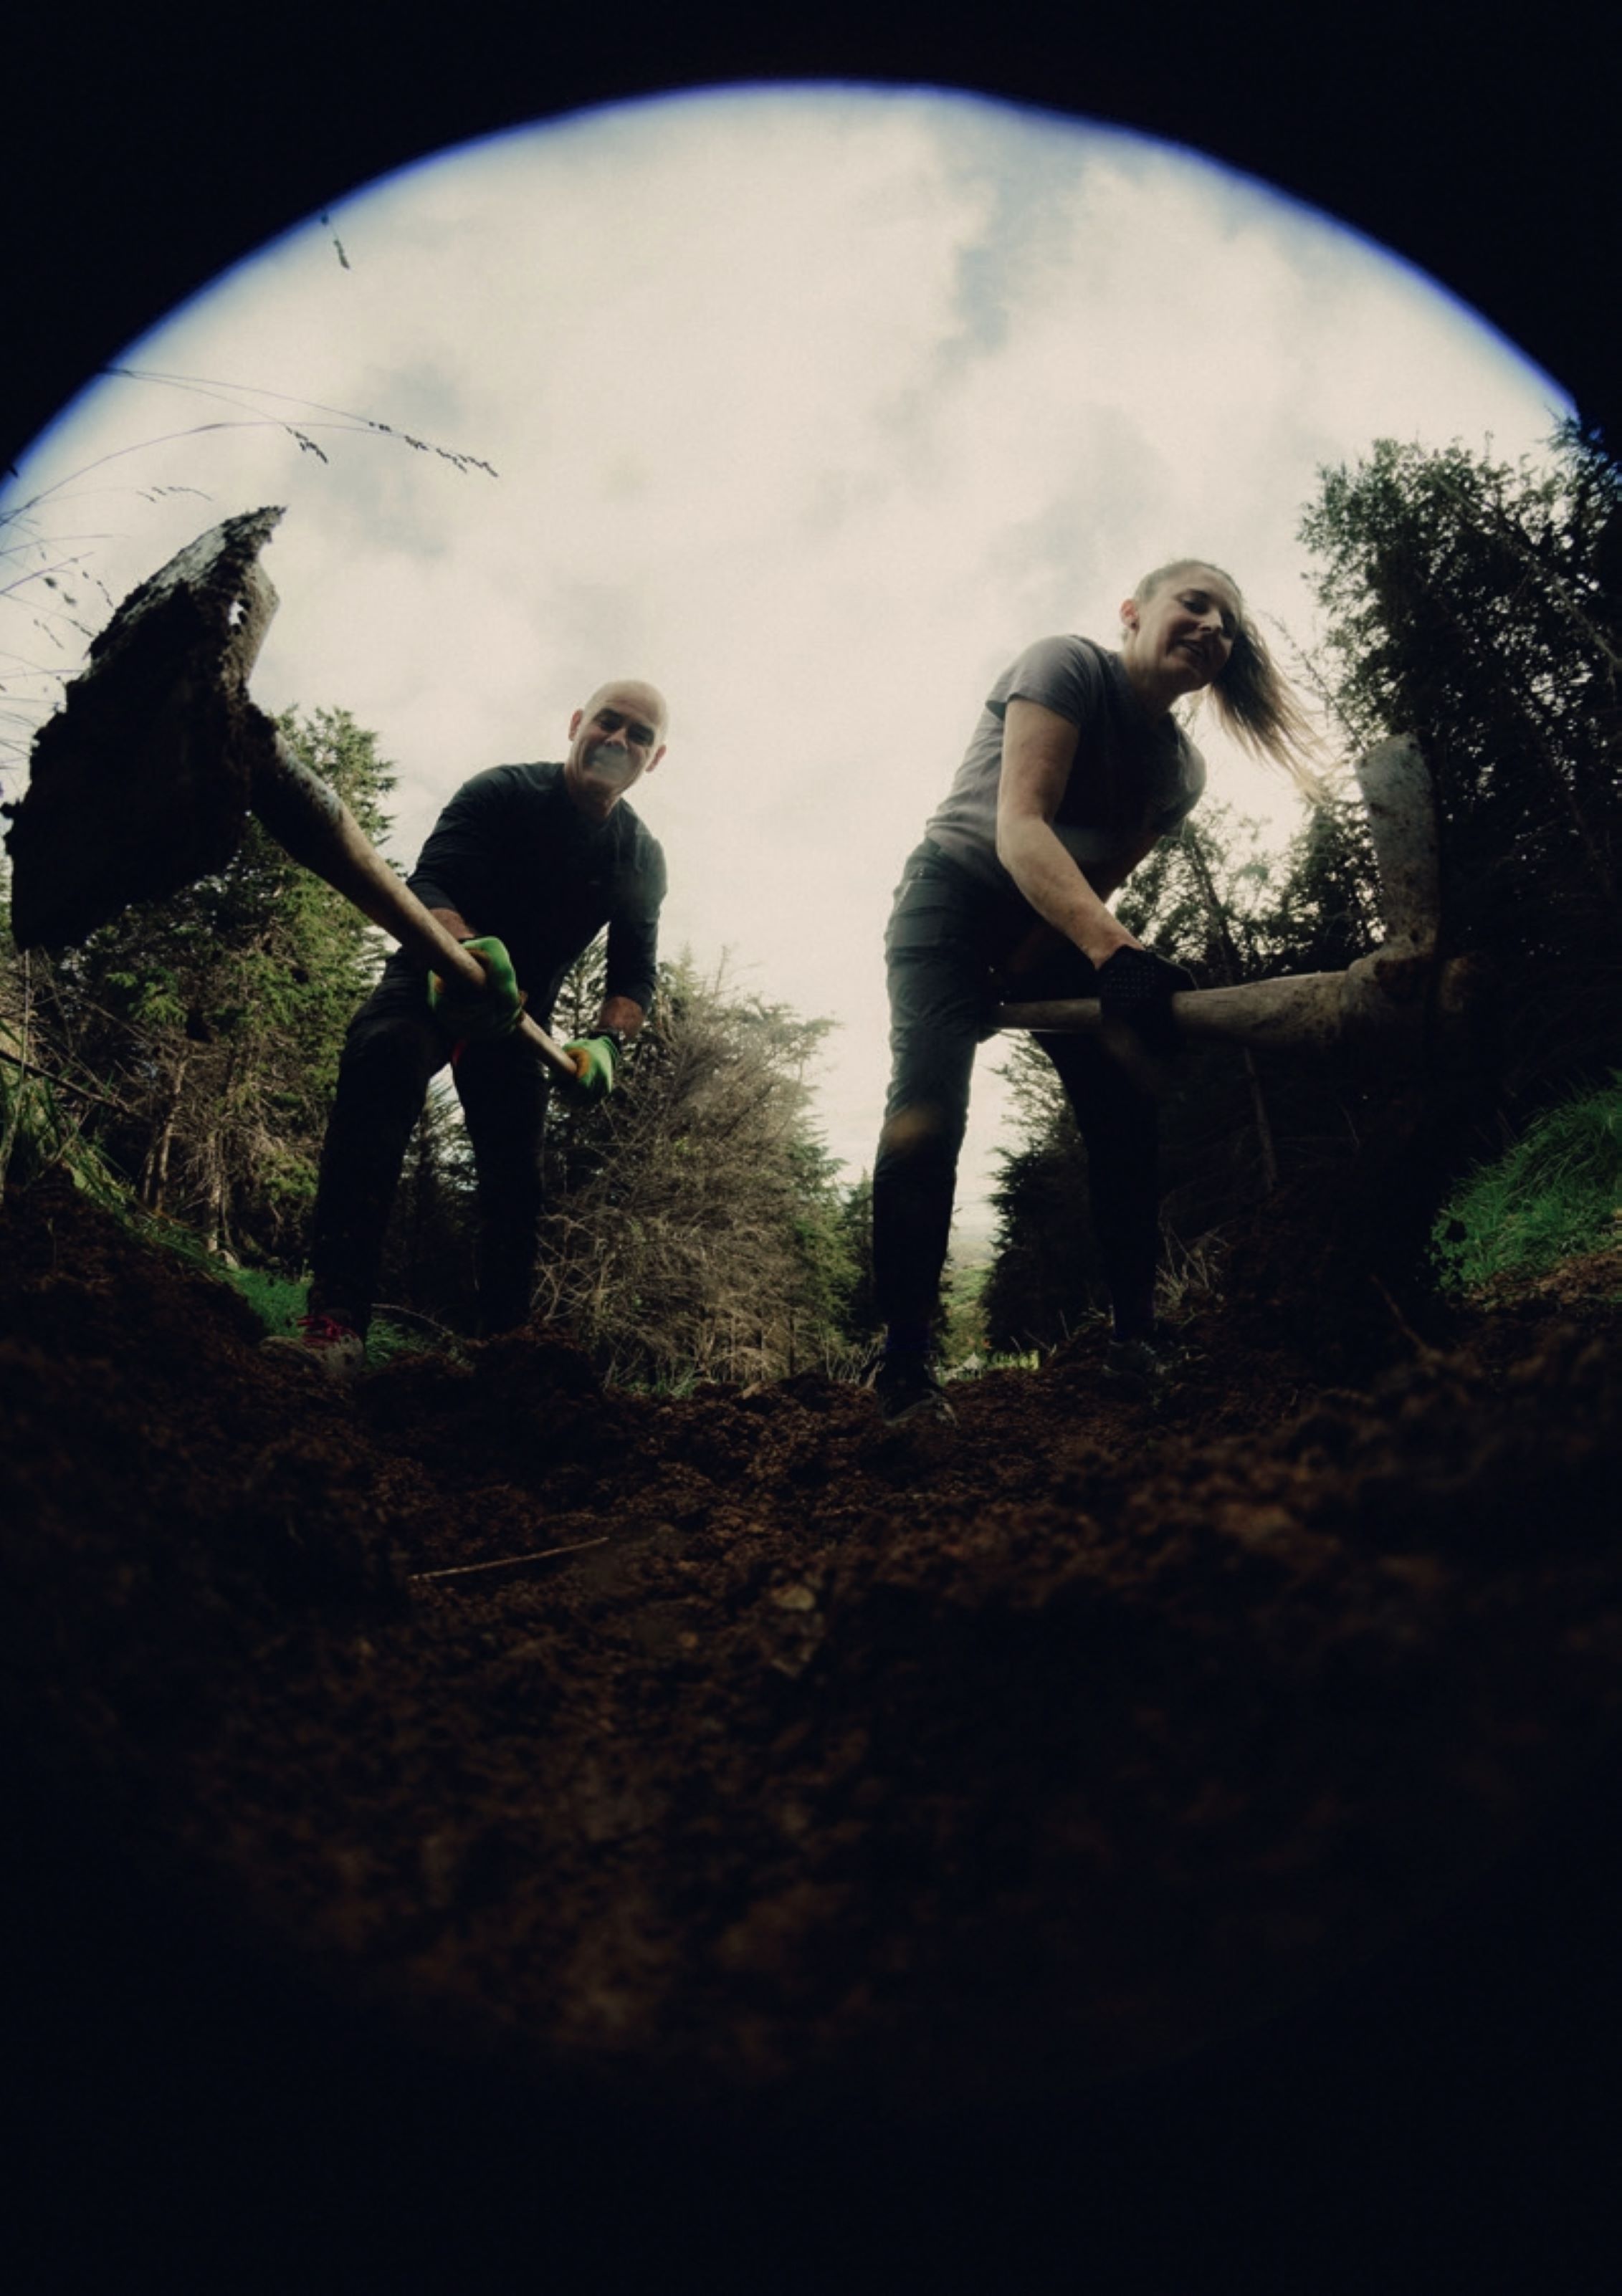
De La Luna trail showcases what can be achieved when passion meets persistence. It first emerged from the Juliana Bicycles NZ trail project during a particularly challenging year for the mountain bike industry—we’ve all heard the stories of the boom-and-bust cycle of the industry during and post pandemic. Instead of getting hung up on those industry issues, the team at Hyperformance Hardware (Juliana Bicycles distributor) decided to put time and effort into building a new trail. This provided an opportunity to channel their energy into something lasting, resulting in the 1100 people- hours of work that went into creating De La Luna.
Leading the charge was Amanda Pearce, Sandra Williams, Mike Stylianou and Chris Mildon (the trail builder and gorse-cutter extraordinaire) who spearheaded this ambitious hand-digging operation. Chris had a strong and loyal core digging team of about eight people around him that were recharged at the end of each dig by baked treats. The trail building crew turned out rain or shine for around 50 weeks, and there were about 80 different people who can proudly say they put some mahi into this trail over the year. The trail demanded new skills and serious physical endurance as the team battled through gorse, clay, and rock across all four seasons, and required a high level of discipline to maintain the grade 4 target. De La Luna is built through some steep, typical Nelson terrain, and while it would have been easier to fall into the dreaded grade increasing fall-line trap, good discipline with maintaining target gradients at every point ensured the right result. The trail’s name, De La Luna, honours Luna, the Griffin family’s black dog, who roamed with us on most of the trails we rode. After one year of hard work and dedication the trail, with a perfect 10-degree gradient, was ready for all to ride.
As soon as you drop into De La Luna, the trail immediately reveals its hand-built character— every corner, camber, and feature carry the essence of handmade craftsmanship over machine precision. The trail’s Grade 4 technical demands become apparent quickly, with exposed sections that require genuine commitment and bike handling skills. There’s something refreshingly honest about the trail. It certainly doesn’t try to flatter your riding—instead, it challenges you to rise to its standards. The hand- cut nature means every one of the 20 turns is slightly different, preventing you from settling into a rhythm and keeping your attention fully engaged with the terrain that lays in front of you.
What makes De La Luna truly special is its diverse character across the 2.1-kilometre descent. The trail opens with those wide, exposed views across Tasman Bay, offering brief moments to appreciate the landscape before diving back into more demanding terrain. As you progress, the trail transitions through tighter, more intimate sections where the hand-built features really shine, before eventually delivering you into some nice native bush sections toward the exit. The trail rewards patience and good bike handling over raw speed.
Perhaps the slump in the bike trade isn’t a bad thing after all, as it could lead to the construction of more trails for everyone. However, a balance between the two would be beneficial. I’m impressed by what a year’s worth of hard graft can achieve. I commend Hyperformance Hardware for making something for the mountain biking community rather than getting bogged down by the state of the bike industry.
Hospitality
There’s accommodation at Silvan Forest with recently constructed rentals at the bottom of the hill. These two bed/two bath units feature sleek fit-outs and stylish furnishings, making grabbing some grub mid-ride or unwinding after days on the trails easy. While the Nelson Tasman region offers plenty of accommodation options, these deliver something uniquely valuable—you’re literally at the trailhead. I particularly liked that there’s no morning drive to get to the goods, no packing bikes onto cars after a long ride. The well-stocked kitchen allowed us to easily prepare meals and fuel up before heading straight back to the trails, creating that seamless flow between riding, resting, and riding again.
When you factor in the region’s exceptional craft beer scene, Nelson Tasman truly shines. The top of the South Island is home to some of New Zealand’s finest hops, and after experiencing Silvan’s trails, we sampled these legendary ingredients at Eddyline Tap Room, which doubles as a taqueria (Eddyline also are the dearly loved primary fluids sponsor of the Trail Carvers). The place was bustling on Friday night—always a good sign—with a relaxed atmosphere that perfectly complemented their excellent beer and delicious food. Sitting there, post-ride, with a cold beer in hand and food arriving at the table, I realised that it’s not just about the trails—it’s also about the people who surround and support riding culture. Sometimes, the best part of a riding destination isn’t just the trails themselves, but how you connect with the people behind the scenes who make everything seamless for us to enjoy. Nelson Tasman has a very high concentration of trails and a very engaged riding community, which is evident every time I visit here.
What the Griffin family and the local community have created at Silvan Forest goes well beyond just another mountain bike park. They’ve transformed a working pine forest into something genuinely special: a 40-kilometre network of thoughtfully built trails that showcase both the natural beauty of the Nelson Tasman region and the potential of community-driven trail development. The transition from commercial forestry to recreational haven tells a story that’s becoming increasingly relevant as other local (and national) landowners investigate alternate uses for steep terrain close to residential populations. As historic uses become less viable, landowners are choosing a long-term strategy with a community focus, rather than short-term profit.

The riding itself delivers on multiple levels. Those north-facing slopes aren’t just a sun trap—they enable pleasant riding all year round, especially during winter riding conditions when other locations could be dark and dank. The trail network’s continuing evolution from intermediate- focused routes to the current mix spanning grades 3-6 means there’s progression available, whether you’re starting out or pushing limits. Silvan Forest MTB Park offers a variety of trails, each with its own unique features and these readily complement the wide range of excellent MTB options in the wider region. Even with only a few days, I was able to experience a wide range of Silvan’s trails and will be venturing back.
Perhaps what impressed me most was how everything connects seamlessly. The trailhead accommodation means you pedal from the front door, the well-maintained trails reflect serious ongoing investment and commitment, and even the local scene—from Eddyline’s craft beer to the broader Nelson Tasman riding community—feels aligned with what Silvan represents. With plans for another 30 kilometres of trail development over the next five years, Silvan Forest is clearly just getting started. The vision of combining native regeneration with world-class mountain biking creates a template that other destinations would do well to follow. Sometimes the best riding experiences aren’t just about the trails themselves, but about finding places where everything from the terrain, the community, and the vision comes together perfectly. Silvan Forest MTB Park delivers exactly that kind of experience.
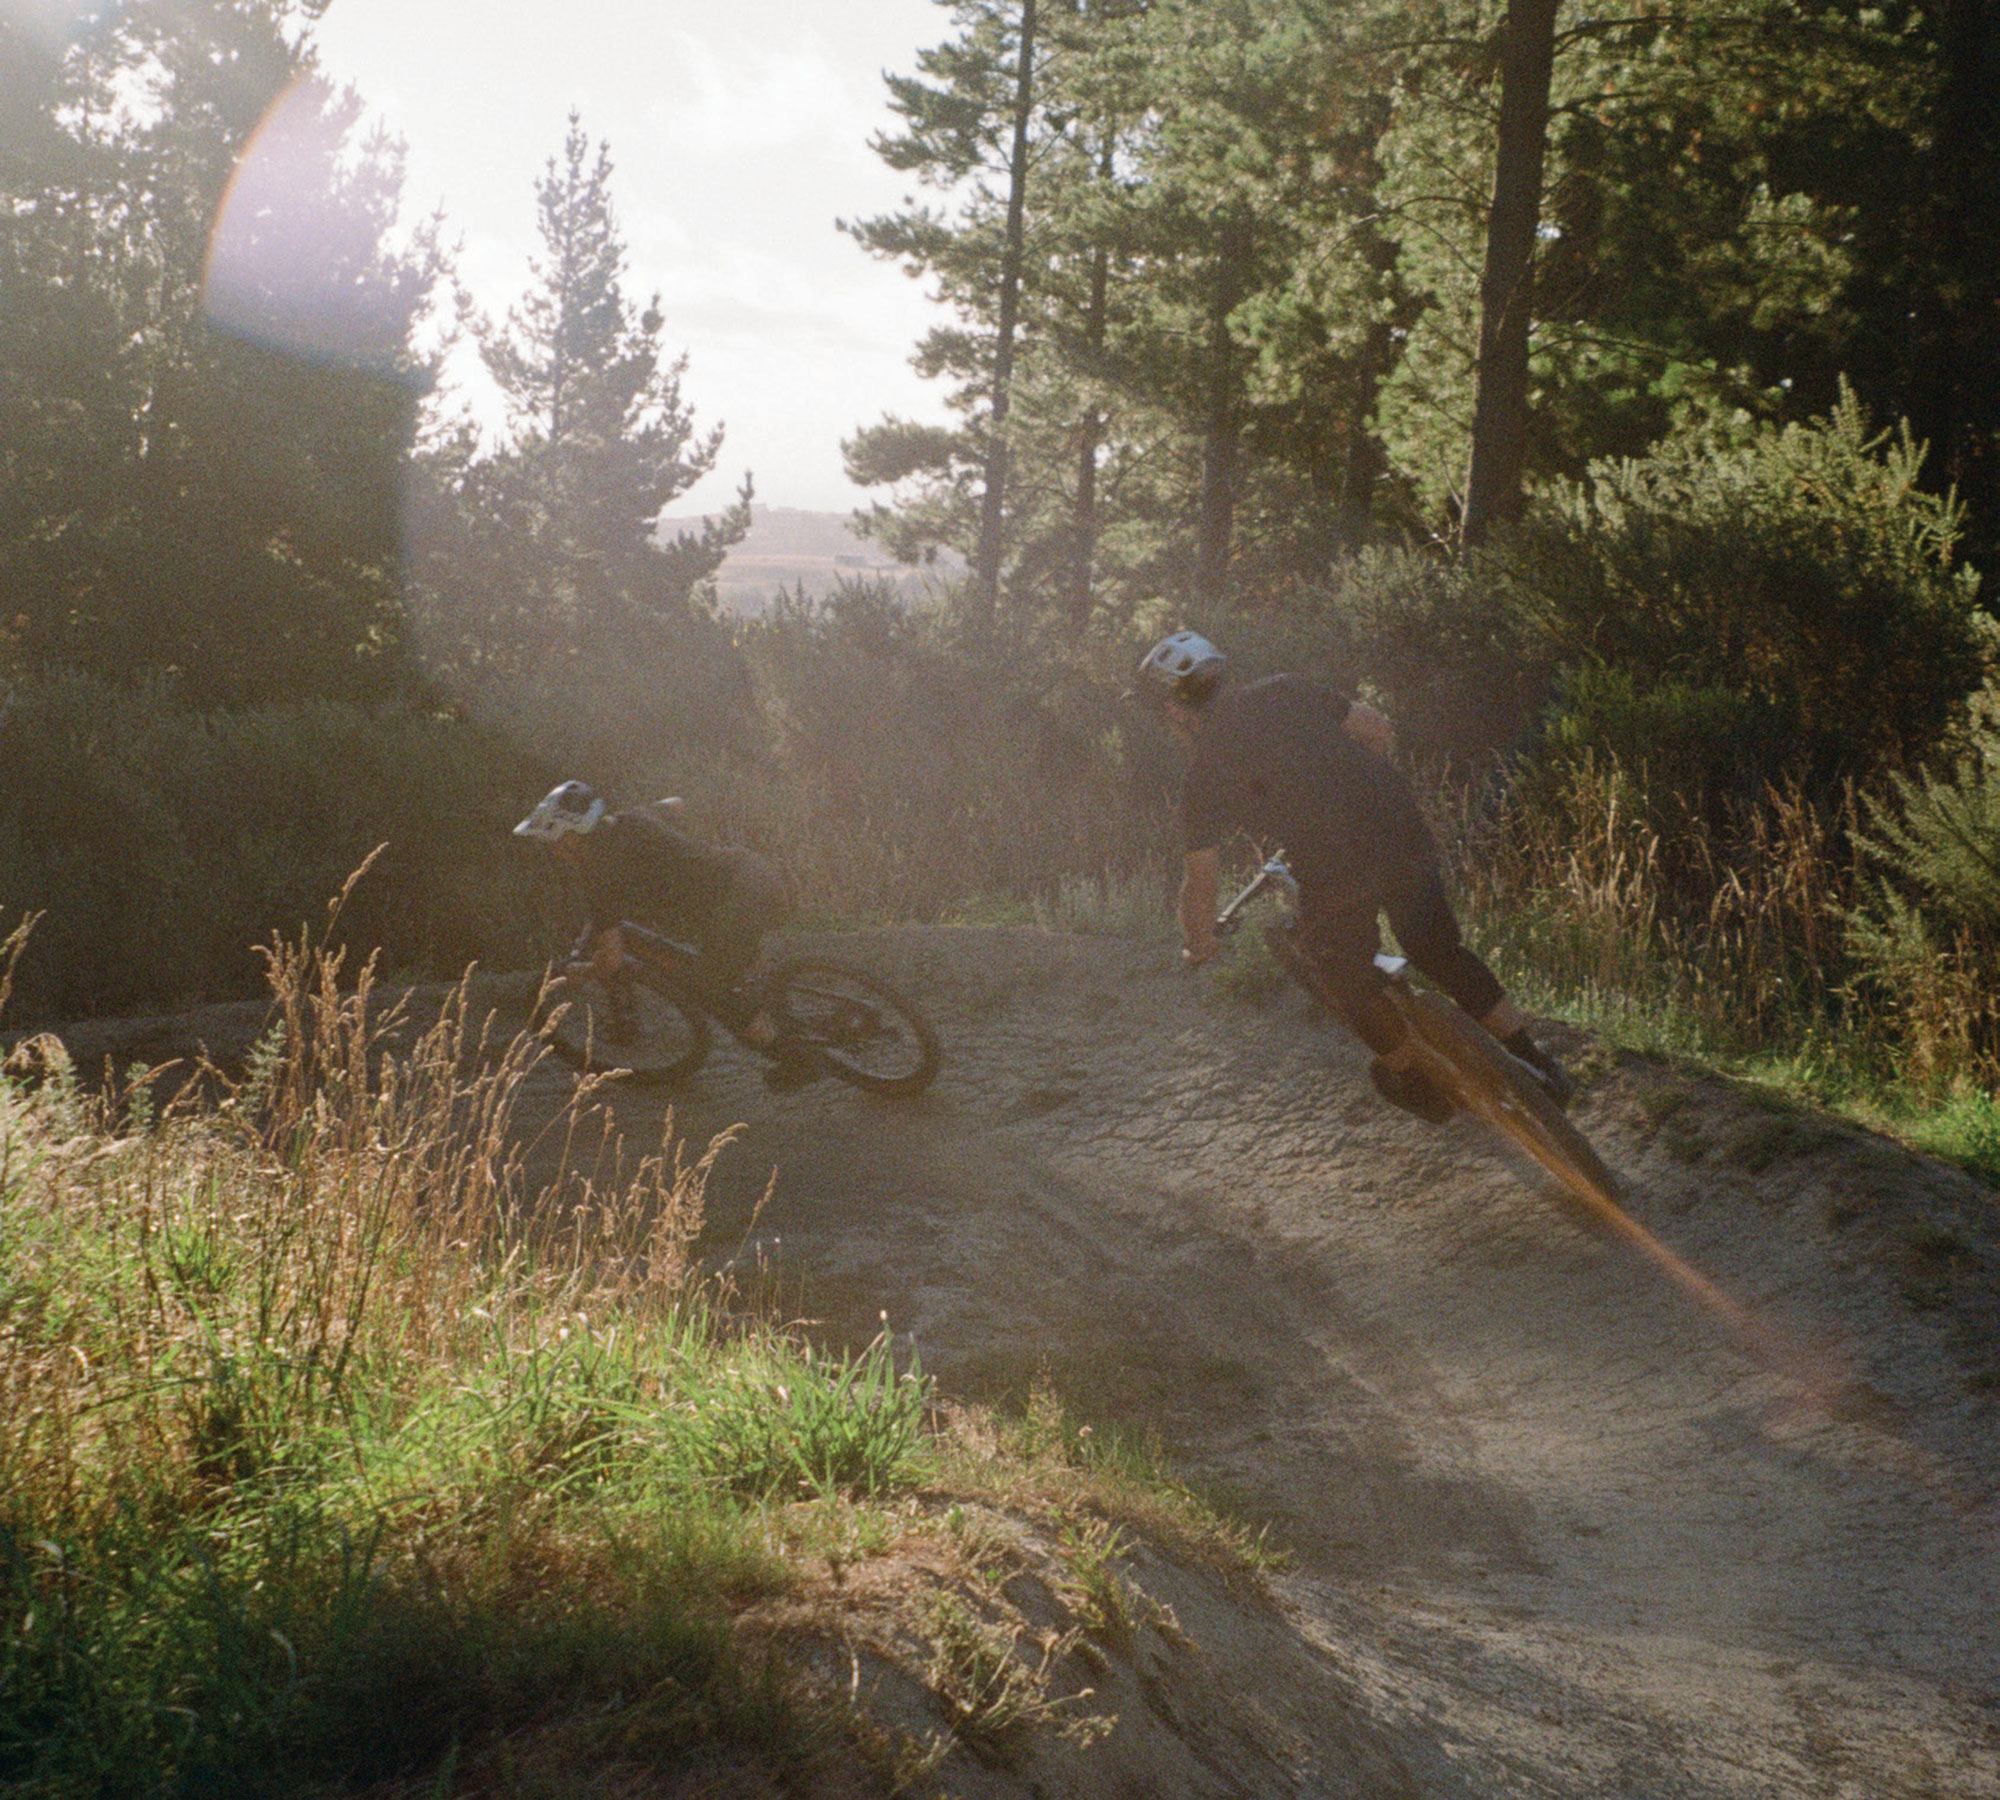
Crankworx Summer Series
Words & Images Liam Friary
The magnetic pull of Aotearoa’s southern landscape never fails to captivate my spirit. When the invitation arrived to journey to Christchurch for the Crankworx Summer Series, there wasn’t so much as a moment’s hesitation in my response. I packed my gear and threw in a 35mm point-and-shoot film camera – an Olympus MJU II – to capture it.
The thriving mountain biking community in Ōtautahi continues to expand impressively and leaves me in awe each time I return. Within hours of touching down, I found myself pedalling up the Port Hills and into the trails of Victoria Park; it wasn’t long before I was lost but, luckily, a smartphone makes pinning locations easier. After that I stayed not far from the back wheel of the local guides. The hours flew by and as the sun dipped we headed for some grub and beer at Moon Under Water. True to form, the place was absolutely chocka, with barely room to squeeze through the animated crowd of riders and locals. The telltale collection of mountain bikes stacked haphazardly out front proves this is indeed the place where the biking community congregates.
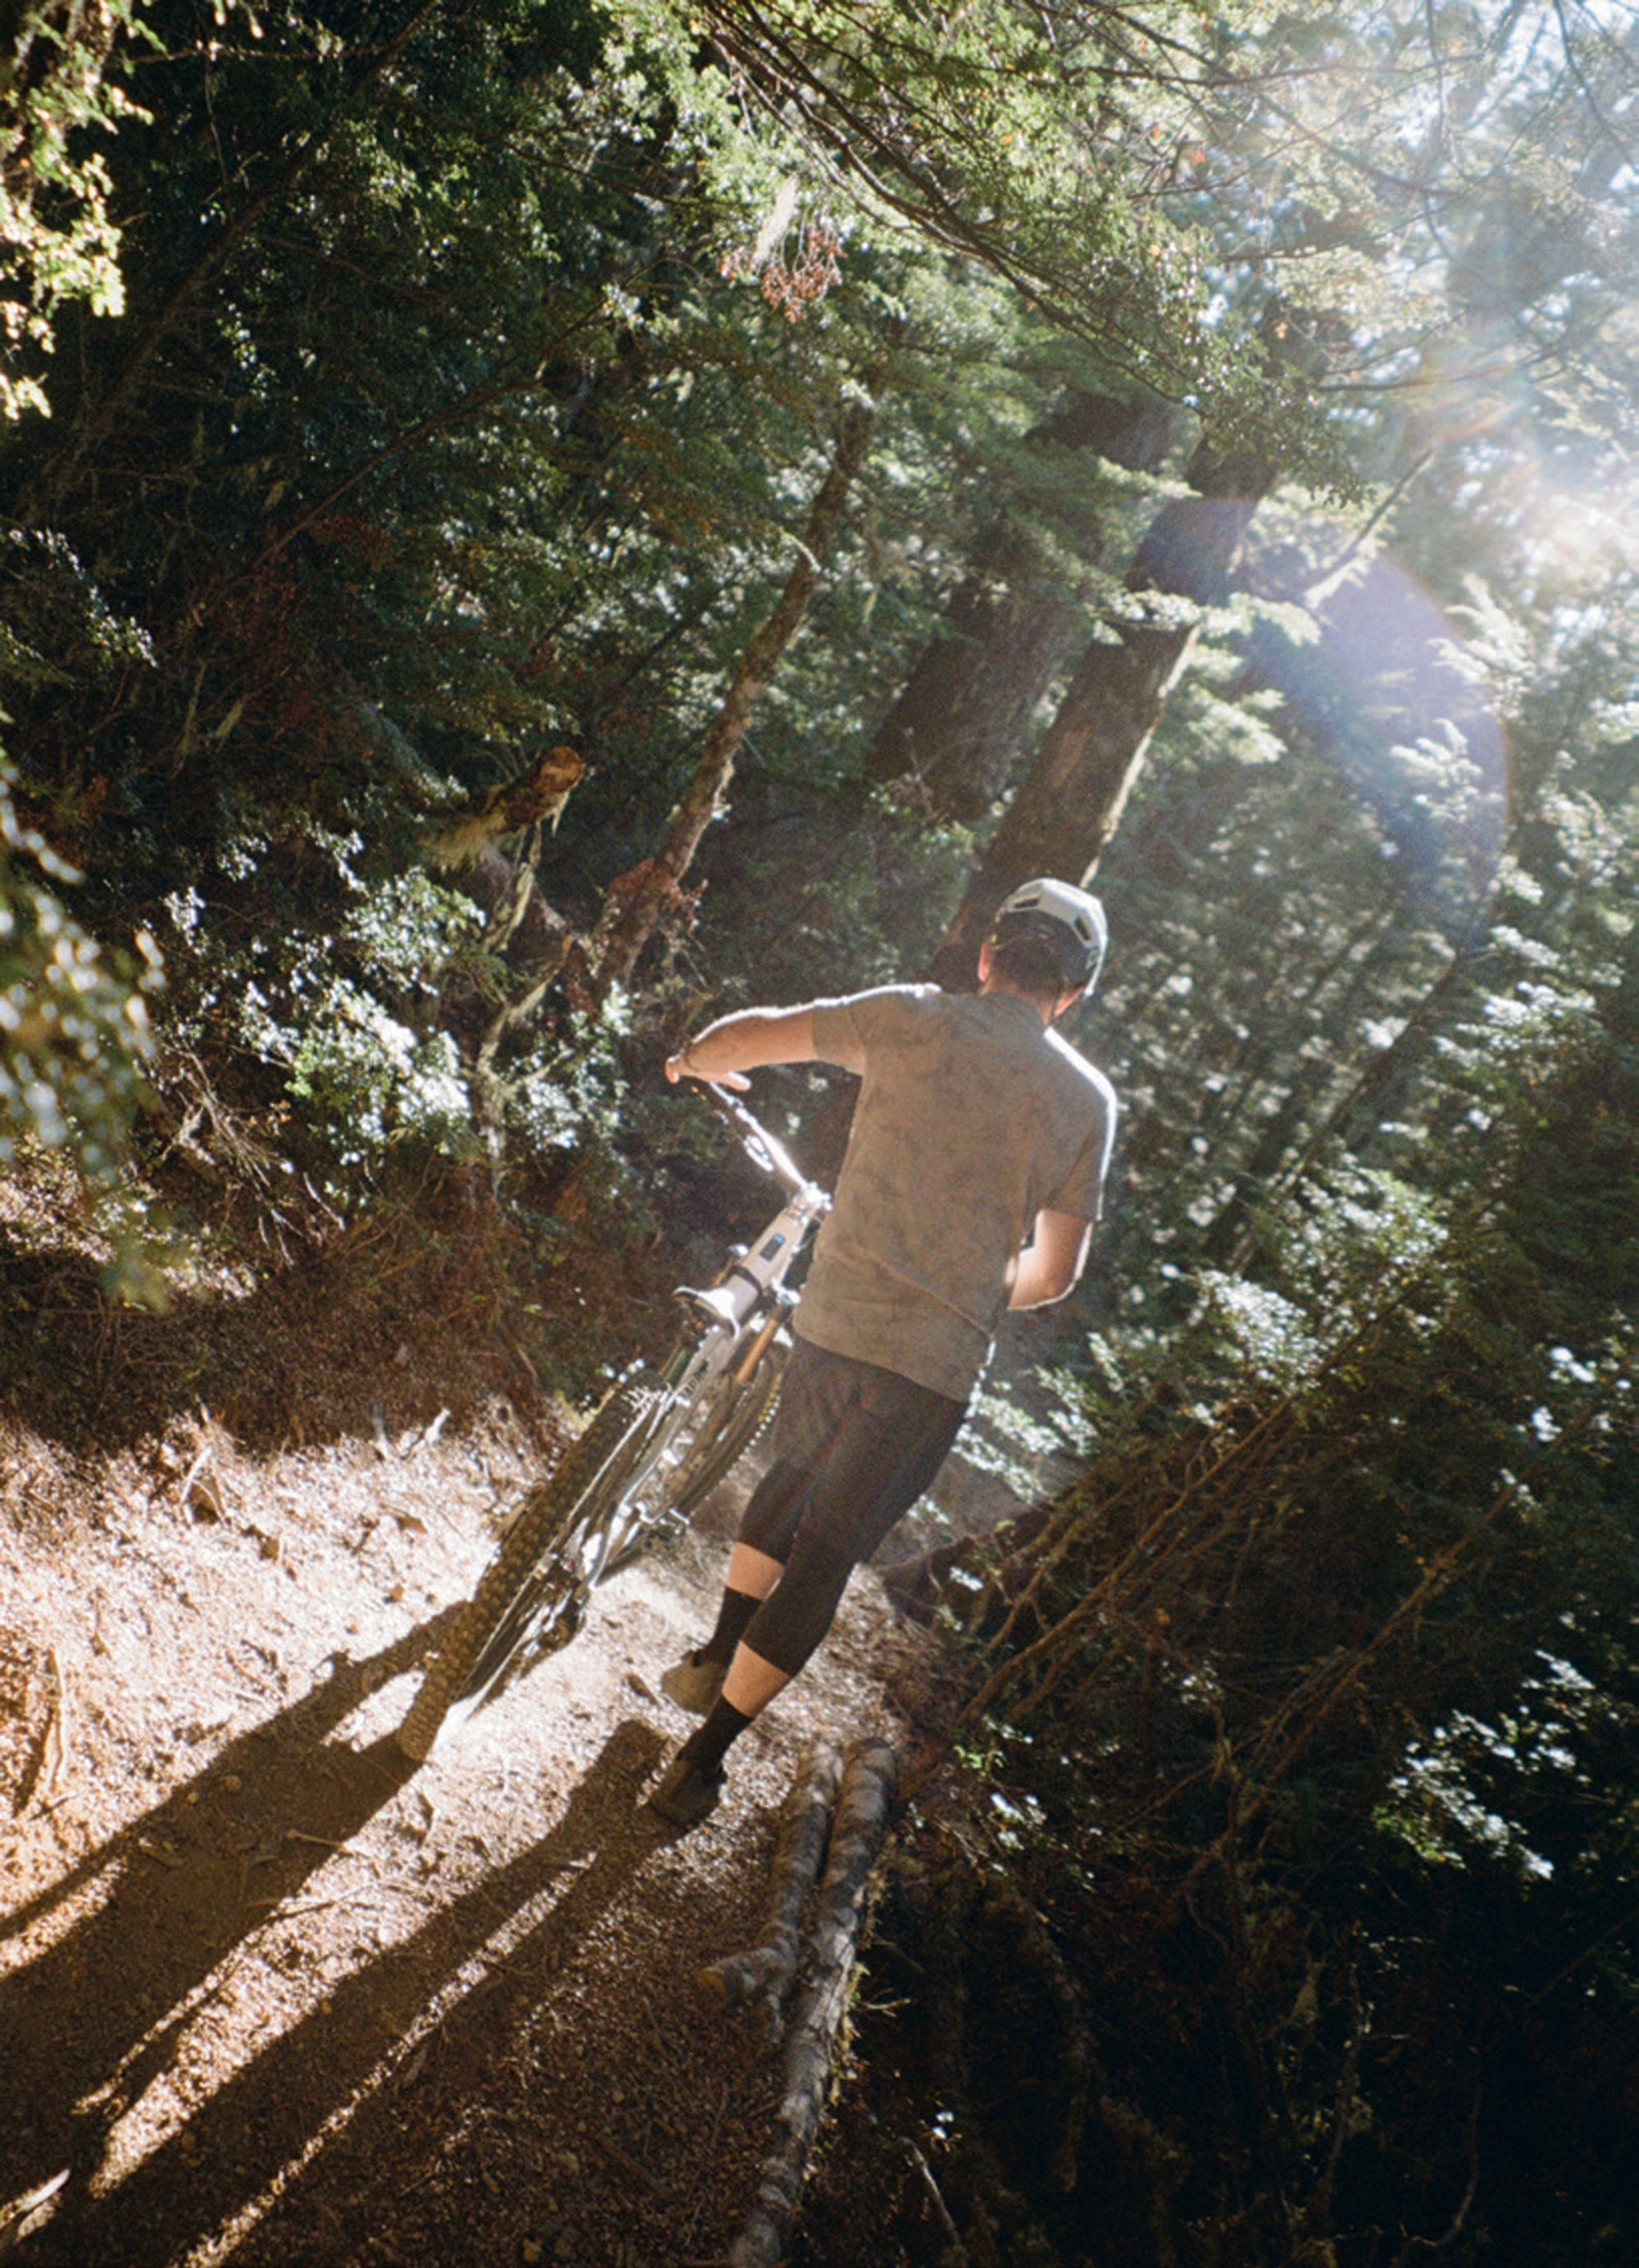

Before immersing myself into the Crankworx spectacle, I ventured deep into the backcountry. I like to ride before I watch riding as it gives a good energy. The alarm screamed, I ran a quick shower, and we were off before the first light of dawn—heading out to Craigieburn for a couple of hours of riding. The best way to get the most out of the trails is on an eMTB so, with the help of a local guide, we did the ‘classic hits’ of Craigieburn. It was so damn lush through the beech forest, with the mountains peeking out every so often. The trails keep you on your game with technical rooted features, exposure, and flat out fast sections—where I was hauling a bit too much at some points. Towards the back end of the ride, we filled our bottles with water from the river and washed our faces. The stoke level was high as we pedalled back and I cracked up when my eMTB ran out of juice just before reaching the truck. The legendary Sheffield Pies warranted not one but two visits, to fuel and refuel my energy stores. After a quick wash at my digs I managed to arrive at the Crankworx event in time to catch the afternoon’s competitions.
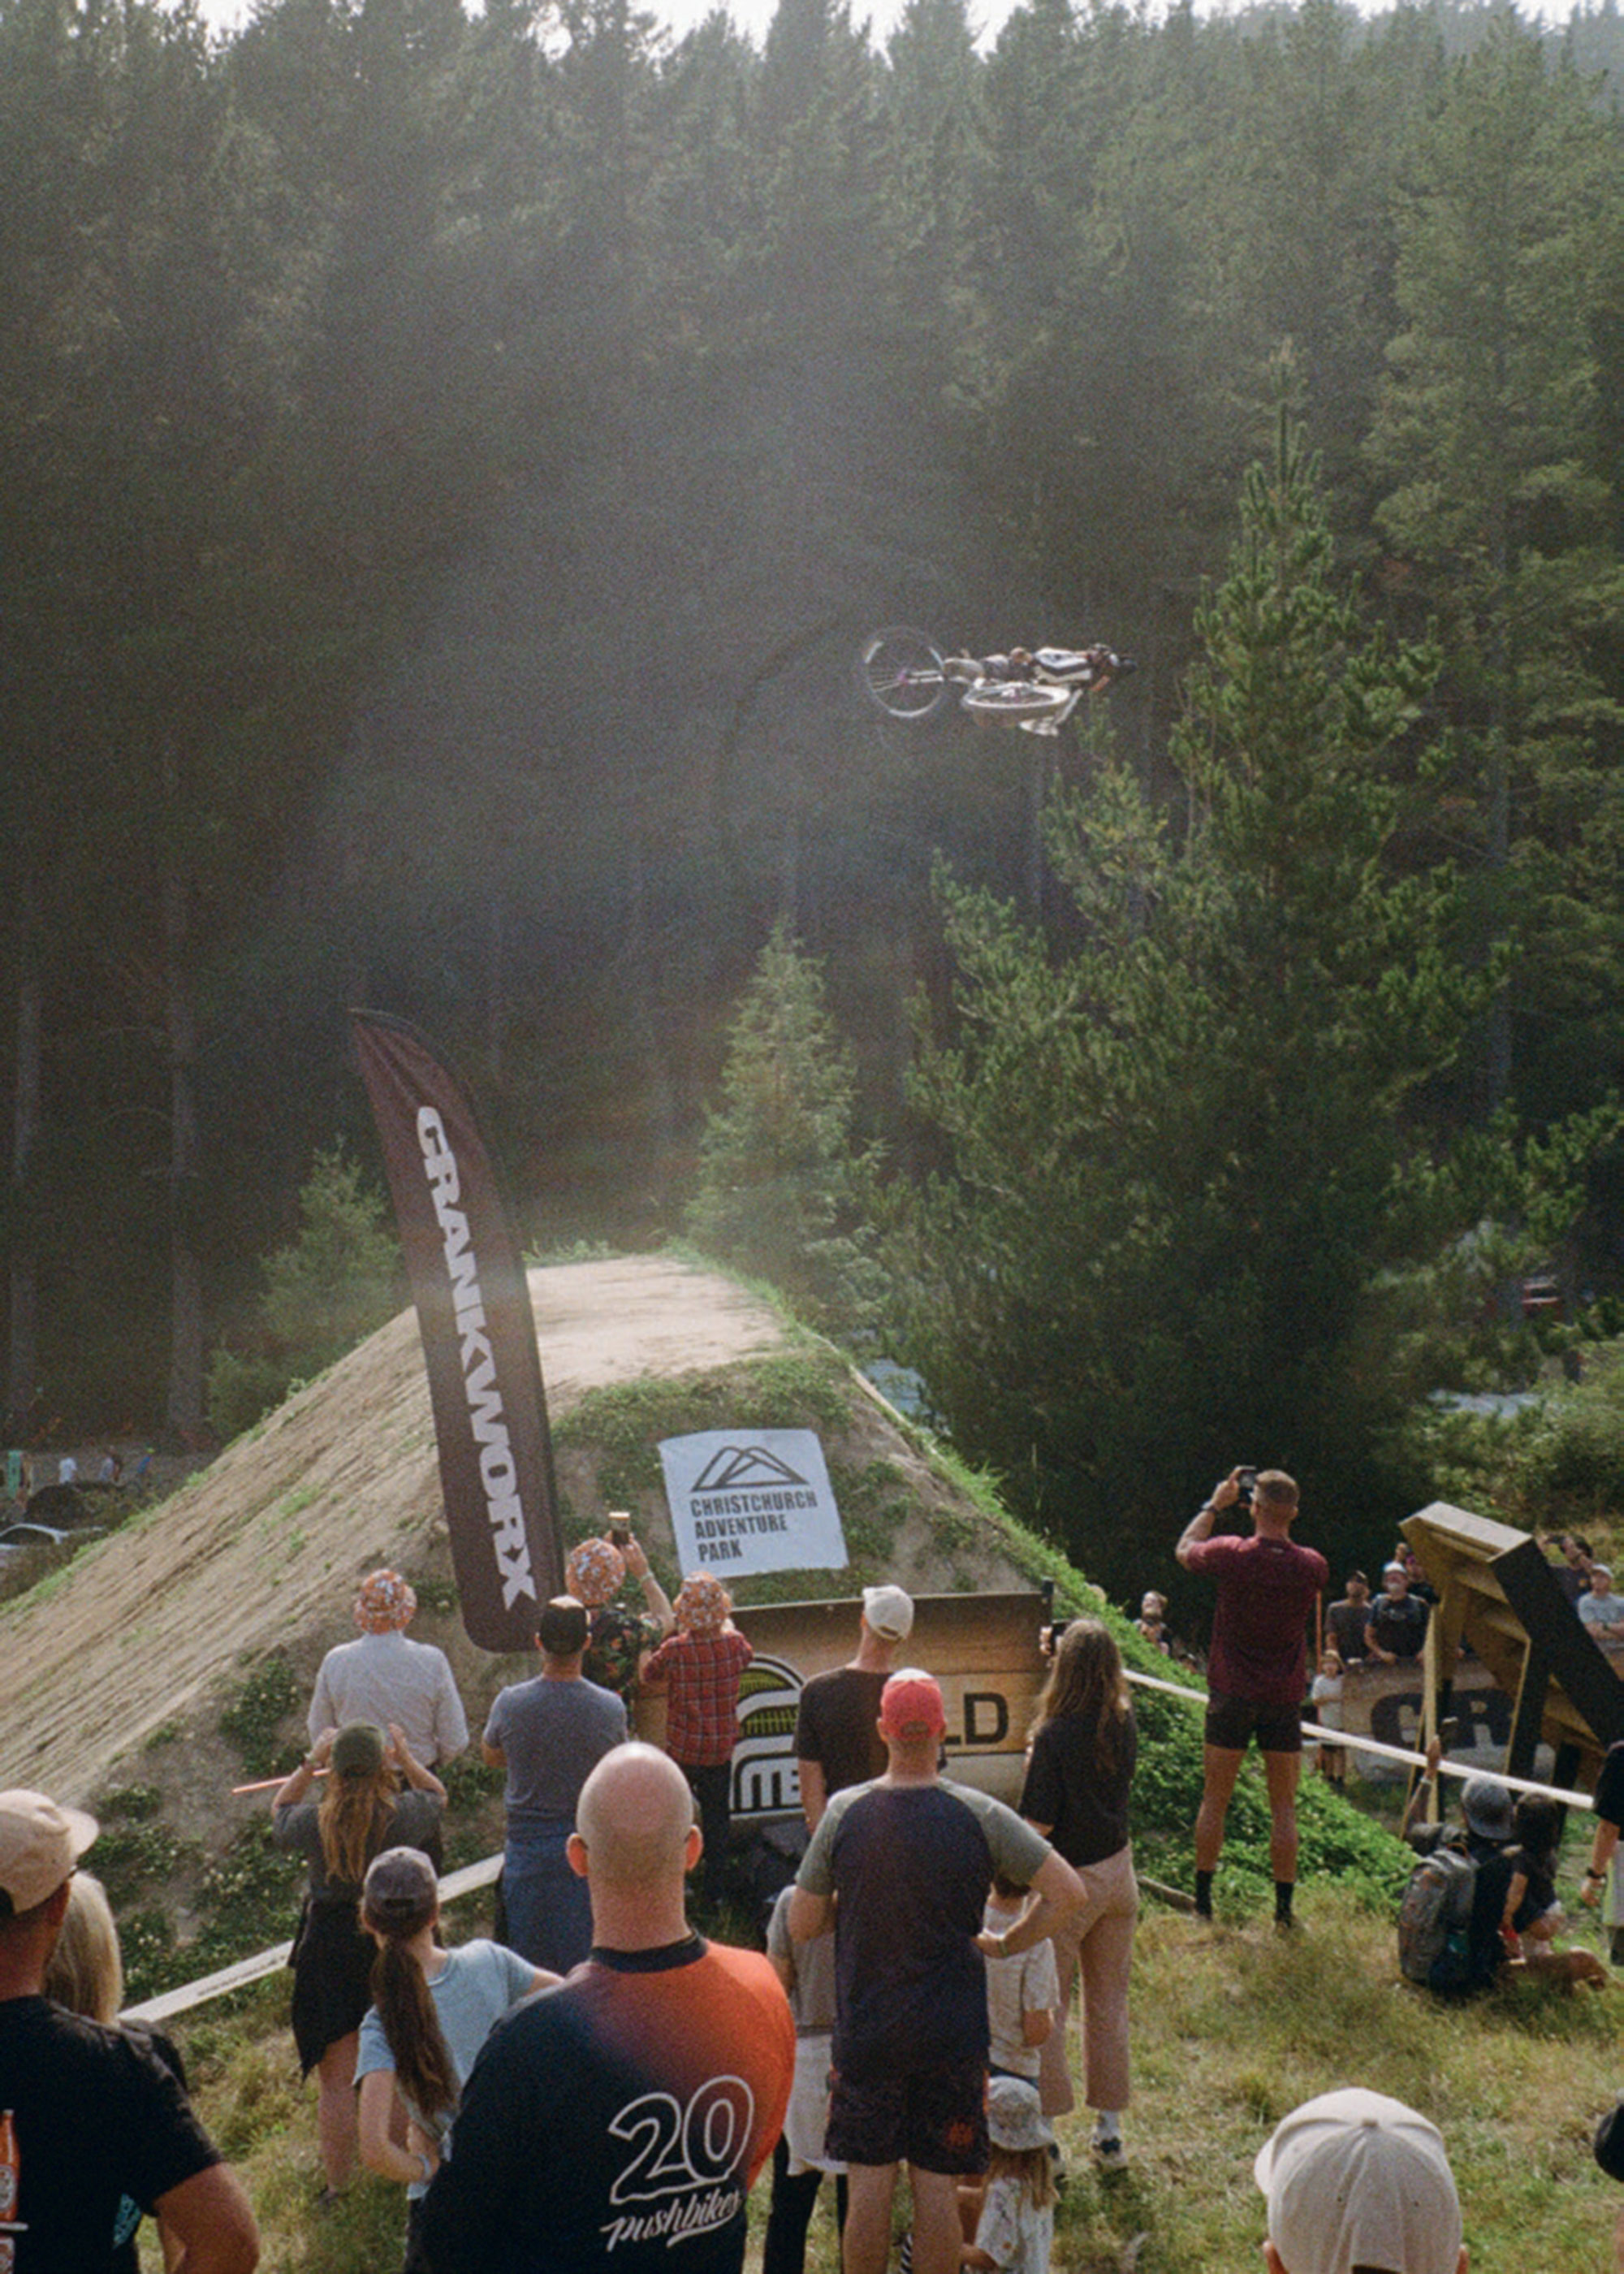
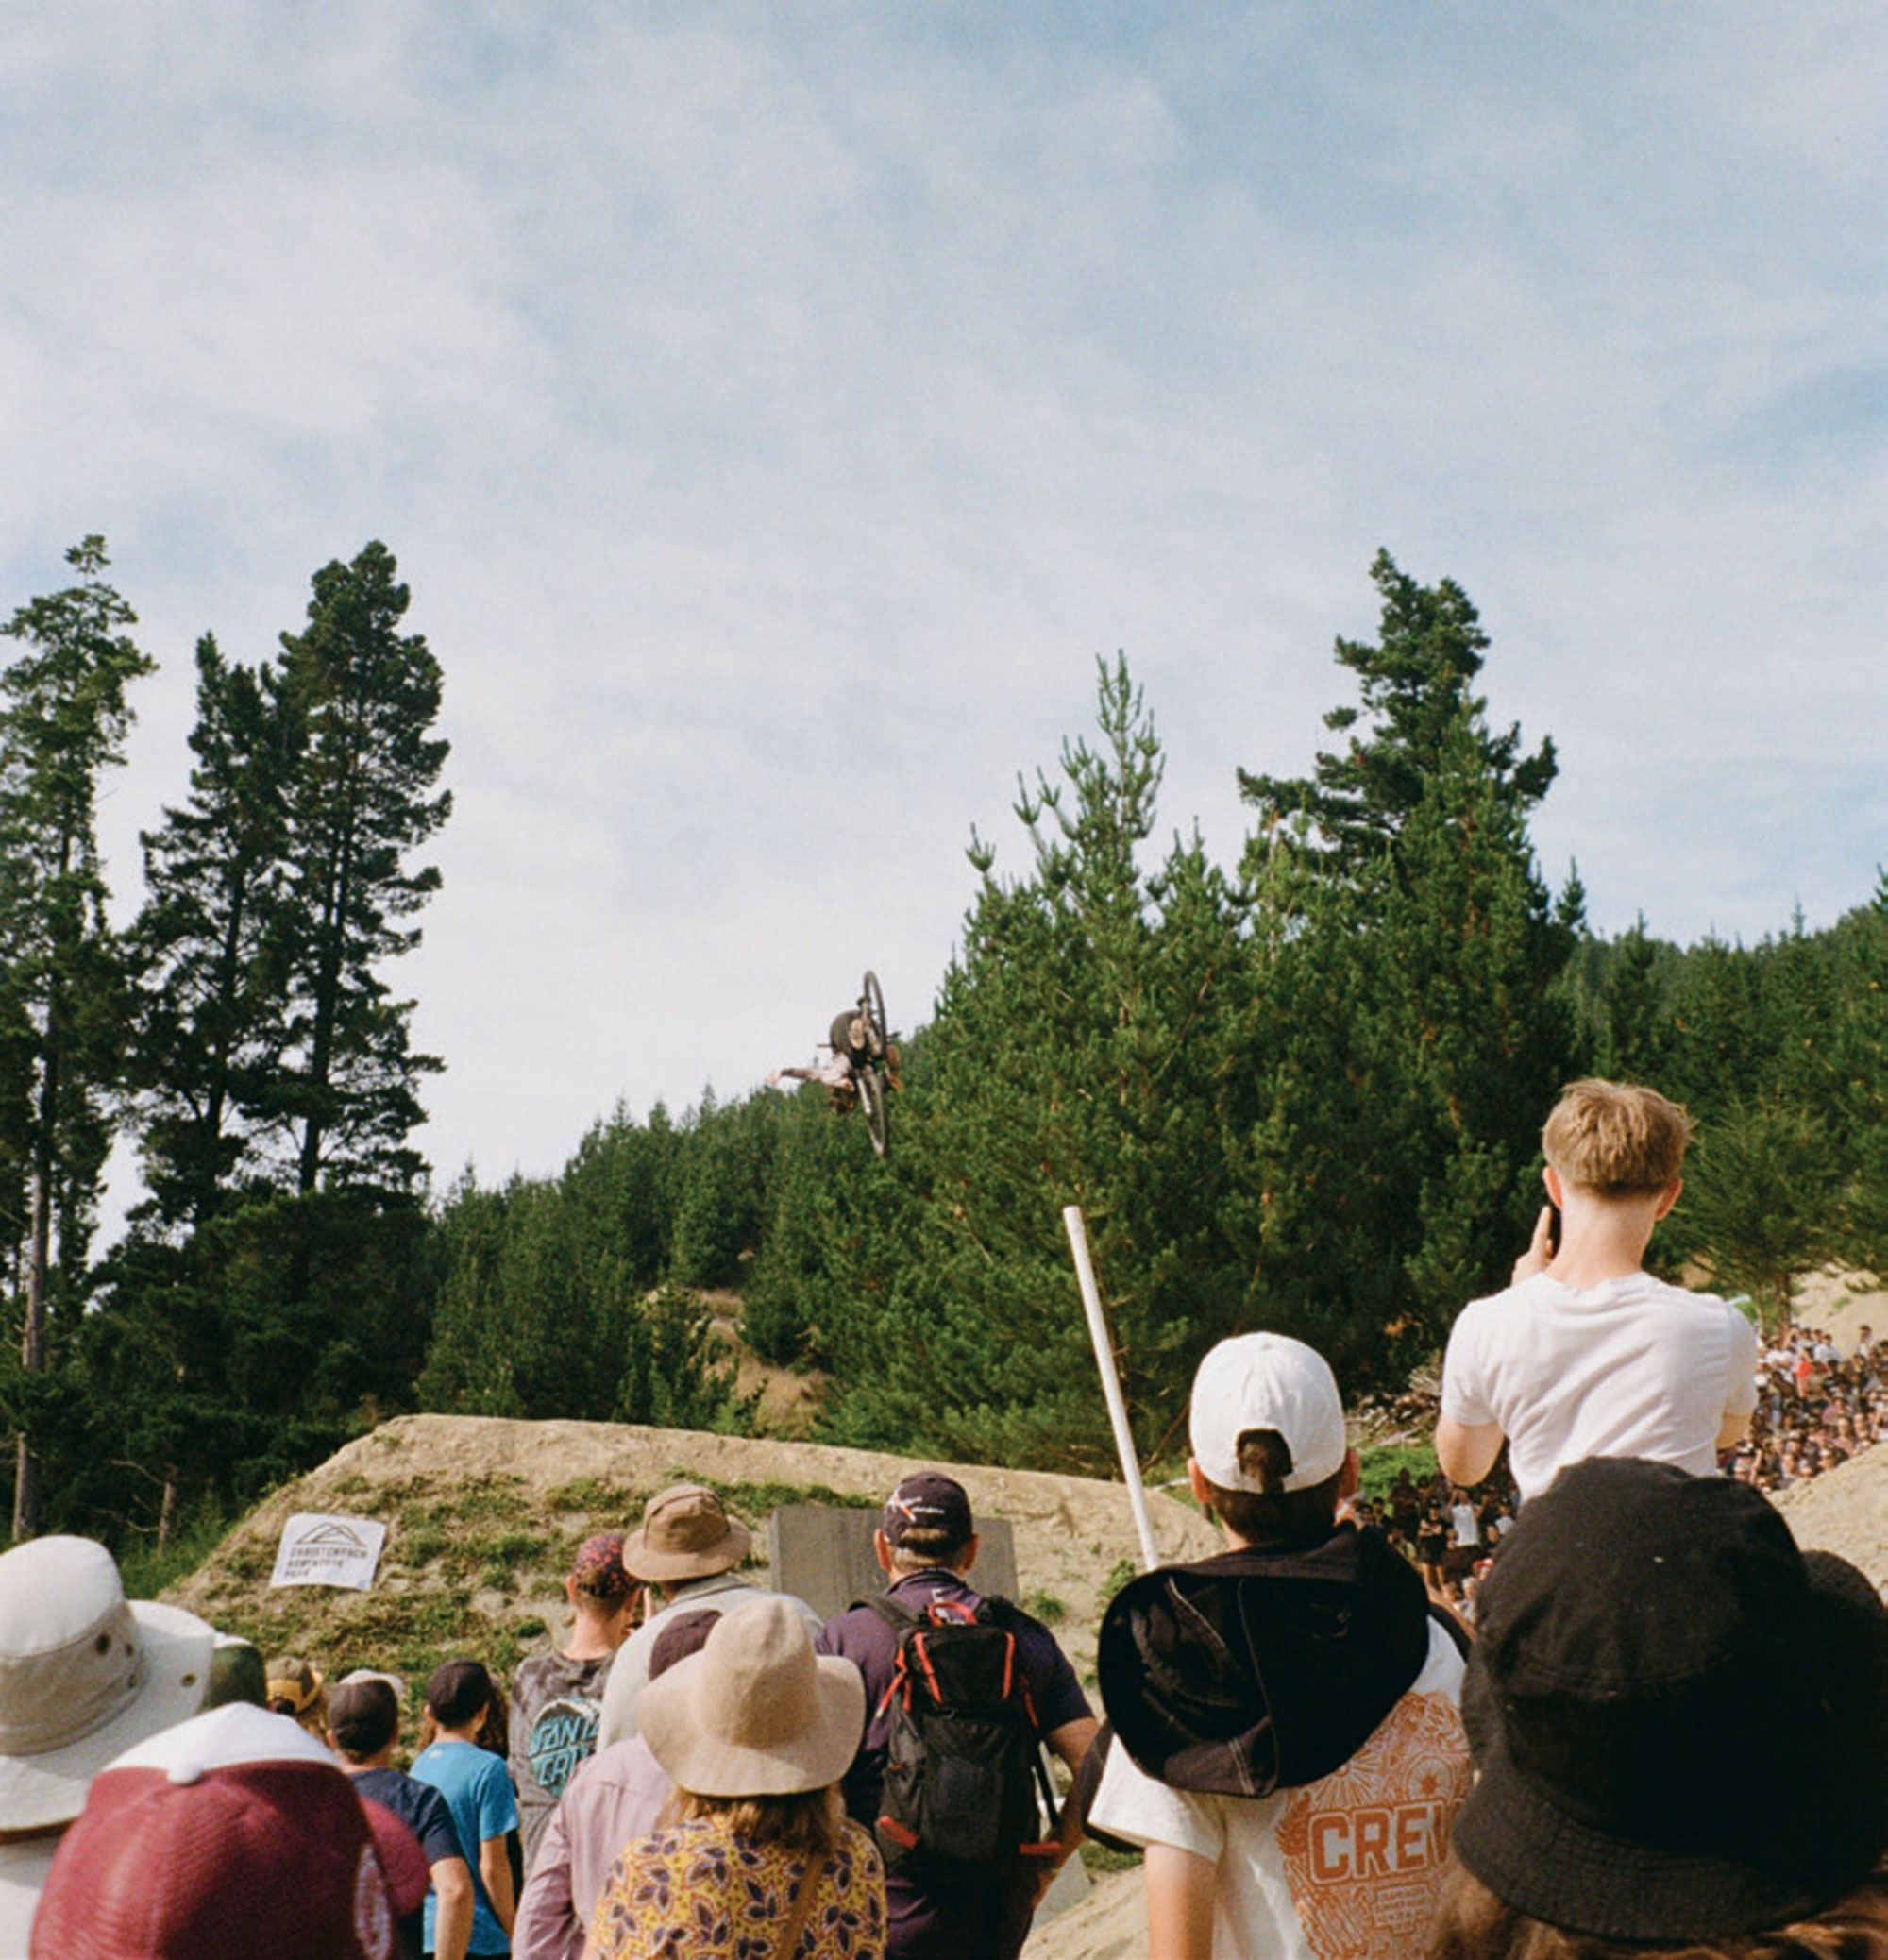
After the disappointment of the inaugural event’s cancellation, anticipation had built tremendously for this second attempt. The electric atmosphere was felt from the moment the Uber driver drew up close to the event. This was a real vibe, with groms left, right and centre, frothing. The industry’s prominent presence, combined with the genuine excitement of the locals celebrating this event in their hometown, created an infectious energy. I walked around chatting to people from the biking scene and it reminded me that we are a strong community. I mean bikes are a bloody good tool for bringing people together. The crowd was a wide spread of age groups with heaps of families. It makes me think these events keep the next generation inspired. The crowning spectacle of the Crankworx Summer Series is the Slopestyle competition. The wind had been playing a bit of havoc during practice so it was decided to move the event to early Sunday morning. I walked up the hill—the crowd was littered everywhere, in high spirits waiting for the next rider to drop. The hillside hype was infectious and being a part of live sporting action is something really special. The athletes really threw down and this grassroots event even managed to rival its bigger brother. Those few days immersed in the Crankworx Summer Series, combined with a quick trip into the backcountry, reminded me just why bikes—and the mountain biking community—are so bloody good.
Metronomic Meditation
Words & Image Gary Sullivan
“It gots to be accepted;
That what? That life is hectic.”
C.R.E.A.M. by Wu-Tang Clan
Although they’re all credited with writing their legendary song, C.R.E.A.M., I’m pretty sure it didn’t take all of the Wu-Tang Clan’s nine iconic members to write that lyric from their debut 1993 album. Whether they all pitched in, heads bobbing as they gathered around a smoking ashtray, behind a mixing desk, or if it were just a single MC with a pencil and notebook scratching notes while on a grimy subway, one thing is for sure: there was one purpose. Whether a posse of nine or an army of one, single-mindedness helped create the masterpiece, confirming we need to accept that, indeed, “life is hectic”.
It’s how we deal with our hectic lives that matters.
And there are many ways to deal with how hectic life has become recently. For most, it’s a combination of different things that take their mind off the busyness of life; for others, it’s singlemindedness, or a single act, that calms them, enabling a refocusing of the mind—away from the stressors of daily life. If you’re reading this magazine, I’m sure that—for you—one of these things is probably mountain biking; a single-minded act. I know for me, personally, at times, riding is more than just a sport; more than just an activity to fill a couple of hours. It’s a meditation of sorts: a metronomic meditation.
Metronomic meditation. I didn’t come up with this phrase but, when I first heard it, it struck a chord. Meditation is “a practice that involves focusing or clearing your mind using a combination of mental and physical techniques”. Both are things that mountain biking requires. Particularly on a technical descent or fast-but-flat singletrack, focus is paramount. I can think of countless times where, had I not been 100% focused on the task at hand, I’d be down a bank, over the bars, or have slid out on an ice-like, wet clay surface. That need for focus means clearing my mind of clutter and forgetting the day-to-day. There’s no space for thoughts other than those required to keep the ship upright, and should my mind wander back to ‘normal life’ even just a little, the consequences could be painful.
Several factors add the metronome-like aspect to mountain biking. Firstly, the pedalling. Stop pedalling while on the flat or going uphill and we fall over; it’s pretty simple. If we’re out for a big day on the bike, the metronome- like effect of pedalling can last hours with only a marginal variation of cadence. It’s simple to ignore, but we’re often pedalling 80 times a minute—multiply that by three hours and 14,400 rotations, which is no doubt metronomic. Then there’s the metronome of our breathing, which is directly related to our pedalling cadence and power. Both affect our breathing, how deep it is, and its frequency.
Boil it all down and it’s pretty basic, really. Between our 100% focus on the trail and the subconscious metronome of our cadence and breathing, we can slip into a trancelike state. Now I think about it, some might call this the ‘Flow State’, but for me, ‘Metronomic Meditation’ is equally adept because we essentially remove ourselves from reality and are forced to cleanse our mind of the day-to-day—a ‘mind bath’ perhaps.
As much as I’m a mountain biker at heart, I spend a lot of time on my local roads, asphalt or gravel. This riding ticks the sporting and physical aspects of riding for me, but I find it’s only partially metronomic meditation. Roads are wide, and I don’t need to pick a cautious line between obstacles or weight my pedals just right across an off-cambered section. I can just concentrate purely on pedalling and staying on my side of the six-inch wide white line, still able to contemplate my daily problems and figure out what I’m having for dinner. There’s undoubtedly some metronomic pedalling and breathing happening, but it’s hardly meditation.
Life is hectic. It’s fair to say, at least for me, mountain biking is the truest form of single- minded metronomic meditation that eases that hecticness (is that even a word?!), if even just for a few hours a week.
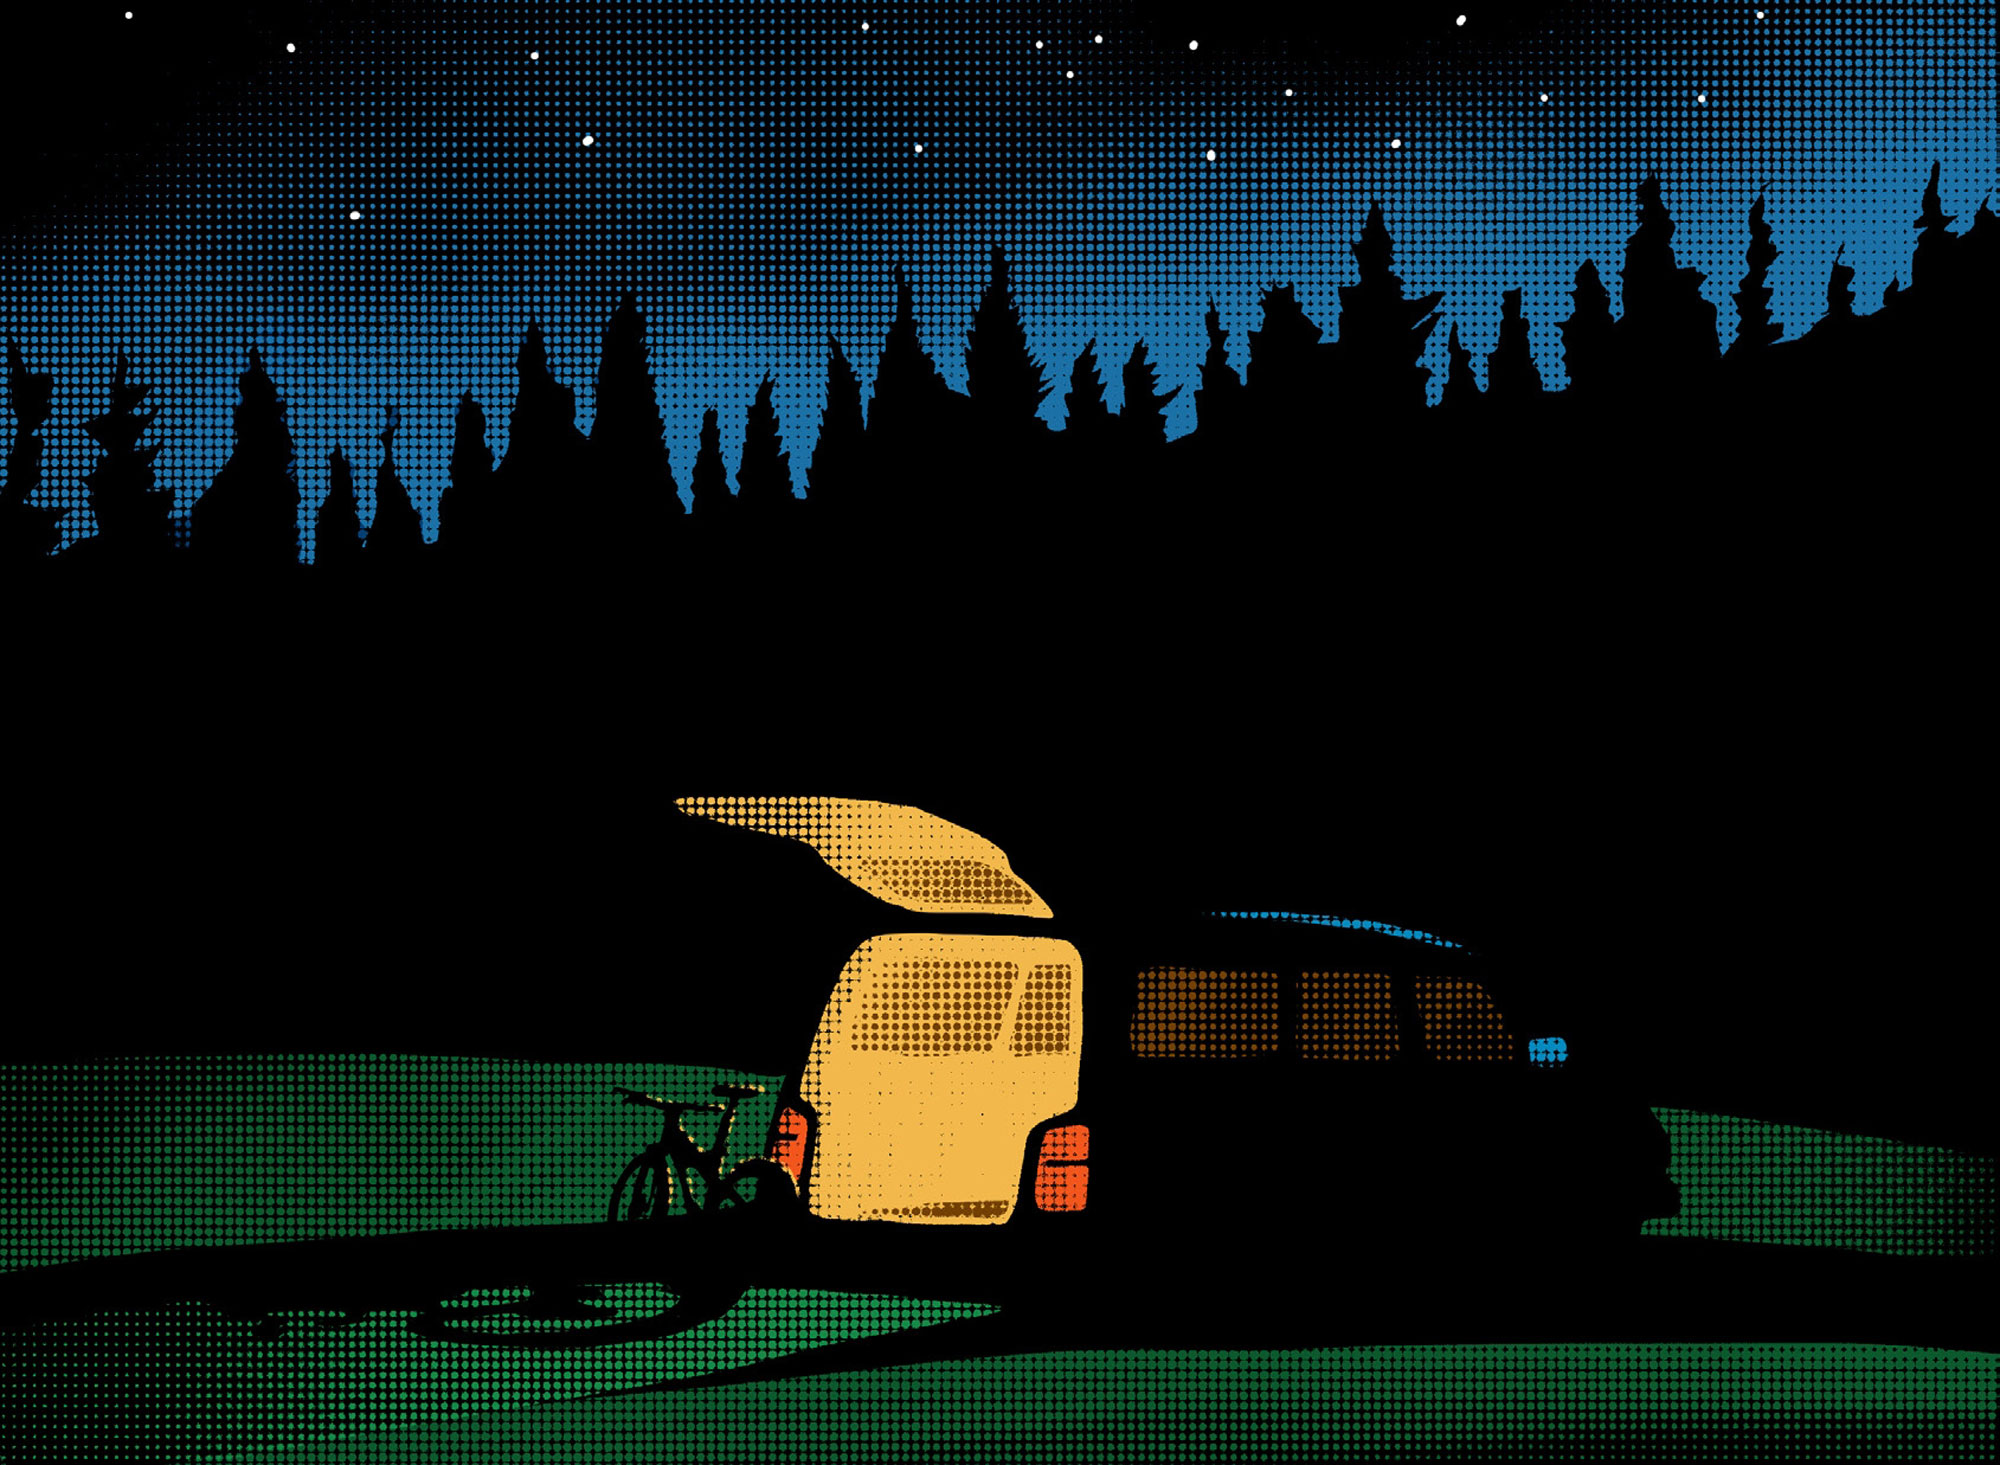
Give it time
Words Lester Perry
Image Henry Jaine
Some bikes are ridden so often, and in so many moments and places, that to part with them becomes almost impossible.
They develop value to the owner which has no connection to reality, so selling them is not only unsatisfactory from a financial perspective, but an emotional wrench that can be too difficult to execute.
Same goes with cars.
Our relationship with our vehicle is kind of like the way we treat drivetrains. There are essentially two ways to do that: keep it fresh by replacing the chain every thousand kilometres; keep an eye on the chainrings and replace them when necessary—and hope that doing those things will make the cassette last longer than it may otherwise. Or the other way, which is ride the stuff until it more or less dissolves, then replace the lot in one mad spend-up after a couple of years.
The more traditional among us get a nice set of wheels when they are able, then trade in or up as often as once every couple of years. The alternative lot buy a vehicle that ticks the required boxes and drive it until it dies—or they do.
That has been my style and, so far, I have outlived half a dozen of them—not counting the odd ones I owned briefly in my youth, and the more sensible ones I have shared with my partner.
The last three have been Toyota HiAces. These venerable buses are examples of what I would argue is the Kombi of the South Pacific. These days, actual Kombis are like high end bicycles: their price bears no relation to their functionality. Don’t get me wrong, they are cool things. In their primitive way they will still be clattering along when cockroaches inherit the planet. But, for everyday abuse and long- lived up-for-itness, the HiAce is hard to beat.
Also hard to kill.
The late 80s white example we caned for a decade, had a slipping clutch for at least five years, which Glen used to repair using positive thinking. Just when we thought it wasn’t going to get whatever pile of stuff we’d loaded into it to the top of the next hill, she would send it kind thoughts and it would take another deep breath and soldier on. Some dear friends took it off our hands and toured the country in it, before selling it to a wrecker in Christchurch.
The one I almost wear as a totem is called a Regius, but it is a HiAce at heart. Sidebar: I reckon a good career, if I was a younger man, would be as a consultant to Japanese car companies, helping them to avoid coming up with names like ‘Regius’. And HiAce for that matter. But, I digress. I have heard this model referred to as a “Loser Cruiser”, but it has carted me, my partner, numerous bikes, a kayak, and a caravan over a quarter of a million kilometres around our country and still goes like it did when I got it.
I have just replaced it. I decided that if I get a decent HiAce now, it will probably be the one that stays on the road longer than I do. I took delivery of it last week, and told a friend about it that evening. I honestly thought she was going to cry. In her view, the old van is part of me. “Surely you can’t be going to sell it!” she exclaimed.
Well, that is the plan.
That was the plan. Now? I am not so sure. Yes, yes, I am. Out it goes.
So what’s the attraction for me, in a HiAce? Mainly; that it’s a van. You can drive around in it. You can keep a bike in it. You can get changed in it, take a nap in it, take shelter in it. You can cart a collection of bikes and people, a pile of rubbish, or half a house load of furniture. You can go camping in it—at a pinch, you could live in it. We have done all these things and more.
I prefer to get one that is past the number of kilometres travelled where problems would have cropped up if they were going to. It is best if the thing already has dents and scratches in the usual places. That means any imperfections I add to it will be pleasant memories of tight spots or straight fuckups, not heartbreaking blights on what was a virgin body.
The new one (well, new to me) has very little personality. Personality will develop, as bits of bark get scrubbed off the corners, bicycle tyre marks get added to the interior, kilometres get added to the clock and resale value slowly becomes irrelevant because with any luck I will never sell it.
Like one of my road bikes, it will become so valuable to me, it will be more or less priceless.
Give it time.
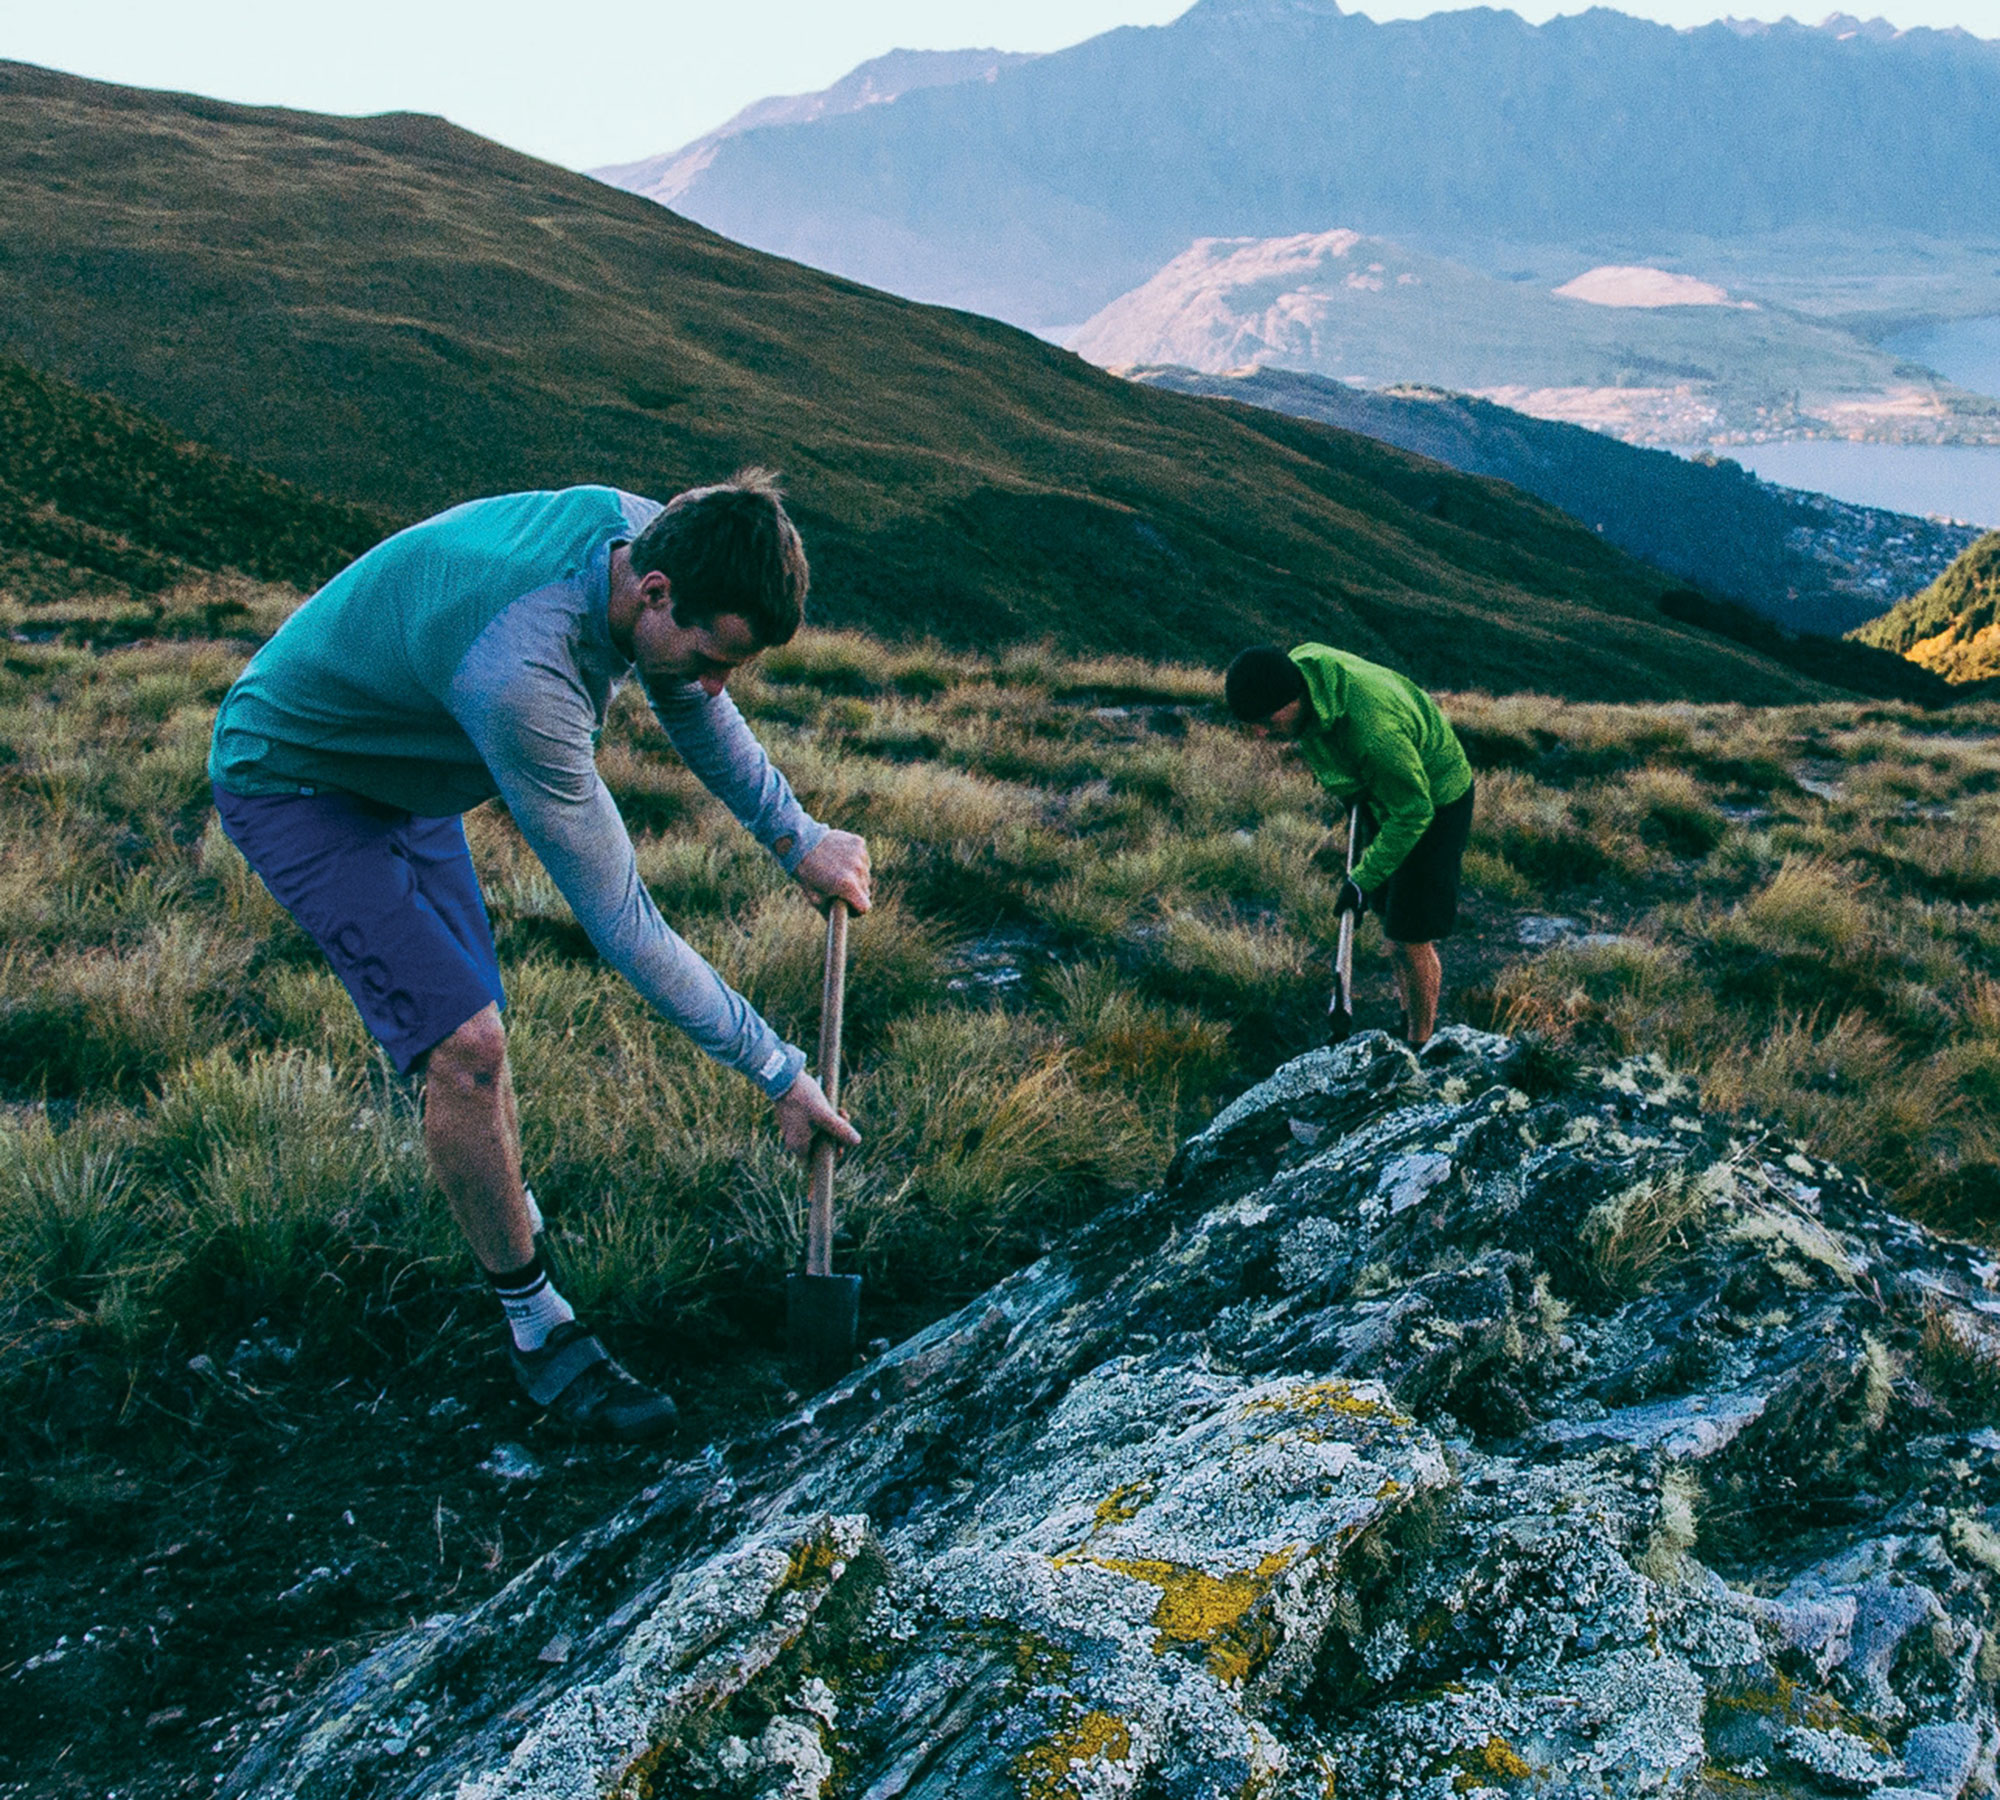
Join Trail Fund as a member to support our advocacy efforts!
Words Meagan Robertson
Image Callum Wood
Not another mountain bike club membership!? Yes, we know. There’s a lot of hands out asking for your money these days, and a lot less money going around. That said, there’s also a lot of debate and drama over trail users, trail guidelines and trail etiquette – and if Trail Fund is going to continue to put its hand up and suggest some strategic ways forward, we need to be able to prove how many people believe in our cause.
What is our cause?
Trail Fund is the only national body that represents and funds trail builders throughout the country. Over the past 13 years, our volunteer- run organisation has distributed more than 120 grants, totaling more than $300,000, to 50 clubs around the country. We also made sure mountain bikers have a seat at the table when it comes to trails on public conservation land, by joining forces with Federated Mountain Clubs and New Zealand Deerstalkers Federation in 2014 to create the Outdoor Recreation Consortium (precursor to the Backcountry Trust).
Our advocacy representative, Jimmy, has also been working tirelessly for six years to realign DOC’s re-classification of bikes on public conservation land as ‘vehicles’, in 2018. It caused significant delays to projects around the country, leaving several passionate volunteers feeling defeated. It also meant that iconic trailsincluding several Great Rides – did not comply.
It’s been a slow process but Jimmy and representatives from various other local clubs are finally gaining traction, and earlier this year he prepared the Trail Fund submission for the Department of Conservation (DOC) on the modernization of conservation and management. This submission can be found on the Trail Fund website and recommends adopting an effects-based approach, improving resource allocation within DOC and ensuring a more equitable concession system.
Back to the money and membership.
As above, we aren’t doing this for the money – we’re doing it for the memberships, and we will have two different levels – individuals and clubs.
Individual memberships are $8 and include a Trail Fund member sticker – or free when you purchase any Trail Fund item in our online shop for the next two months.
Club memberships – which automatically translate to individual memberships for every club member – will be $25. Clubs will need to be members to apply for funding rounds going forward.
That’s the gist. No drama, little money, big impact.
We look forward to welcoming you to the club – officially!
April funding round now open!
Got your membership sorted? We have two ebarrows and ten Weapon of Mass Creation tools up for grabs – so get your application in now. Applications will be accepted until 15 May.
Learn more:
trailfund.org.nz/products/trail-fund-nz-membership-2
Leatt Products
Words Lester Perry
Images Jamie Fox
RRP $249—ProClip 4.0 Shoes | $119 — Velocity 4.0 MTB X-Flow Iriz Goggle $69 — Glove MTB 2.0 X-Flow Stealth
Distributor BikeCorp
I remember wandering the expo at Crankworx 2020, in Rotorua, when I was called over to the Leatt booth with the promise of seeing something exciting. I was indeed excited as I checked out Leatt’s first range of MTB shoes. It wasn’t perfect, but it showed glimmers of hope that Leatt could become a legitimate player in the MTB footwear game, completing their head-to-toe ethos.
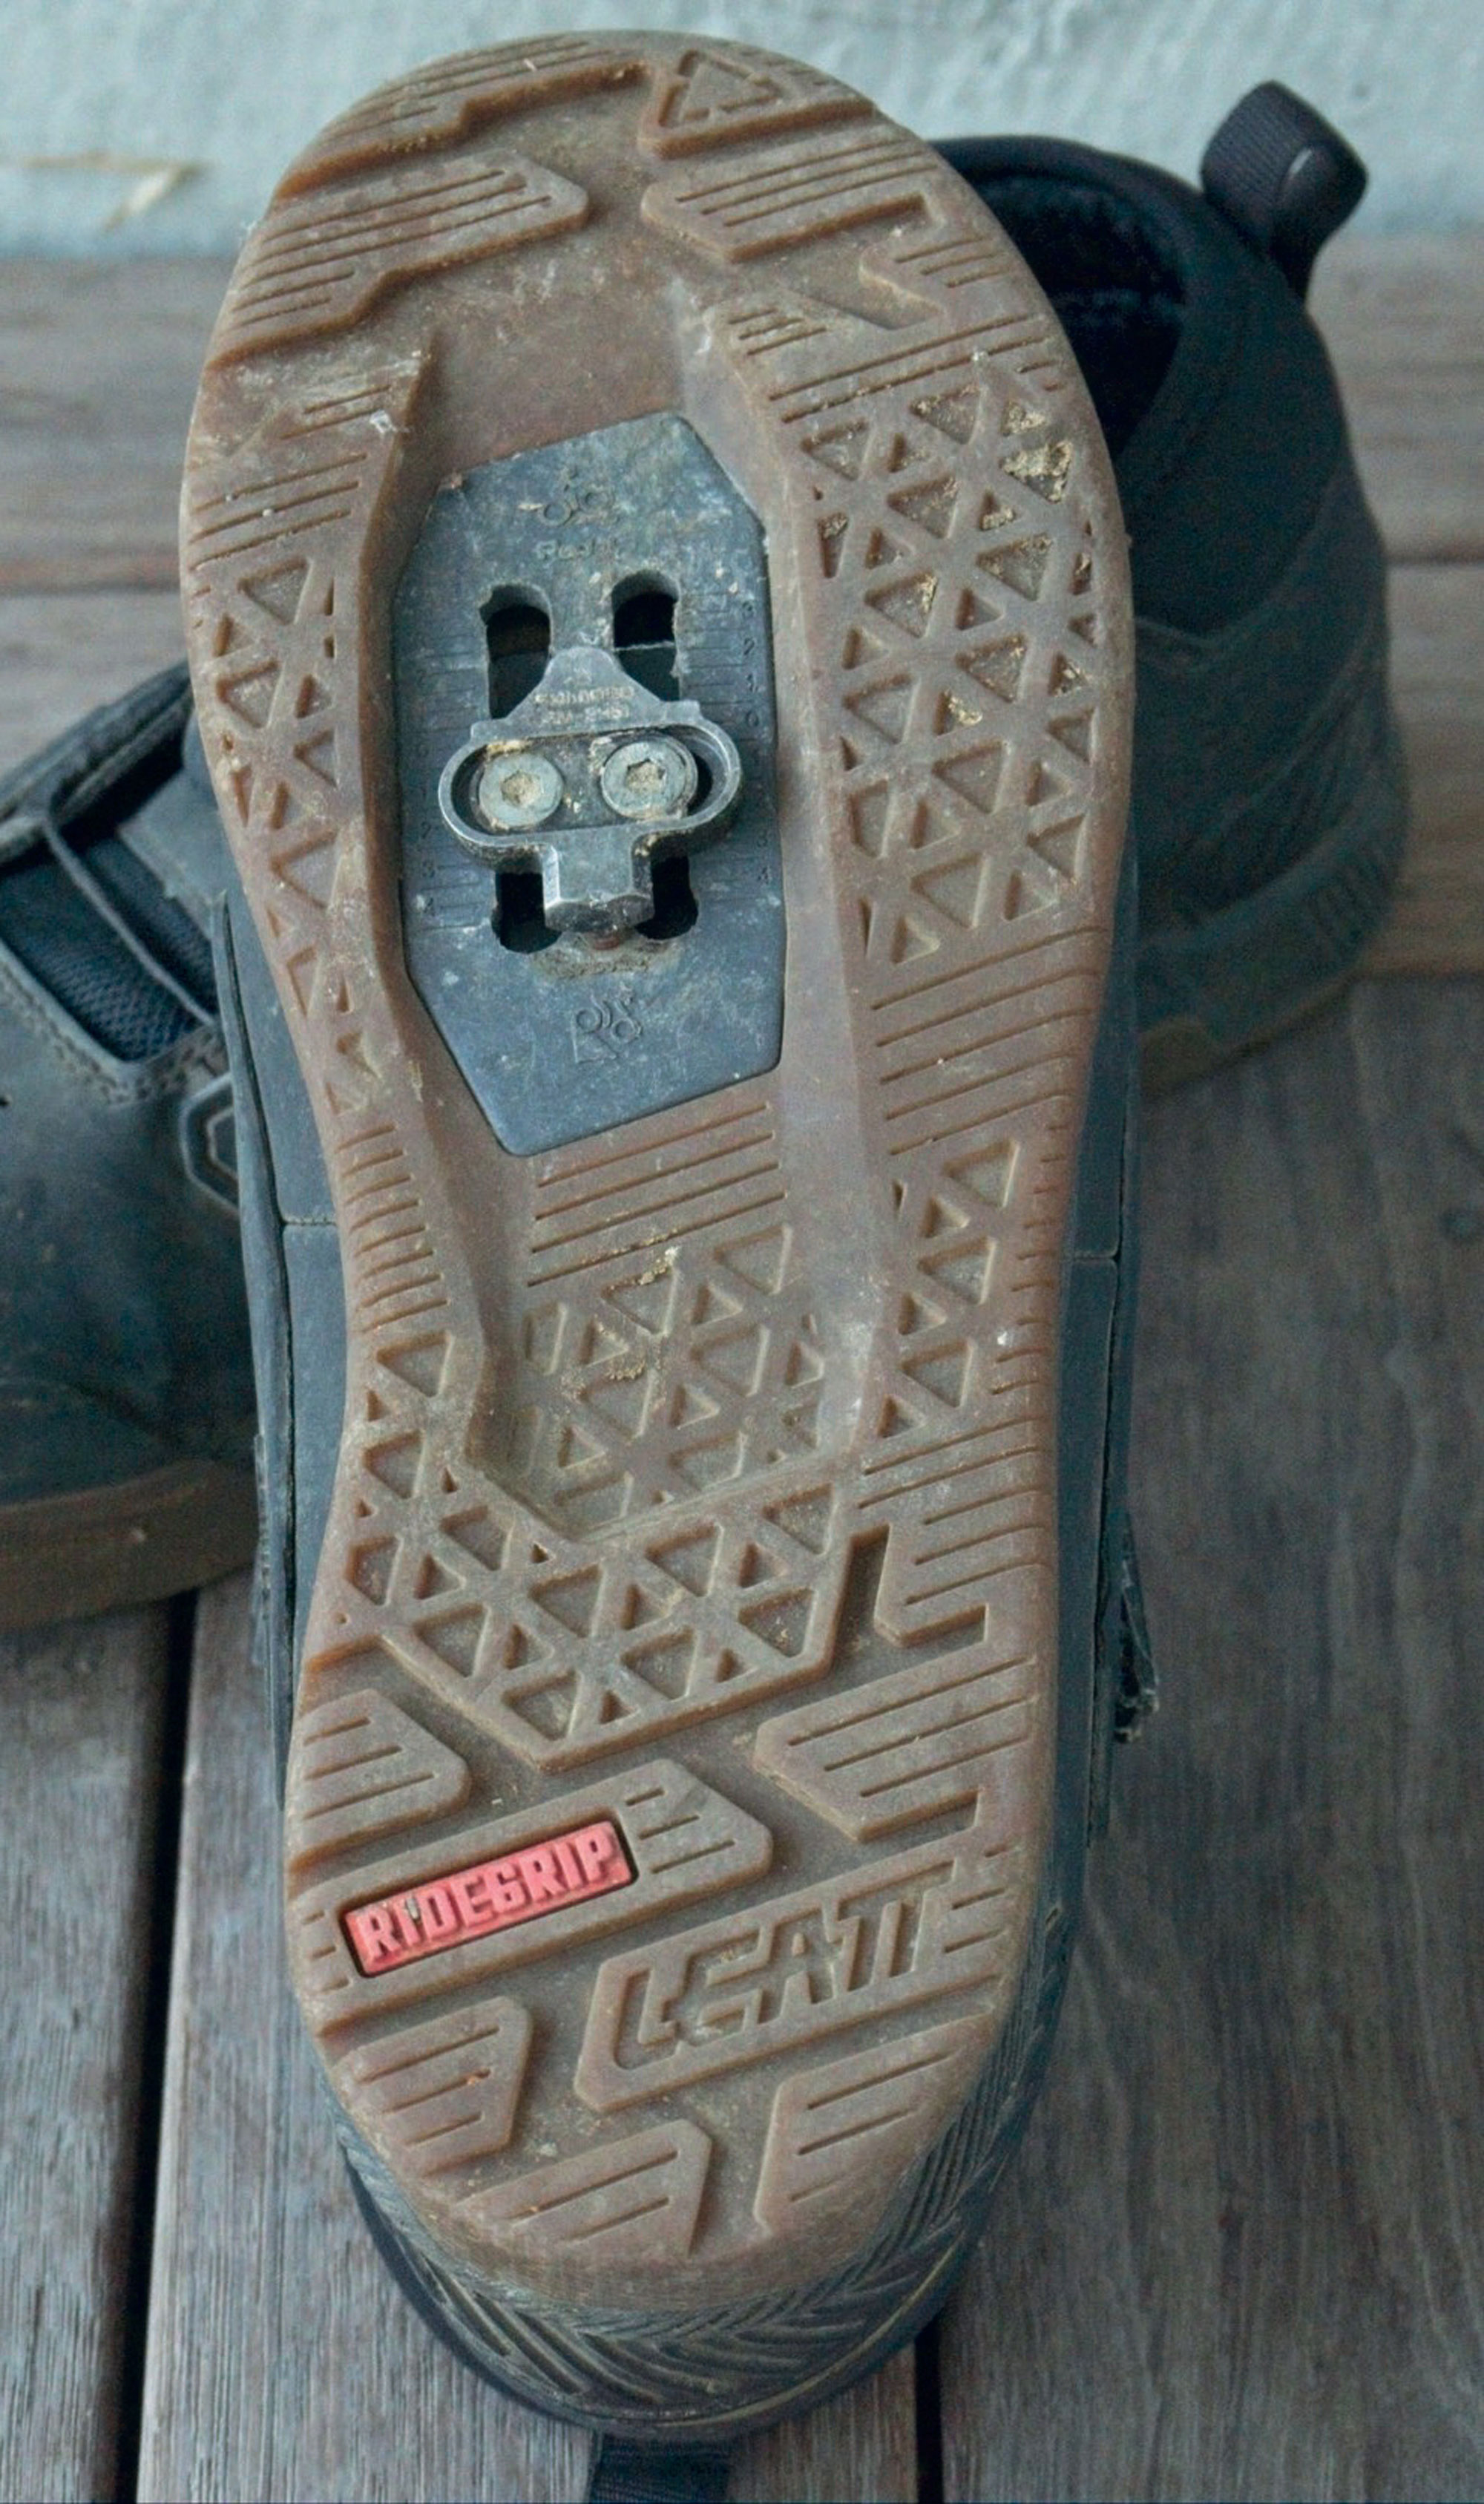
ProClip 4.0 Shoes
Fast-forward five years and I’m rolling deep in a fresh pair of Leatt ProClip 4.0 shoes to review. The 4.0 ProClip is a gravity-focused shoe that aims to protect – rather than be lightweight – without detracting from pedalling performance or power transfer.
There’s no missing the MOZ dial cable lacing system at the front and centre of the tongue. MOZ allows micro-adjust tension, with a pull to release its complete tension. The system makes for an easy-on, easy-off shoe. The dial is simple to use and has a decent rubberised outer edge, allowing it to be tensioned as tight as you’d ever need. I’ve encountered some dial styles that don’t have enough grip to grunt on them, but they work well. Over the front of the foot seems to make more sense than the all-too- common venerable dials on the side of shoes.
My only comment on the MOZ would be that it would be nice to see micro-adjust for tension release rather than the pull release that dumps all the tension in one go… but perhaps I’m being a little picky, and it’s by no means a deal breaker. A nice firm Velcro strap tensions the ankle area; there’s no stretch in the strap, so I can pull it nice and tight. I need to get it in just the right place to give perfect tension as there is no ‘give’ in the strap, meaning once it’s in place, it stays firm.
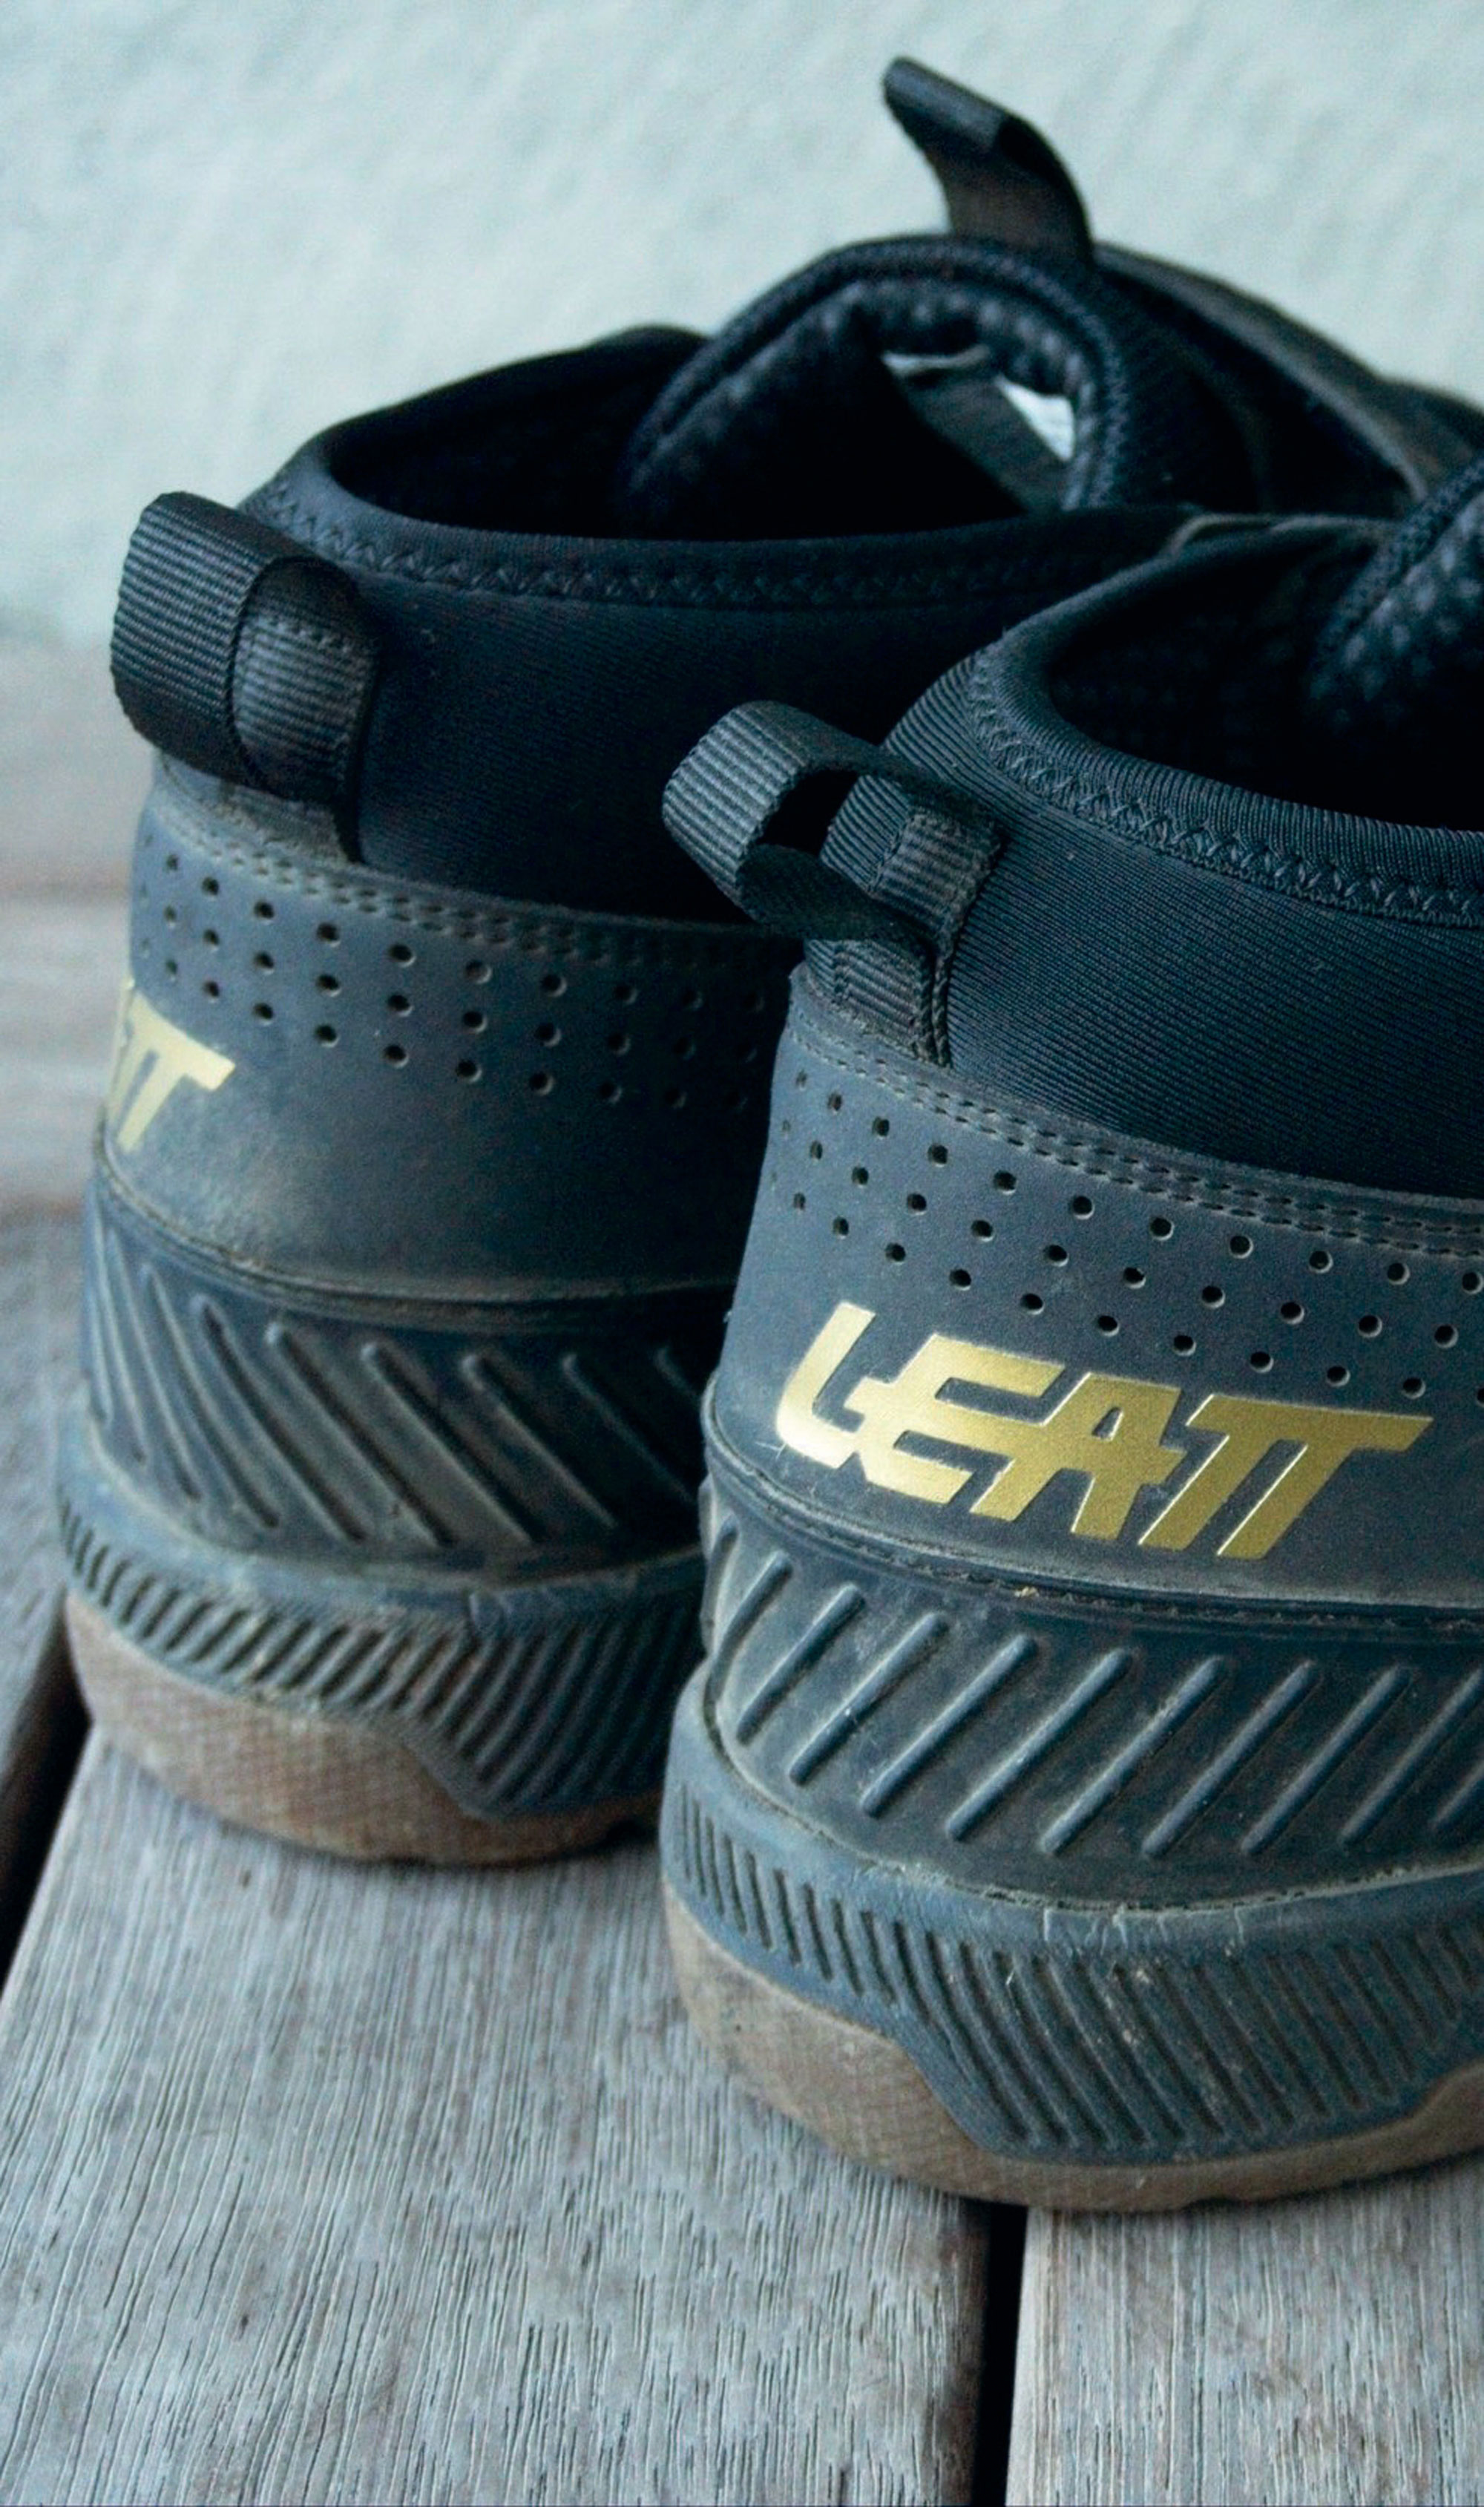
Visually, the shoe takes cues from the classic skate shoes of the 90s. The ProClip 4.0 doesn’t strike a slim silhouette; they’re a protective item, so we wouldn’t want a shoe that’s too slim. There’s no excess padding to absorb water; once wet, they dry pretty quickly compared to some. The outer is a mid-cut with a higher neoprene cuff to keep the loam and niggly pebbles from entering the shoe. It works great and has the nice touch of being slightly perforated to help with breathability. Heel and toe reinforcements offer some peace of mind that your tootsies should come out unscathed after those sketchy moments when you’re dabbing feet, or clipping a sniper root with your toes.
The gum sole is oh-so-hot right now. It features a familiar waffle pattern throughout most of its length, with strategically placed lugs under the toes and heel for walking grip. Thanks to the RideGrip rubber compound, the platform is surprisingly stable when not clipped in, assisted by a shallow concave section under the arch. A soft EVA midsole makes them comfy on foot while walking or hiking. The EVA does a noticeable job of absorbing chatter and vibrations, helping to reduce fatigue in the feet and lower legs. Traction for walking is reasonable in the dry, and the rubber is tacky enough to offer confidence, although scrambling around in the mud is as slippery as you’d expect; these are riding shoes, not hiking or “all-mountain” shoes. Pedalling stiffness is similar to the pair of Shimano GE-700s I recently reviewed, with a good medium flex for efficient pedalling and comfort for standing in lift queues or hiking jump lines. The 4.0 ProClip could take the win for having the most extended cleat channels in any shoe I’ve seen – there’s a serious amount of fore and aft adjustment, allowing for an almost mid-foot through to under-the-toe cleat mounting if you so desire. Gravity riders rejoice.
Size wise, I found these run on the larger size compared to most, so you may be able to downsize. As with almost all footwear: try before you buy.
Overall, the ProClip 4.0 is plenty comfortable and offers great protection for all eventualities. I like the mega cleat channels; it’s the first shoe I haven’t had to slam my cleat right back on. They aren’t the lightest or stiffest shoes out there but, if you’re more suited to cutting downhill laps, riding shuttles or just goofing off on the bike rather than pedalling significant distances, you can’t go wrong with these.
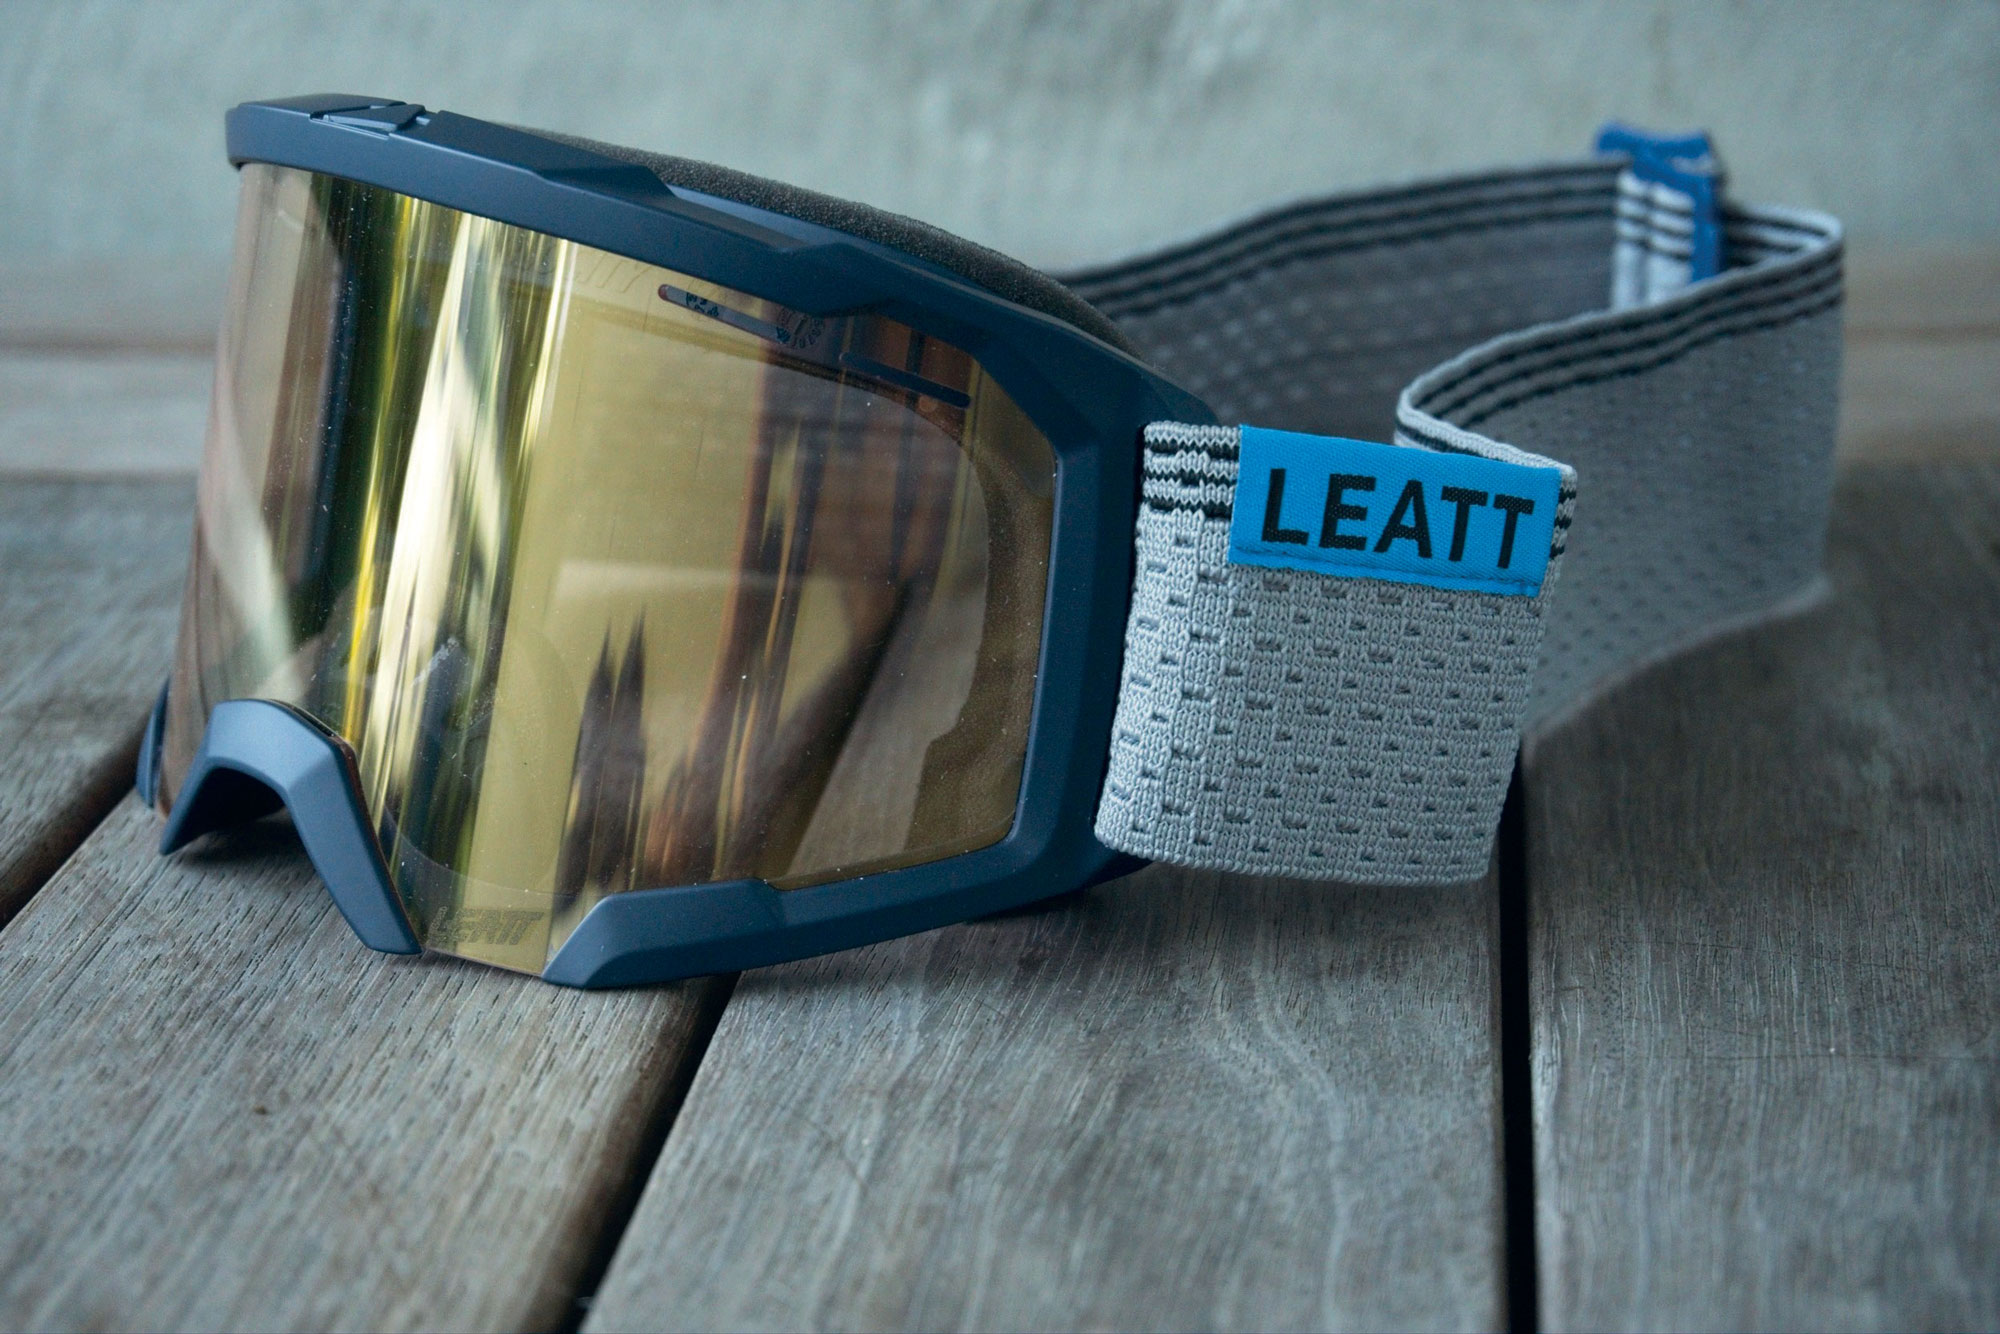
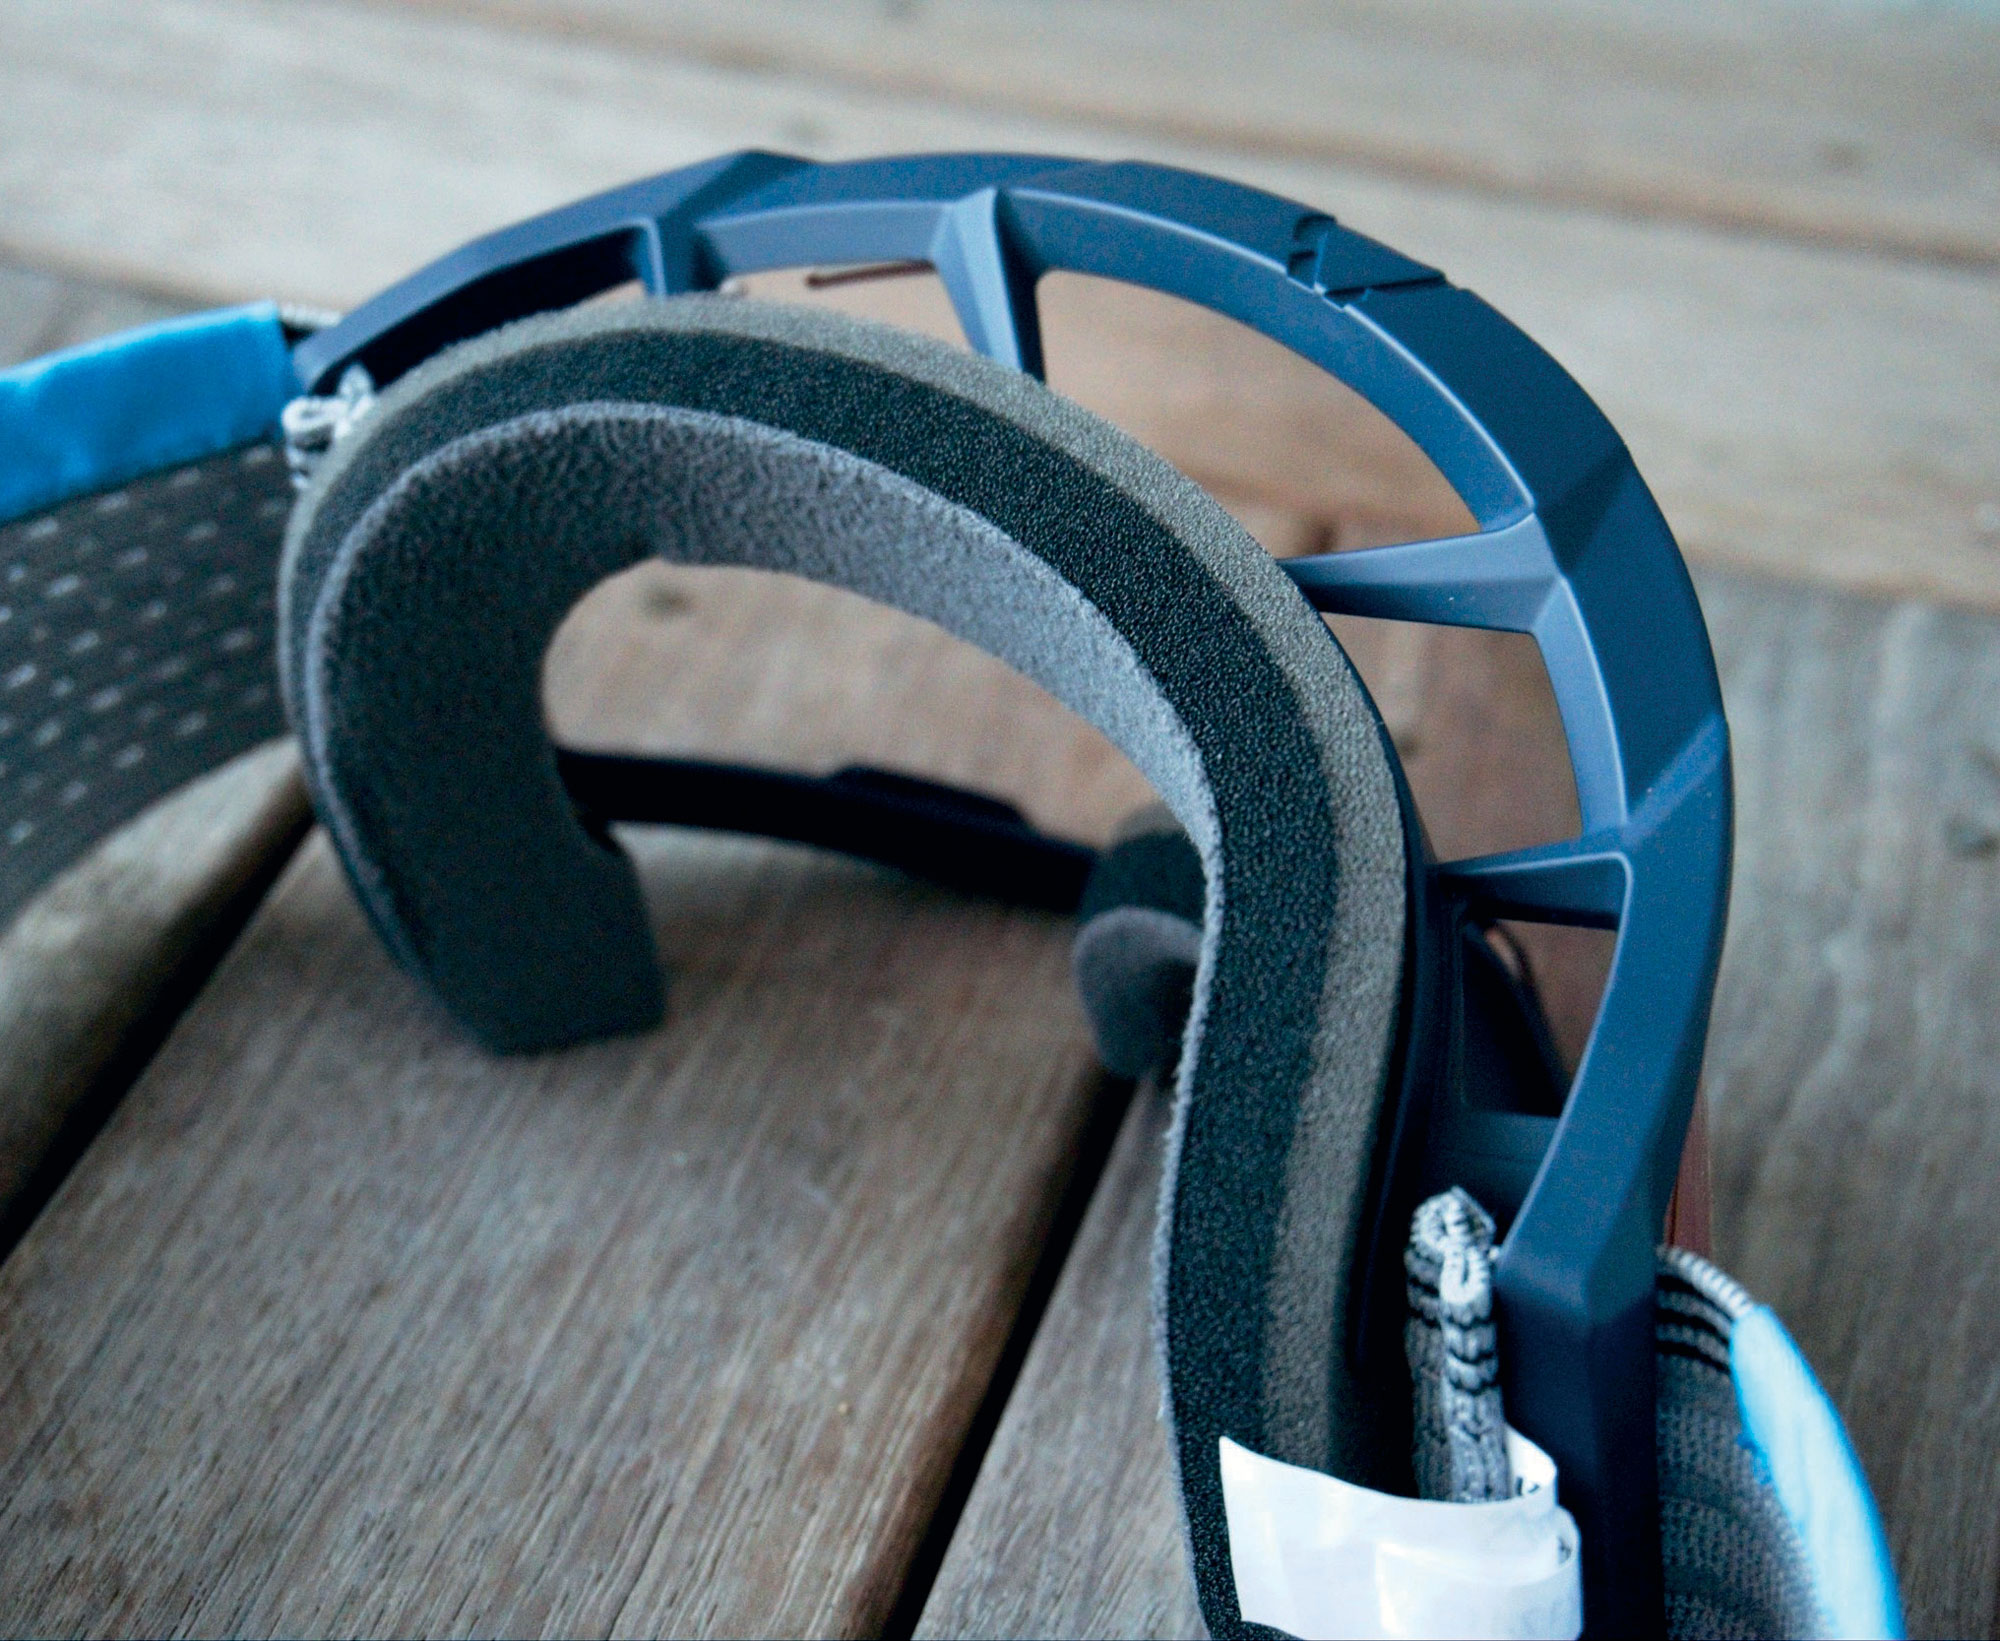
Velocity 4.0 MTB X-Flow Iriz Goggle
Ask anyone who’s gone over the bars and landed on their face if they think goggles are an essential part of their protective kit, and I’m confident you’ll get a resounding “yes”. Speaking from experience and a nice scar down my cheek, I’d agree. On a hot January day, while practising for a downhill race at Cardrona, in the early 2000s, I stopped on a corner to remove my goggles as they were saturated in sweat and stifling my face. As I rolled back onto the track my front wheel caught a rock, and I was pitched headfirst down a bank. A rock shot the gap in my full-face and got me just beneath my right eye, splitting my face open like a tomato. Fortunately, I sustained no lasting effects other than a scar, but the doctors determined the cut was millimetres from causing severe damage to my eye. The funny thing is, had I been wearing the Velocity 4.0 X-Flow goggles, I’d probably not have overheated and would have kept the goggles on rather than hanging them off my handlebars, and likely walked away from the crash with just a bruised ego and scratched goggles. Goggles or glasses? I’m not entirely sure what to call these. They have advantages similar to glasses but with the extra cushion and a more secure fit. They also have the protection and field of view of goggles, which is, to some degree, the best of both worlds. Mountain bike riders generally don’t see the same speeds as motocross riders, and there’s seldom debris or dust flung from a rider in front, so in the form of the 4.0 X-Flow, the traditional moto goggle has been tweaked to suit mountain biker’s needs.
The use case for wearing goggles has become much broader with the advent of the Velocity X-Flow series from Leatt, which has ruled out – or at least minimised – the downsides of wearing regular goggles. The minor trade-off of having open areas in the frame is that debris could make it into the goggle cavity. I haven’t experienced this, but I imagine it could happen, particularly in the wet, when worn with an open-face helmet.
The fit is similar to that of a good pair of goggles, with a twist. Leatt designers strategically removed sections of the foam padding, allowing for a vast amount of breathability from the top and bottom of the frame. They also nailed the look by keeping them looking like a pair of goggles, rather than the more polarising hybrid goggles/glasses style of some competitors.
The Rideviz lens features permanent anti-fog and scratch-resistant coatings and meets the ‘Military Ballistic Impact Standard (MIL-DTL- 43511D)’ – so the rock that pierced my face wouldn’t stand a chance against this lens! The Iriz tint strikes the sweet spot between being too dark and too light; I find it spot on for almost all conditions, taking the harshness out of the light on open trails but not dark enough to dull the scene too much when in the bush.
My first outing with these on my face was a jaunt aboard an eBike on a muggy, blue sky spring day, not the usual conditions for me to reach for a pair of goggles. The increased airflow over a regular goggle was immediately noticeable. My face didn’t feel sealed in a hot box, and air flowed between the lens and my face, controlling the temperature. The field of view is mega and no different to a quality set of goggles.
The top foam absorbs sweat, which is excellent until it becomes saturated; at that point, I occasionally experience a drip of sweat down the inside of the lens. On a stinking hot day, the X-Flows are still warmer than sunglasses, but not by much. Since the lens sits further from the face than on glasses, they collect less sweat on the lens, and there’s a significant increase in protection, too. The mesh strap is a nice touch, theoretically allowing some breeze to pass through into the helmet vents—a hard one to quantify, but I see no reason it wouldn’t be the case.
I’ve become a fan of these goggles. I appreciate that they resemble traditional goggles, and Leatt has nailed it regarding breathability. I now wear them in situations or rides where I wouldn’t have even considered it with regular goggles—thumbs up.
Glove MTB 2.0 X-Flow Stealth
Is it me, or have gloves become a consumable, throwaway item? Back in the early 2000s, a pair of gloves would literally last me seasons, and my riding volume was probably twice what it is now. Since then, quality gloves seem more and more difficult to find, particularly if you’re chasing something lightweight and breathable that will last more than a summer. The stitching, particularly on the fingers, is usually the first to go, and there are only so many times I want to restitch and bodge them to be usable. I didn’t get too excited when the Leatt 2.0 X-Flow gloves arrived for review last year.
I’m pretty finicky about what gloves I’m comfortable in. A minimal palm is key, and I find the fabric tension across the back of my hand needs to be just right—not too tight to restrict movement, but with enough support to keep them snug and avoid bunching. More importantly, they must help keep the palm taut and in place. See what I mean? Finicky.
With a stretch fit and slip-on design, these take a little technique and patience to put on, but once on, the medium size fits my medium-sized hands perfectly; snug throughout with no firm points or obvious pressure points. Fingers are explicitly tailored to minimise bunching when wrapped around a handlebar, and are stitched with a specific thread to aid longevity. The main body fabric is a Leatt X-Flow material, a 4-way stretch mesh that helps with breathability and fit. Knuckles and pinky fingers get an extra layer of thin rubber material for added protection and reinforcement, adding negligible weight or bulk. The backs of the thumbs have a terry cloth wipe.
The palm is made from a single piece of Leatt’s NanoGrip material. It’s nice and thin and has a slightly furry, almost cat-paw-like surface, which gives superior grip in all conditions. The handlebar feel is exceptional, possibly the best of any gloves I’ve worn. Some wizardry in the fabric means the fingers are touchscreen compatible, which is a bonus whether you’re filming ‘shreddits’ with your mates or calling for help after a crash.
After about four months of wearing these gloves, I’m pretty impressed, and they’ve become my go- to. The X-Flow fabric has kept its shape and firm stretch, and all seams are still intact. Although the palm has some stains, it is holding up well with no signs of wear. A resounding clap for Leatt for continuing to make gear that works well and lasts the distance. There is no fast fashion here.
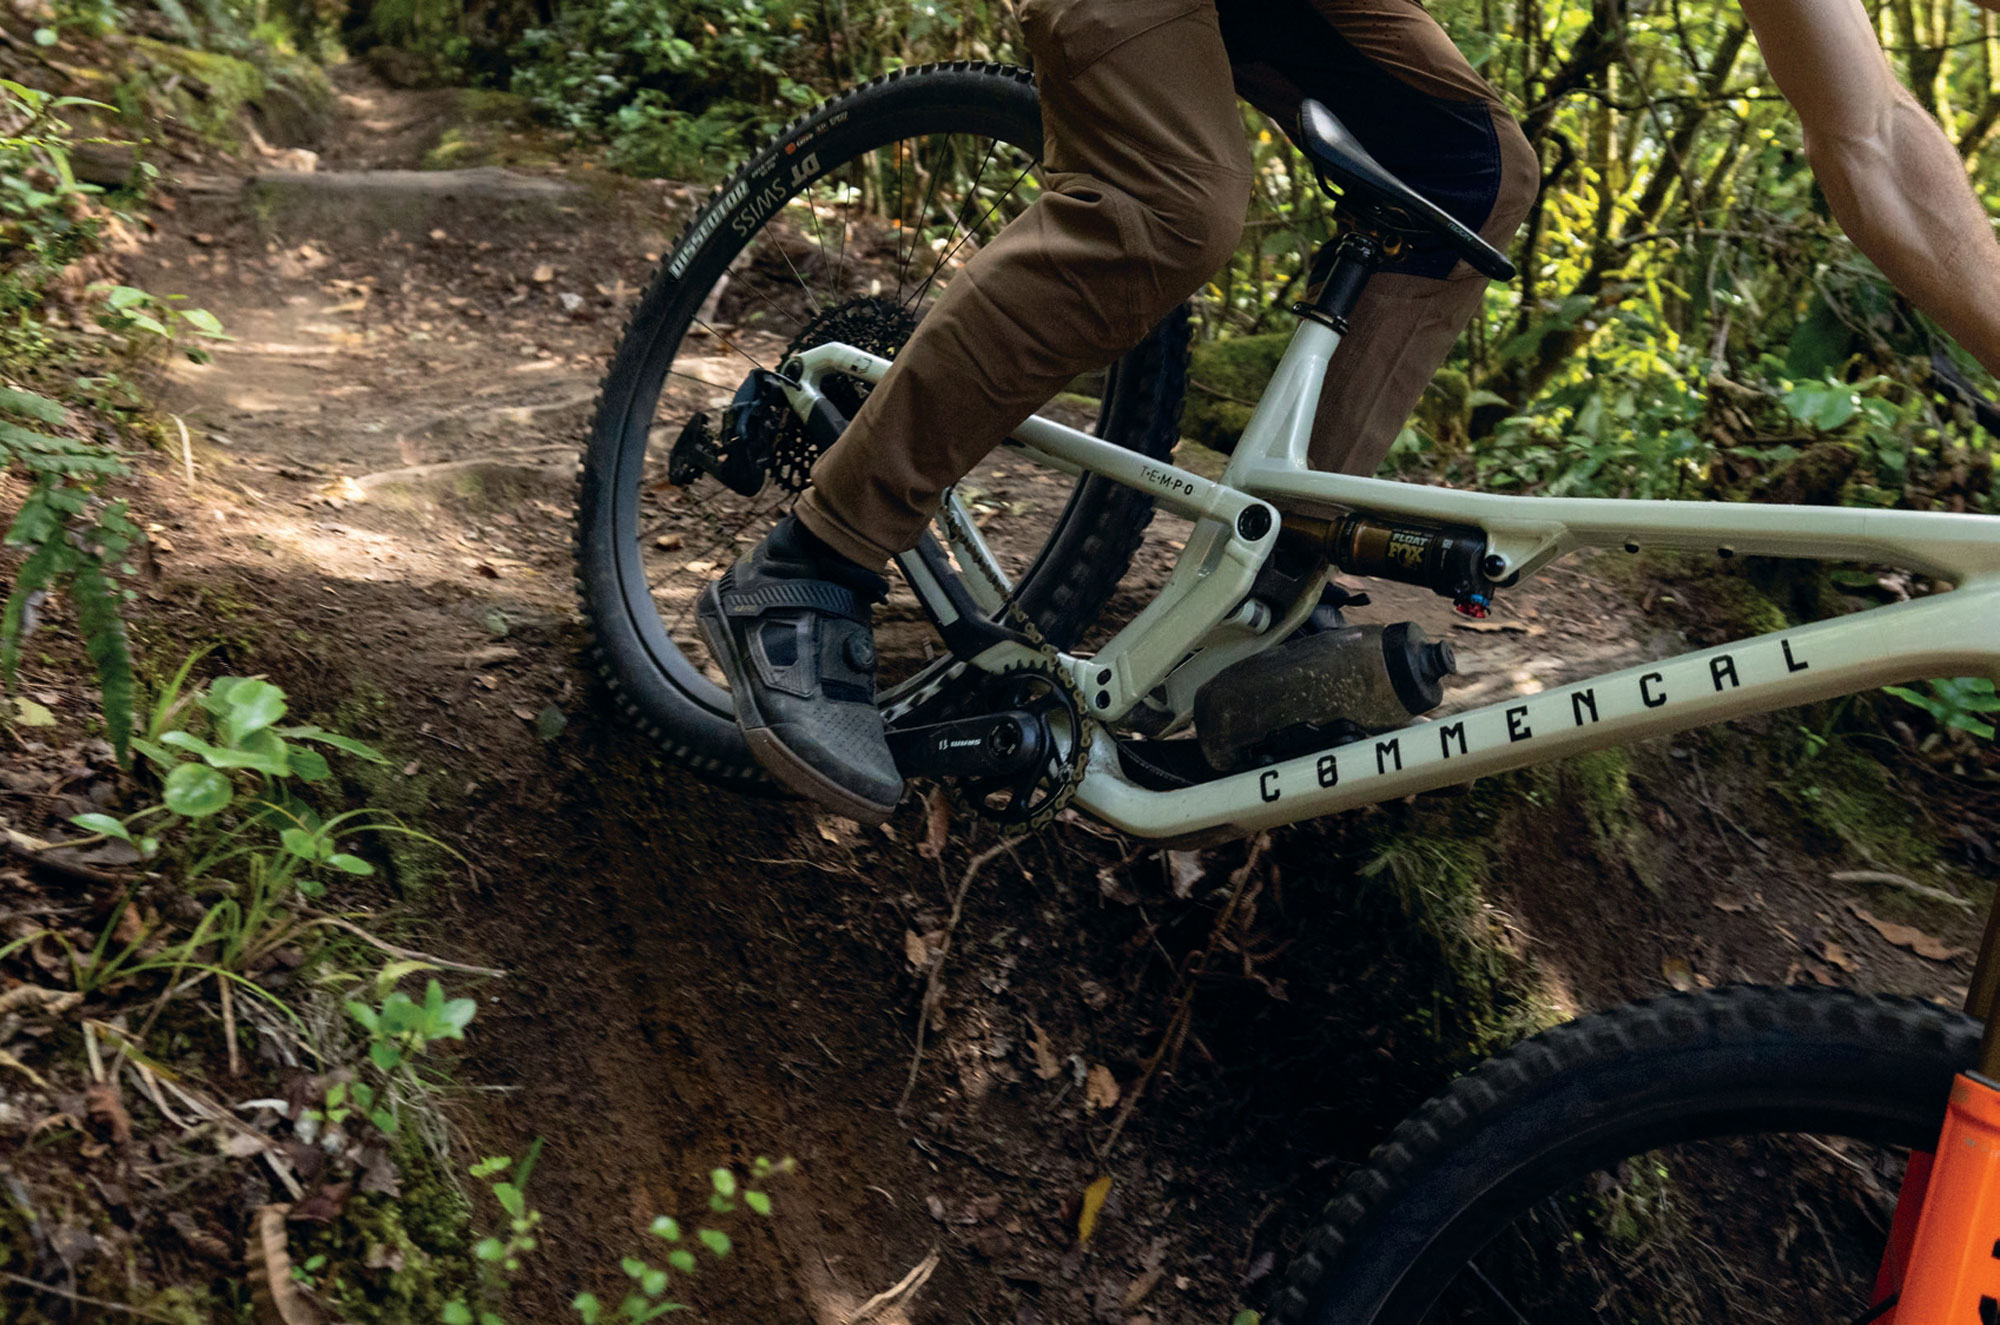
Commencal T.E.M.P.O. Signature
Words Lester Perry
Images Jamie Fox
RRP $9,200
Distributor Commencal NZ
Imagine this: The year is 2020. On a wall in the Commencal design office, there’s a mood board for a bike they’re developing. It’s covered in images torn from magazines and printed by the office laser printer, the products of quick-fingered Google image searches.
Amongst the chaotic collage of images, there’s a jet boat, a compass, a Pyrenean Ibex, a steam-roller with a big red X marked across it, one of those kid’s playground rides with a seat mounted atop a big spring, a metronome with a green tick scrawled over it, and a picture of Eli Tomac mid-whip over a motocross finish jump. Each image highlights a trait of the TEMPO—for example, the snappy handling of a jet boat and the climbing prowess of the Ibex. You get the idea.
Rumours swirled about an upcoming release after a prototype frame was teased online. With a distinctly lightweight XC build and ridden by none other than Pauline Ferrand-Prévot, would the new bike be Commencal’s entry into XC World Cup racing, piloted by PFP herself? Come 20th November 2022, speculation was put to rest as the bike officially broke cover in its final guise, under Hugo Frixtalon, in what is still one of the best bike launch videos I’ve ever seen. A short travel trail bike that would help define the category and embody all the inspiration from that design studio mood board.
Over the last five years or so, there’s been somewhat of an evolution in mountain bike geometry. Before this, if someone was searching for a bike to push their riding—and was into technical, aggressive trails—then a 150-160mm frame was the way to go. This was a necessity, to find the geometry that would be optimal to offer the rider confidence and control when tackling whatever trail lay before them. Nowadays, there’s been a pronounced shift in how designers think about geometry, and we’re finding bikes with travel in the 120-130mm region with geometry that is more suited to how most people want to ride. These bikes sit alongside those with similar travel numbers, but more cross-country-targeted geometry, on bike shop floors—an interesting dichotomy that not so long ago wasn’t the case. Rather than lugging around suspension travel (and associated weight), riders can now choose the geometry they want, coupled with their preferred suspension travel: a ‘Goldilocks porridge’ bike that is focussed on precisely what they want, rather than compromising on geometry or suspension travel.
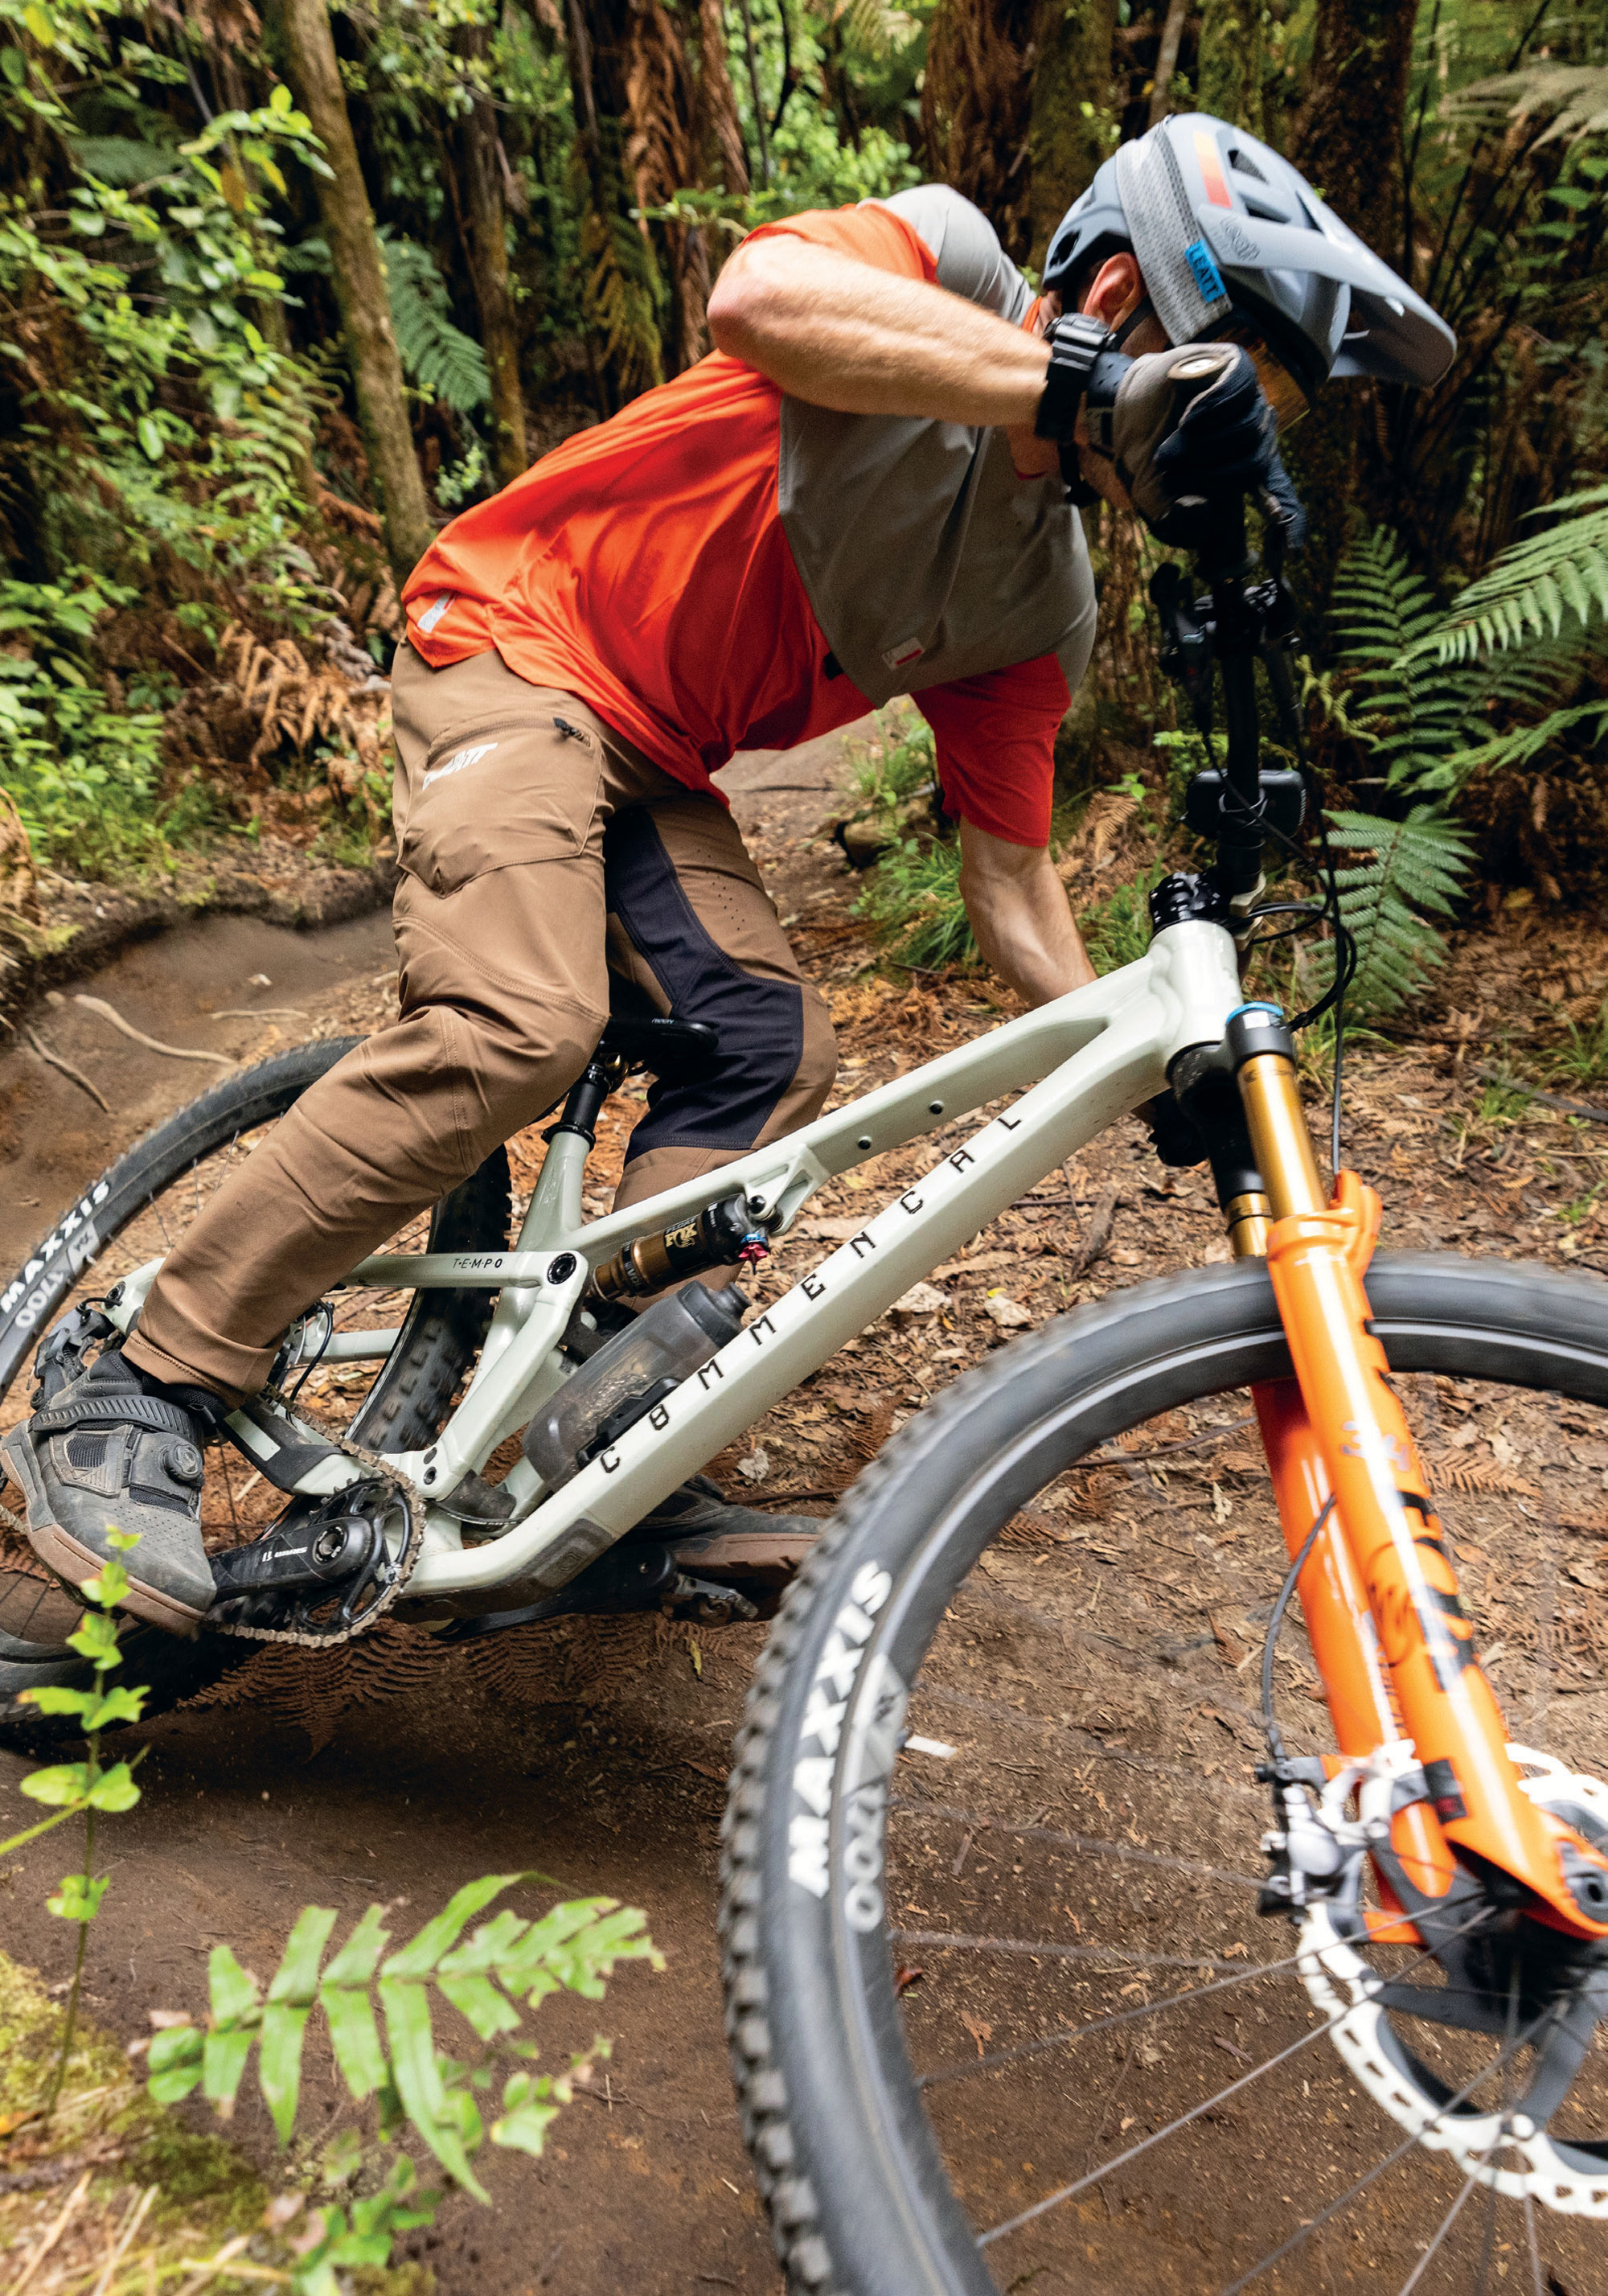
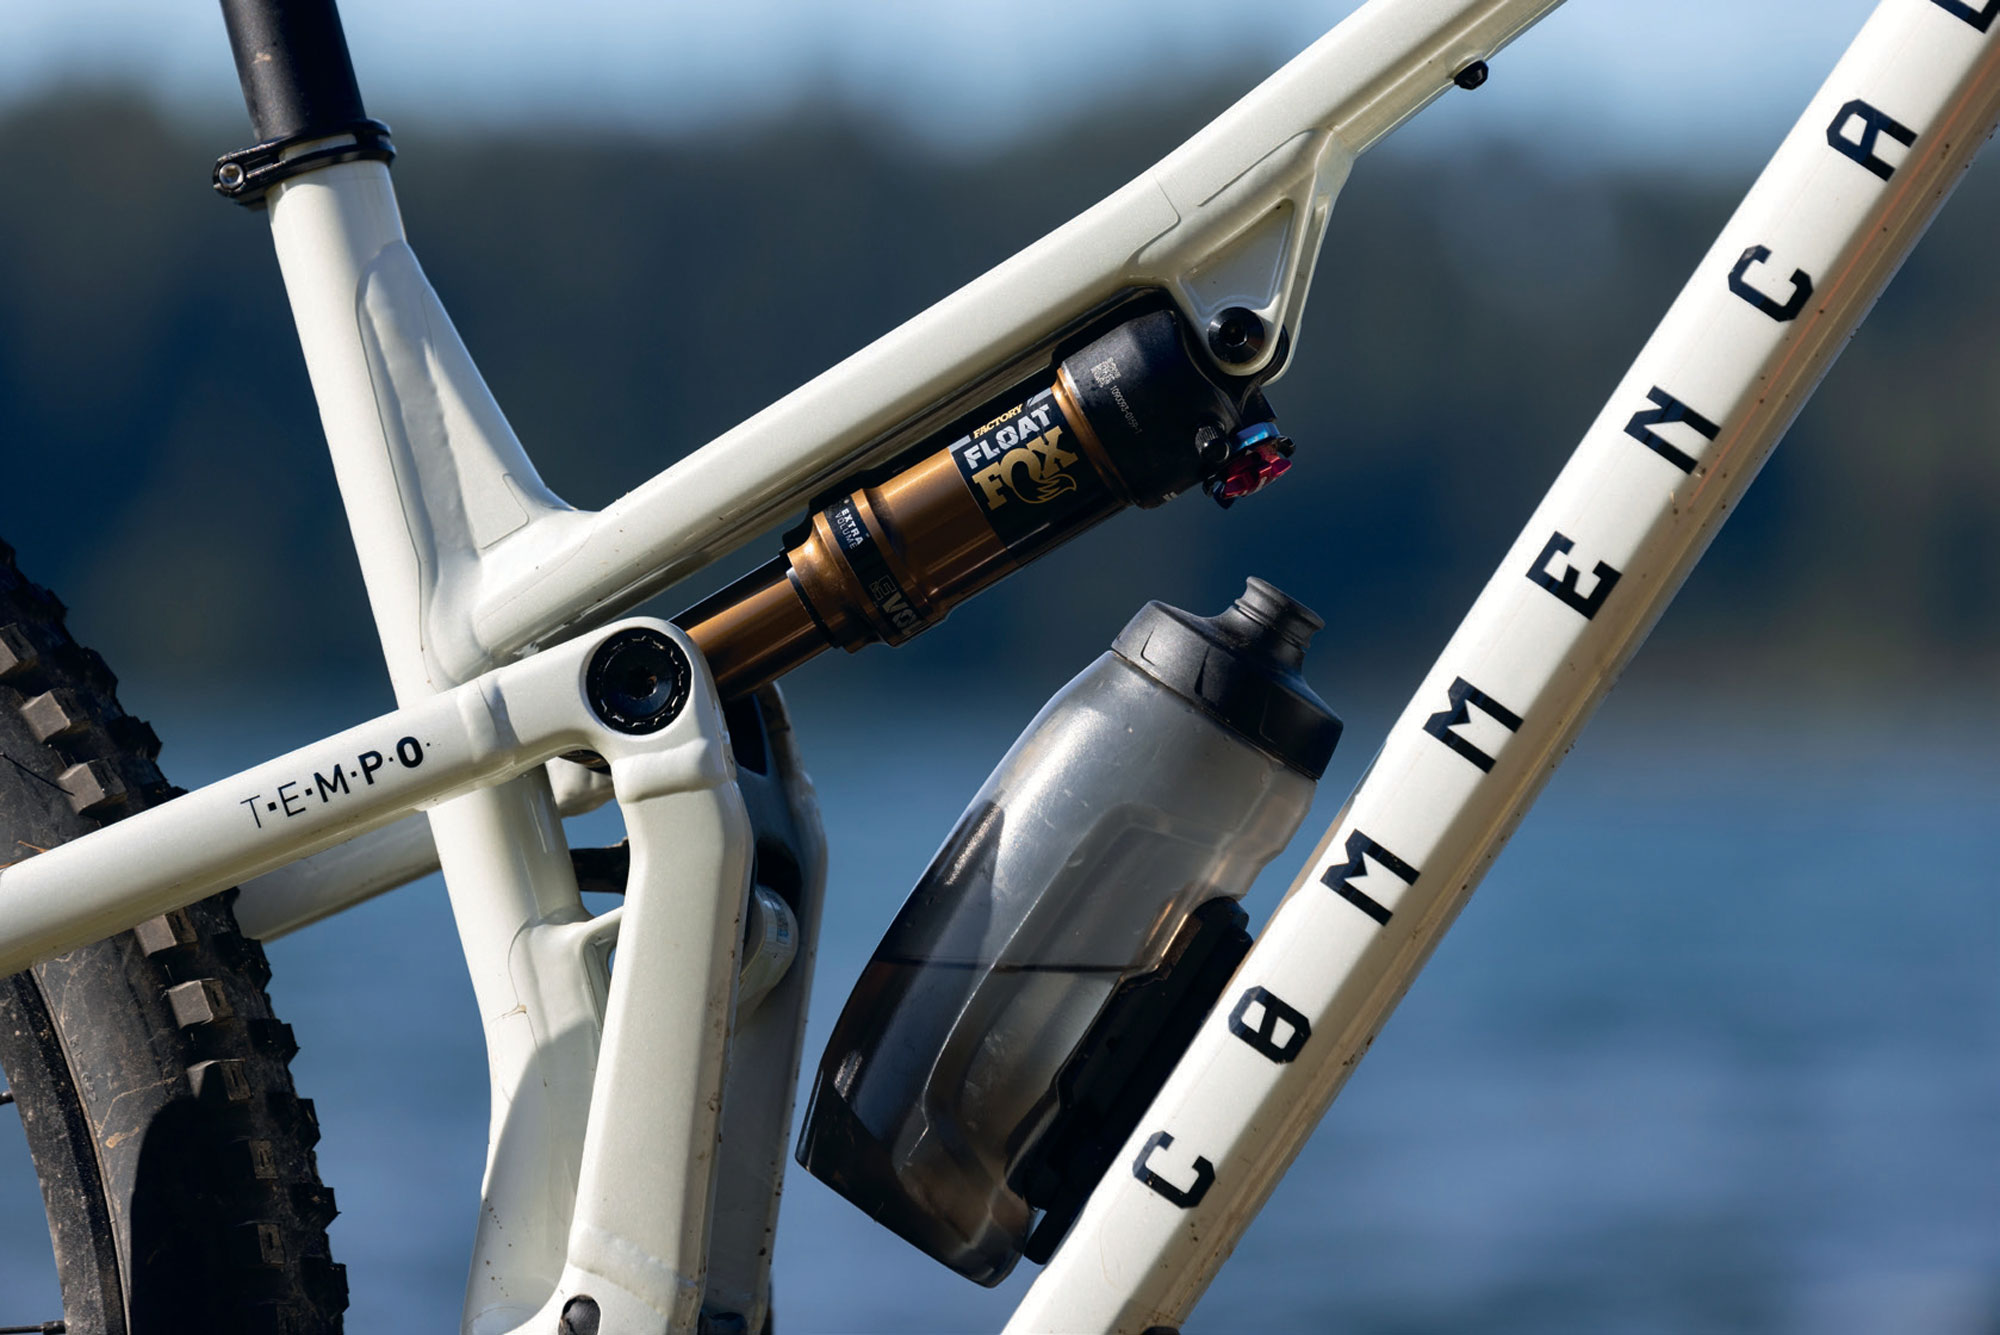
Enter the Commencal TEMPO: A big bike personality in a small travel package. Designed for pedalling efficiency while retaining the ability to tackle whatever trail is thrown at it. The bike’s metronome graphic points to a key aspect of the bike: pedalling—like a metronome, tapping out a cadence and covering kilometres. Its geometry speaks to its gravity roots.
There’s a lot to like about the Tempo.
Frameset
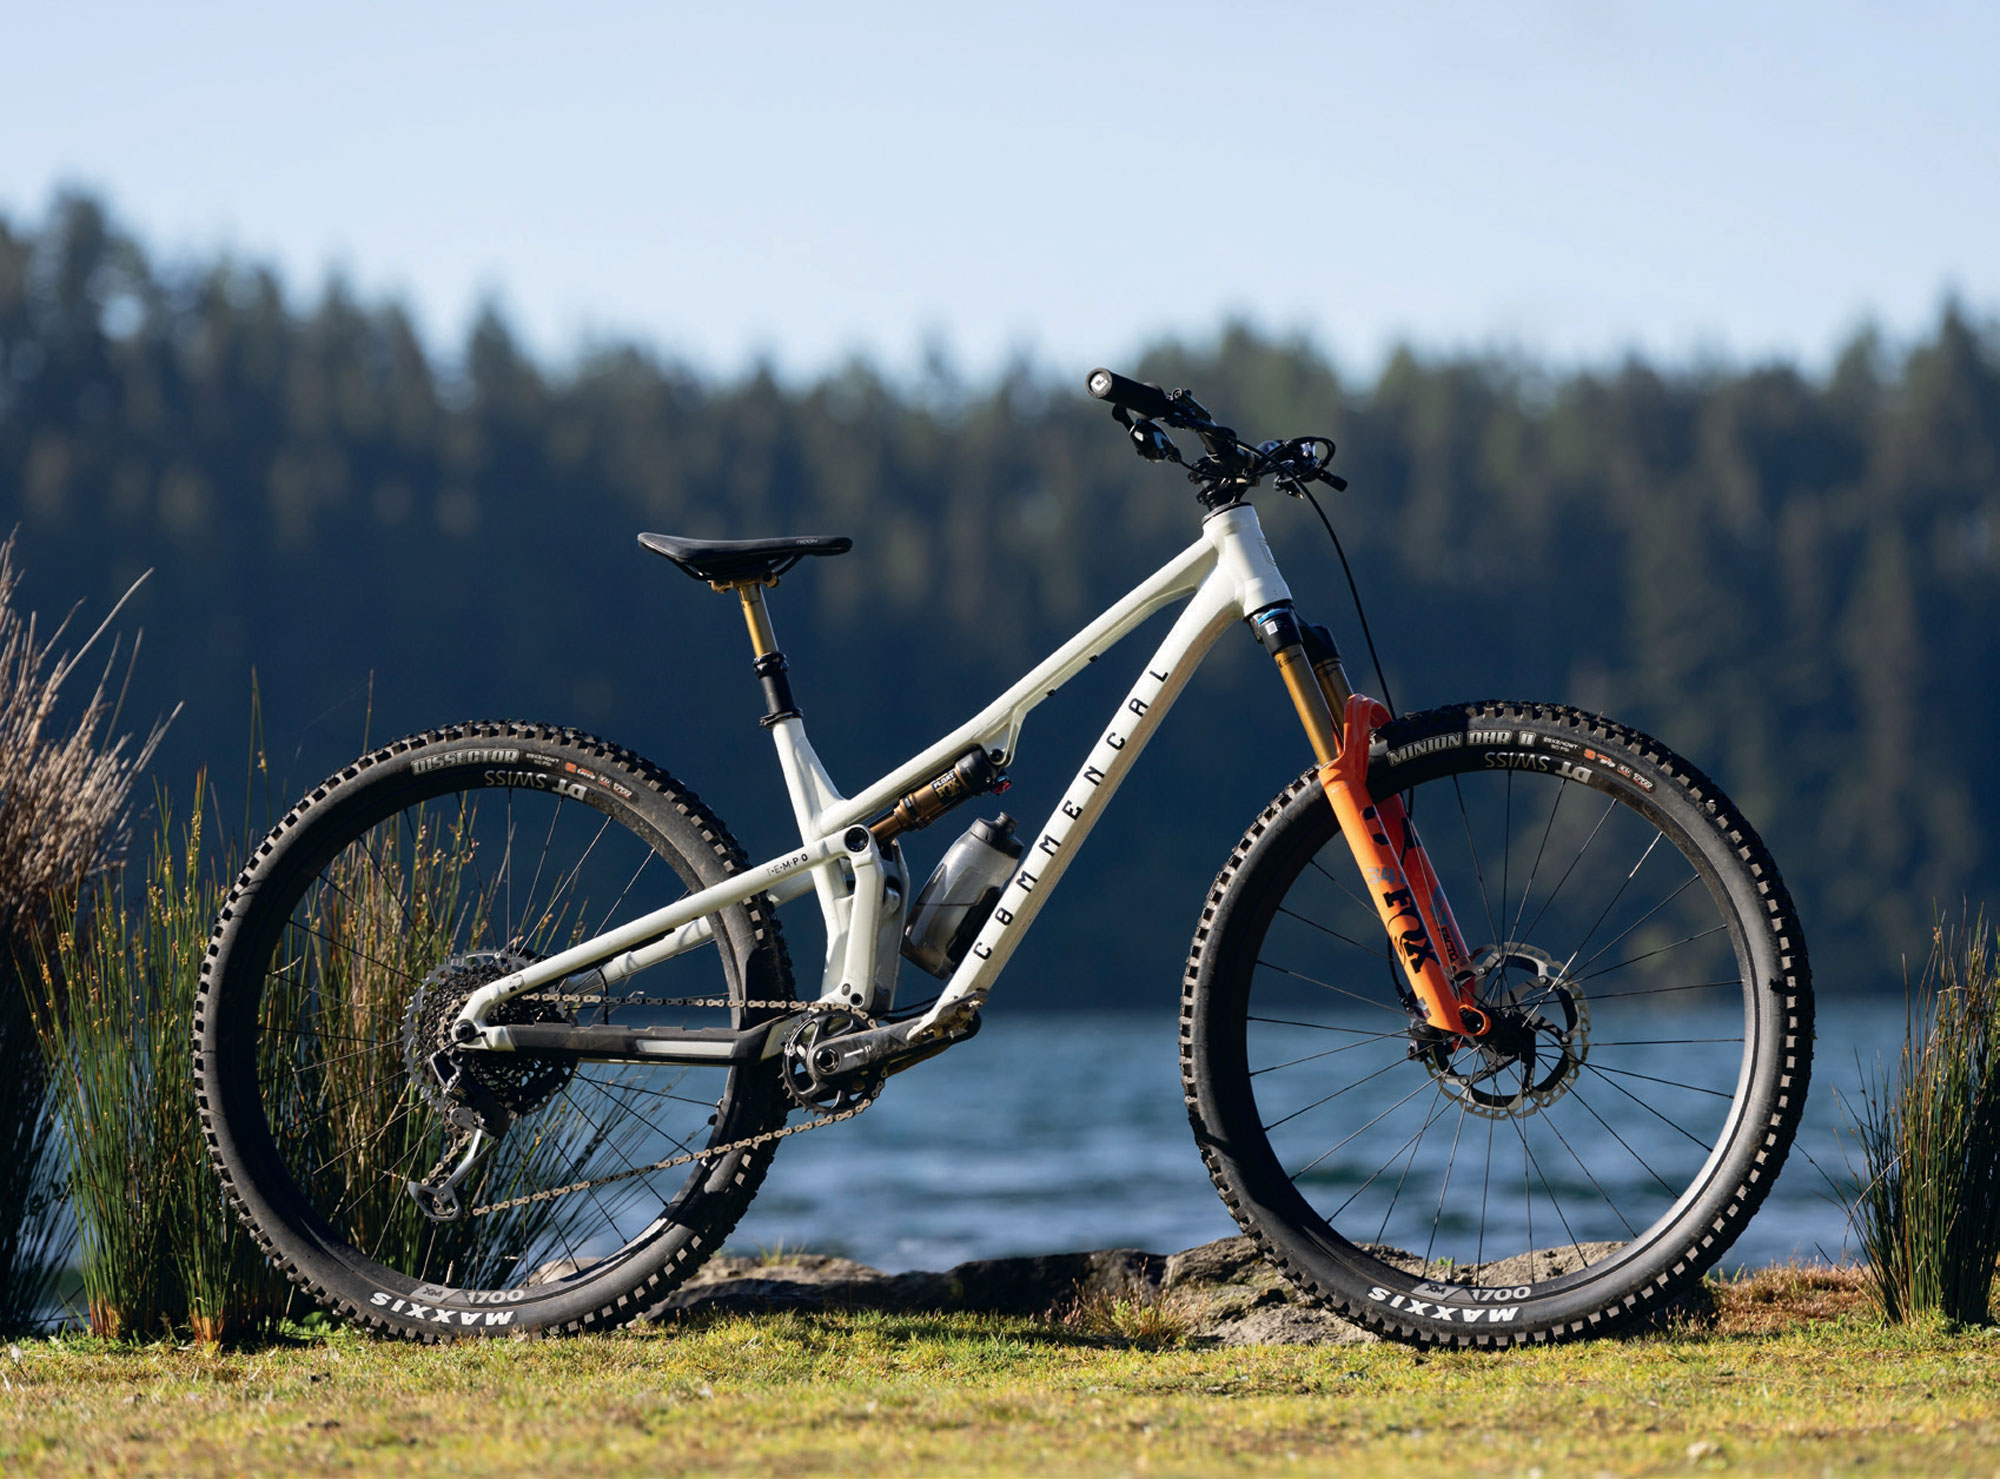
The Tempo is based around 125mm of rear travel and a 140mm fork, aiming squarely at the short travel trail bike segment. Offered only in Aluminium, the frame stays true to Commencal’s commitment to avoid using carbon fibre, due to concern about its environmental impact.
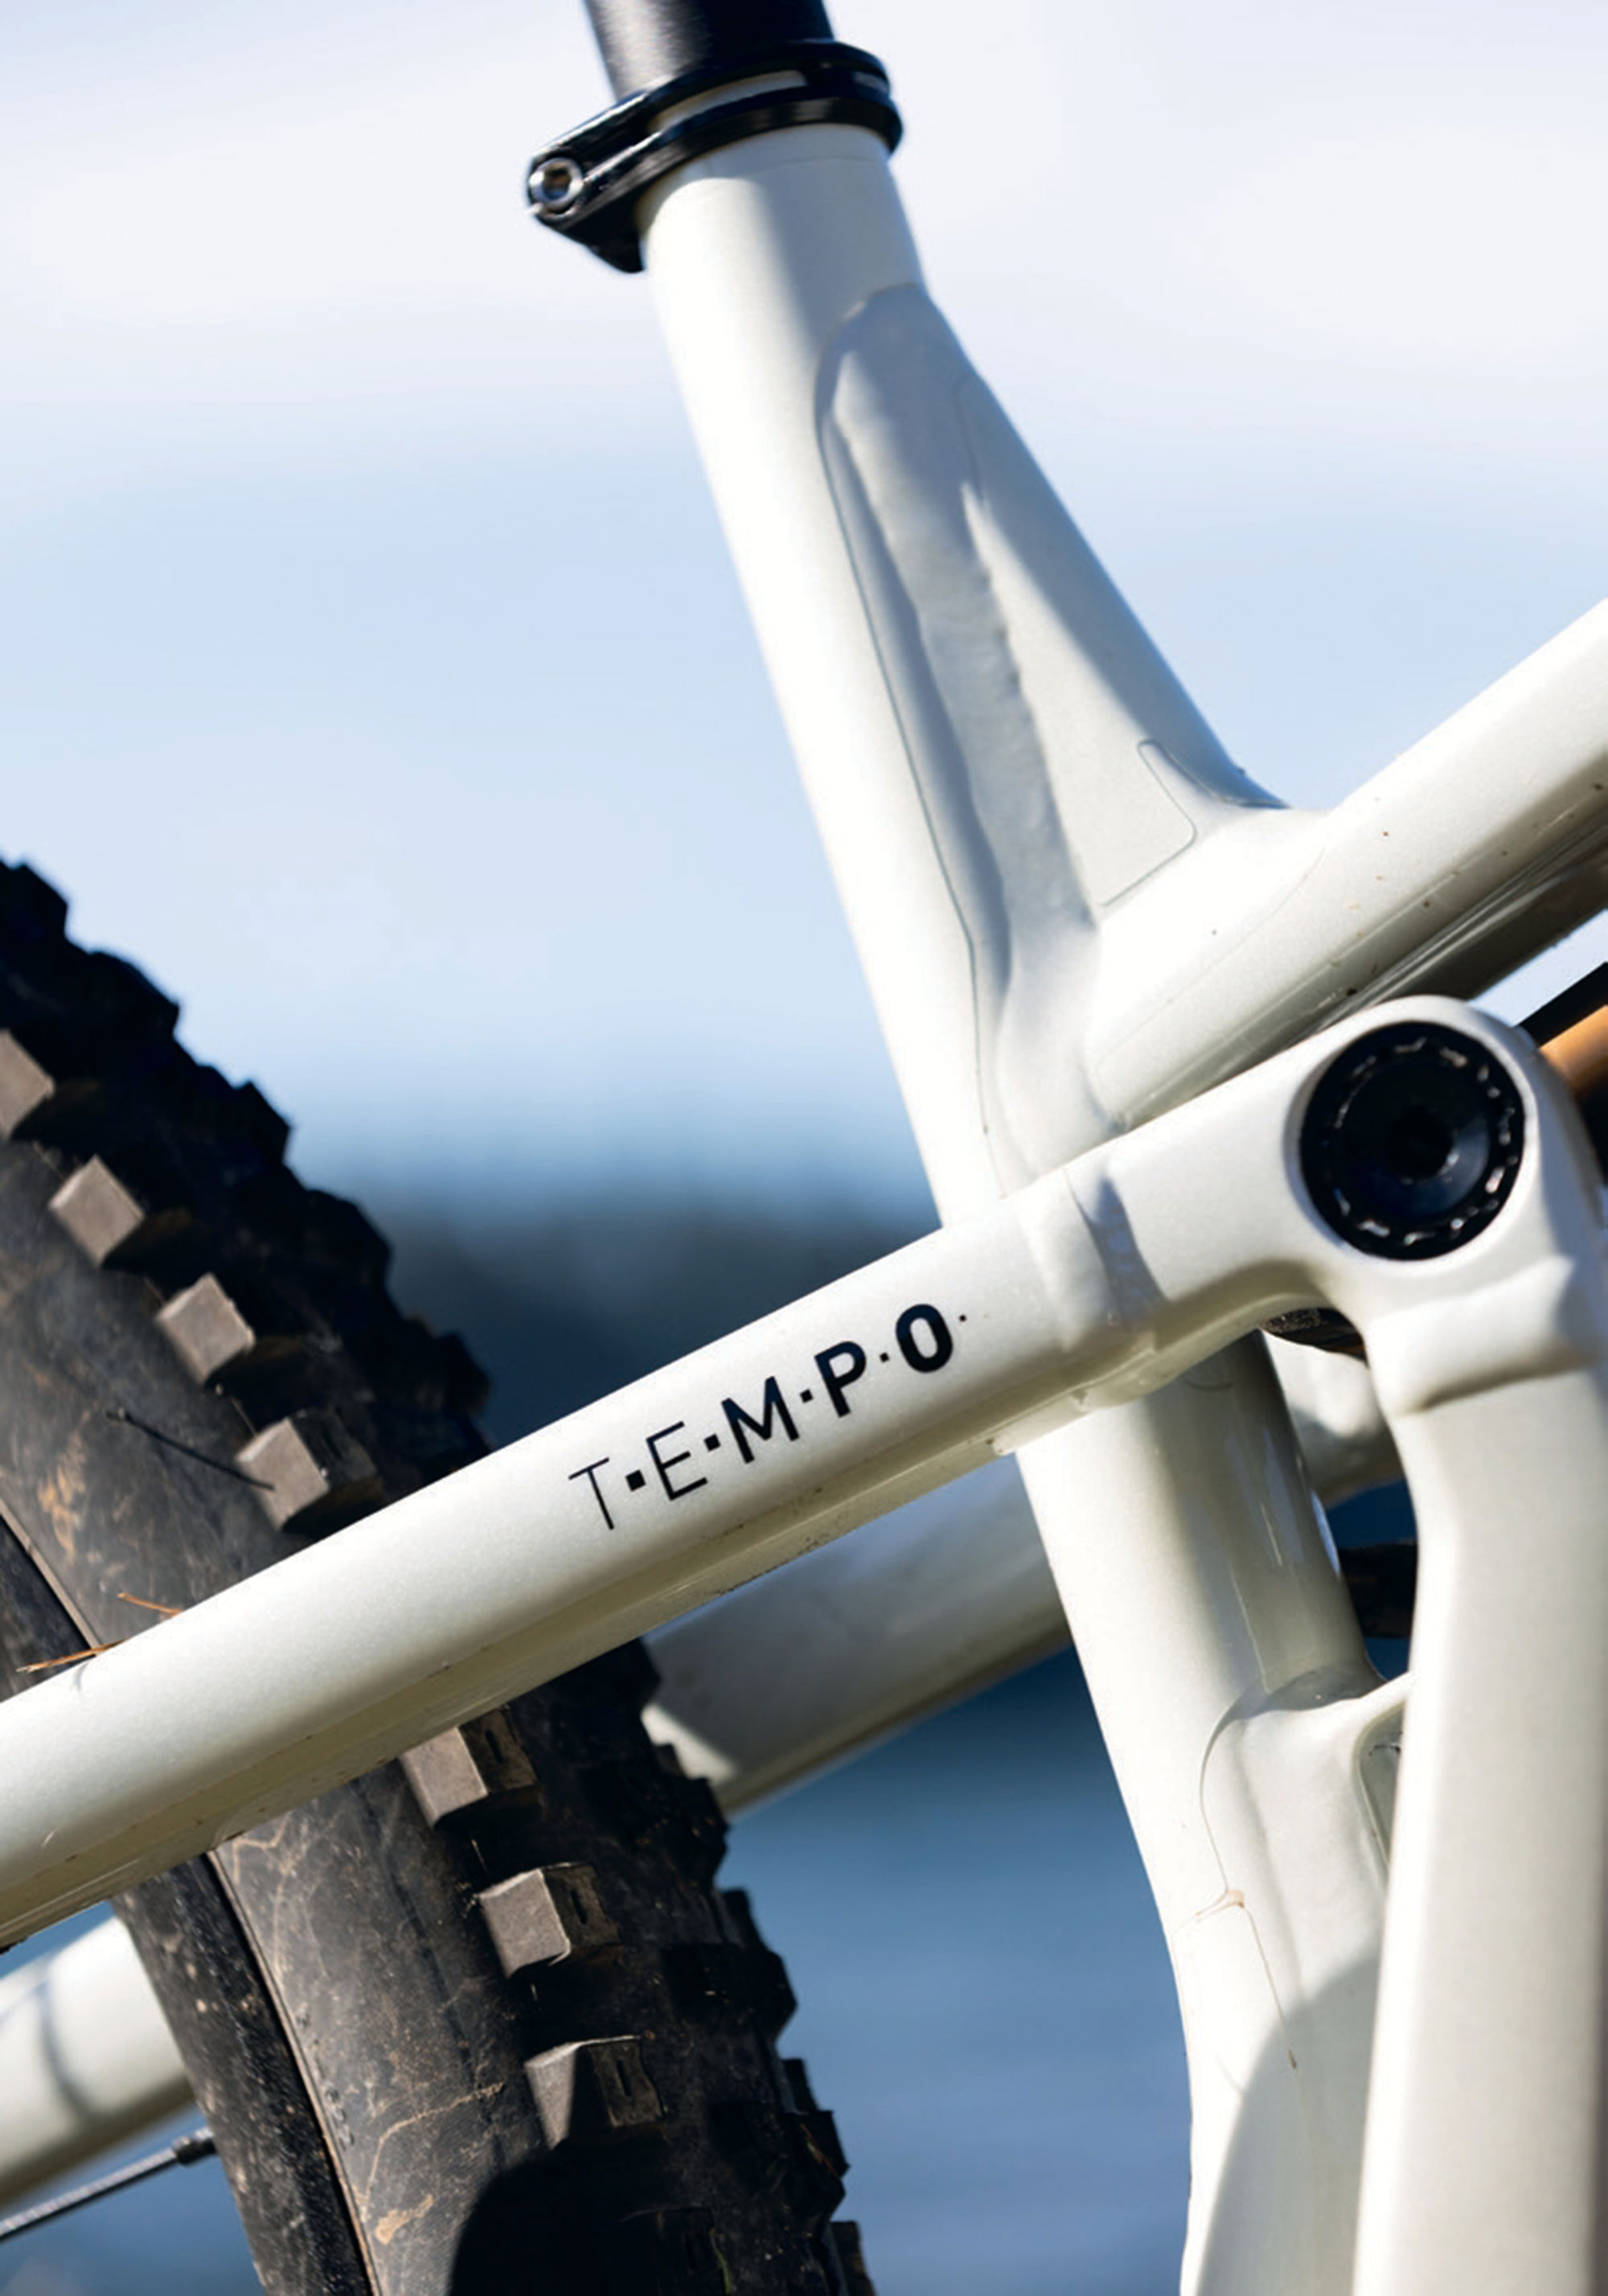
The Tempo shares the sleek look of the Meta V5. The frame’s lines flow seamlessly from the headtube down to the rear stays. The low-slung top tube gives ample room for a rider to move around the chassis and helps keep the centre of gravity low.
Designers borrowed the Virtual Contact System (VCS) suspension linkage from the Tempo’s big brother, the Meta V5, which I reviewed in a previous issue. While maintaining the same overall function, the VCS is simplified slightly to suit the Tempo’s smaller suspension package. This virtual pivot design suits the TEMPO to a tee, allowing a reasonably supple start to the stroke, while retaining satisfactory pedalling efficiency.
Linkage pivots are all ‘through axle’ style with an expander cap to help keep them tight. They performed admirably and not once did I need to tighten any pivot point. Bearings are all manufactured by ‘Enduro,’ so I’d expect these to last longer than many OEM options. Three months in, I haven’t had any cause for concern, although most of my riding has been in the dry over summer, so time will tell.
At the end of the chainstay is the now obligatory UDH derailleur hangar, making an upgrade to a T-type drivetrain a no-brainer; a worthy upgrade for sure to get rid of one of those headset-routed cables!
There’s no funky, proprietary stuff happening with the Tempo, we find Boost 148mm spacing in the rear, a 31.6mm seatpost, and a BB92 press-fit bottom bracket—all bog standard, in a good way.
Rubber bumpers across the drive side seatstay, chainstay, and on the lower downtube, help mute unwanted noise and protect the frame from nasty chain chips or debris. Just like the Meta V5, the Tempo is surprisingly quiet on the trail, thanks in part to these bumpers.
Geometry
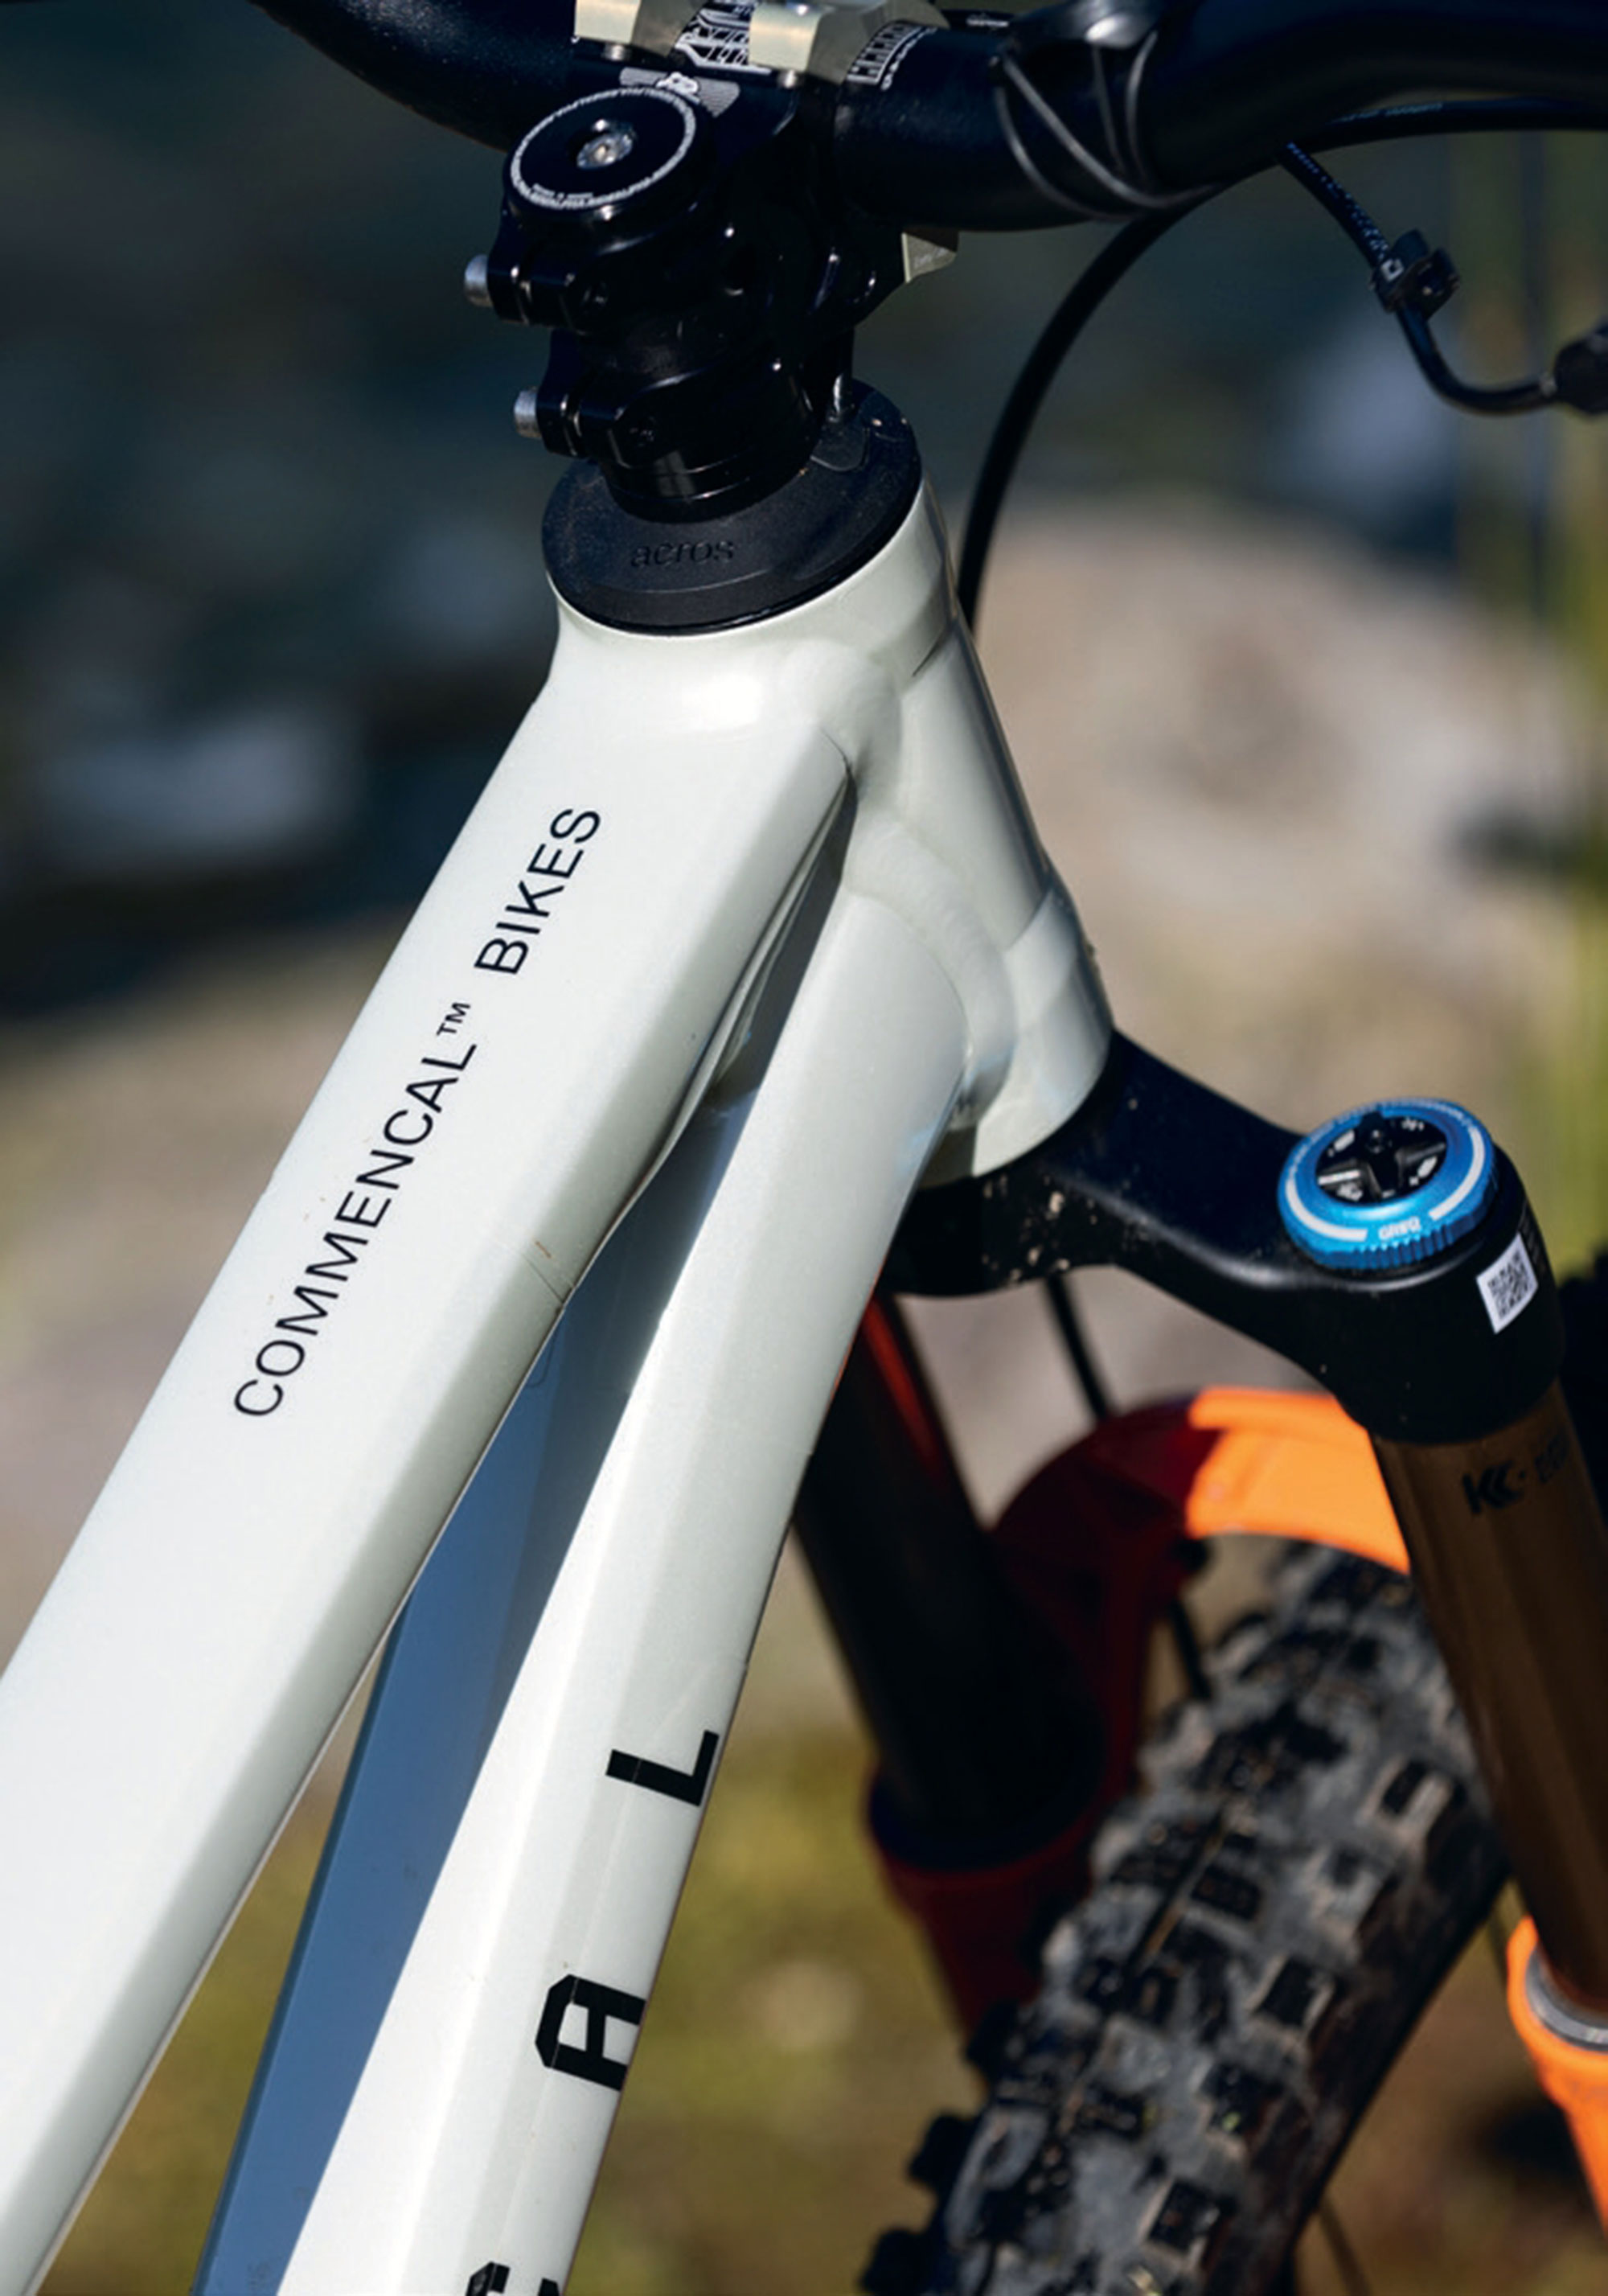
The geometry numbers on the Tempo are modern but not extreme, striking a comfy middle ground between an Enduro bike and a cross country bike. The ‘medium’ size I rode has a middle-of-the-road 450mm reach, a category-topping 628.5mm stack, and an almost vanilla 435mm chainstay (440mm on L and XL bikes), while the seat tube angle is “better than most” at 76.6 degrees steep. The head angle is “steeper than some” at 65.5 degrees, but quite normal for a bike in this travel bracket. All that is to say; much like the Meta V5, the Tempo has a very balanced feel, with rider weight feeling like it sits slightly further back than on the Meta V5 (which has a 10mm longer reach in size medium).
Cockpit
A complete Renthal cockpit features a ‘Fatbar Lite’ 31.8-mm handlebar that is 760mm wide and has 30mm of rise. It’s clamped in place by a Renthal Apex 40mm-long stem. This setup has a nice balance of weight, performance and value, and the fact that they specified a 31.8mm clamp bar gets a big tick in my book. Not to mention my favourite grip: the ODI Longneck.
Wheels & Tyres
The party bus rolls on a set of DT Swiss XM 1700 rims on DT 350 hubs. As I’ve mentioned in other reviews, I’m a big fan of DT Swiss wheels—and these never skipped a beat. They’re not the lightest, at over 1800 grams, but given the price point and intended use, at least a rider won’t need to give their wheels a second thought as they are burly enough to handle some heavy hits. Their 30mm internal width pairs perfectly with the specced Maxxis EXO casing tyres. Up the front, the DHR II 29” x 2.4” WT with soft 3C MaxxGrip rubber compound is a savvy choice, offering exceptional grip across most scenarios. It rolls nicely, considering the level of grip and soft compound, and is an asset to the Tempo when trails get spicy. The Dissector 29” x 2.4” WT 3C MaxxTerra on the rear rolls well and has enough grip to keep things under control in most scenarios. It’s not a fantastic tyre, but it does suit general ‘trail bike’ type riding – although, if I were riding more on loose, rocky trails, I’d be reaching for something with a bit more bite.
Brakes
A tried-and-true pair of Shimano XT M8100 two-piston brakes help slow the Tempo down and, although they’ve proved reliable, the product managers missed a trick by not speccing a pair of lower-end—but more powerful—SLX 4-pot brakes. The M8100 brakes are okay on short descents, thanks to the MT905 Ice-Tech Freeza rotors, but they suffer on long descents, and I found myself having to haul on the levers more than I’d like. Simply changing to some 4-piston callipers would make a huge difference.
Shock
The Fox Float Factory, in its stock format, suited me perfectly, and no tweaking was required from Commencal’s initial recommendations. There’s a lockout lever in easy reach while riding and I used this a lot while climbing on gravel roads or smooth trails. A dial also offers two additional compression levels when the shock is ‘open’. I played a bit with these but found the bike’s overall feel much nicer in the lowest setting. It certainly pedalled better in the second or third setting than when fully open, but the added compression stunted the feel and was only a bonus on smooth trails where I’d throw the lockout anyway.
Fork
Front suspension is handled by a Fox 34 Factory with 140mm travel. There’s all the adjustment one would want, with low and high-speed rebound and compression dials. Interestingly, the spec sheet listed the fork as having a 51mm offset, something that I thought had gone away almost entirely these days in favour of 44mm versions. I initially thought maybe it was a typo but, sure enough, the bike turned up with the 51mm offset fork. Perhaps smaller travel bikes suit the larger offset? Whatever the case, I never gave it a second thought. Once I was out on the trail, it turned out that a bike still handles fine without the much-hyped 44mm offset. Who would have thought?! (I say this in jest!)
I was stoked on this fork; anything less would hamper the bike’s overall performance, and the 34 took everything I could throw at it. I’m 80kg, so not a lightweight, but I didn’t notice any untoward flex and, regardless of the trail, the fork was controlled and felt well damped. They say something works well if you never have to give it any thought, and this fork was proof of that. I backed off one click of highspeed rebound from recommended and called it good.
Drivetrain
The combination of a SRAM GX Eagle derailleur, shifter, cassette and chain takes care of shifting. While this stuff does the job, it wouldn’t be my first port of call for an upgrade on this bike, given the accessibility, accuracy and reliability of electronic derailleurs these days.
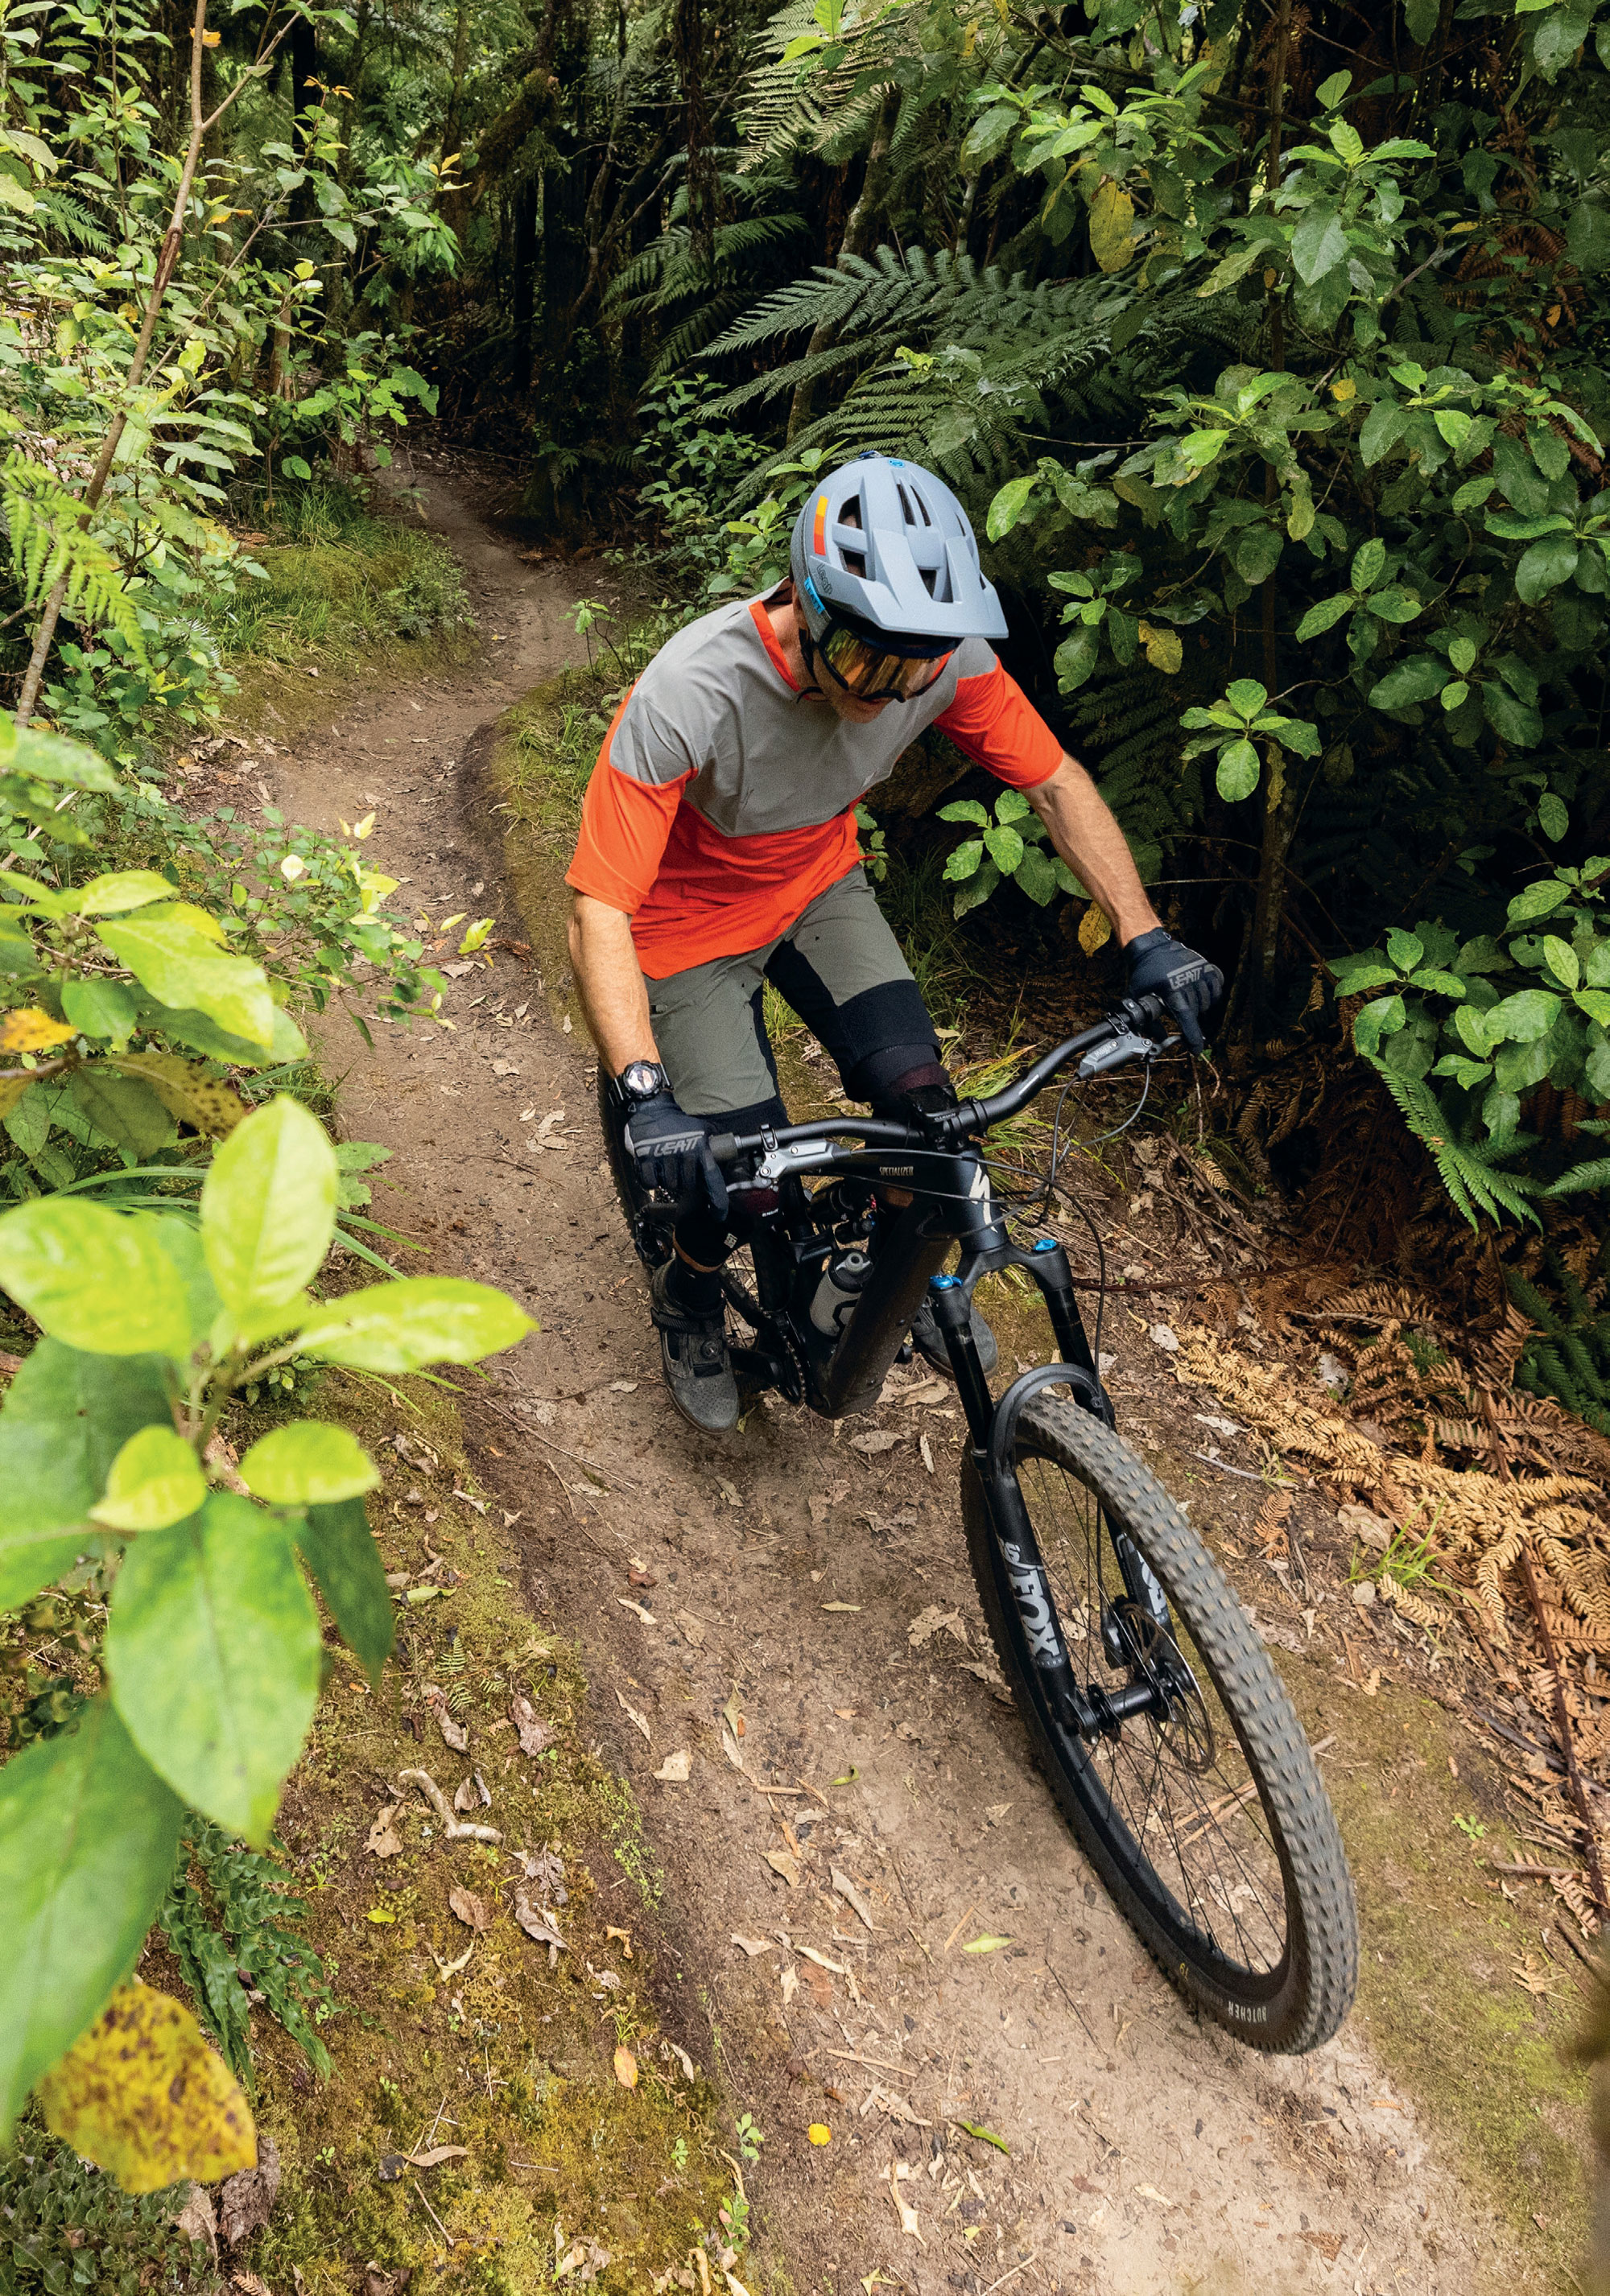
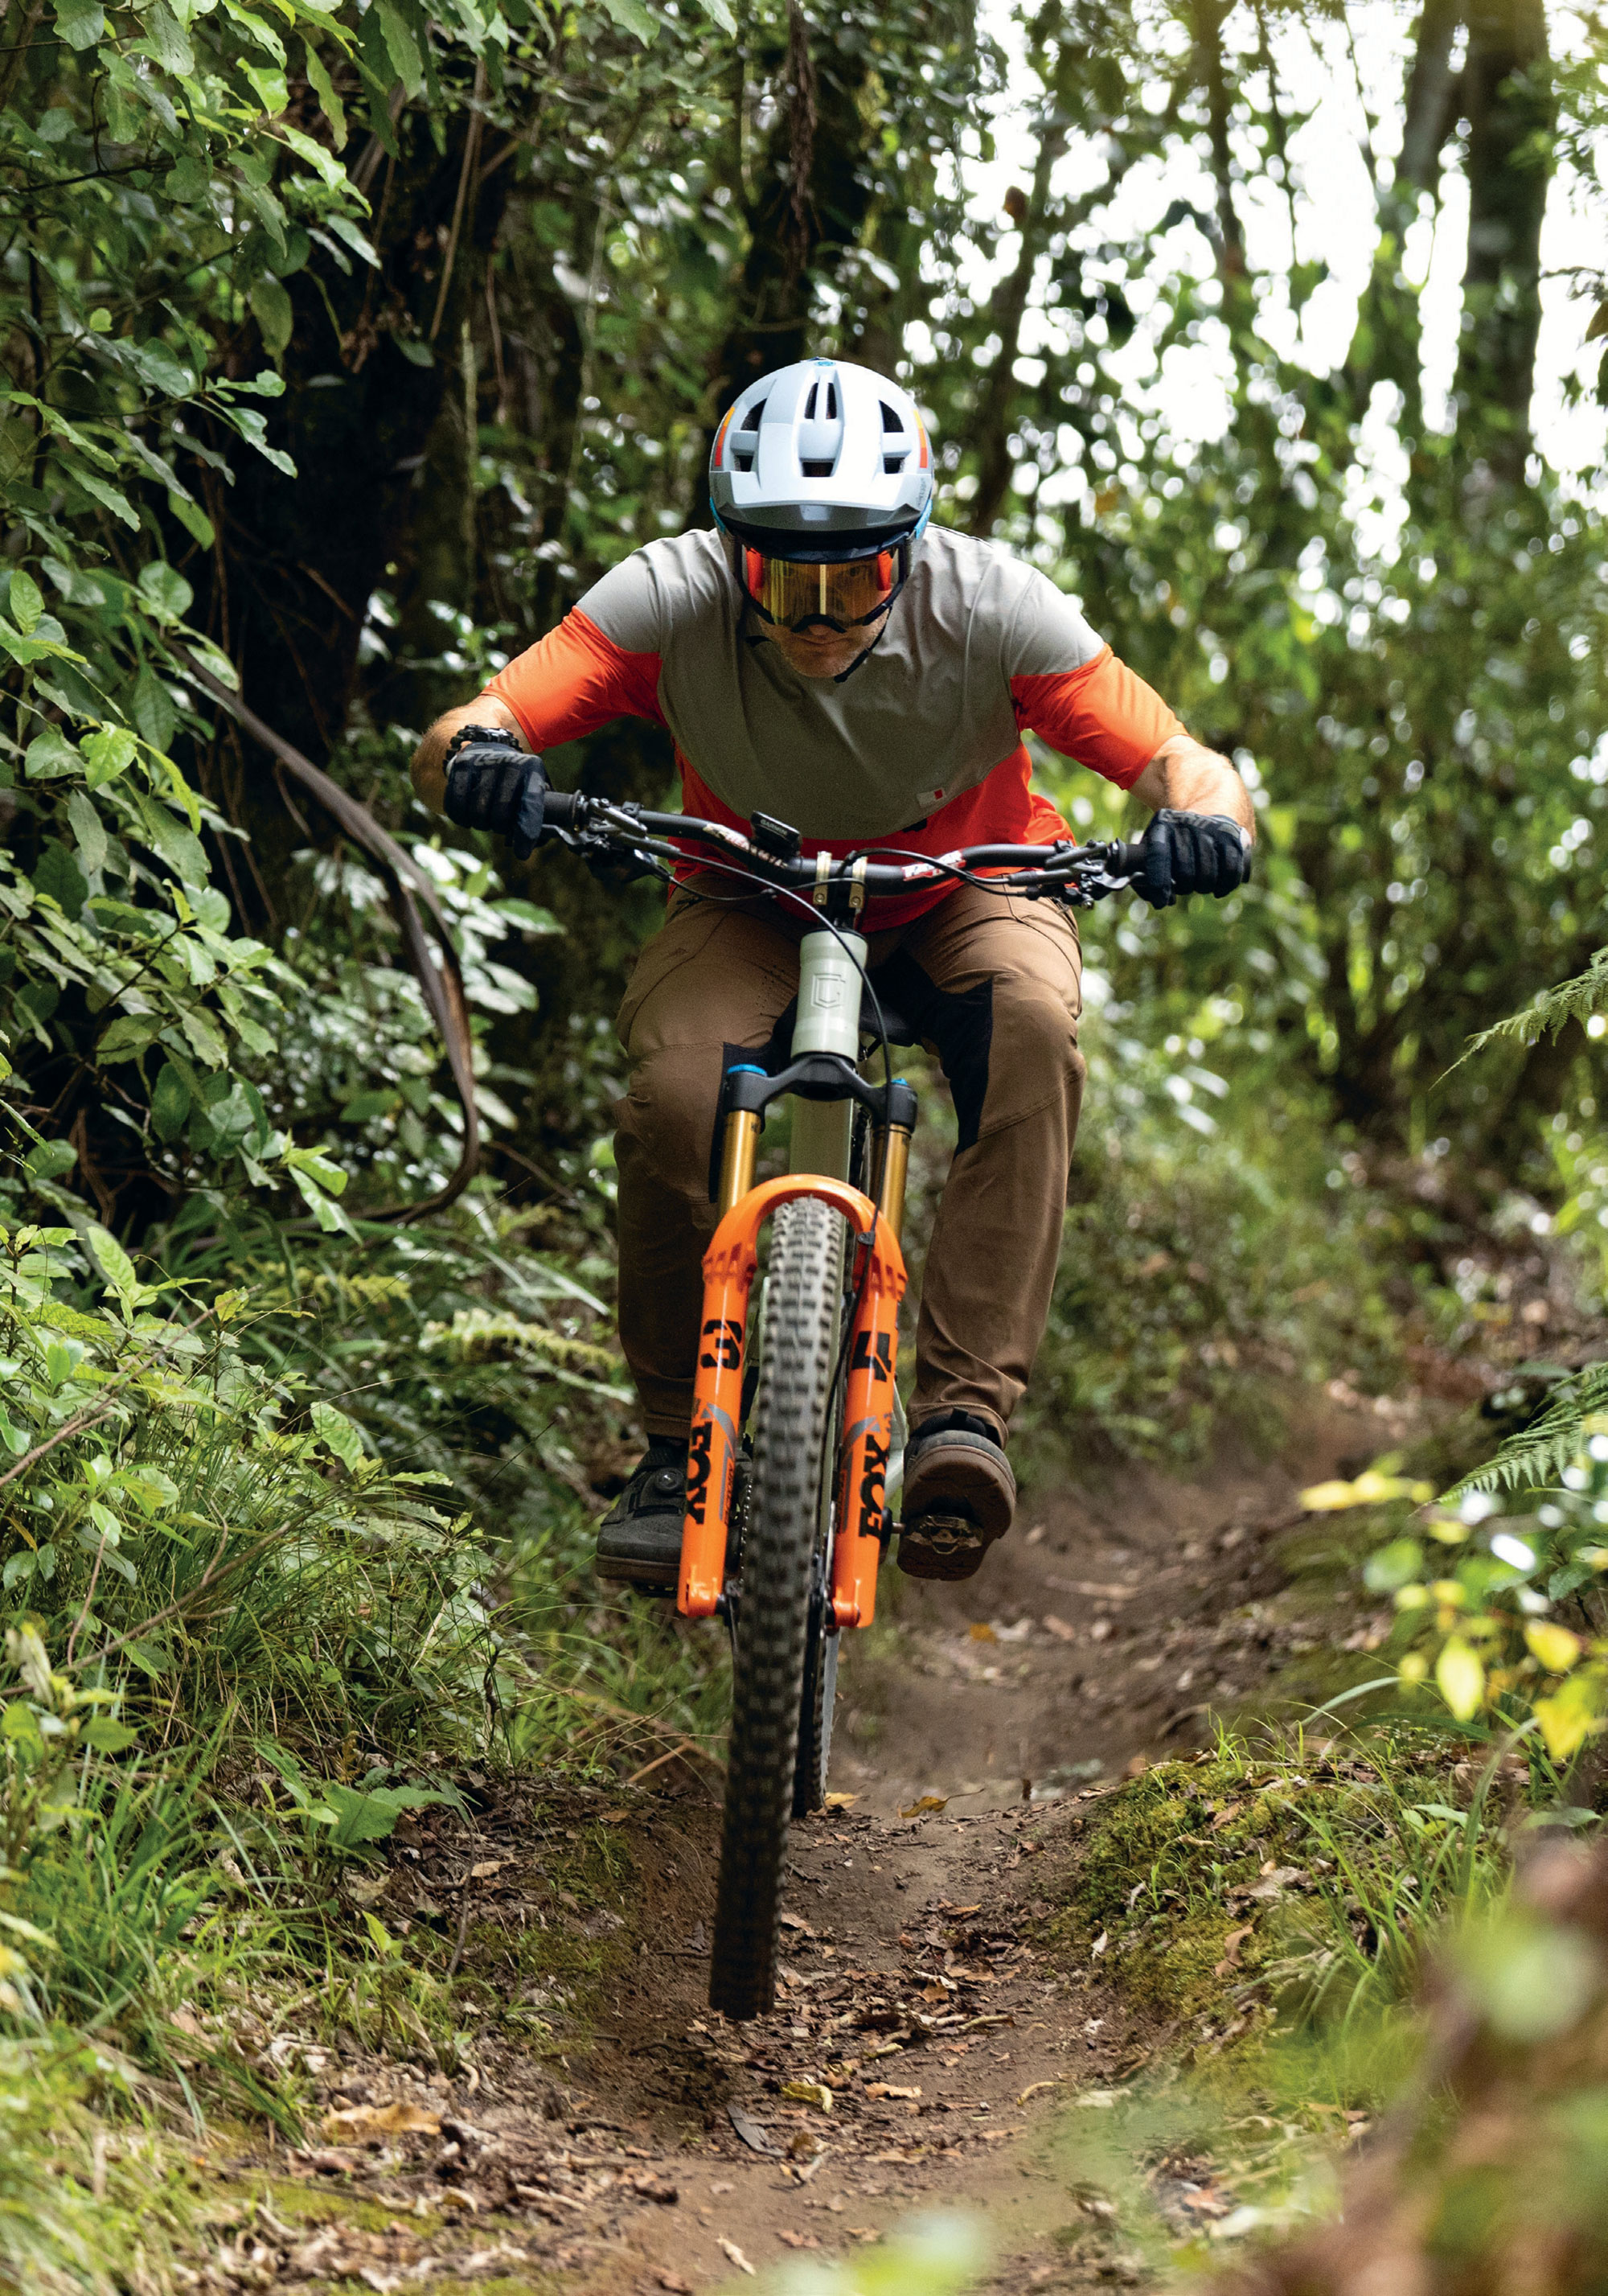
The Ride
From early 2024 until I took possession of the Tempo in October ‘24, I’d been getting about on either a 160-170mm travel Enduro bike or a full-gas XC race bike. So, I was keen to get on board a modern, short-travel trail bike, hoping that it would be more suited to how and where I ride most of the time.
As is the norm for me on many brands, I sit between the medium and large recommendations on the Tempo, so I chose to size down rather than up. With the steep seat tube and short reach (450mm), the bike felt short when seated but put me in a nice central position between the wheels, and the ample stack combined with the 30mm rise bar put my hands up relatively high, giving me a distinct feeling of confidence; helping the bike feel like it would handle more than it’s suspension travel numbers would first suggest.
I’d convey the vibe of the bike as “playful”—akin to a big wheeled BMX in many scenarios. It excels when you’re being creative on the trail and allows for a super dynamic riding style; jumps, manuals, Scandi flicks and nose bonks are all in the Tempo’s remit, but it’s equally at home just cruising around in more of a ‘cross country’ mode.
Seated climbing is excellent. The steep seat tube helped put a good amount of weight on the front tyre, helping retain control when threading the needle between obstacles or up steep switchbacks or steps. Climbing steep pitches out of the saddle, the suspension extends nicely, giving a firm platform to push against and a relatively snappy feel. At over 14kg, and with components designed for longevity rather than light weight, it’s unlikely a rider would be getting any climbing KOMs on the Tempo. Still, at least it gets you to the top of the hill efficiently and without feeling like you’re dragging an anchor.
I commented in my Meta V5 review about how easy it was to change directions and drive through turns, and the Tempo retains this feeling. It straight-up rips turns—flat or bermed. I have fond memories of blasting through successive steep berms at the Whangamata MTB park, surprised by how it transitioned from one to the other. The only drawback of short travel like this is that rough and loose corners take a little more finesse to maintain traction; less travel means less sag and, ultimately, less traction.
Snapping out of turns, and under power while coming from a dead stop, the bike gets up to speed well and there’s no excessive loss of energy to the suspension.
Descending on the Tempo is surprising. It’s not the first small-travel bike to ride like it has more travel, but it would be one of the better ones, leaving nothing on the table. With only 125mm of travel, it can’t offer a big bike ‘buttery’ feel as it sits into its sag, but it does a great job of quieting the chatter on the trail. It doesn’t blow through travel to an uncontrolled or harsh bottom out during larger hits or g-outs.
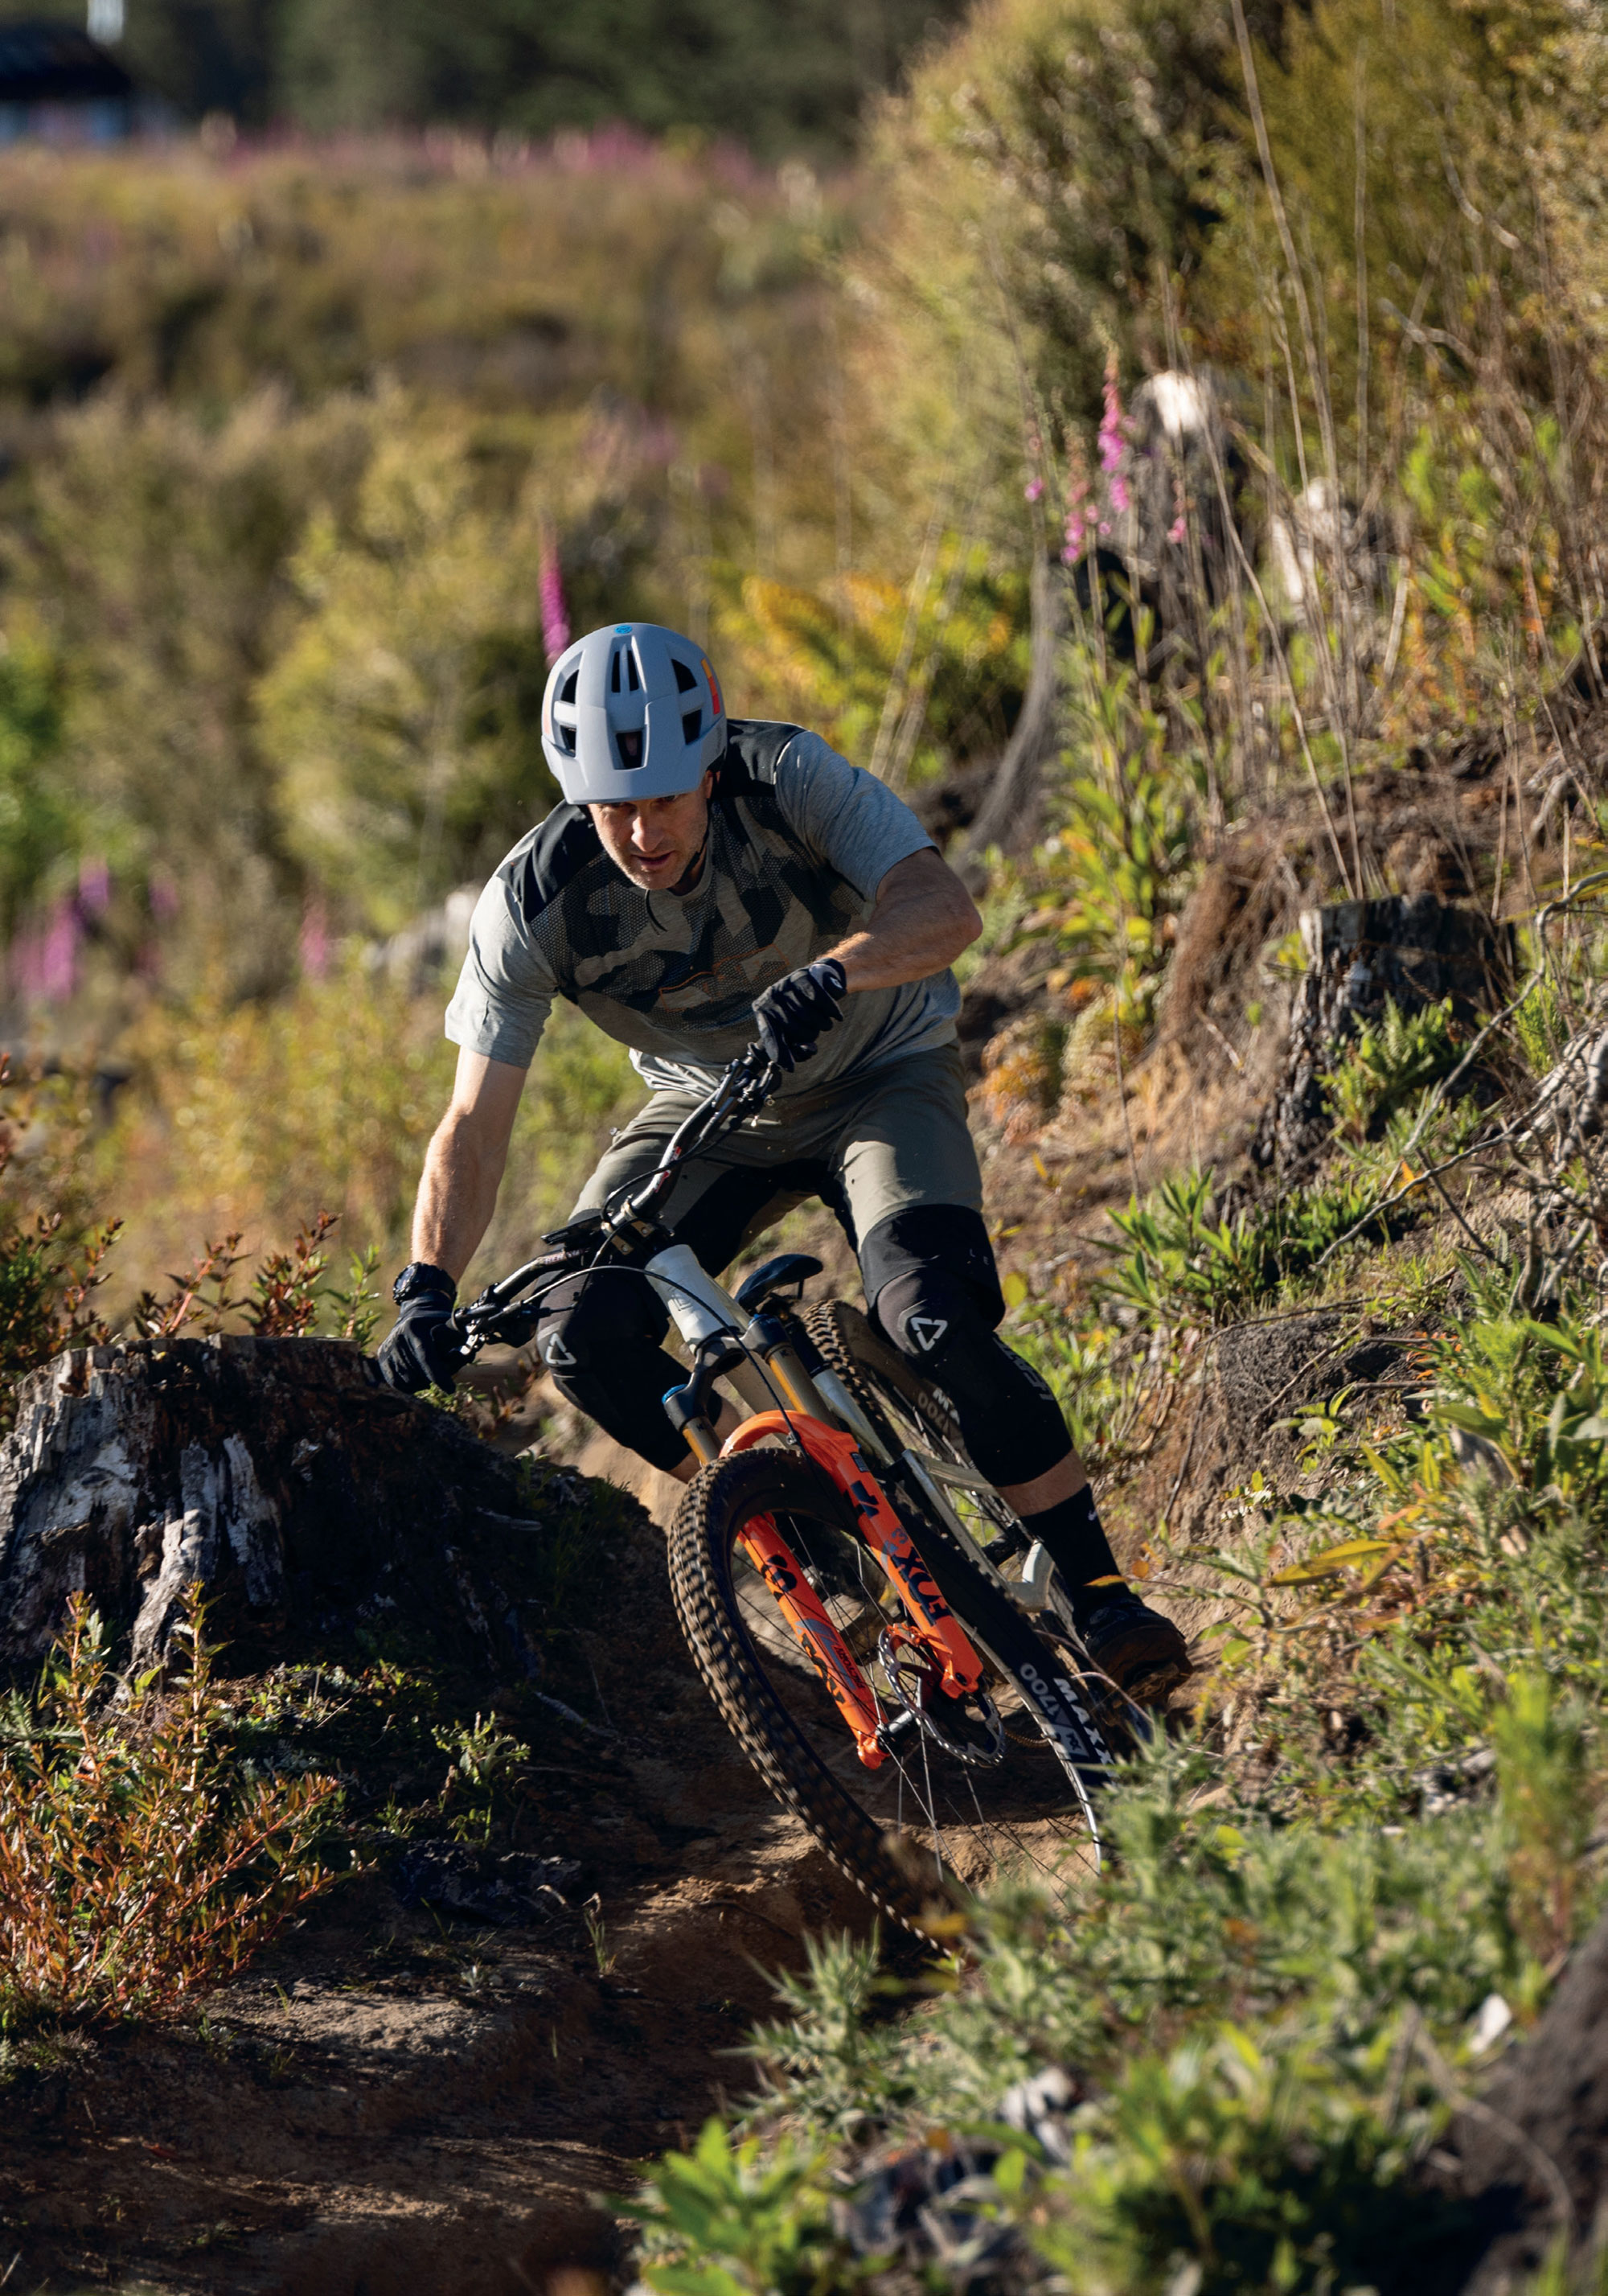
The Tempo is stable at speed, although the nature of its shorter travel means it’s not as planted as the Meta V5 or other similar Enduro bikes, and needs more brains and less brawn to deal with rough terrain. Aboard a bigger bike, one could essentially point and shoot, standing on the pedals and having the bike do all the work—the Tempo isn’t that sort of bike…. it’s true that you can’t have your cake and eat it too.
The 125mm of suspension is enough—until it isn’t. Over my three-month stint with the Tempo, there were a few times I came into a rough section a bit hot and really had to keep my wits about me as I used every millimetre of the travel, then relied on strength, skill and (possibly more so in my case) luck, to keep the ship upright. These situations were few and far between, but it’s worth keeping in mind that there’s not the safety net that a full enduro bike would offer. Although that’s not what anyone riding this bike would be after anyway.
I like a big day in the saddle, under my own steam, and I don’t like to feel like my fun is hampered by my choice of bike – regardless of whether I’m headed up or downhill. Living in the Waikato, the majority of my riding (all within a couple of hours’ drive) is on trails tending more towards the mellow end of the spectrum. Lots of digger-built trails and not so many gnarly, steep, rocky, “heck, I hope I can make this” sort of trails—unless I’m away in Nelson or Queenstown, which is once or twice a year, if I’m lucky. With this in mind, I’ve settled on the fact that a bike like the Tempo is realistically all I need: the ability to cover a decent amount of ground, climb effectively up hills, and be able to bomb back down whatever trail I choose without feeling like I’m being held back by inactive suspension or pucker-inducing handling.
Although I didn’t need to faff with the linkage at all, if I needed to—due to the layout of the VCS linkage and pivots—accessing the bottom shock bolt or pivot bolts can be a bit niggly; needing to remove some pivot bolts to access others. Not impossible, just time-consuming. If something in the back end comes loose while out on the trail, you’ll be holding up your riding buddies for a few minutes while you get it sorted.
The internal headset cable routing is the most polarising feature of the Tempo. Cables for the rear derailleur, dropper post and rear brake all squeeze their way through the headset top cap and down through the top bearing. There’s a bit going on up front. I’m yet to have a review bike long enough to need to replace a headset bearing and, if I had, I’m sure I’d do myself the favour of taking it to a bike shop with a mechanic who has far more patience than I do to complete the procedure. It’s fair to say that simply cracking the headset open, cleaning everything, popping off the bearing seal and re-lubing it once a month or so (depending on riding conditions) would drastically increase its lifespan. Spending 15 minutes doing this periodically is easier than a bearing replacement, which could take upwards of an hour.
Final thoughts
It’s taken some time for manufacturers to get little bikes ‘right’, but it seems they’re finally getting them dialled, bringing a shift in the mountain bike market as people realise a bike with “just” 125mm travel can handle everything they throw at it. Depending on where people ride, they probably don’t need a big travel bike as their daily rig. I’m now one of these people, and I’ve had an absolute blast riding the Tempo over the summer. I still have questions about headset routing and pivot bearing servicing over a longer term and through a winter of riding but, so far, I’m grinning.
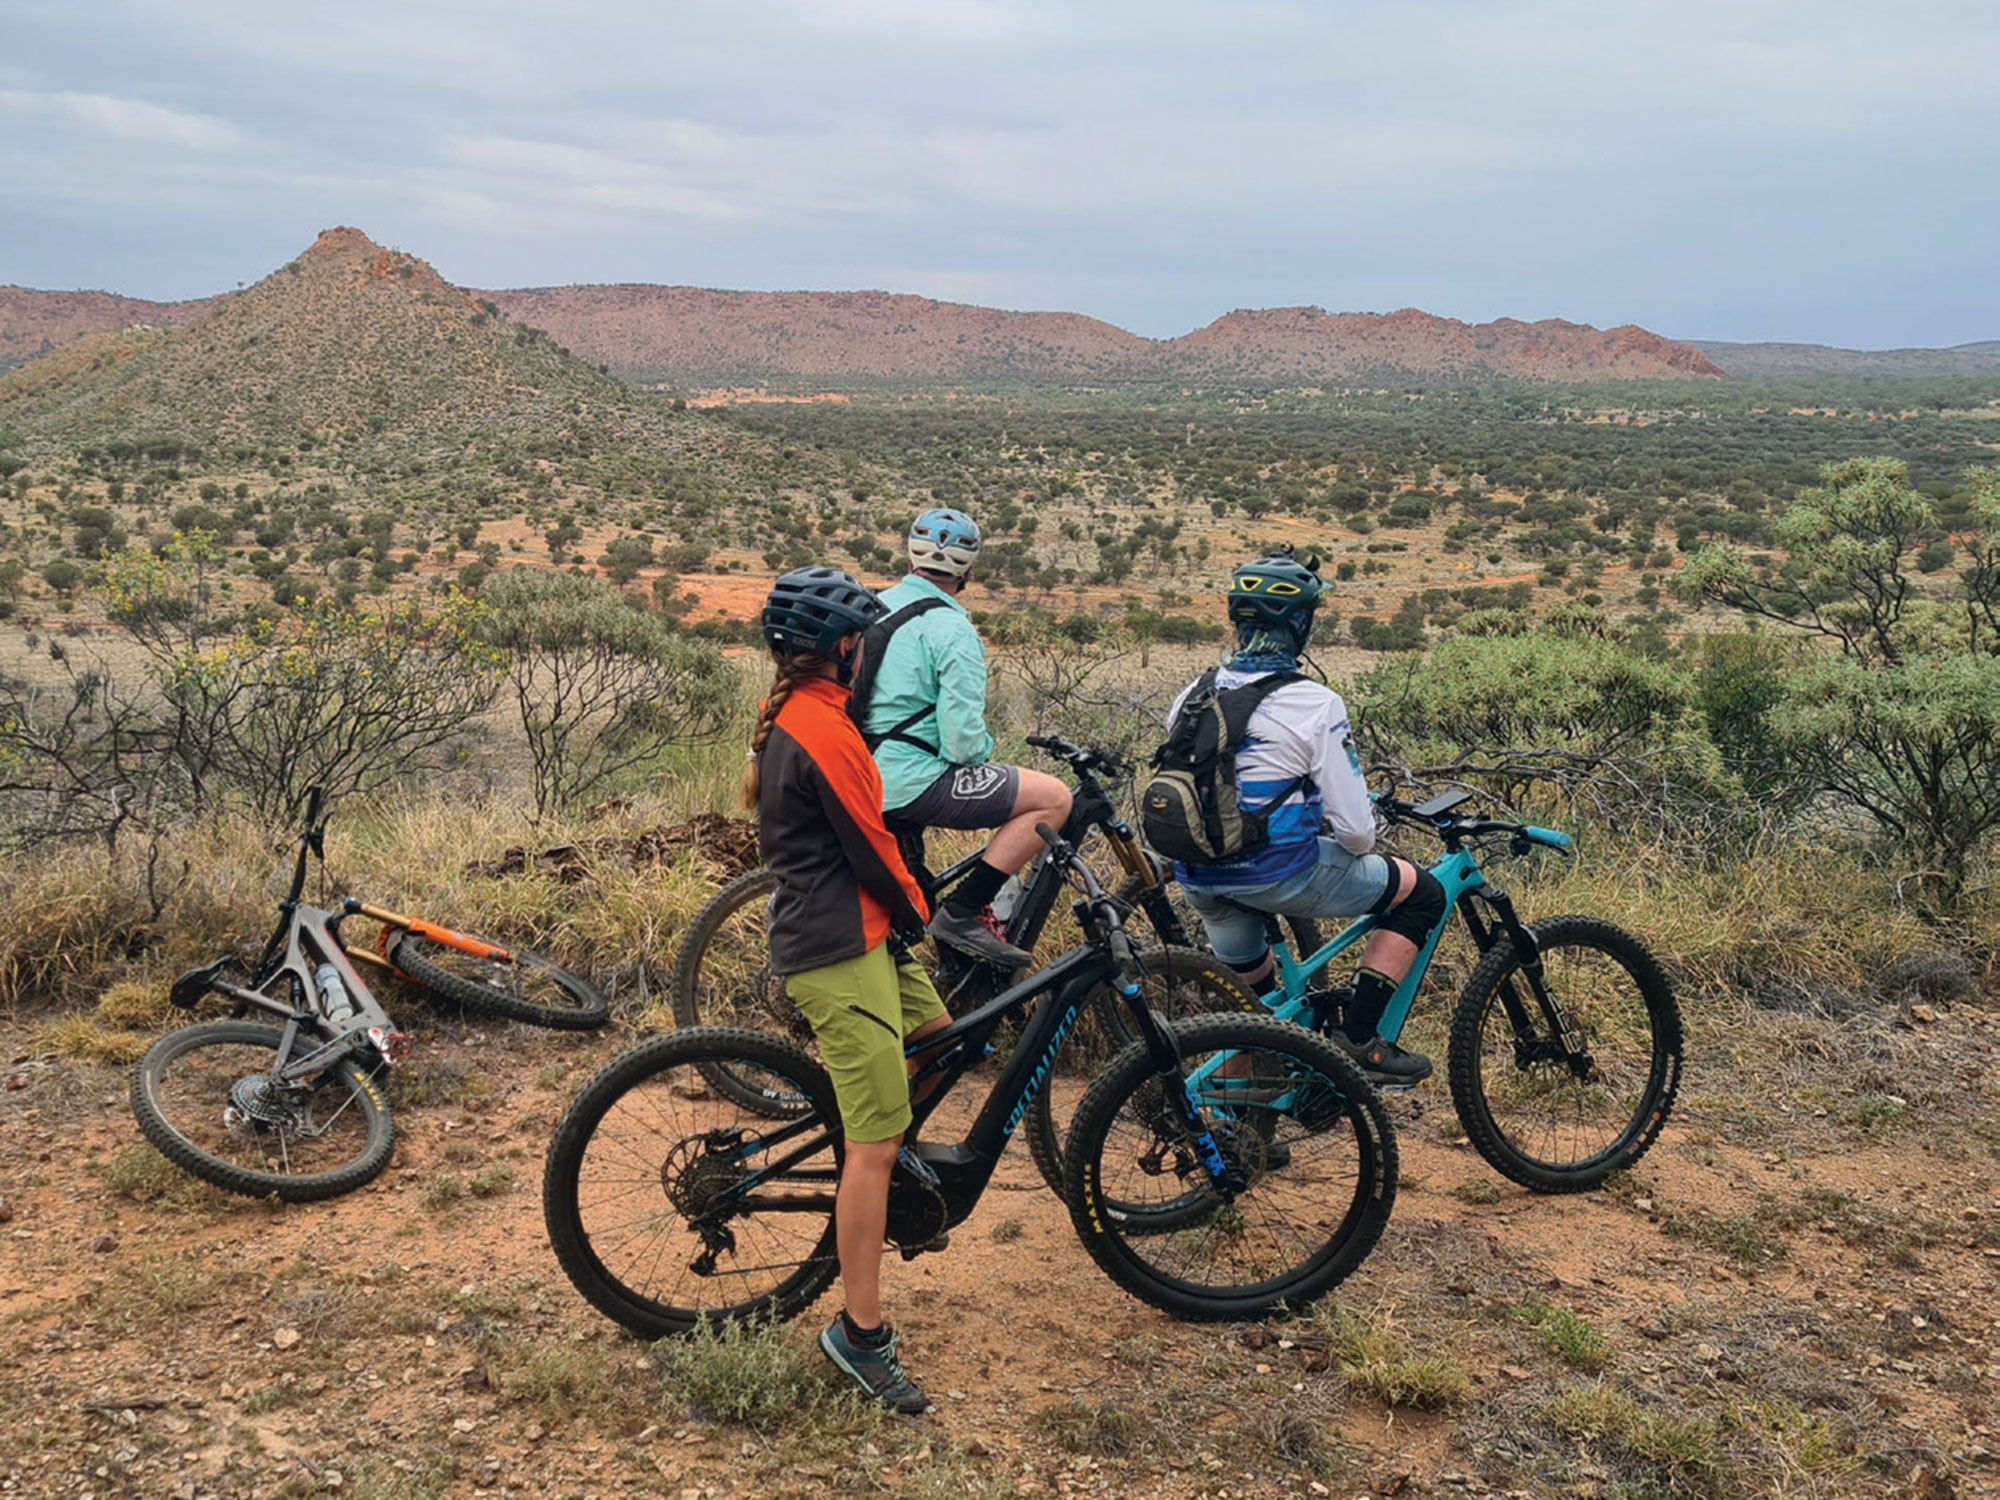
Straya: Trails and tales from the Aussie Outback
Words & Images Jamie Nicoll & Anja Foley
Imagine: hot, red desert sand; endless horizons; crimson balls of sunset; hot springs; bike-length lizards; crocodiles and sea turtles cruising around the turquoise Timor Sea; flocks of green budgies; waterfalls crashing over bright orange cliffs; ancient Indigenous culture; camping under the stars–and stillness. “Castel like” serenity! This is Outback Australia. This is where our bikes have taken us.
Along with Collin the Landcruiser, we (Jamie and Anja) have returned to Australia for a second stint of overlanding adventure with the continued mission of riding in remote and unusual places.
Arriving at our friend’s place in Coffs Harbour, New South Wales, we were so excited to be reunited with Collin and rejoiced in the comforts of our all-in-one adventure vehicle—Collin had been parked at our friend’s place on the East Coast for the past six months. We immediately jumped on our bikes and headed out for a few rides at the local Saw Mill trails—a simple little park with sand-based trails. We enjoyed the nice flow and the fun log rides scattered throughout, but it was soon time to fuel up (a cool 250 litres), fill the water tank, restock our provisions and complete some maintenance before heading off. This year’s mission was to head into the Red Centre, crossing the Madigan Line, the most remote track in the Simpson Desert, before taking a northern course to Arnhem Land via Kakadu National Park just east of Darwin.
A day’s drive from the coast, we stopped at Durrigo National Park; a ride that feels like being transported back in time. We checked out the rainforest trails, sitting at roughly 1000 metres in elevation. Durrigo is known for its remnants of ancient forests that are linked back to Gondwana Land.
The Rosewood trail, a shared track, was a superb ride with its exhilarating fast flow and technical creek crossings. A speedy traversing descent on steep terrain made for high concentration, and staying wary of the numerous vines hanging across the track. We stopped so often, captured by the tall ancient trees with huge buttress roots. We climbed around waterfalls flowing down massive boulders and even jumped into the ice-cold river for a very quick morning dip.
A couple thousand kilometres later, we were at Tibooburra, a very remote outback town on the edge of the Strzelecki Desert. It is best known for its 450-million-year-old granite tors. This was a quick ride, but great to stretch our legs on the long drive. Heading up this loop track set amongst a field of ancient granite boulders, provided a mix of smooth track and very technical rock manoeuvres. It was scorching hot too and our daily cold banana smoothies were calling.
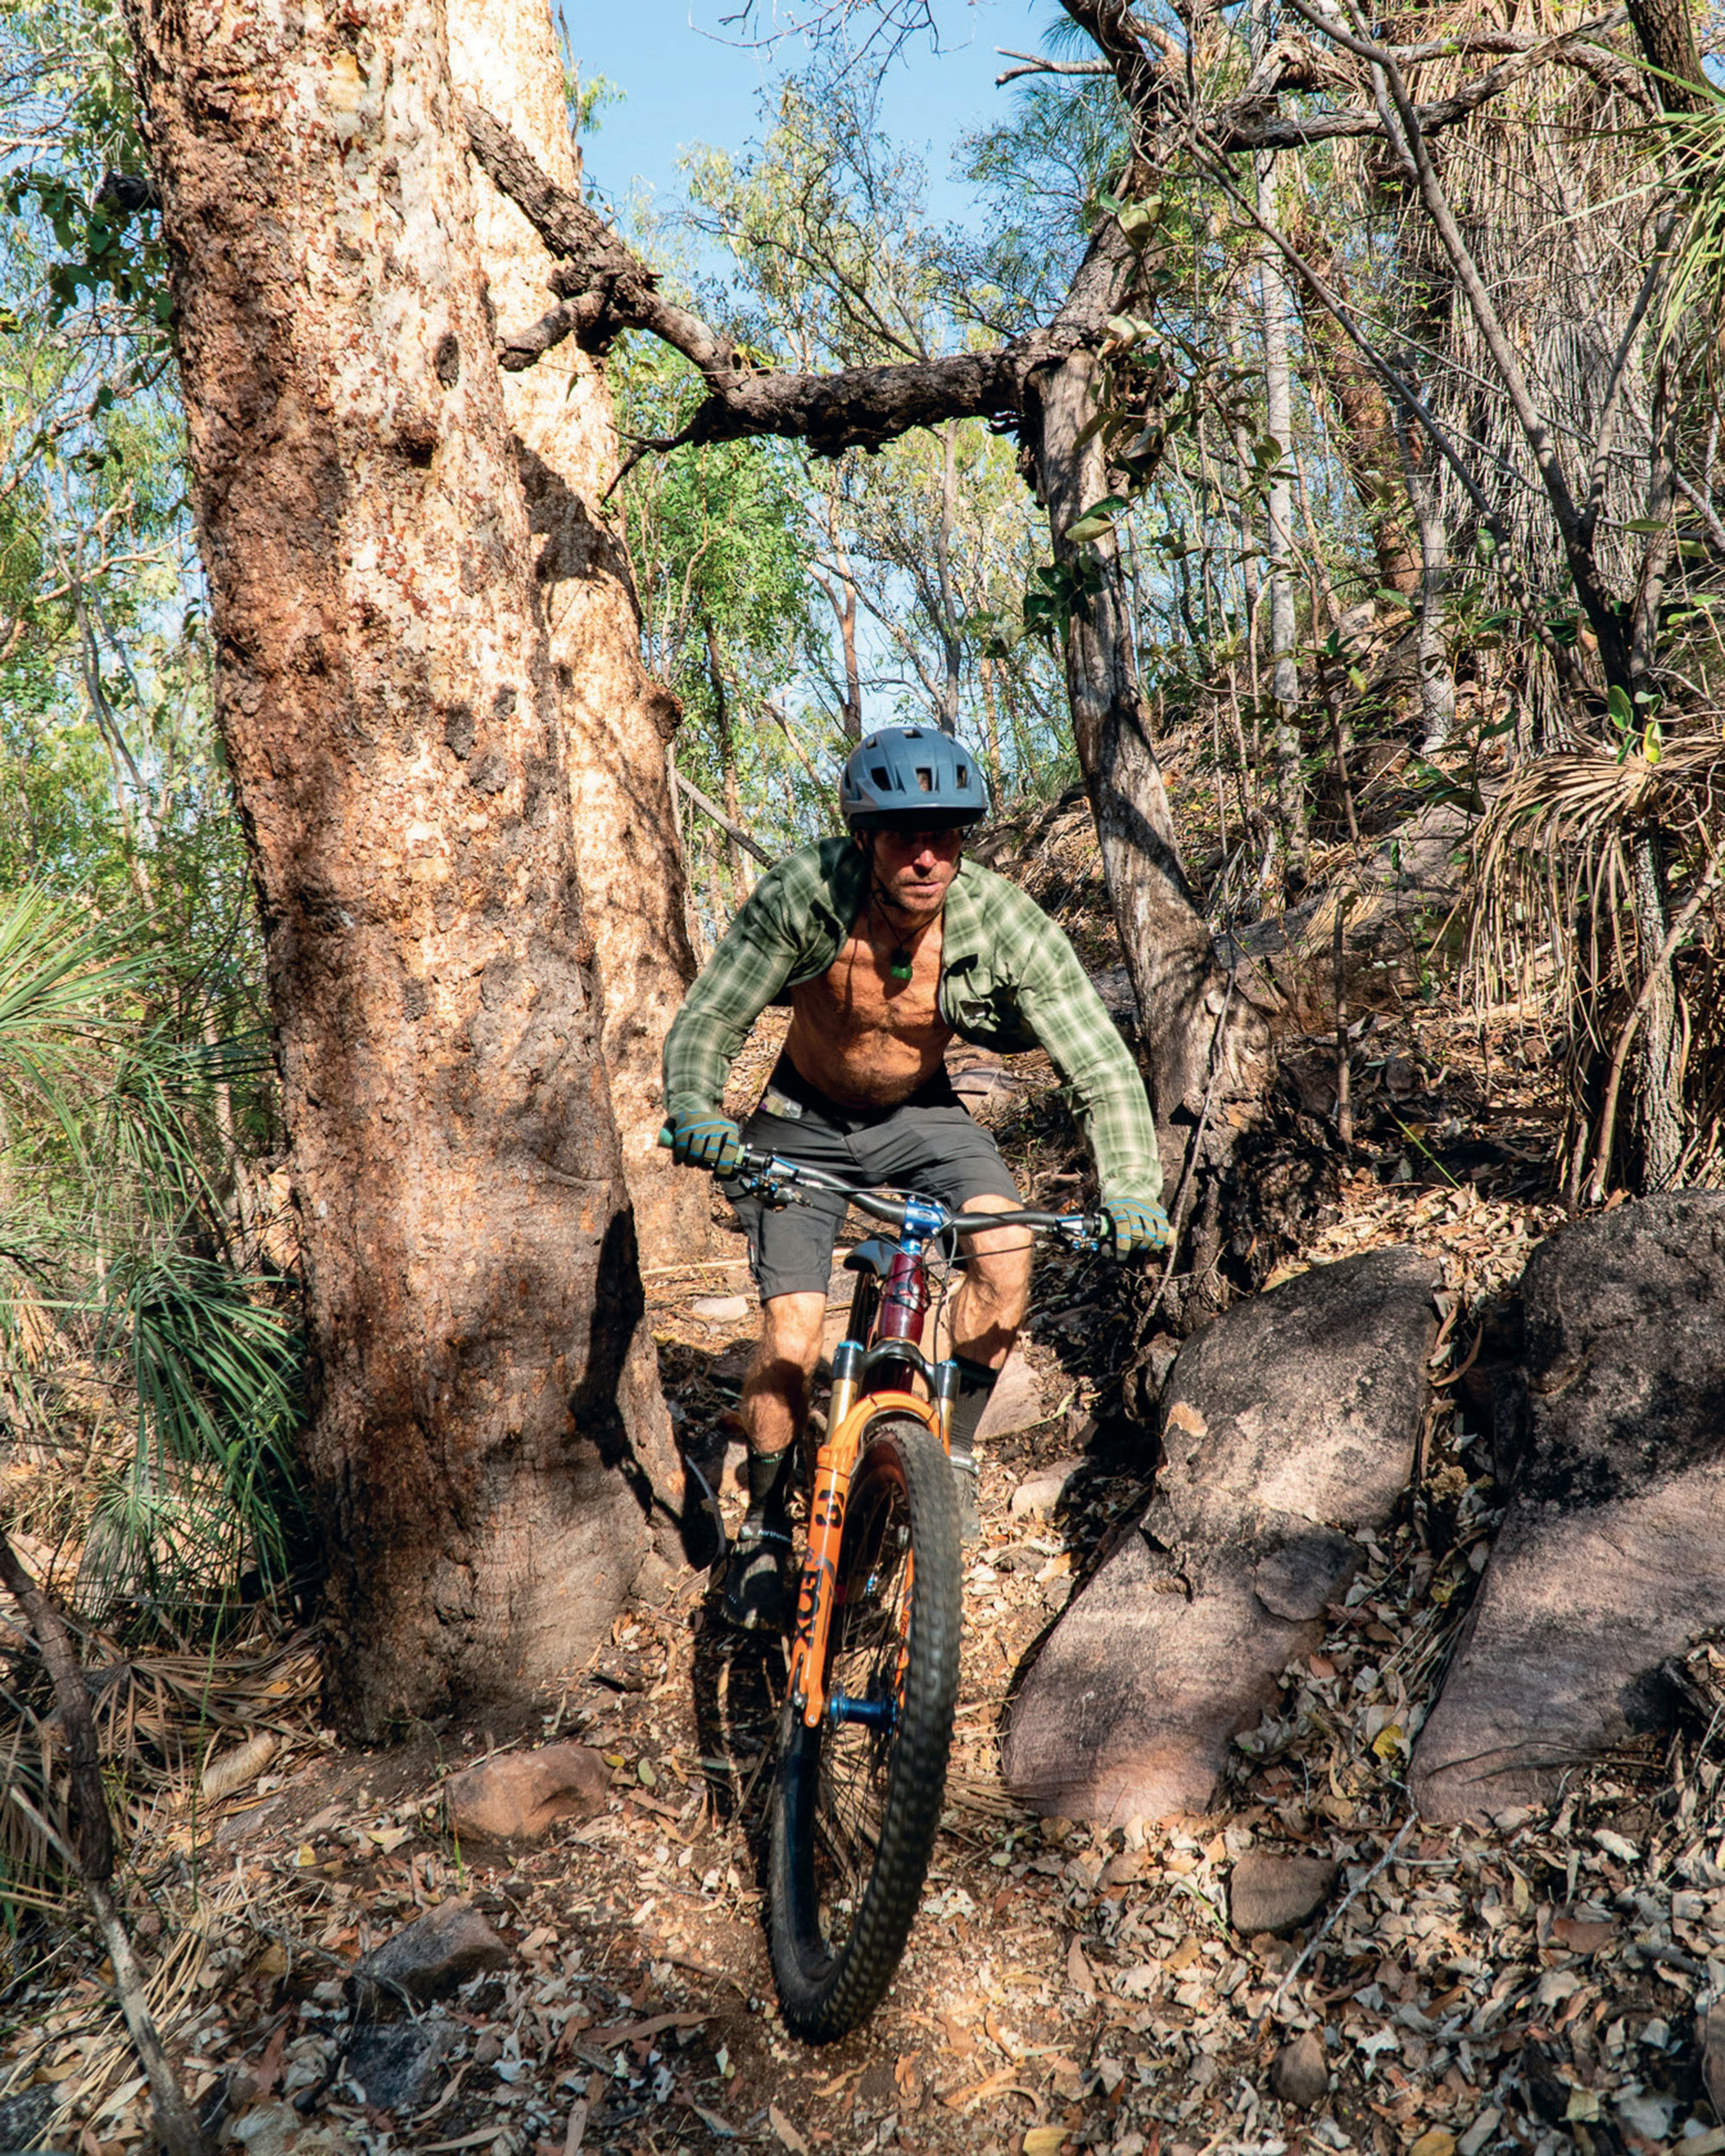
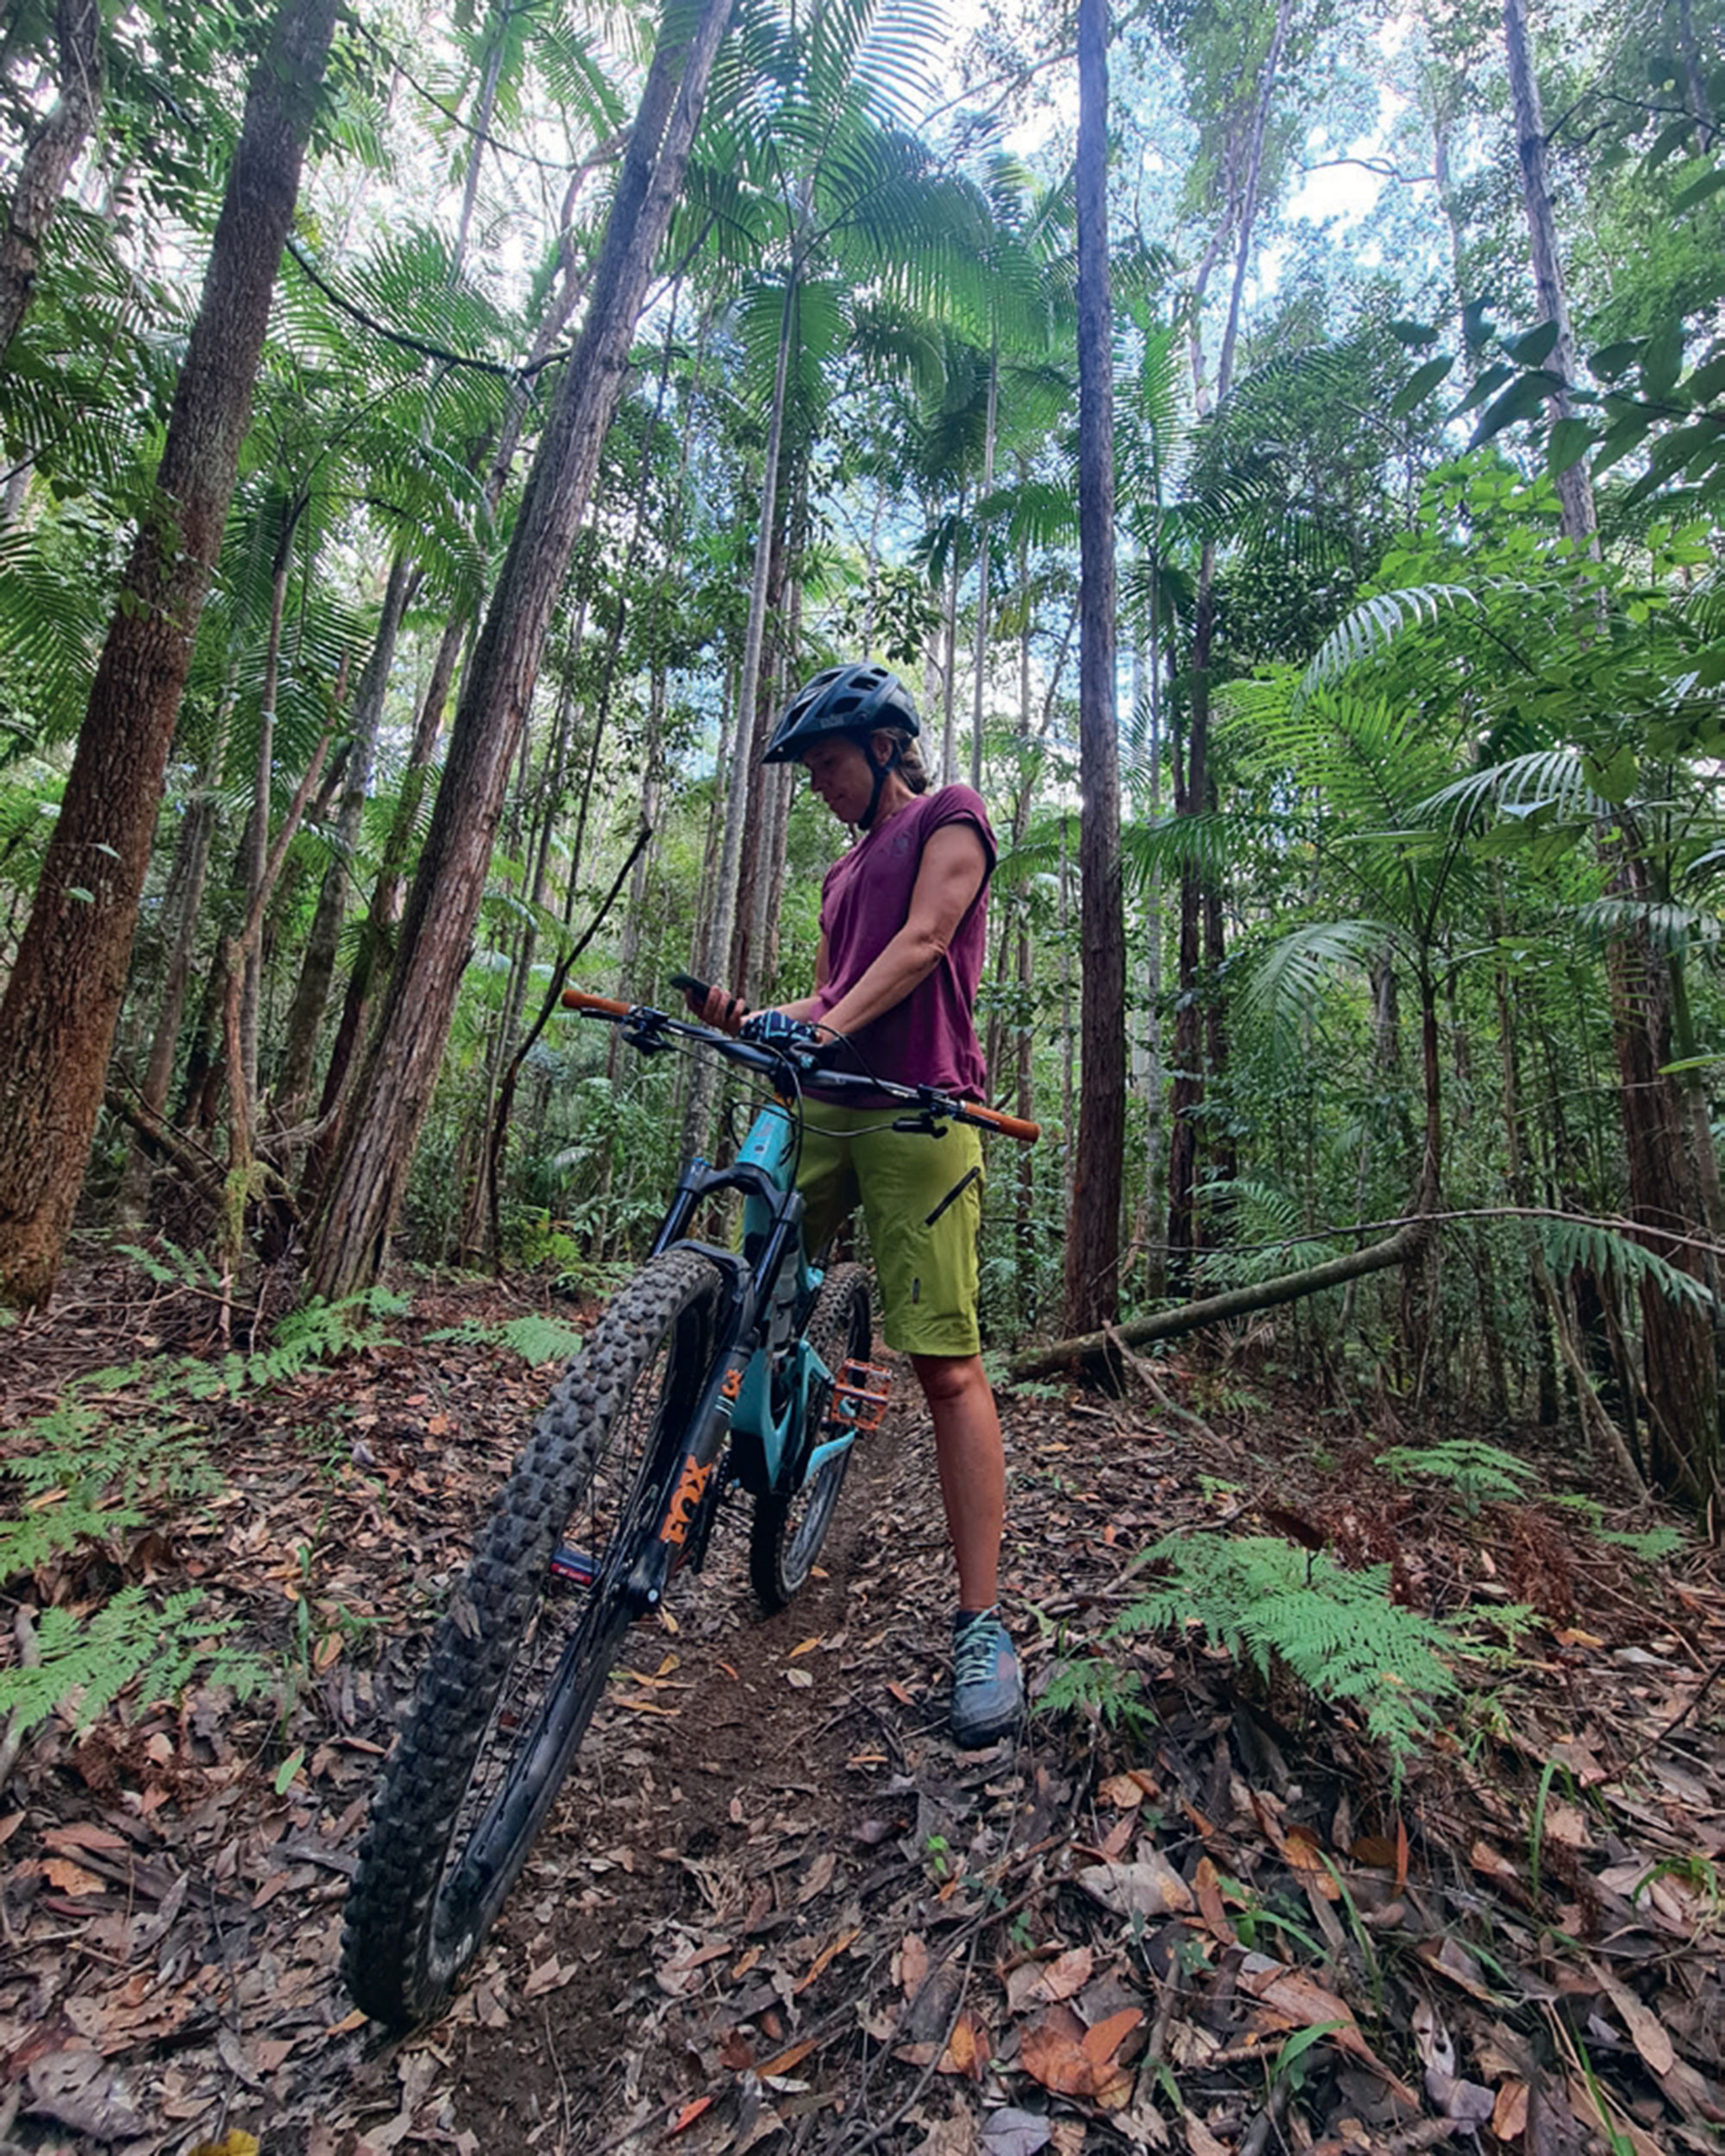
The riding was hugely spread out as we crossed the massive continent. We had already woven our way across the Strzelecki and Stuart Deserts using the abandoned Walkers Crossing to get us near to Birdsville, the edge of the next big nothing. As we wanted to explore more of the outback, we now had the huge Simpson Desert to cross to get to our next riding destination: Alice Springs.
The Madigan Line, our most direct route, also meant a lot of sand and over 1,100 dunes to scramble up. Red sand flew as the low-pressure tyres searched for traction, with low-range gears in full use and the right foot deeply engaged. Bouncing around for hours, and then arriving at camp, there is nothing quite like the stillness, the crimson sunsets and sunrises, and sleeping around campfires under the stars.
Pulling into Alice was a chance to restock and do maintenance after the extremely rugged outback crossing. It is one rough crossing that’s for sure, with uncountable bottom outs on our new and raised suspension and heavy corrugations battering everything for hours on end. Our mountain bike community was right there behind us, and we were able to use addresses to receive parts with others welding up cracked bike racks and providing us with a camp spot and hot showers. One of them, Chris, has been the most excellent man to know. He rang up and offered to show us around a new trail network while we were there.
Some 30km of trail, all built by one man, Mark’s network sits near Owen Springs, southwest of Alice. Many Alice Springs riders haven’t even heard about these trails, let alone ridden them. They’re well suited for eBikes as the additional speed creates a lot of fun on less gravity- orientated sections. Rocketing along on flat sections, and weaving our way through narrow stands of trees, we followed dry river beds up and down rocky outcrops, and long spinifex grass, constantly careful of tyre placements on the many abrasive slab rock sections.
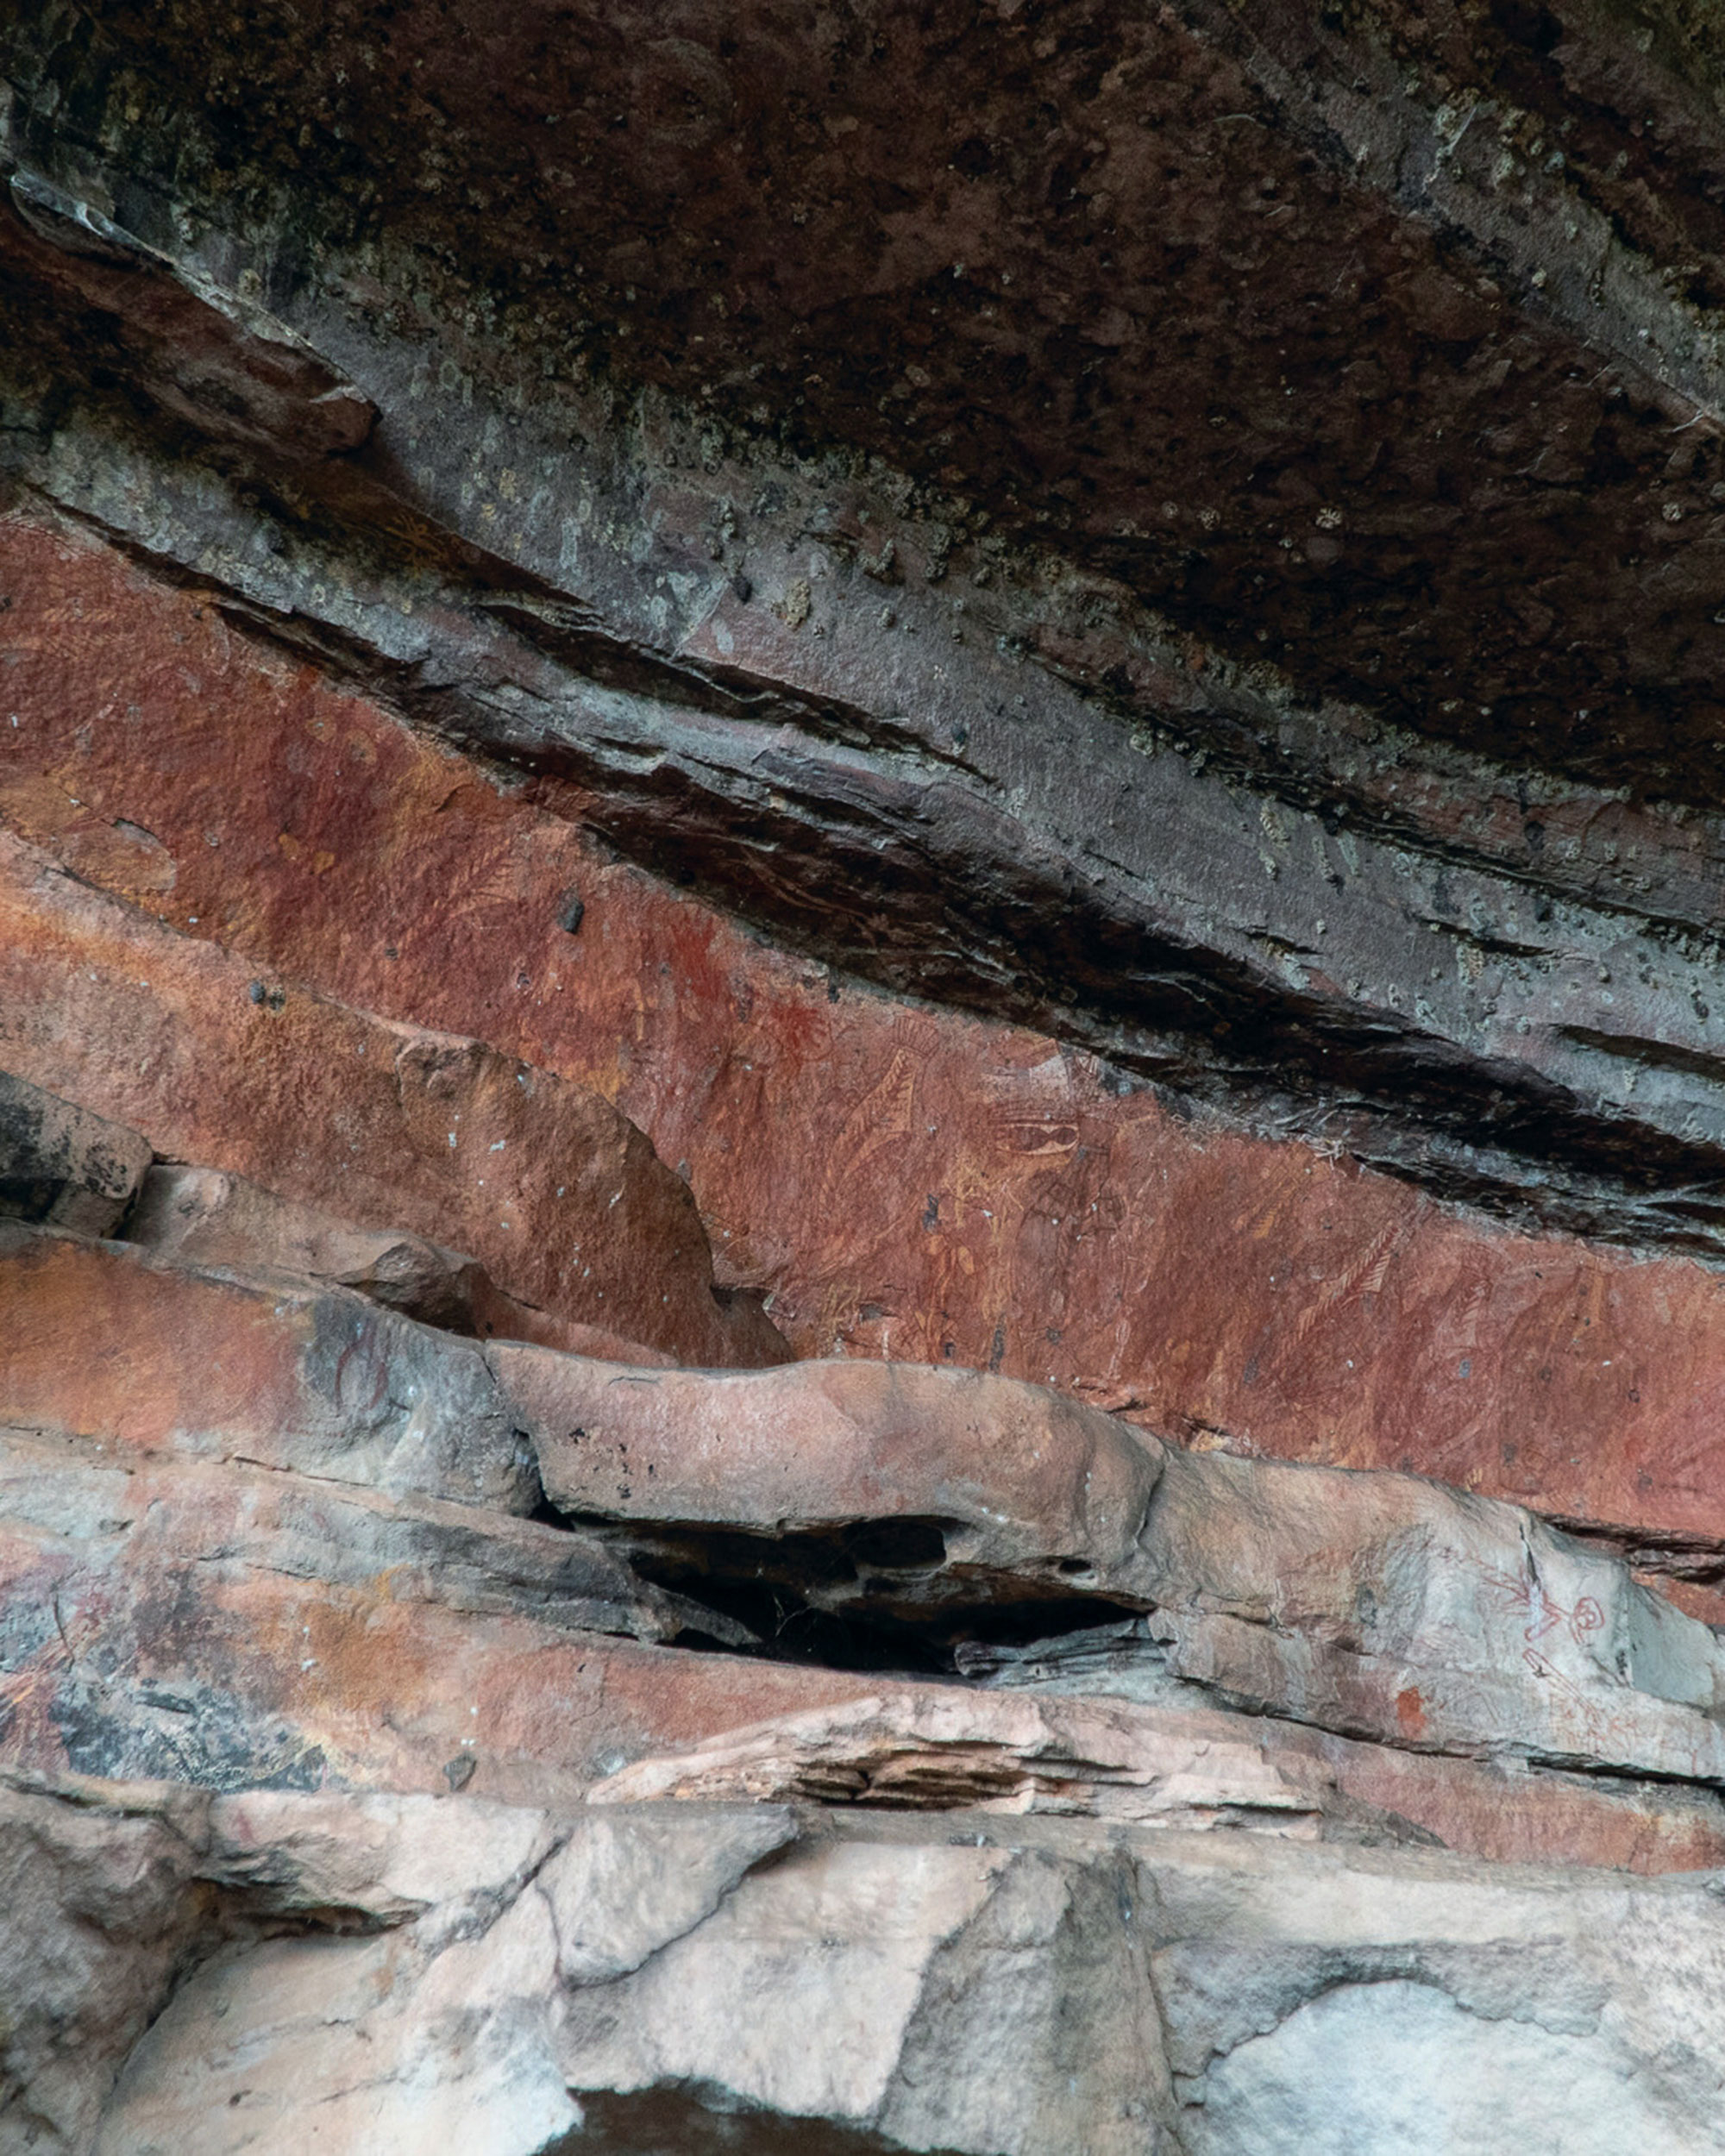
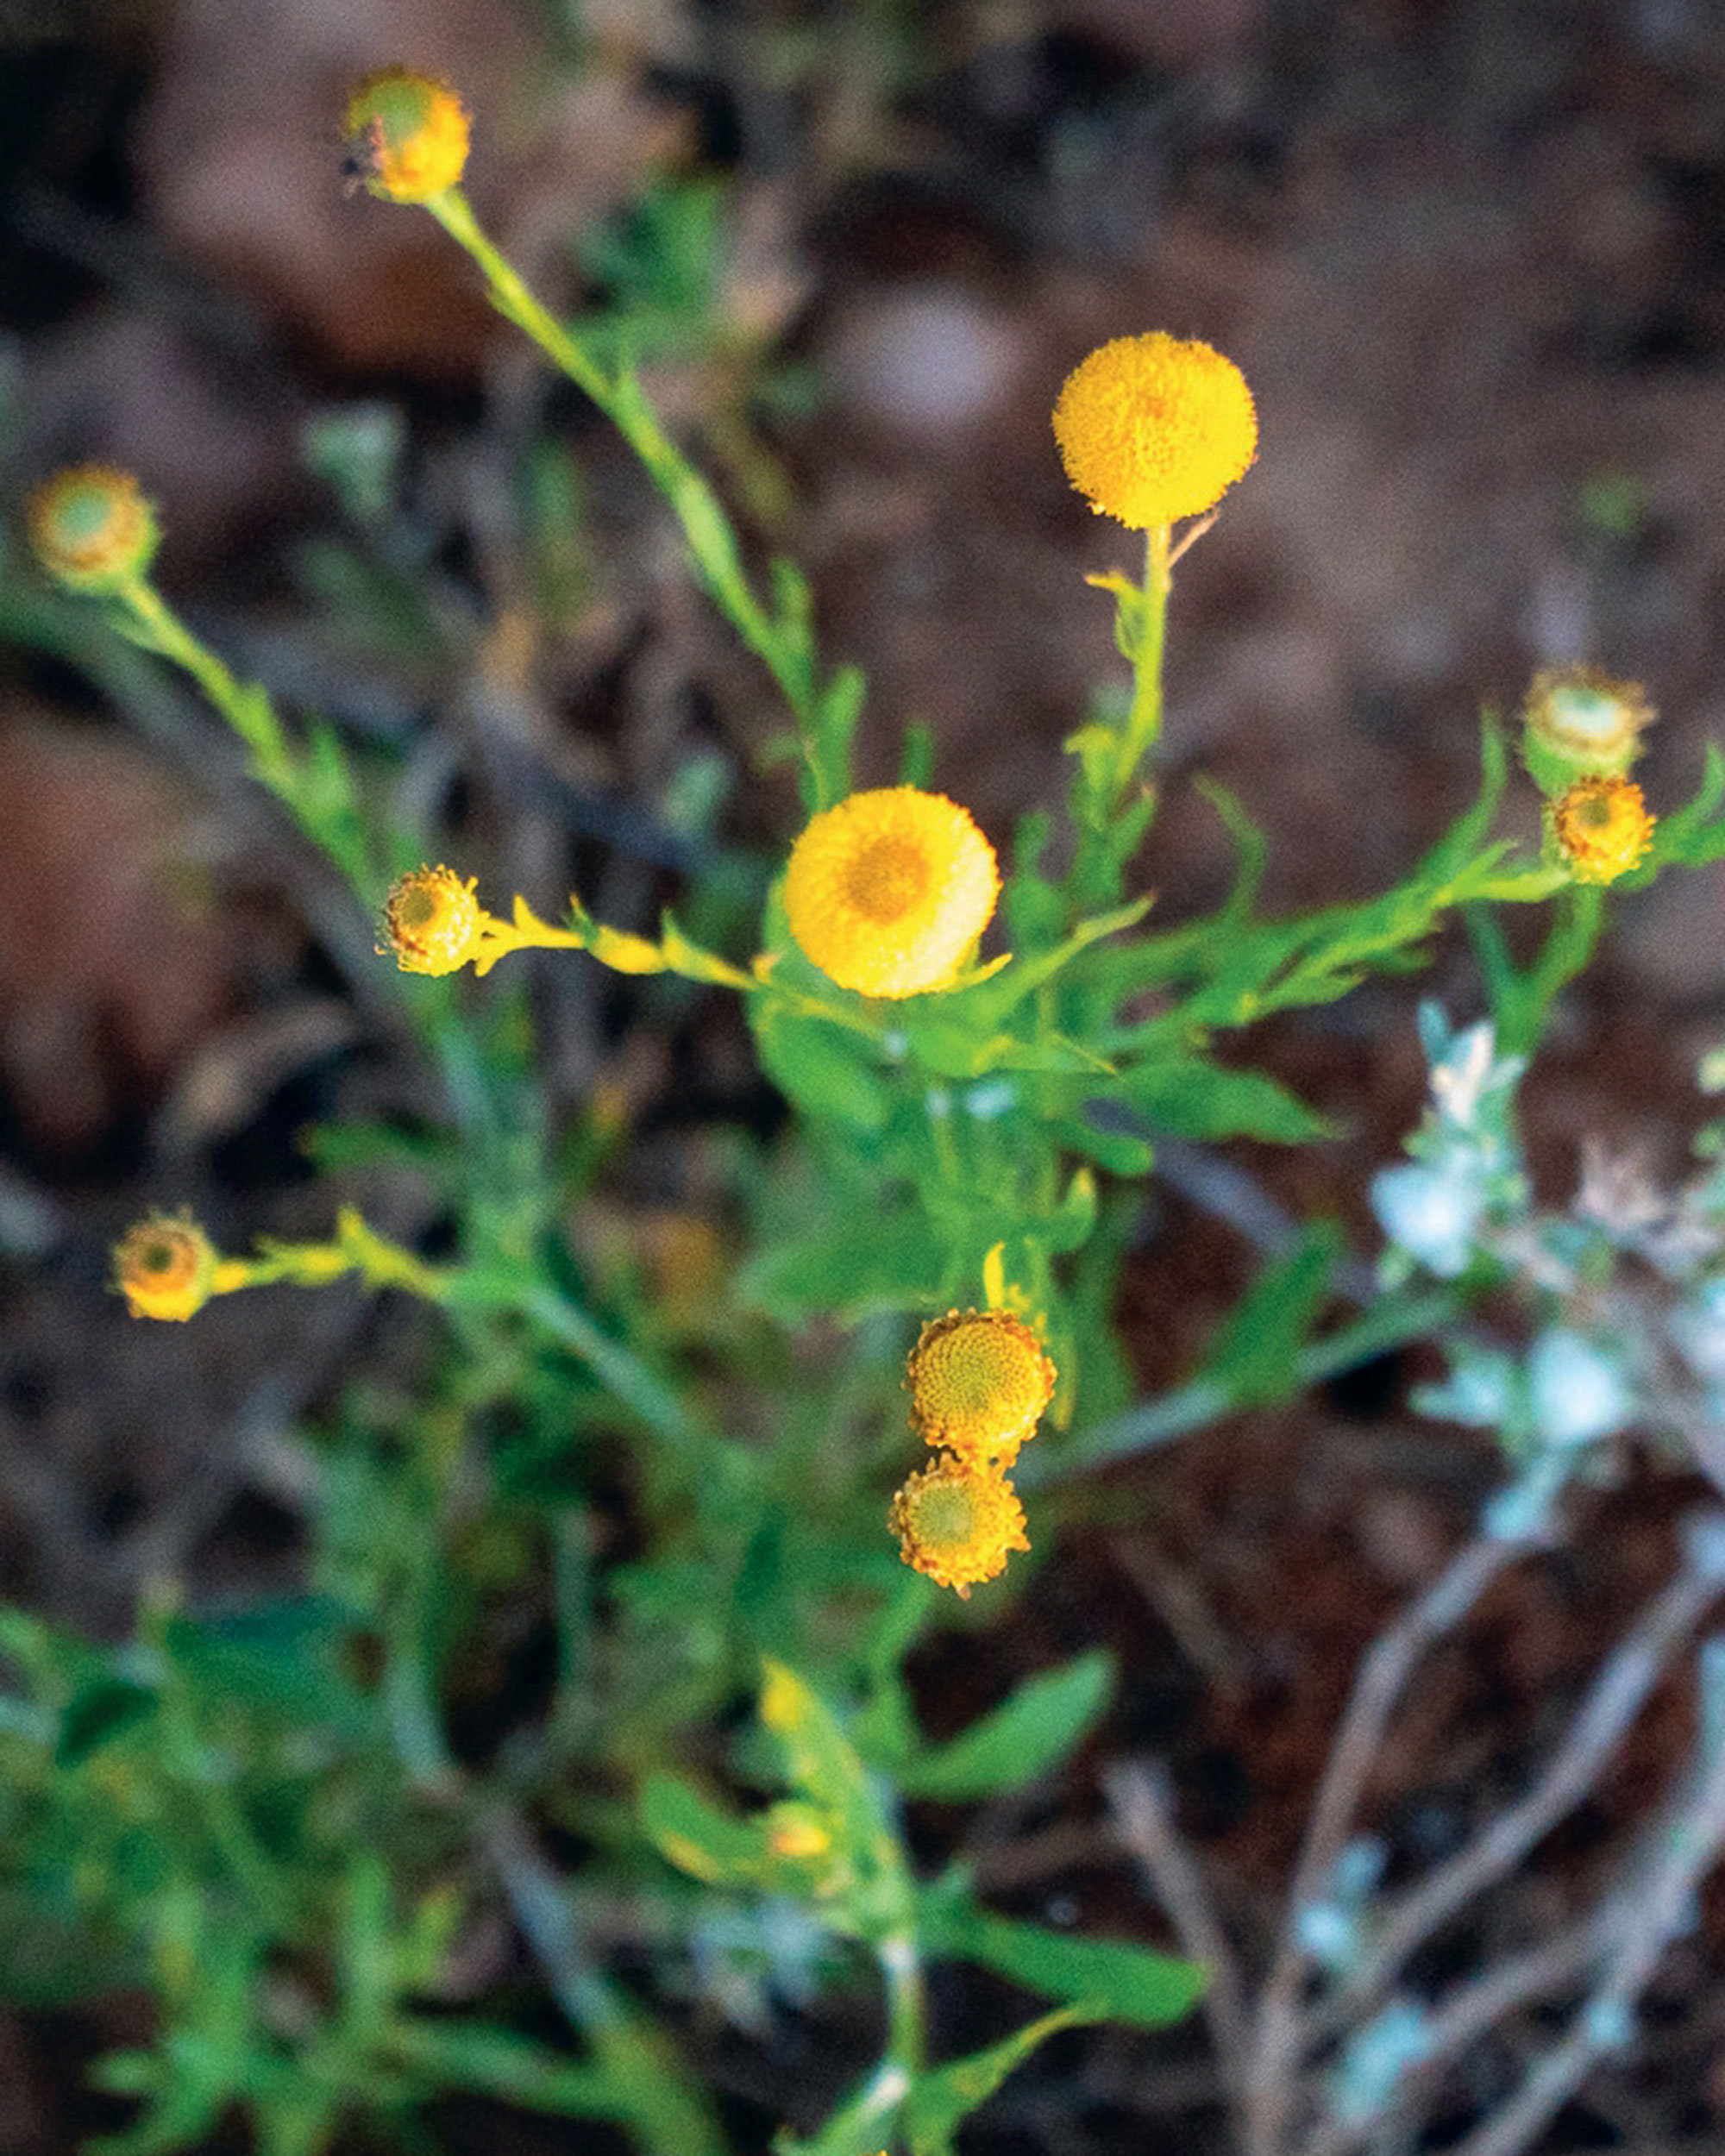
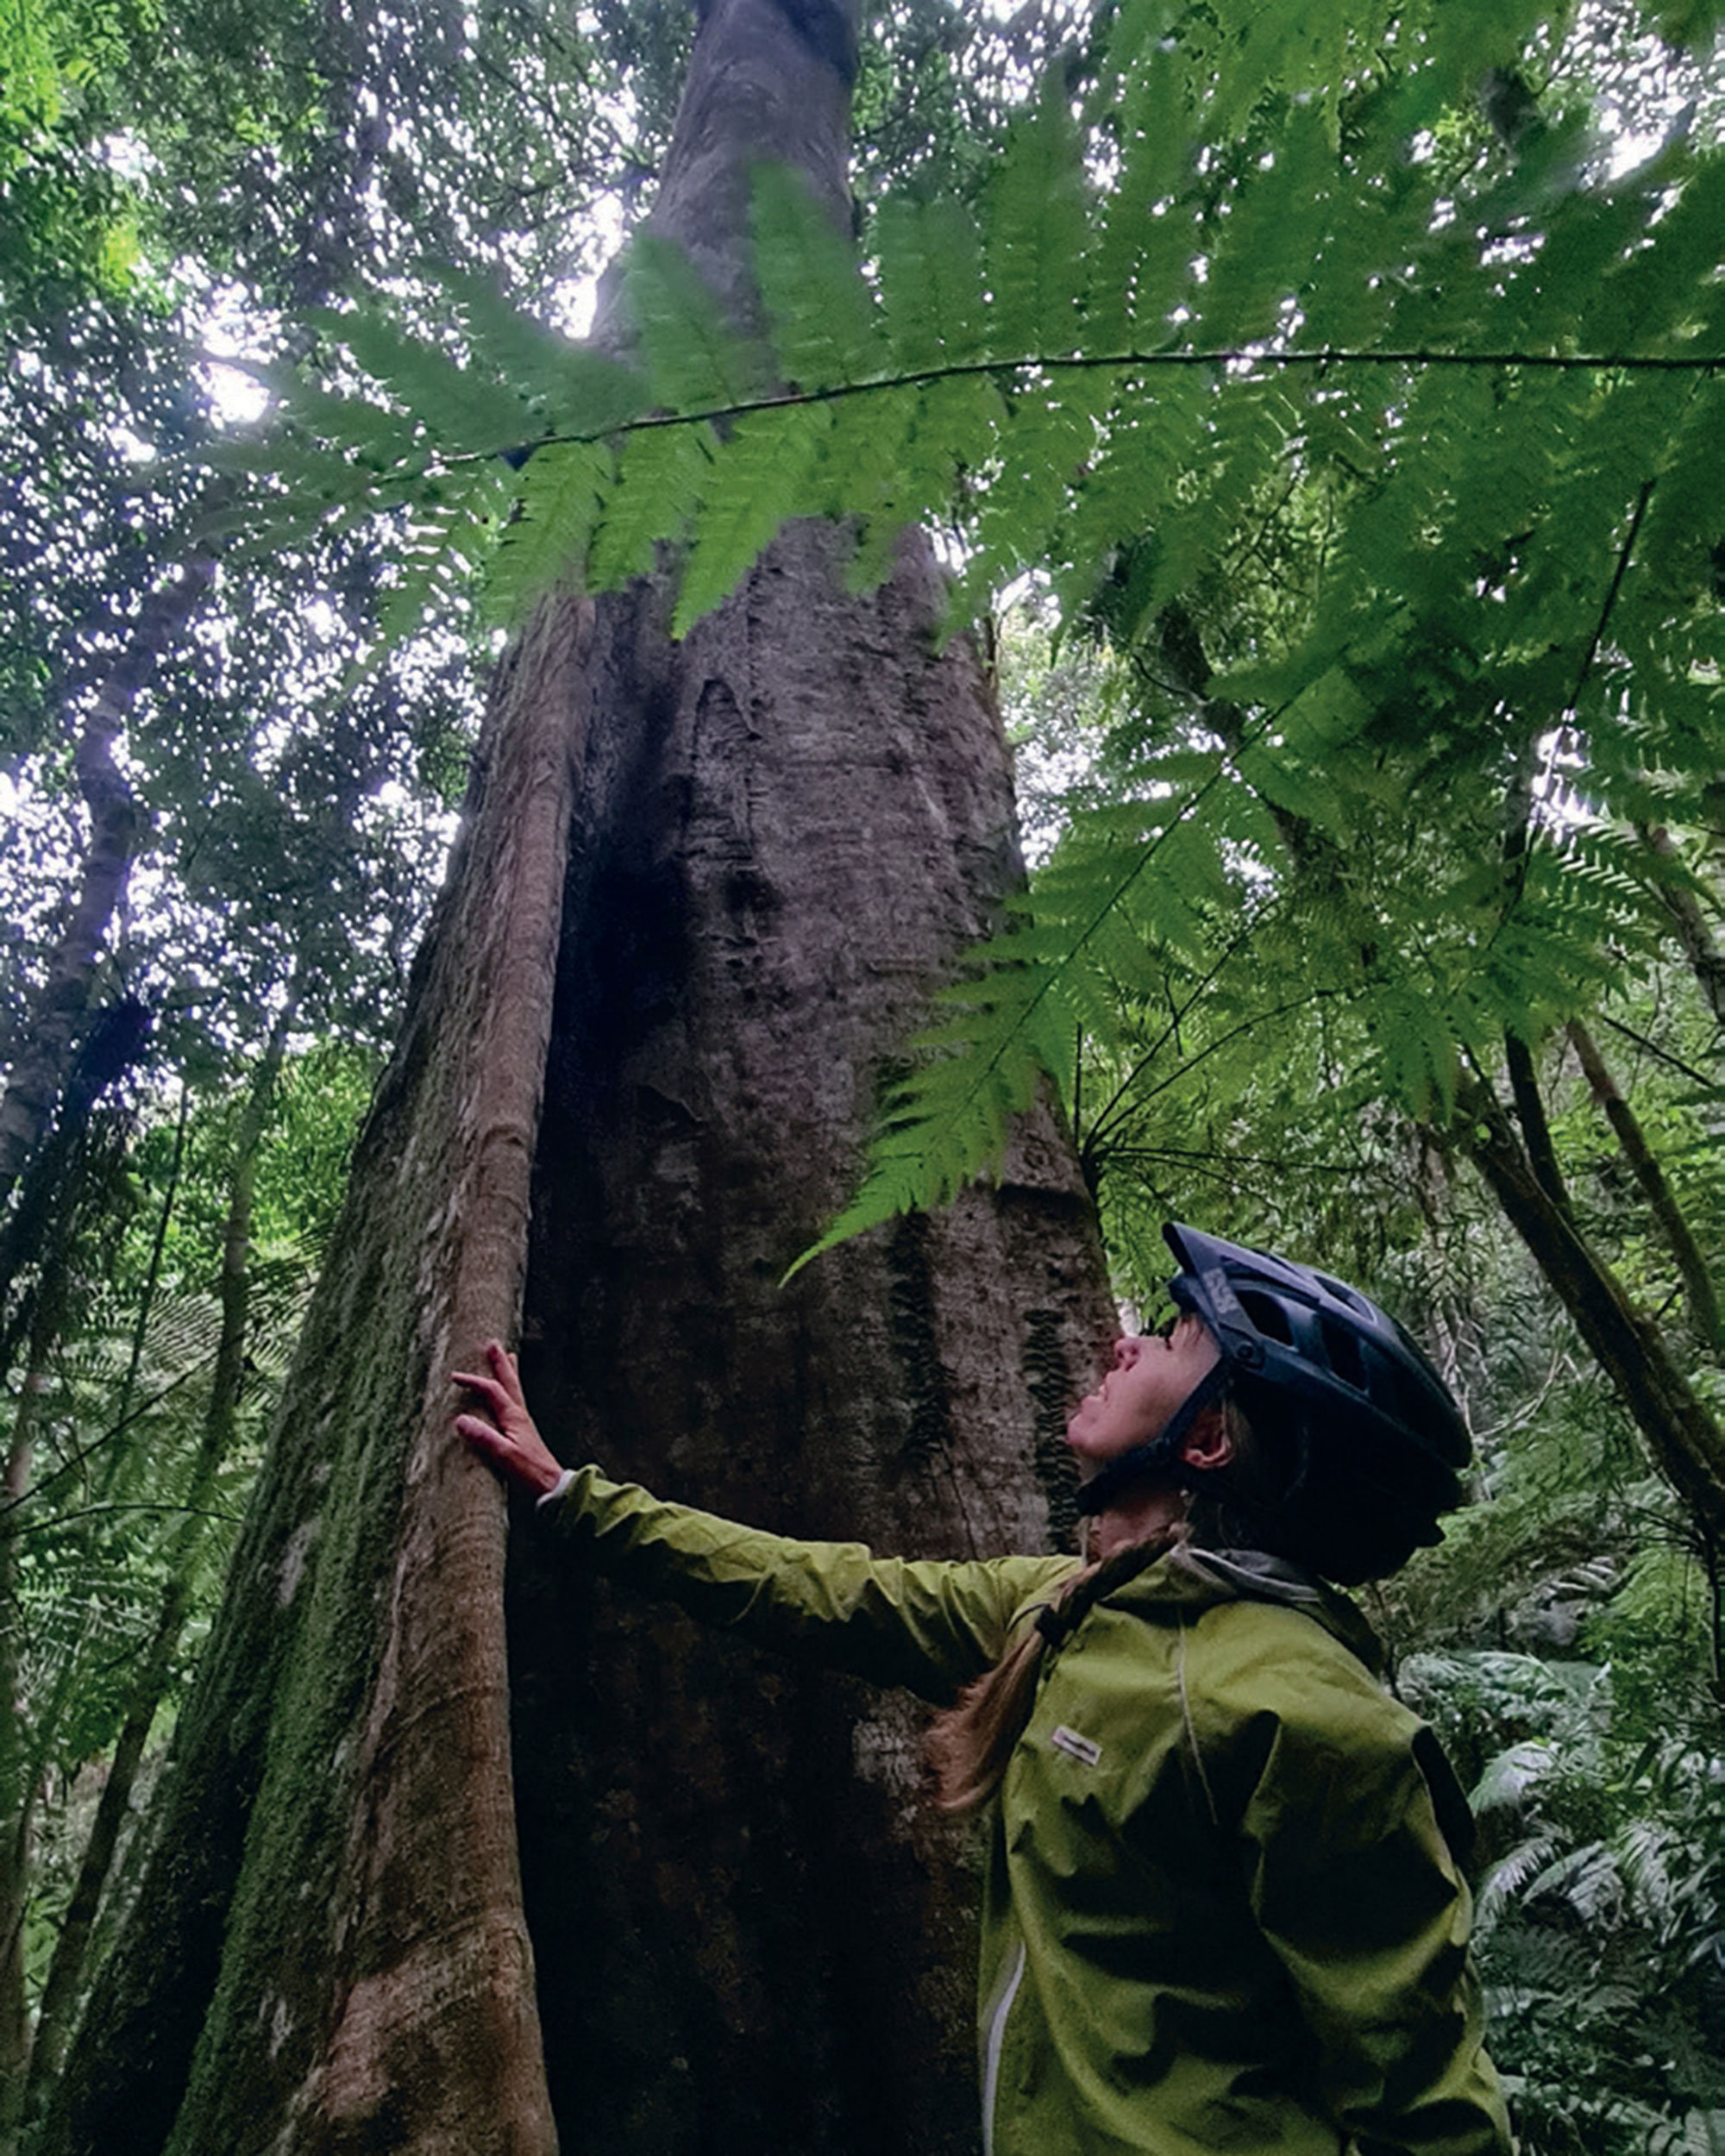
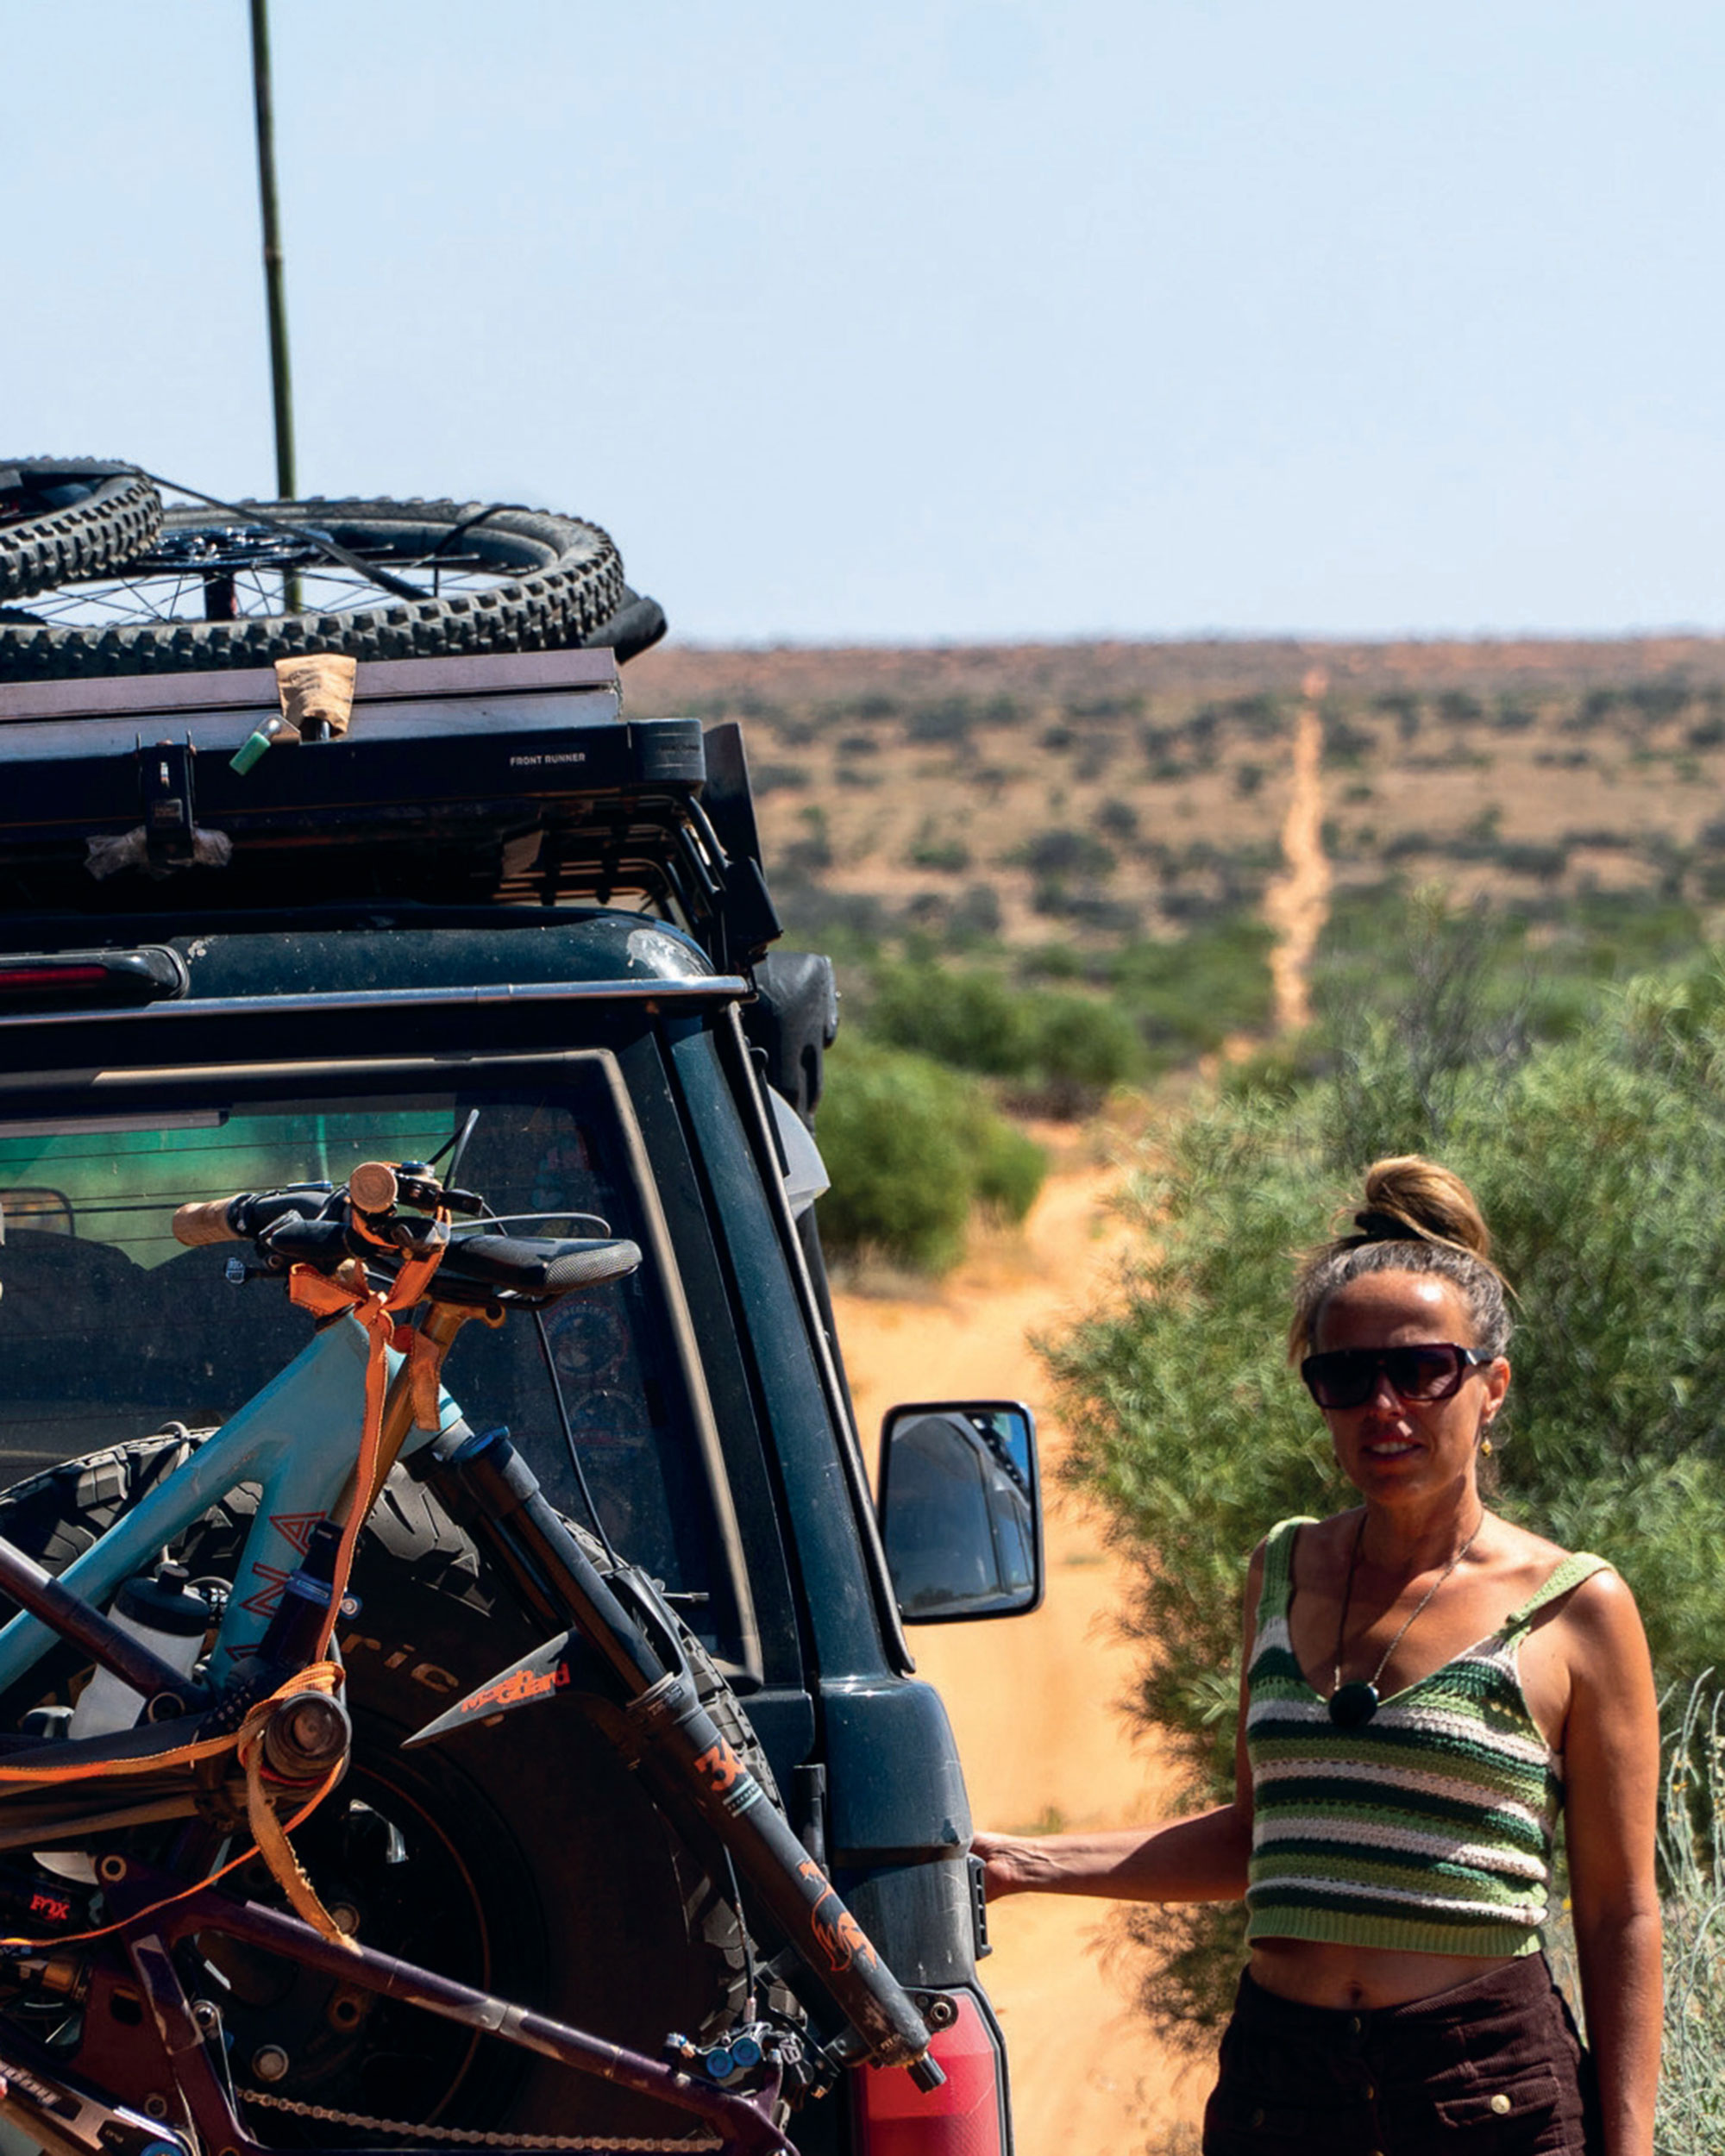
Darwin sits on the coast, 1500km directly north of Alice. East of Darwin is a traditional Aboriginal area called Arnhem Land. On this route north, just outside of Katherine, we pulled into Nitmiluk NP – the bike trails here are built on the escarpments, high above the Katherine Gorge. The tracks weave between boulder fields and over playful slab rock sections, leaving us smiling, with descriptive chatter flowing. To finish, we dived into the sparkling thermal steam in town, leaving us stoked and refreshed. And, if that wasn’t enough, our new friend Andrew, the local MTB club president, turned out to be an ex-crocodile hunter who back in the day would jump on the backs of up to eight-foot-long saltwater crocs and bring them up to a boat for scientific research tagging. He regaled us with stories of his youth, diving—yes, diving not jumping—from 200-foot (61m) towers into the sea at Port Darwin, and even his time on the set of Crocodile Dundee. Being an ex-park ranger with excellent storytelling skills, Andrew is a walking encyclopaedia for all things nature-related. He was so entertaining that his stories distracted us on even the longest climbs.
Arnhem land and the Cobourg Peninsular, as a riding destination, are not mentioned anywhere that we found, so we thought it sounded like a great start. Once again, this meant filling the full 250 litres of diesel to make the distance there and back on these remote roads.
Arnhem Land has been an Aboriginal stronghold for over 65,000 years. British colonizers struggled to create a lasting presence here due to the extreme tropical conditions, leaving the indigenous population and their way of living comparatively undisturbed. Aboriginal elder of the area clan, Violet Smith, quotes; “Long ago we Jawoyn lived here. The old people have passed on. It’s okay for you to go around here. You stay maybe two nights, then you go back to your country”.
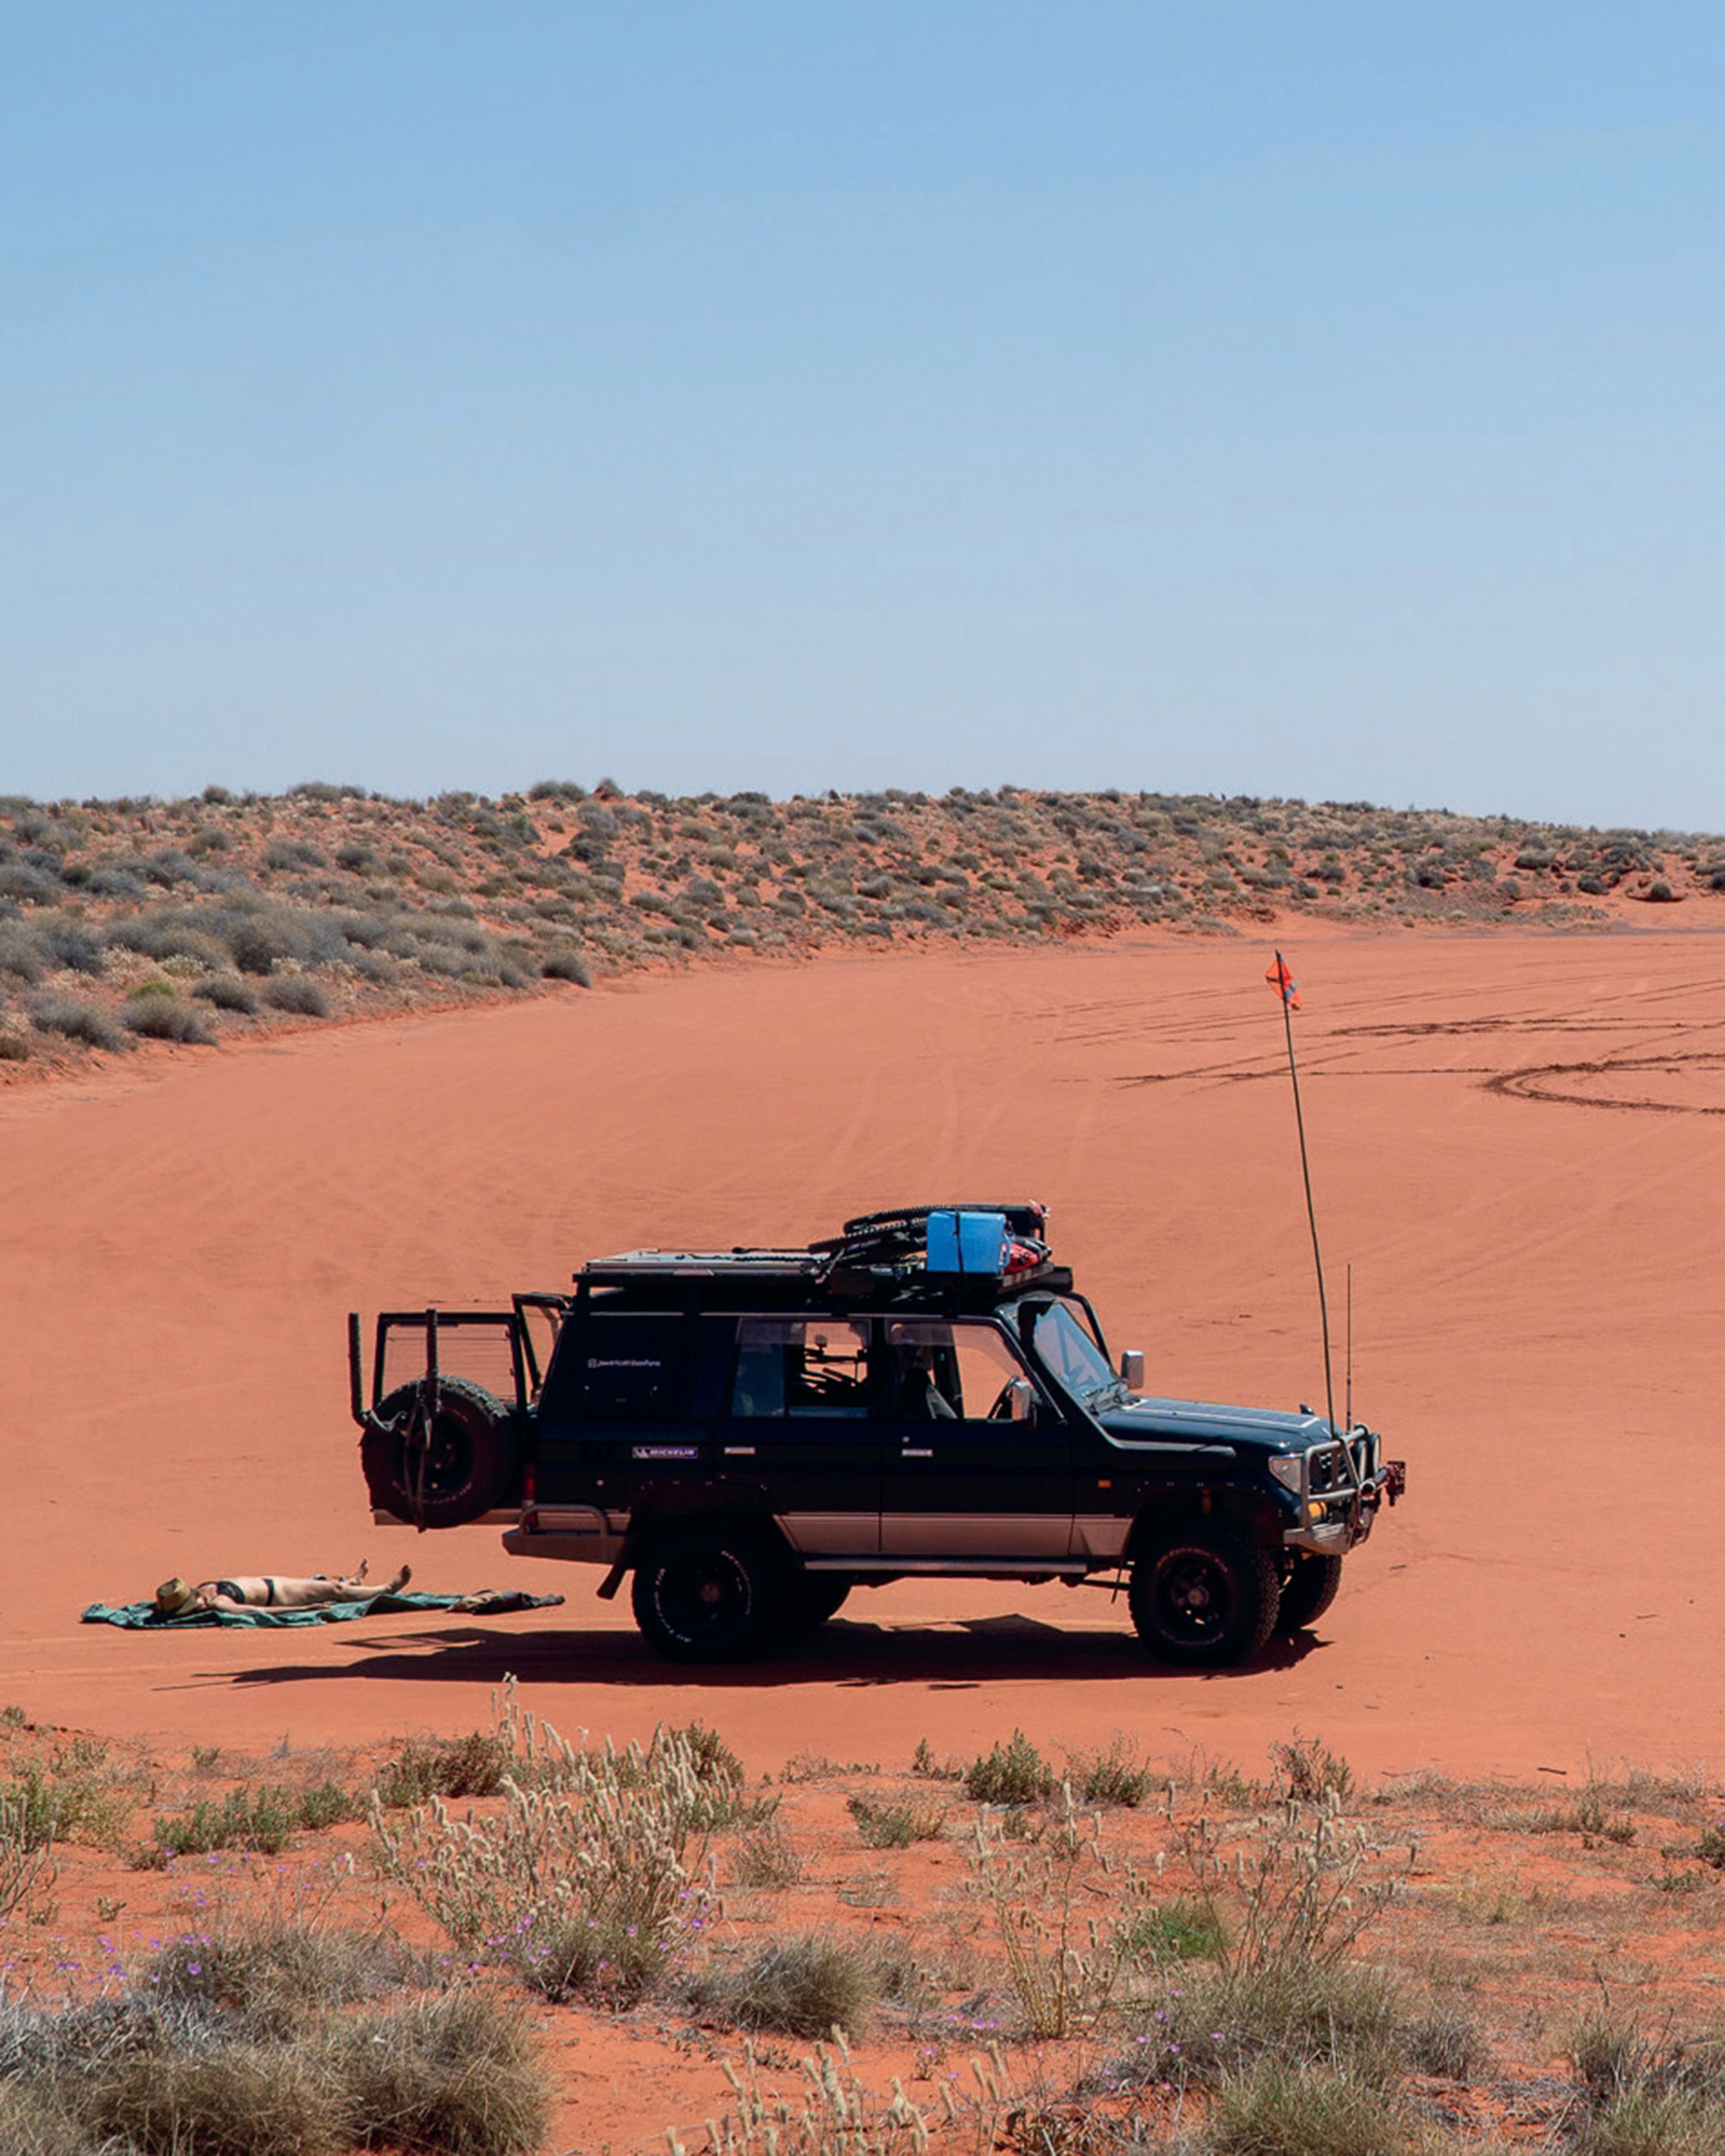
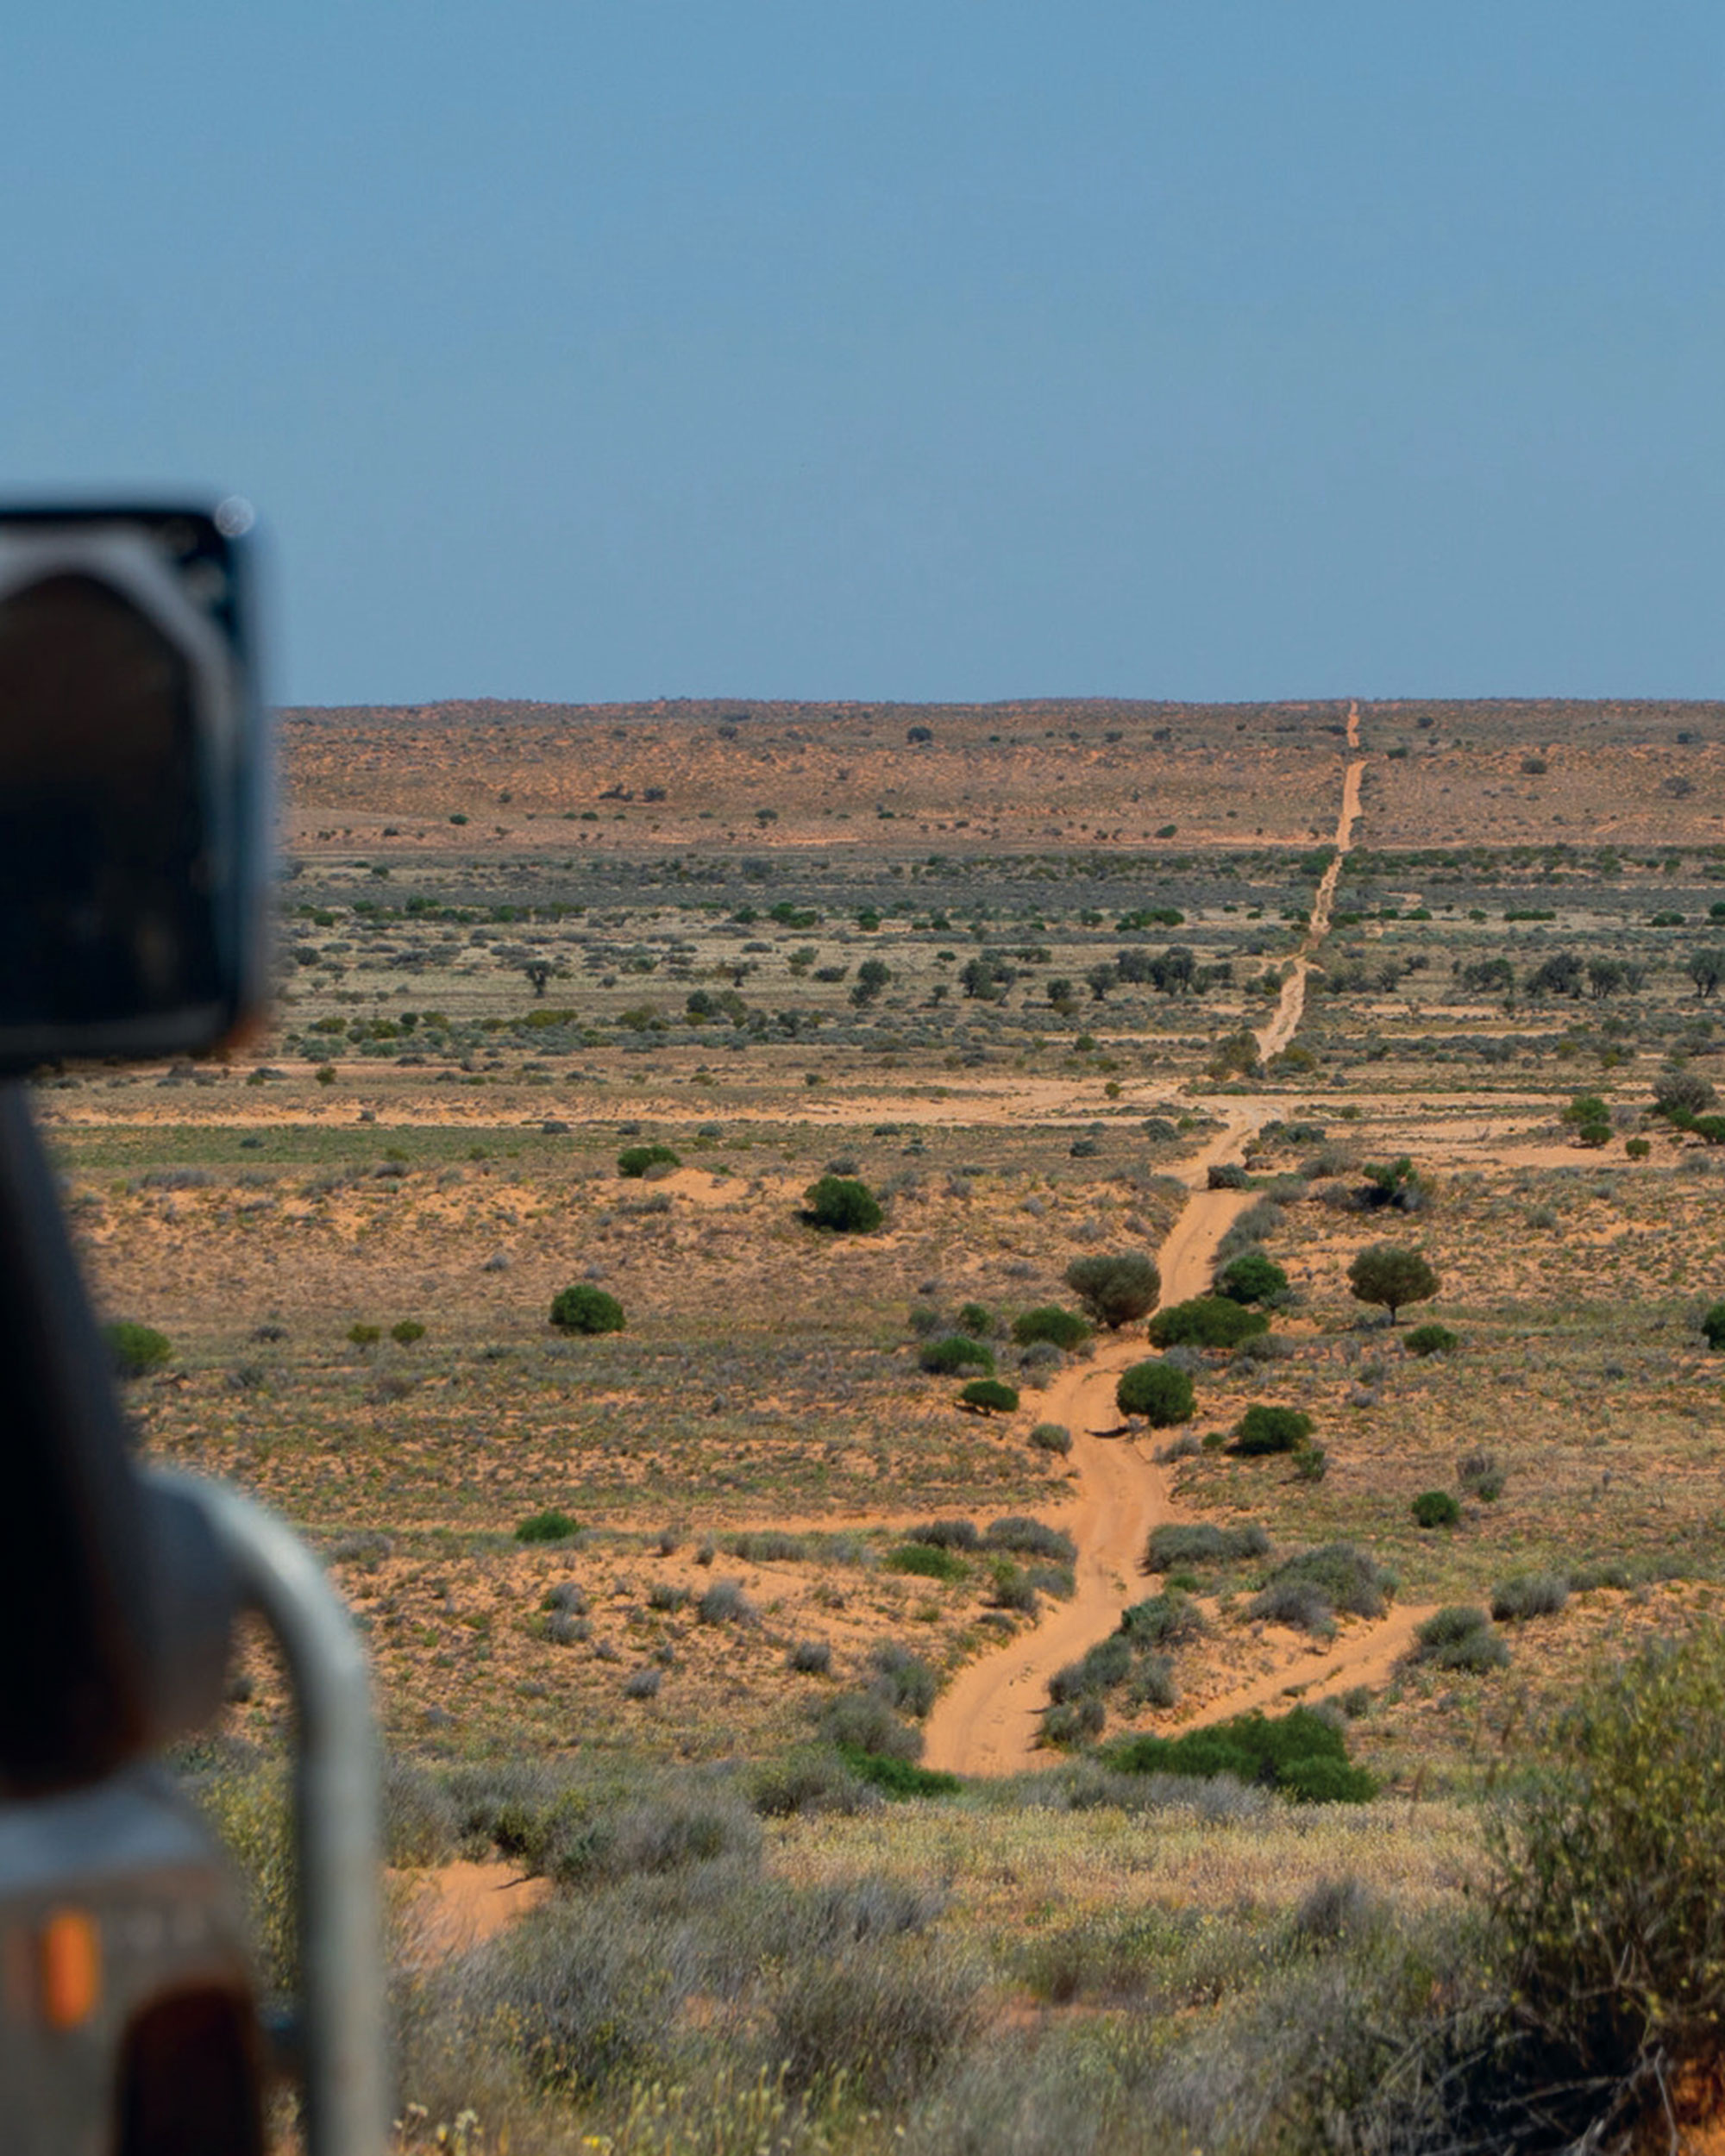

Our efforts to get the correct permits would test even the most tenacious administrator. Getting into Arnhem Land from the west means traversing the Kakadu National Park with its stunning rock gorges and deep plunge pools. Even the accepted swimming spots are somewhat “at your own risk” as from time to time a saltwater croc has made its way into these pools undetected, avoiding the purpose-built traps and monitoring. Oh, but these pools are so delightfully refreshing—we were now well into the 40-degree zone with high humidity which makes any type of exercise, including a leisurely bike ride, feel like a workout.
The border to Arnhem Land is via the famous ford at Cahills Crossing on the East Alligator River, most famous for its large saltwater crocs swimming around on either side of the vehicle—as you can imagine, it is not a place to get stuck that’s for sure. We counted 12 crocs in the water around us as we drove across the river, all waiting for the fish to come over the rocks with the tidal shift. From our camp, there was a sweet 40km bike ride around Smith Point, the northern tip of Garig Gunak Barlu National Park on the Cobourg Peninsula. With the vastness of the Timor Sea in the background, Olive Ridley sea turtles coming on shore to lay their eggs, and an epic UNESCO wetland, the ride became a well-rounded experience.
After an epic trip through the most remote parts of Australia, Jamie and Anja are planning on shipping Collin over to South Korea, to access Russia, Mongolia, and many of the Stans, en route to Europe. Stay tuned for more adventures.
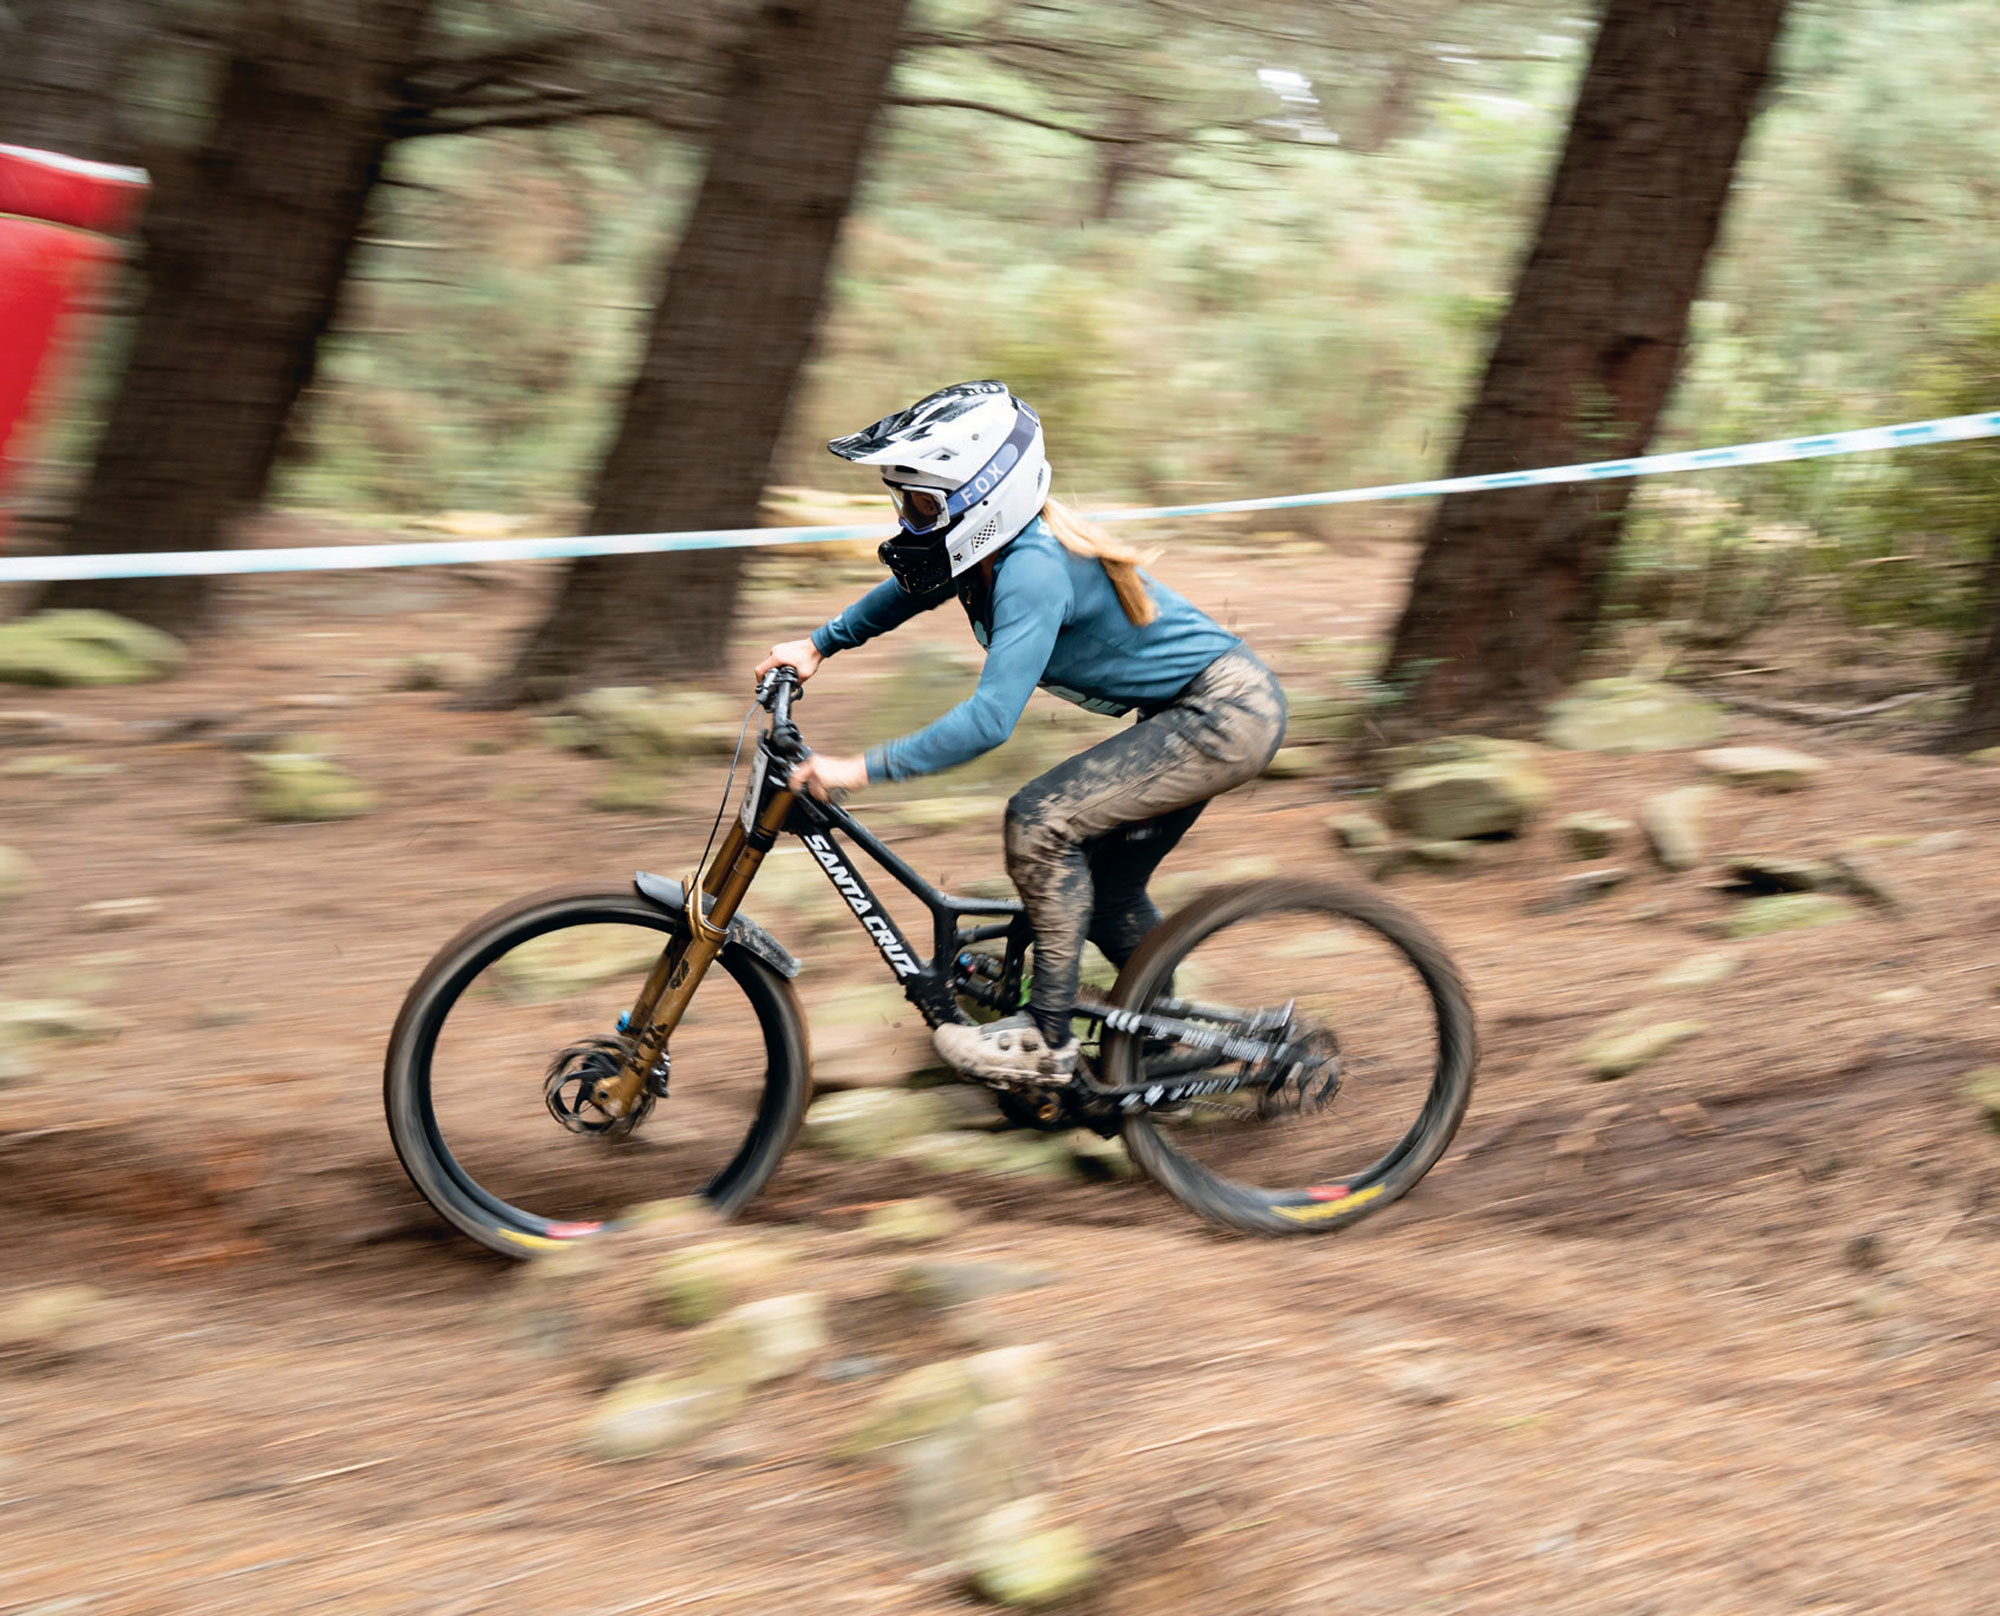
Leaders of the New School
Words & Images Riley McLay
New Zealand has recently experienced a golden age of downhill racers, putting our small country on the map as a powerhouse of talent. Originally, it was riders like Brook Macdonald, Sam Blenkinsop and Wyn Masters who stood out for their raw speed mixed with a relaxed outlook on racing, creating an international reputation that showcased the spirit of New Zealand’s mountain biking culture.
The torch was then passed to the VANZACS, where the talent pool increased with the likes of Eddie Masters, George Brannigan and Matt Walker redefining what was required to find racing success. This was the era of incorporating the DIY mentality of getting the job done by any means necessary with a lifestyle-based approach to building their careers. While both cohorts of talent found success at the World Cup level, New Zealand has since experienced a noticeable gap in racers transitioning from juniors to elite success. Now, however, New Zealand is home to an influx of junior talent already making waves globally.
Aotearoa has always had a strong racing scene at the grassroots level, but breaking onto the international stage comes with significant challenges. Kiwi racers have consistently faced two major barriers to competing internationally. One being the fact that, as you can imagine, chasing the World Cup circuit isn’t cheap; and two, our geographical isolation, making travel something of an ordeal. With the sport largely based in Europe, traveling back and forth from New Zealand isn’t practical for most people. Instead, riders must base themselves there for most of the season, which can be three to four months. The financial burden is high even before racing begins, not to mention when you factor in race fees, insurance, spare parts and essential nutrition. The mental strain of just getting to races isn’t ideal when a racer is chasing good results. This is why external funding and sponsorships are so crucial for success.
As the sport becomes more professional, privateers are increasingly being pushed out of competition. This makes securing a spot on a factory team more important than ever. Recent UCI rule changes have made it even harder for privateers to qualify for a World Cup, so riders must now earn UCI points through a new feeder series called the Continental Cup. Finishing in the top five of any Continental Cup Series grants access to the next World Cup on the calendar. Alternatively, winning their country’s National or Continental Championship guarantees automatic entry for the season. Confusing, I know. And yet another hurdle for Kiwi riders, making strategic race planning more critical than ever.
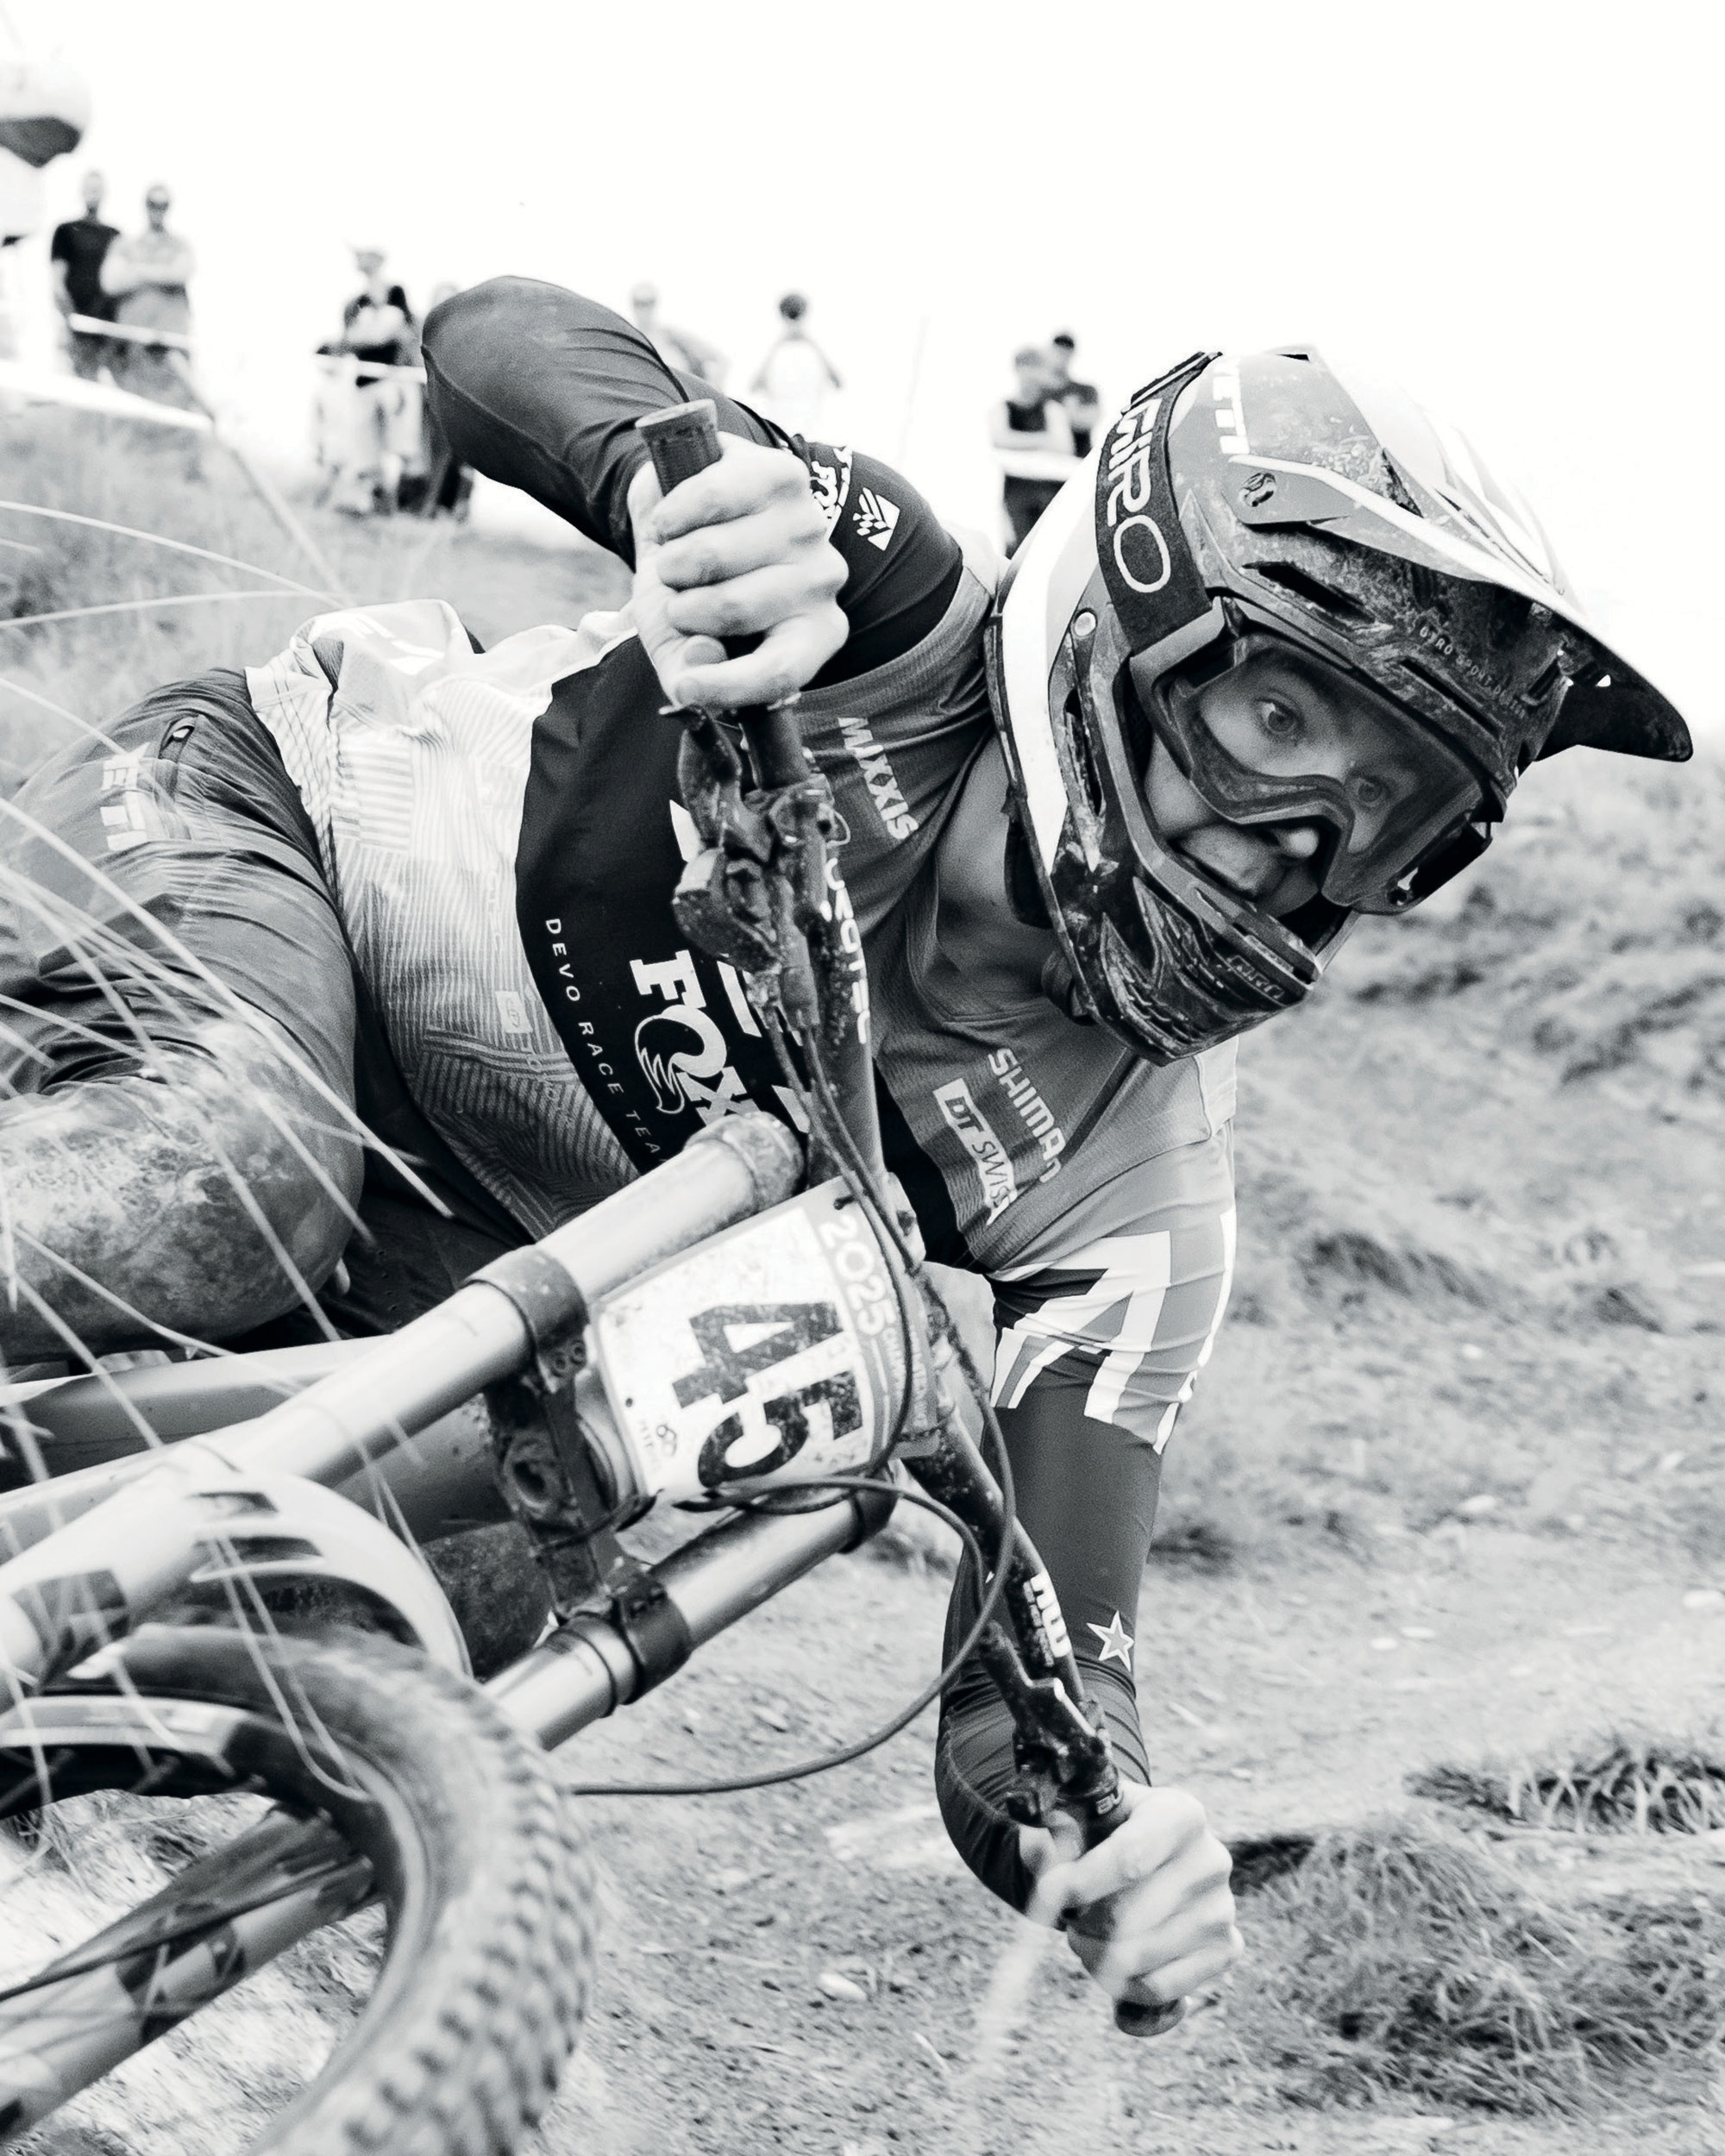
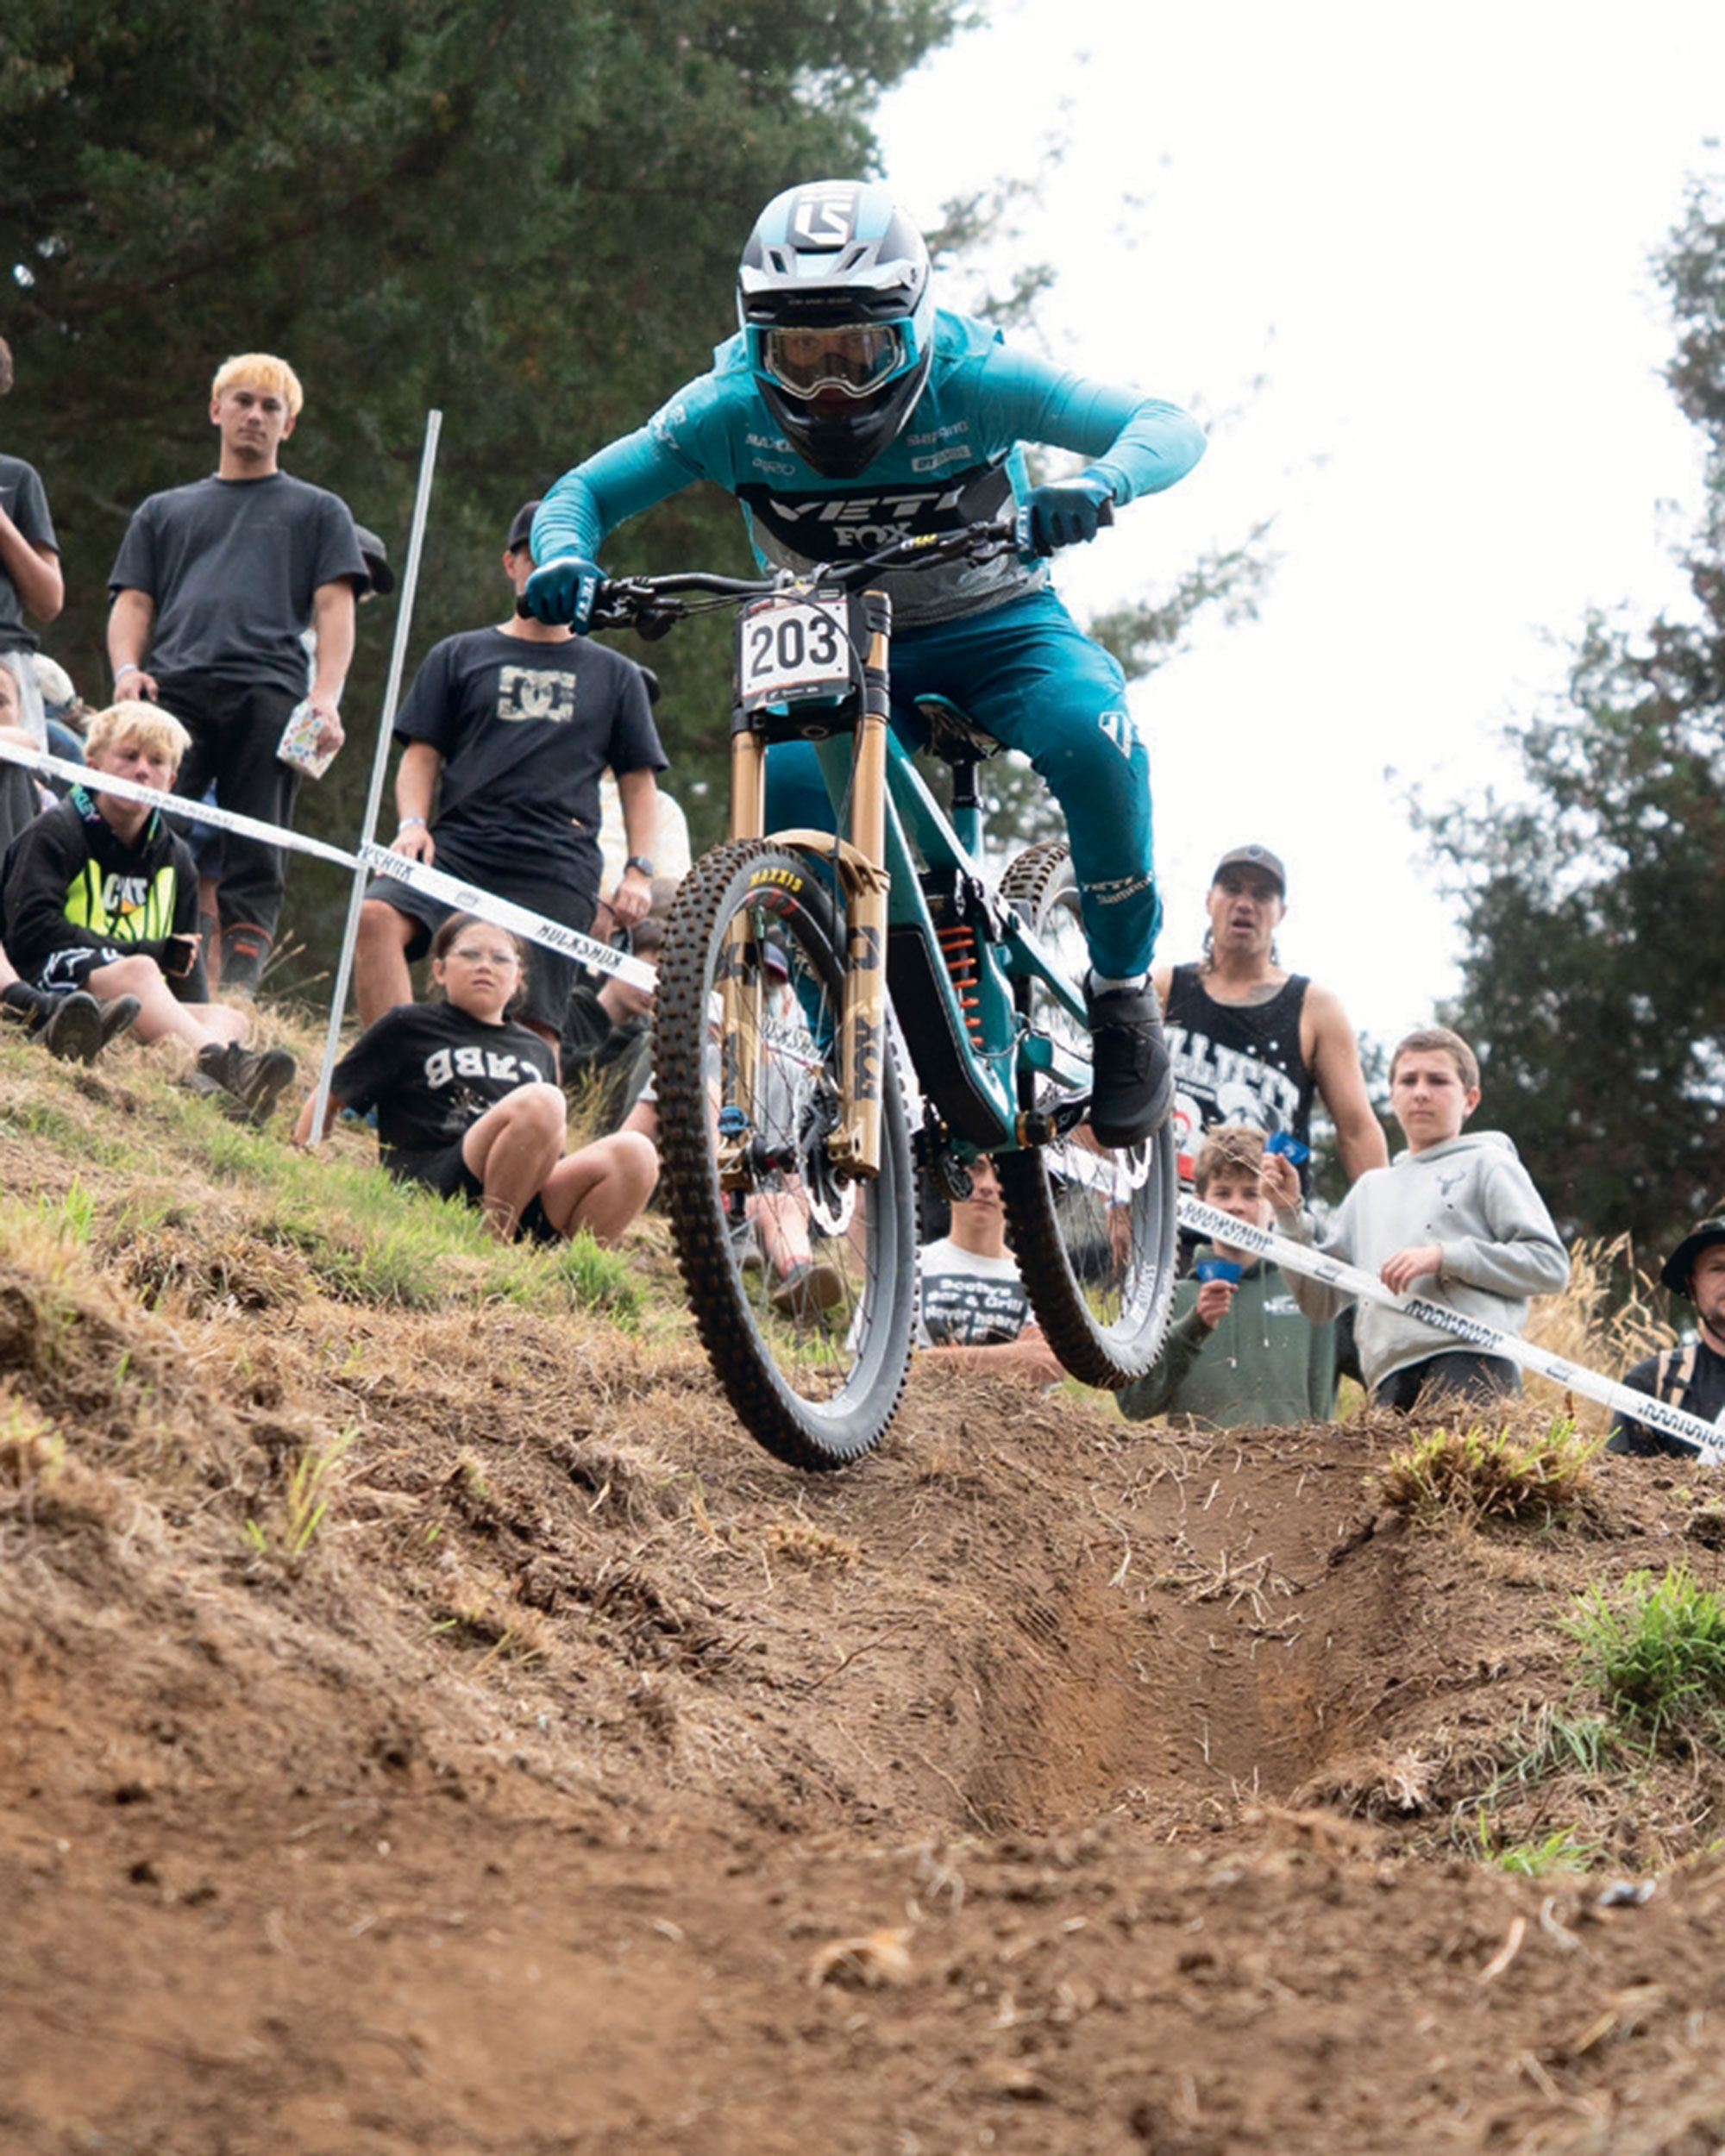
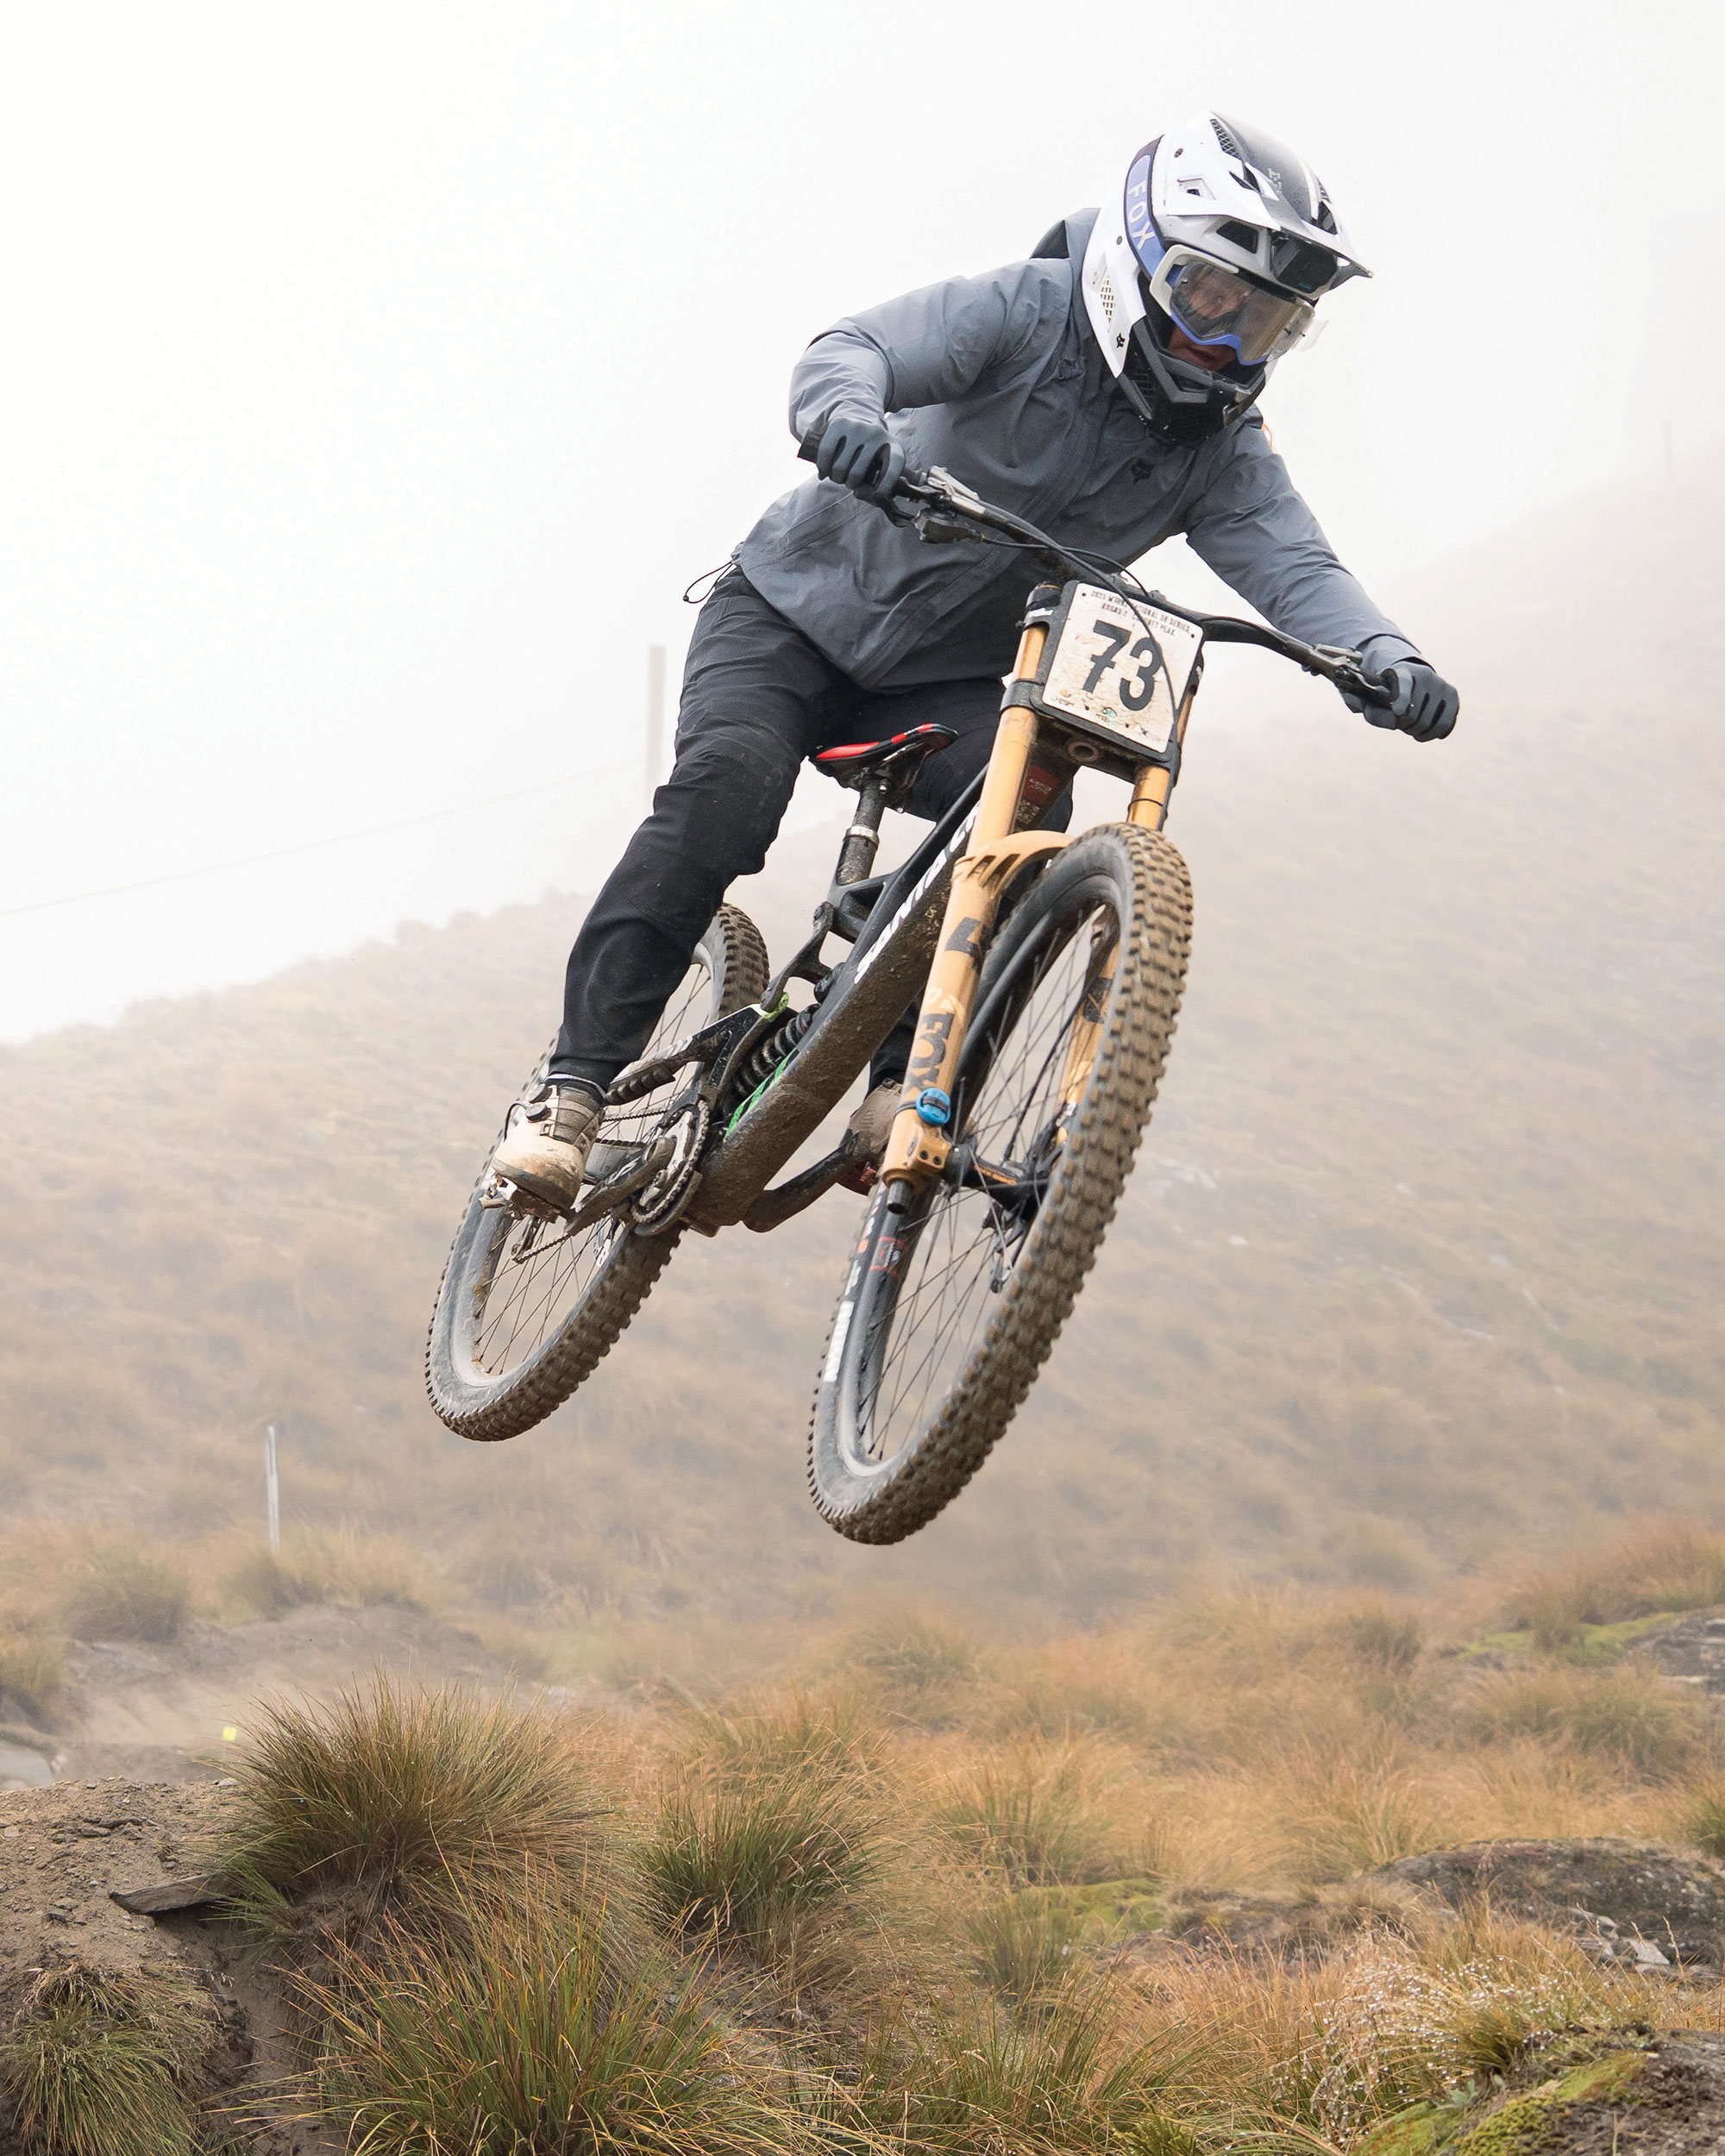
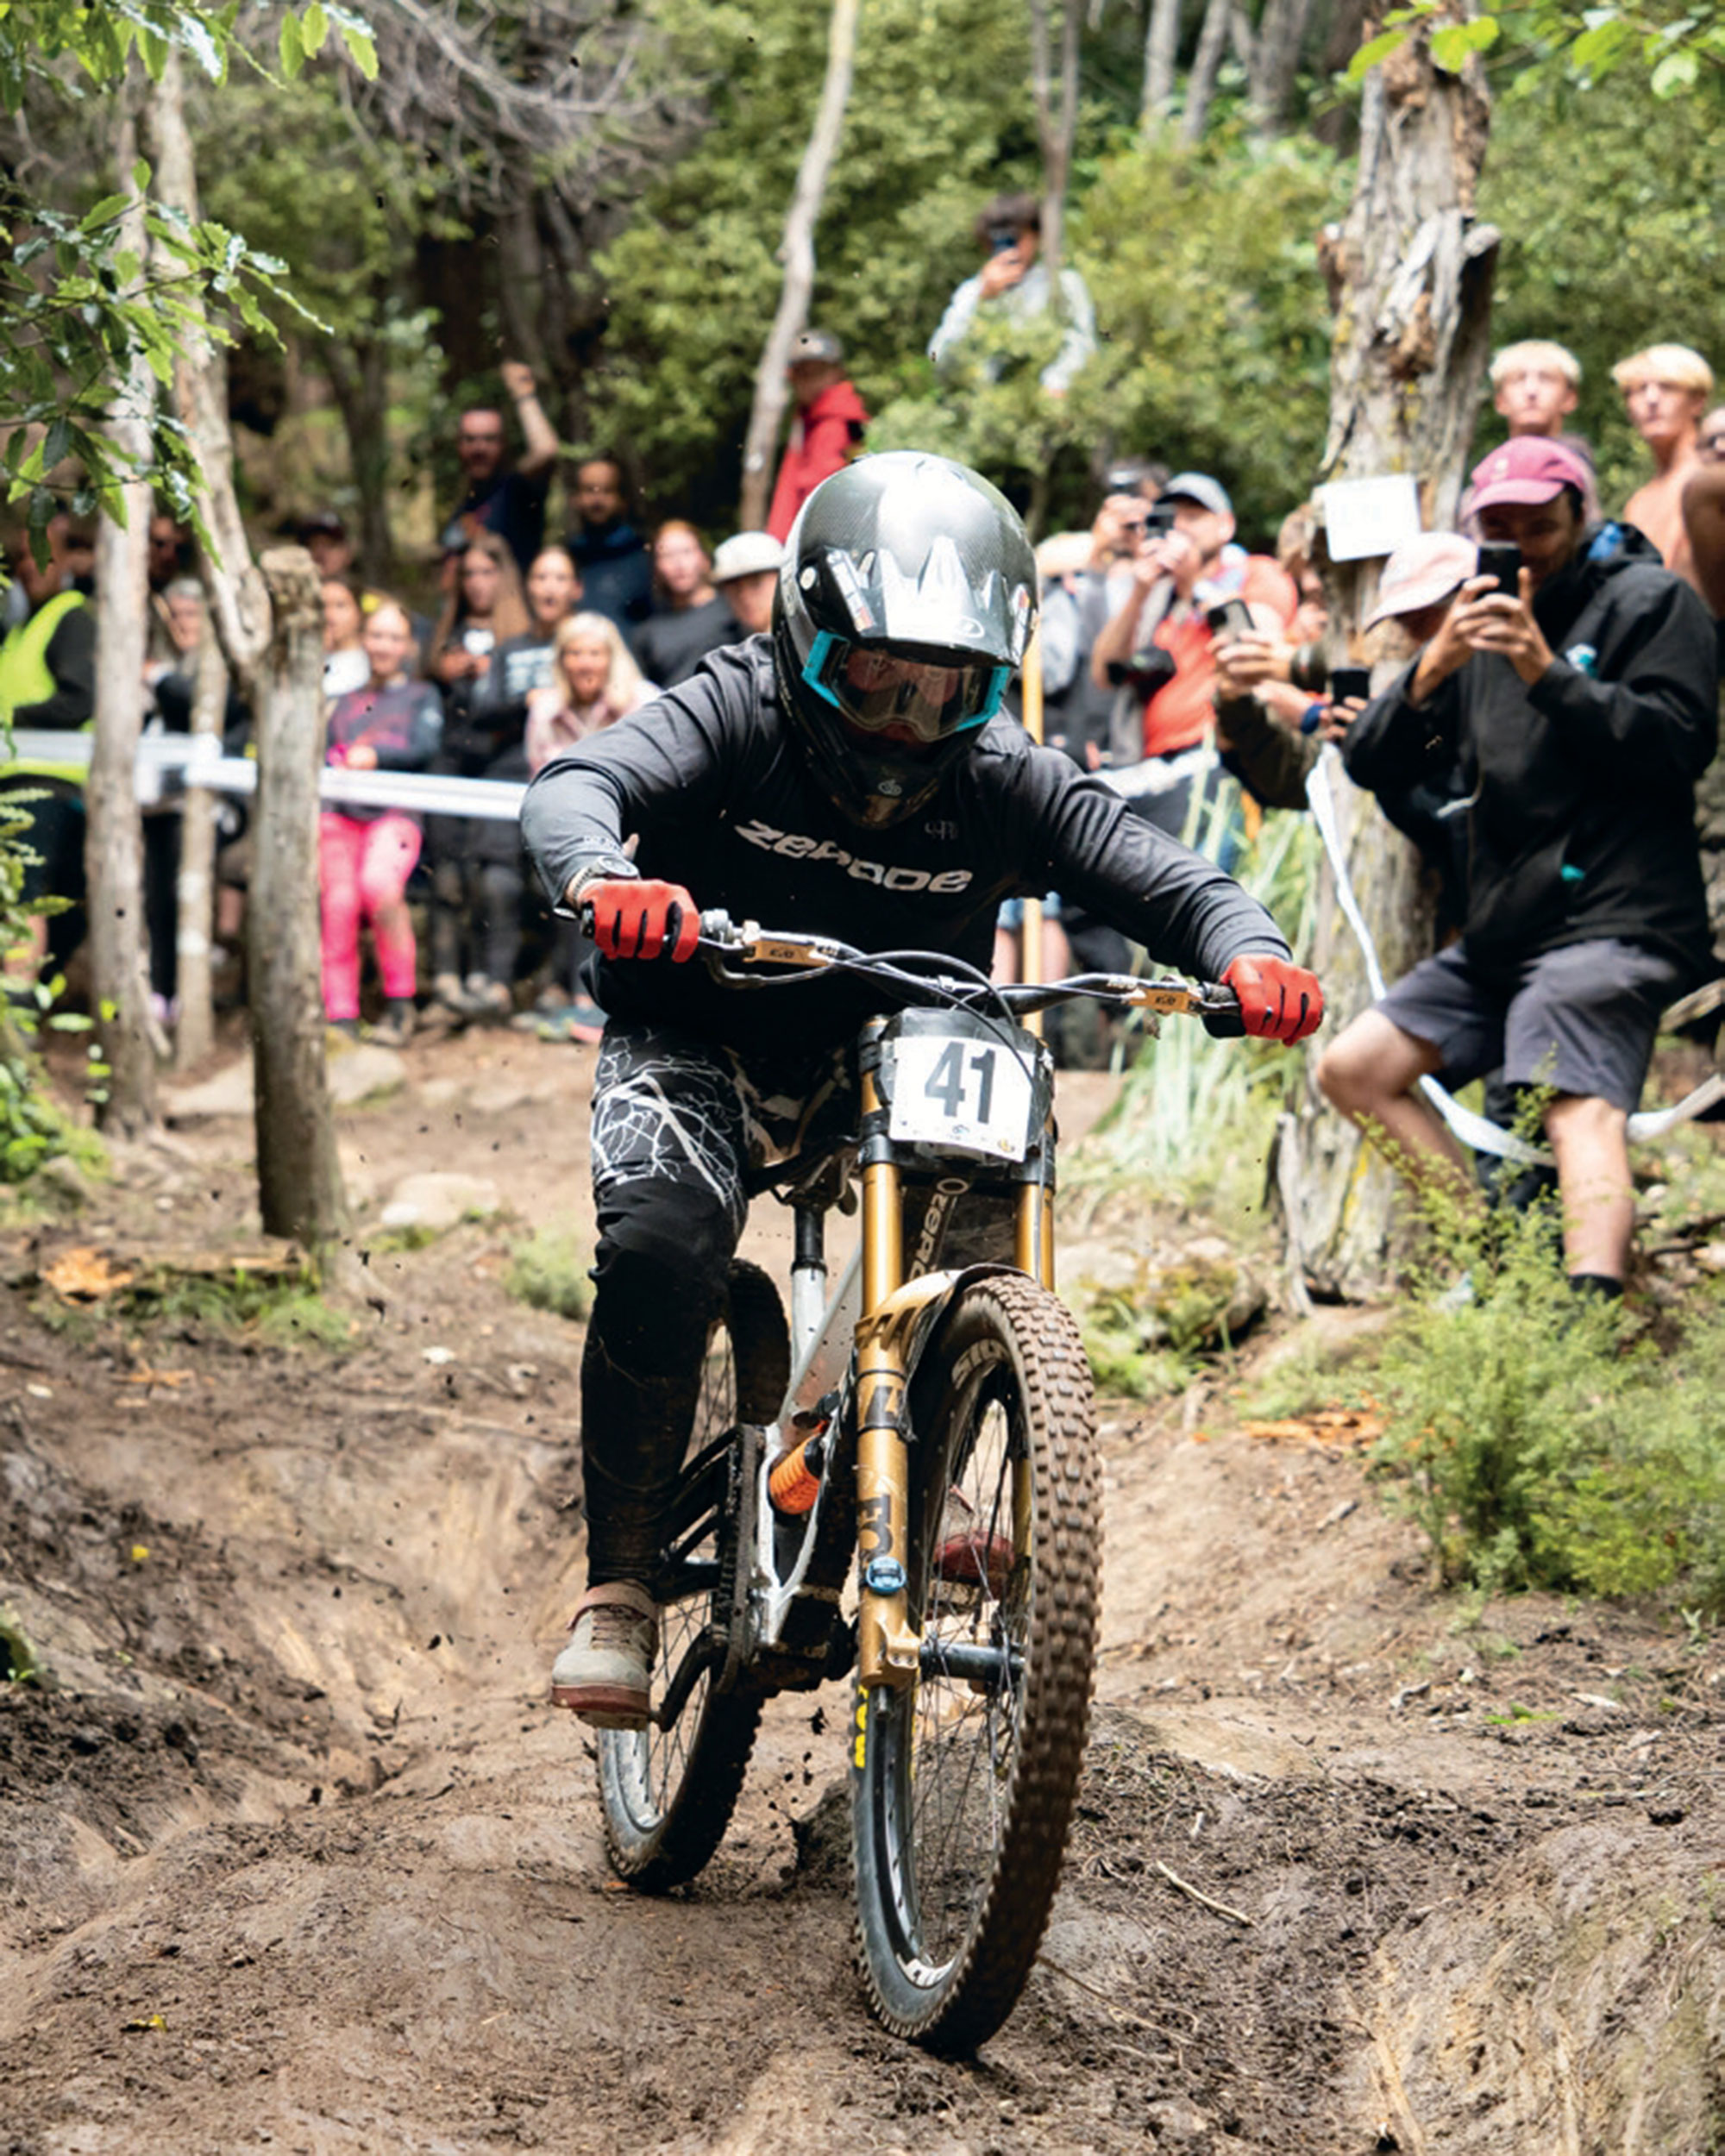
New Zealand riders have been fortunate to hone their skills on some of the world’s best downhill tracks, contributing to the development of top-tier talent. Over the years, as mountain biking’s popularity has grown, there’s been a collective effort to expand and improve existing networks to meet increasing demand. As a result, New Zealand has become a go-to destination for the world’s best riders to train during the Northern Leaders of the New School Hemisphere off-season. We’ve all seen clips of the likes of Ronan Dunne and Jackson Goldstone going full throttle down the Coronet DH track. With social media being so accessible, having the world’s best riders on our shores not only provides incredible exposure for mountain biking in New Zealand, but it also inspires a new generation to take up the sport. As more kids get into biking, many want to try racing and push their own limits—so much so that the Secondary School Nationals have been sold out year after year.
Honing talent at an early age is the best way to develop habits for success, but balancing race results with the need to play into the social media game to get noticed, can be tricky. Marketing yourself as a junior rider has always been challenging, but the landscape has shifted with new changes to the UCI World Cup format. Now, junior riders not only have their runs televised on race-day broadcasts, but their UCI points are also valued equally to those of elite racers. As a result, teams see greater value in including junior riders—not just for long-term development, but also for securing enough points to qualify their team for the season.
Talent seems to come through in waves, and a new generation of Kiwi downhill racers is already making its mark on the world stage. It all kicked off with Jenna Hastings bursting into the spotlight, winning the Junior World Championships in Les Gets in 2022. Then, in 2023, New Zealand stole the show once again with a clean sweep of the podium at World Champs, thanks to Erice van Leuven, Poppy Lane, and Sacha Earnest. Erice went on to become a back-to-back Junior World Champion and overall series champion in 2024, securing a sought-after contract with one of the biggest teams on the circuit, Norco Race Division. Sacha’s impressive efforts didn’t go unnoticed either—she was picked up by Trek Factory Racing. Young phenom, Eliana Hulsebosch, impressed by securing a deal with the Santa Cruz Syndicate after a breakout season in 2024 on The Union. Eliana consistently finished in the top five and clinched her first World Cup win in Val di Sole, Italy.
In the junior male category, several Kiwi riders have been making a strong impact on the World Cup stage, with Oli Clark and Rory Meek standing out with a number of impressive top 20 finishes in 2024. After missing over half the season due to injury, Tyler Waite made a strong comeback, finishing fourth at the World Championships, second at Loudenvielle, and third at Mont-Sainte-Anne to round out the season. Being part of a powerhouse team like Yeti Factory Racing, with the experience of riders like Richie Rude and Camille Balanche to learn from, he will undoubtedly have plenty of eyes on him in 2025. Finally, Luke Wayman was the epitome of consistency last season, securing second place in the UCI World Cup junior overall and never finishing outside the top 10 in any race. In 2025, Luke will be riding for Continental Atherton Racing—a team led by a legend of the sport, Gee Atherton. Also, becoming teammates with 2023 World Champion, Charlie Hatton, will provide the perfect environment to build into his first year in the elite ranks.
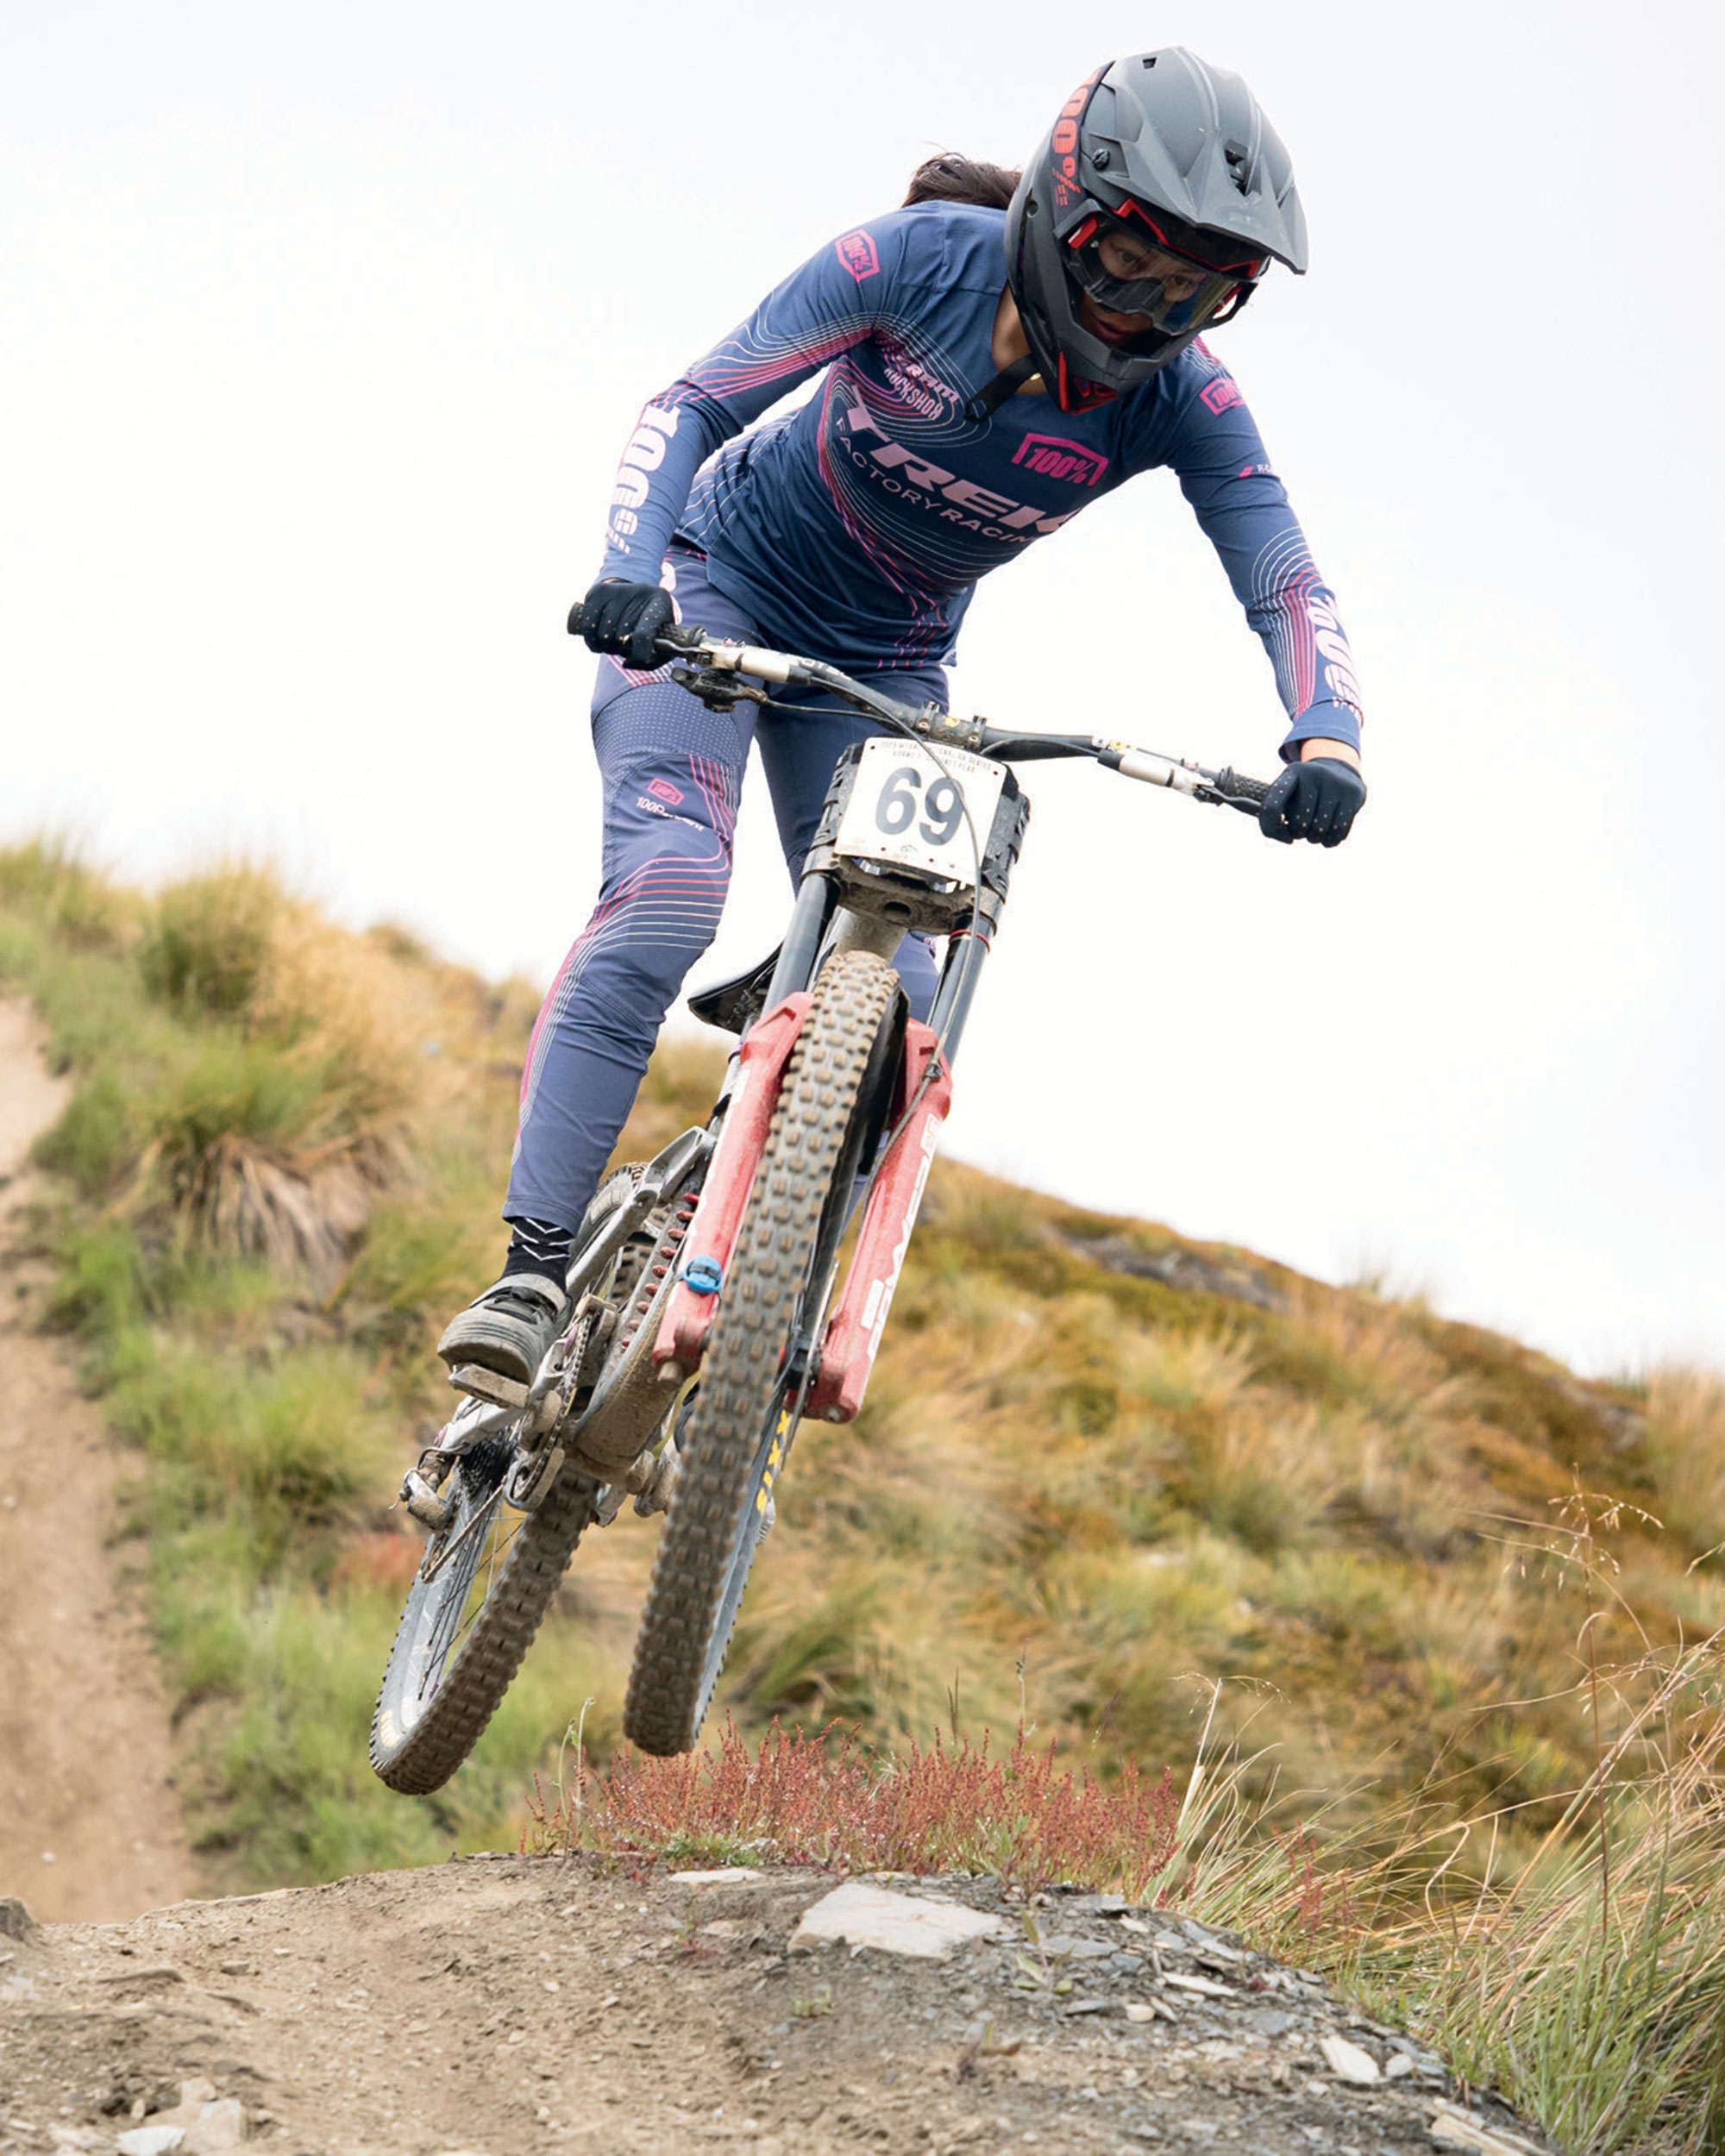
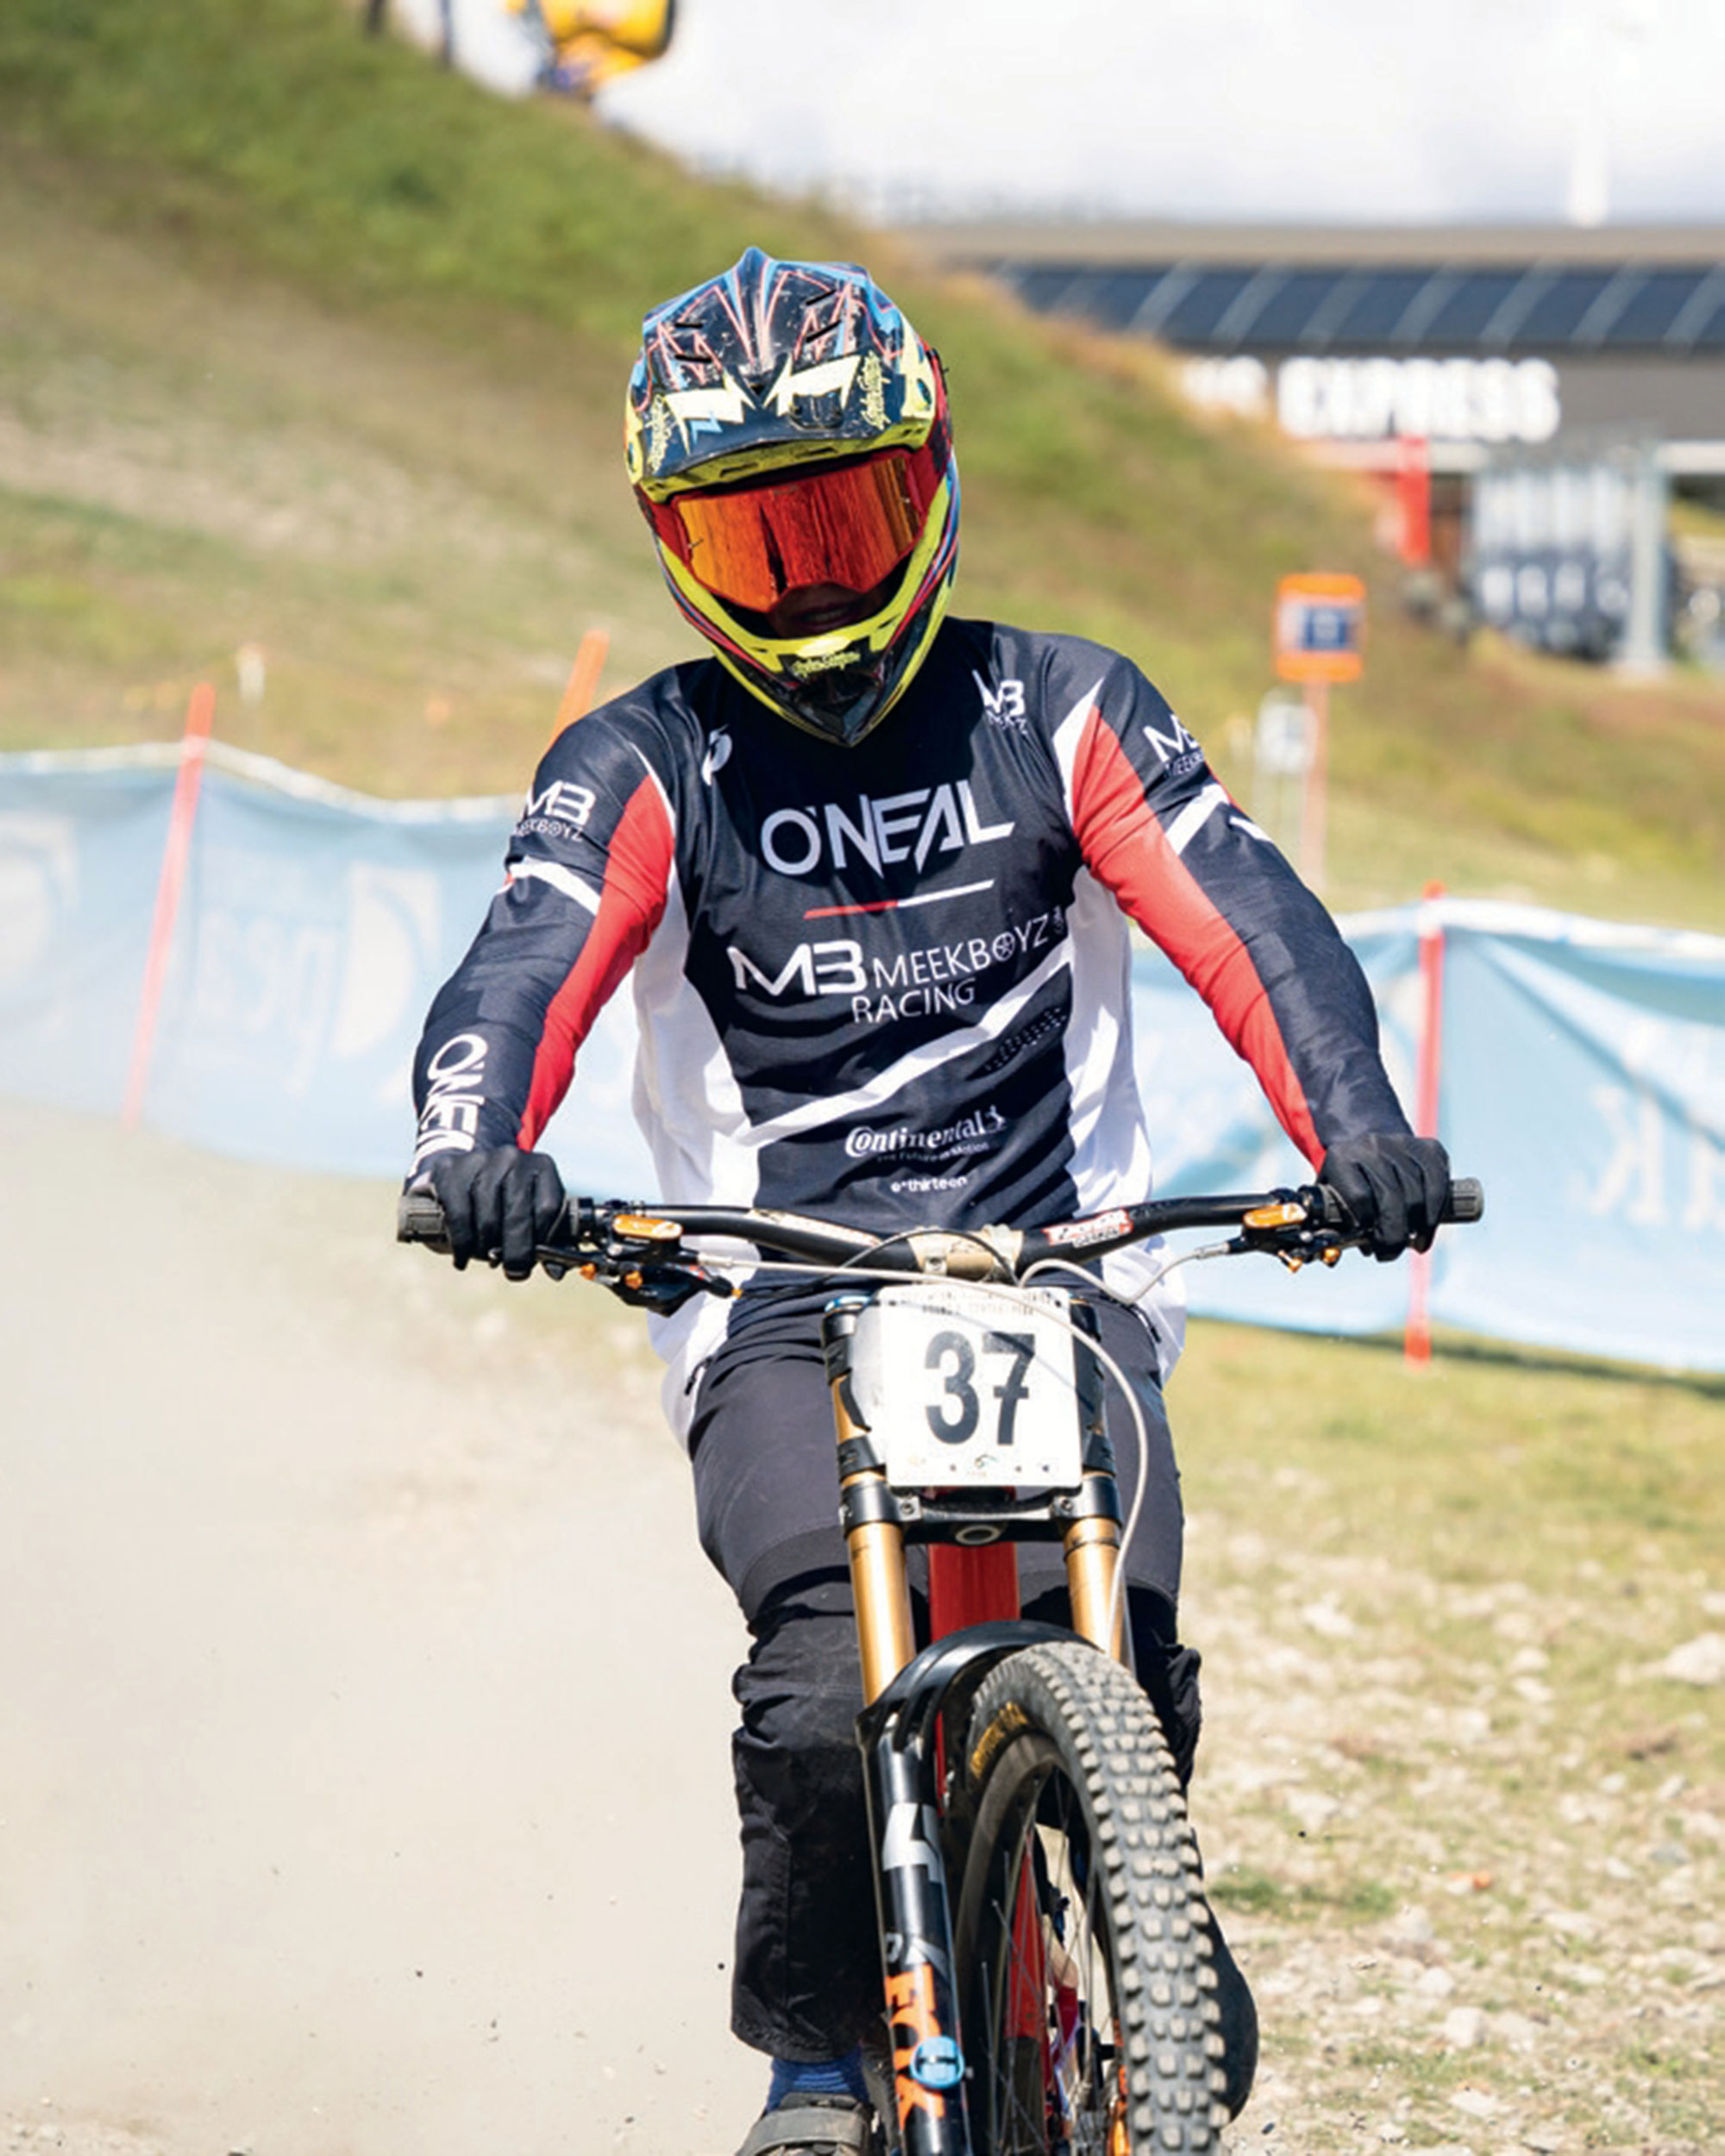
Development race teams are not a new concept, but Envision Racing aims to expand its rider’s opportunities—not just in racing, but by helping them build connections for careers beyond the track. Founded by Cam Cole and Liam Jackson, the team provides industry support to help riders compete while also teaching them the expectations of becoming professionals in the sport. Cam’s experience and connections as a former World Cup racer, and Liam’s marketing expertise, helps mentor riders to understand their value to sponsors while still being appreciative of the opportunities given. While raw speed gets you on a team’s radar, Envision Racing values a combination of attitude and work ethic above all else. Envision Racing’s goal is to minimize upfront costs for their riders by supplying them with a bike and gear for the season. Riders can then sell their previous setups to fund travel and chase races. The 2025 race season has already delivered strong results for the team. Rider Cole Hulsebosch claimed victory in the Under 17 category at the National Championships in Rotorua, a perfect way to kick off the year as he prepares for his Northern Hemisphere season. Meanwhile, Jonty Williamson’s standout performances have earned him a contract with Yeti Factory Racing for 2025. This marks a major success for the Envision Racing team, whose mission is to serve as a steppingstone for opportunities like this. Inspired by top development programs overseas, Envision Racing remains committed to identifying and nurturing young talent, helping them reach their full potential.
The NZ MTB Academy offers a fresh alternative to the traditional development team model, bridging gaps in an athlete’s progression to help them succeed on the international stage. Founded by Sam Thompson, the academy draws on his extensive experience running mountain bike programs and coaching in the gravity space, equipping Kiwi riders with the knowledge and support needed to navigate the World Cup racing scene more effectively. What sets the academy apart is its flexibility. It works with riders, whether they are on a team or not, fostering lasting relationships for the future. It also provides opportunities for senior riders, such as Tuhoto-Ariki Pene, to take on mentoring roles, passing down firsthand knowledge that they have learnt to the next generation. Being competitive in New Zealand is one thing, but succeeding internationally requires a deep understanding of training, nutrition, and sports psychology to gain an edge. The academy primarily targets junior riders who demonstrate the right attitude, a genuine willingness to learn, and a passion for racing—not just the lifestyle that comes with it.
This past October, the Academy hosted one of its largest camps yet, with around 40 kids in Rotorua. Their future goal is to support as many riders as possible as they progress in the sport, not only during the off-season but also by providing logistical support on the ground while they compete overseas. This structure will ensure that future waves of young Kiwi riders can continue to make their mark on the world stage, and carry forward the legacy of those who came before them—proving that New Zealand will remain a force to be reckoned with for years to come.