

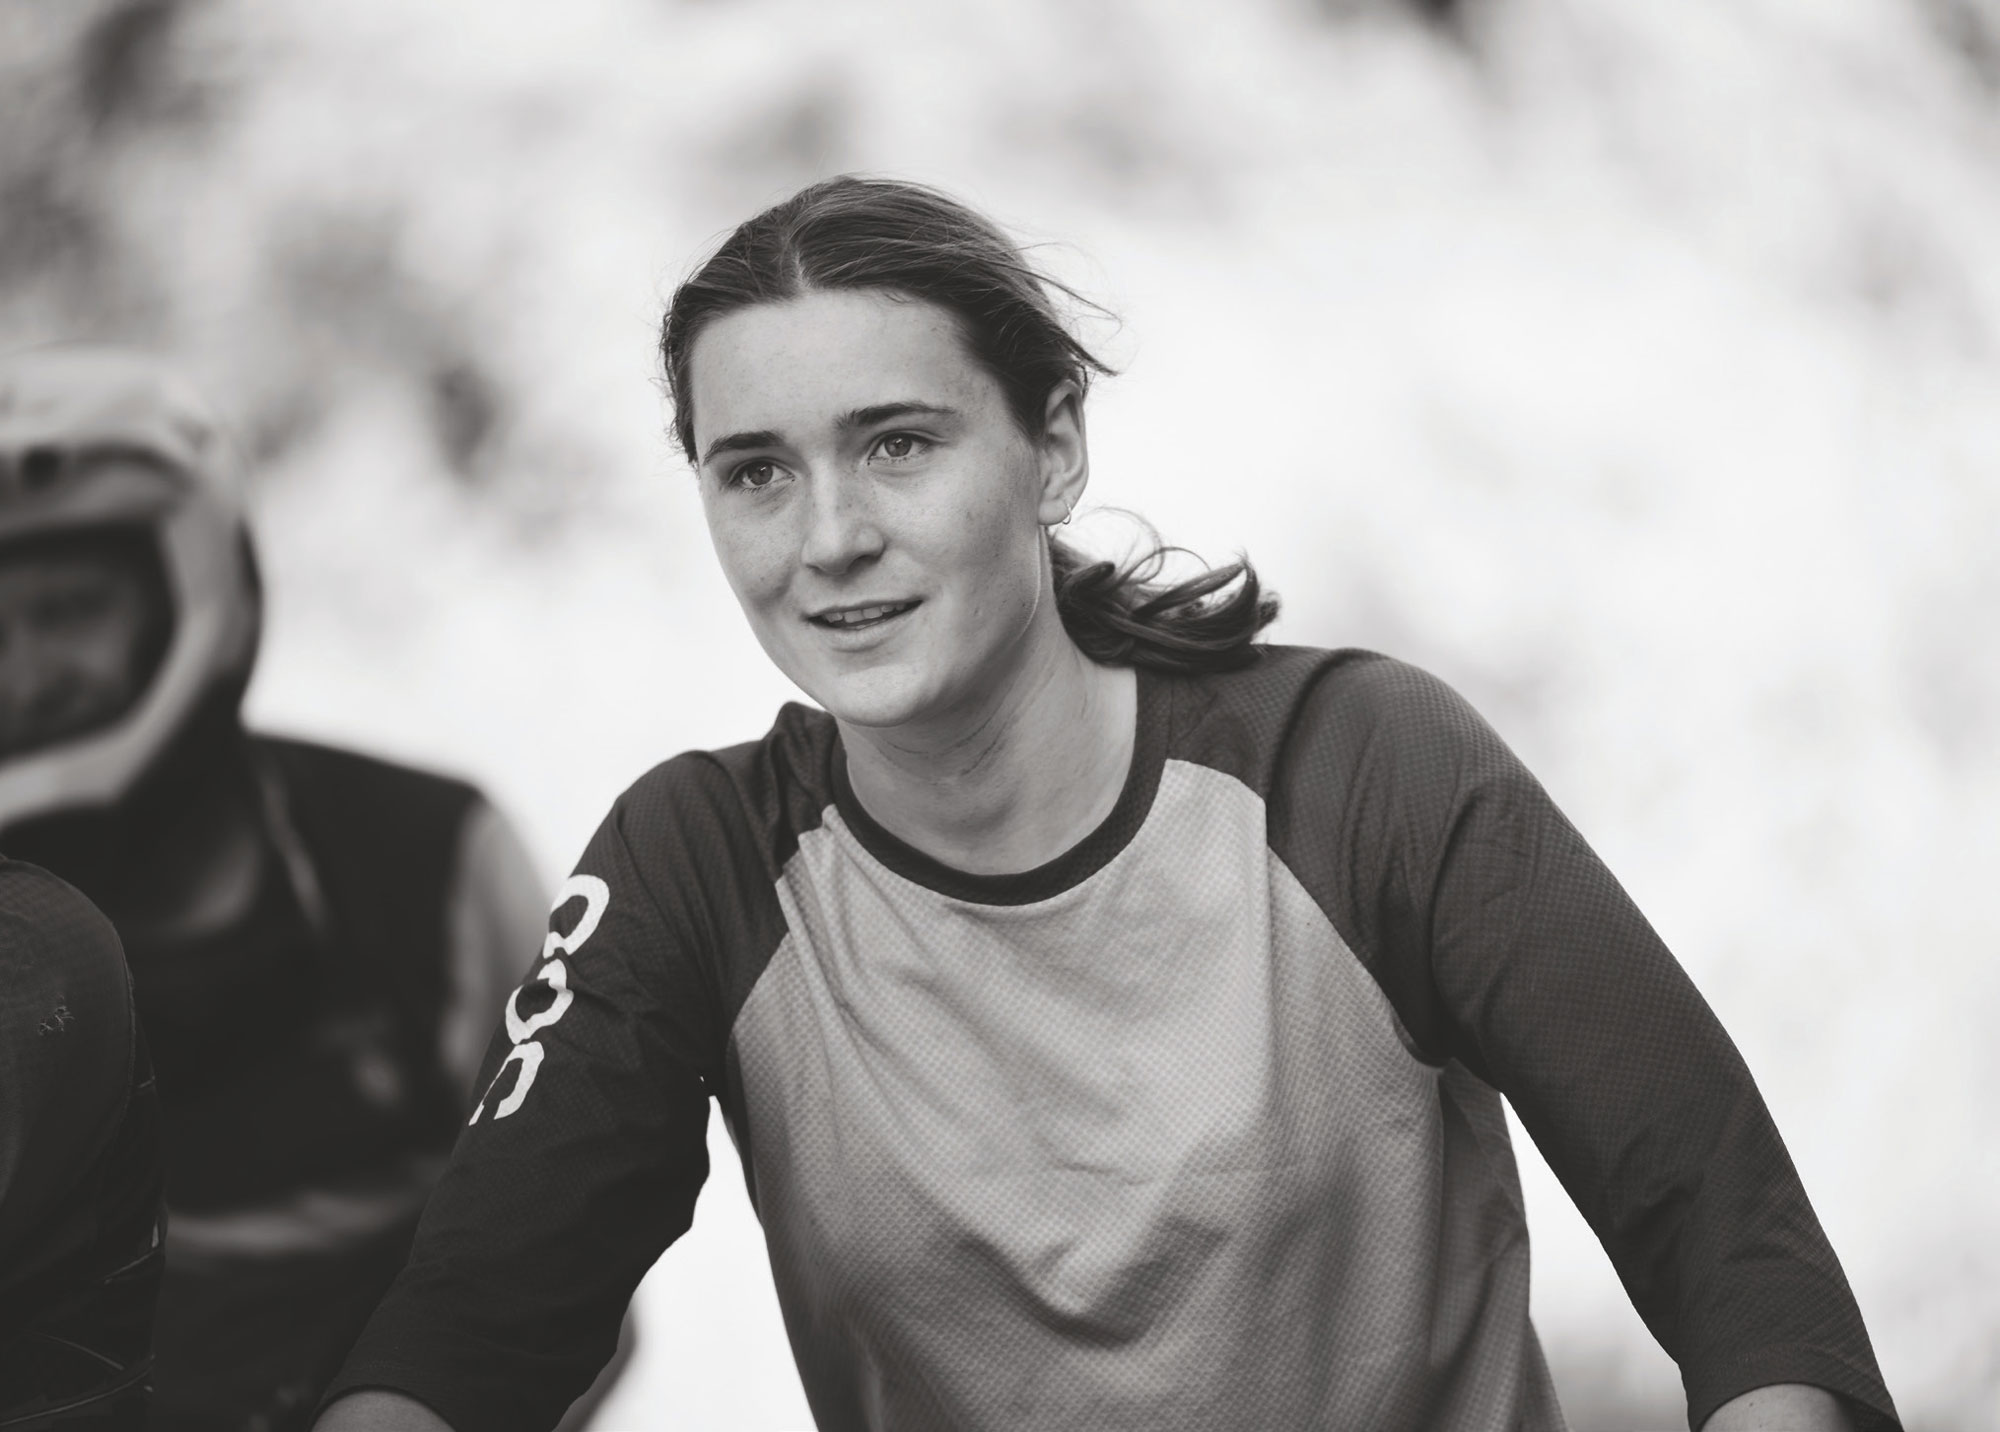
Mammoth of a Time with Winni Goldsbury
Words by Lester Perry
Images by Henry Jaine
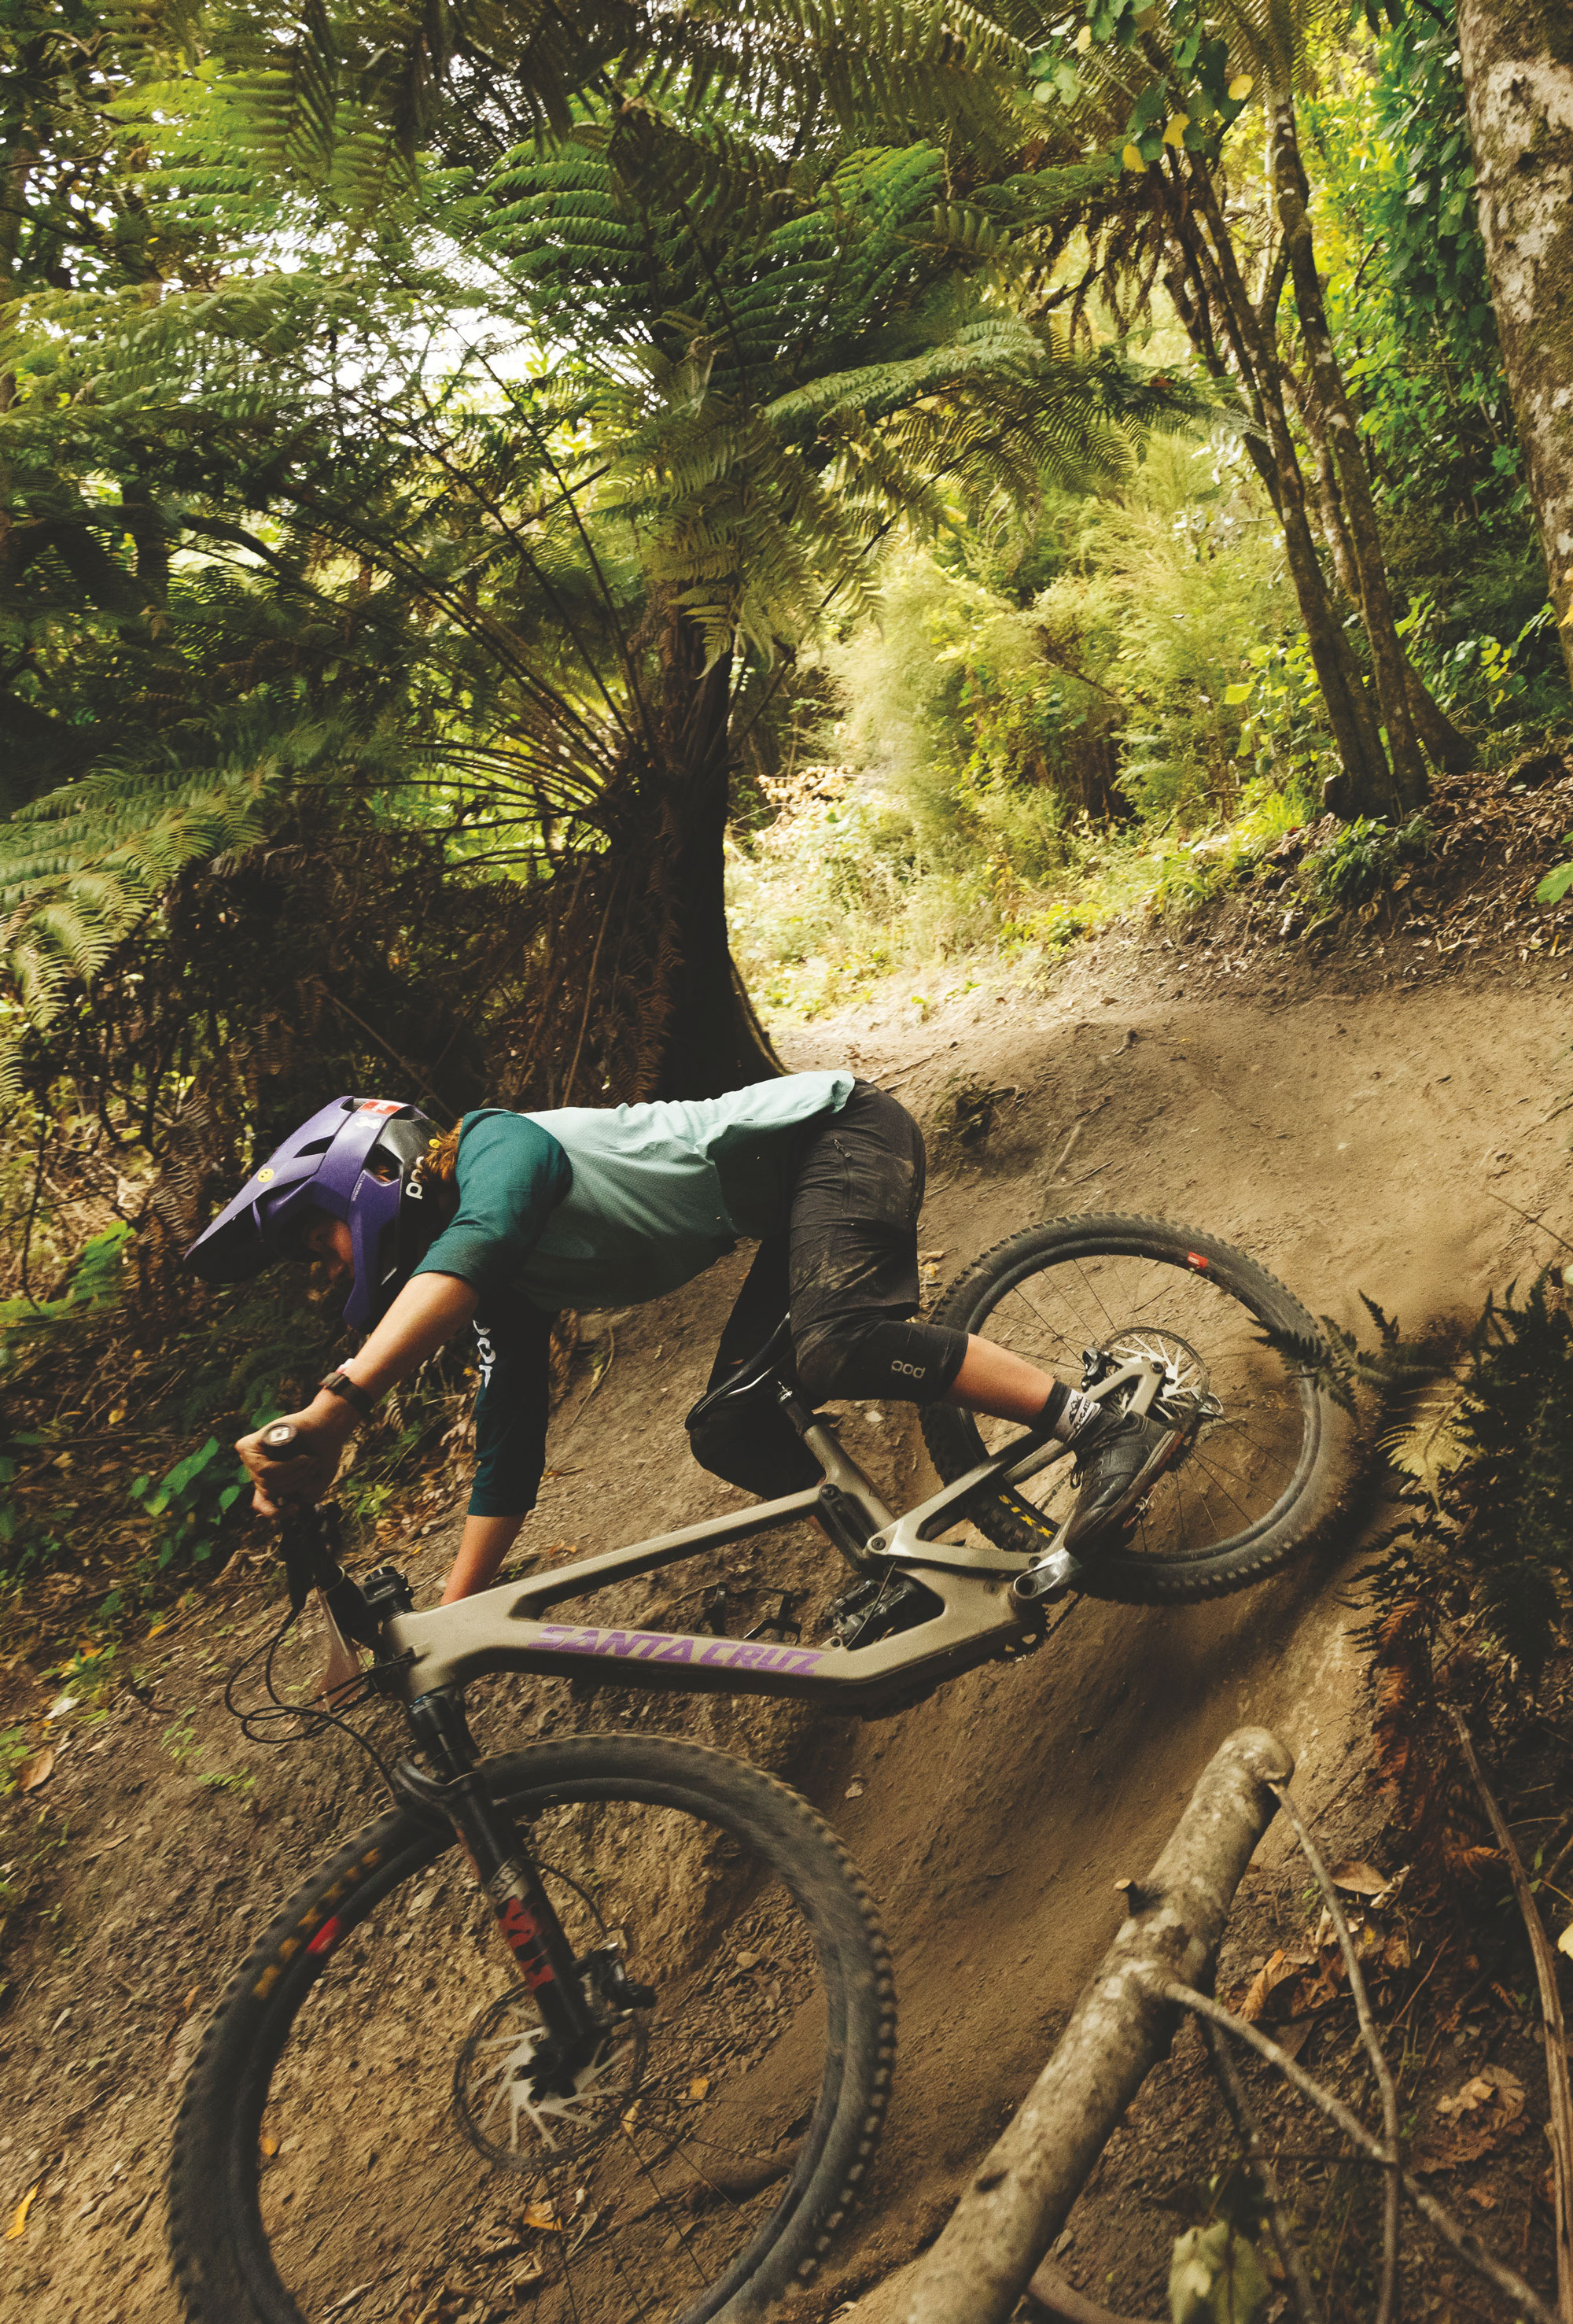
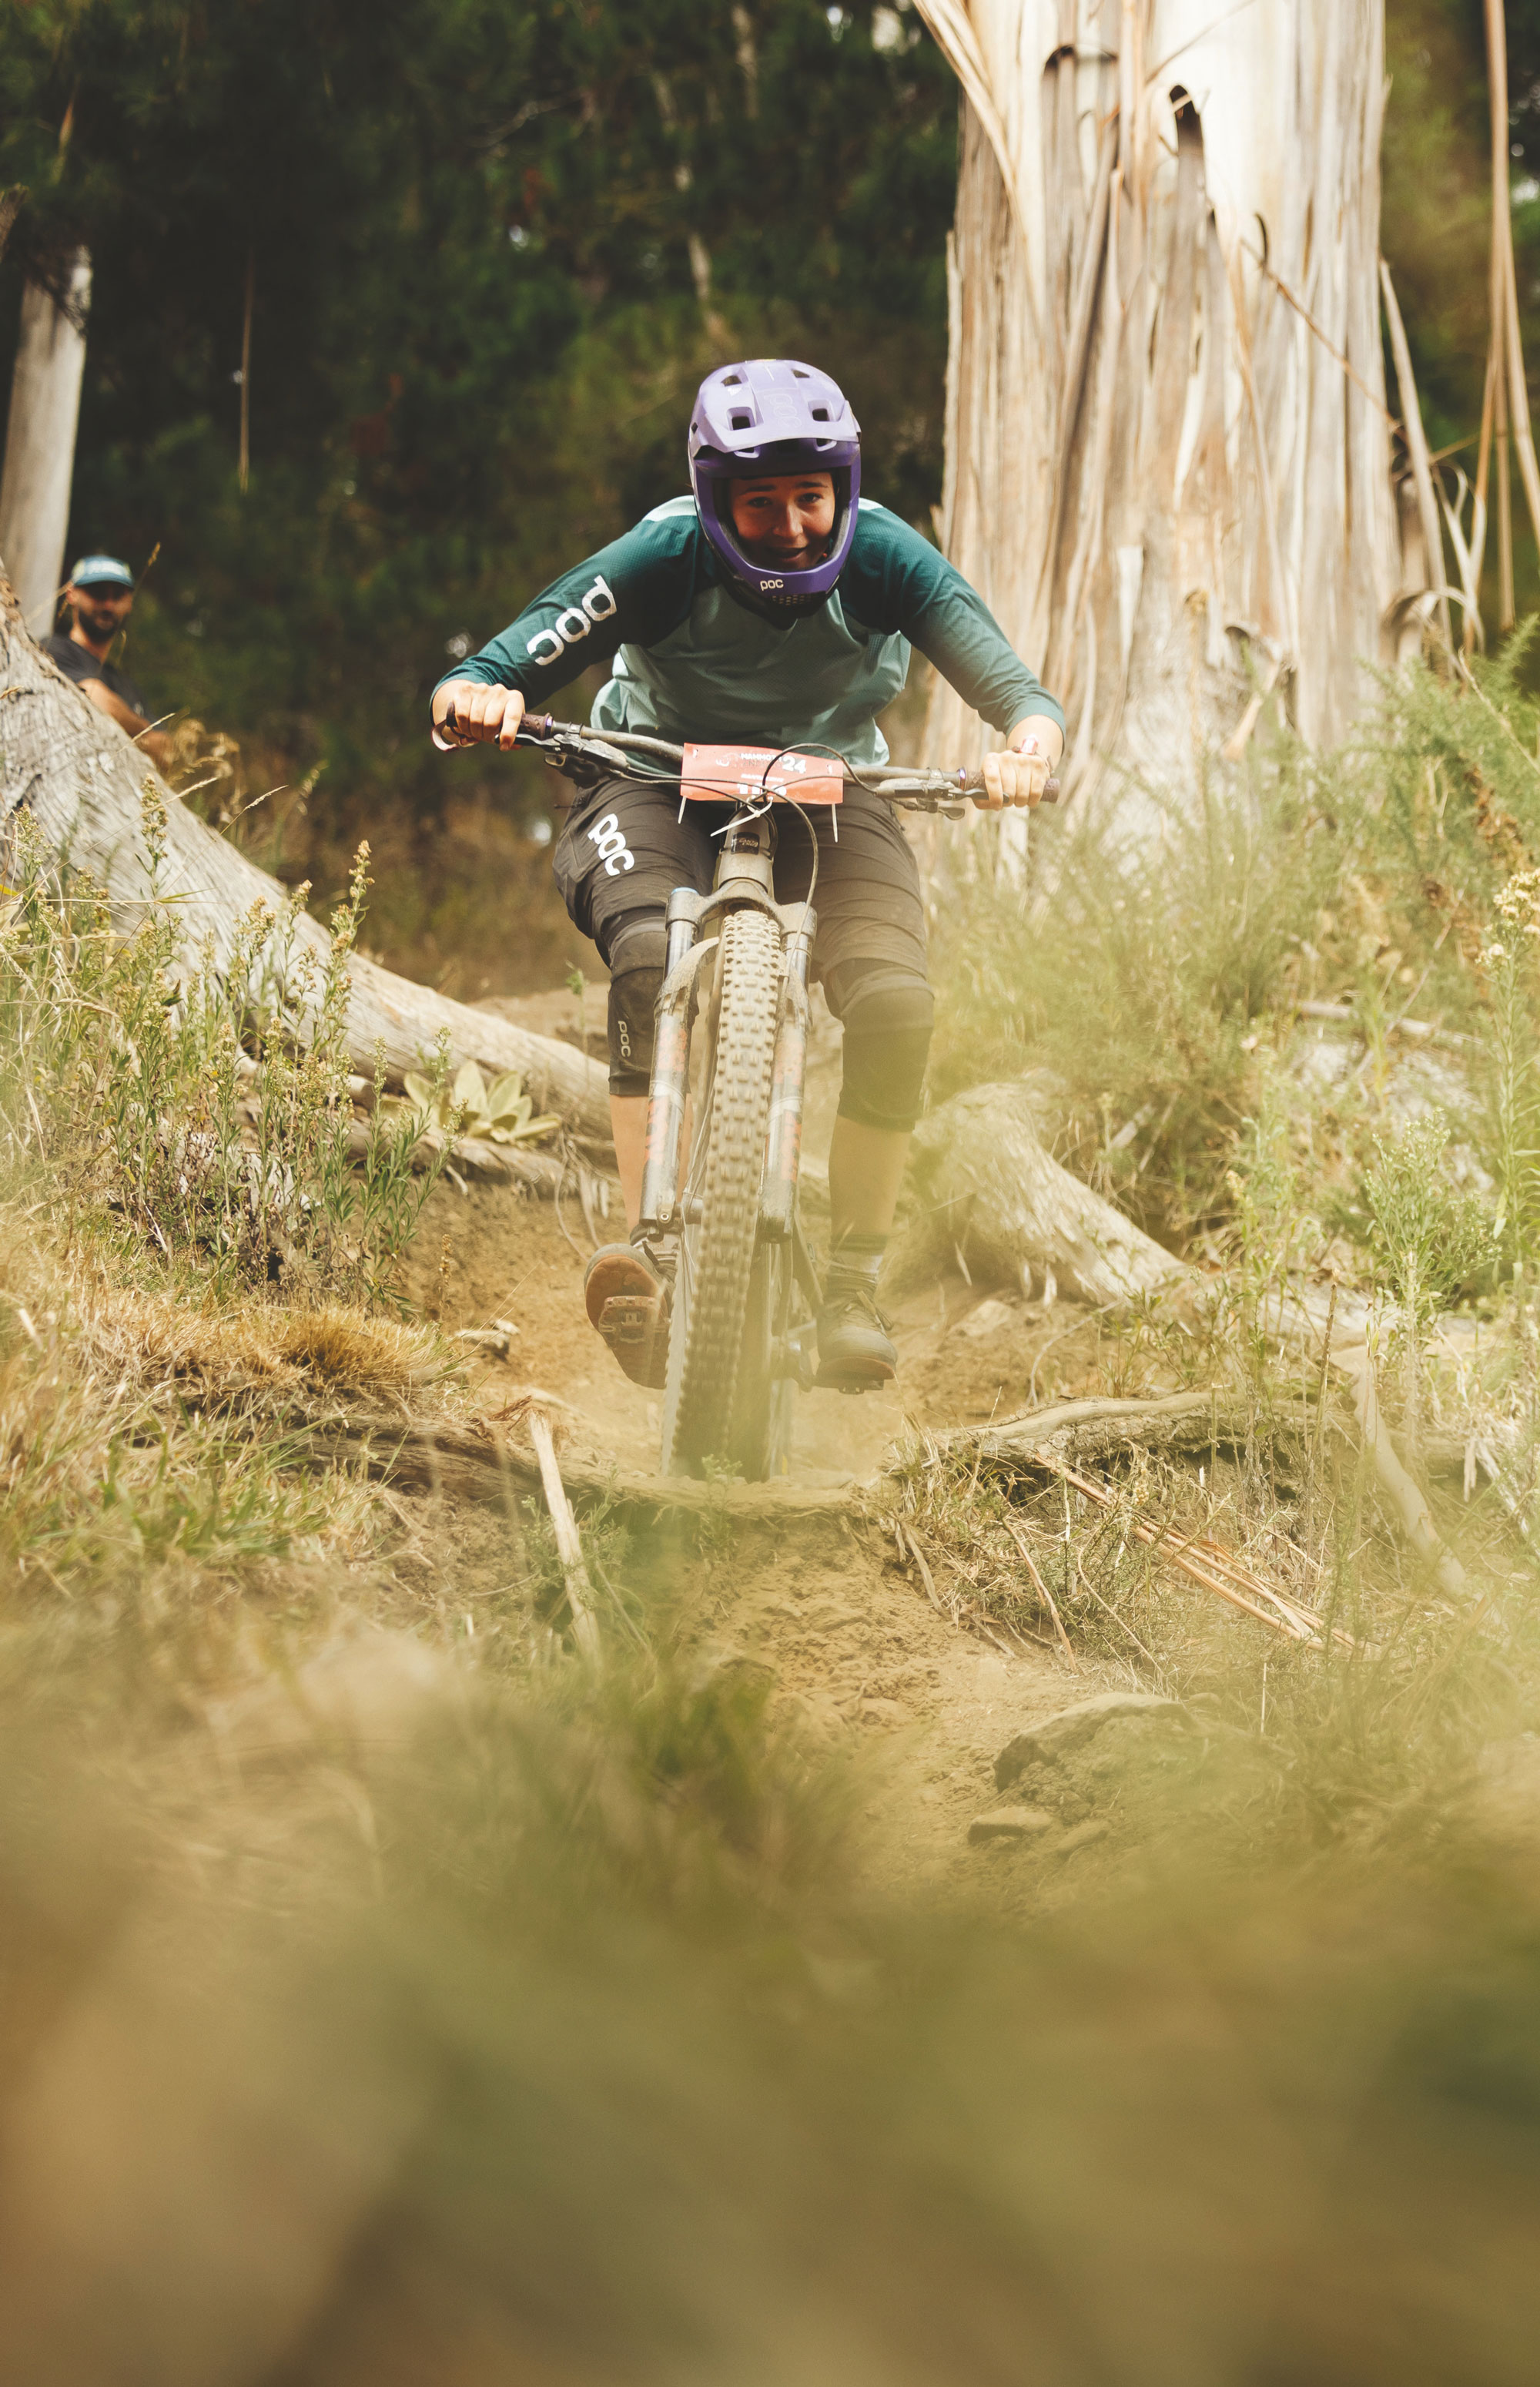
On 23rd and 24th March 2024, Nelson Mtb Club knocked out the tenth edition of what is arguably NZ’s toughest gravity race; the Mammoth Enduro. Riders were presented with six epic descents linked by equally epic liaison climbs. The course designers aren’t total masochists, and eased the pressure on competitors by throwing in a couple of (no doubt banter-filled) shuttle uplifts to keep spirits high.
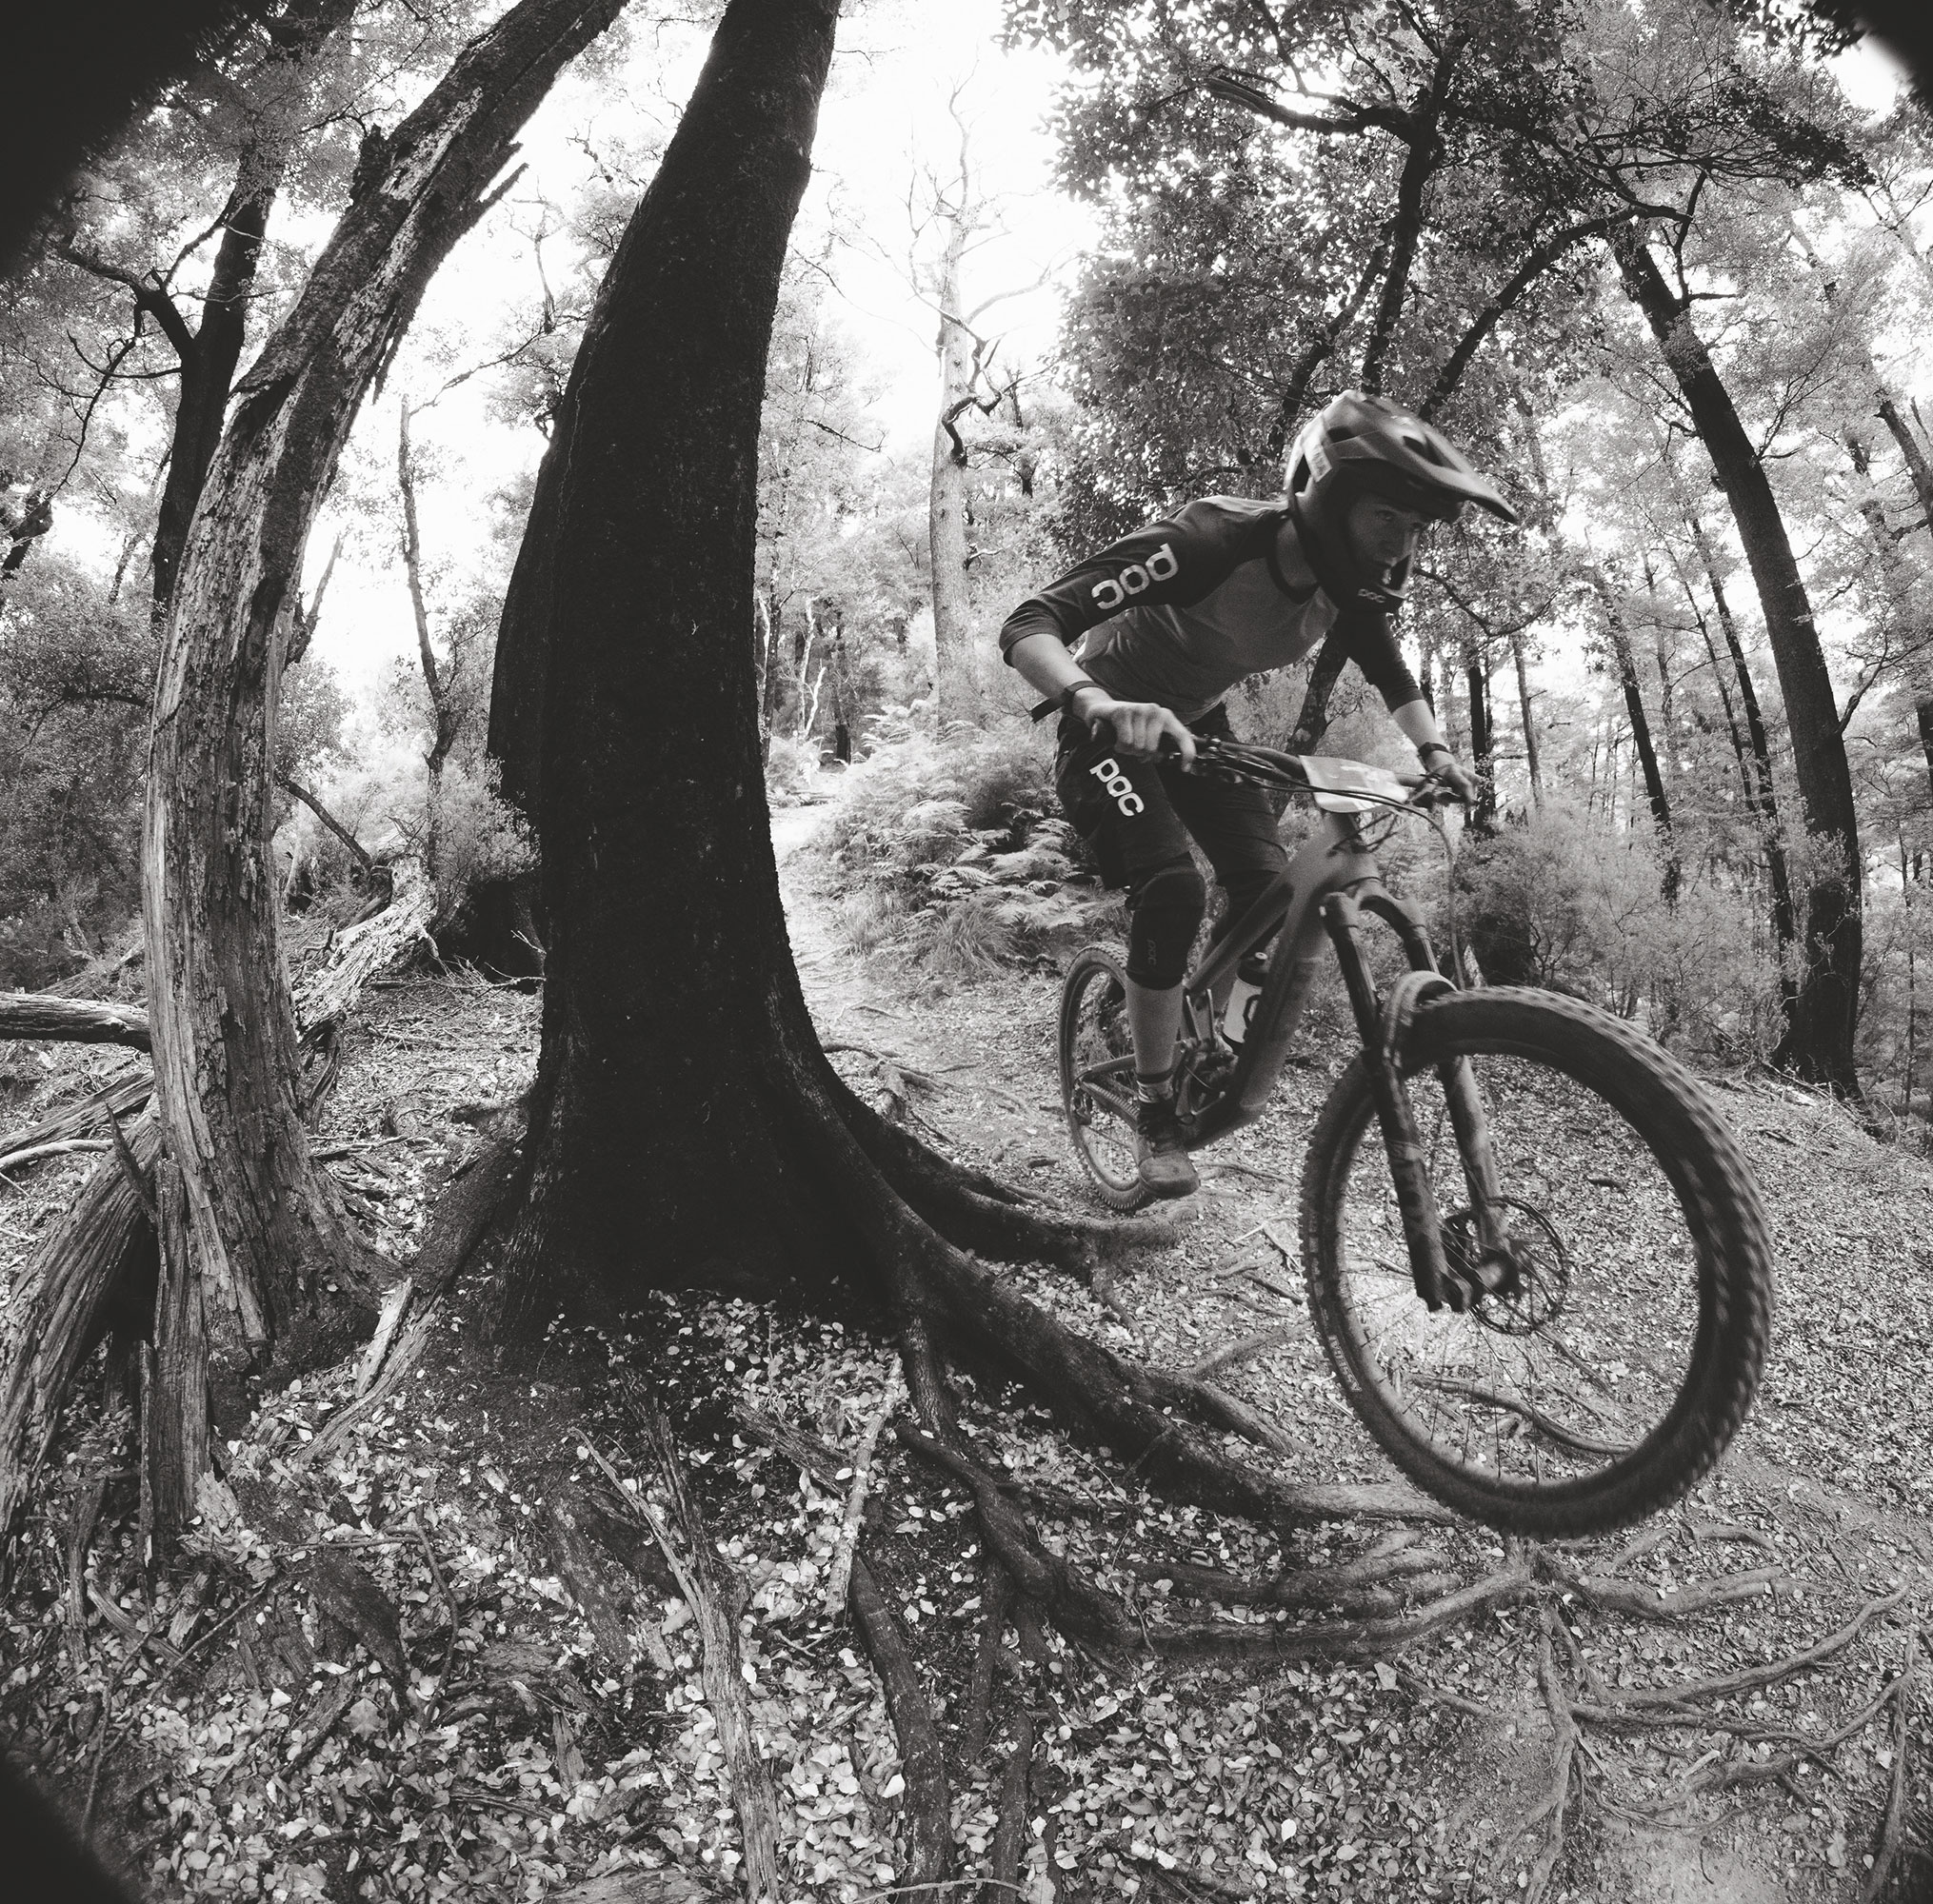
Racing down Peaking Ridge for Stage 4 was a highlight for Winni, the difference in speed from just riding it at her normal pace to a full-attack race pack, transformed the trail from a janky rhythmless physical challenge to a grin-inducing run where the root-balls and jank became flowy jumps and compressions.
A few out-of-towners joined the local heavy hitters, but as with any enduro race, the locals certainly have the upper hand when it comes to knowing the trail nuances and how to race them well. This is definitely the case on Nelson’s technical steeps, where local knowledge pays dividends in the form of seconds on the clock.
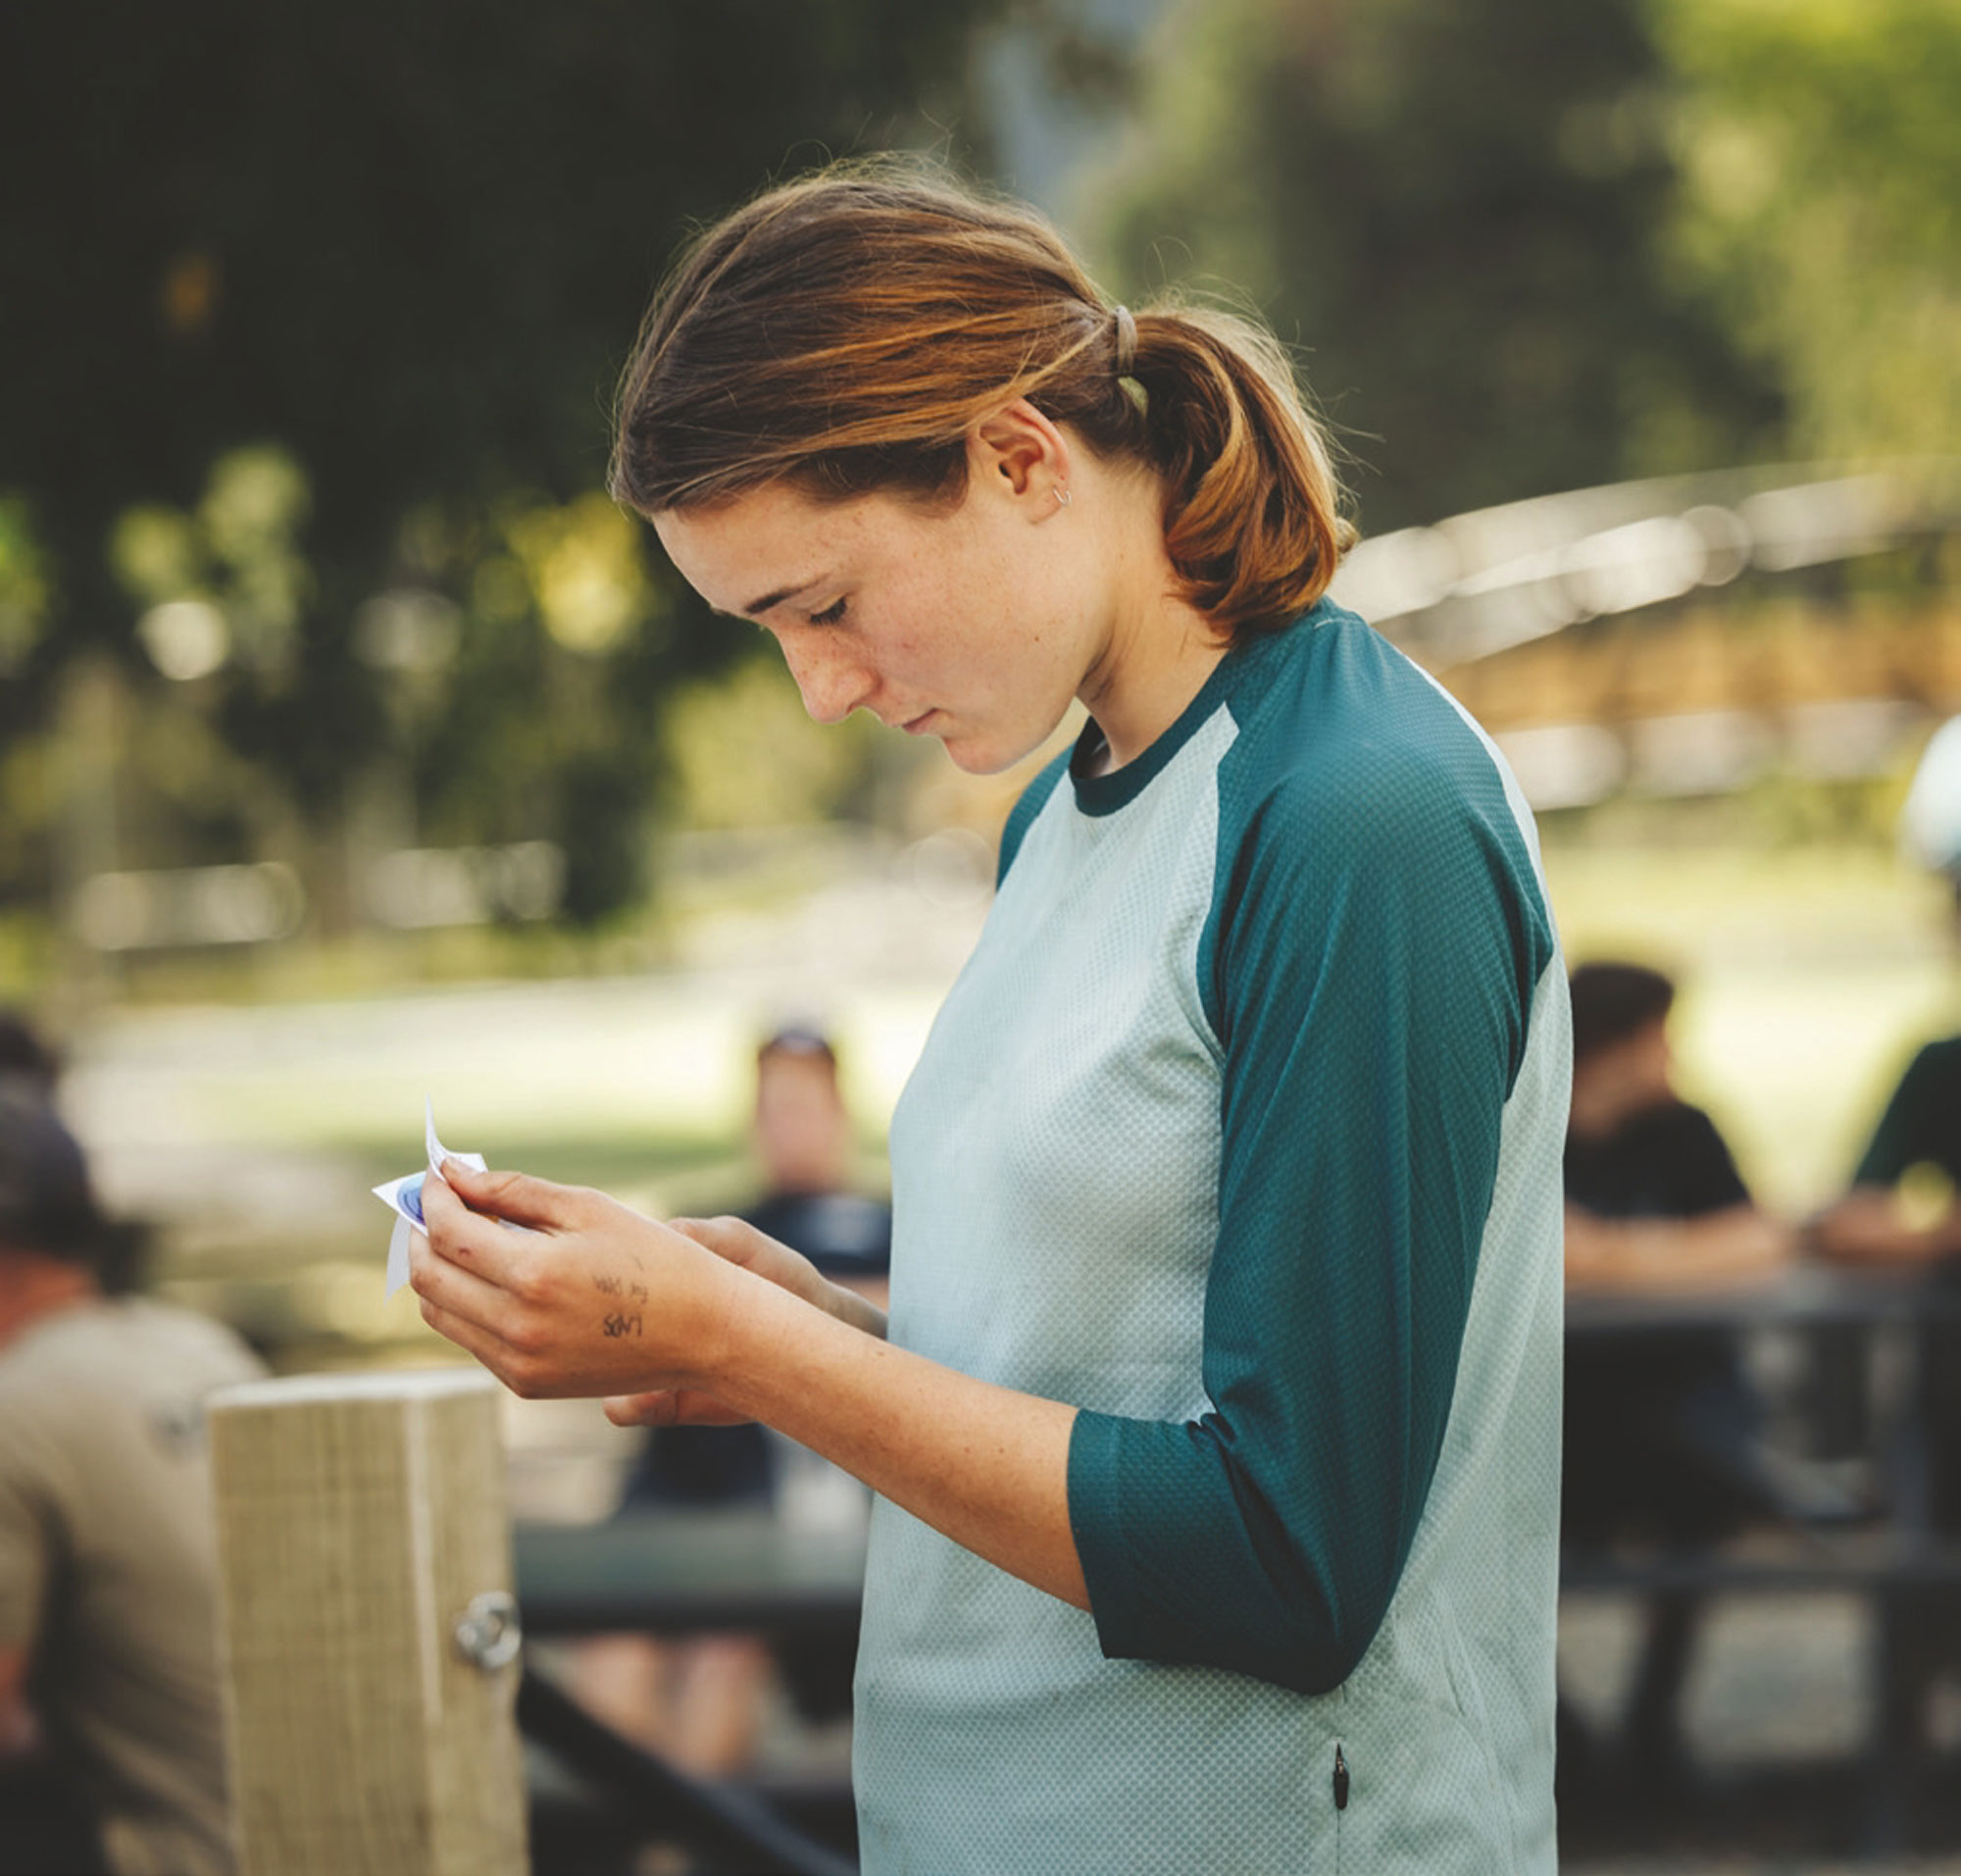
Hailing from Christchurch, seventeen-year-old Winni Goldsbury turned up to Mammoth having ridden some, but not all, of the race stages. Practice was to be her first look at some of the trails. Not exactly confidence-inspiring when you’re about to go head to head with not only Nelson’s finest, but the women who are some of the nation’s fastest enduro racers.
The ace in Winni’s hand was that she’d proven herself just three weeks earlier at the NZ Enduro National Championship at Cable Bay Adventure Park, just outside of Nelson. Winni not only won the U21 championship but bested all other women in attendance, including the Elites.
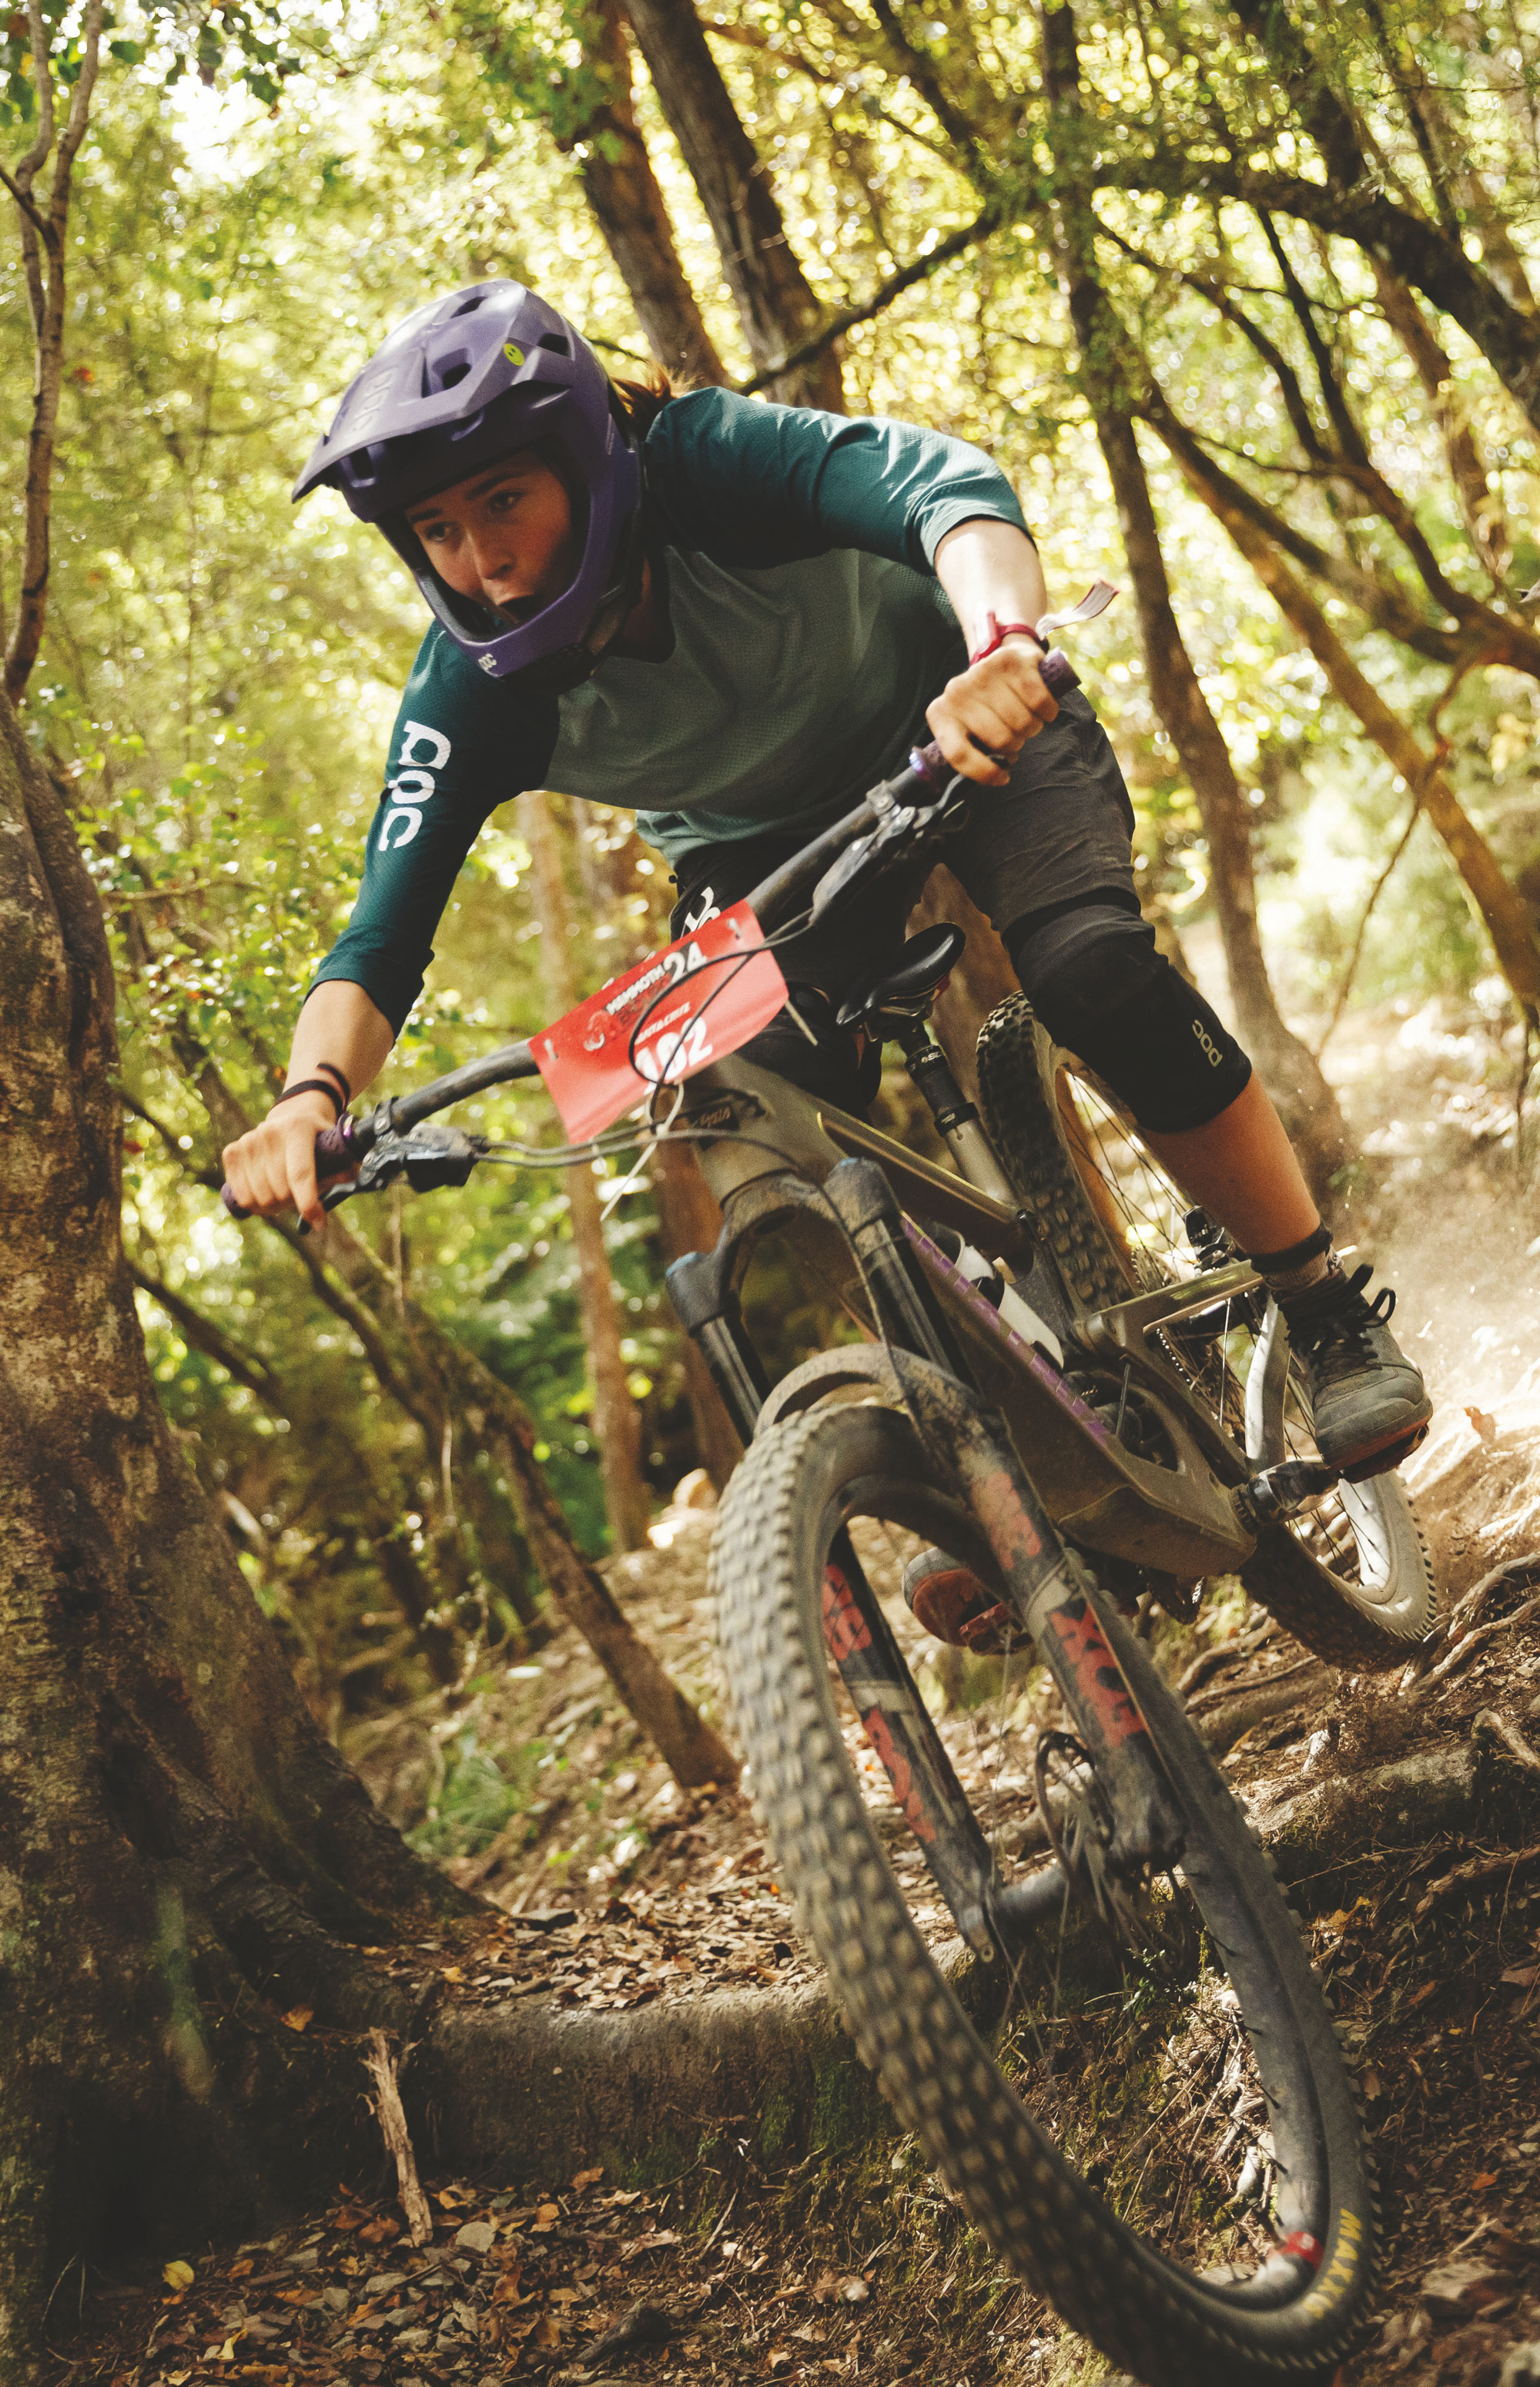
Winni battled on foreign soil against local fast woman, Rae Morrison, duking it out over the Mammoth’s stages, trading stage wins and the race lead multiple times throughout the two competition days. Winni narrowly cinched the win over the seasoned Morrison by a sniff under a second! This was tight racing at its finest, and not only a huge surprise but another boost in confidence for the ever-improving Winni, with yet another podium in her break-out 2024 season.
She’s been at this bike game a while now, most of her life to be precise. At just six months old, she and her twin brother were presented with a pair of bikes by their grandfather. Handcrafted from old Kauri weatherboards from his house, these first bikes mean the pair can claim they were literally riding bikes before they could walk. From then on, mountain biking has been a key part of life for Winni, from doing skids at the local park, to cutting laps at the Christchurch Adventure Park once that was built. Since her first races at age 11, it’s been all go – and her passion for riding and racing continues to grow.
The ace in Winni’s hand was that she’d proven herself just three weeks earlier at the NZ Enduro National Championship at Cable Bay Adventure Park, just outside of Nelson. Winni not only won the U21 championship but bested all other women in attendance, including the Elites.
We caught up with Winni after Mammoth to get her thoughts on the event, dig a little deeper into her past, and get a glimpse into her hopes for the future.
“Becoming the NZ Women’s Enduro National Champion for 2024 is definitely a pretty great start to the year; hopefully, I can keep the momentum going for the rest of the year! Racing the Mammoth for the first time was awesome because the race had lovely people both participating and running it, as well as being run on an amazing bunch of trails. Honestly, it feels kind of like a dream to be up there with these ladies. I get to race with women as amazing and kind as Lou Kelly, Rae Morrison, George Swift and Xanthe Robb; it’s absolutely astounding. To be able to keep up with them makes the whole experience even more surreal,” explains Winni.
Winni had a couple of solid, and ultimately successful, days at the Mammoth, but the race wasn’t without adversity. On the first day, her chain came off during the first timed stage. Returning to the timing tent, the person who was doing the timing said that Rae’s time for stage one was 30 seconds faster than her time, which meant Rae would’ve been 4th in the pro-elite men category. Winni thought Rae must have had an amazing run. As luck should have it, though, the intel she received was incorrect, and Rae had finished only one second ahead of her in that opening stage. Seeing Rae’s time was still within reach added some pressure and ultimately fired Winni up to push harder heading into day two.
“The second day was also sweet. I was just so happy to be there racing with all those awesome people. Overall it was an amazing weekend,” she confirms.
“Honestly, it feels kind of like a dream to be up there with these ladies. I get to race with women as amazing and kind as Lou Kelly, Rae Morrison, George Swift and Xanthe Robb, it’s absolutely astounding. To be able to keep up with them makes the whole experience even more surreal.”
Day two kicked off with Stage 2, ‘Te Ara Koa’ into ‘Fringe DH’ and finishing down ‘Butters’; three trails combined to make one epic 3.3km trail, and the longest of the race. Aside from a lap in practice, Winni hadn’t ridden Fringe DH or Butters, and the stoke was real to get to race them for the first time. Unfortunately, Lady Luck wasn’t on her side, and she took a crash on this stage. All was not lost, however, she took the race lead from Rae, finishing the stage to take a sub-1-second buffer going into stage 3.
Racing down Peaking Ridge for Stage 4 was a highlight for Winni, the difference in speed from just riding it at her normal pace to a full- attack race pack, transformed the trail from a janky rhythmless physical challenge to a grin-inducing run where the root-balls and jank became flowy jumps and compressions.
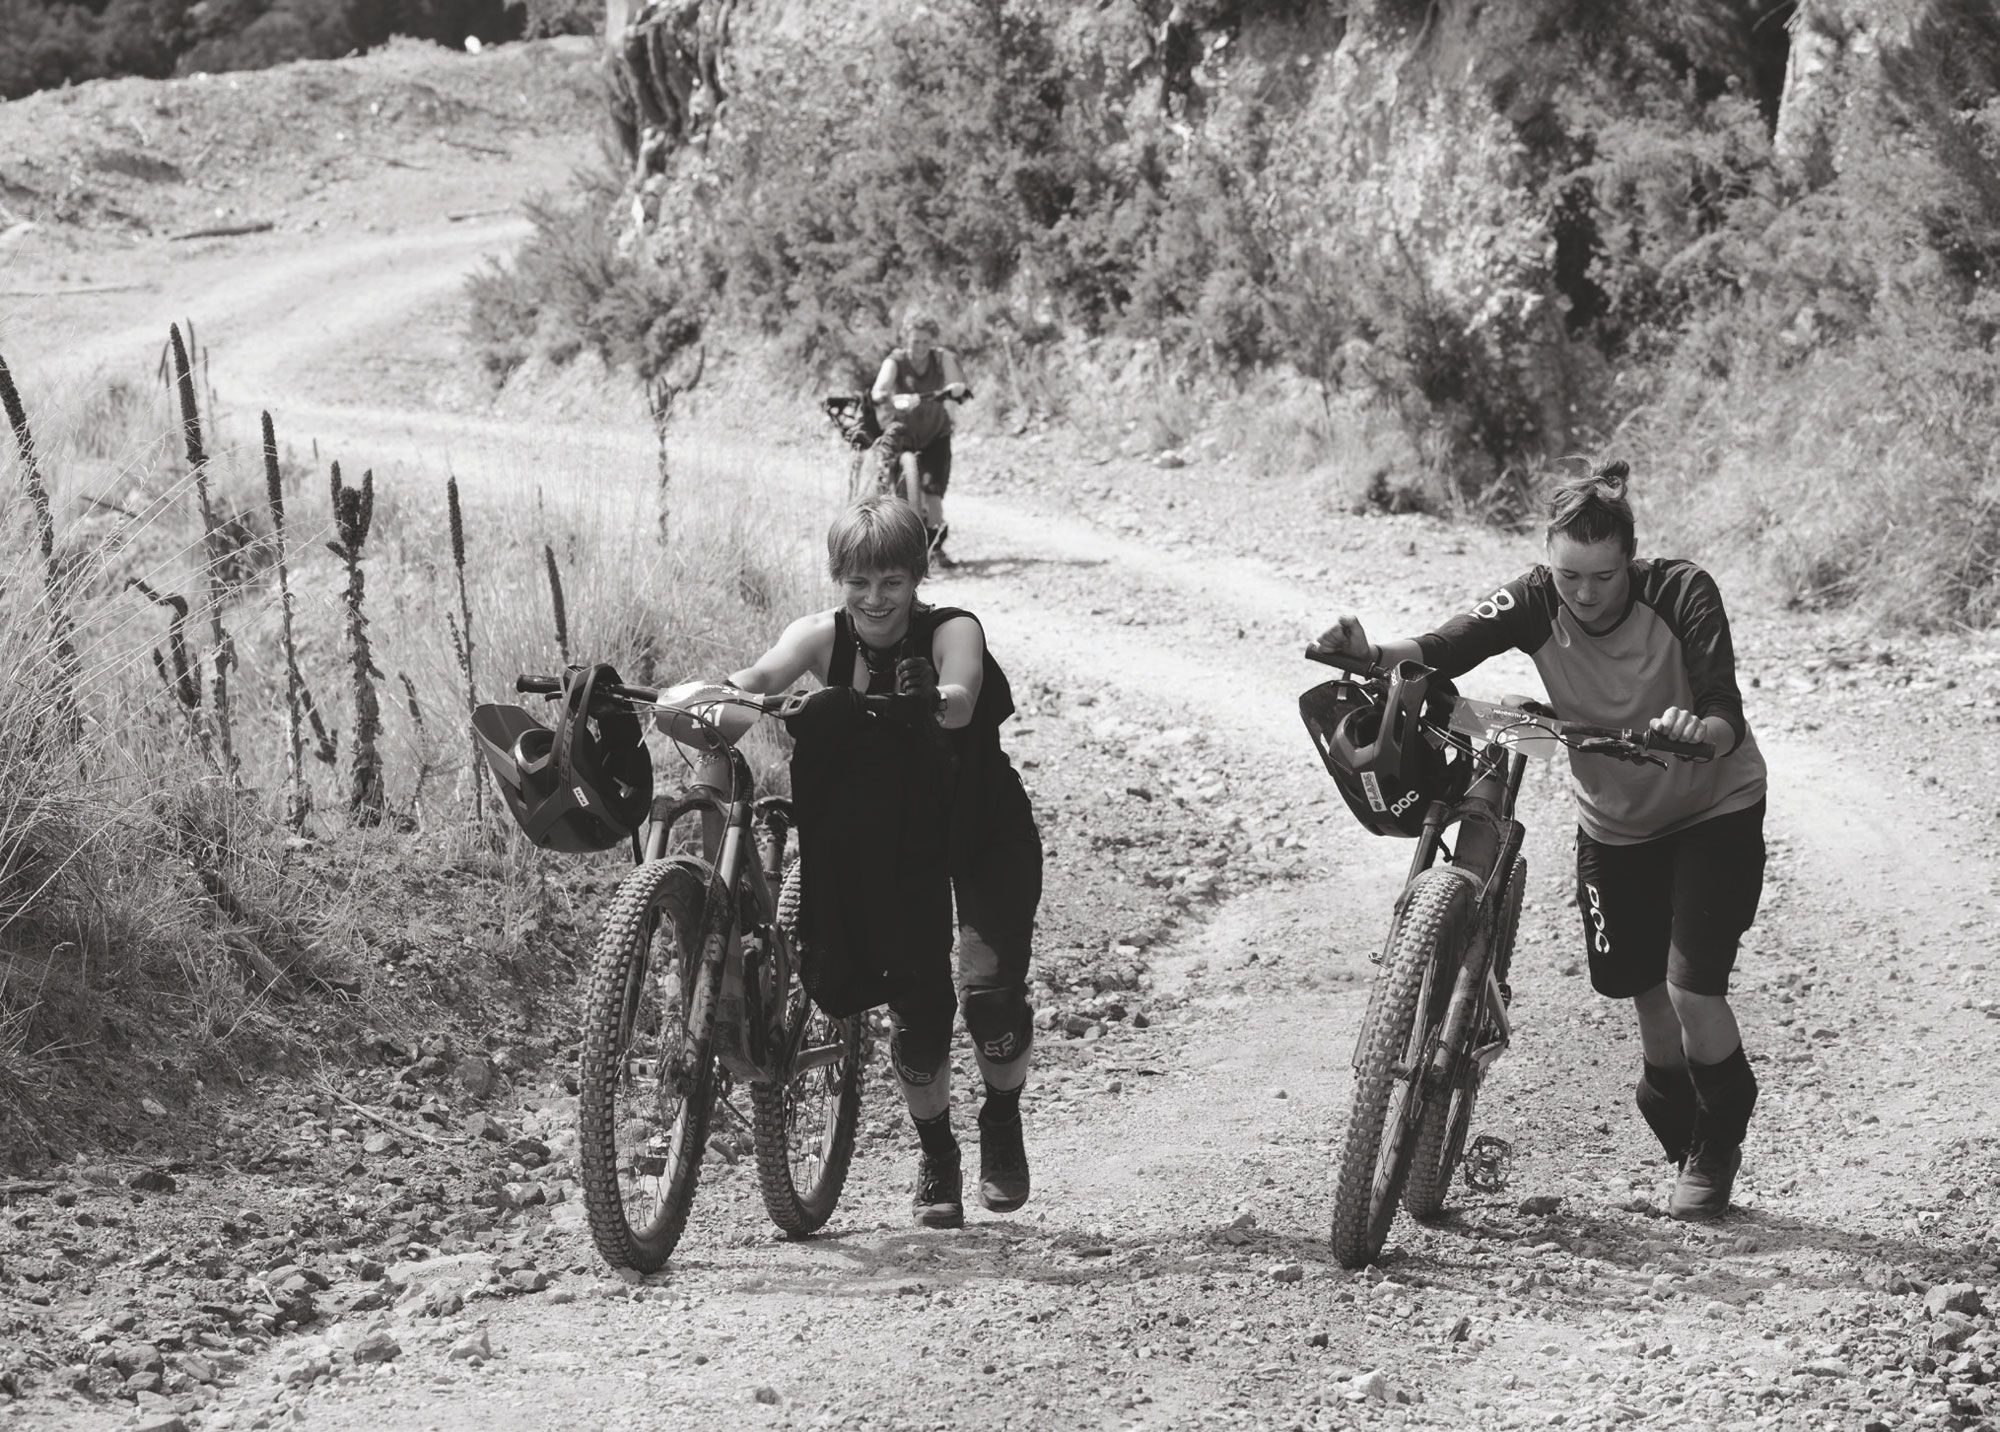
Stage 5 was raced down the infamous 629 trail and its smorgasbord of steep dropping turns, slippery chutes, roots and rock; a jewel in Nelson’s MTB crown! Partway down the stage, Winni “had a random burst of energy which lasted until the end of the race; sprinted the entirety of the final horrible climb up Maitai Face”. It seems it may have been more than just a “random energy burst” though, having stopped at the food station on the climb to Maitai Face for a quick break to pat a puppy.
Maitai Face is a staple at most enduros in the area, dropping riders down through lofty pines, over roots, off-camber – and it has some of the steepest grades in the region; tough in the dry but nearly-unrideable in the wet. Fortunately, the weather gods played ball and delivered bone-dry conditions for the Mammoth riders. It was this 6th and final stage where Winni secured her win, pipping Rae by a narrow 3.5 seconds, putting her ahead once again and giving her the overall win by a scant half a second. A dominant performance battling not only Rae Morrison but Xanthe Rob, who raced consistently through the day to round out the top three over a minute and a half back.
Off the back of Mammoth, Winni picked up couple of injuries which slowed her down for a few weeks but, once recovered, she was all go - preparing to head over to Europe to race some Enduros. By the time this magazine breaks cover, she should be jetting her way to the other side of the globe to begin another chapter in her life.
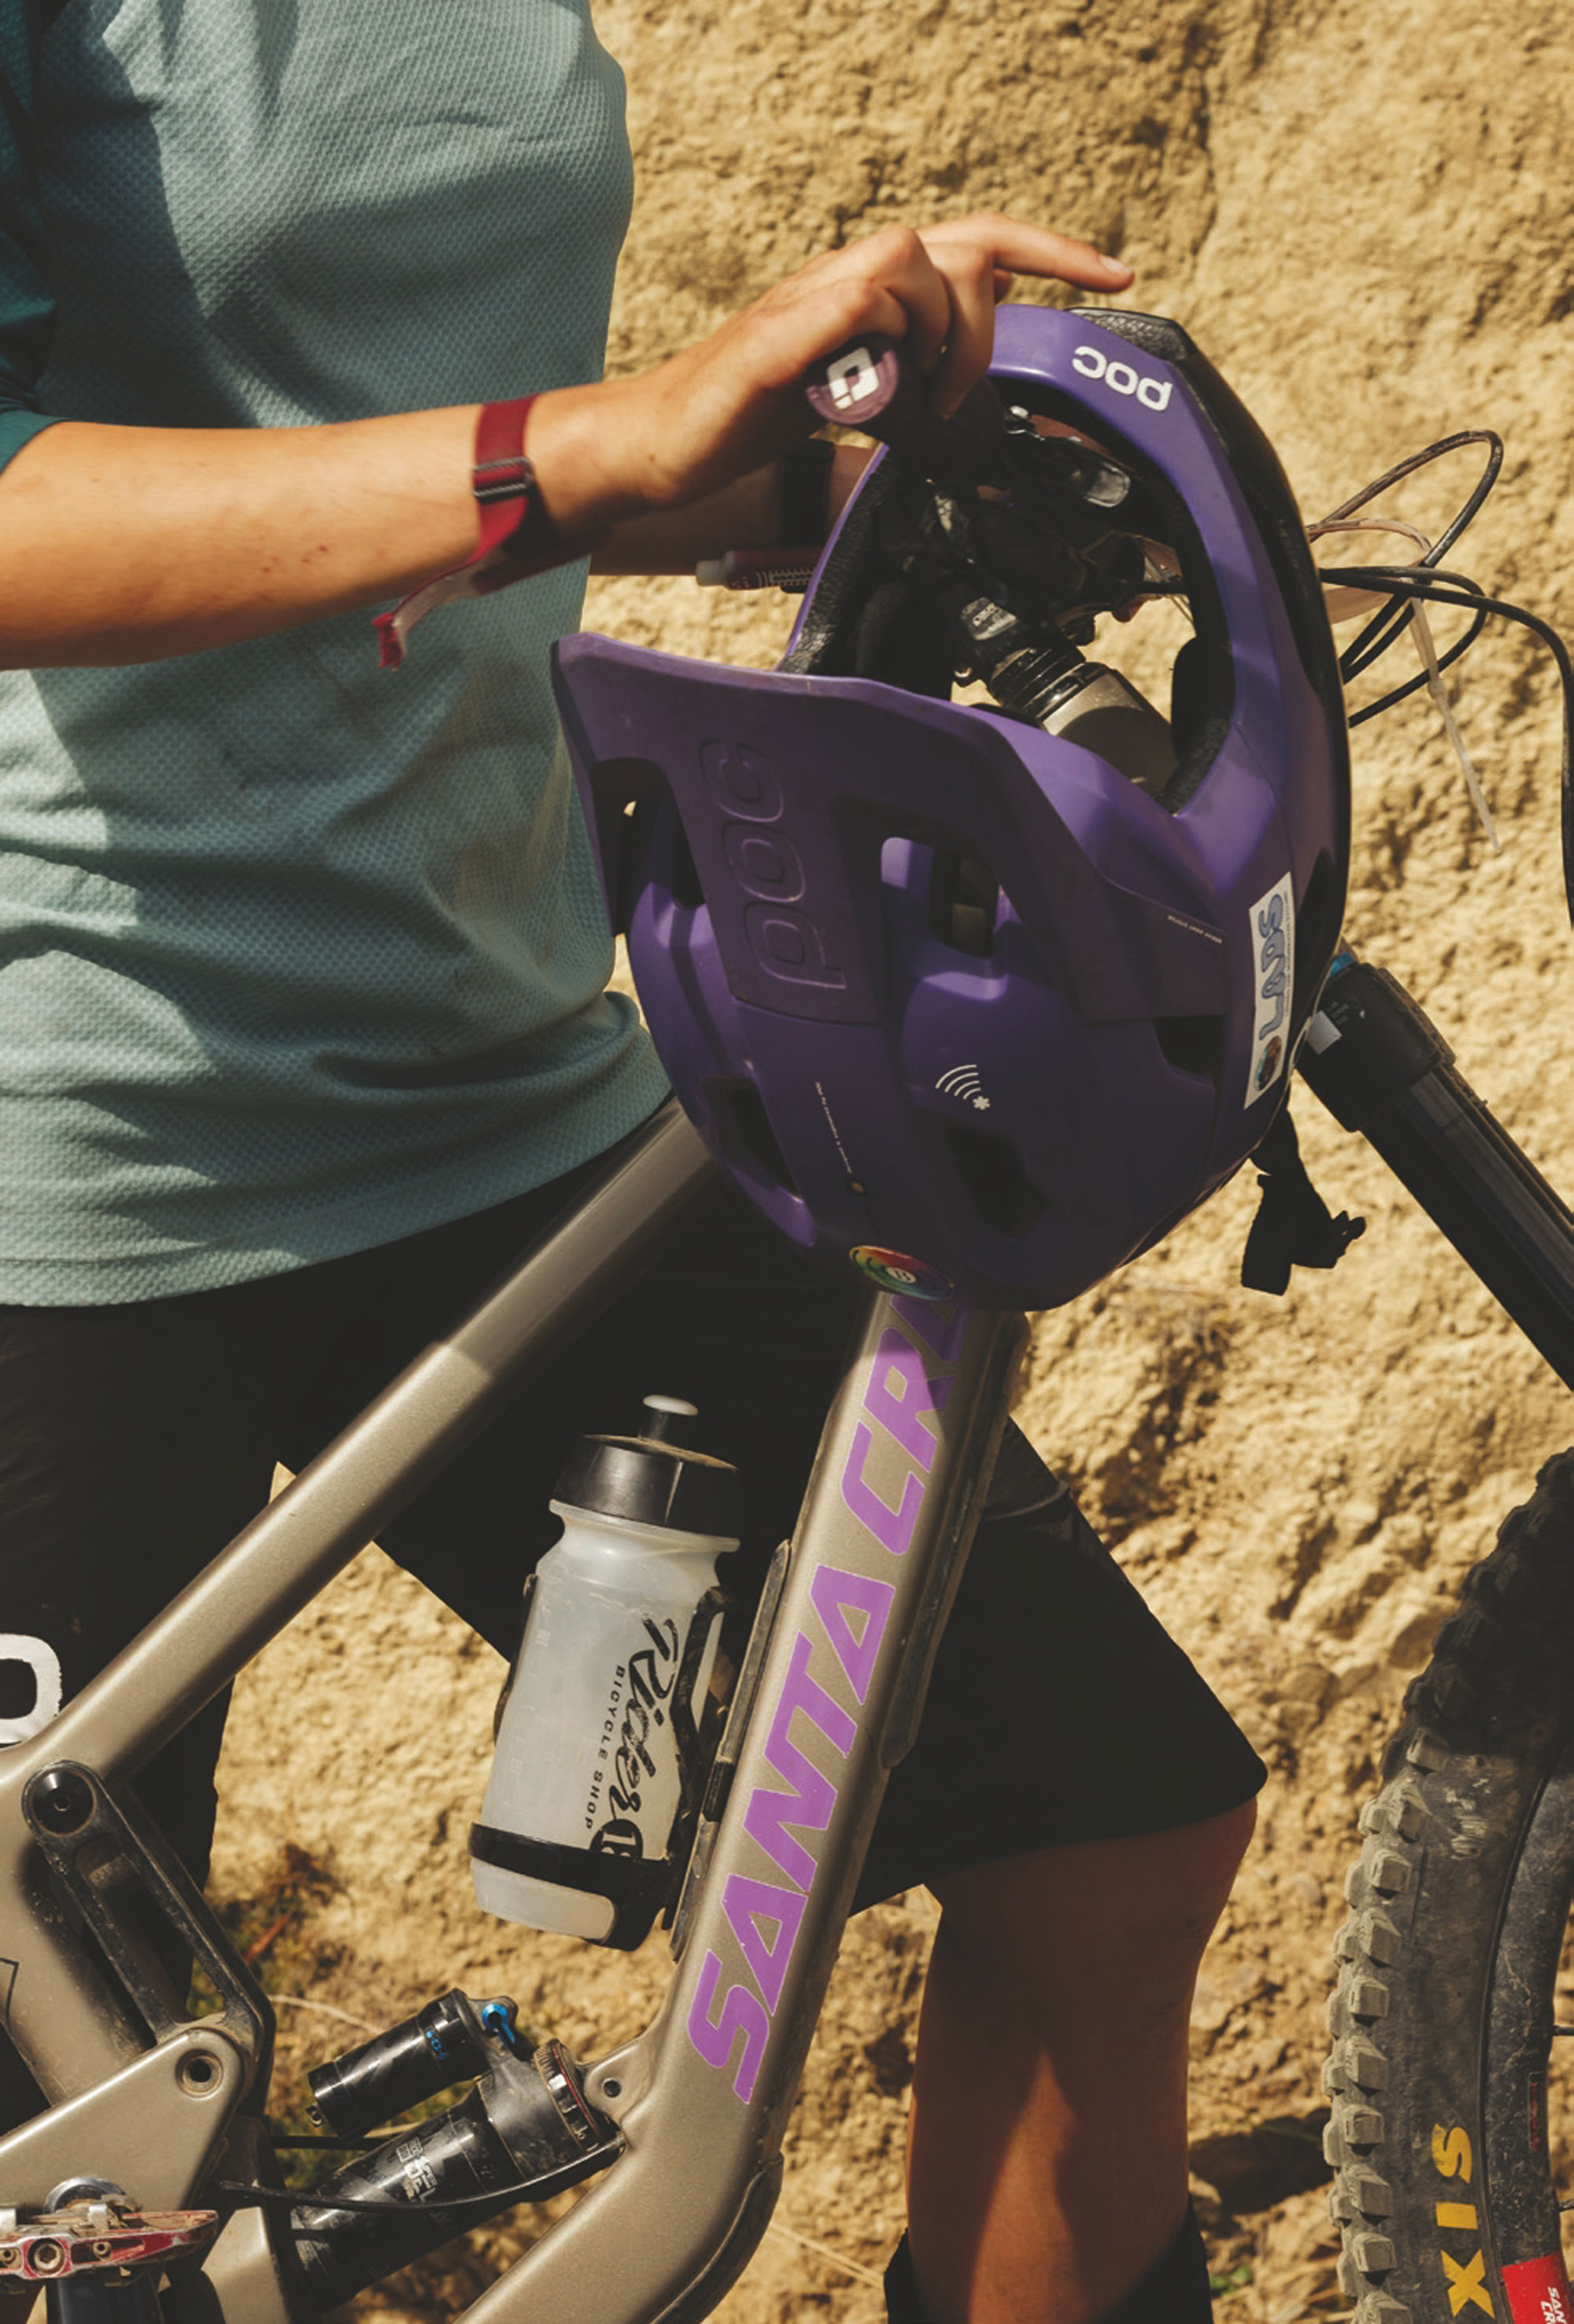
Winni’s not one to get too bogged down in the details of bike setup; there are no special tweaks or specifics to her setup, it’s more of a “run what you brung” scenario. Her only comment about setup was the use of a pair of Reserve wheels fitted with Cushcore inserts and Maxxis Assegai tyres, pumped to 23 PSI front and rear, allowing her to attack Nelson’s gnarliest, remaining fully focussed on the task at hand rather than nursing her steed or riding light while concerned about flat tyres.
Breakout seasons often come after a period of hard work and focused training; for Winni though, her approach is more laid back than many at her level. “My training schedule is very, very serious, and intense,” she jokes. “No, no, my training is very relaxed and is limited to push- ups and intervals. I just ride every day and try to keep up with people who are faster than me.”
As simple as that.
Winni’s seemingly laissez-faire, relaxed attitude and absolute froth for mountain biking aren’t unique to her; it’s a full-family affair.
“My parents have both been extremely important in my MTB journey so far, as they are also obsessive mountain bikers. My mum, Melanie Blomfield, is a super competitive person all around and mountain biking is no different. She has dominated the 50+ category for the last five years and often beats most of the open women in local races. She has always been phenomenal and extremely supportive of my racing,” explains Winni. “My dad, Richard Goldsbury, was a cross country and downhill racer in the 90’s and 00’s. When enduro came into existence he definitely enjoyed that, and now he sometimes gives races the privilege of his participation, although mainly spends his time taking stunning photos of riding, and building the coolest tracks in Canterbury. He is very supportive. They’ve both influenced my riding so much because of their different riding styles, so I’ve learned to ride lots of different types of terrain. We travel across New Zealand a lot and get to ride all the different types of riding NZ has to offer.”
Off the back of Mammoth, Winni picked up couple of injuries which slowed her down for a few weeks but, once recovered, she was all go – preparing to head over to Europe to race some enduros. By the time this magazine breaks cover, she should be jetting her way to the other side of the globe to begin another chapter in her life.
Alongside Winni, Shannon Hewetson backed up his win at the NZ Enduro Championships at the Mammoth.
“Mammoth Enduro was a really rad event,” says Shannon. “They had everyone speculating on the tracks with the organisers staying tight lipped right up to the week of, meaning most were in the same boat practice-wise. We raced some of the best, most iconic trails – both skill and fitness-wise – for Nelson. Peaking Ridge and 629 were lots of fun, but all stages required a lot of focus with their duration, and all had high consequences if you misjudged things. The weekend went smoothly for me, didn’t really expect to do what I did; I thought I’d be feeling flat after Cable Bay (NZ Champs). Sometimes those days when you think things could have gone better, or you could have had better intensity, can really surprise you! Coming off the back of taking out Nationals Champs a few weeks prior, I felt a lot of pressure to back it up with a solid win, so was pretty stoked to take it out and to close out the summer season with another win.”
Thats a wrap for our Mammoth Enduro series. We’re looking forward to next year’s race and hope to see some of you there!
No regrets
Words Liam Friary
Image Cameron Mackenzie
The past few weeks have been a really good reminder of how great bike riding is. There are two instances that really stand out. Firstly, I happened to be in Central Otago attending and talking at Trail Forum, which is something. I mean, rewind about a decade or more and you wouldn’t have this amount of people engaged in riding let alone having businesses that now rely solely on it, and not to mention the regional tourism organisations that clearly know the economic impact of cycling in their regions. It’s truly amazing and I hope we can continue to build trails, foster more riding communities, and create better cycling infrastructure across the motu. It was after this event that an unscheduled ride became an epic outing with four riders who didn’t know each other. I was like the conduit blending these individuals together, knowing that riding would bond them. And, it did. After an all-day ride, we were all mates sharing large amounts of conversation, ups, downs, and good times. Bikes were simply the portal that helped us take in the landscape and connect with us one another. You can’t have that quantity – or quality! – of time in a meeting room (in-person or online) or even sitting in a coffee shop with someone. The standout for me is undistracted time where the other person is engaged and listening without any device diverting their attention. This simplicity is what I crave; just riding and conversing is so refreshing in this fast-paced age.
The second reminder was a ride with a good friend. We don’t get to catch up that often as work and life schedules don’t always align, and we’re not the best at conversing over digital platforms. I mean, we used it to make a meet-up spot but that’s pretty much it. I find a ride meet-up will fill me in so much more about how my friend is doing, rather than a flurry of text exchanges. I got to the mountain bike park, unloaded my bike, clipped my helmet on, and checked my phone… only to read a message from my friend, telling me they couldn’t make it as they weren’t feeling well. I was committed and went riding anyway. The solo riding time helped me decompress from life’s never-ending to-do list and growing work commitments. I connected with nature, stretched myself on rowdy trails and just had some ‘me’ time. I drove back thinking about how that’s not just a ‘want’ but more of a ‘need’ now. I don’t often allow myself the time, but often putting aside part of the day for a solo ride lets me gain perspective on everything. I missed my mate that day, but thoroughly enjoyed shredding the trials alone. You never regret the ride you went on.
Bosch SX: Is this the new natural?
Words Nathan Petrie
Images Cameron Mackenzie
Looks can be deceiving. Something may appear small or neat, but take a peak under the hood
and you’ll find something much greater
In the bike world, we lust after the lightest (and latest) technology but, at the same time, we never want to give up that purity of the ‘natural’ ride feel. At the forefront of our communal infatuation with ‘bike porn’ is the eBike. Is it possible to embrace the technology without giving up on the simple joy we get from pedalling a bike?
Since Covid, eBikes have become commonplace on our trails and the daily ride for many of us. The maturing market now provides a wide range of eBike products for every style of rider. From full-power to lightweight motor options, a variety of battery sizes, and matched with different bike brand geometry. Bosch has led this charge and the arrival of their Performance Line SX system in New Zealand is the next phase of this evolution.
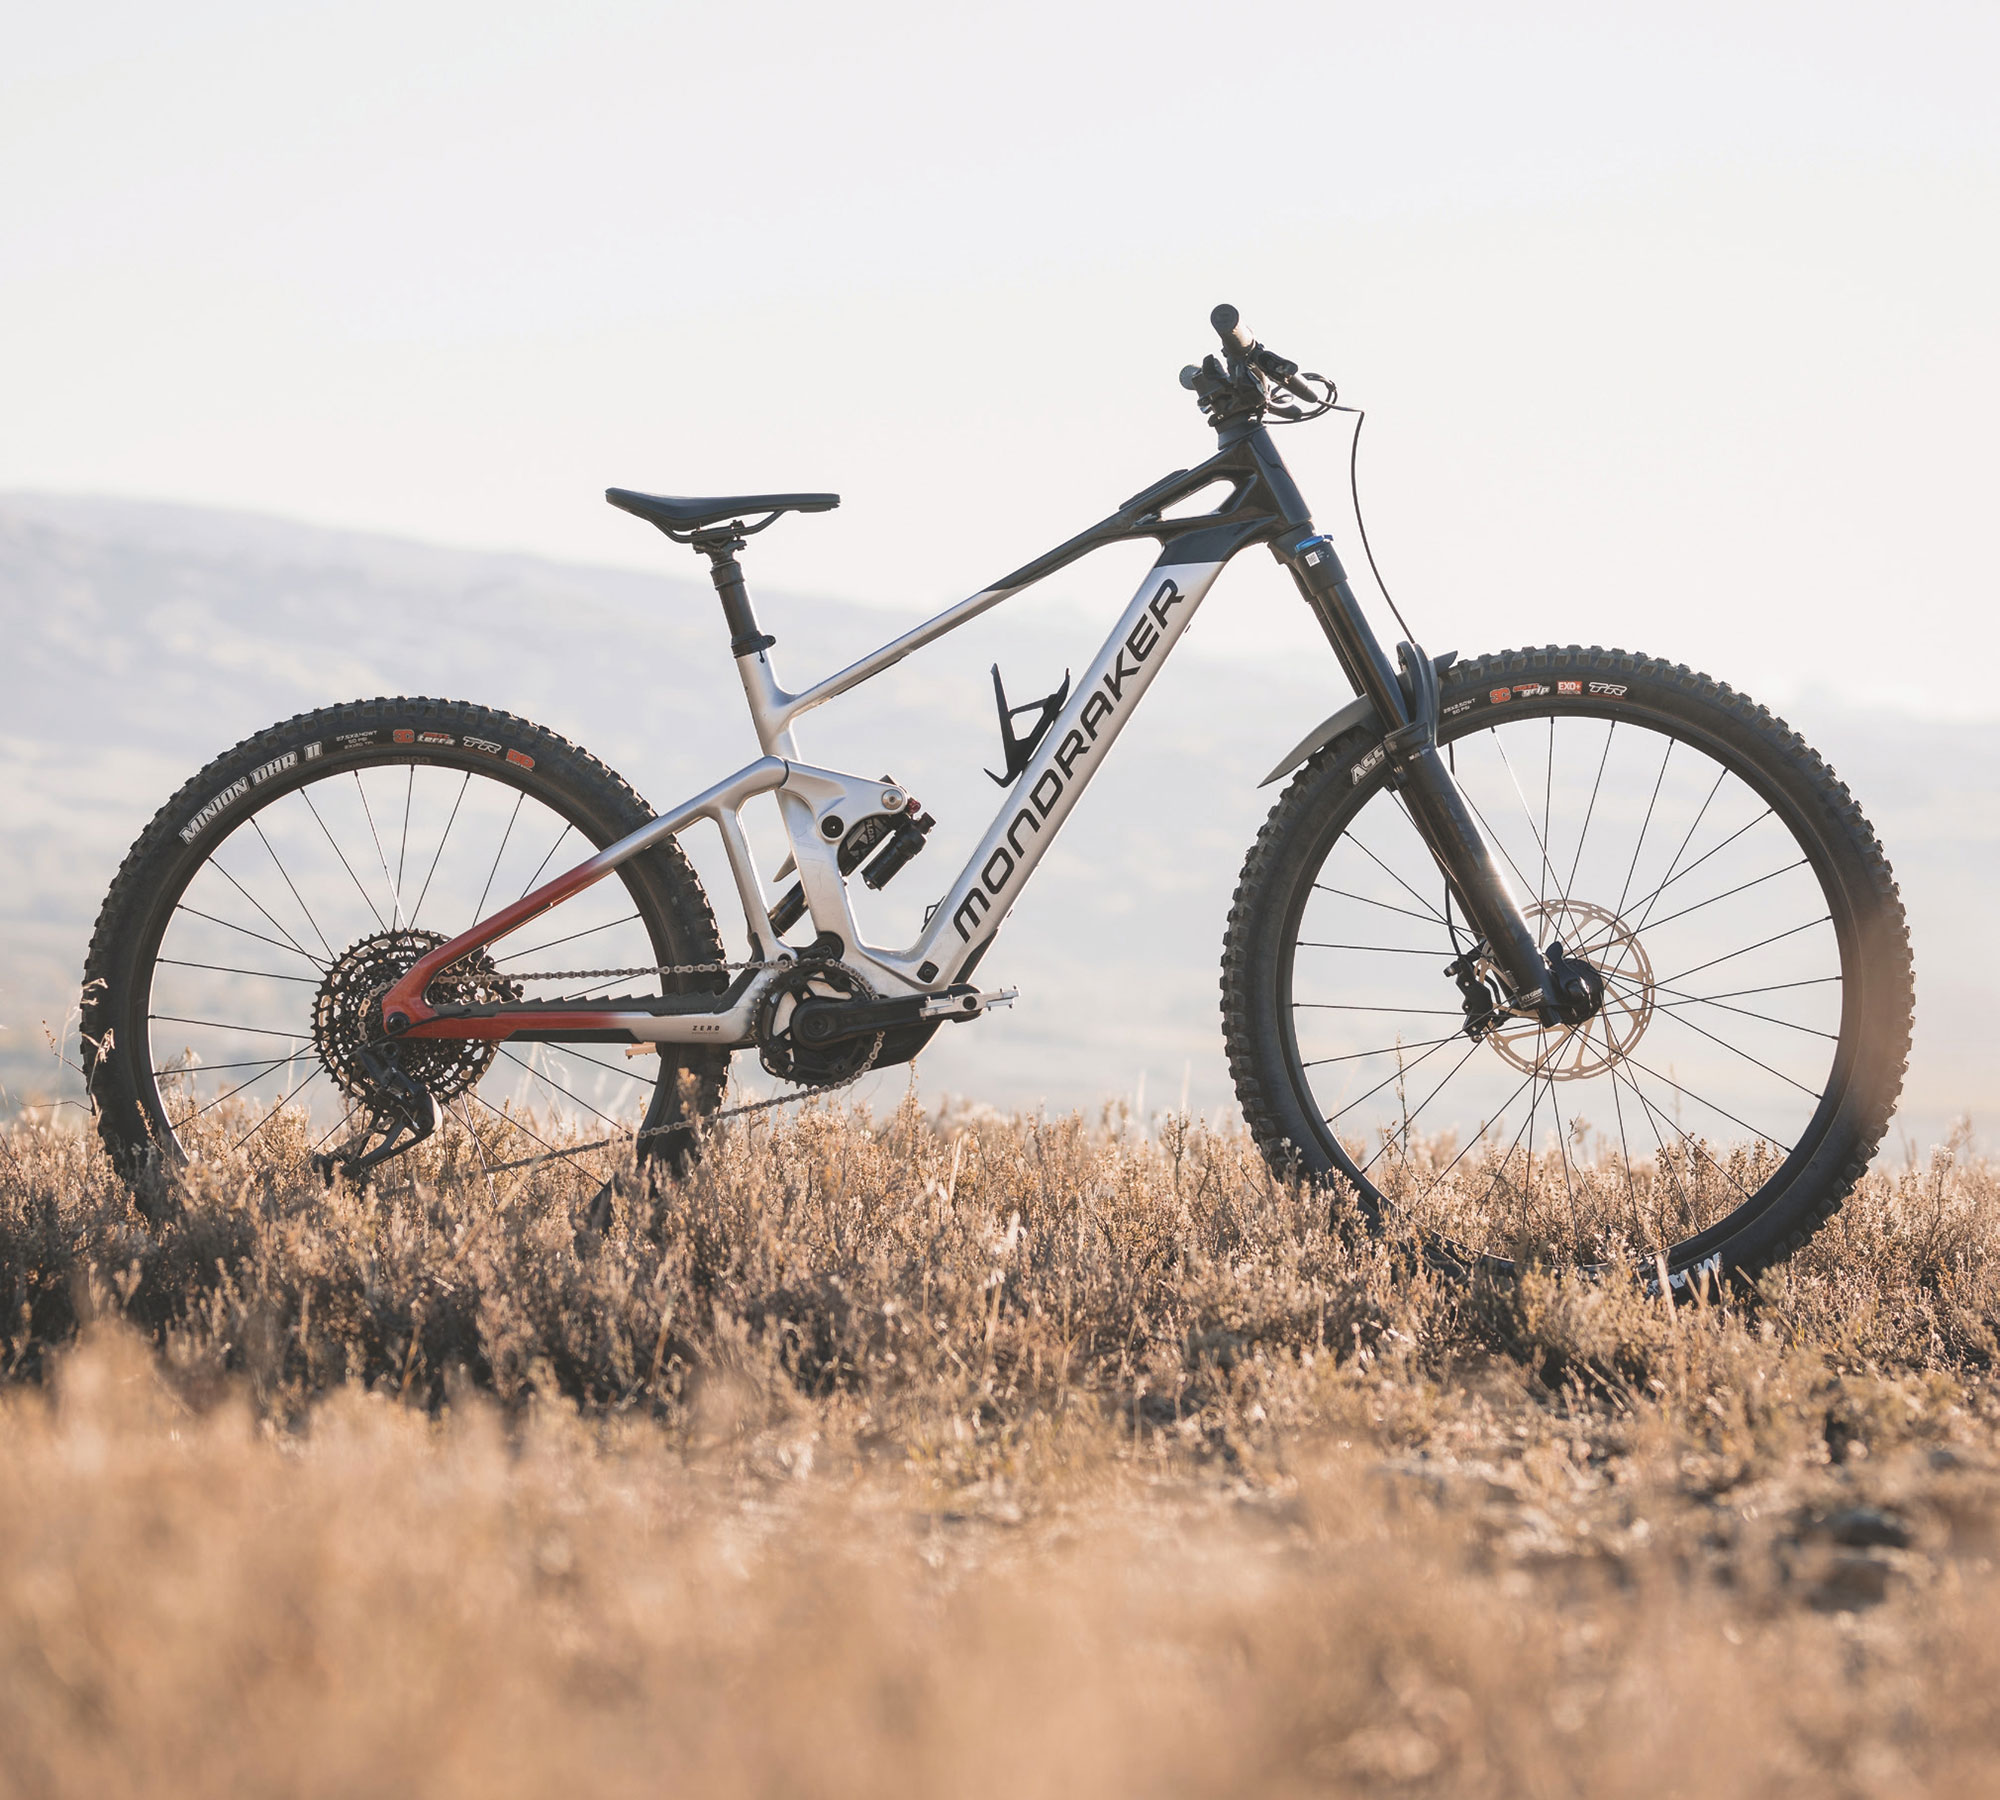
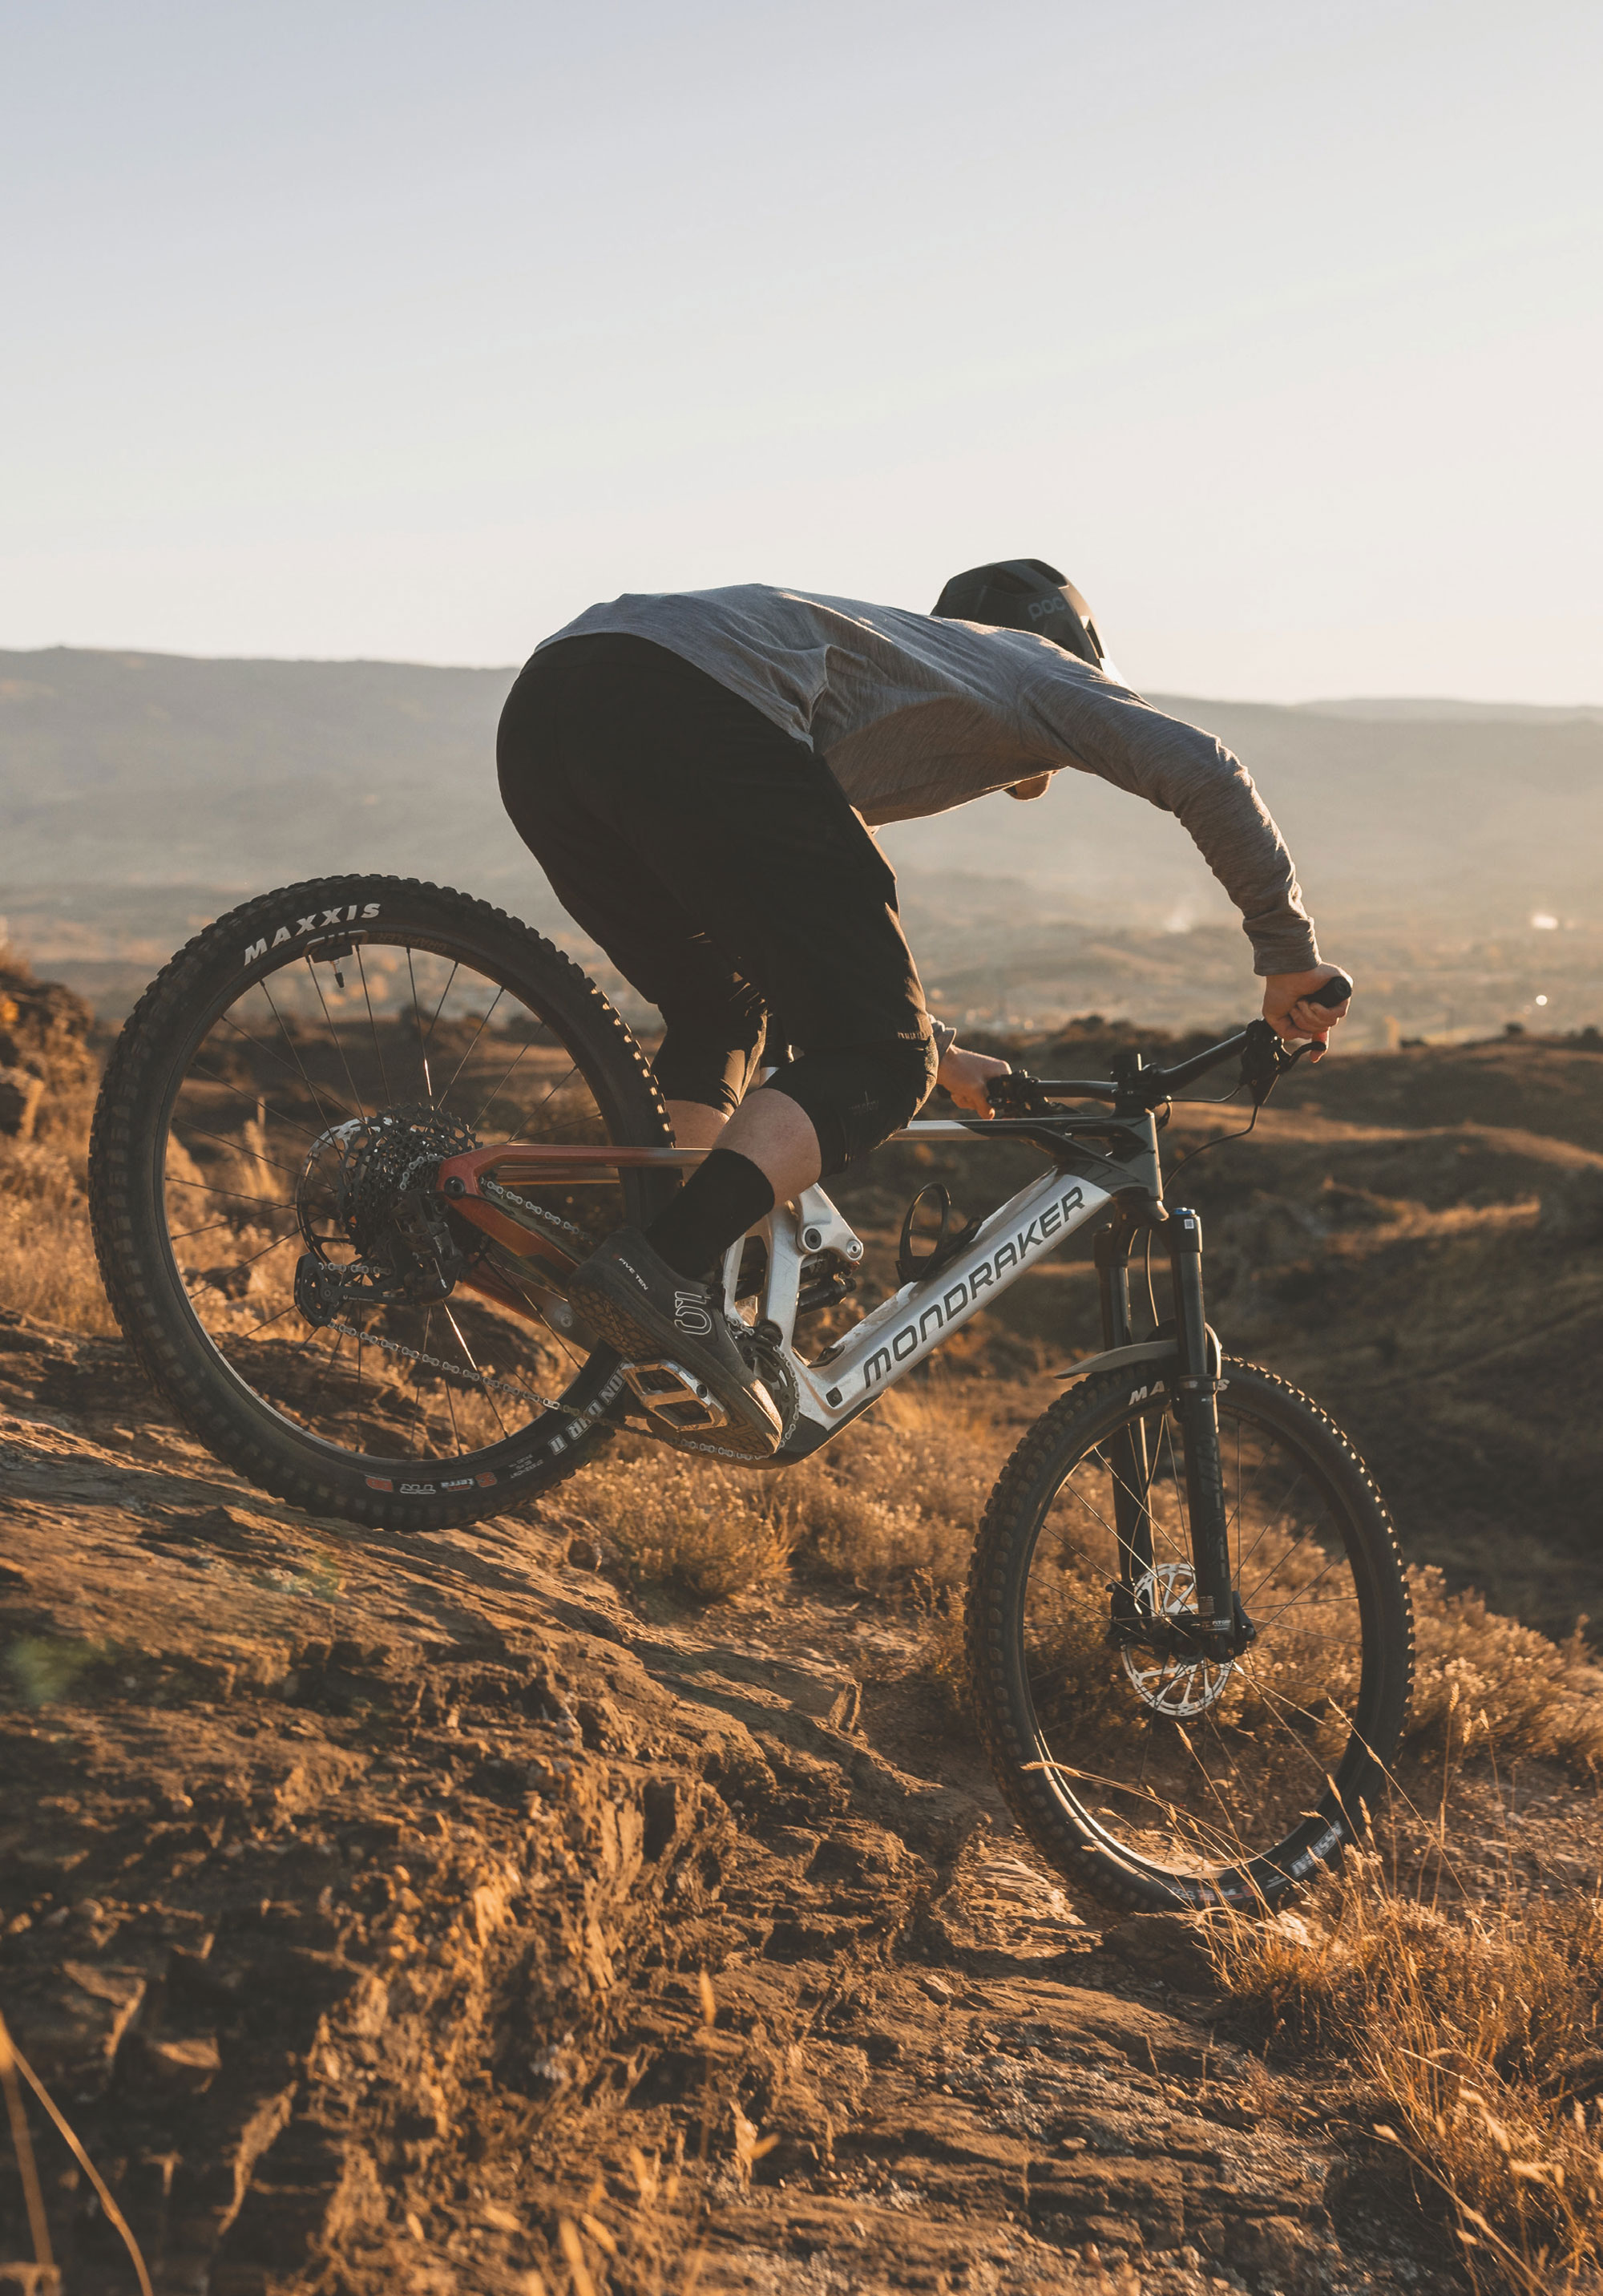
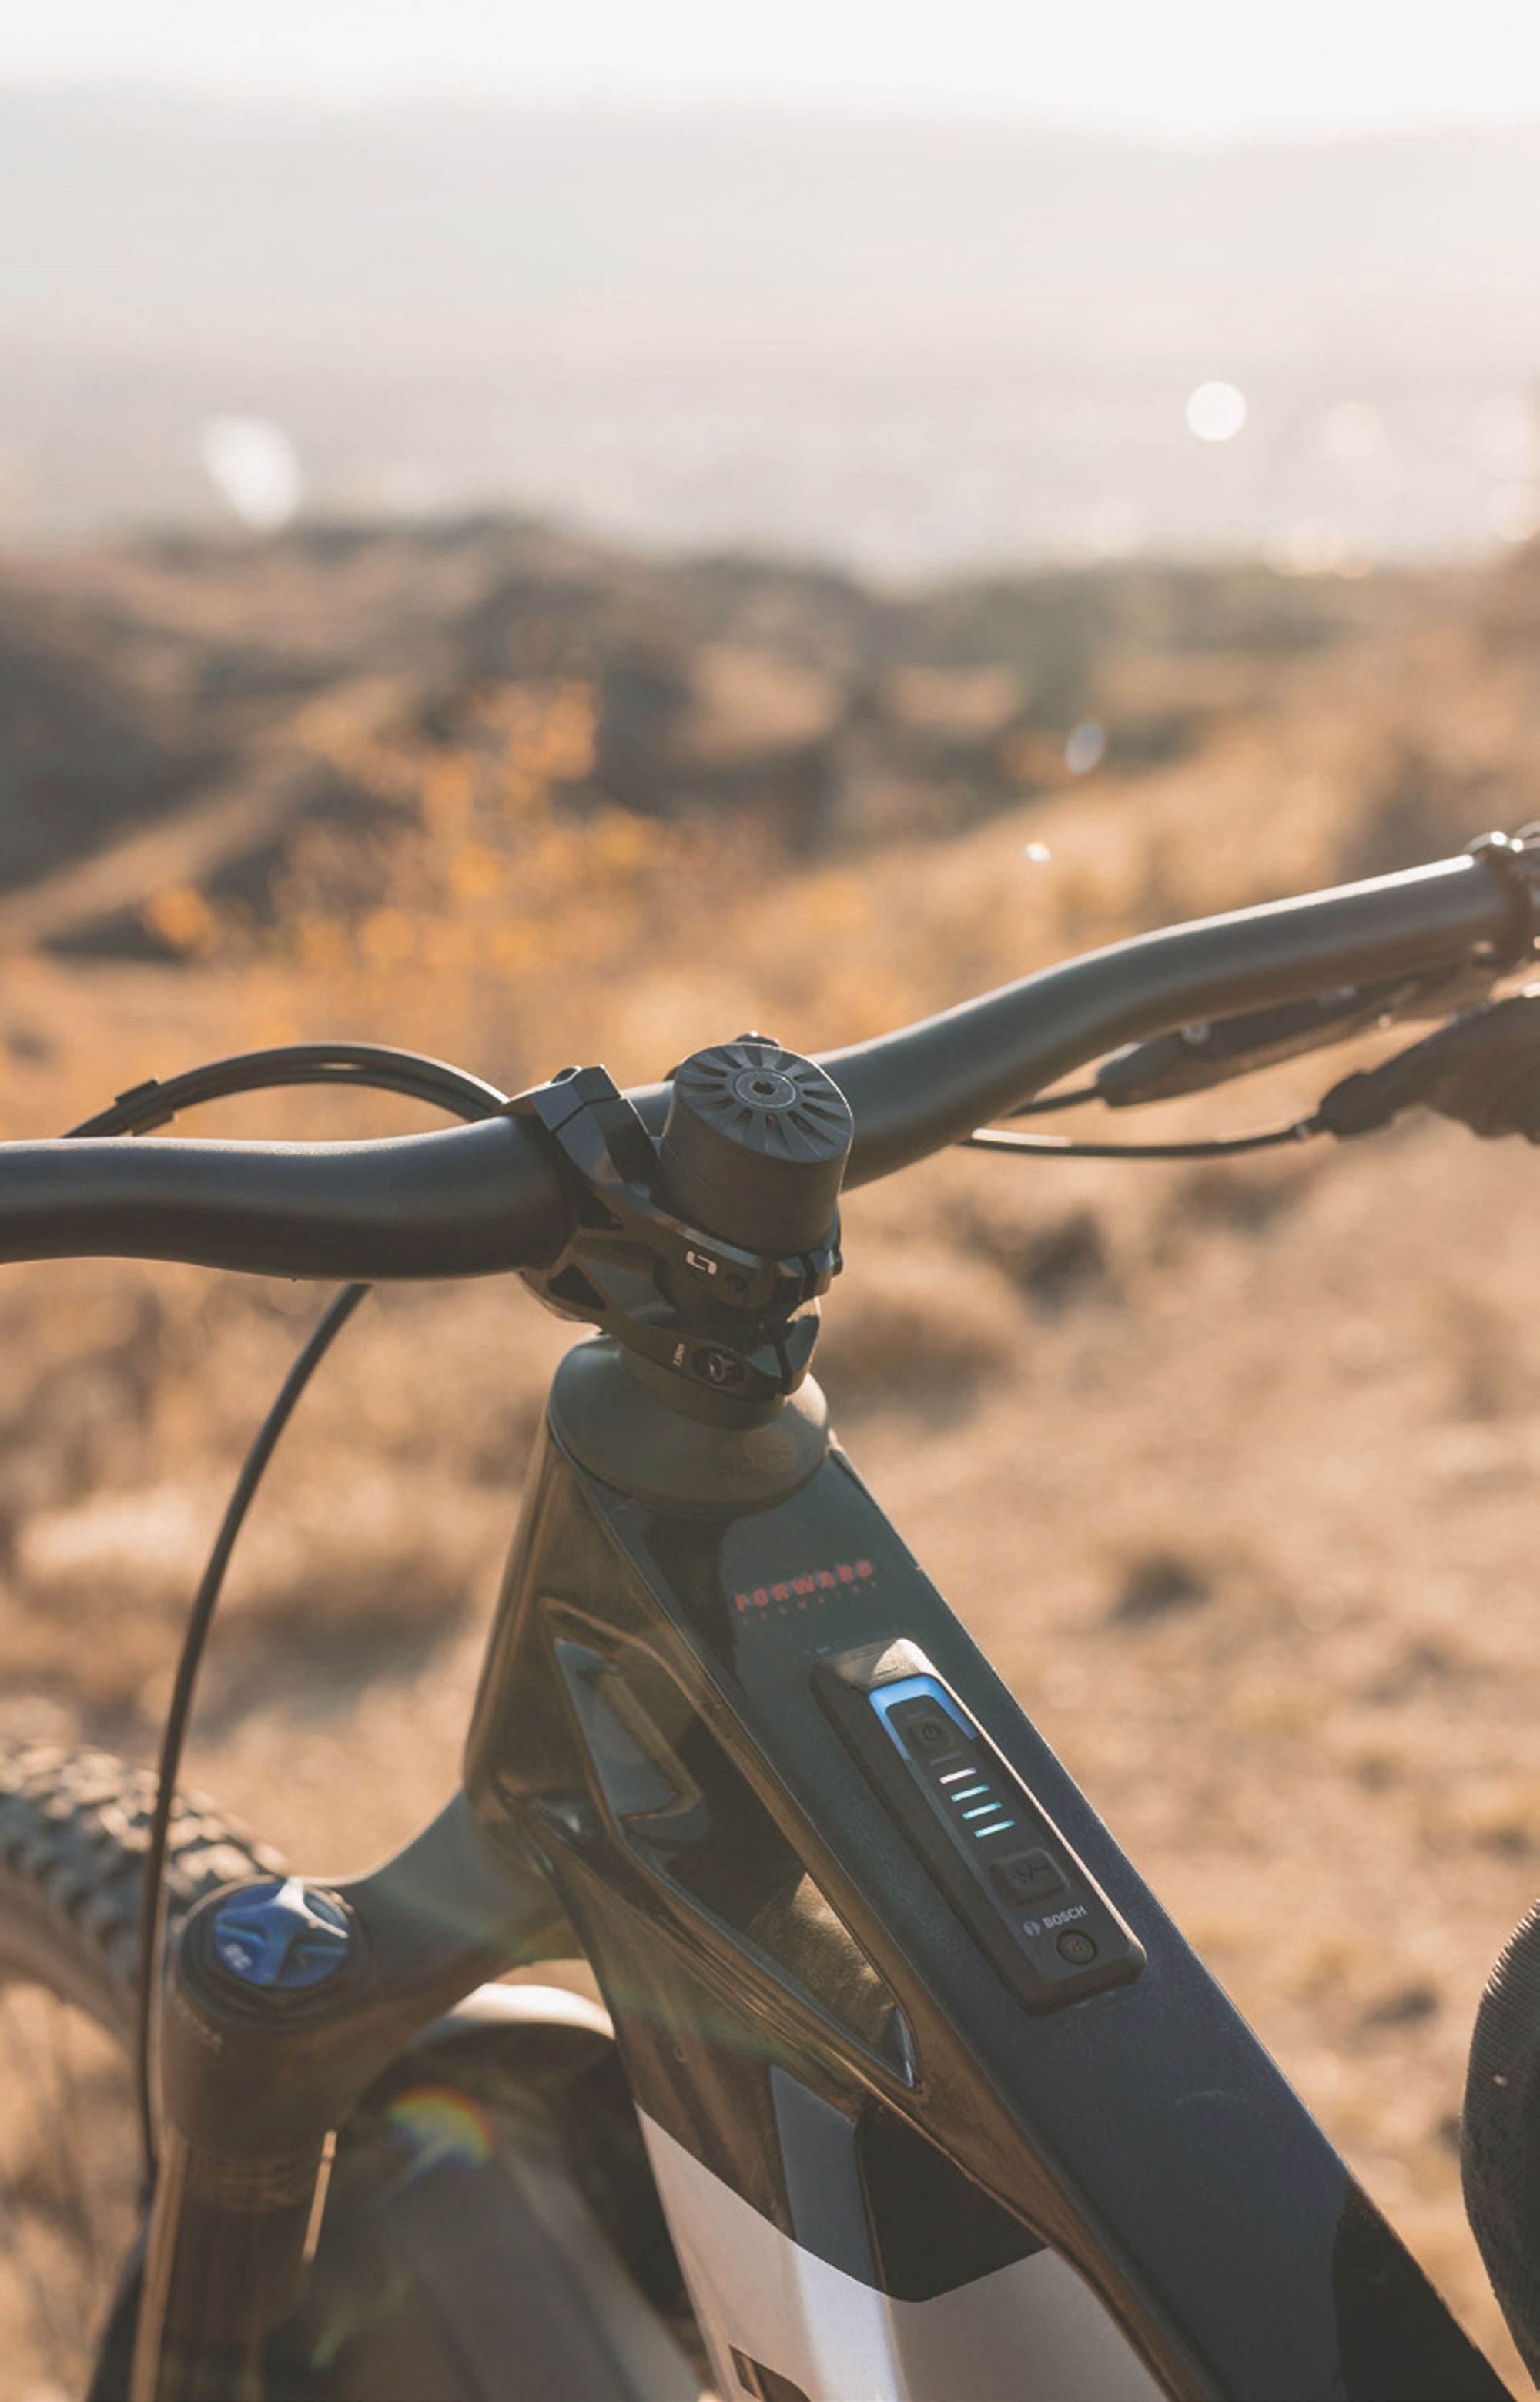
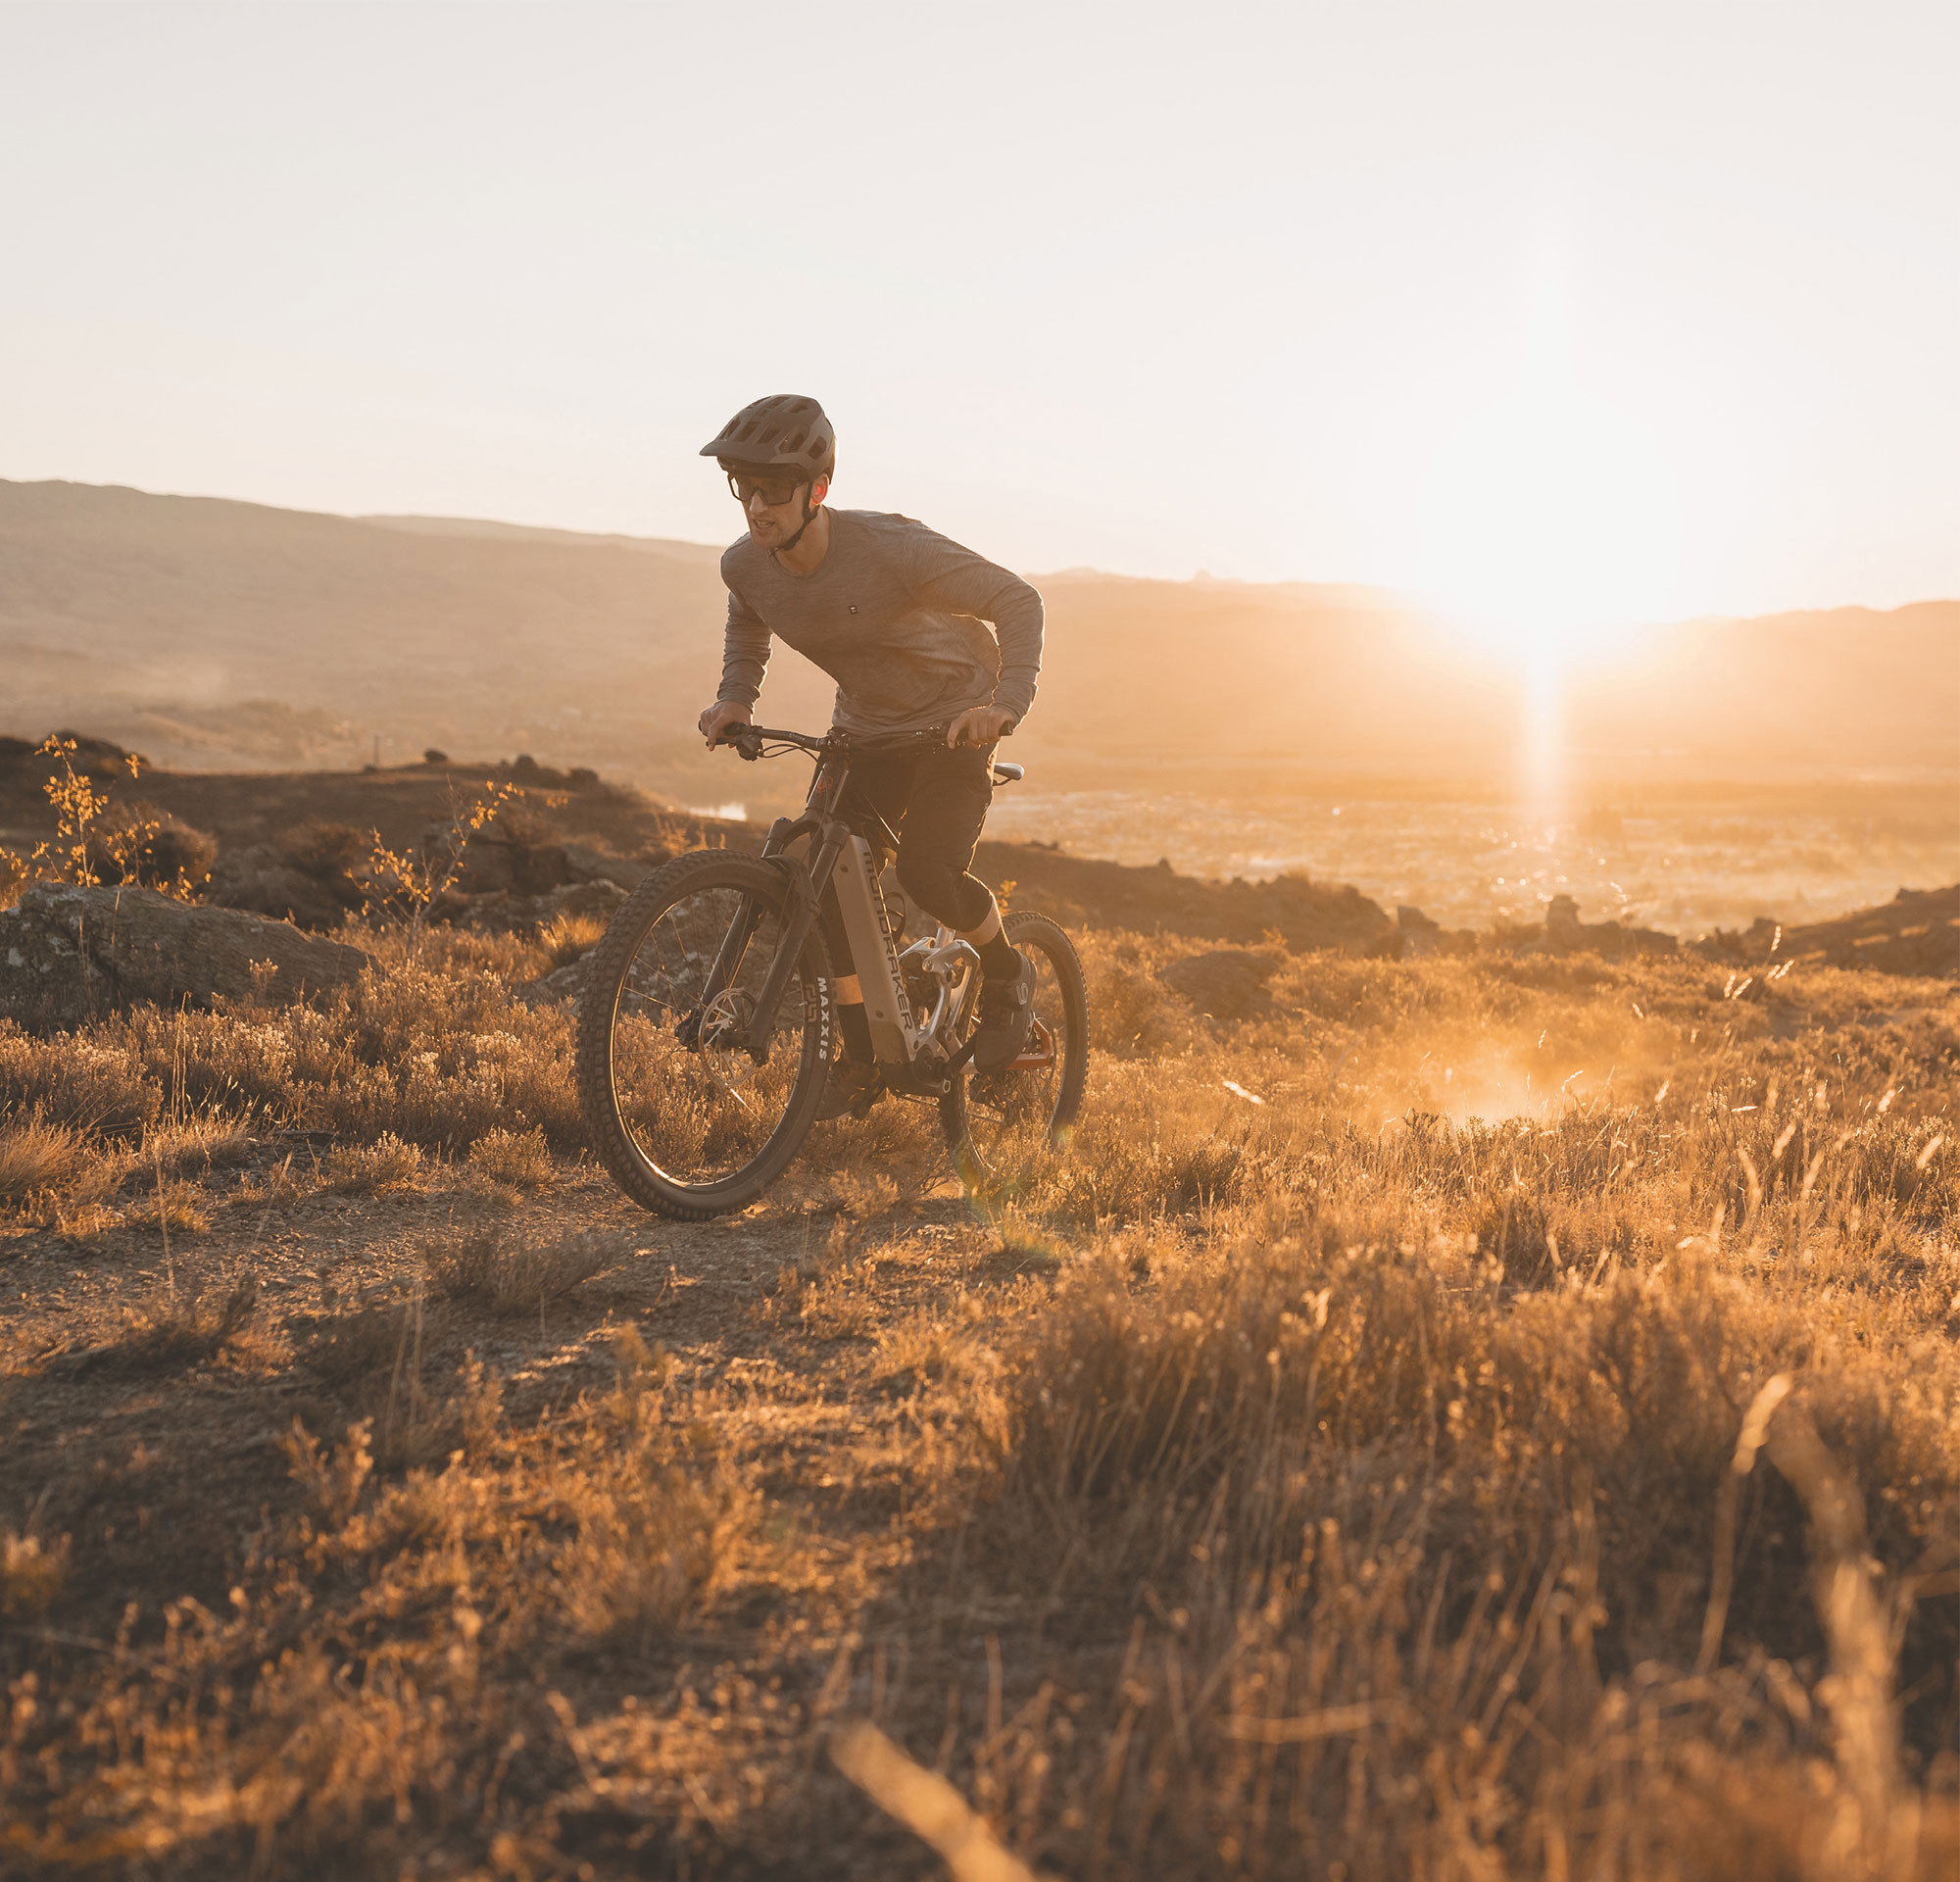
When the opportunity came through to test ride the new Mondraker Dune R, equipped with Bosch’s Performance Line SX, my interest was well and truly piqued. My current bike is fitted with the Performance Line CX, and I knew the SX was a light-weight system, so was keen to see how it would compare. We headed for the rugged terrain of Matangi Station in Alexandra, to put it through its paces; the perfect proving ground for both the system and bike with steep climbs, tight pinches and rocky single track.
My most obvious question was how the SX motor would feel in terms of assistance compared to my experience on the Performance Line CX. Would it feel underpowered or too much of a jump down? How natural would it feel to ride? I was also interested to see how you use the modes. For the type of riding I do, I usually ride my CX bike in the two lowest modes, Eco and Tour, but I wondered if I’d need to use eMTB or Turbo? Or, if I stuck to my usual modes, how fast would I be able to climb up stuff? Would I feel like I was going a whole lot slower? Would the SX system experience be up to Bosch’s usual high standards?
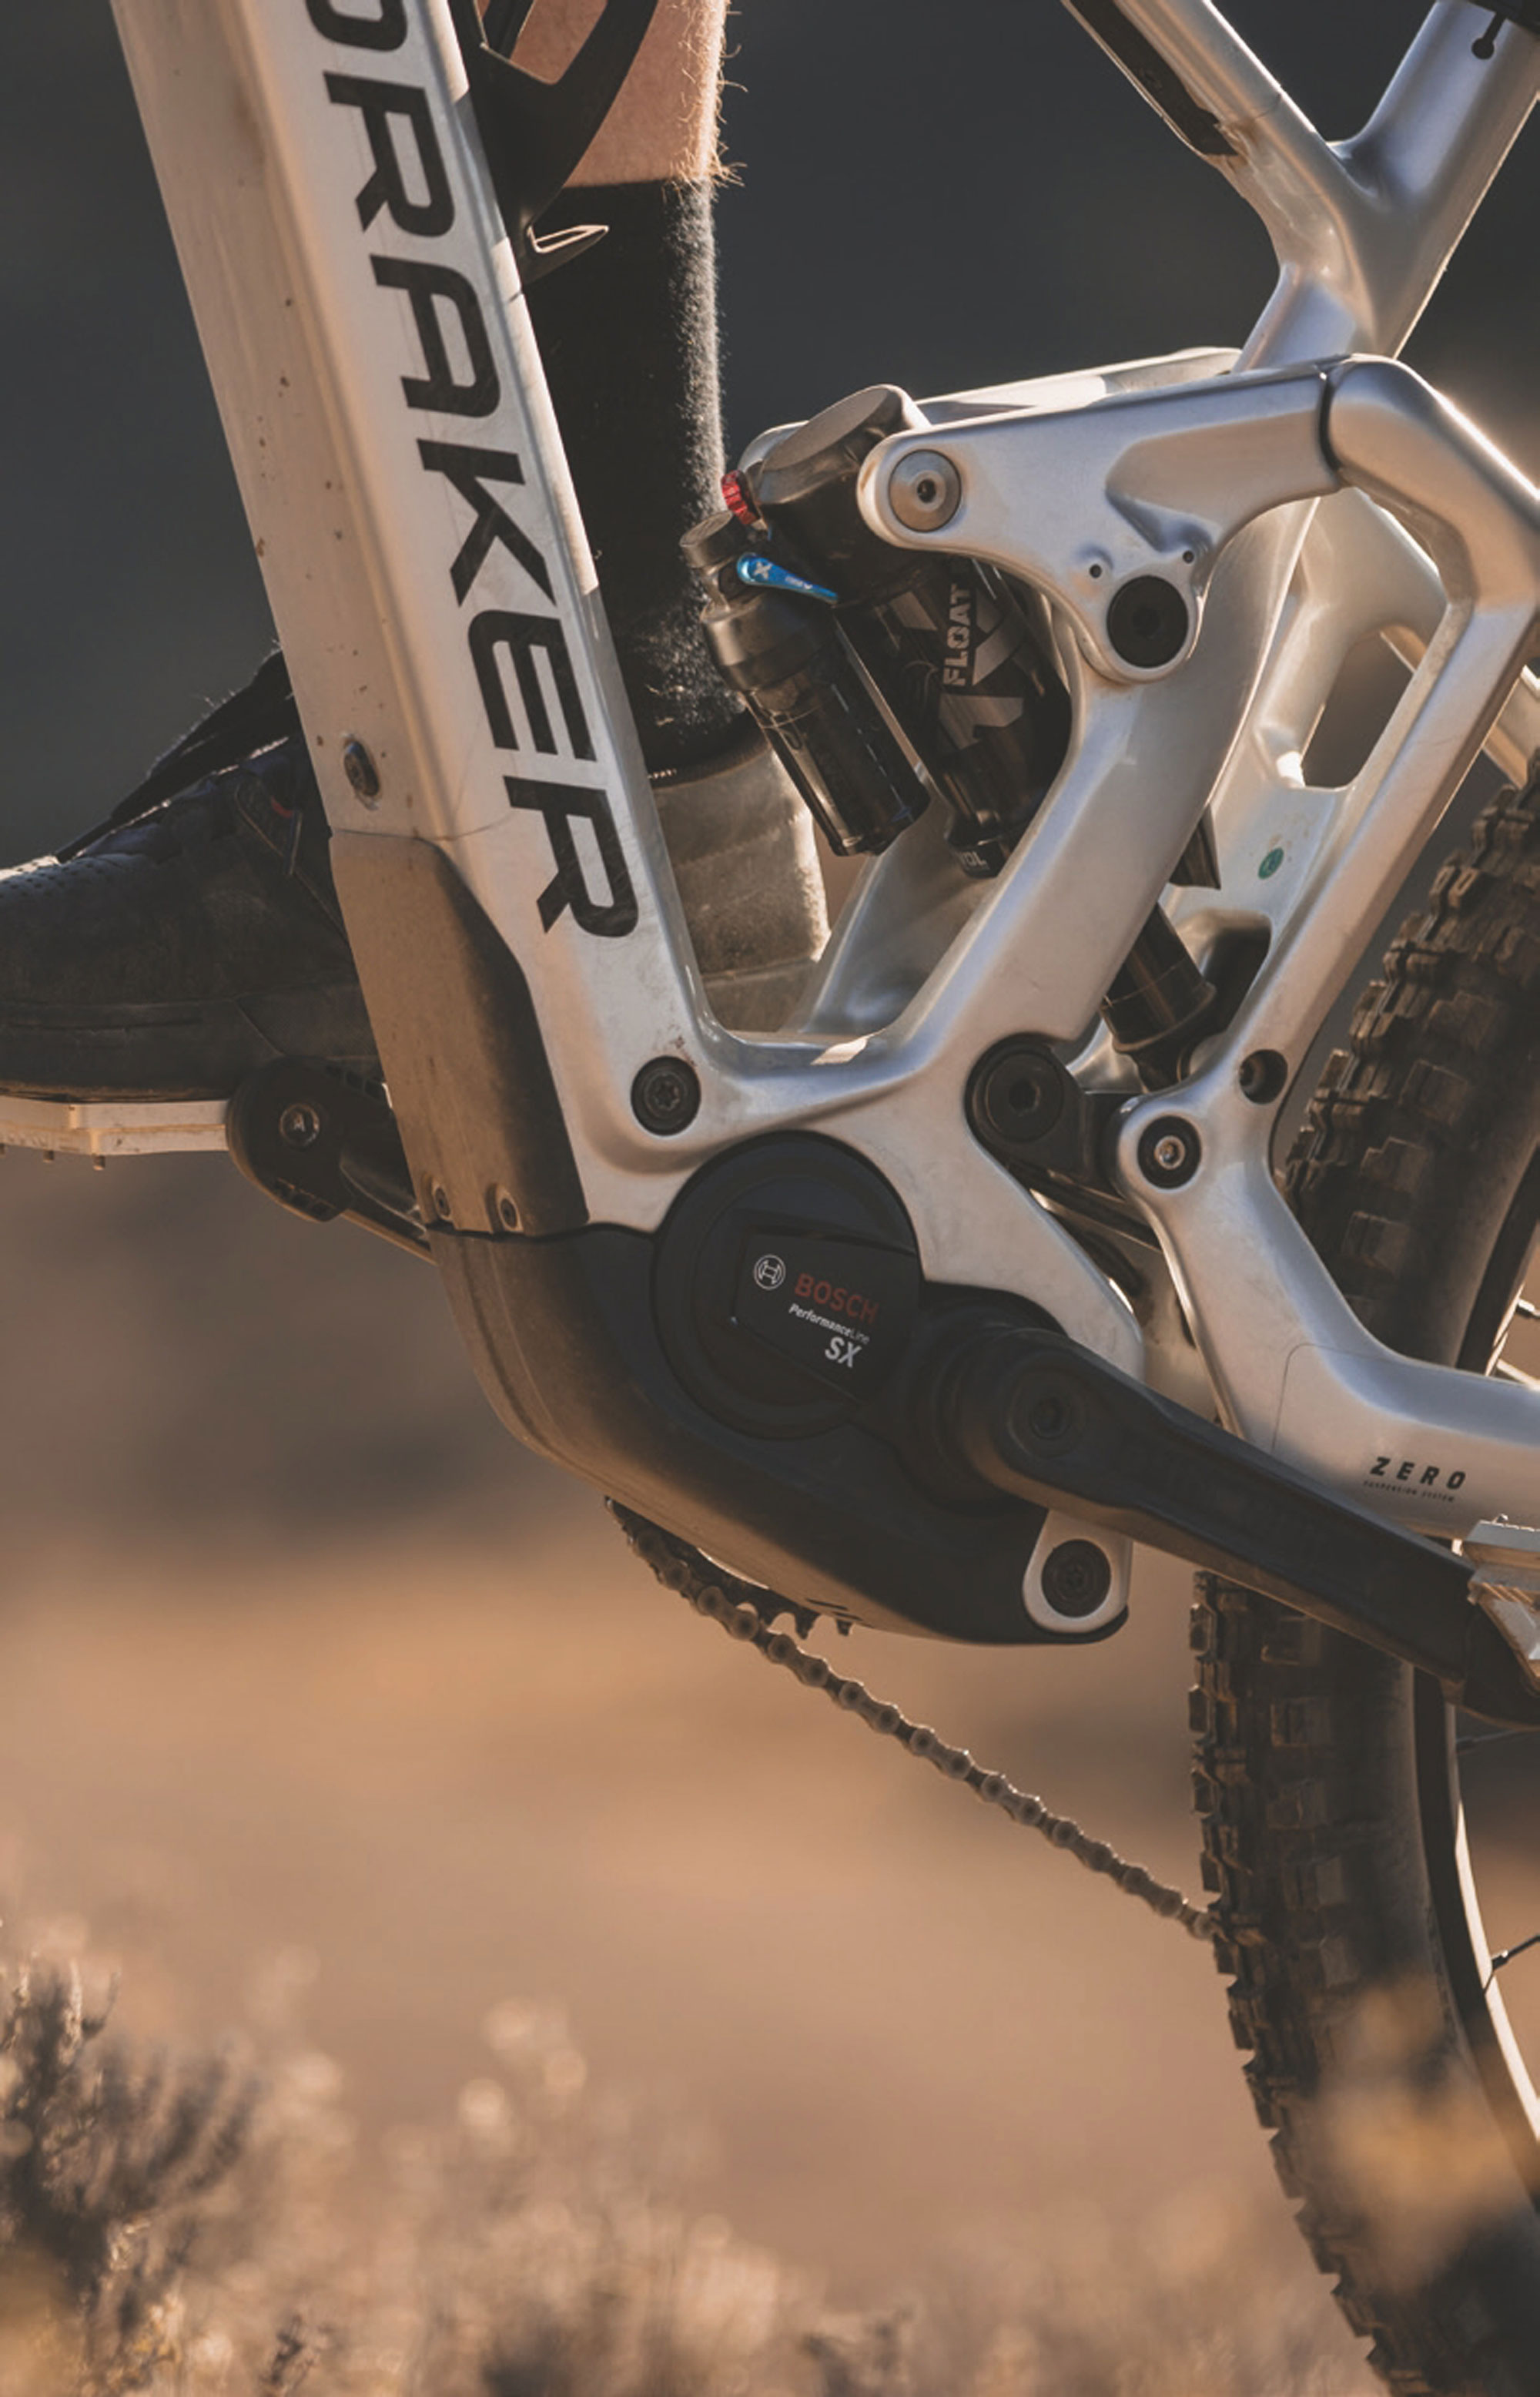
I put the motor to the test straight out of the car park, climbing up a steep four-wheel drive track to access the trails. I didn’t expect the SX to be as strong as a full-power motor like the CX but it was easily powerful enough going up. I didn’t need to switch to eMTB or Turbo mode. Even on the loose gravel surface, where you can easily lose traction on the steep sections, the bike performed well and I could push through without having to get out of the saddle.
I think a lot of experienced riders still yearn for that analogue bike feel and the lower-powered modes deliver that nice balance of assistance.
On an eBike, you can sometimes feel like the front wheel is going to lift off on steep sections, especially in high power modes, but I didn’t experience any of that pull-up at the front. I felt like you could manage the torque and it was well delivered. It was smooth and consistent and didn’t come on in a big burst.
I had heard that the SX is more cadence- sensitive but even so I didn’t have to spin it up as quickly as I thought I might have to and was getting good assistance low down. It wasn’t hard to get used to it either. I just had to drop down one gear and I was set. I was still covering the ground fast and it felt really natural.
My personal preference when it comes to modes on my CX powered bike is to be in Tour mode 80% of the time, maybe eMTB mode if I’m going up a more sustained technical climb. I never really feel like I need Turbo and I hardly ever use it. I love to pedal but still want that assistance when I need it. I think a lot of experienced riders still yearn for that analogue bike feel and the lower-powered modes deliver that nice balance of assistance. Eco and Tour don’t feel super strong on a heavier bike so I thought I’d see how they felt on the SX. I switched to Tour on the steep sections and it was ideal, giving me the assistance I needed.
I had a try with eMTB and Turbo and found they were good for starting on a steep technical climb, getting you into it without feeling too strong. This is where these modes come into their own. In the spots where you’re at a low cadence and can run out of traction pretty easily, those high- power modes can help you get moving without having to worry about spinning the wheel and losing grip straight away. You get the torque that you need, where you need it. With eMTB mode you can get up and over most things and it’s the most intuitive mode for most types of riding.
The PowerMore 250 range extender is a good size, weighing in at just 1.5kg and sits on the bottle cage mount. Even though you’re carrying the minimal extra weight, you’re not going to be suffering anymore because you’ve still got the assistance from the motor and the bike is already lighter.
In the morning, we used about 40% of the battery, then rode three hours in the afternoon on some pretty steep, techy terrain, all on one battery charge and I never felt any range anxiety. We didn’t have the Bosch PowerMore range extender with us, but it would be ideal on big days like this. Having the option of an extra 250Wh on top of the 400Wh from the Bosch CompactTube 400 that comes on the Mondraker Dune R is a huge bonus.
The PowerMore 250 range extender is a good size, weighing in at just 1.5kg and sits on the bottle cage mount. Even though you’re carrying the minimal extra weight, you’re not going to be suffering anymore because you’ve still got the assistance from the motor and the bike is already lighter. It’s much easier to add 1.5kg to your backpack than a full-size second battery and it widens the scope for more ambitious backcountry missions.
The Mondraker Dune R has a system controller installed in the top tube, so you can do a quick glance down to check how much battery you’ve got left and what mode you’re in. I liked not having a display unit to clutter the cockpit. But if you prefer having a display unit you can have this added on. Having a minimalist eBike setup with only the system controller and mini remote, but the Flow App in your pocket, means you’re getting the best of both worlds: a pure riding experience with the reassurance of powerful data in your pocket so you can quickly crunch big numbers if you need to. The Mini Remote next to the grip is great. If you’re in a tough spot where you need to change the mode easily and quickly, it behaves responsively.
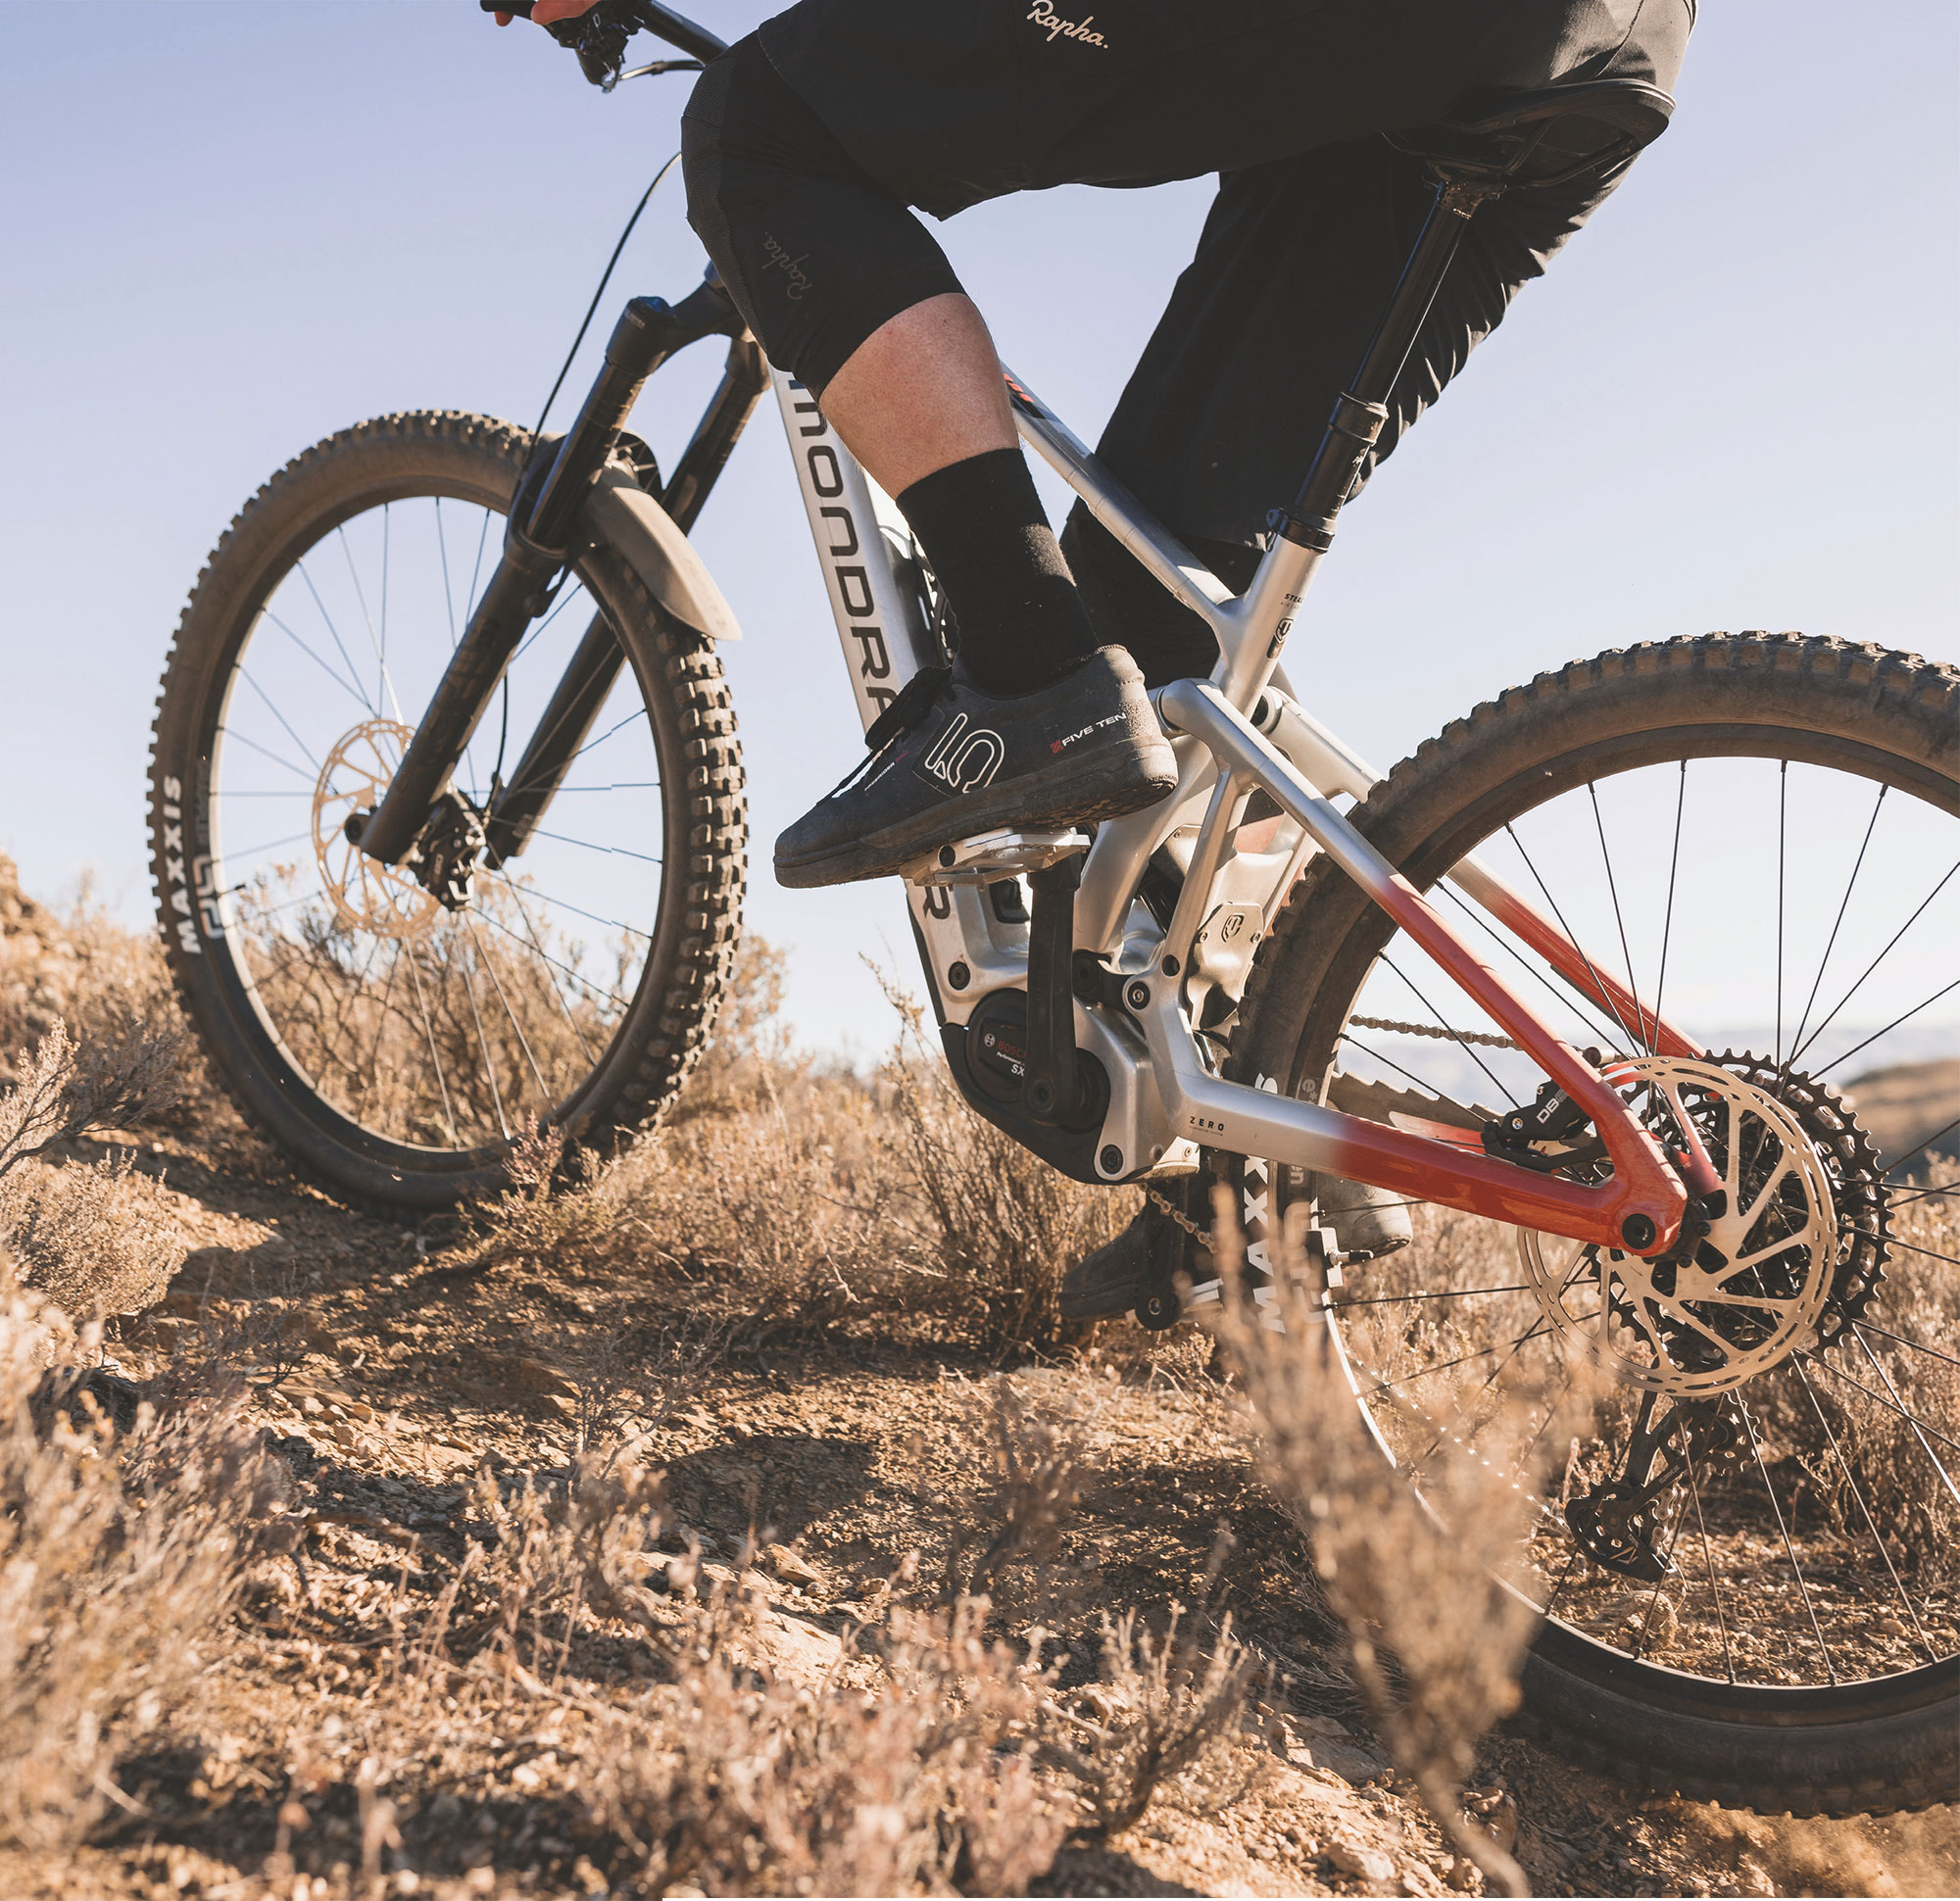
Going on a deep dive on the bike itself, The Dune R is a solid package. Mondraker has three tiers of the Dune R and this is the most affordable. Build-wise, this is in line with what you would expect at this price point. The headset was super clean with the internal cable routing; that was a nice touch and didn’t impact the steering range. Having the 180mm fork on the front means it’s quite a burly bike. I had thought it would be a bit of a handful but was pleasantly surprised on some of the tighter spots we rode; it still felt light and manoeuvrable and handling was really good. Mondraker uses their own patented dual link suspension design where the shock is compressed at both ends. This gives the bike amazing pedalling efficiency, a very progressive nature. It felt lively and responsive, firm but still plush. It was also very quiet and the build quality was immaculate. The geometry was that classic Mondraker style from their race pedigree – an aggressive approach for descents where you’re tucked in but, if you’re sitting down climbing, it puts you in a good spot. Mondraker also has a unique approach to its high-end carbon bikes. They use pure Toray Carbon with a unique layup to achieve low weight, high strength and stiffness. Most carbon frames are composites where carbon is mixed with fibreglass, so this is very solid. The bike itself really is an amazing first pairing with the Bosch SX system. I think the overall aggressive approach of the Dune makes this a compelling option.
After riding this bike, I asked myself who the bike and – specifically – the Bosch SX system could be suited to?
For advanced riders, the eBike choices are really interesting now, especially if you’re someone who’s come from an acoustic bike. This bike and system is not such a drastic jump as it would be to a full-powered eBike. It has a super-natural feel; you’re taking an analogue experience and you’re just giving it enough assistance but not in a heavy- handed way. Likewise for existing eBike riders, this presents a really different ride experience.
This system will suit someone who loves technical climbing and still wants the capability to manoeuvre, but understands that it is going to ride like a trail bike on the descents as well. It has got the right amount of torque, you can spend most of your time using the low assist modes but with the reassurance that you can bump up to eMTB when you need it and dial it back down when you don’t. Even if you’re riding with people on non-eBikes you can still chuck it in the lowest mode and ride quite naturally in a mixed group, which is sometimes difficult to do with a full-powered eBike.
This system will suit someone who loves technical climbing and still wants the capability to manoeuvre, but understands that it is going to ride like a trail bike on the descents as well.
I think this could be the ultimate system for backcountry and hike-a-bike missions. The SX has plenty of torque and power, so you can climb the more unusual trails you come across on backcountry outings – and having the option of the range extender gives you that certainty of range. An eBike assists you in exploring places you otherwise wouldn’t reach, but there are always sections where you’re going to have to carry your bike over deep river crossings, where trees are down or you’re navigating a washout. Hauling a bike over that unexpected stuff can be taxing and this is where the weight is really important. Walk mode with the lighter weight system is also a breeze.
To sum up, it was an amazingly fun experience to ride this eBike and I was well and truly surprised at its capability. I was already familiar with the Bosch system so the SX felt comfortable while also bringing in some new experiences. Everything was developed to the expected high standard, from the overall system to the Flow App. I think the SX system fills a really broad part of the market and it actually strengthens where its full-powered CX offering fits. Once people ride it, it will change a lot of mindsets. The system that bridges both the eBike and the analogue worlds – you can have your cake and eat it too. This is the new natural.
Special thanks to Outside Sports, Matangi Station and Mondraker NZ (Allsports Distribution).
The Mondraker Dune R is available for purchase at outsidesports.co.nz and nationwide. For a full list of Mondraker NZ retailers visit mondraker.co.nz
Opinion: Square peg, round hole
Words Lester Perry
Illustration Gary Sullivan
Consider this: you’re a new rider rolling up to a trailhead, you’ve borrowed a bike from a mate who didn’t need it today, and it’s your first time riding by yourself. Unloading the bike, you’re excited; it’s a size too big but you wouldn’t know otherwise. Your mate who you’d normally ride with isn’t with you today, so you’re more focused on what’s happening around you. Dressed in the clothes you wear daily, you mount your steed. Heading toward the trail from the car, you’re looking at what other people are riding, what they’re wearing, and the lingo they’re using. You see things you don’t usually notice when you’re riding with your mate. “Cripes, those bikes are worth more than my mate’s bike, his car – and mine – combined!” “Those guys in all that fancy riding kit look pretty serious, must be what you need to wear for this riding stuff…”\
If you’re reading this, you’re probably not the person above. It’s likely, like me, you’re one of those other people our person rolled past on their way to the trailhead. It gets me thinking – are we losing people from our sport because they feel out of place or because it’s not an accessible or inclusive sport? I sure think so.
The person mentioned above is probably going to feel out of place – in fact, maybe they’ll have the same feeling I get after walking into a high-fashion store. “There’s nothing here for me; I don’t identify with anything or see anyone like me.” Maybe we’ll see these people at the trails a few times, but maybe they’ll switch off, and riding will become a “now and then” hobby as opposed to an exciting and enriching part of their lives – like it is for us.
Mountain biking has become an upper-middle- class sport at best. In particular regions, I’d almost go as far as to say that, from the outside, it looks like an elitist sport. That’s a huge generalisation and there are people working hard to break this mould but, for now, that’s how I think it looks from the outside.
We need a shift in thinking. Too often these days, trailside chat is about the latest wizz-bang gadget, recent component or gear purchase – or the cost of said part -, rather than about what a good time we’re having out on the trails. It’s worth pondering; are the upgrades and purchases we make really necessary upgrades, or just vanity purchases?
There’s an undercurrent that the bike we’re on must be as close to the top of the range as possible - and heaven forbid we ride it in its stock form straight from the shop floor!
Unfortunately, it seems mountain biking has become a fashion sport, with purchasing decisions nowadays driven by fashion and the need to have the latest thing, rather than an actual necessity. There’s an undercurrent that the bike we’re on must be as close to the top of the range as possible – and heaven forbid we ride it in its stock form straight from the shop floor! Honestly, how many people are out-riding a mid-level fork and need the top model? Those OEM tyres?They’re probably not that bad, so why not wear them out before you change them? You might even be surprised at how good they really are, regardless of what you’re told.
Sure, if something’s worn out or broken, it needs replacing – but I reckon we need to normalise buying secondhand, or at least considering it, for no other reason than minimising our impact on the planet and, in a small way, we may avoid excluding people. If a bike has been properly looked after, it should last years – and to be fair, the minuscule upgrades we see from season to season are almost unnoticeable. They’re 1% changes barely worth dropping bank on. Will you really feel the difference or is it just that shiny decal you want to show your mates on Instagram?
When it comes to buying a brand-new bike, the same logic applies. I’ve seen riders (myself included in the past) ticking up high-end rigs on high-interest schemes, all to keep up with the Joneses, leaving them financially overreaching and ultimately over-capitalising on their bike. Let’s normalise buying a cheaper bike – it doesn’t necessarily need to be of lesser quality, but perhaps not a premium top-level rig. I’ve been surprised by the performance of some mid- level groupsets and suspension. Are those shiny decals and a 300-gram saving in weight really worth a few extra grand? Doubt it. I’d encourage buying a value-conscious bike that’s more realistically suited to the level it will be used. Don’t skimp out too much, but deal with that extra weight and spend the money saved on a skills clinic and a riding trip. Both of these will boost your riding level and give longer-lasting enjoyment than that 300-gram saving ever will.
Opinion: Bikes are good, period
Words & Illustration Gary Sullivan
This column was going to be about a bike ride and yet another weird character trait I discovered while doing it.
Then, I read Lester’s excellent opinion piece, which can be found elsewhere in this issue. I get to preview things like that if I am asked to provide an illustration to go with it, and I absorbed it in full agreement. I like to say my favourite bike is the one I am riding when I should be working, so just about anything with two wheels will qualify on any given day. Doesn’t need to be top of the line, up-to-date, or even manufactured this century. Bikes are good, period.
That thinking got me started on the state of things in the ‘industry’ right now.
One of the retail behemoths that trade in the New Zealand bike segment has recently changed hands for a dollar. A well-known brand, a bunch of stores, a heap of staff, and probably a significant pile of debt – all this for a dollar, presumably ex-GST.
People have often remarked, in recent years, that this outfit and the other more specialised retail behemoth were in a race to the bottom, and I guess this means there is now a winner.
Financial commentators place some of the blame for the failure of this outfit to make a profit on the post-COVID struggles of the bike market. Not sure about that, but the bike market is definitely in a weird state.
Suppliers super-flush with inventory are struggling to sell stuff. There are solid reasons for that situation.
Talk to just about anybody in the bike caper – they will tell you times are tough. The troubles started with COVID, and not with a downturn. It was a boom. Most activities that were fun were off the table, but riding a bike was still allowed. Travel was a no-go, and interest rates were still almost non-existent, so a lot of people threw their excess dough and energy into bikes.
I like to say my favourite bike is the one I am riding when I should be working, so just about anything with two wheels will qualify on any given day. Doesn’t need to be top of the line, up-to-date, or even manufactured this century.
This happened globally… in the developed world anyway. Nearly every supplier ran out of more or less everything. Lead times for the products people wanted were years long in some cases, and retailers and their customers were very cranky with distributors, who were similarly cranky with their suppliers.
As the retail market clamoured for more, manufacturers cranked up their ability to deliver stuff.
It is perhaps surprising that the general expectation seemed to be that the golden weather would go on forever.
By the time that increased productivity reached the shop floor, most people who were going to had already bought their bike stuff, COVID was now a boring sidebar to life, and the heat was disappearing from the market.
Then a bunch of discretionary cash was hoovered out of the picture by increasing costs of living, and interest rates.
Around the world, big companies have gone bust, teams have folded, sponsorships are drying up. Top riders in some branches of the sport have found themselves out of a gig.
I think the current problem in the bike game is similar to the challenges of capitalism in general: endless growth is impossible to maintain, and it was never going to continue like it did for that brief period during COVID.
There is a lot of product available, new stuff will continue to arrive, and right now things are tight.
But hey! A good bike shop is a wonderful thing. A real bike shop will be kept afloat year-round by the constant need that riders have for parts and service. Of course, it will sell bikes, as many as possible. A good shop will try to ensure that the bike sold matches the customer’s needs.
Meanwhile, out in the woods, things have never been better. There is nothing wrong with the actual sport of riding a bike. Doesn’t matter if the rider is on the latest thing or on a sled from last century - hooning down a trail is as good as it ever was, and many people are out there doing it.
More valuable to their customers will be the advice and insights they pass on. By the time a punter has been absorbed into the sport to the point where escaping is unlikely, they will have figured out which bike shop suits them and will be in there on a regular basis, dropping cash on keeping a bike (or fleet) functional.
Meanwhile, out in the woods, things have never been better. There is nothing wrong with the actual sport of riding a bike. Doesn’t matter if the rider is on the latest thing or on a sled from last century – hooning down a trail is as good as it ever was, and many people are out there doing it. Gravel is growing, bikepacking is growing, eBikes are everywhere.
Which brings me back to my initial sentence – the bike ride.
I got a stellar Saturday a few weeks ago and, for reasons I now forget, I had nothing else that urgently needed doing except bike riding.
As usual when riding familiar territory, I started creating a route in my head on the way to the trails. By the time I got to my start point I had one sketched out.
It was ambitious.
Up As You Do, down Ten of Clubs, on to Corridor, then Turkish, Rock Drop and Rosebank, coffee and muffin, up Soakhole, down K2, up Direct, down Tutaeata, up Apumoana, down Johnsons, up Lobotomy to the top, down Tihi-O-Tawa, back to the top, through Tuhoto Ariki, up Moerangi, down Te Ahi Manawa, up Lookout, down No Brains, along Taura, up Tokorangi, down Fluffies.
Incomprehensible if you have never visited Rotorua but, trust me, it is a big and lavish helping of trails.
I expected it to take a while.
It did. It was great, I met people here and there (see above re. the state of the sport), only got passed twice (two young fellas at the same time, so only counts as once). I fell off twice.
Here is the weird character trait: by the last climb I was out of gas. I had to sit down on the side of the trail and gaze into space for a while. Some complete beginners even asked me if I was alright. I was, I was just rooted.
But I had to finish my route. Once created, it needed completion. Why, I can’t explain. It just did.
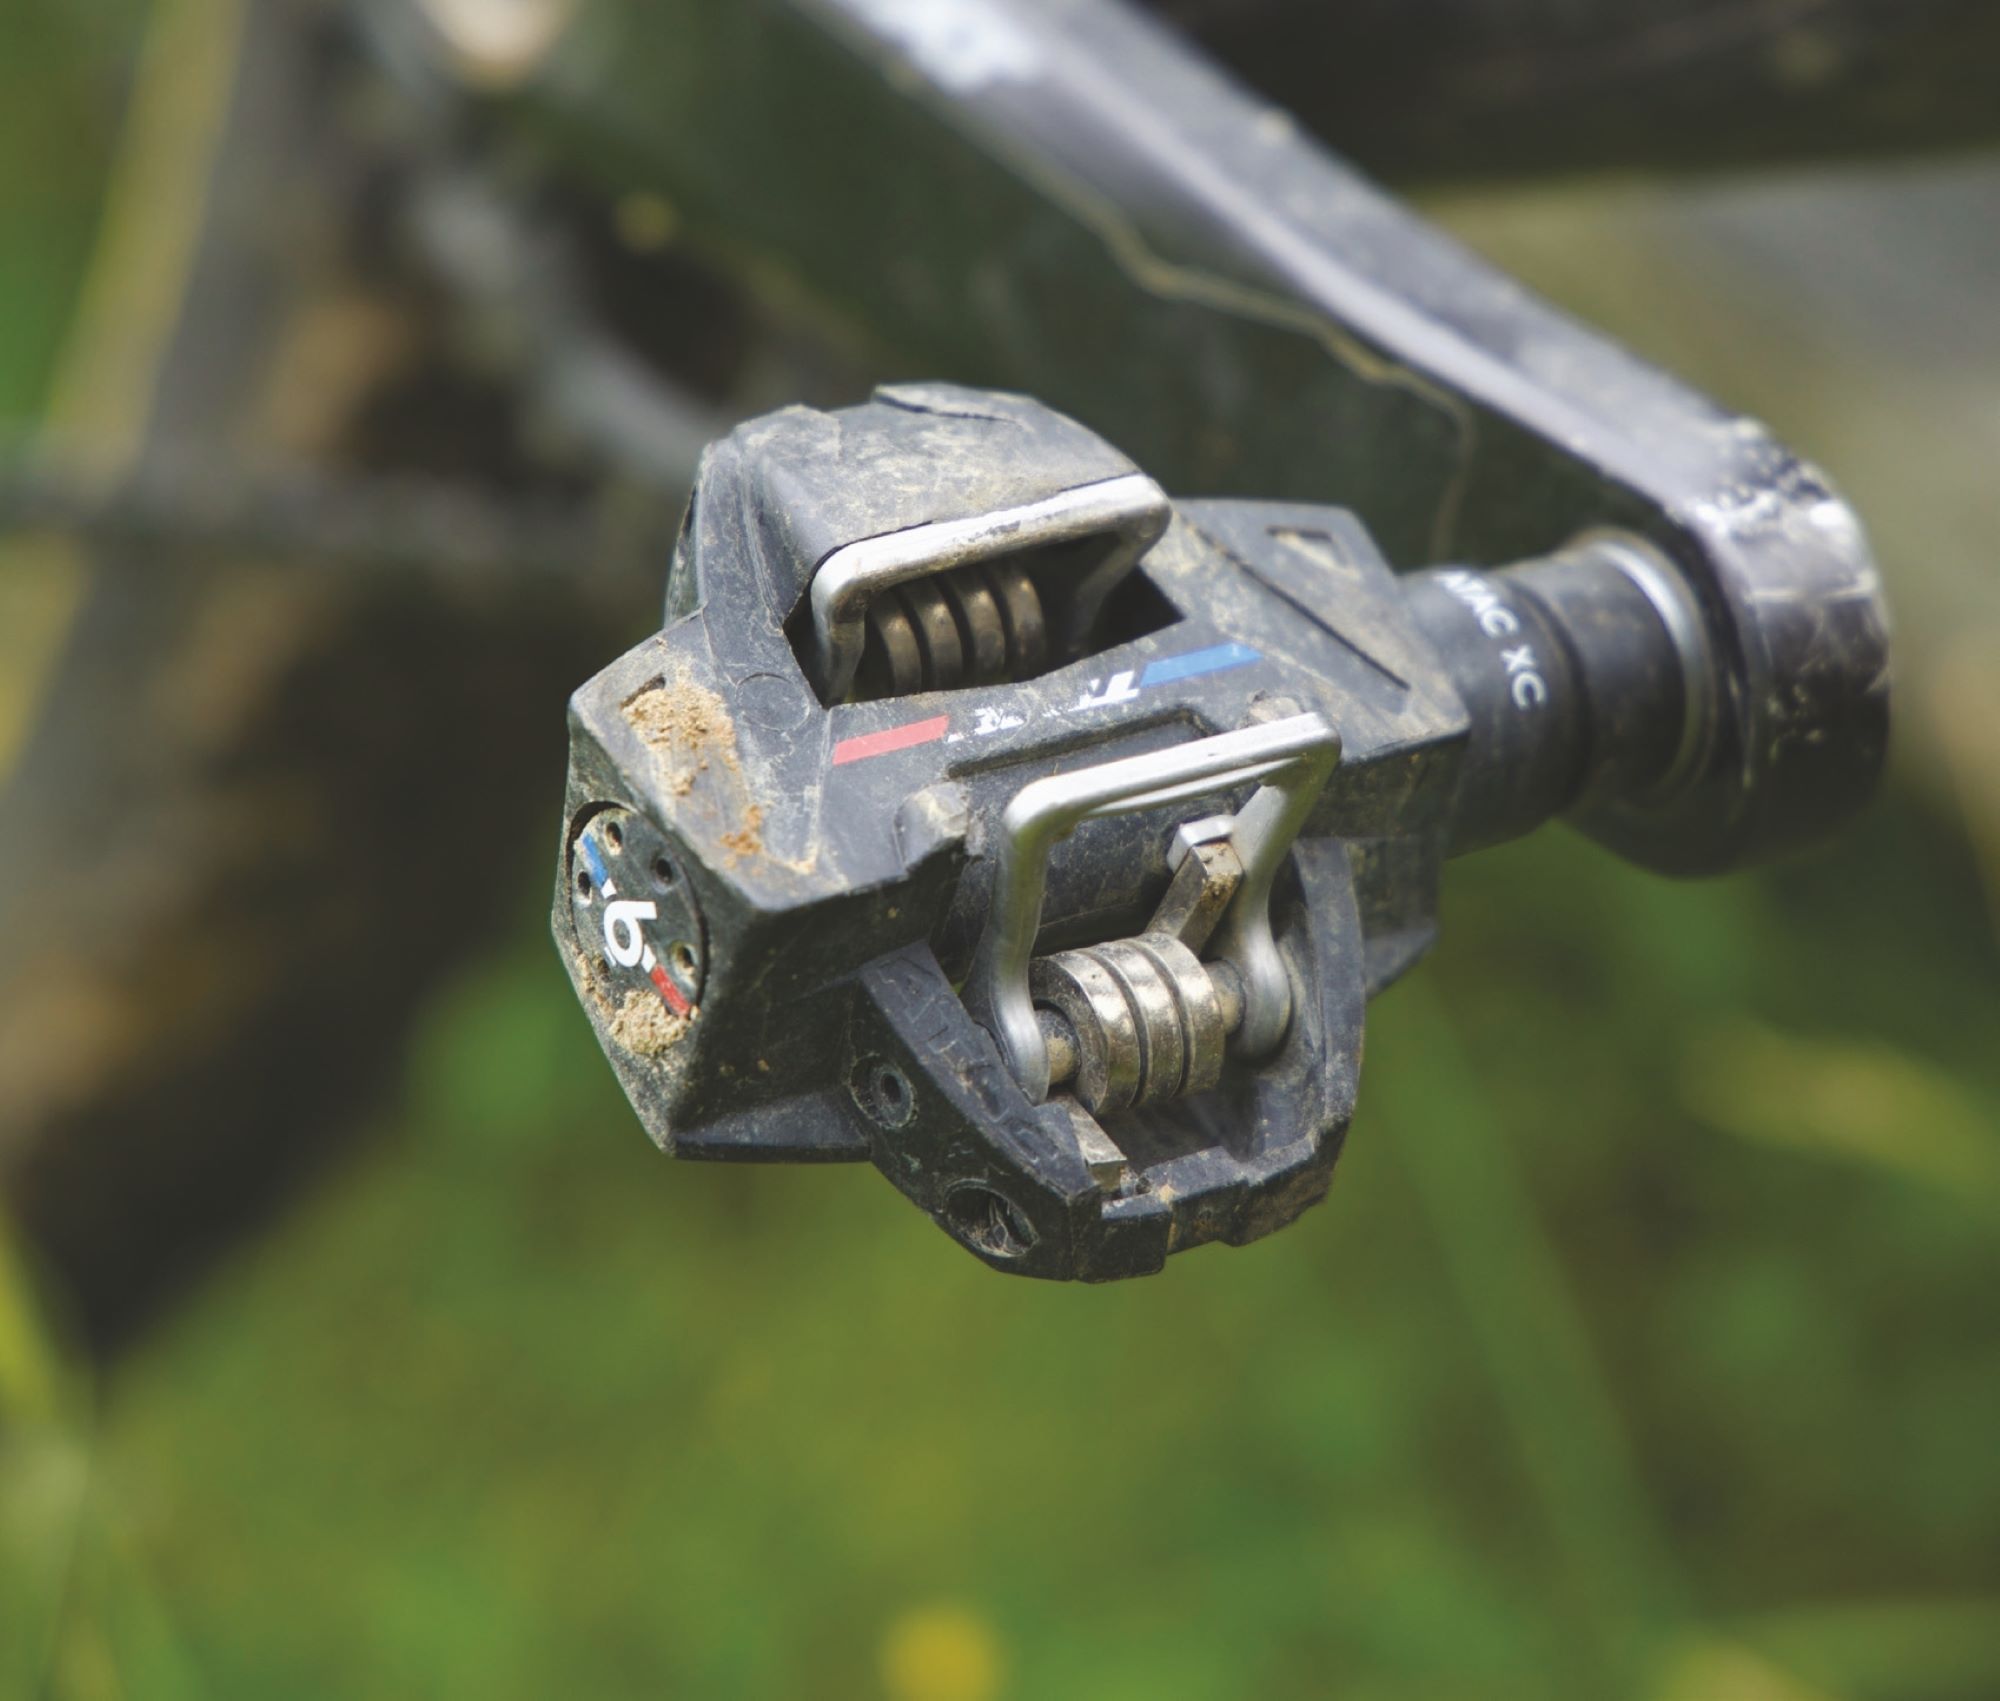
Time ATAC XC6 Pedals
Words & Image Lester Perry
RRP $235
Distributor Worralls
Since 1987, Time pedals have been a regular feature in the road peloton, often found under the shoes of many a Tour de France contender, regardless of whether they were sponsored by them or not.
In 1991, Time added the ATAC MTB pedal to their range, satisfying cross-country riders’ need for float in the cleat while retaining efficient power transfer. Time pedals have taken multiple riders to World and Olympic glory in cross-country races, but seem to have always flown somewhat under the radar in wider MTB circles – although they’ve maintained an underground, hardcore following of those who like the feel and self-cleaning of the system.
In February 2021, SRAM acquired Time Pedals, bringing it into its extensive family of brands, boosting its profile and putting it back on people’s radars.
The few times I’ve stepped away from my tried-and-true Shimano pedals, I’ve jumped right back on them in just a few rides. I’m either too impatient and didn’t give myself time to adapt to the feel of something new, or the product wasn’t up to par. Until the box turned up with the Time XC6 pedals inside. I’d never even considered trying Time pedals, such was my fear of changing from the familiar.
Featuring a hollow steel axle for lightness and durability, a composite body, and tension adjustment, the features of the XC6 are familiar. The ATAC retention system offers easy engagement, and its open design helps clear debris each time you step in, the cleat forcing debris out through the retention device.
There are two heel release angles available, depending on which shoe you mounted which cleat on. One configuration gives a 13-degree release angle and swapping the cleats left for right gives a 17-degree release angle. Whichever way you choose to set up the cleats, there’s a 5-degree angular float. Uniquely, and fitting with Time’s aim to offer more ergonomic pedals than their competition, there’s also a +/-2.5mm of lateral float helping a rider’s legs move in more natural planes.
Clipping in is more or less the same as what I’m used to, a positive feel, and an audible click as the cleat snaps into place. Compared to what I’m used to, there’s a more progressive feel as you unclip, a slow build of tension before it pops free, rather than the firmer ‘snap’, almost instant, feeling I’m used to.
With cleats set at 17 degrees, I found them odd – far more ‘twist’ of the foot was needed than I liked, leaving me unsure I’d get along with the system, as I couldn’t get my foot out as fast as I needed for an emergency foot dab! I imagine some riders would like the feel of being able to move their feet around this much without fear of them unclipping, but it’s certainly more than I’d like.
After my experience at 17 degrees, I not so enthusiastically swapped the cleats around to the 13-degree release set up. What a game-changer that was; a more familiar feeling, although still different from my norm, and a completely different experience from the 17-degree. Only after the swap was I really beginning to click with these pedals! (See what I did there?) There are only three clicks of tension adjustment on offer and I really thought Time had missed a beat here, but after some experimenting, I tensioned them up to max and left them. The retention is so solid that I haven’t felt I needed them any tighter.
Using the XC6 pedals exclusively on my Shimano XC-901 cross-country shoes, they feel nice and solid; there’s no fouling with the sole or anything unexpected while clipping in or out. They feel noticeably more locked-in than other systems I’ve used and feel extremely positive under power. There’s almost no torsional movement or rocking of the shoe once clipped in, and no ‘up and down’ play between pedal and cleat either, just a very secure feeling all around.
After spending a few months on the pedals I’ve been impressed, they’ve done their job without skipping a beat and I’m now surprised Time pedals don’t feature more on people’s bikes, particularly in one of the more popular ‘trail’ styles that Time offer.
Clipping in is more or less the same as what I’m used to, a positive feel, and an audible click as the cleat snaps into place. Compared to what I’m used to, there’s a more progressive feel as you unclip, a slow build of tension before it pops free, rather than the firmer ‘snap’, almost instant, feeling I’m used to.
While out of the saddle pedalling up steep inclines, I’ve occasionally felt my shoe moving forward and backwards a fraction. I’m putting this down to the bars of the retention device moving a smidgen, they’re basically two springs so I figure they’ll move slightly in some scenarios. Not a biggie and by no means a deal breaker, but it was a bit unnerving at first although it’s only in extreme uphill scenarios when it is noticeable.
Thus far the only wear on the pedal body is cosmetic, and the cleats have lasted well, although being brass I wonder if they’ll wear quicker over winter in some slop. My only real concern is noticeable groves wearing in front of, and behind the cleat on my shoes, the mechanism has worn into the carbon sole slightly. This isn’t a worry yet, although I’ll be interested to see it in another six months. I do wonder if they “bed in” and then stop wearing any further. I know other pedal brands offer “shoe shields” but Time doesn’t appear to; these would remedy this I’m sure.
After spending a few months on the pedals I’ve been impressed, they’ve done their job without skipping a beat and I’m now surprised Time pedals don’t feature more on people’s bikes, particularly in one of the more popular ‘trail’ styles that Time offer.
If you’ve had knee or hip issues in the past, want pedals that clear muck exceptionally, or simply want something a little different from your mates, then don’t look past the Time pedals!
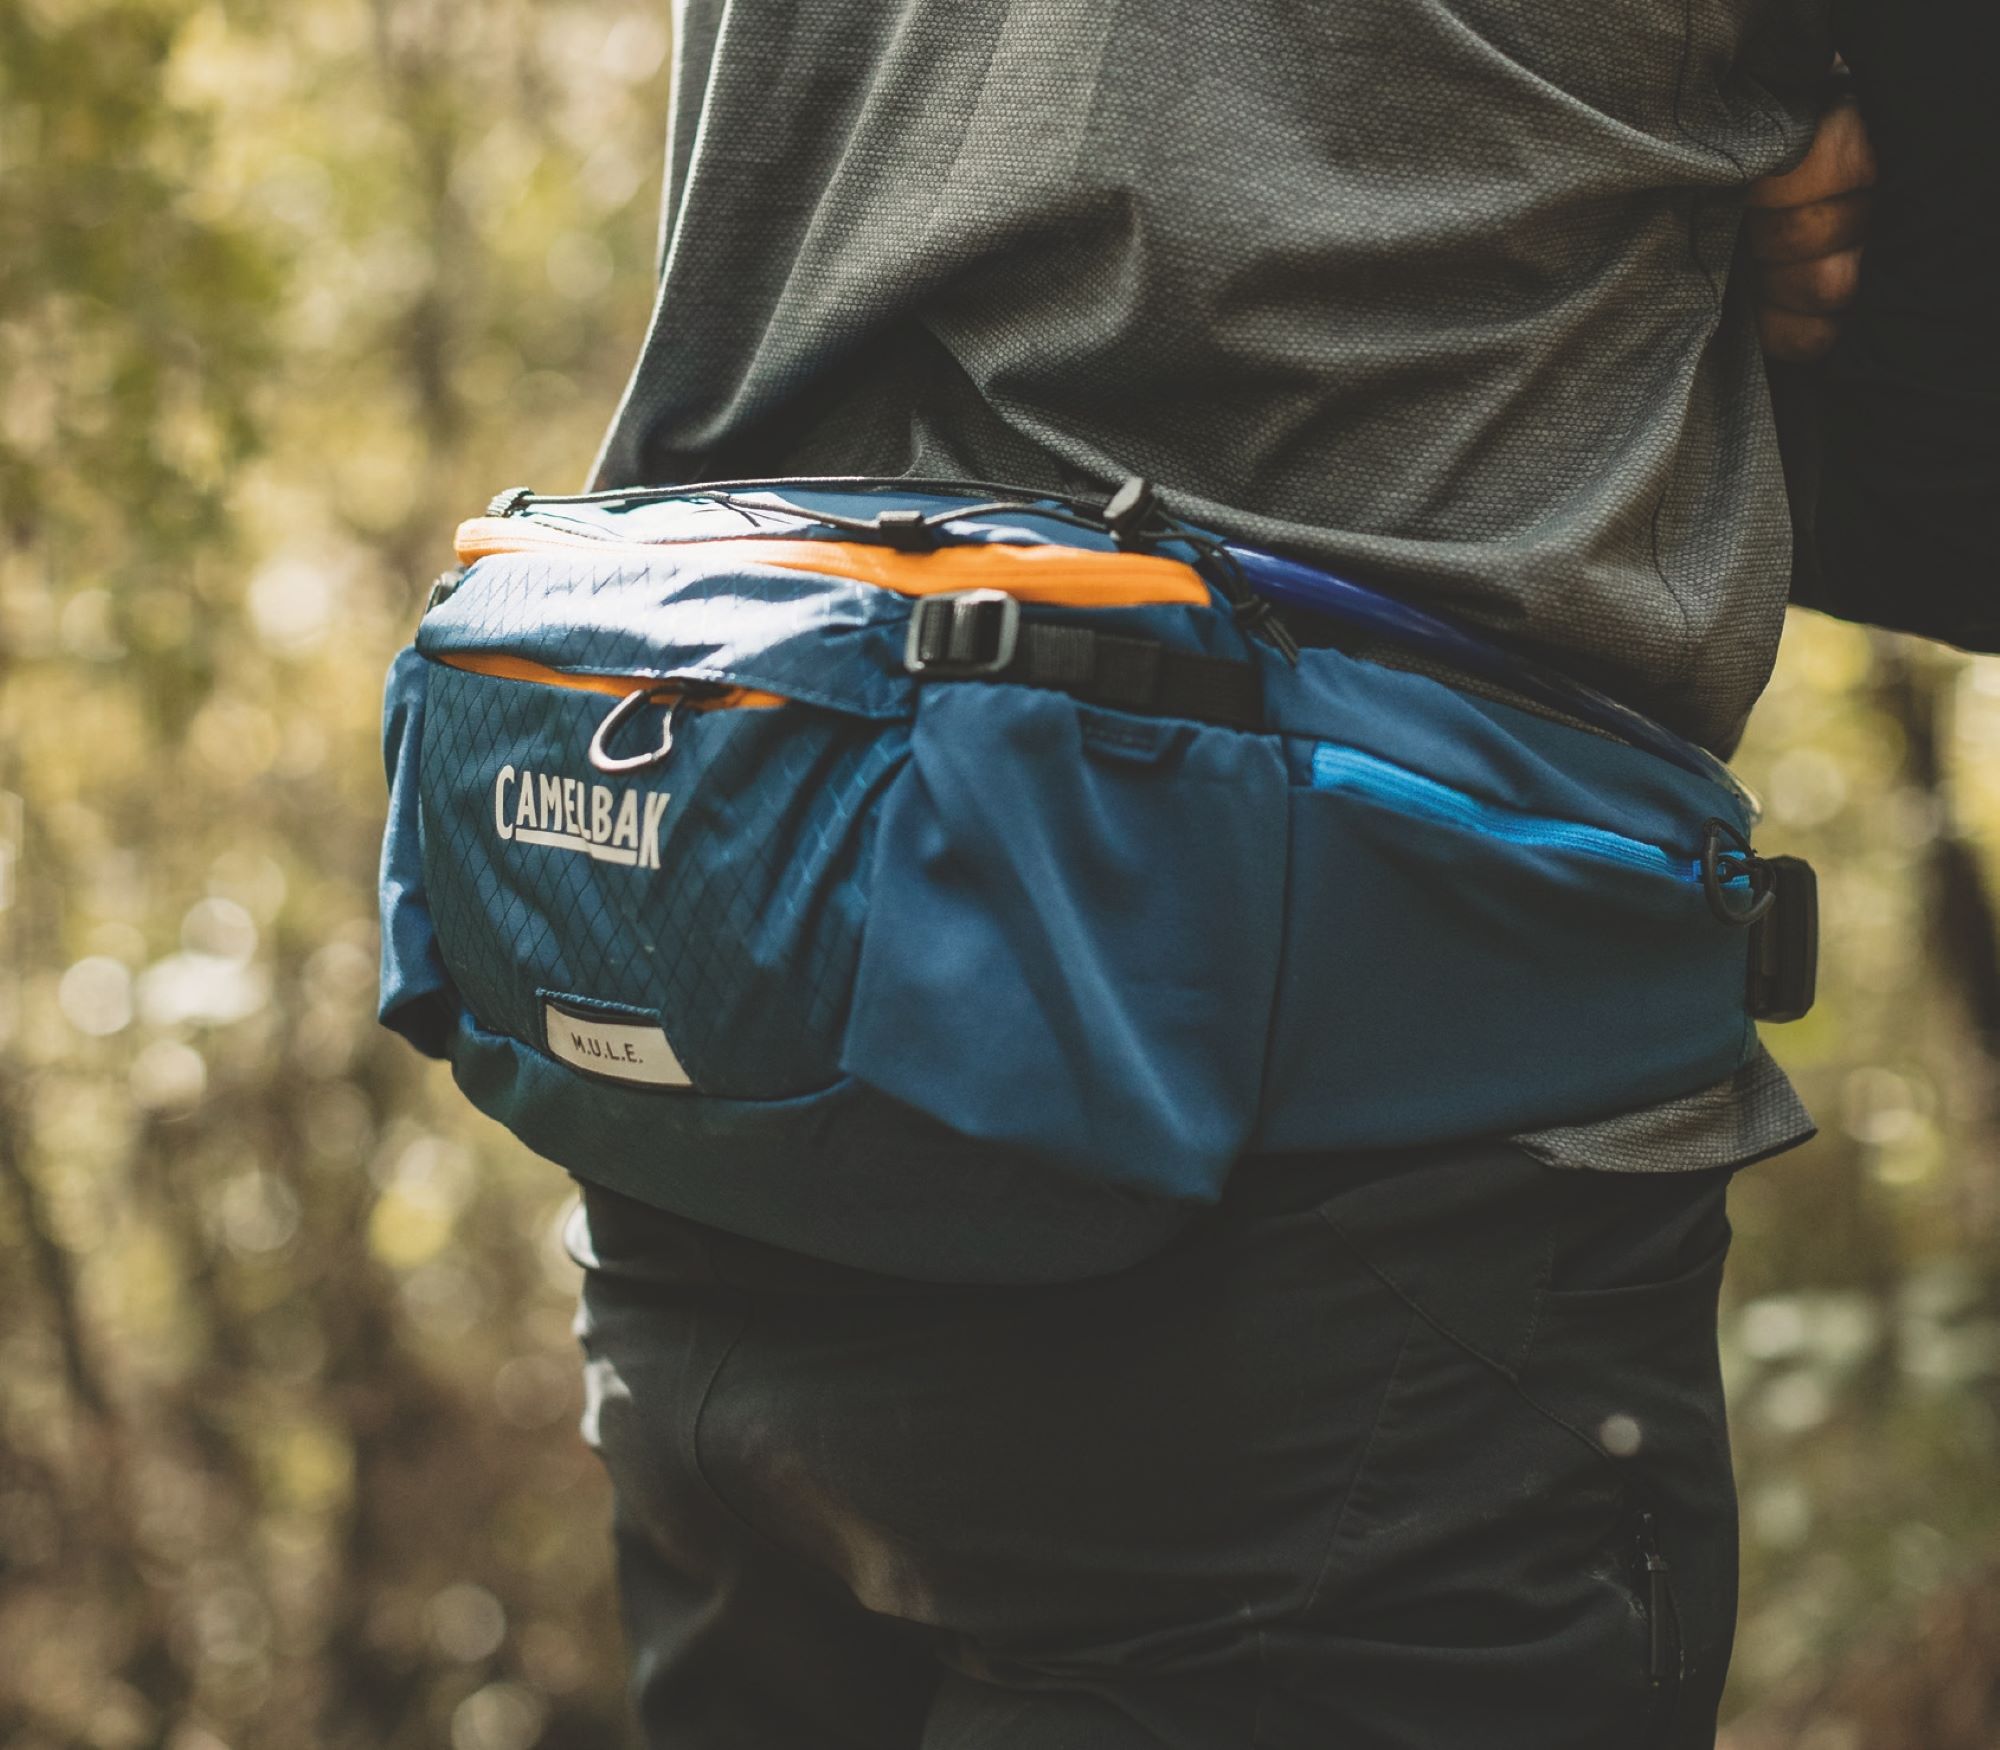
CamelBak M.U.L.E 5 Waist Pack
Words Lester Perry
Image Cameron Mackenzie
RRP $179
Distributor Southern Approach
Let’s face it: most people avoid riding with a backpack at all costs, particularly on hot summer days. Out on the trails, we see all sorts of things strapped to bikes, but if you’re hoping to go further afield and into the outback then you need more than that tube, a CO2 canister and a tyre lever strapped to your top tube, let alone the need for extra hydration.
The CamelBak M.U.L.E is a worthy attempt to solve the problem of not wanting to wear a pack, whilst carrying almost as much gear as a small pack, along with some extra hydration. The hip-pack weighs in at 320 grams and offers a 3.5-litre capacity. It’s sewn from a hardwearing, lightweight 200D Nylon Ripstop material. An Air Support back panel helps with airflow between the pack and the body, using an open mesh and foam combo to help air move between the two.
The M.U.L.E has lots of storage options; the main compartment has a pocket for the bladder and some internal pockets to help keep small items in place and right where you put them; and there’s also a smaller outer pocket. On either side of the main compartment are bottle holders, designed for a regular-sized CamelBak Podium bottle but ideal for whatever you want to stuff in them. The waist strap helps support the load on the hips and adds stretchy pockets with envelope closures on either side of the main compartments, ideal for small items you want easy access to without needing to rotate the pack forward. Compression straps can be cinched up to hold the contents in place and help keep the weight close to the body. Along the bottom of the pack are some elastic loops, offering additional external storage, ideal for a jacket, large salami, or half-eaten baguette.
The M.U.L.E comes supplied with a Crux 1.5L hydration bladder, offering effortless access for your sipping pleasure thanks to its nifty QuickLink magnetic holster and high-flow bit valve. If you wanted, you could forego the bladder and add bottles to the side pockets for a more versatile and adaptable setup.
Having a waist pack on some of our hottest days, rather than a full pack, has been great - it’s so much cooler to wear.
As you can see, there’s quite a lot going on with the M.U.L.E. I’ve found it a versatile piece of kit, using it on some lengthy rides, sans bladder, mainly as a place to stow some tools, food, and a jacket, while keeping bottles on my bike. I’ve generally left it loaded up after each ride so I can just clip it on when I’m heading out for a dawn raid, knowing I’ve got everything I need for every eventuality, within arm’s reach. Having a waist pack on some of our hottest days, rather than a full pack, has been great – it’s so much cooler to wear. Without a full bladder in there, the capacity is quite large and I can’t imagine anyone would need anything bigger than this to carry a day-trip worth of gear.
On adventures where I’ve added the 1.5-litre bladder into the mix, I’ve found the pack quite heavy, probably a good couple of kilos hanging off my hips. When I was breathing heavily while seated (think a steep hour-long climb) the waist belt got in the way of breathing freely – not ideal. Trying to remedy this, I’ve taken to fitting the strap as low on my hips as possible; this helps to a point, but doesn’t solve the problem. I have found it’s better suited to riding a more relaxed, upright position (i.e. on an Enduro bike) and when I’m not puffing hard it’s certainly not as noticeable.
Does it work well? Yes. Is it comfortable and unobtrusive to use? Sort of. It’s comfortable to wear and I’ve appreciated being able to have a bunch of kit on hand, but when the bladder is full, all that weight hanging off my hips and interfering with breathing kills the advantages of using it for me. I’ll keep using it to carry gear and food when required, but only use a full bladder when there’s really no other option.
Small Victories: Celebrating a 40th following a spinal cord injury
Words & Images Chris Owen
Turning forty is a milestone that deserves a decent celebration. A couple of years ago, I was on the verge of hitting the big Four-O, but it was hard to believe… How had I been a ‘grown up’ for that long? When it came to the good times I had on bikes, it didn’t seem I had progressed far from adolescence really!
I’d spent a good part of my adult life riding bikes, and the things I loved about it hadn’t changed since I was a kid; doing skids, hucking off stuff, and trying (failing?) to go faster than my mates – all put a big grin on my face. And, of course, that surge of adrenaline and relief you experience when you ride out the other side of something terrifying.
On the 10th of September 2022, I suddenly felt my age pretty significantly, following a crash that was one for the books. Bike parks often promote the ‘Pre-Ride / Re-Ride / Freeride’ approach to hitting new or re-built trails, and a popular jump line had just re-opened after having some work done on it. I was keen to sample the new features, but I was also in a hurry to get home and keep promises to my wife – no time for pre-rides or re-rides. Bombing down the trail, I overshot a jump at full pace and, looking ahead with horror, saw what was about to happen.
The second my wheels touched down, way past the landing, my bike ploughed into the back of a freshly built berm. The result (after getting flipped upside down and clipping a tree), was twelve broken ribs, a split diaphragm, three broken vertebrae and a spinal cord injury. In a split second, some bad decision making had changed my life.
The weeks and months following the crash pushed my body and my mind to their limits. I spent four months as a patient in Burwood Hospital’s spinal unit, full of uncertainty about what the rest of my life was going to look like. Burwood is an excellent facility, but even the most qualified doctors were reluctant to tell me whether or not I’d walk again. When your lower body suddenly goes offline and you don’t know whether you will get it back, it’s terrifying; there is so much to process. At Burwood, I felt like I’d been plucked out of my ‘normal life’ into a whole new world; one that involved wheelchairs, catheters, an endless array of medication, and a total invasion of privacy. The first few evenings there were the hardest; after visitors left and the ward was quiet. In those moments, negative thoughts, anxiety and fear tried their best to consume me.
Reflecting on my time in Burwood, I consider myself one of the lucky ones, for so many reasons. Firstly, I didn’t hit my head. Secondly, I did have a shot at getting back on my feet, due to the way I’d damaged my spine – it wasn’t certain, but if I put the work in, I may just walk again. More importantly, though, my accident taught me just how much the people in my life cared about me. I was deeply moved by the ongoing flow of love and support I received. Collectively, everyone strongly believed that I would crush my recovery, and this lit a fire under me – I had so many incredible people in my corner, I was seriously motivated to work as hard as possible; not just for myself, but for them as well.
Amongst the patients at Burwood were some inspirational people who became close friends. They helped me realise that the hard work started in my head. I learnt early on that I couldn’t let negative thoughts see the light of day. Easier said than done, but crucial to getting out of bed every morning, into a wheelchair, and down the hallway to physio. I did my best to focus on the present – I tried not to pay attention to the sheer scale of work that lay ahead of me. It became obvious pretty quickly that this recovery was going to be a slow grind, so I chose (and still choose) to celebrate the small victories. It was all about the small victories. Focus on the battles, don’t think about the war. Block out thoughts about the future, just visualise walking out the front door on discharge day. Most importantly, believe in myself. There were plenty of rough days when this mindset went to the dogs. But, for the most part, I tried to see life through this lens, and so I went to work.
Fast forward to November 2023: it’s been a heavy year but I’m on my feet, and even better – I’m back on a bike! I discharged from Burwood by walking out the front door just as I had imagined. But, despite that milestone, I’m not out of the woods – a number of leg muscles still lack proper function, and it doesn’t take much to absolutely exhaust me. It’s still uncertain how much strength I’ll get back but, after everything I’ve been through, I’m insanely grateful to get this far. It’s been months of life on repeat, working with a cast of amazing people: physio, acupuncture, hydrotherapy, gym, Pilates, work, family time, rest. Rinse and repeat weekly. The progress is glacially slow, but there is always noticeable improvement every week or two, even if it’s minimal. That’s all the motivation I need to keep going at it. Small victories.
Focus on the battles, don’t think about the war. Block out thoughts about the future, just visualise walking out the front door on discharge day. Most importantly, believe in myself. There were plenty of rough days when this mindset went to the dogs. But, for the most part, I tried to see life through this lens, and so I went to work.

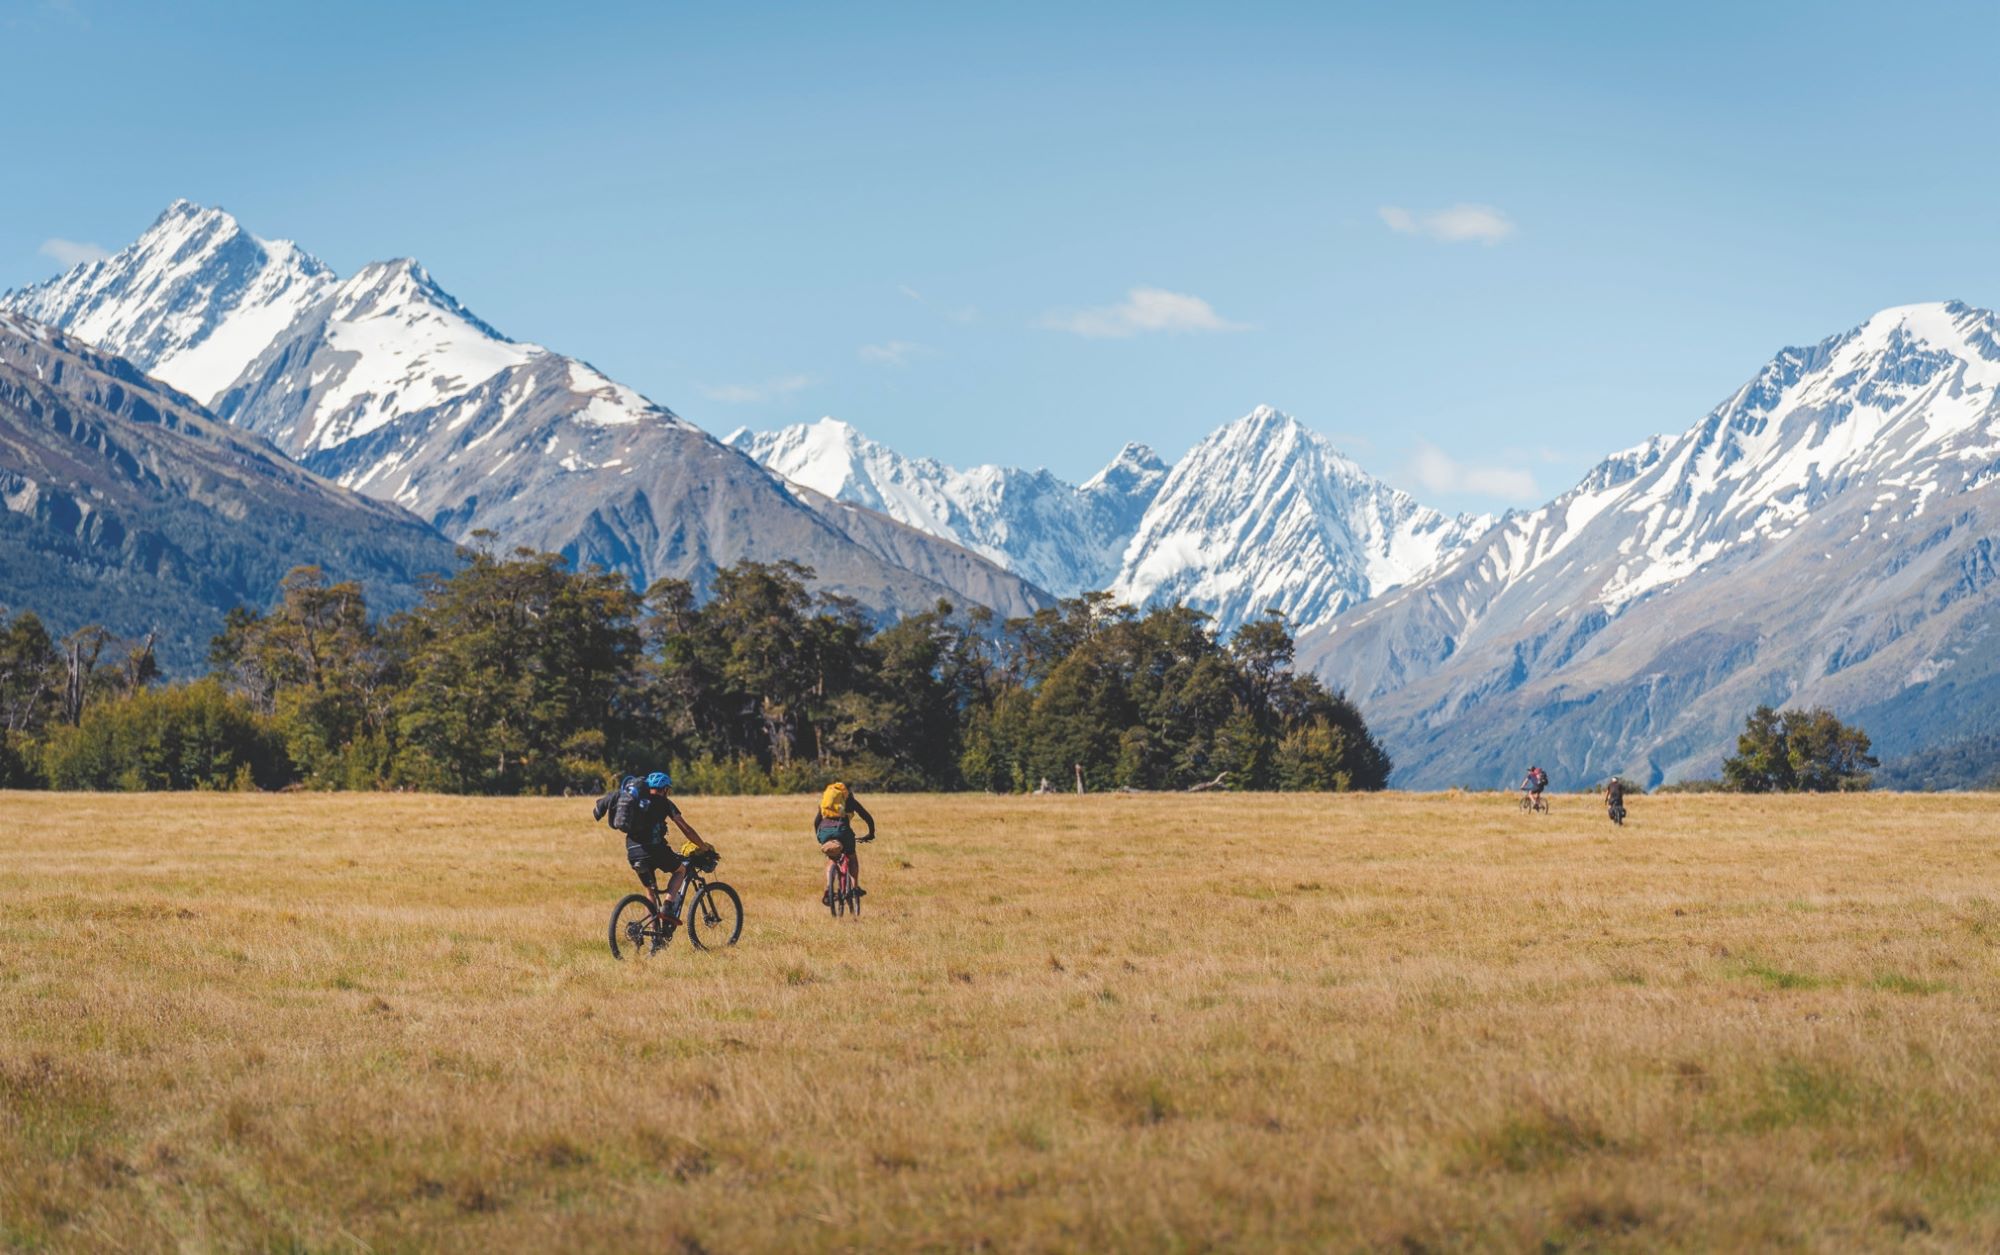
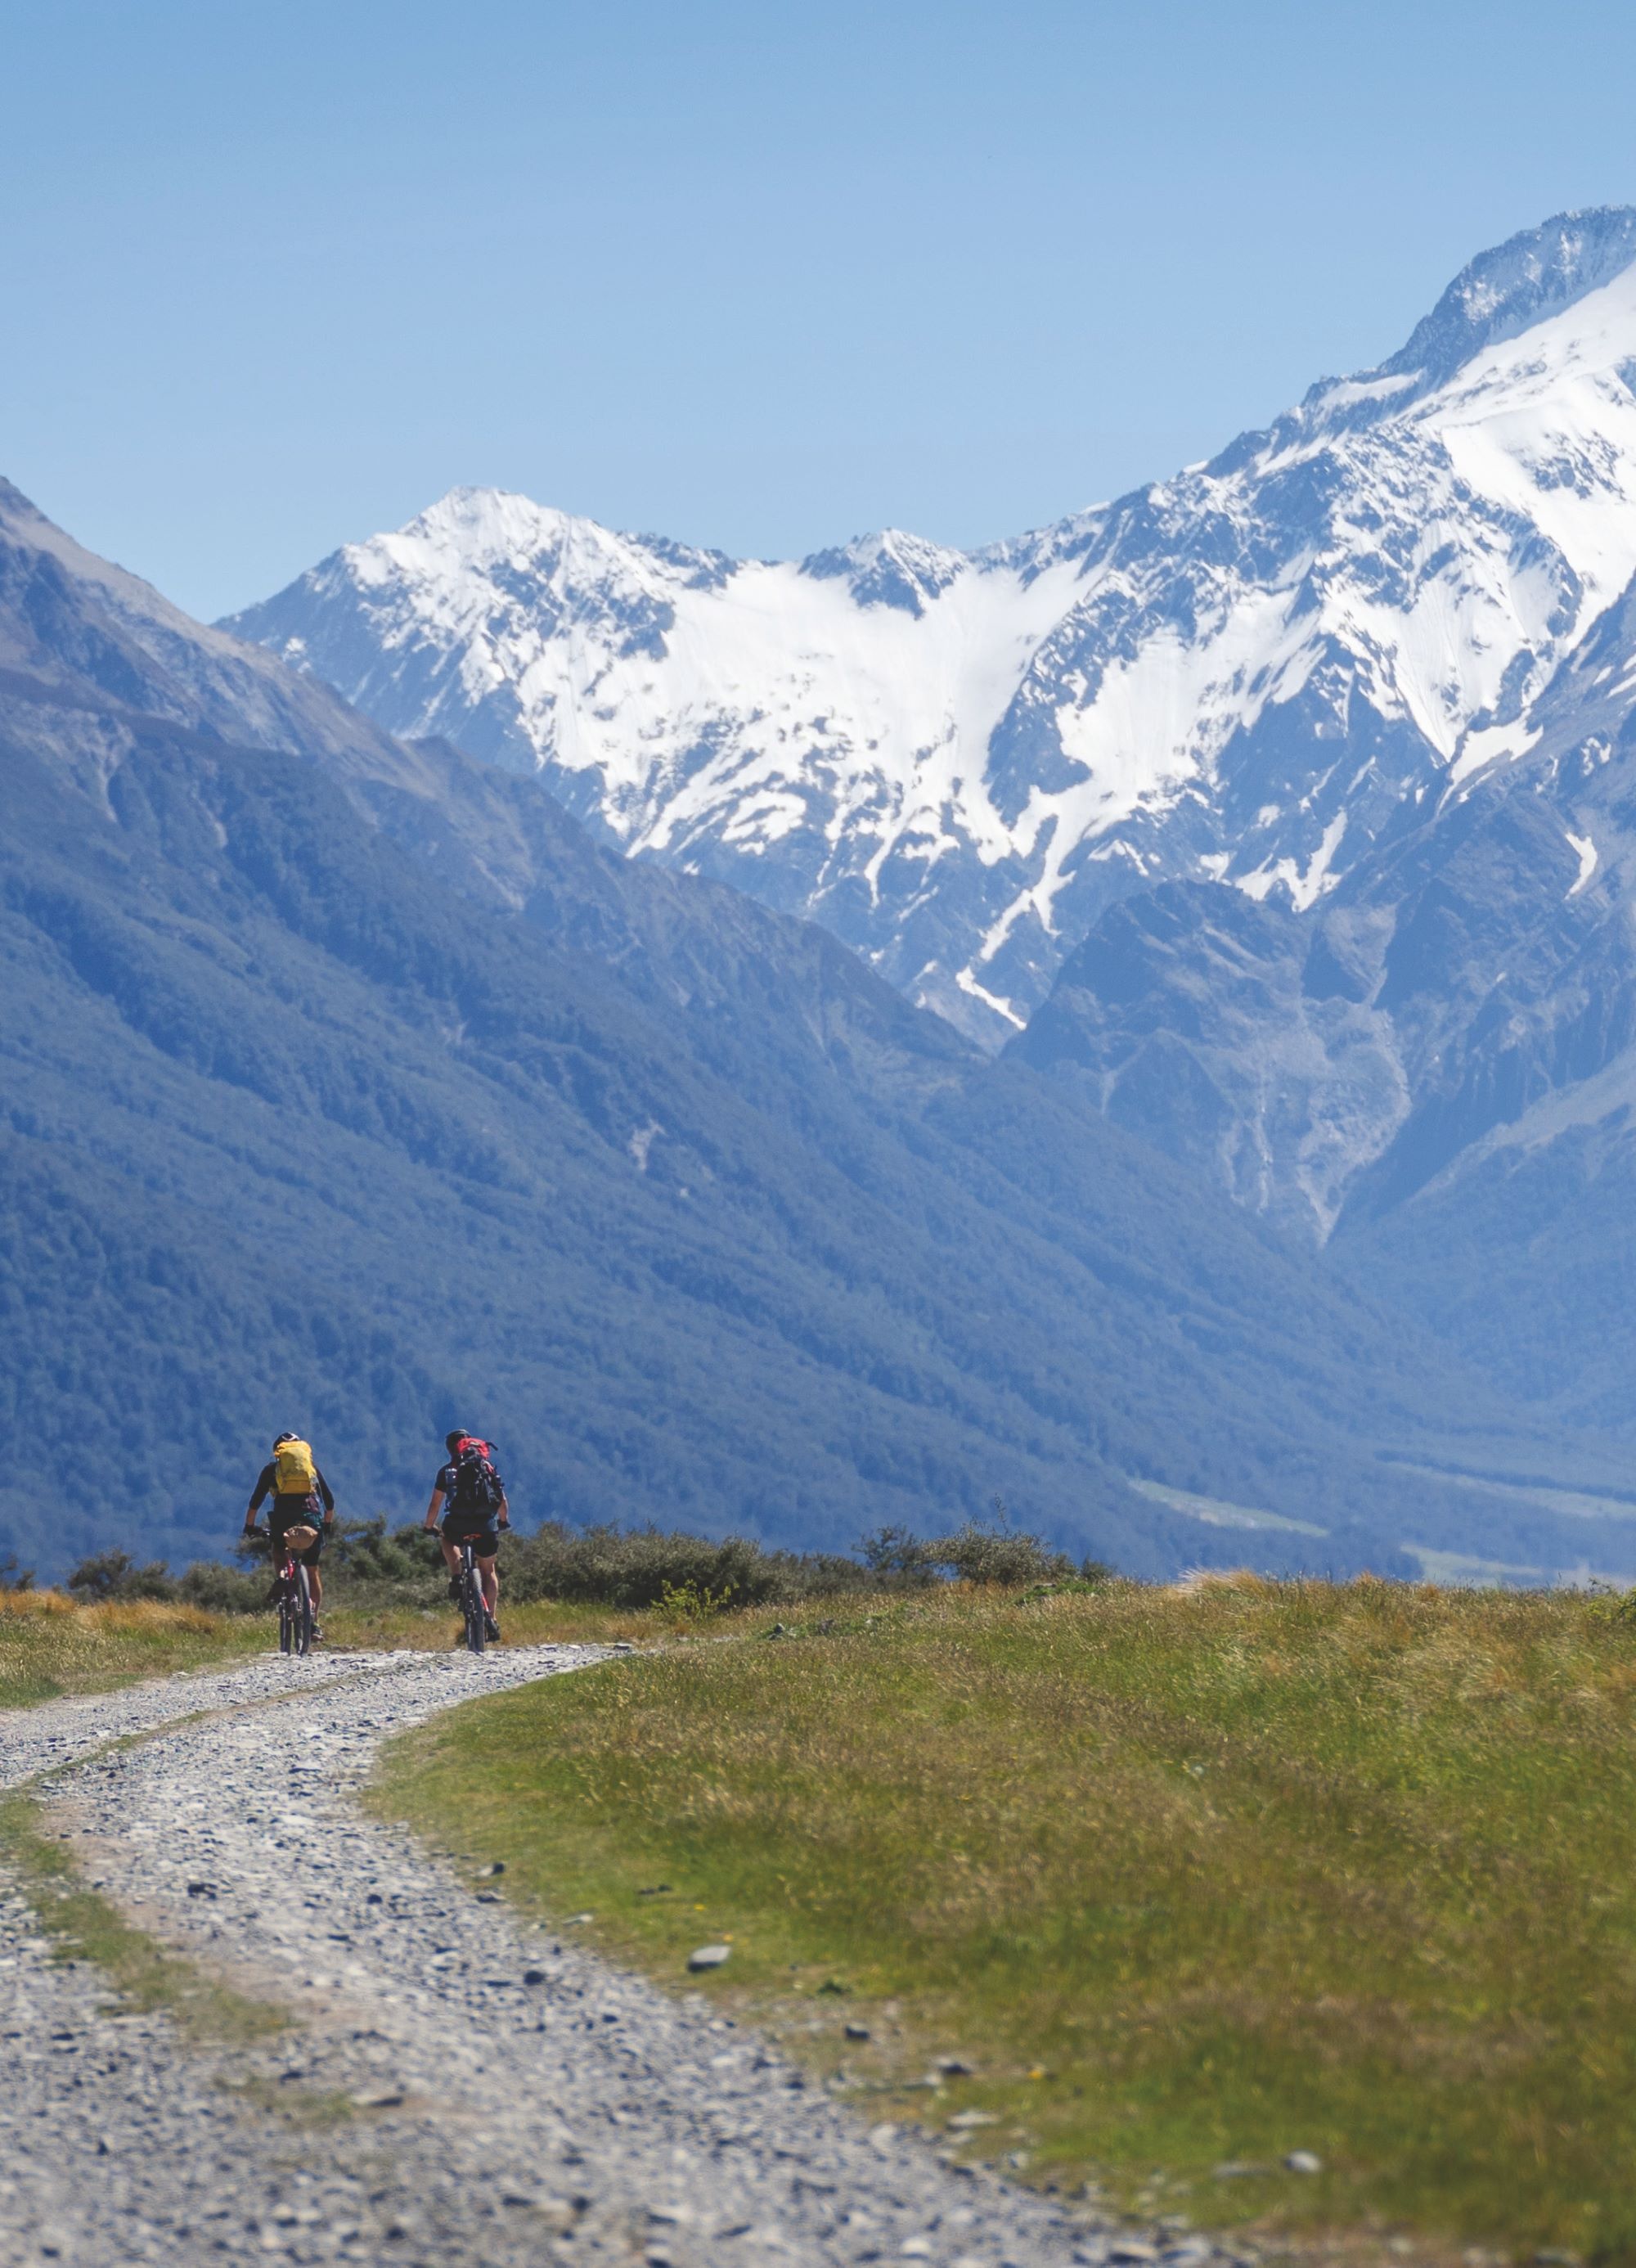
Seemingly out of nowhere, my 40th is just around the corner and, aside from special time with my beautiful wife and cheeky children, there’s only one way I want to celebrate it – on bikes in the mountains (eBike for me), with my mates and my brother. Doing something that, for a while, looked like it may never be possible for me again. Group chat created, keen participants locked in, route and hut suggestions getting thrown around. Lots of ideas are kicked to the curb. Understandably, everyone is concerned about what I’ll be able to manage. I convince the boys an overnighter in the Hopkins Valley is perfect, based on my very faded recollection of a climbing trip there 11 years ago. I sell it as a cruisy pedal up a flat valley, mostly 4WD track with a few shallow river crossings. Sold. Packing starts in earnest, including all the usual bikepacking and camera gear as well as crutches, a bag of meds, and bathroom consumables (if you know, you know… if you don’t, ignorance is bliss). It’s the night before, forecast looks perfect, and I can’t wait. I decide to dig out the photos from that climbing trip, years before. I notice suddenly that the ‘shallow’ river crossings I recalled were actually knee-deep and swift, in more than one photo… Hmmm.
The drive down is great. I can’t believe I’m on the road with mates, heading into the hills, after the year that has just passed. Unreal. It’s a thought that sticks with me all of Friday evening and well into Saturday morning as we set off up the valley. We enjoy a chilled 4WD trail for the first few kilometres, but suddenly we are faced with our first river crossing. It’s definitely not shallow, but it’s not ridiculously deep either… it’ll go. One by one we egg each other on as the acoustic bikes get across with a few near-swims, and a lot of laughs. Then it’s my turn – I’ve done my research on the Turbo Levo’s waterproof rating, now it’s seriously about to get tested. So is my skinny right leg – if I mess this up and have to tripod quickly, there’s a fair chance the leg will just buckle, and I’ll go down with the ship. Stop thinking, start pedaling. I charge at the river and emerge on the other side upright and grinning. The boys are cheering, and so am I. More importantly, the bike is still working!
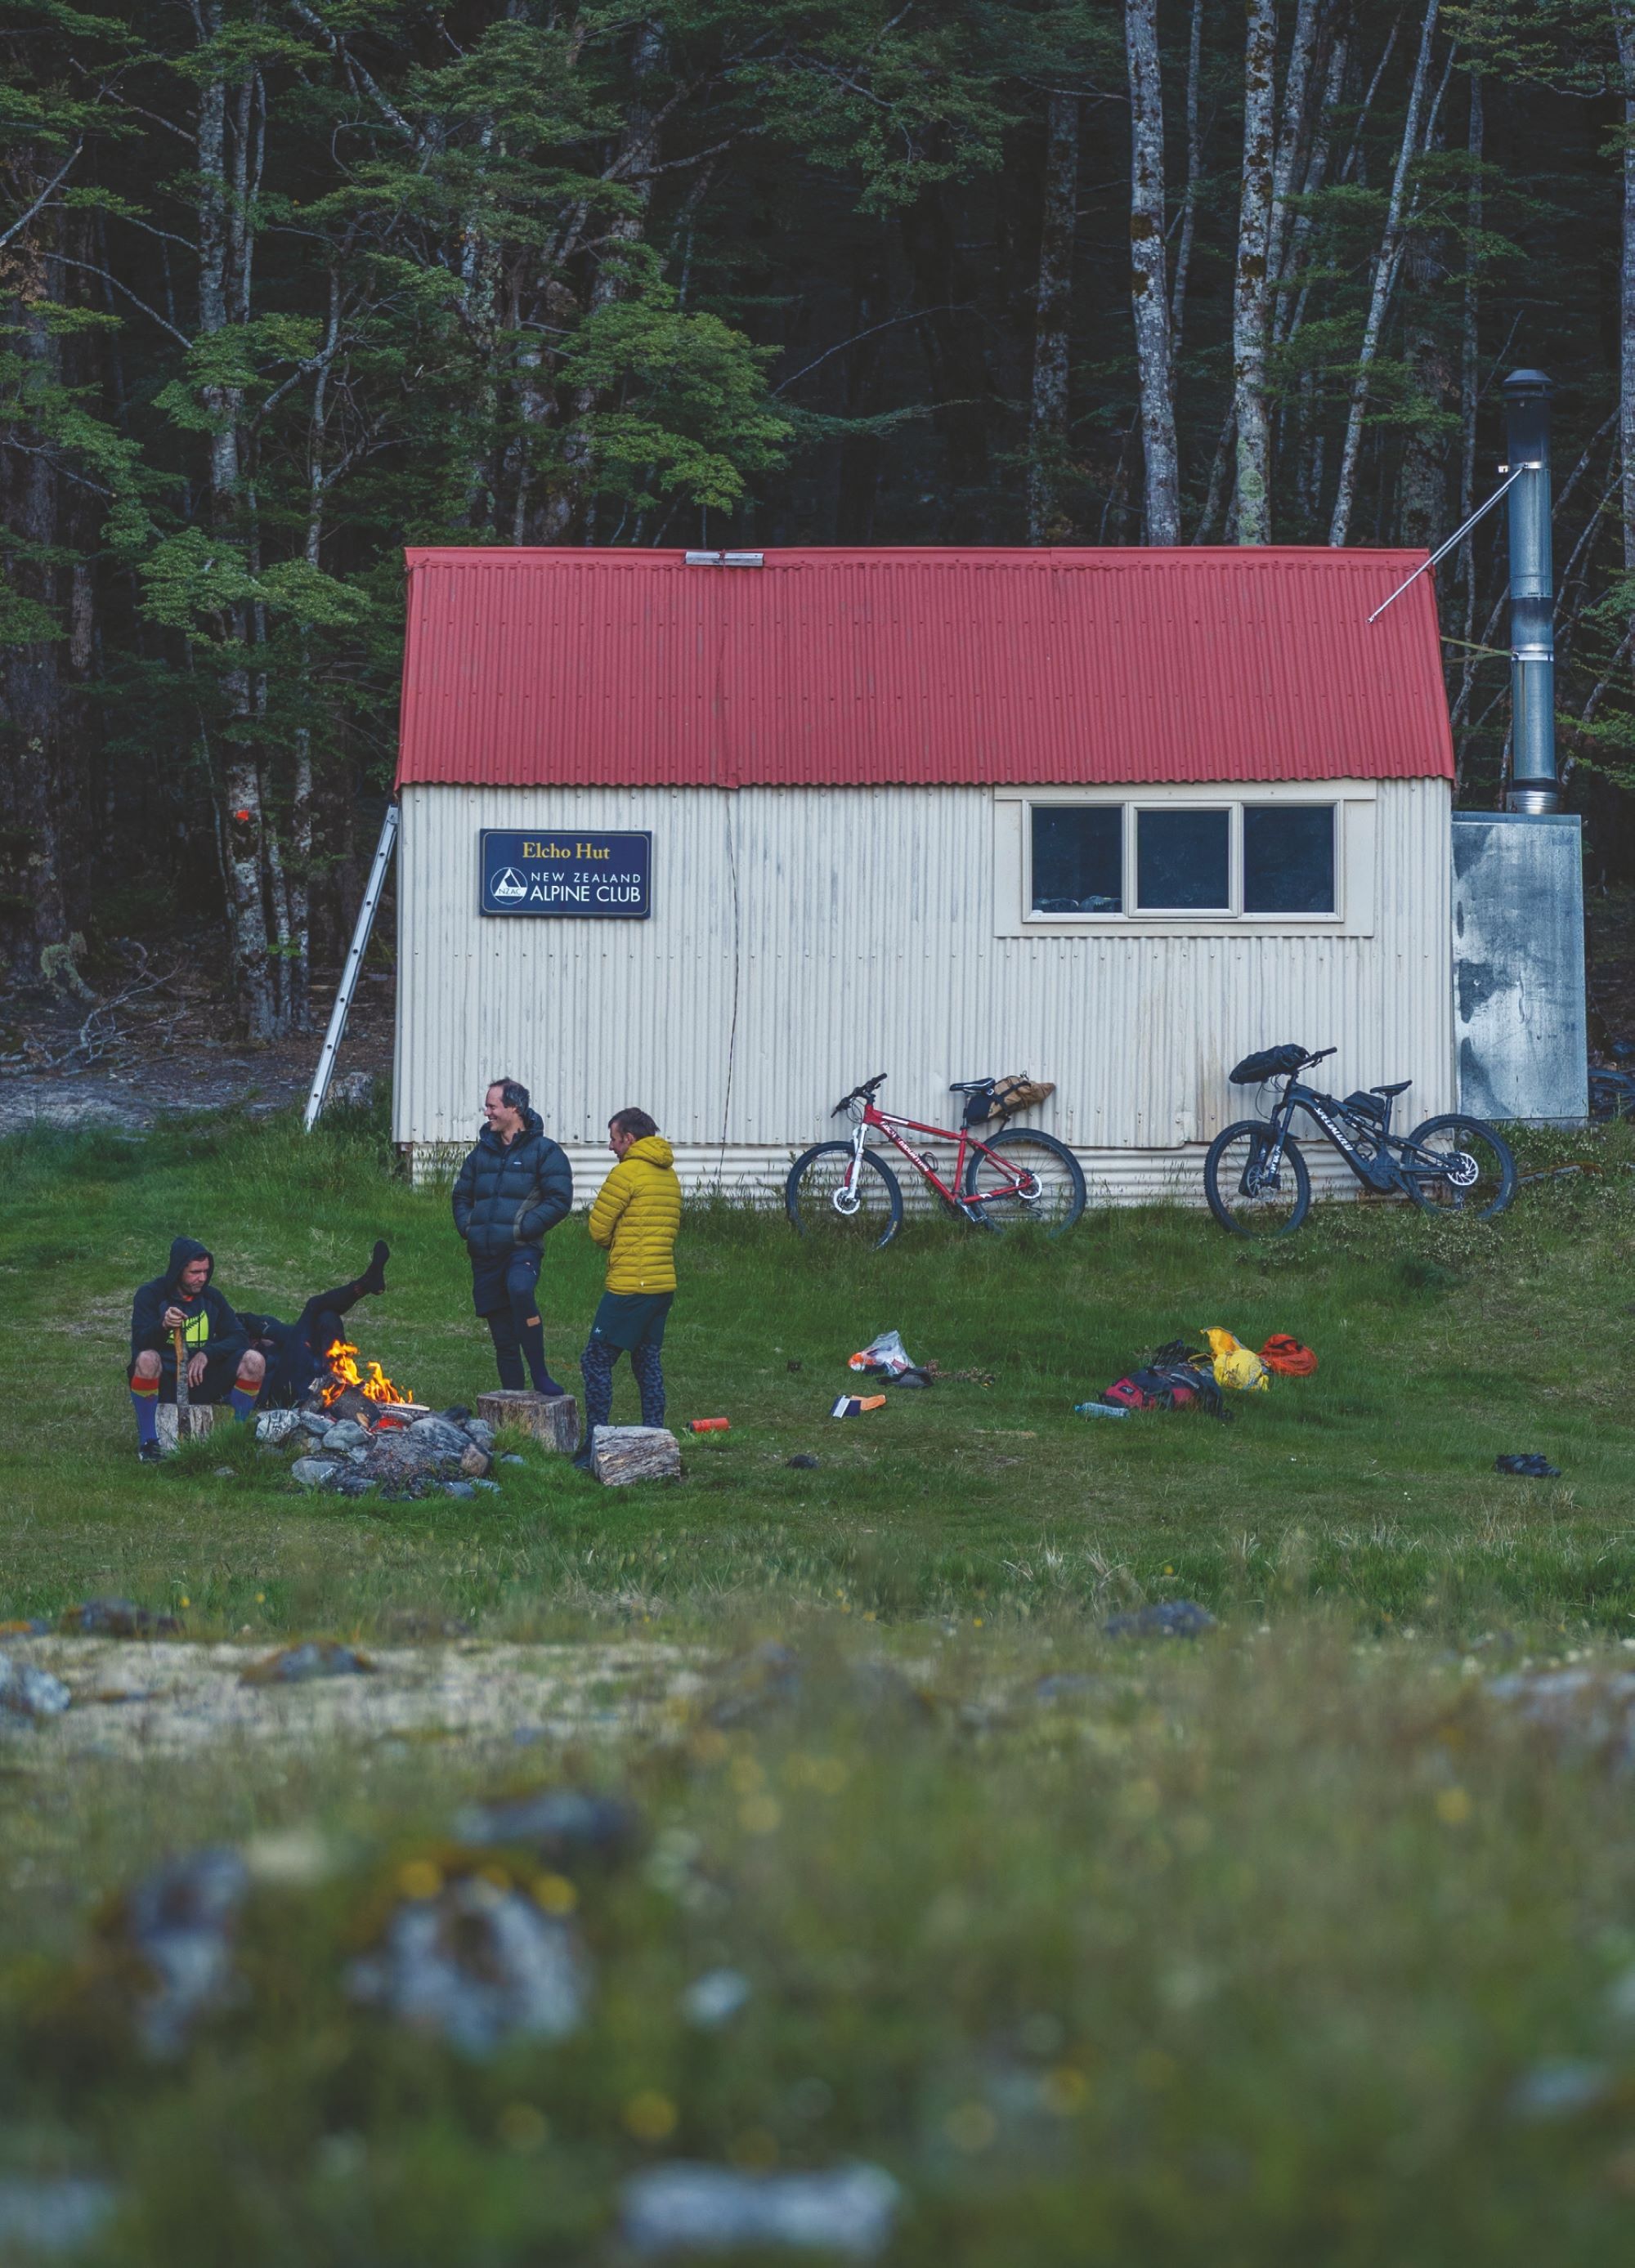
That first crossing sets the tone for the next two or three hours; weaving our way up the riverbed, carefully looking for good spots to cross, then going for it. The kilometres fall away and our bed for the night, Elcho Hut, is only a couple of km’s away. I couldn’t be more content.
Suddenly, we’ve arrived at a bottle neck. On our right, the river has become noticeably deeper and swifter. Even the strongest amongst us (including an ultra-runner and a 6-foot sheep shearer) reckon it’s dicey, let alone for a bloke with semi- functional legs! We have no choice but to explore options on our left, where the river cuts in abruptly against the bush. Looks OK on the map, just have to link up with the nearby tramping track. The boys can portage my bike along the track for about 500m while I hobble along it on crutches; all good. Except, it’s not…. the boys find the orange track markers amongst an ocean of windfallen trees and thick saplings. Pretty average terrain to push a 23kg eBike through, loaded with gear! Regardless, everyone gives it a damn good go, trying to clear a path, knowing that it looks like our only option. To me, that shows the character of guys I’m privileged to be here with. They have my back, just as they have right through this injury.
I feel a bit helpless, sitting on the riverbed while everybody else is working so hard to find a way through. We regroup, confirming my worries – the bush route’s just not going to work. At this point, I notice the fatigue starting to creep in. I know this feeling after limping home from physio more times than I care to recall, and it means my body is on the gas light. I won’t have the energy to backtrack five hours to the car. Nobody says it out loud, but it’s looking like an unplanned night in the bush could be on the cards. Everyone spreads out on one last recce. We might be in luck: Phil thinks he has found a goaty little route sandwiched between the bank and the river’s edge, about one foot wide in places, weaving under and over fallen trees. Beggars can’t be choosers, so we set out in single file – me on crutches and everyone else carrying bikes in one hand, balancing against the riverbank with the other. So far so good. After about 15 minutes of this procession, we are nearly through the worst of it. The last obstacle, a semi-submerged tree, has me doing my best to crawl/dry-hump my way over it, in an effort not to fall in the drink. We regroup on the river flat, chuffed. The Type 2 fun is over, and we’re looking forward to knocking it off with one last pedal.
Suddenly, we’ve arrived at a bottle neck. On our right, the river has become noticeably deeper and swifter. Even the strongest amongst us (including an ultra-runner and a 6-foot sheep shearer) reckon it’s dicey, let alone for a bloke with semi-functional legs! We have no choice but to explore options on our left, where the river cuts in abruptly against the bush.
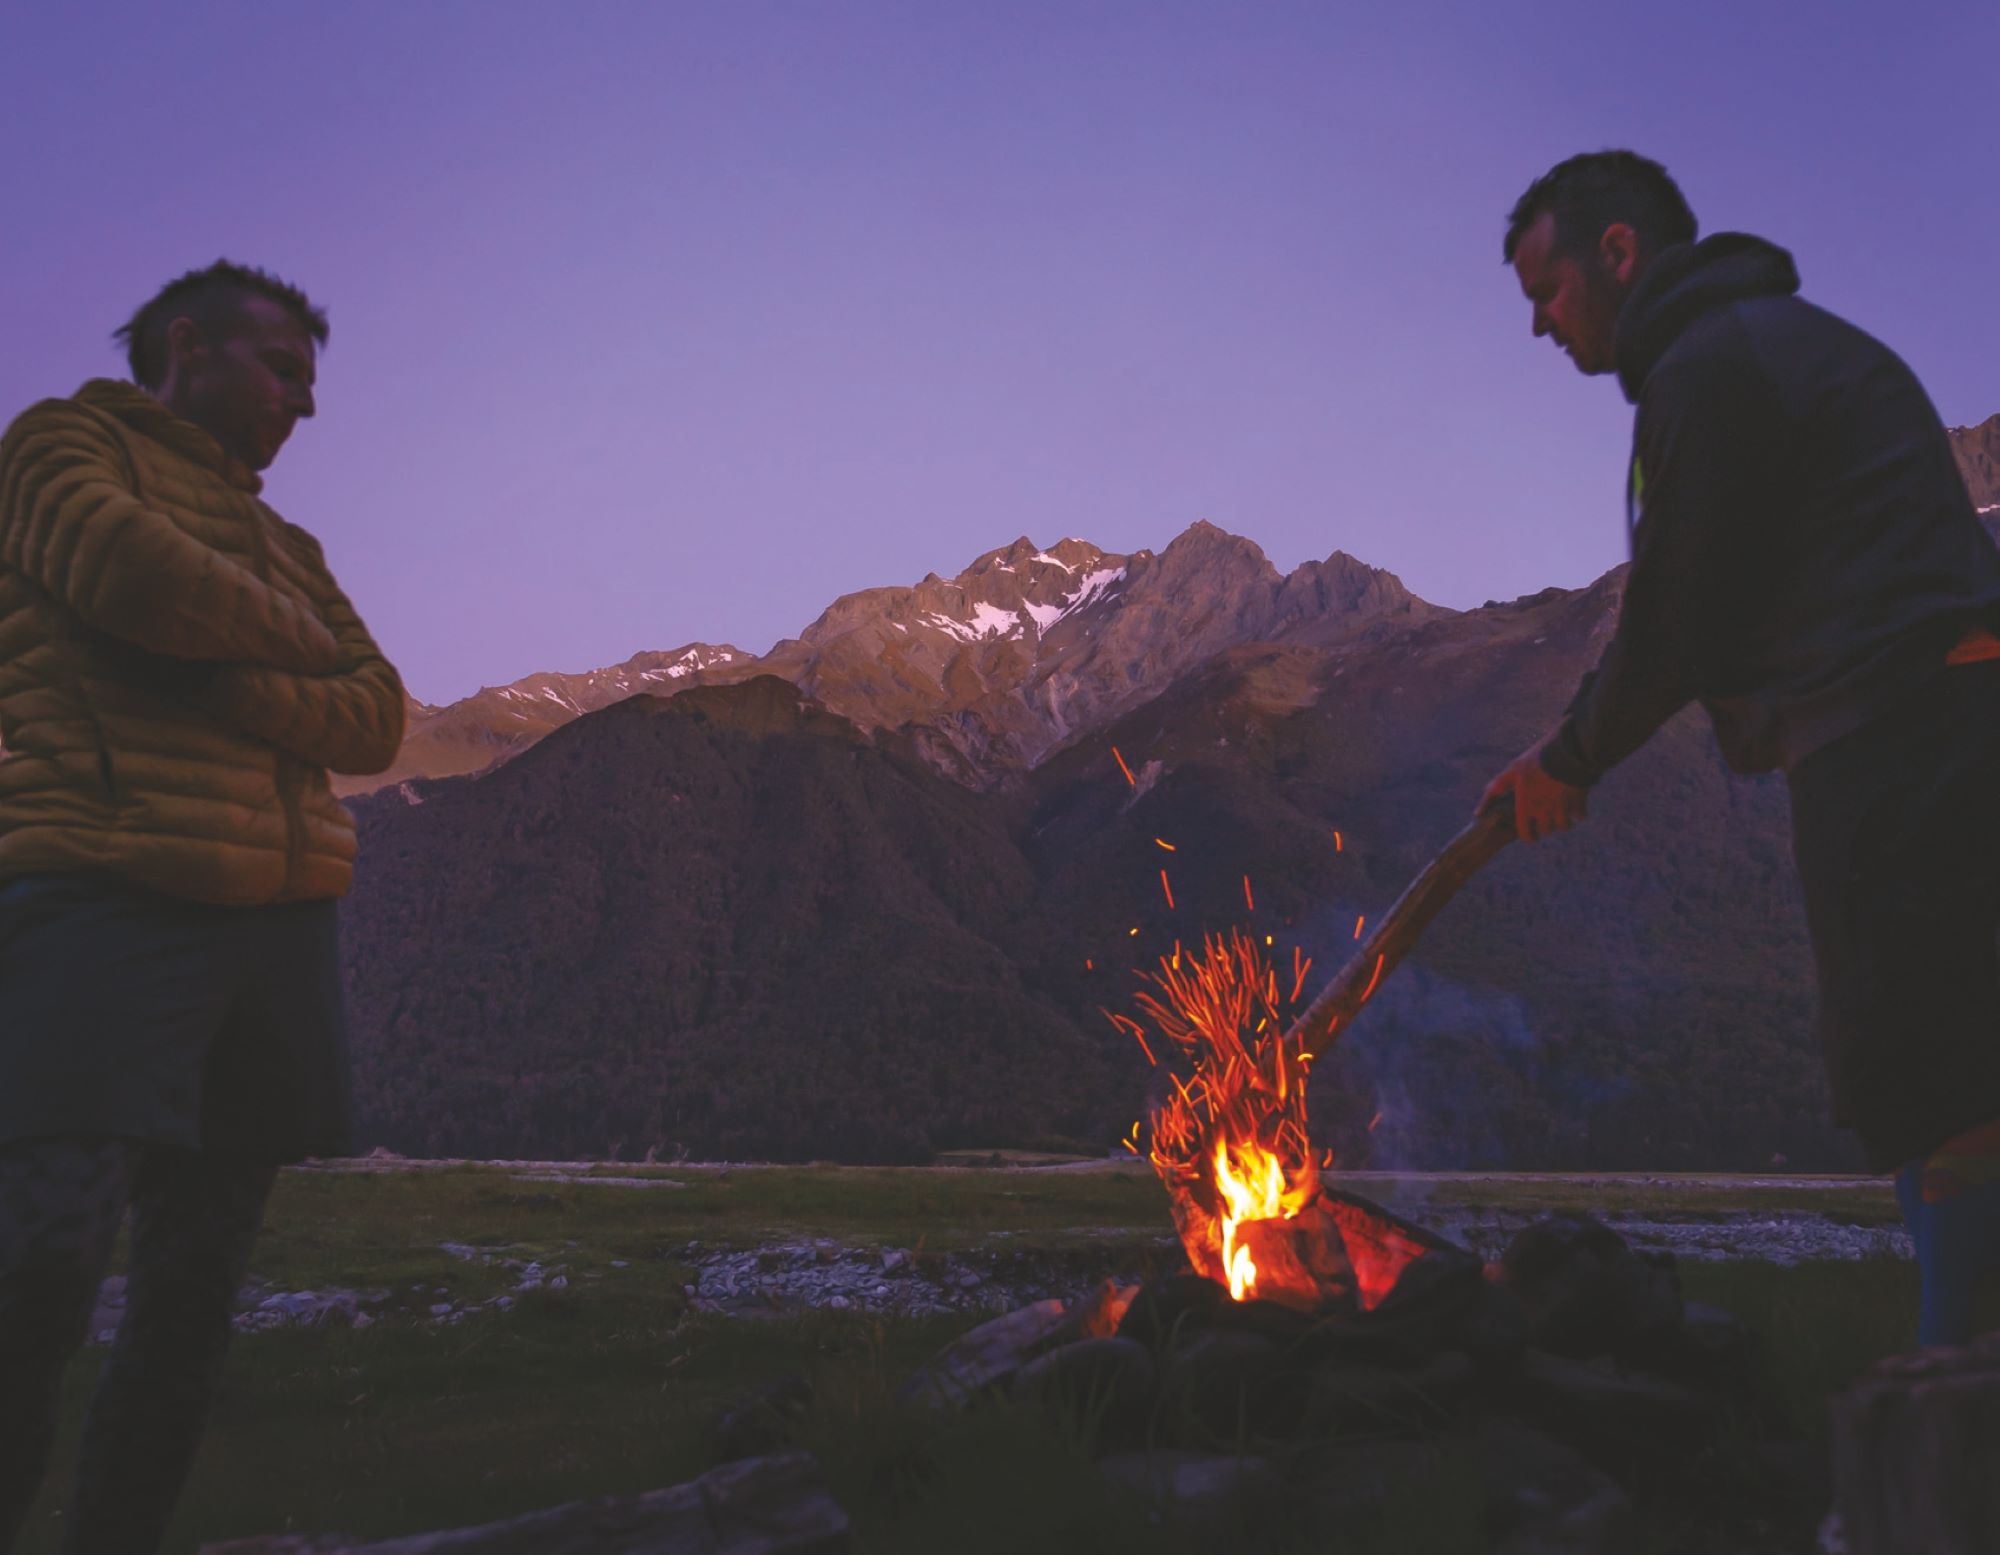
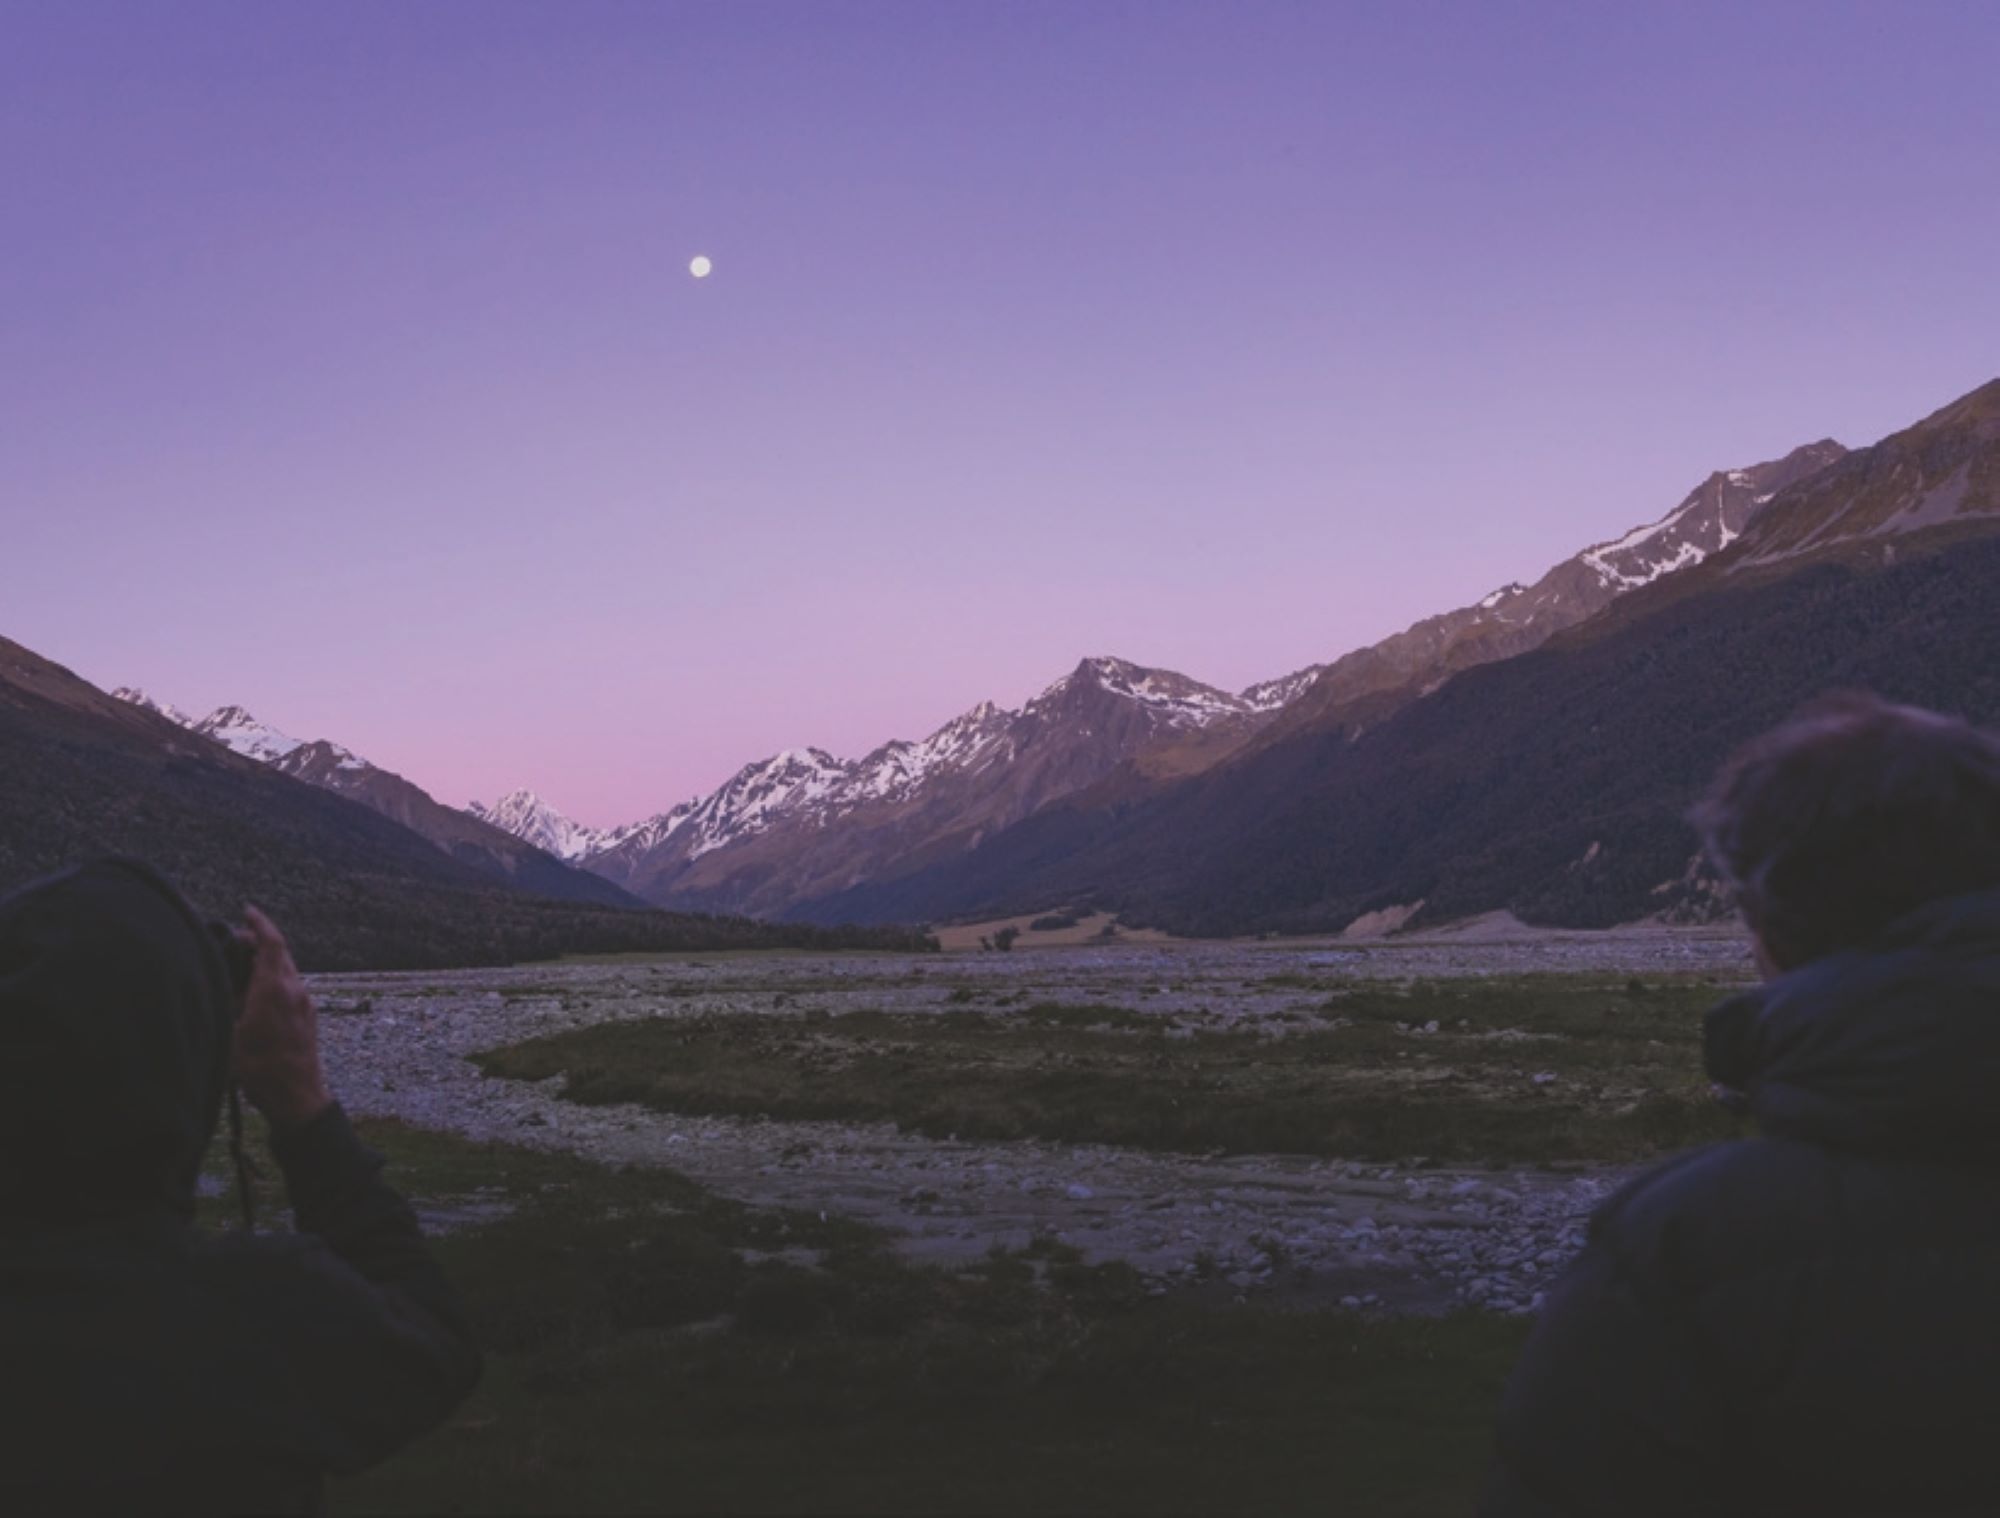
After everything I’ve been through, the privilege of being in this valley on a clear moonlit night with my bro and my mates, is not lost on me. What a way to turn 40.
The final, grassy river flat has us surrounded by a chain of snowcapped peaks, and it’s a pleasurable bit of riding after the last couple of hours. We all feel the relief at this point, roaring with laughter when Brion suddenly goes over the bars, courtesy of a camouflaged hole. Elcho Hut comes in to view, stoked. The evening is spent glassing for Tahr, taking pictures, swatting sandflies and spinning yarns. We are an eclectic mix of blokes, so the conversation topics are wide ranging to say the least.
I break away from the boys for a bit, camera in hand, and hobble around on the riverbed. As much as I want to enjoy the campfire yarns, I also want a quiet moment to enjoy what’s around me, and reflect on where I’ve come from. It’s been a wild year. I always thought spinal injuries happened to those at the pointy end of the sport. Truth is, we risk an injury of this magnitude every time we swing a leg over our bikes. Despite the issues I still face today, I’m immensely grateful that the injury wasn’t worse, and proud that my body has been able to repair itself to this point. I can’t ride the kind of trails I used to enjoy, and on a bad day, that fact hurts…. But this injury (and this trip) has taught me that just being out in the hills surrounded by good friends and family is what matters most. After everything I’ve been through, the privilege of being in this valley on a clear moonlit night with my bro and my mates, is not lost on me. What a way to turn 40.
“We don’t know how lucky we are mate” - Fred Dagg
Shimano GE700 Shoes
Words Lester Perry
Image Henry Jaine
RRP $249
Distributor Shimano NZ
If the shoe fits, wear it.
The GE7 is part of the latest range of redefined Shimano shoes. Much like the flat pedal- focussed GF6 we reviewed in our previous issue, the GE7 has received a new silhouette and last, as well as incorporated a host of Shimano’s latest tech and buzzword features.
Striking a healthy balance of inspiration from skate, MTB, and outdoor shoes, I’d say there are equal parts of each included in the design; the GE7’s styling doesn’t delve too far into any one category. Internationally. I see there’s a light grey colourway available with some nice earthy-toned accents – certainly in line with current fashion trends, but unfortunately this appears to be unavailable in NZ. If you like black then these will be right up your alley. And, fortunately, black goes with everything! Want some colour in your life? You can step up a level to the GE9 – essentially the same shoe but with a BOA tensioner.
I’m roughly three months – and a tonne of varied rides – into my time with the GE, and I’m stoked about these kicks. The synthetic leather upper is showing few signs of wear, although just like a glossy black Audi, it’s tough to keep them looking clean. Sturdy laces keep the shoe secure on foot and, rest assured, there’s nothing mechanical to worry about breaking when you’re in the back blocks of nowhere. The chunky Velcro strap at the top of the shoe can be cranked down as tight as you’d like, providing a super secure heel hold if that’s what you’re after. Laces can be tucked tidily under the strap for snag-free riding or hiking.
If you’ve ever kicked your toes into a rock while foot out drifting through a turn, or clipped a root while rodeoing through a section of trail, you’ll appreciate the robust cap over the front of the toe box.
I’m roughly three months - and a tonne of varied rides - into my time with the GE, and I’m stoked about these kicks.
There’s a substantial amount of fore and aft adjustment in the cleat bed, so regardless of your beliefs on cleat positioning, you should find your nirvana with these shoes. While clipping in, there’s no interference from the sole with the pedal and, in classic Shimano fashion, the cleat glides right on into, and out of, the pedal unhampered. Honestly, I’ve had a hard time with shoes over the years, and I’m always nervous to try anything new.
I’m after a reasonably stiff sole for pedalling but want a shoe that’s equally as walkable; the holy grail, Goldilock’s porridge sort of vibes. I’ve had gravity-focused shoes from Shimano that were plenty comfy, but too flexible while pedalling for my liking. Utilising Shimano’s Torbal 2.0 midsole, the GE7 offers what I reckon is edging on the perfect level of stiffness for trail and gravity endeavours, ticking all the boxes for me. I’ve been impressed by how solid they feel on the pedals, there’s minimal flex under power – there is some but it takes some watts to really feel it, and there’s enough flex that they feel quite natural through the transition from heel to forefoot while walking.
The Volume Trail Last gives a snug fit through the midsection up to the ball of the foot, then widens significantly towards the toes. This shape is ideal for us jandle-wearing Kiwis or anyone with a wide foot. The roomy heel cup doesn’t strangle your Achilles but is secure enough for minimal heel movement while on the gas, and even while walking the heel remains pretty well locked in place.
The midsole has an EVA foam section running the length of it, providing a comfy level of cush for walking – plus it noticeably dampens vibrations while clipped in. Shimano have nailed the rubber outsole by utilising their new ULTREAD GE rubber. While unclipped, there’s a stable platform and traction to stop you from getting too sketchy on the pedals in those situations when you just can’t get clipped in. Scrambling up steep inclines is sure-footed thanks to deep knobs under the toes. These, combined with compliance at the toes, give the shoe an almost hiking boot feel while tackling hike-a-bike sections – impressive for sure.
These are hands-down the best all-round MTB shoes I’ve used. I’ve struggled to find any fault or weak point and I think you’d be hard-pressed to find a better pair for general trail use. I don’t make that statement lightly: they really are that good.
Embracing data: A smarter way to ride
Words Alex Stevens
Images Supplied
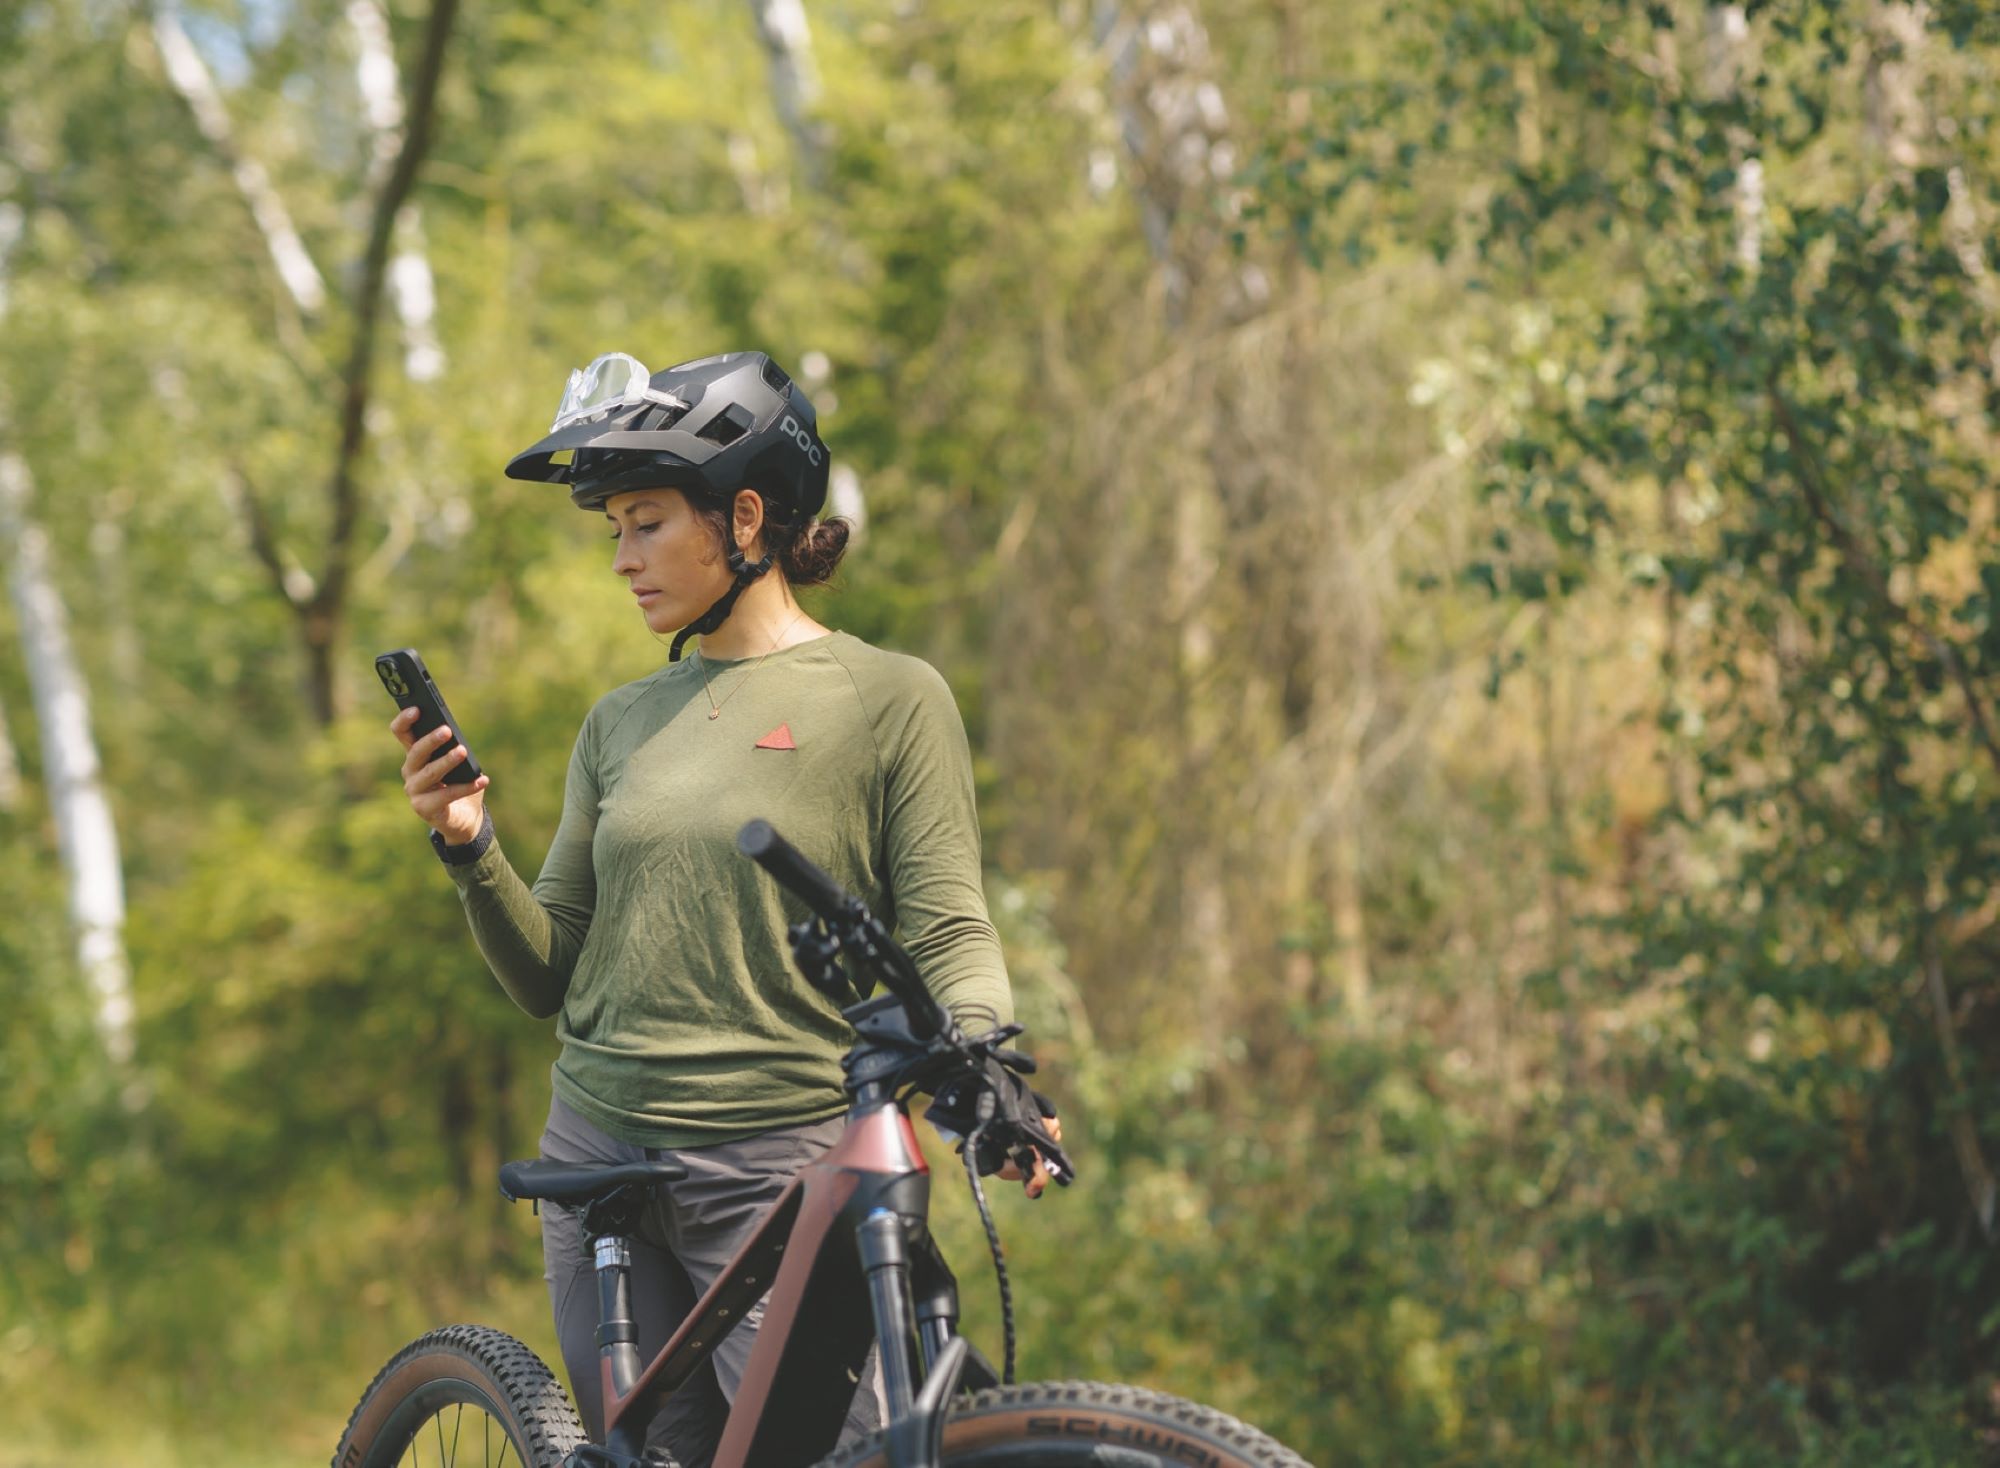
If data is the key to our modern lifestyles, it pays to get smart about how we use it. Thanks to the super computers we carry around in our pockets, tracking how we sleep, eat and exercise is now part of everyday life. It’s all about harnessing the power of the data and, as I’ve found out, if you add an eBike to the mix, you get double the fun on the power front.
As someone who has been lucky enough to own a bike at pretty much every stage of my life ever since the BMX of a long-since-passed childhood, I was keen to get a look in once the eBike revolution began taking hold. After all, if you’re someone who owned a BMX back in the day it’s a sure sign you’re no spring chicken and let’s just say my oldish legs have been through a few rotations. A bit of assistance on the uphills sounded like a great idea as long as nothing was lost in the downhill experience. So, I’ve had my eBike for a while now and can confirm: less leg burn plus more laps equals even more fun.
I opted for a Bosch-powered Trek Rail knowing there would be no issues when it came to performance and reliability of the motor or the battery – what I considered the key elements of an eBike. There was also talk of the eBike Flow app as part of Bosch’s Smart System, but I didn’t get around to downloading that straight away when I first got my bike. I figured it was something like Strava or another fitness style tracker which I already use and there was no point having yet another app. I was just keen to get out and ride.
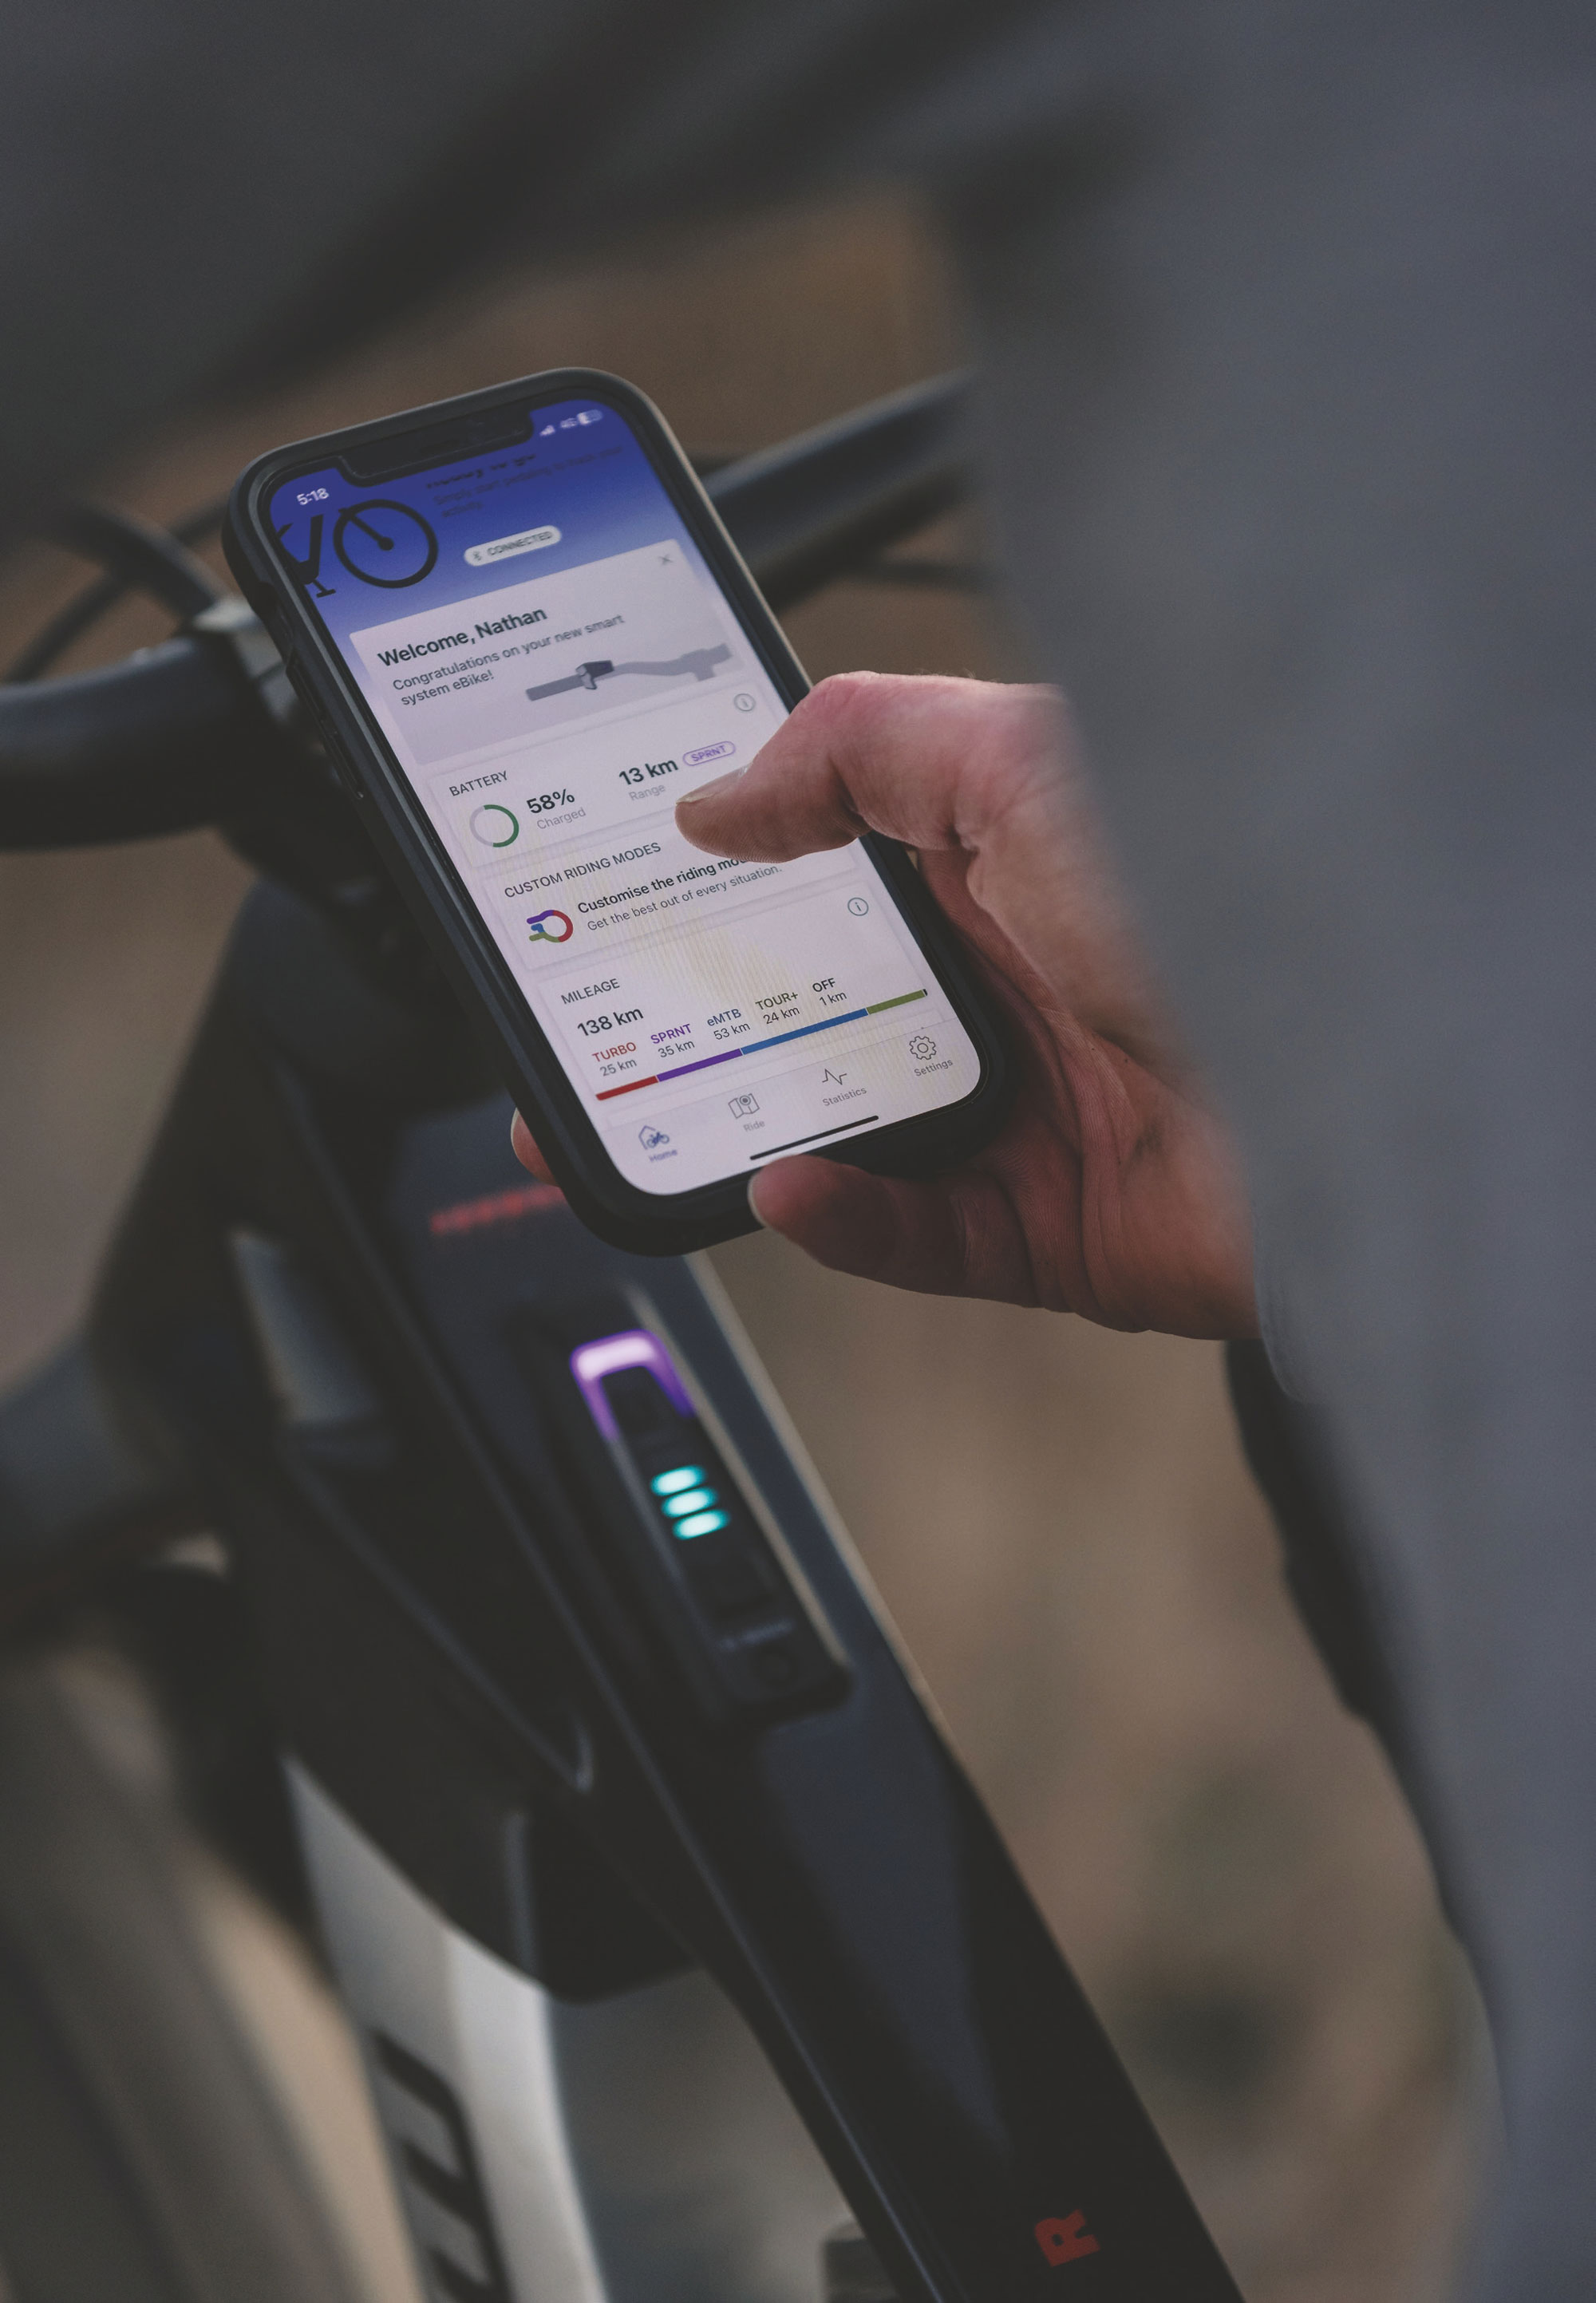
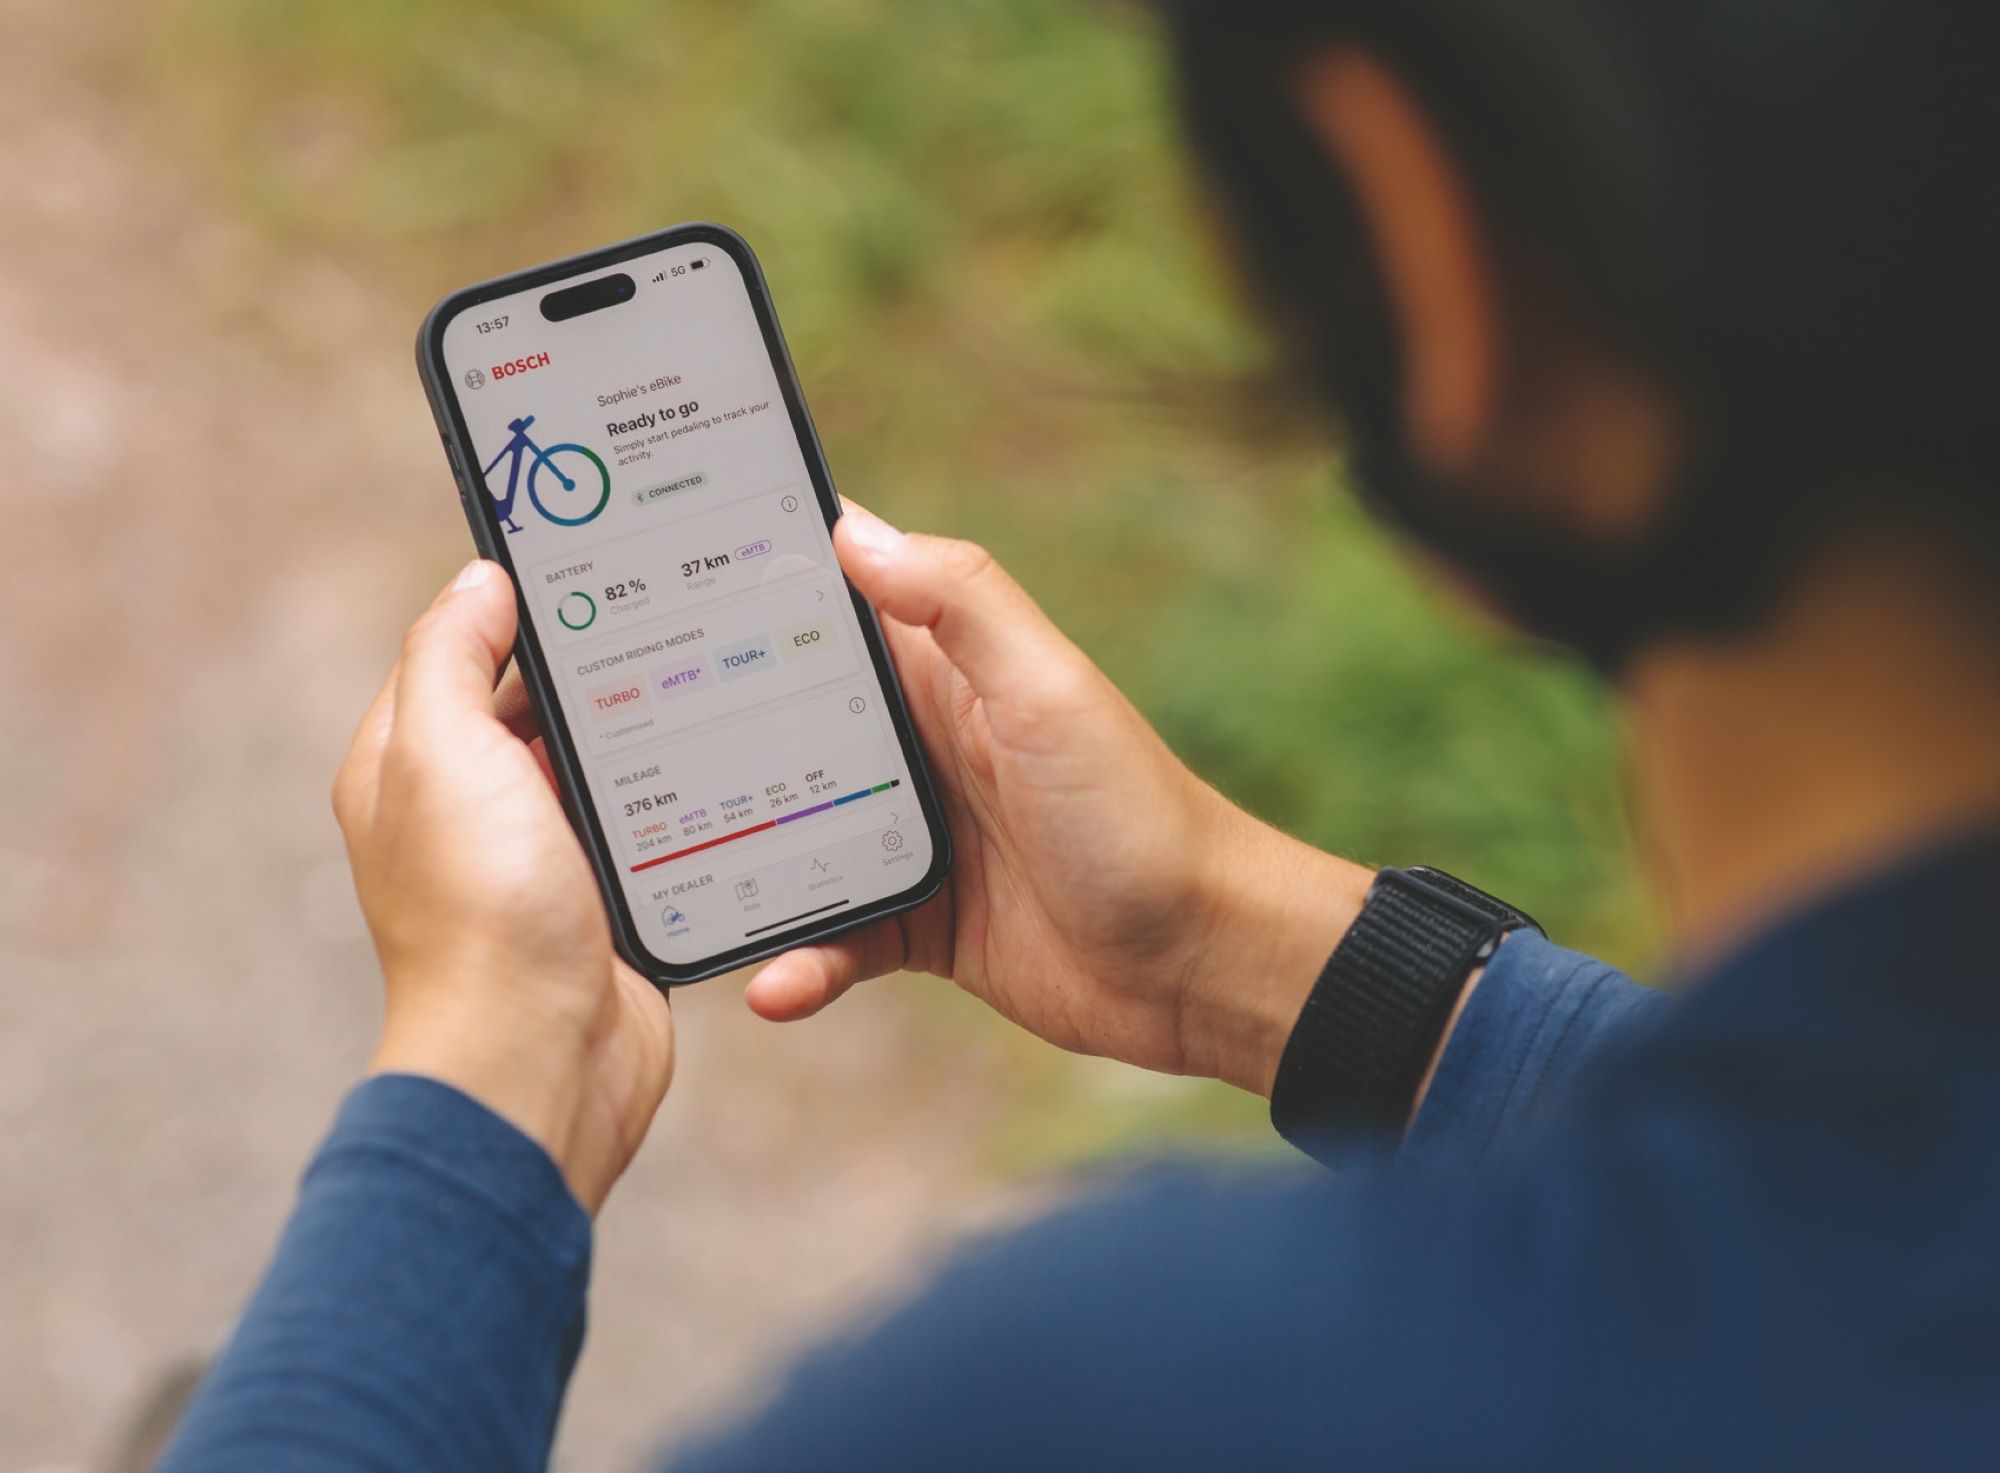
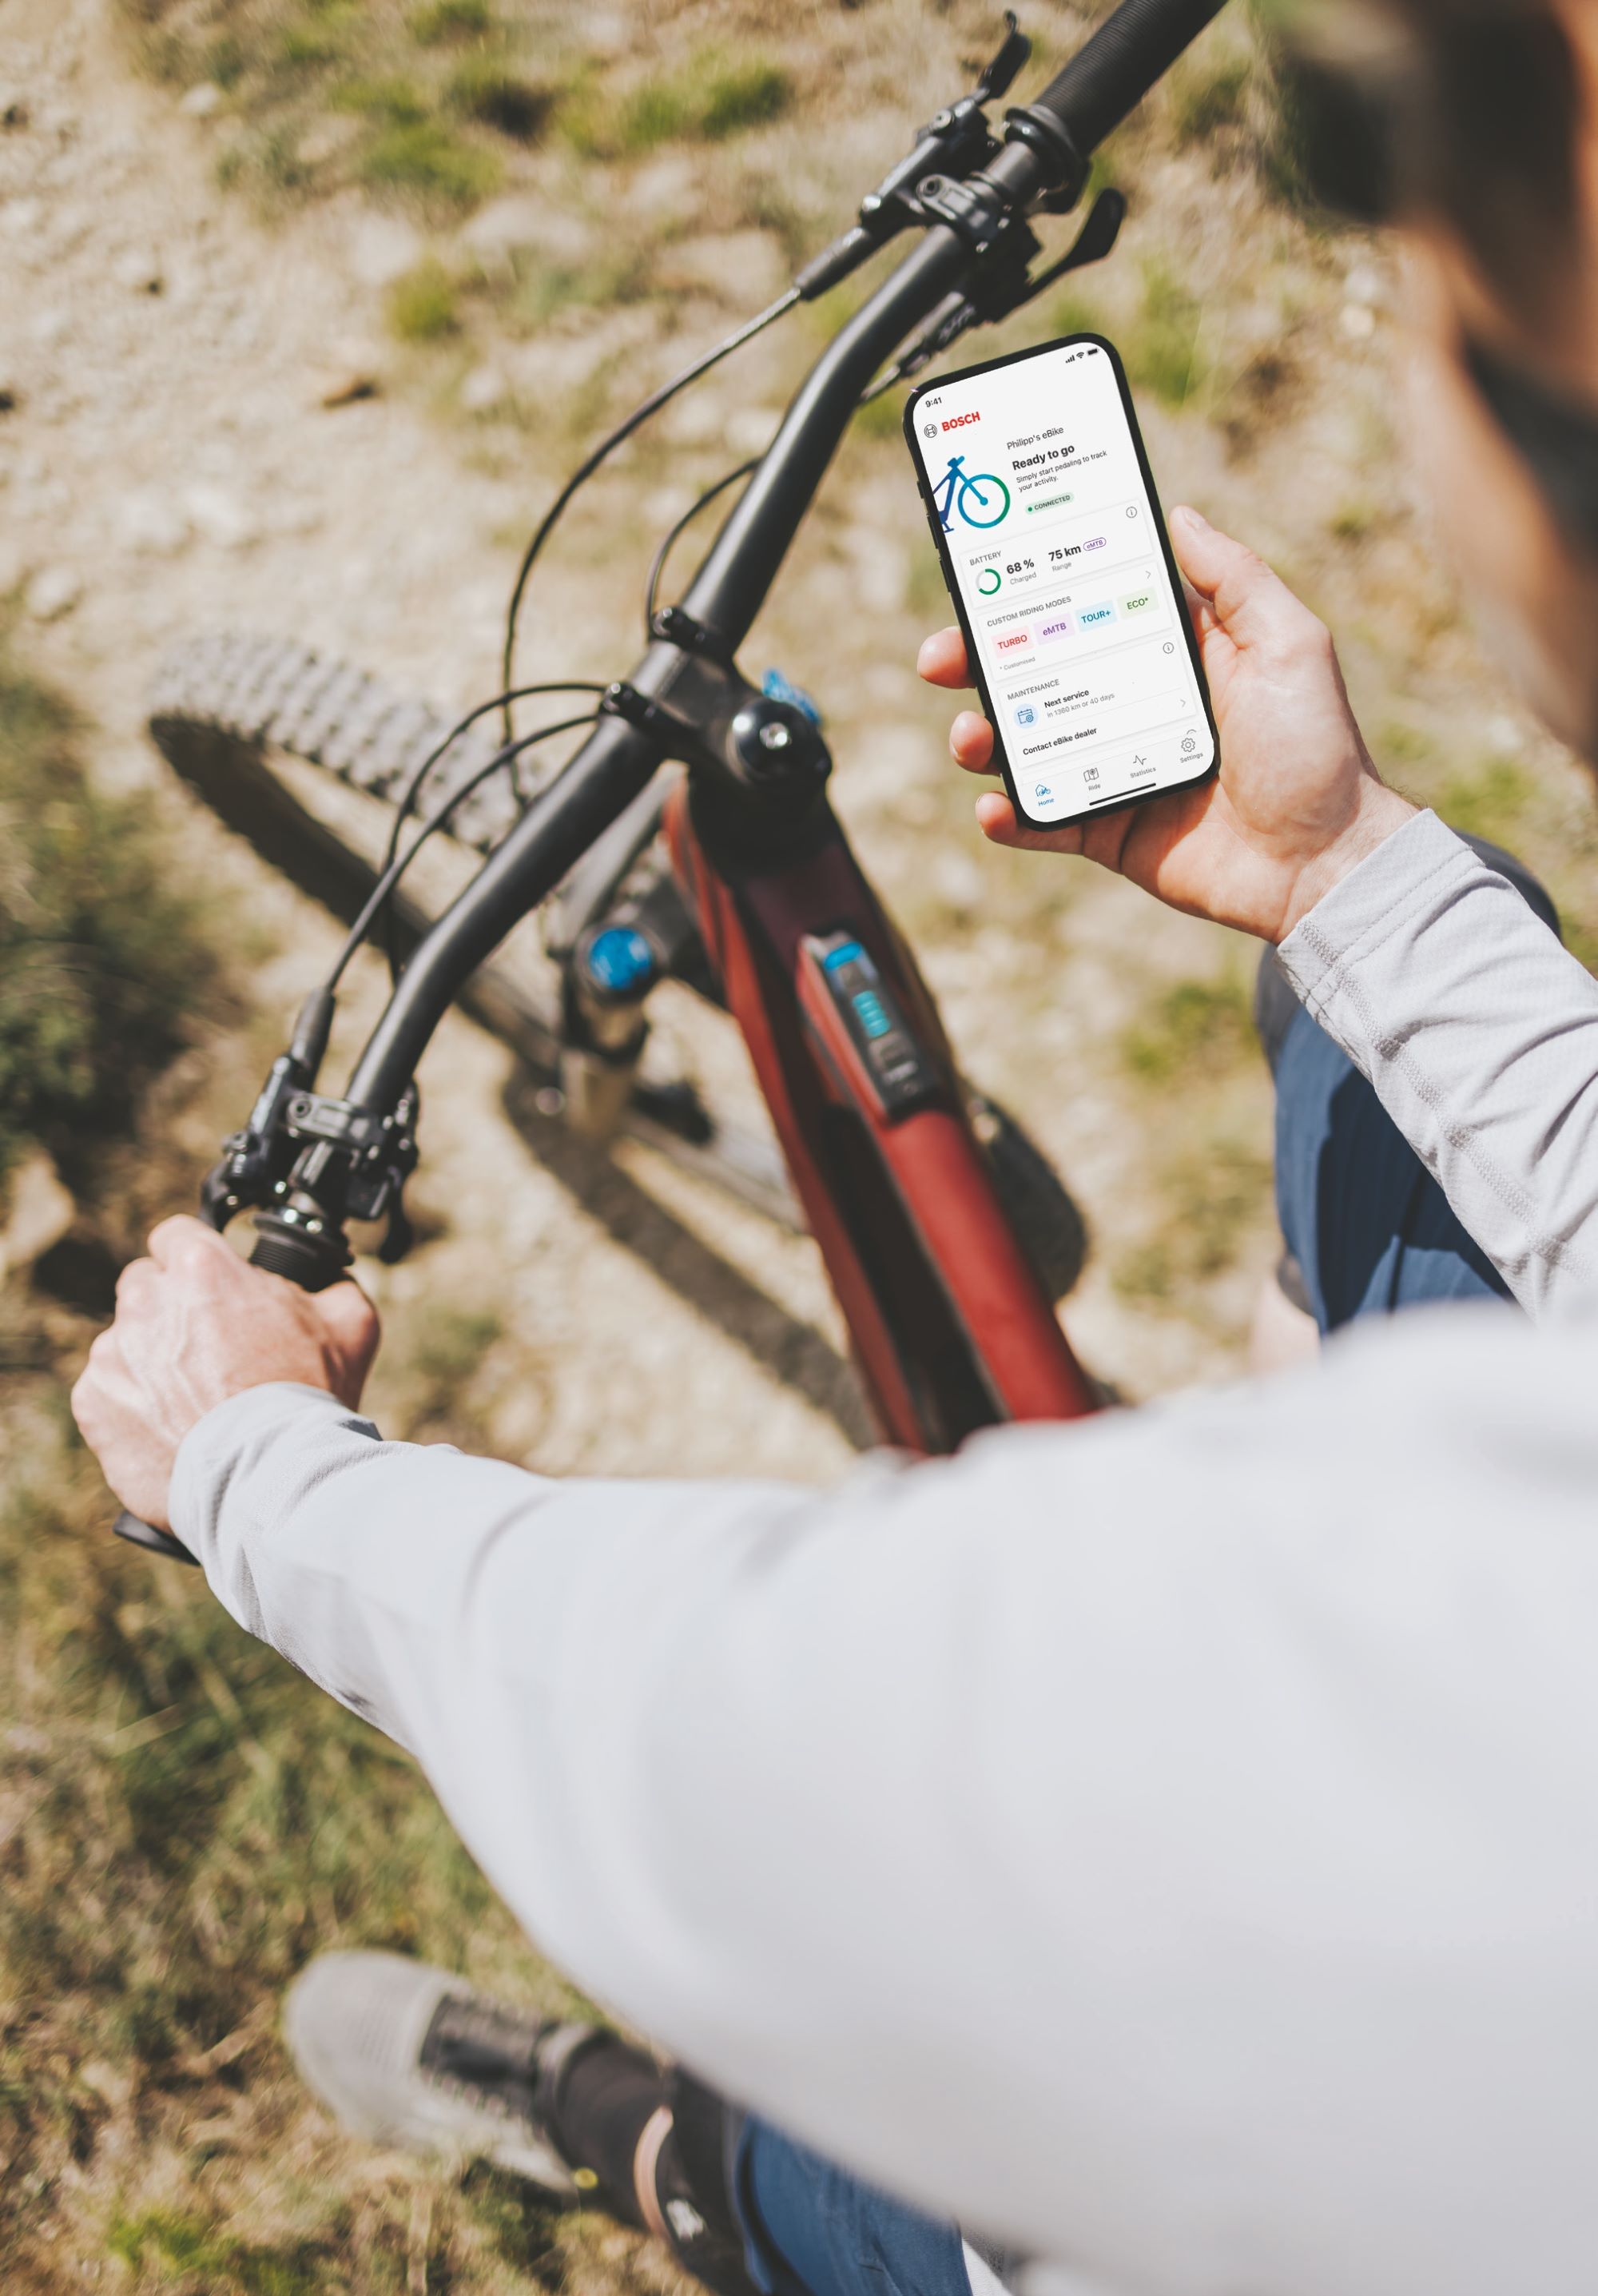
I finally checked it out after a mate told me about some of the app’s features and I started to realise maybe I was missing a trick. Turns out there’s more to it than a way to track your ride and fitness data, although this is one of its key uses. It’s also designed to sync with tools like Strava, Komoot and Apple Health rather than replace them. So, what is the eBike Flow app? It’s actually the brains of the operation if your Bosch eBike is equipped with the Smart System. An easy way to tell is from the display unit. If your eBike is equipped with the Mini Remote with System Controller, Intuvia 100, Purion 200, LED Remote, Kiox 300, Kiox 500 or Smartphone Grip you have an eBike with the Smart System and you can connect it with the Flow app.
It’s all about making the tech work for you which, having started using the eBike Flow app, I’ve realised I’m all about. After all, if you’ve decided to embrace e-powered riding you might as well enjoy all the benefits.
The eBike componentry, including the drive unit, battery and display screen are fully connected and the app is the control centre. So, rather than jumping on your eBike and letting it do all the work, or having to adapt to a one-size-fits-all set up, through the Flow app you have the option to customise the eBike so it suits your riding style and needs.
In Eco or Turbo modes you can tune support, dynamics, maximum torque and maximum speed. If, for example, you still want to do a bit of work on the hills or you’re light and just don’t need too much assistance, you can reduce the maximum support level and save some battery while you’re there.
It’s all about making the tech work for you which, having started using the eBike Flow app, I’ve realised I’m all about. After all, if you’ve decided to embrace e-powered riding you might as well enjoy all the benefits. So, the app connects you with your eBike and your eBike with the digital world.
It’s all about making the tech work for you which, having started using the eBike Flow app, I’ve realised I’m all about. After all, if you’ve decided to embrace e-powered riding you might as well enjoy all the benefits. So, the app connects you with your eBike and your eBike with the digital world.
One thing I’ve really been enjoying is not having to worry so much about battery range. While your display screen is good for letting you know how much battery you’ve got left, the Flow app takes this a step further. Thanks to the on-board mapping technology, it’ll tell you how much battery it takes to do your favourite trails, based on your individual data. You can see how changing between modes affects your battery usage so you’ll know if you’ve got enough juice to hit Turbo on the last hill or you’re going to have to pedal home a bit harder in Eco. It’ll even calculate your arrival time.
Battery status, remaining range and distance travelled are all displayed right there on the home screen along with other handy info like when your next service is due – because who remembers to put that in the diary. If you’re like me, you don’t even manage that for the car, let alone your eBike.
The navigation and route planning features also make life easier, especially if you’re scoping out new trails. You plan the route in the app and then use your smartphone as a navigation display simply by installing the Smartphone Grip (which is sold separately). Rather than just following a line on a map you can see details like junctions and descents so it’s harder to get lost. I still managed it but thankfully there’s a re-routing function, much like you’d find in a car, so I was back on the right track almost instantaneously. I imagine this would be even more handy if you’re riding in a town or city and having to deal with traffic at the same time.
The good news is you can now receive these updates over-the-air, rather than having to take your eBike to a bike store. You just download the updates via the app and transfer to your eBike via Bluetooth.
So if, like me, you’d thought that the eBike Flow app was just another activity tracker I’d recommend taking a closer look. It’ll unlock the potential of your eBike and help you up your eMTB game. Crunch the numbers, crush the climbs.