

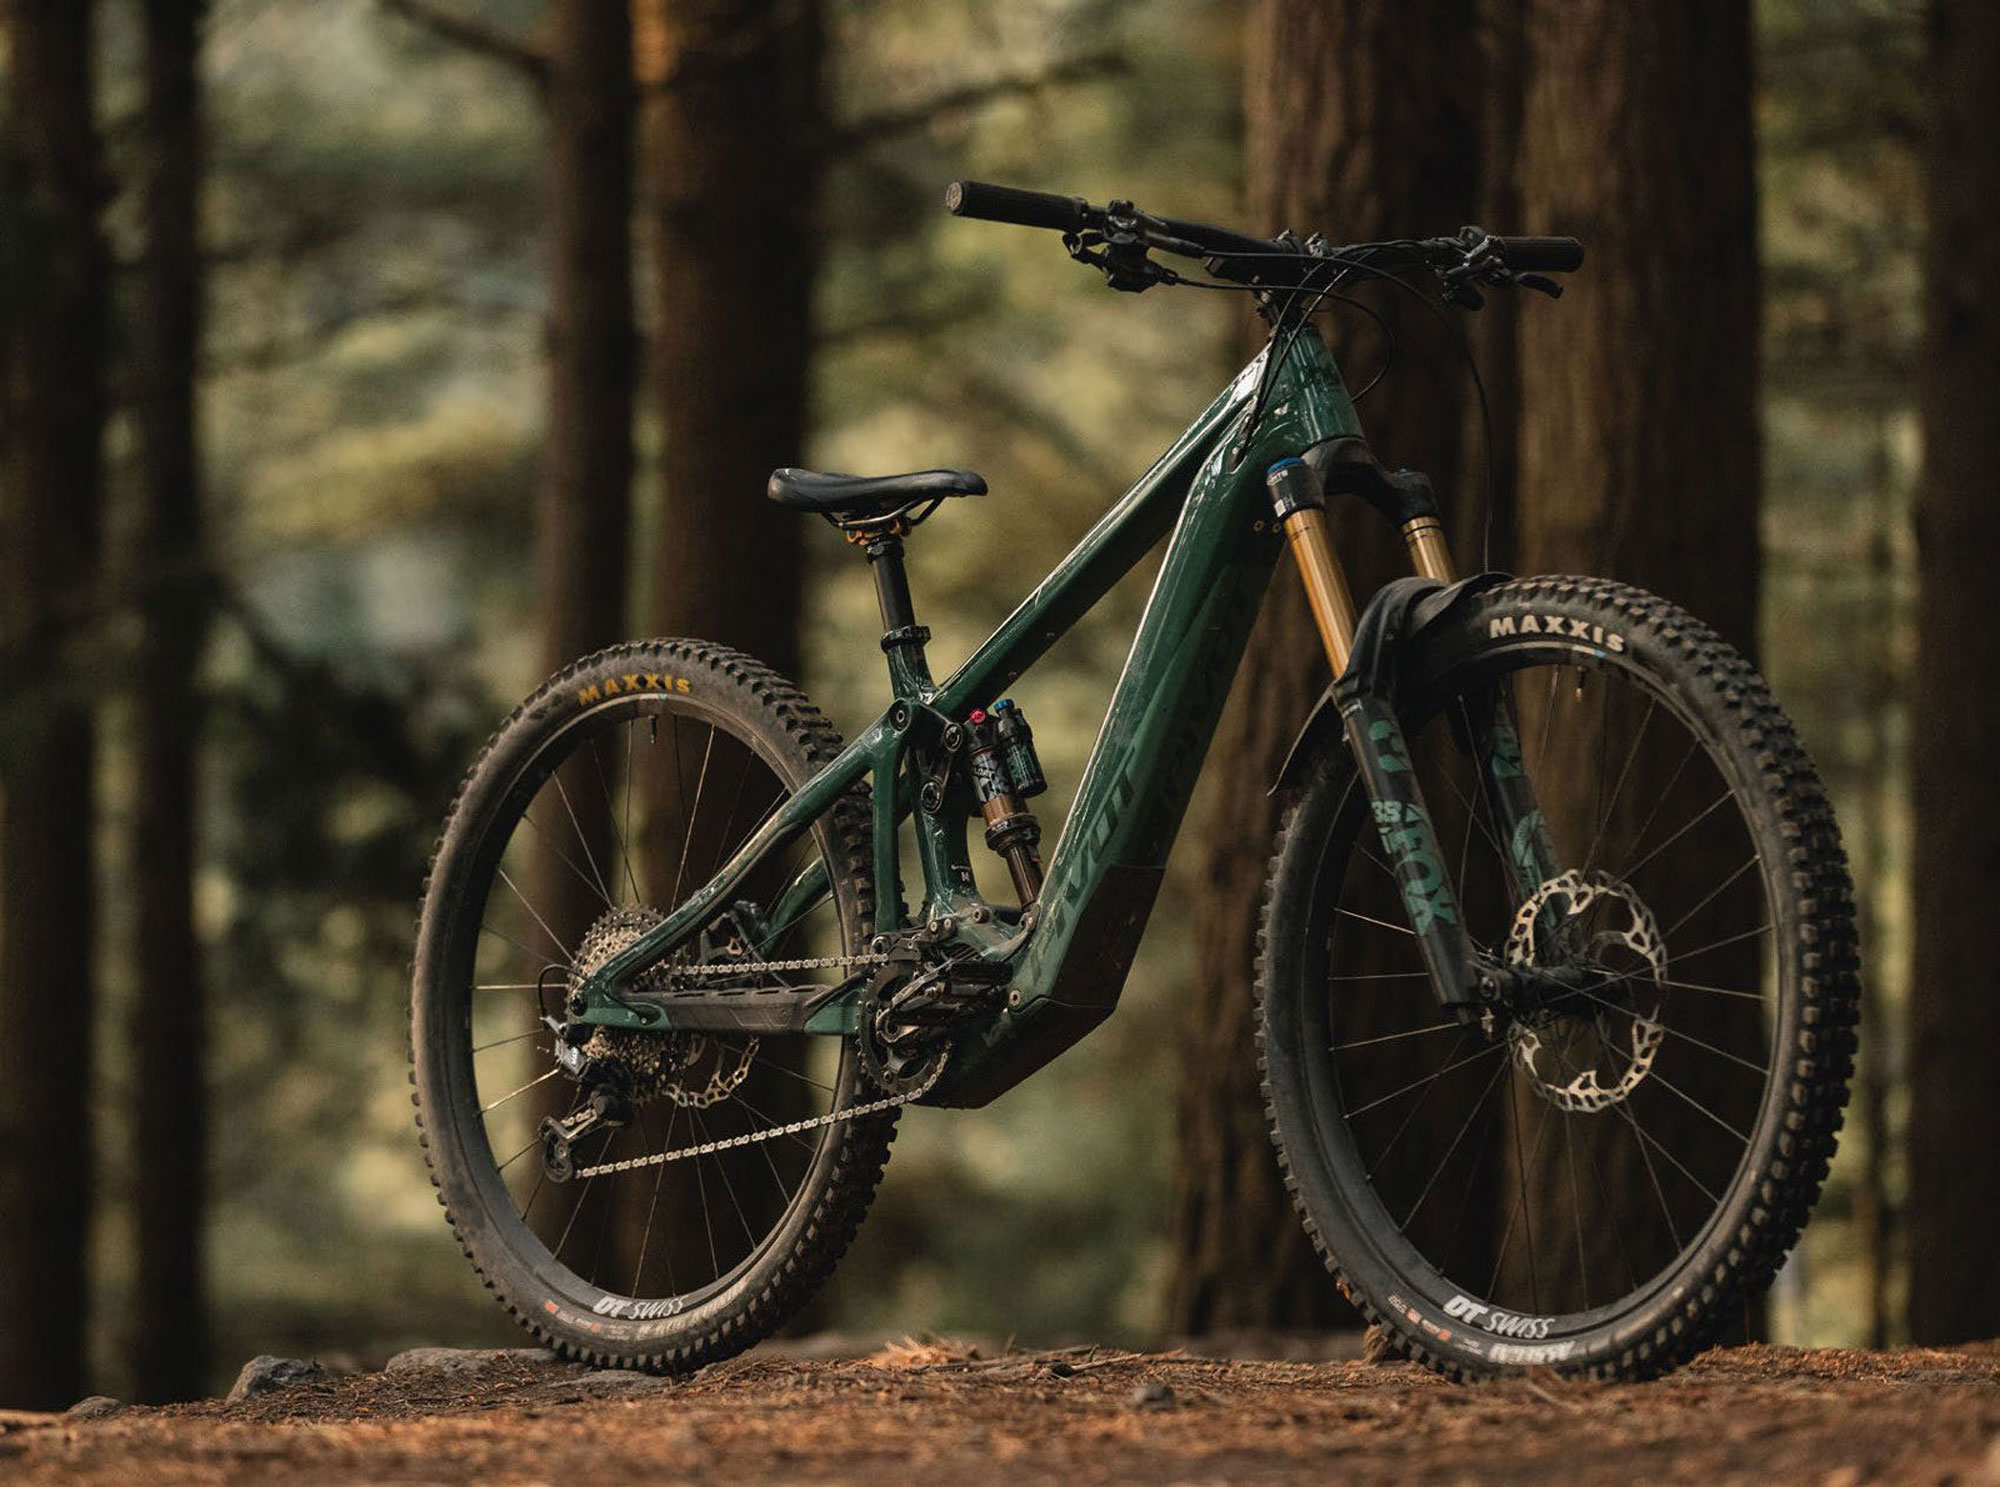
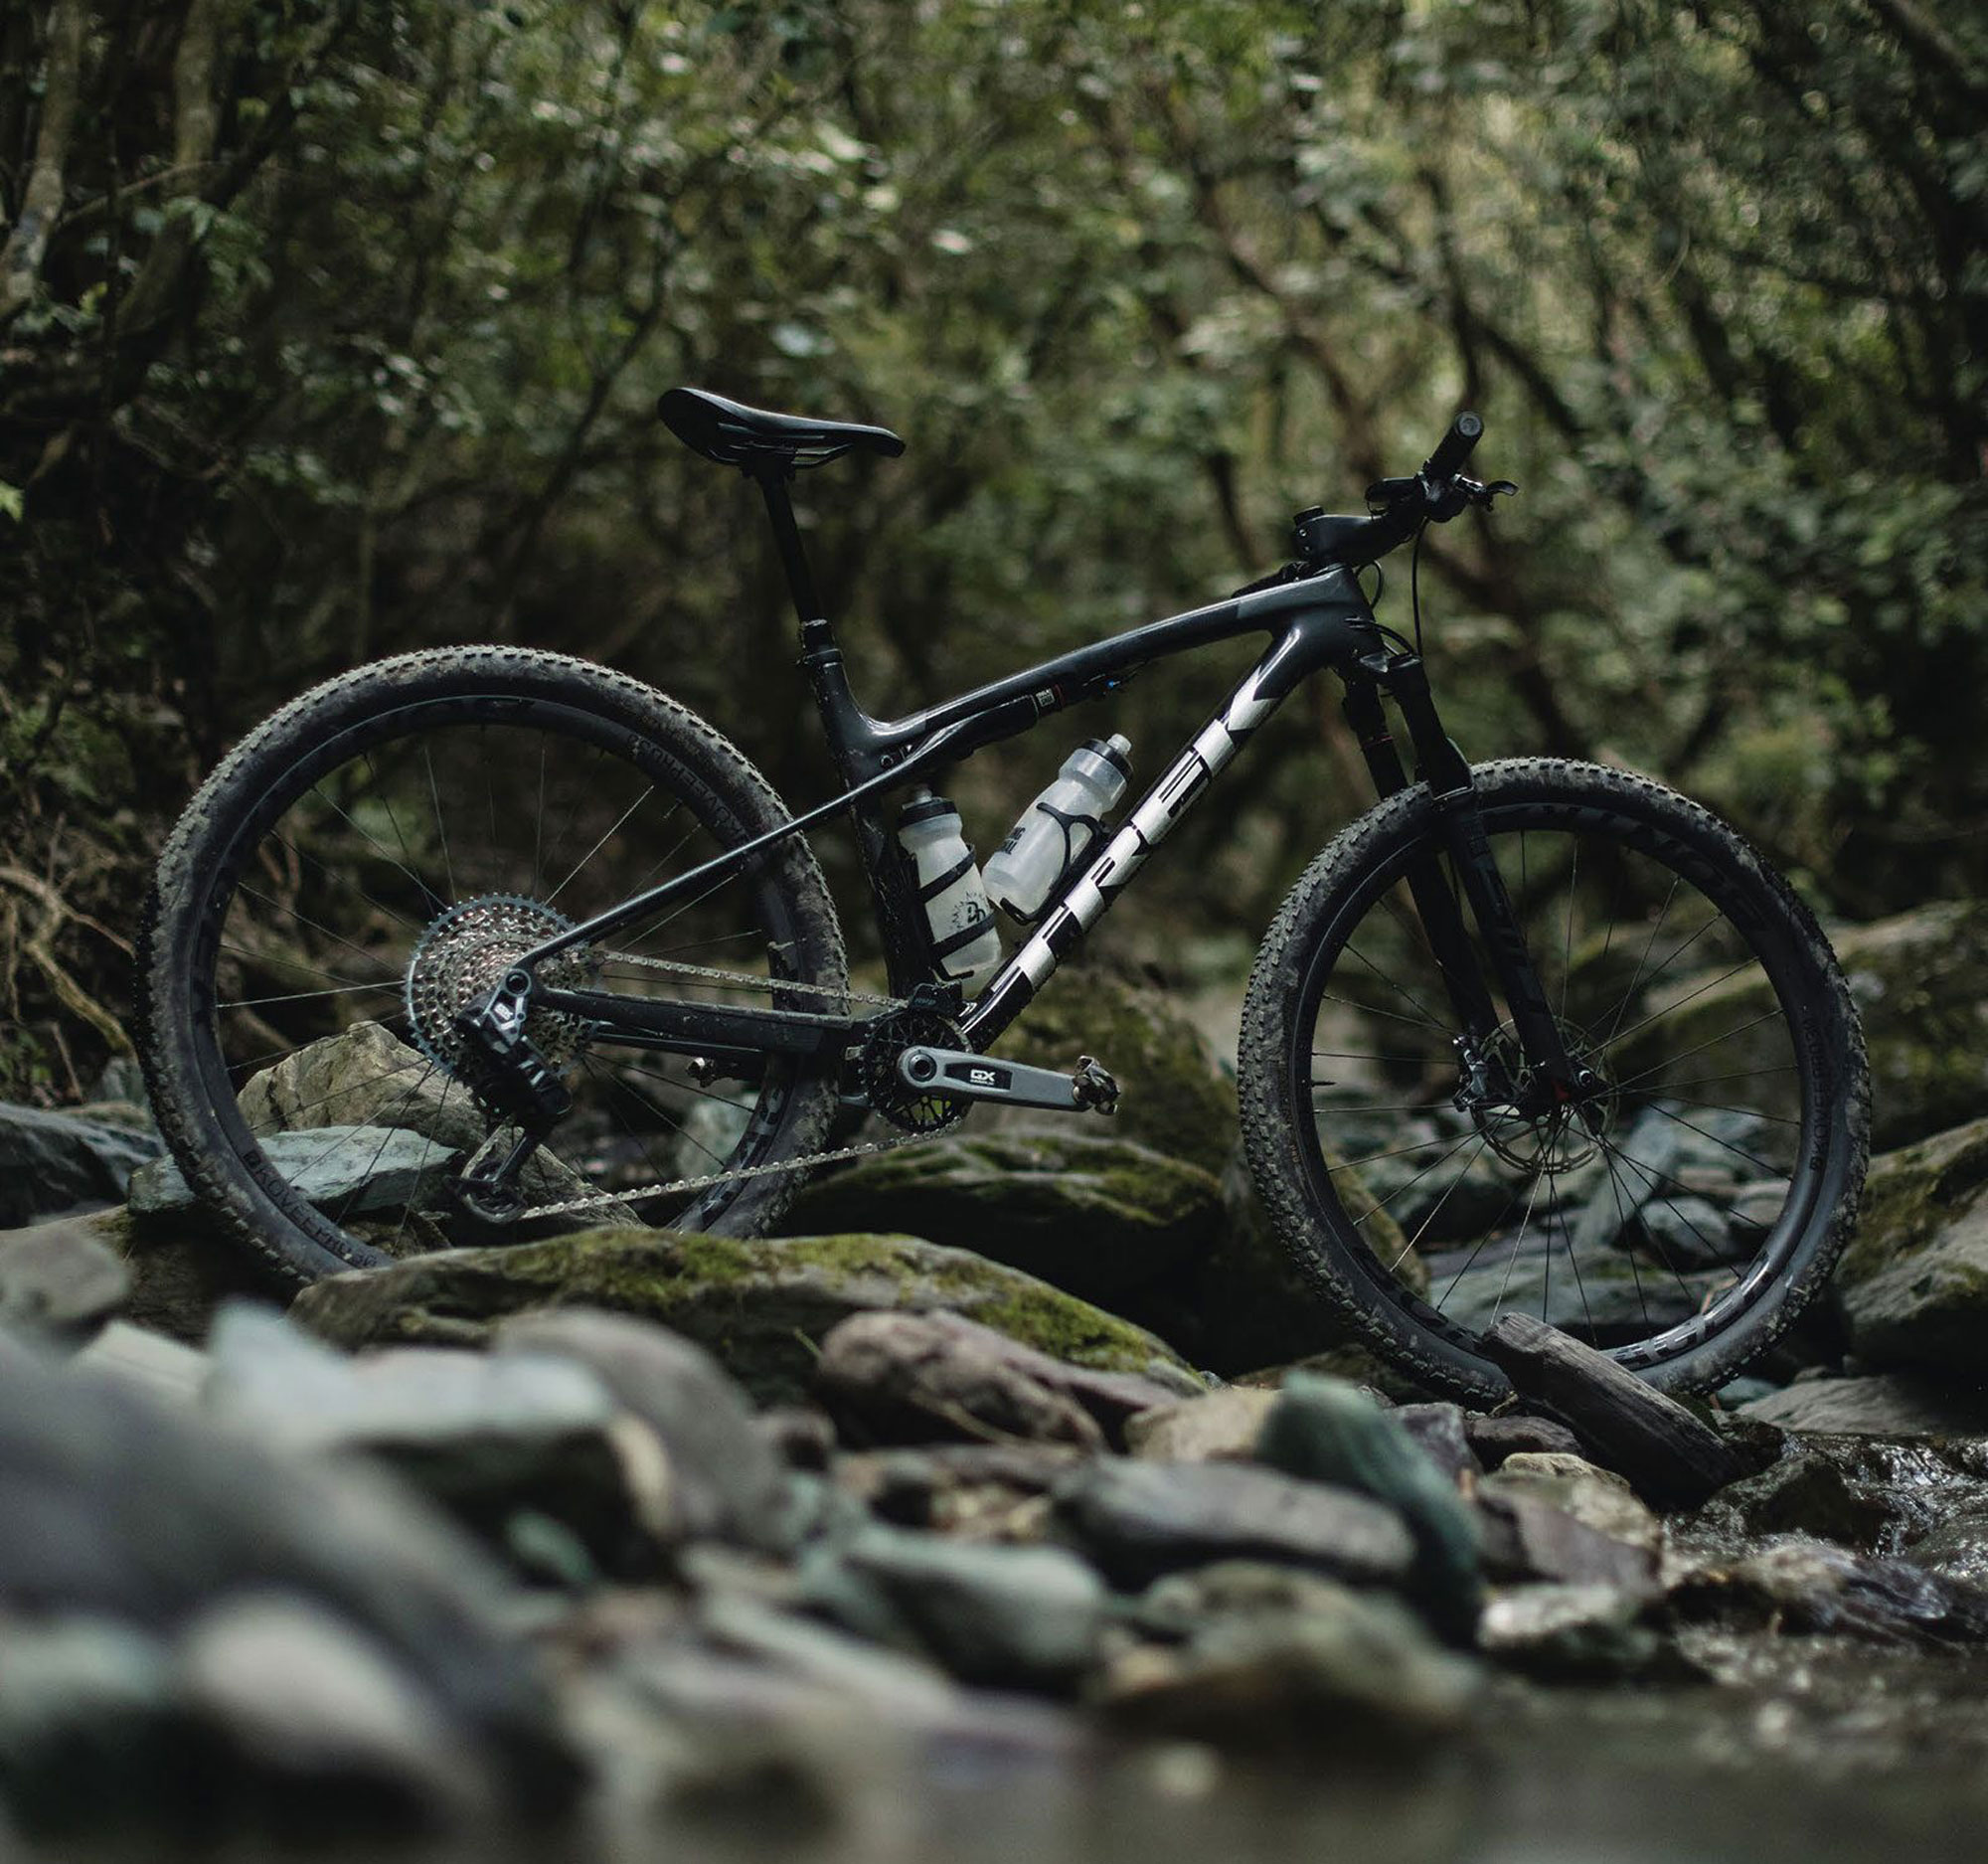
Pivot Shuttle LT
Words Georgia Petrie
Images Cameron Mackenzie
RRP $25,995
Distributor Allsports

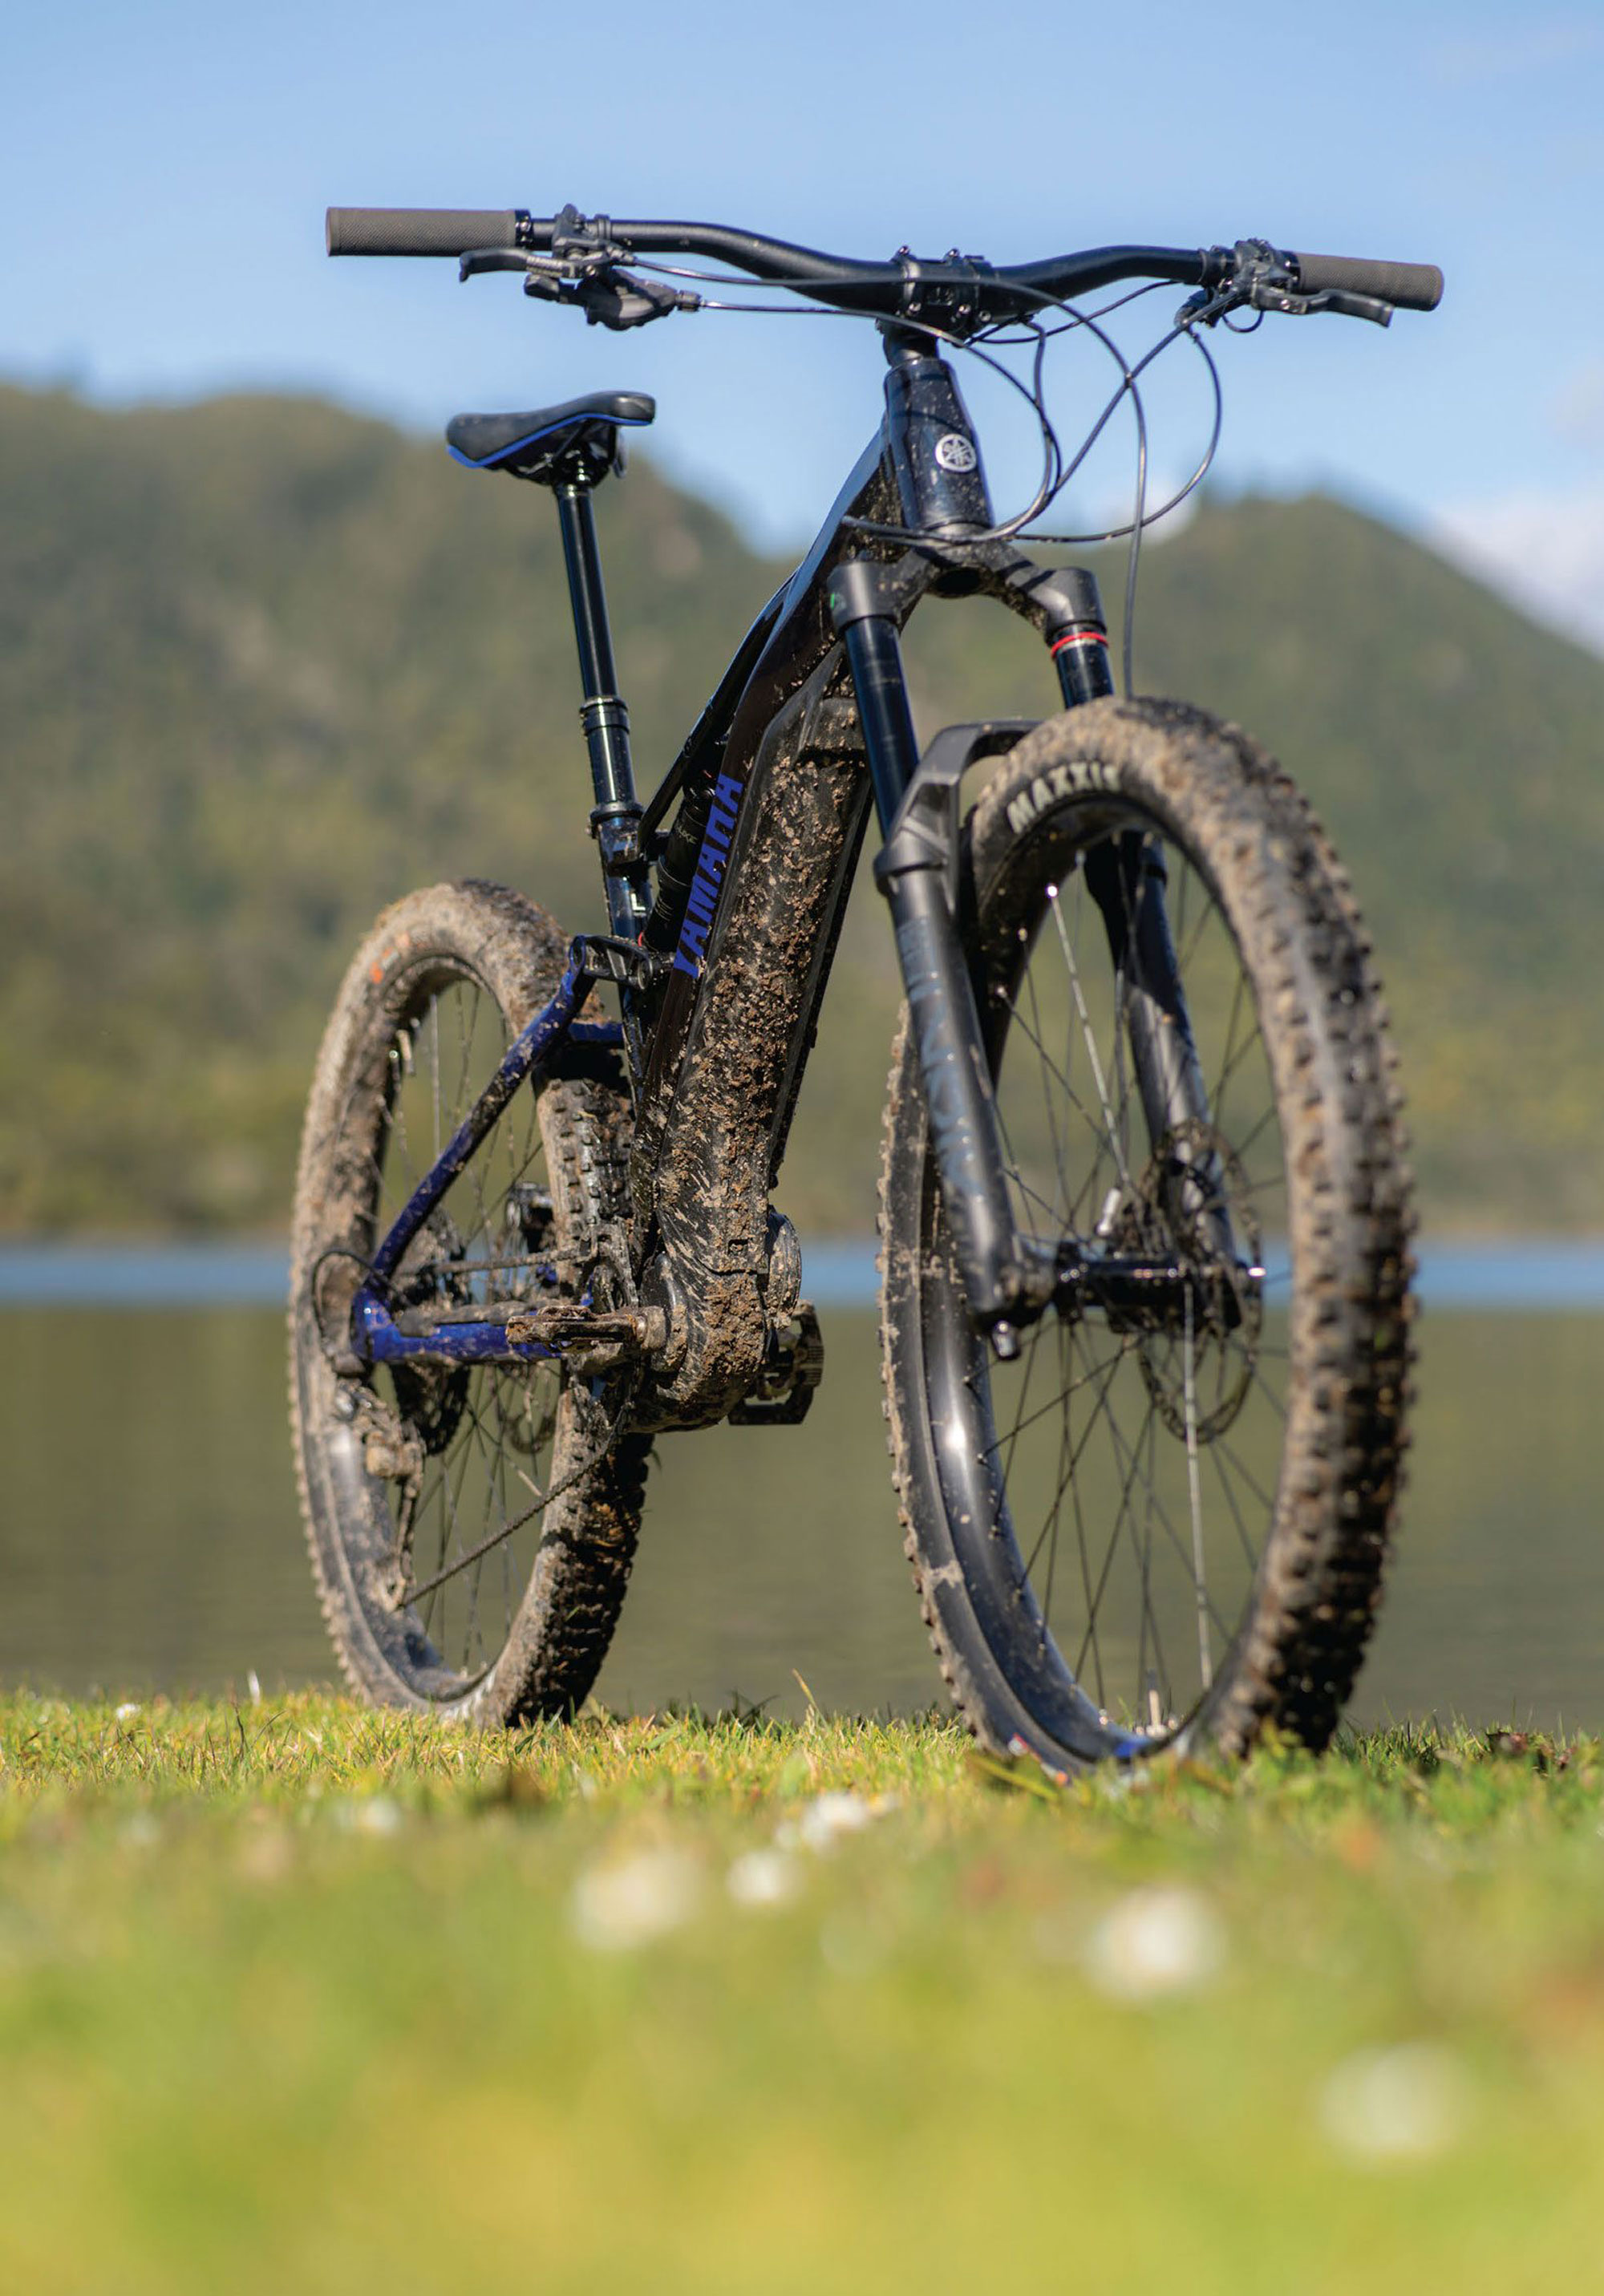
It’s been several years since we saw Pivot’s first iteration of an eBike. Back then, it was a 27’5” wheel-equipped, 66-degree head-tubed, monstrosity with less power than your toothbrush. Fast forward five years and, thankfully, Pivot’s designs have moved on, along with a lot of the tech hanging between the wheels.
For the eagle-eyed bike nerds amongst us, it was clear to see Pivot’s new design direction from a mile away. It was only a matter of time before we saw them electrify their proven Firebird platform, among others. Those dreams have been realised with the release of the Shuttle LT. Positioned firmly at the top end of their line-up, both in geometry and price, the Shuttle LT isn’t for café enthusiasts.
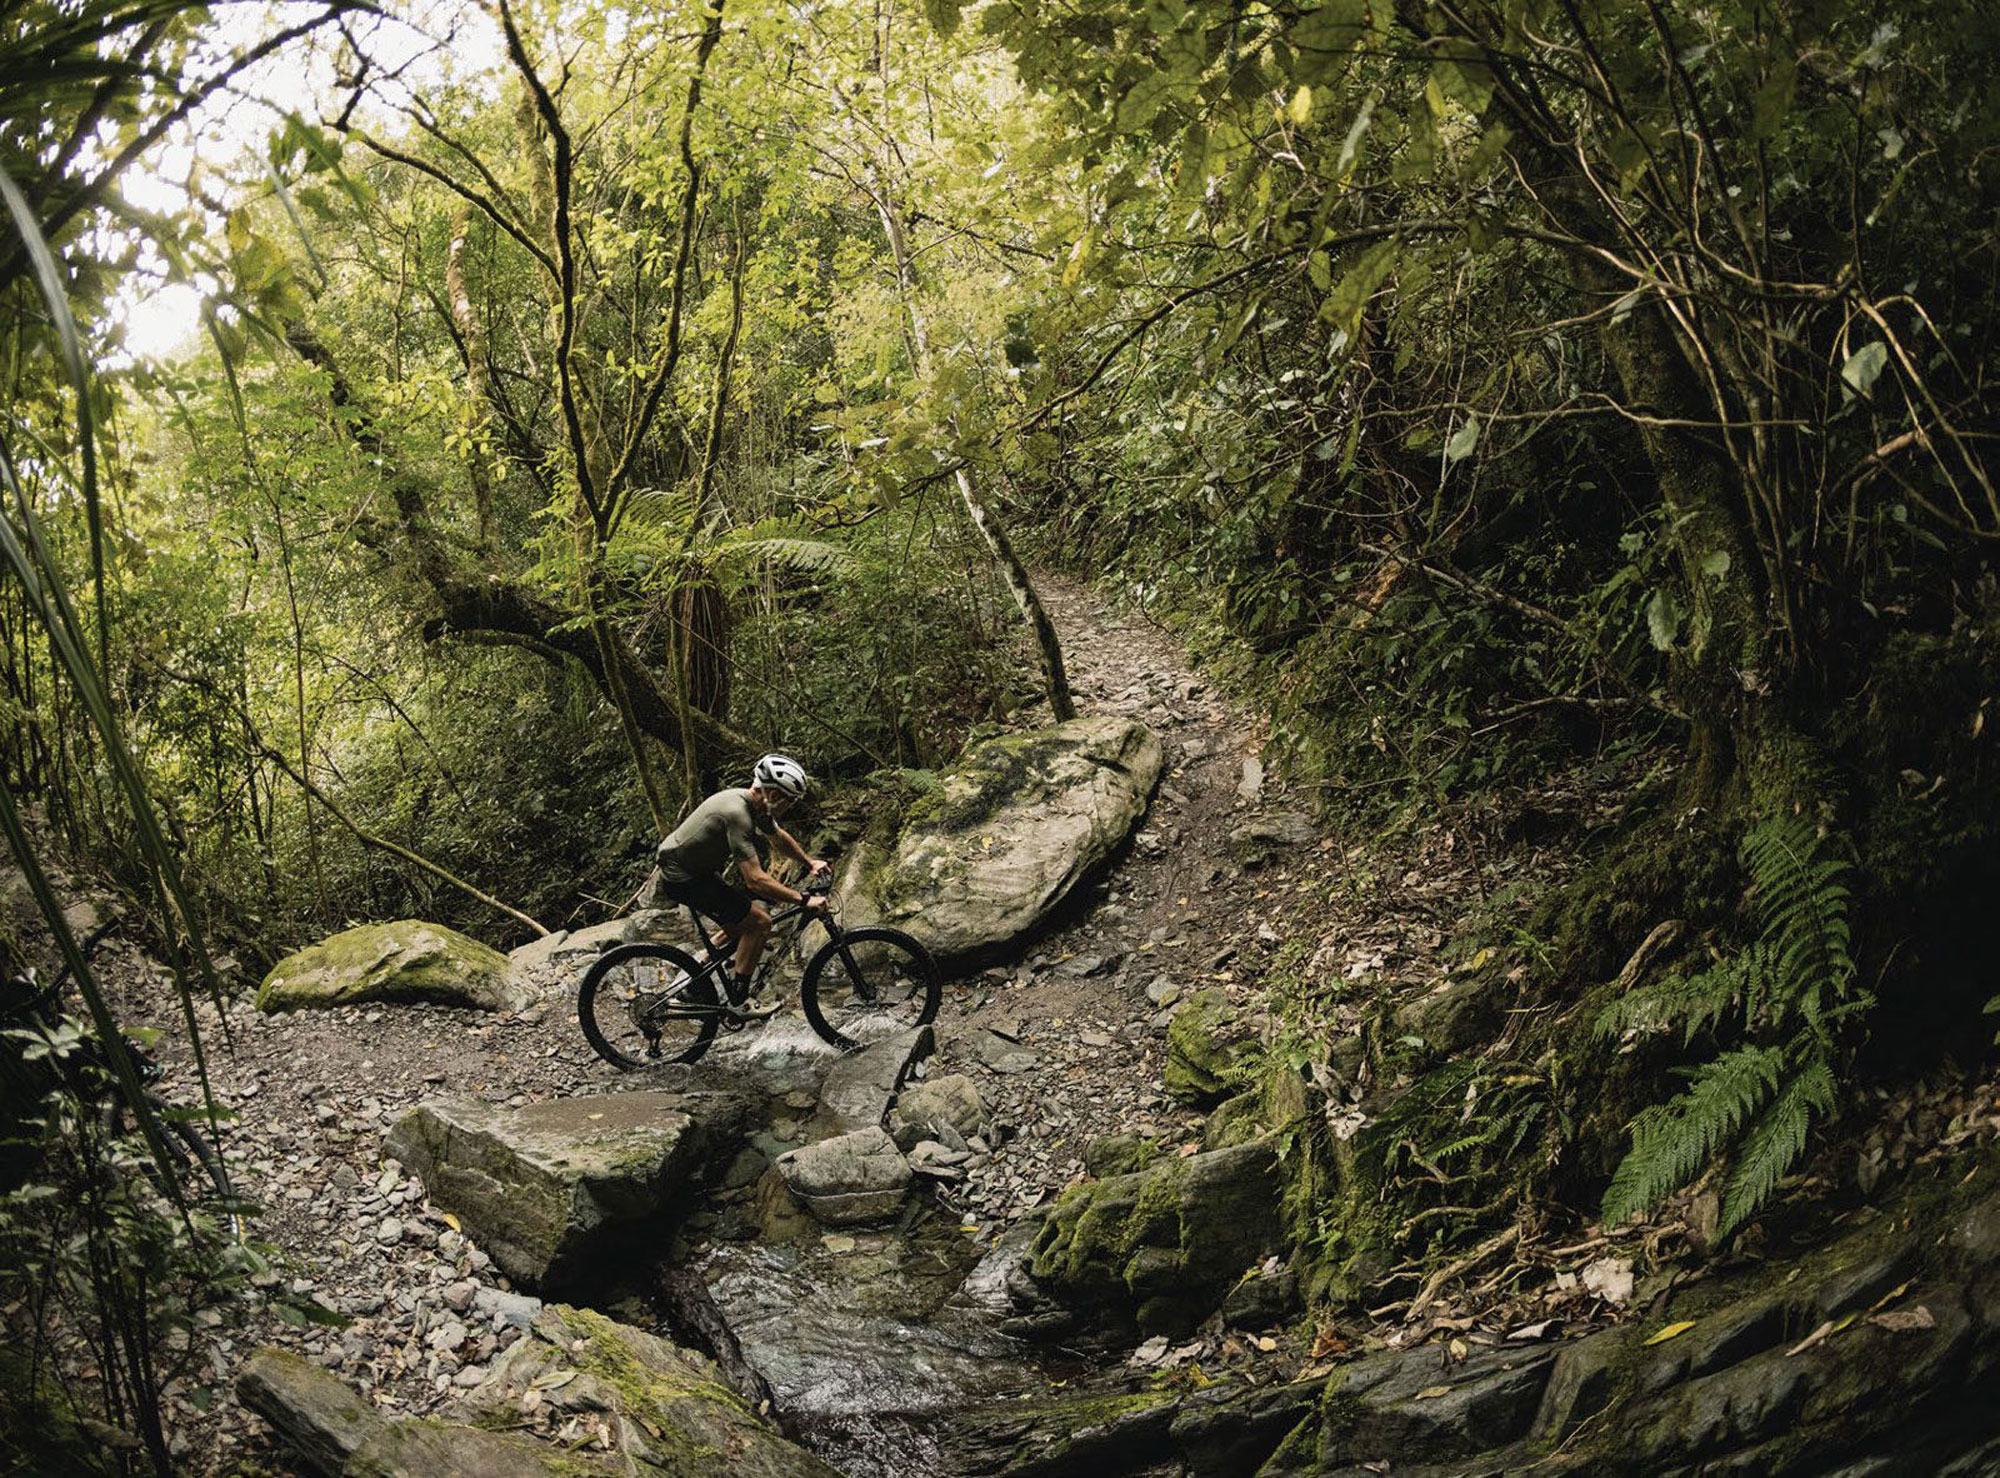
Frame & Features
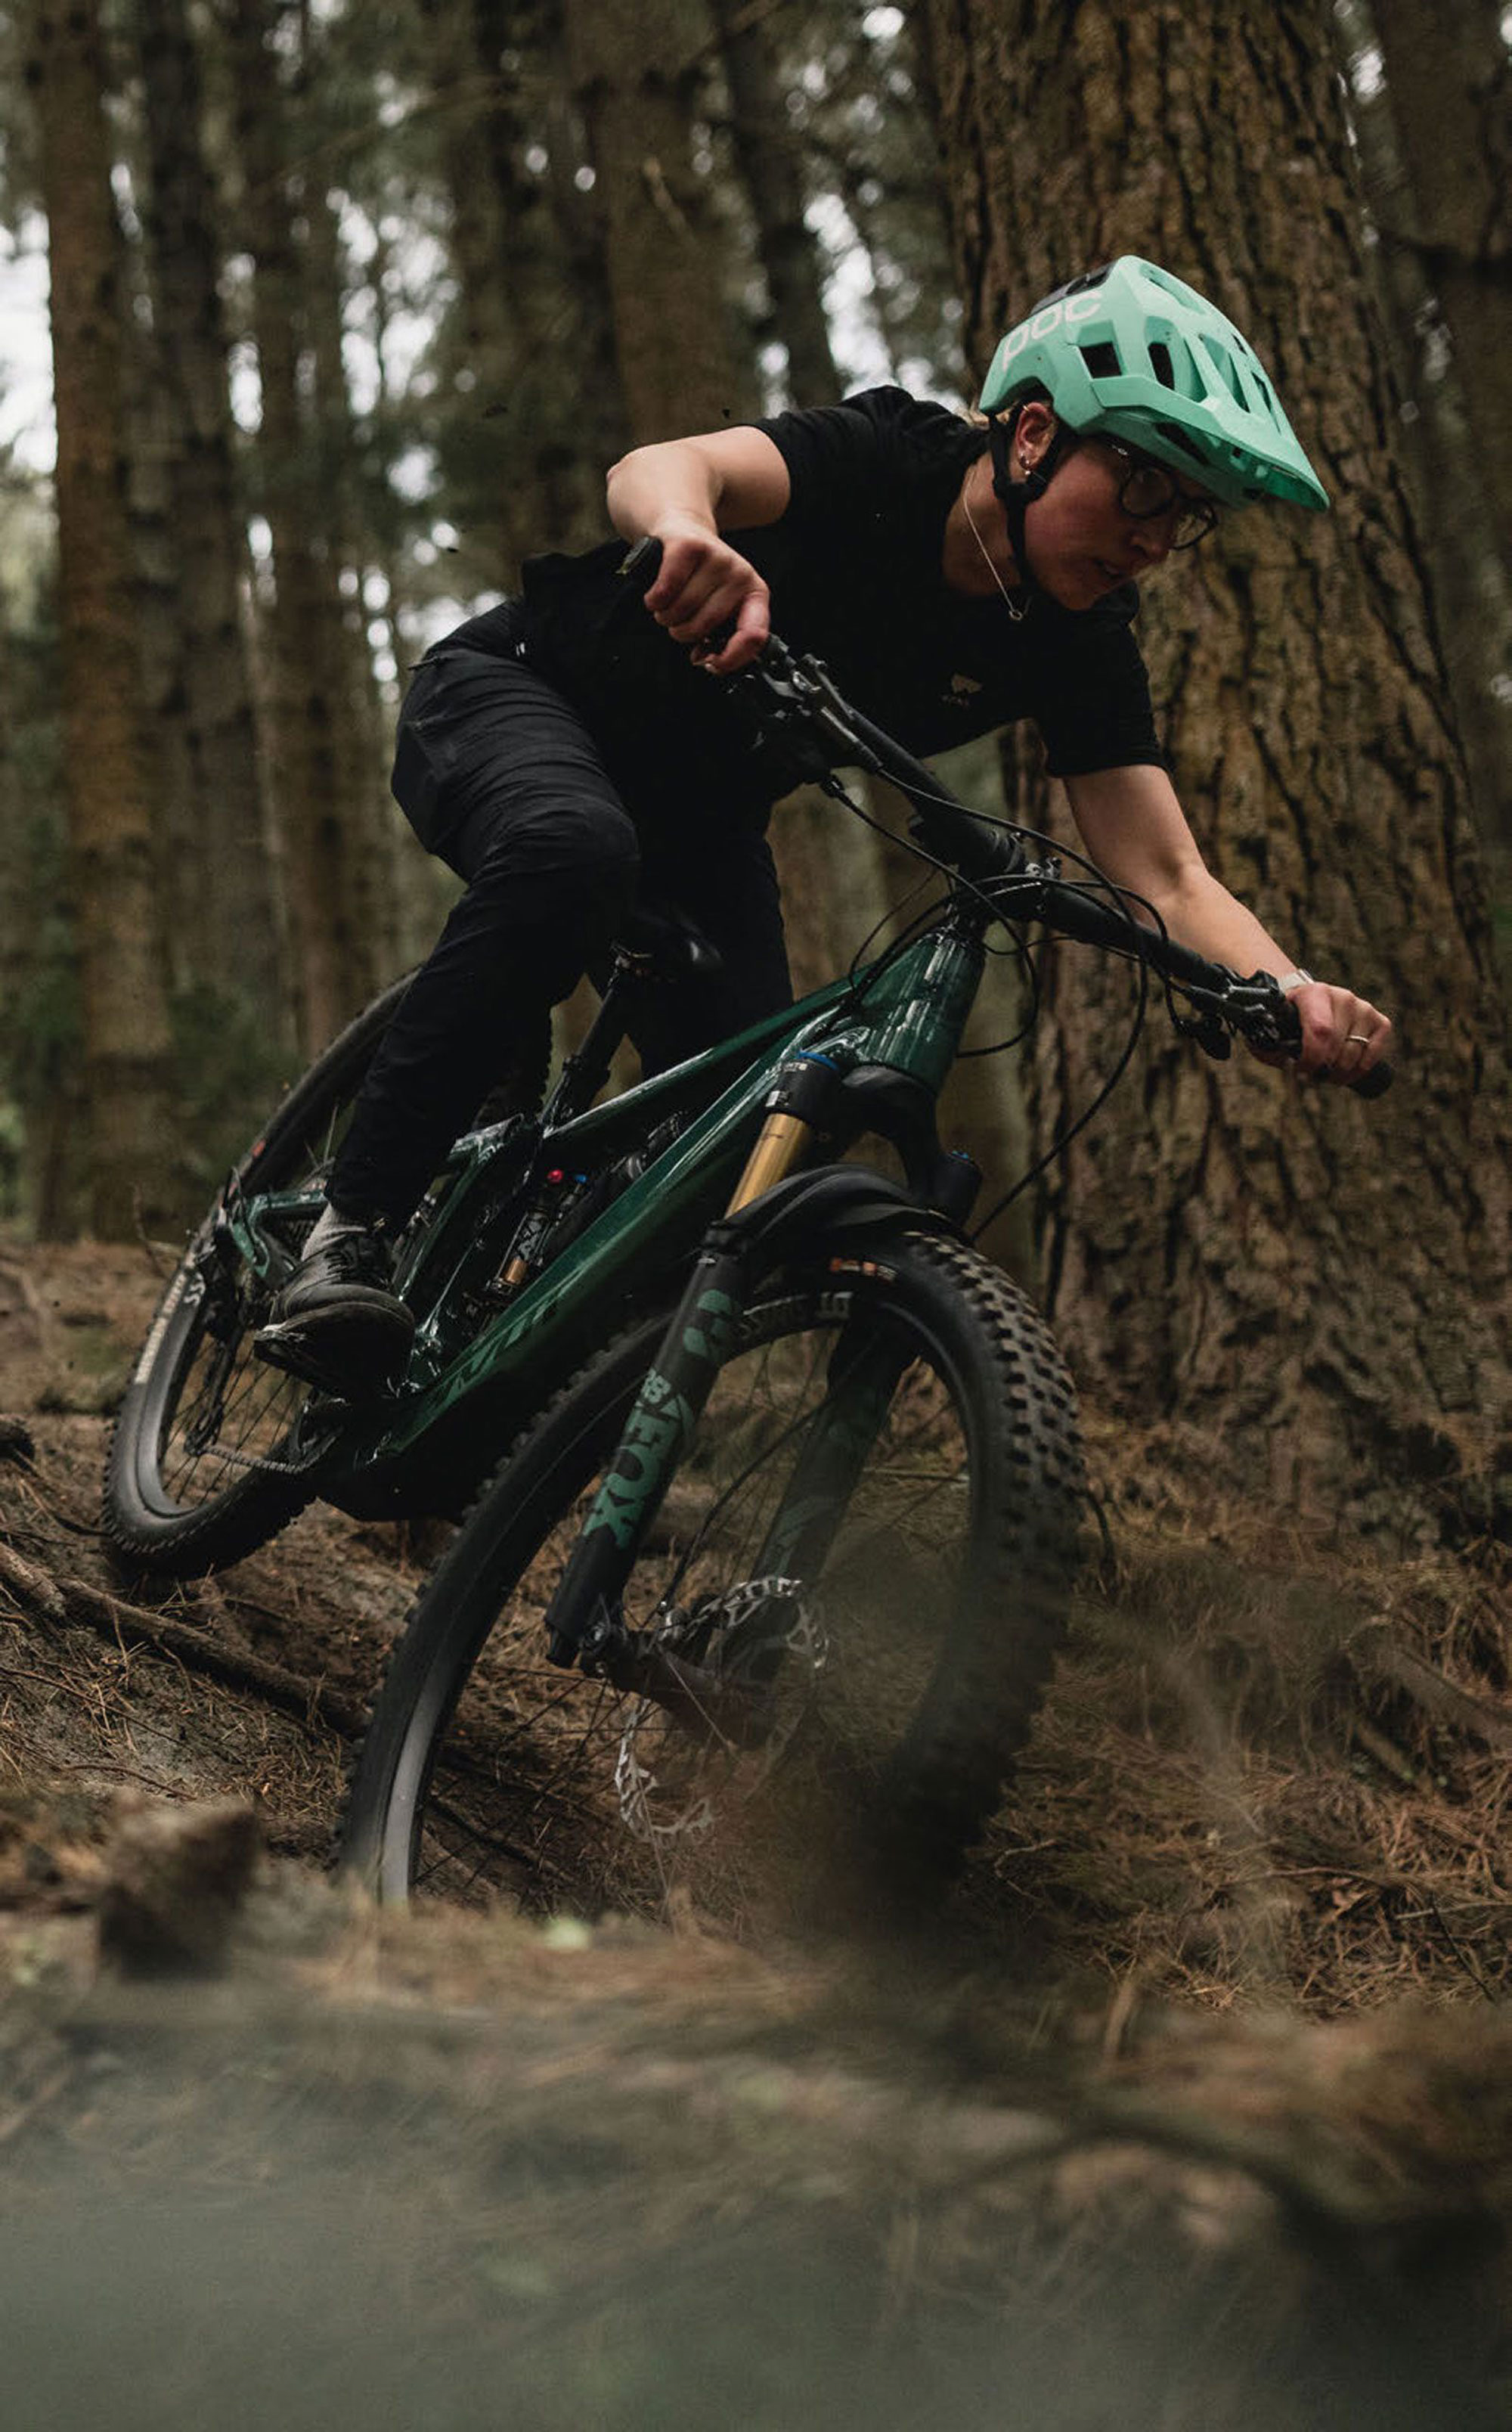
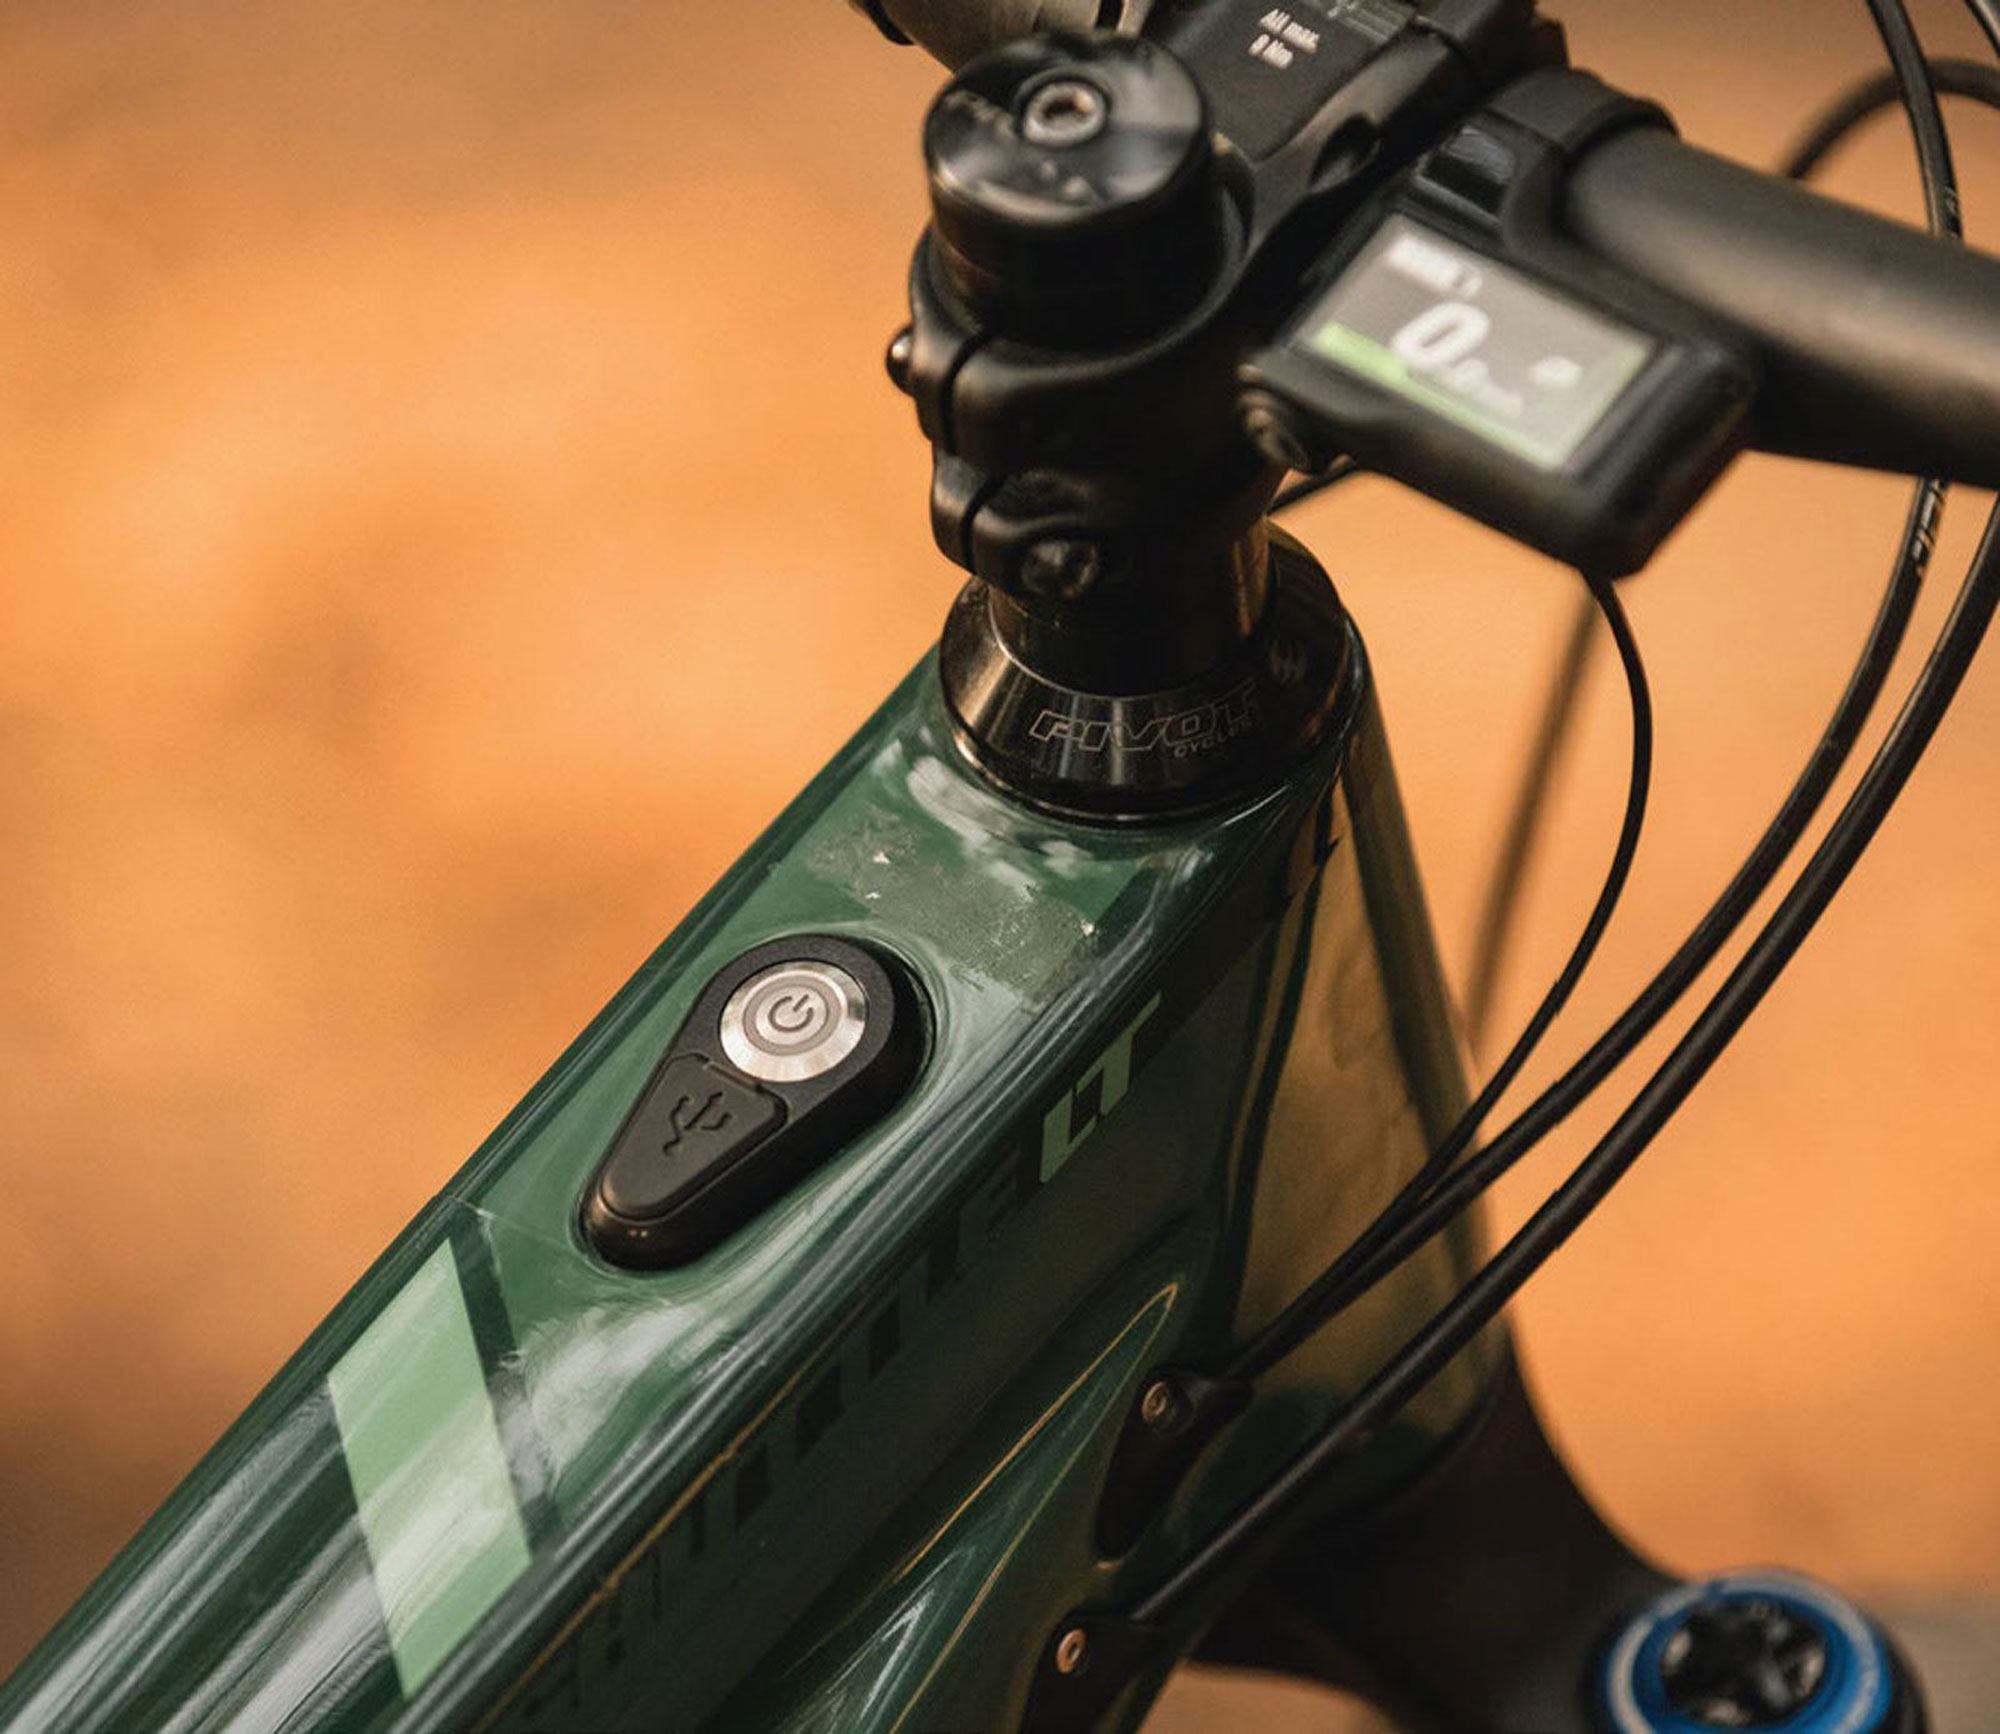
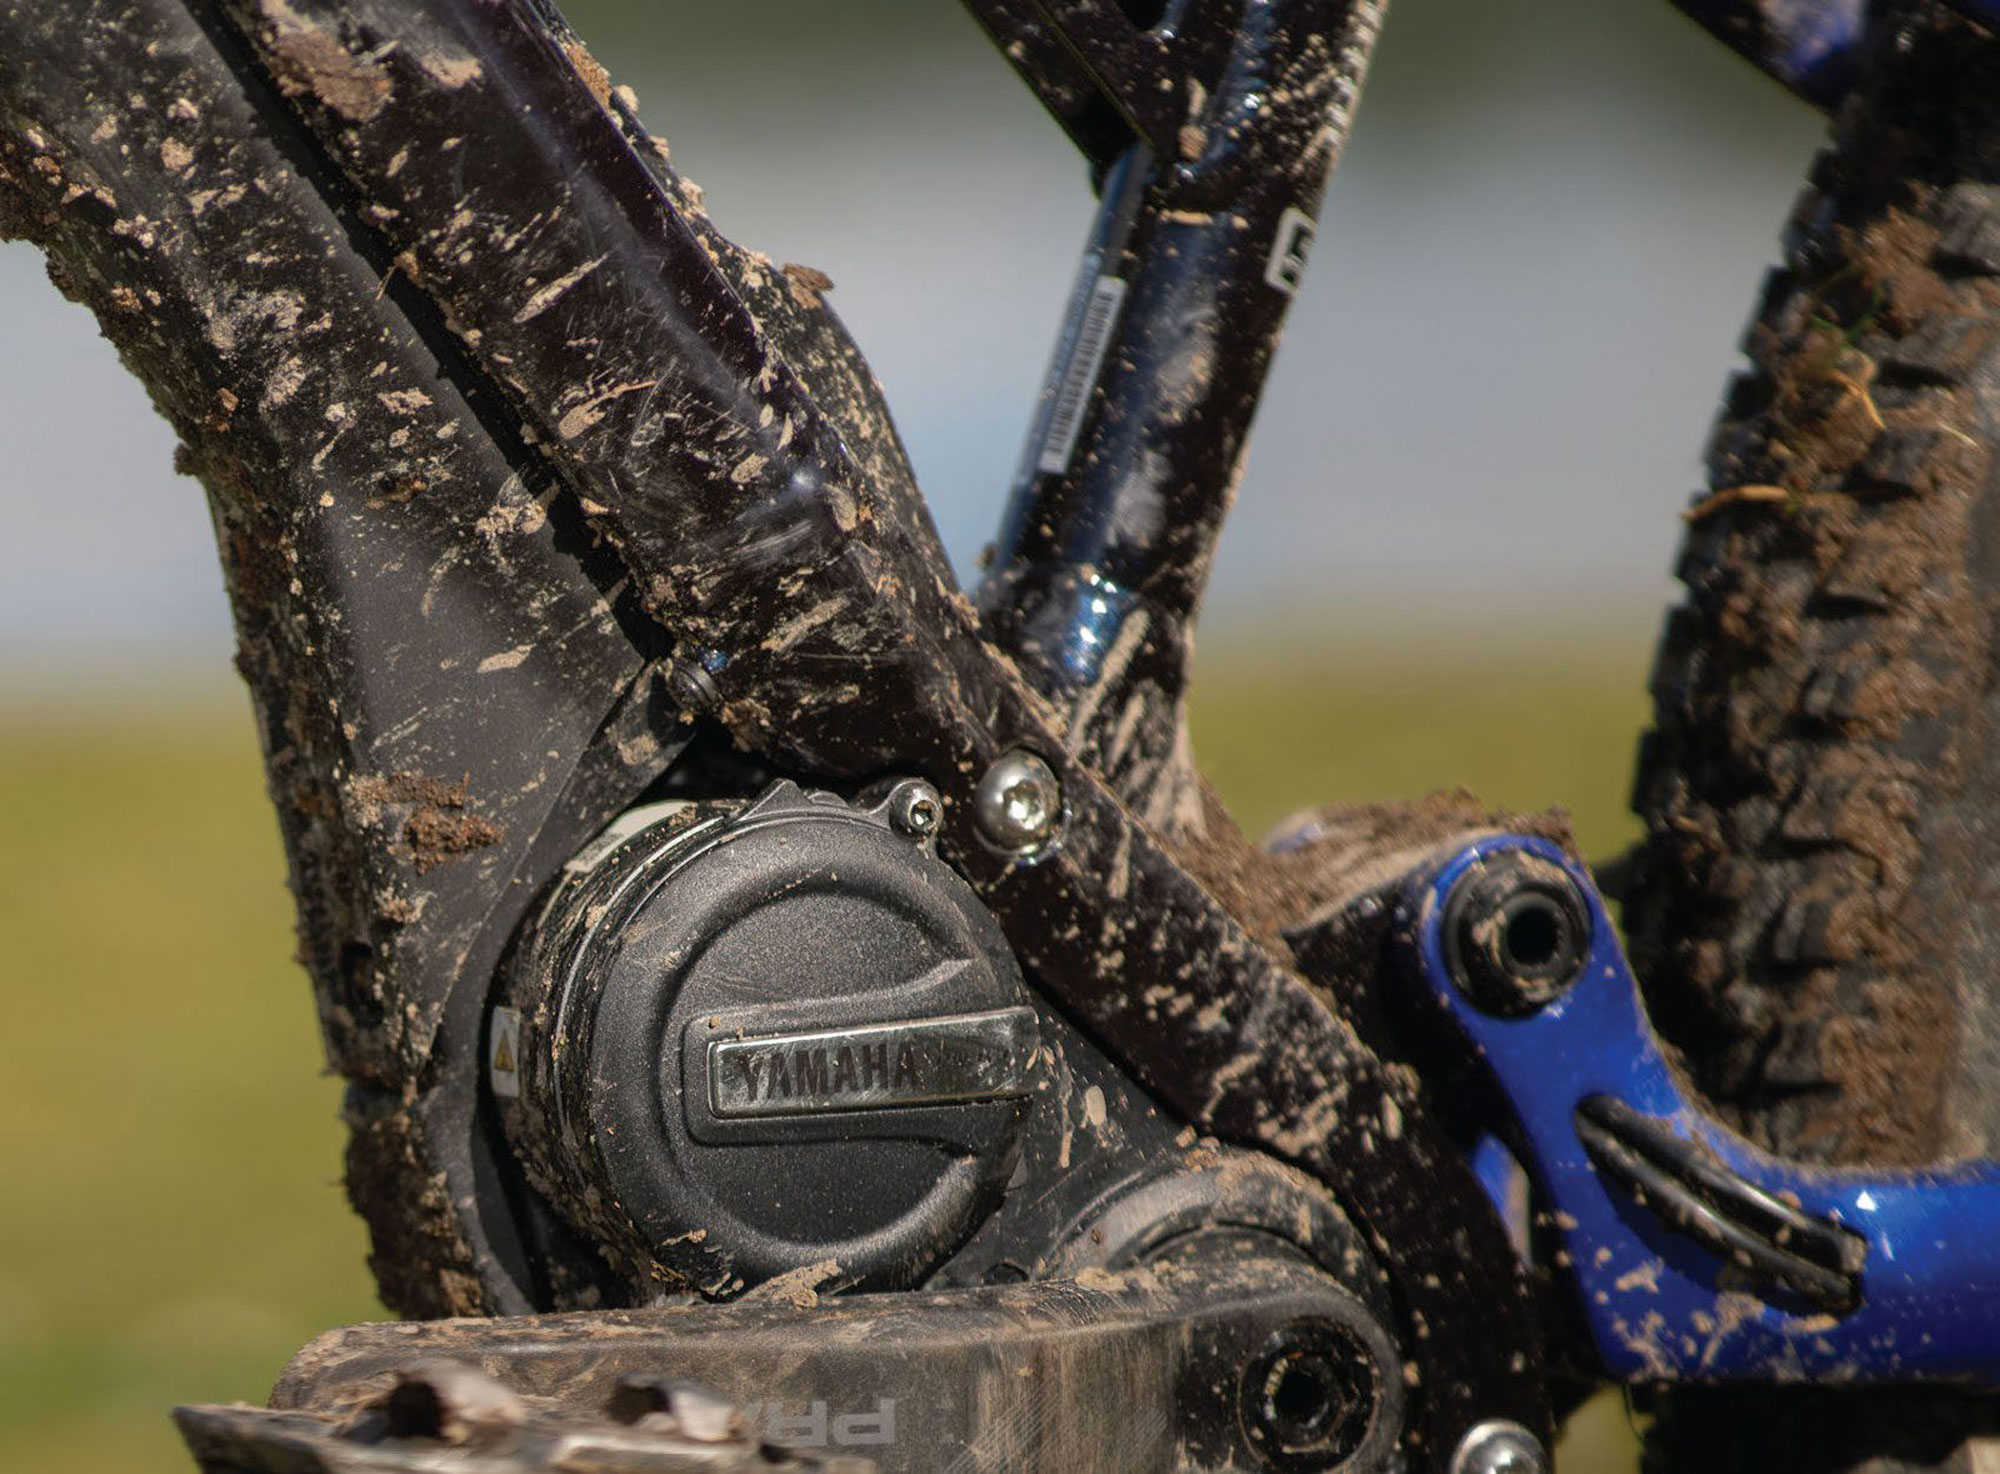
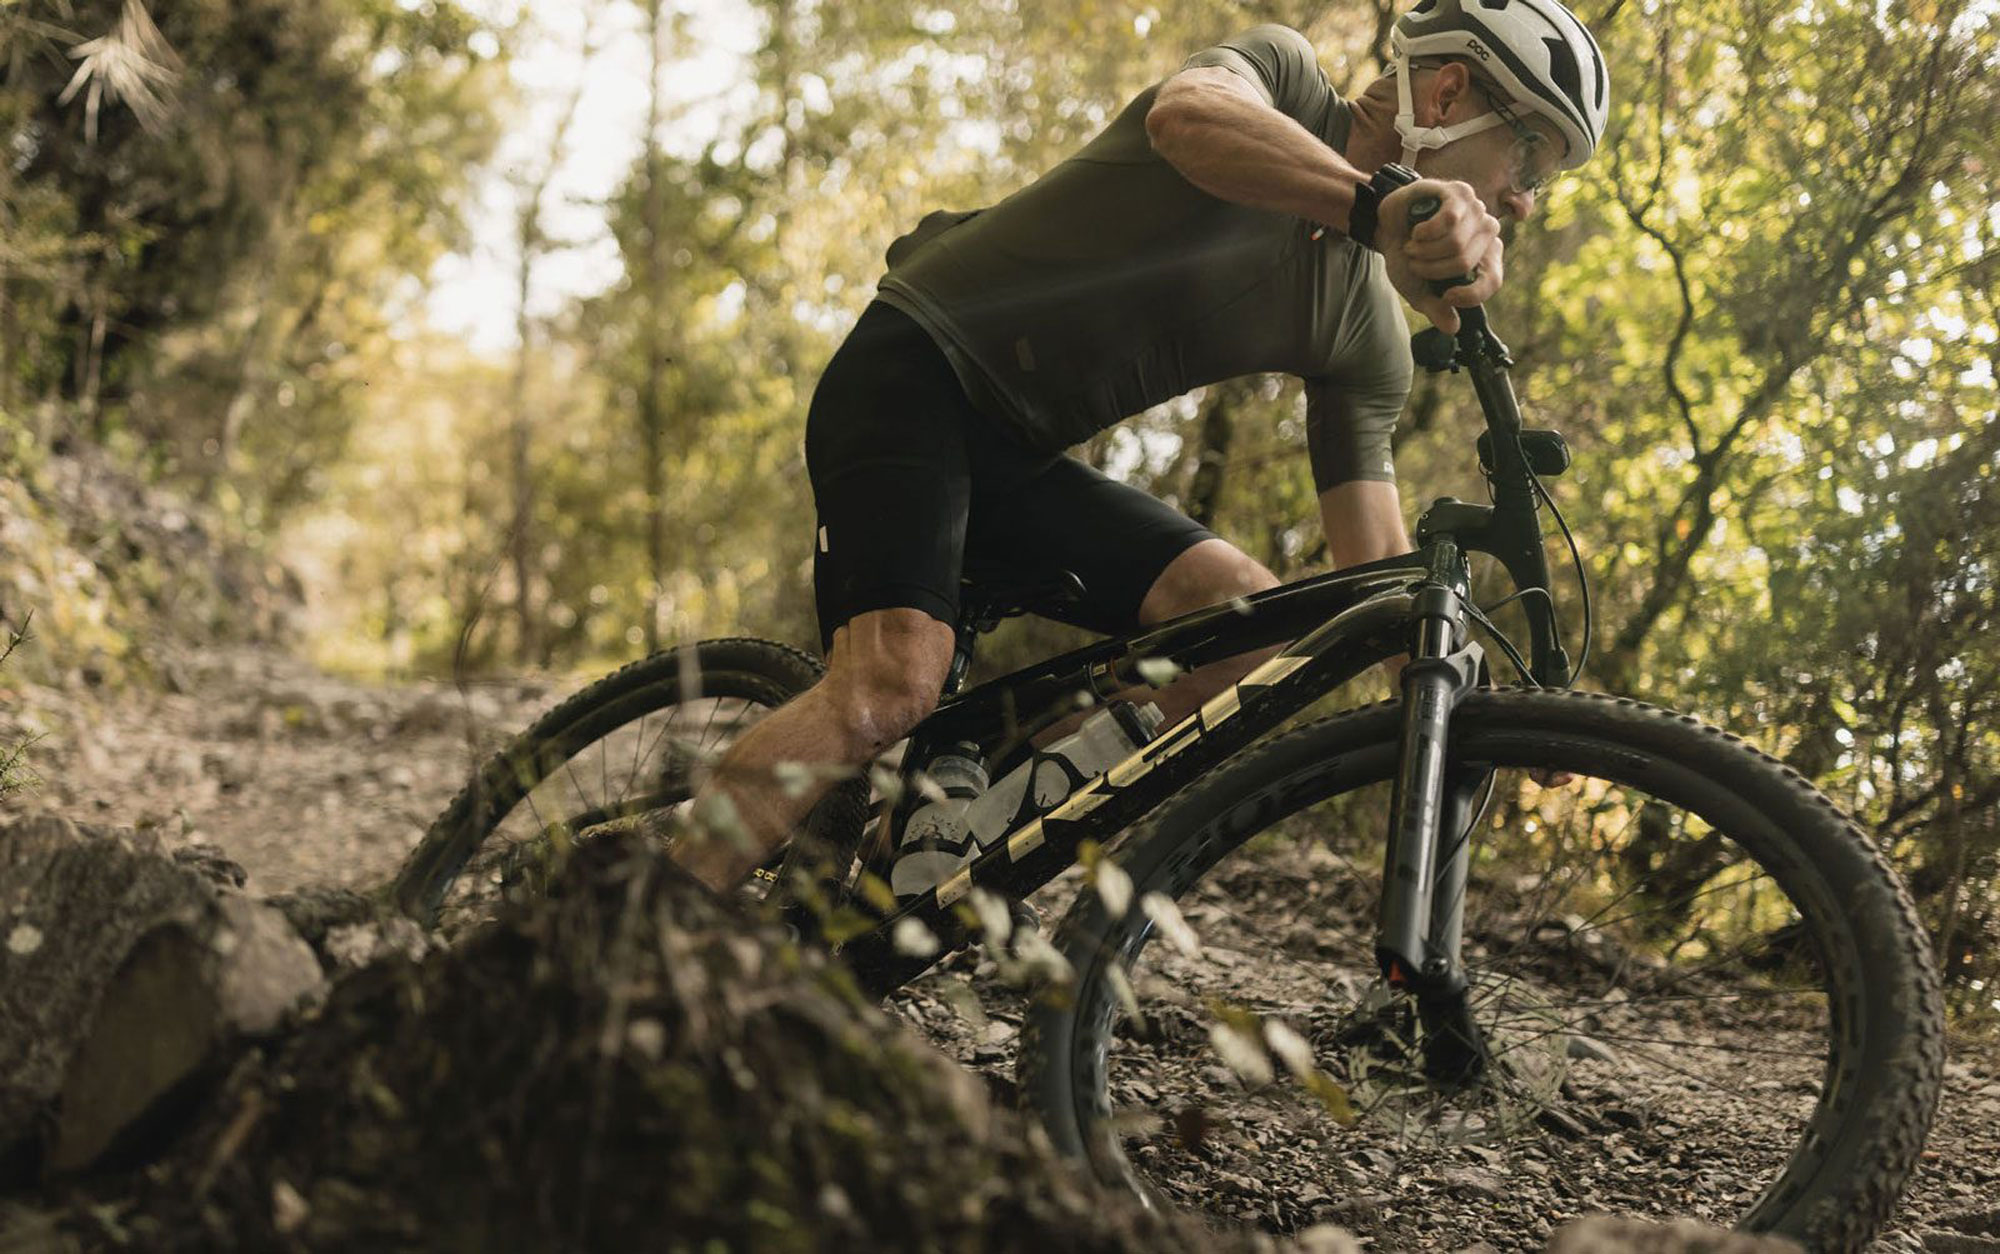
Boasting 170mm front and 160mm rear travel, Pivot’s Shuttle LT doesn’t muck around. Paired with aggressive geometry, the bike is a capable all-rounder designed to tackle any trail –the chunkier the better –without compromising on uphill performance. The Shuttle LT comes equipped with Pivot’s long-time, proven, DW-Link suspension platform and atypically short signature Pivot chainstays. That is to say, it’s a nimble climber that, despite its meaty travel, isn’t intimidated by awkward roots and rocks amidst steep ascending pitches. Likewise, on the descents, The DW-Link platform provides superb bump sensitivity, and aids in feeling as if the bike desperately wants you to go faster. This is evident with the Shuttle LT’s non-powered brother, the Firebird, however the added weight of the motor and battery exacerbate its ability to suck up small bumps and heavy hits even further. Like what we’re accustomed to seeing on many other Pivot models, no small details have been missed. It’s clear that a lot of thought has been given to the integration of the eBike specific details on the shuttle, like the power button, charge ports, and custom motor cover/bash plate.
eBike features
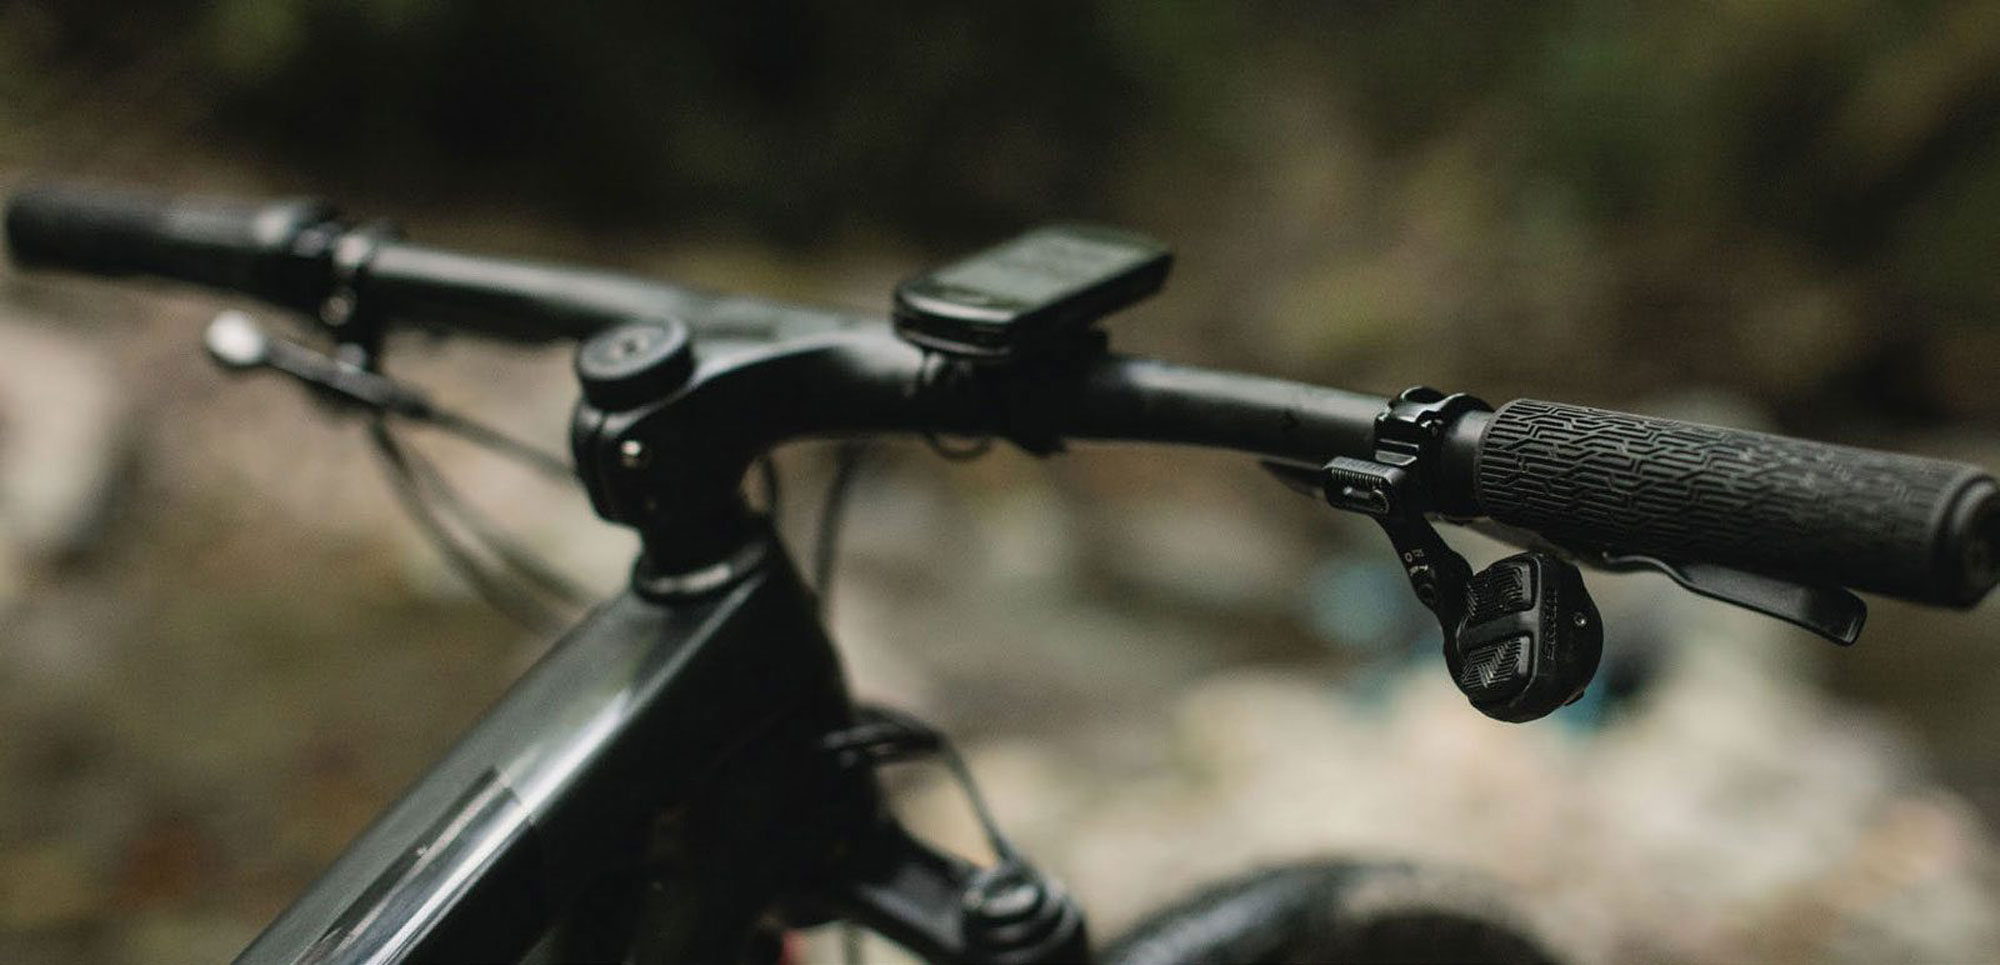
The Shuttle LT sports Shimano’s top-tier EP8 system, which boasts 85 NM of torque and a peak power output of 500wh. On trail, the EP8 system performs flawlessly –providing responsive and assertive assistance, whilst not avoiding the high-pitched whirring of generations gone-by. You’d be very hard pressed to find a technical climb that this bike can’t handle – in fact, you’ll find yourself wanting to turn the assistance down, as opposed to up. A key feature of the EP8 system is the connectivity with Shimano’s E-Tube app, which was faultless to connect with and intuitive to use. After a few rides, I found myself wanting to adjust the motor’s tune so that there was more discernible difference between the three modes –Eco, Trail and Boost. I personally found the factory tune to be a little too powerful for my liking, and the difference between Trail and Boost a little too marginal, so I opted instead for a tune with equal difference across the three modes. Out of the box, the Eco tune was akin to riding a magic carpet on climbs – almost a little unnatural, and removing too much of the likeness to a non- powered bike. The difference between Trail and Boost was so marginal that it didn’t really matter which mode you chose, each would fly. Using the app to adjust the assistance offered in each mode improved the riding experience juristically, and helped remove that all-or-nothing feeling -though I’m not sure how many of the prospective buyers for this bike would be aware of that functionality. While the EP8 motor integrates into the frame well, the rest of the system leaves little to be desired. A lot of other manufacturers, such as Brose or Bosch, offer much cleaner and sleeker integration of their displays and controls nowadays, with some handlebar controllers even being wireless, and displays fitted into or onto the top tubes of bikes. In the case of Shimano’s EP8 System, the controls are connected via a network of small cables, linked to a basic display fitted to the handlebar. The system isn’t bad overall, and Shimano’s controller is sleek, but the little cables added have a big impact on the tidiness of the front end.
Geometry
The Shuttle LT sports progressive and aggressive geometry, comparable to many non-powered EDR World Cup winning Enduro bikes. The 64.5-degree headtube angle means the bike isn’t intimidated by steep, technical tails and maintains a “point and shoot” feeling –no matter how tricky the trail, you can be rest assured this bike has got your back. Paired with a long 1245mm wheelbase, the bike excels on fast, wide-open trails where it is stable and planted; however, its heavy weight can sometimes feel a little cumbersome on more awkward, tighter sections of trail, both climbing and descending. The Shuttle LT’s aggressive design continues through into the front triangle, with the bike boasting a longer-than-usual reach – 471mm on the size medium. It’s not uncommon to find many other long-travel eBikes offering smaller reach numbers, as a way to overcome the weight and manoeuvrability penalties of full-powered bikes. In the case of the Shuttle, this long front-centre doesn’t penalize the performance off the bike – rather adding to its point-and-shoot portfolio – but is a critical pinch point for the bike, and prospective buyers whom may be wanting the bike to fit or feel a certain way on the trail. The long reach and wheelbase are complemented by a steep seat tube angle of 77-degrees that balances out the cockpit, creating a forward-riding position that reduces the feeling of reaching far, making the bike delightfully comfortable on lengthy climbs. While the short seat tube ensures the bike is well and truly out of the way when attacking technical descents, those with longer limbs (myself included) may find the stock 175mm Fox Factory Transfer dropper post a little short, leaving more seat post exposed than desired, and therefore find themselves wishing for a 200mm drop post instead.

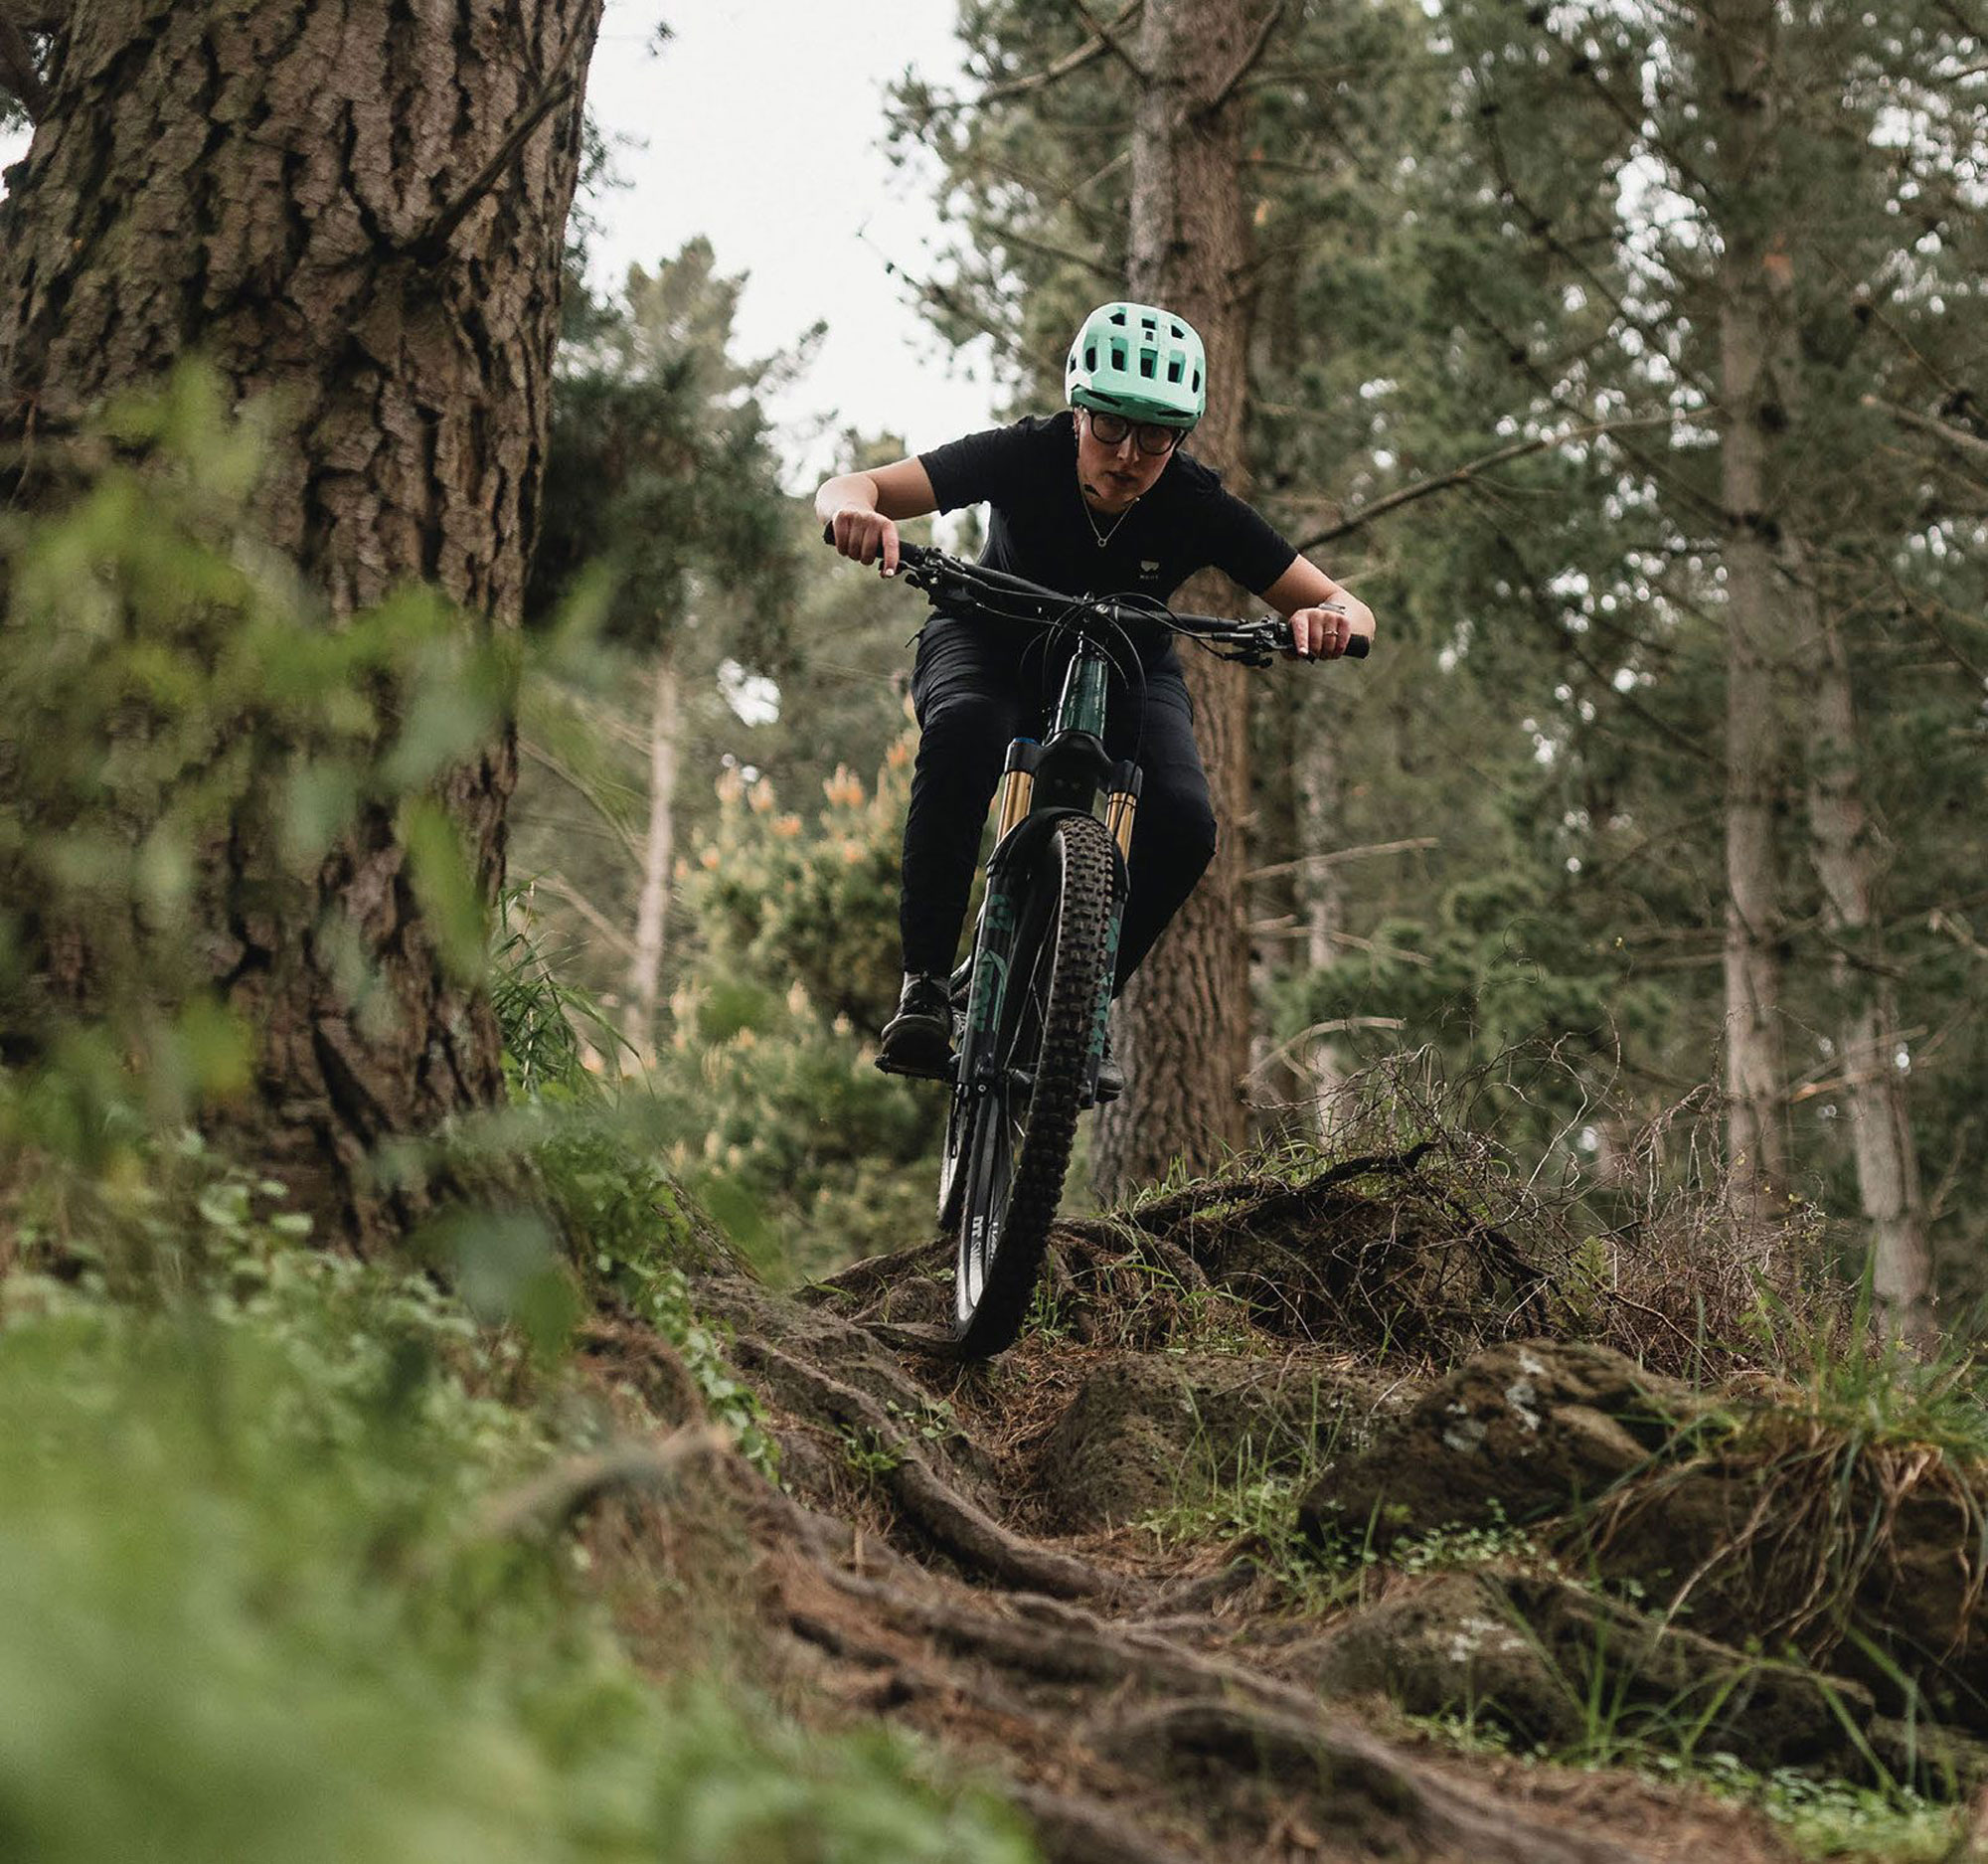
Ride performance
Climbing
Pivot have managed to strike a fine balance between a wheelbase that creates a stable, planted feel on the descents whilst maintaining a cockpit that doesn’t feel cramped when climbing. Without contradicting myself, the only downside to the Shuttle’s long-limbs is that the bike can be a little cumbersome on tight uphill corners, especially when combined with the added weight of the powertrain. I found myself needing to be a bit careful where you point your front wheel to ensure that the power and torque are tracking exactly where you want to be, because if you end up a little off-line, it can be a bit awkward to correct your trajectory. However, all in all it is delightfully comfortable on the ascents; the upright, forward-climbing position makes it feel almost eager to propel you forward with each pedal stroke, even on the steepest of climbs. This will come as no surprise for those familiar with Pivot’s adaptation of the long-proven DW Link suspension platform – having ridden many of their non-electric offerings in the past, the sensation of efficient propulsion is certainly as present on the Shuttle LT. The shifting quality is impeccable thanks to the top-of-the-line Shimano XTR groupset, meaning you need not worry about the bike hesitating or searching for gears upon downshifting, a particularly beneficial quality given the ample
torque produced by the EP8 motor when climbing.
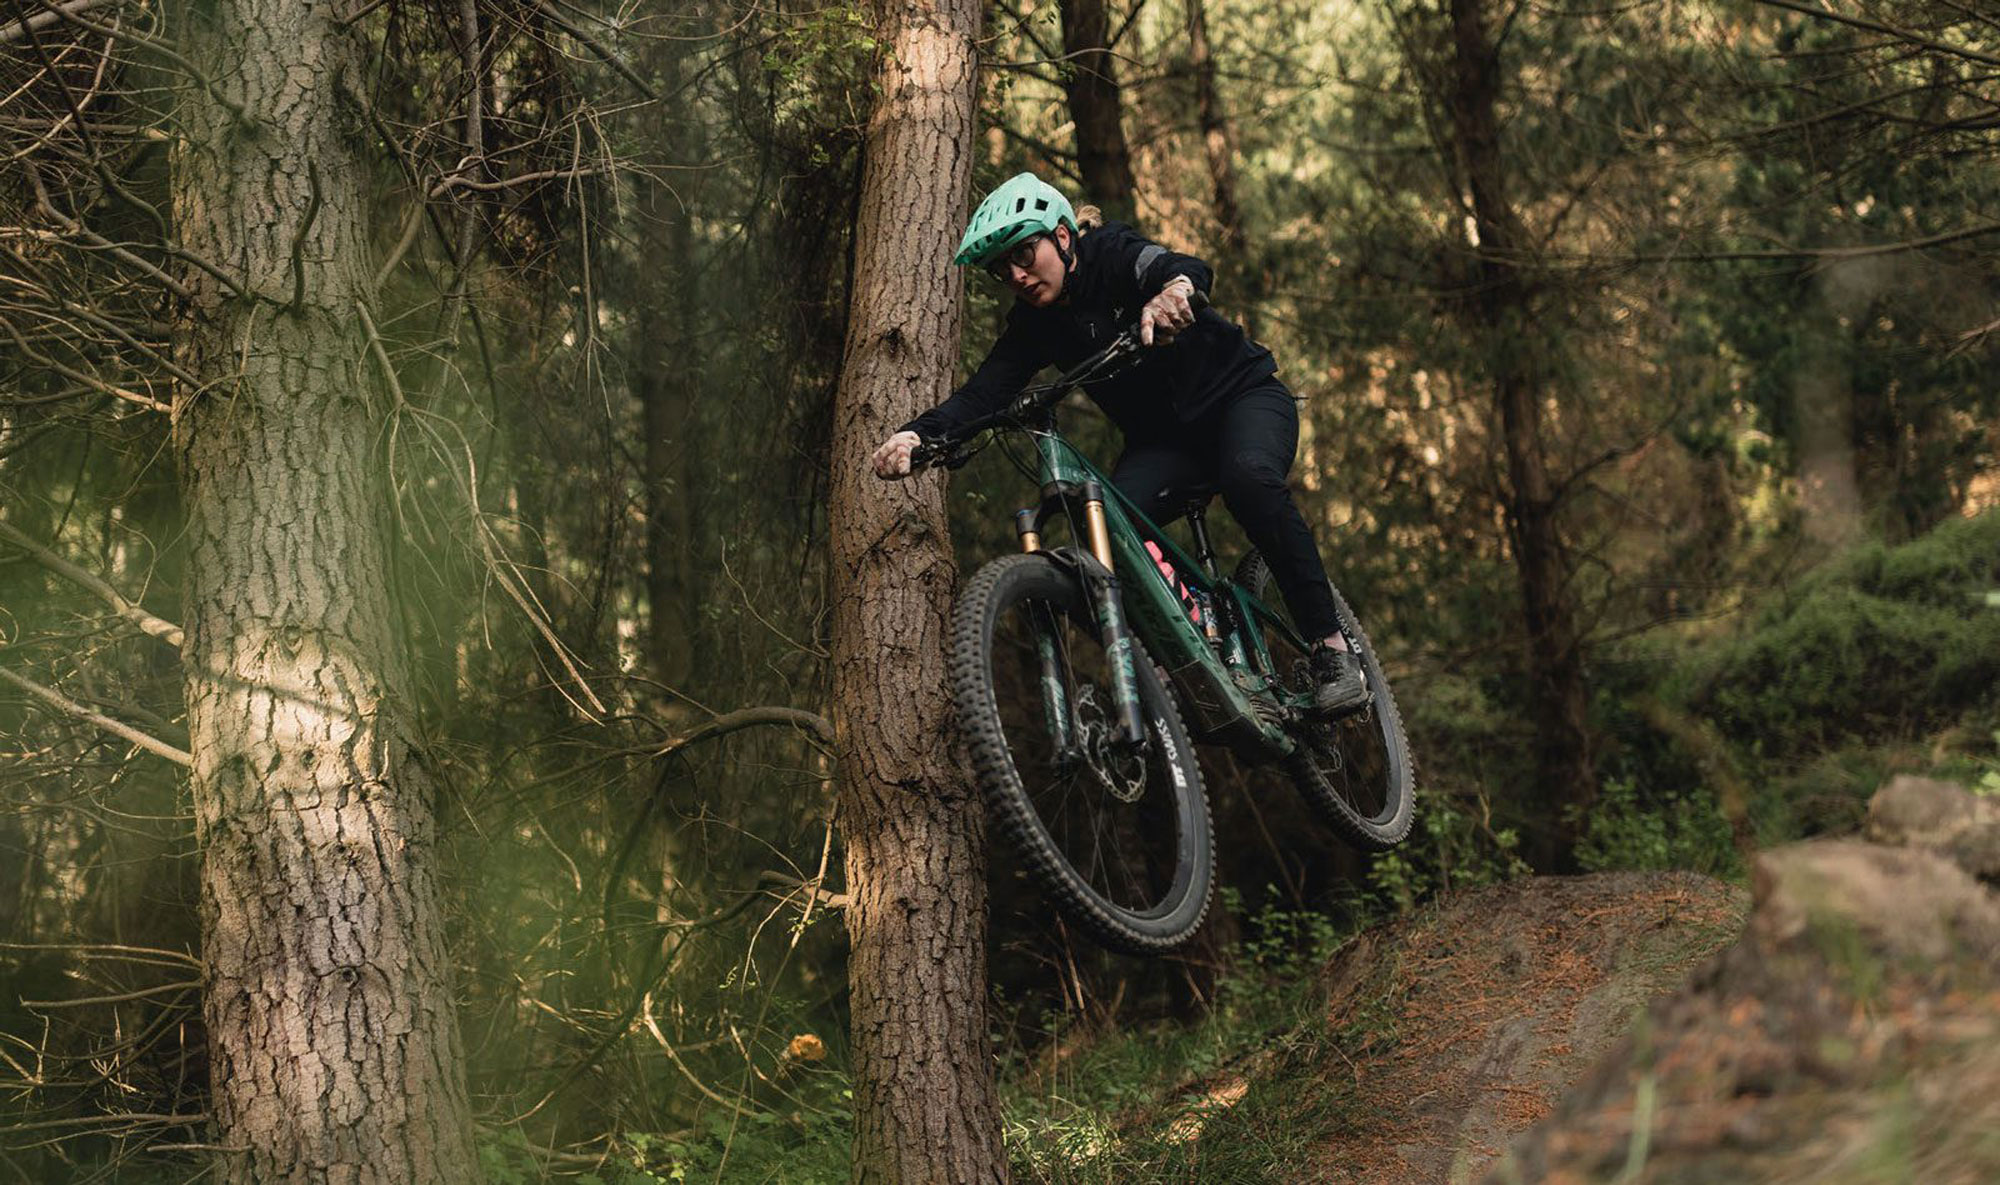
Descending
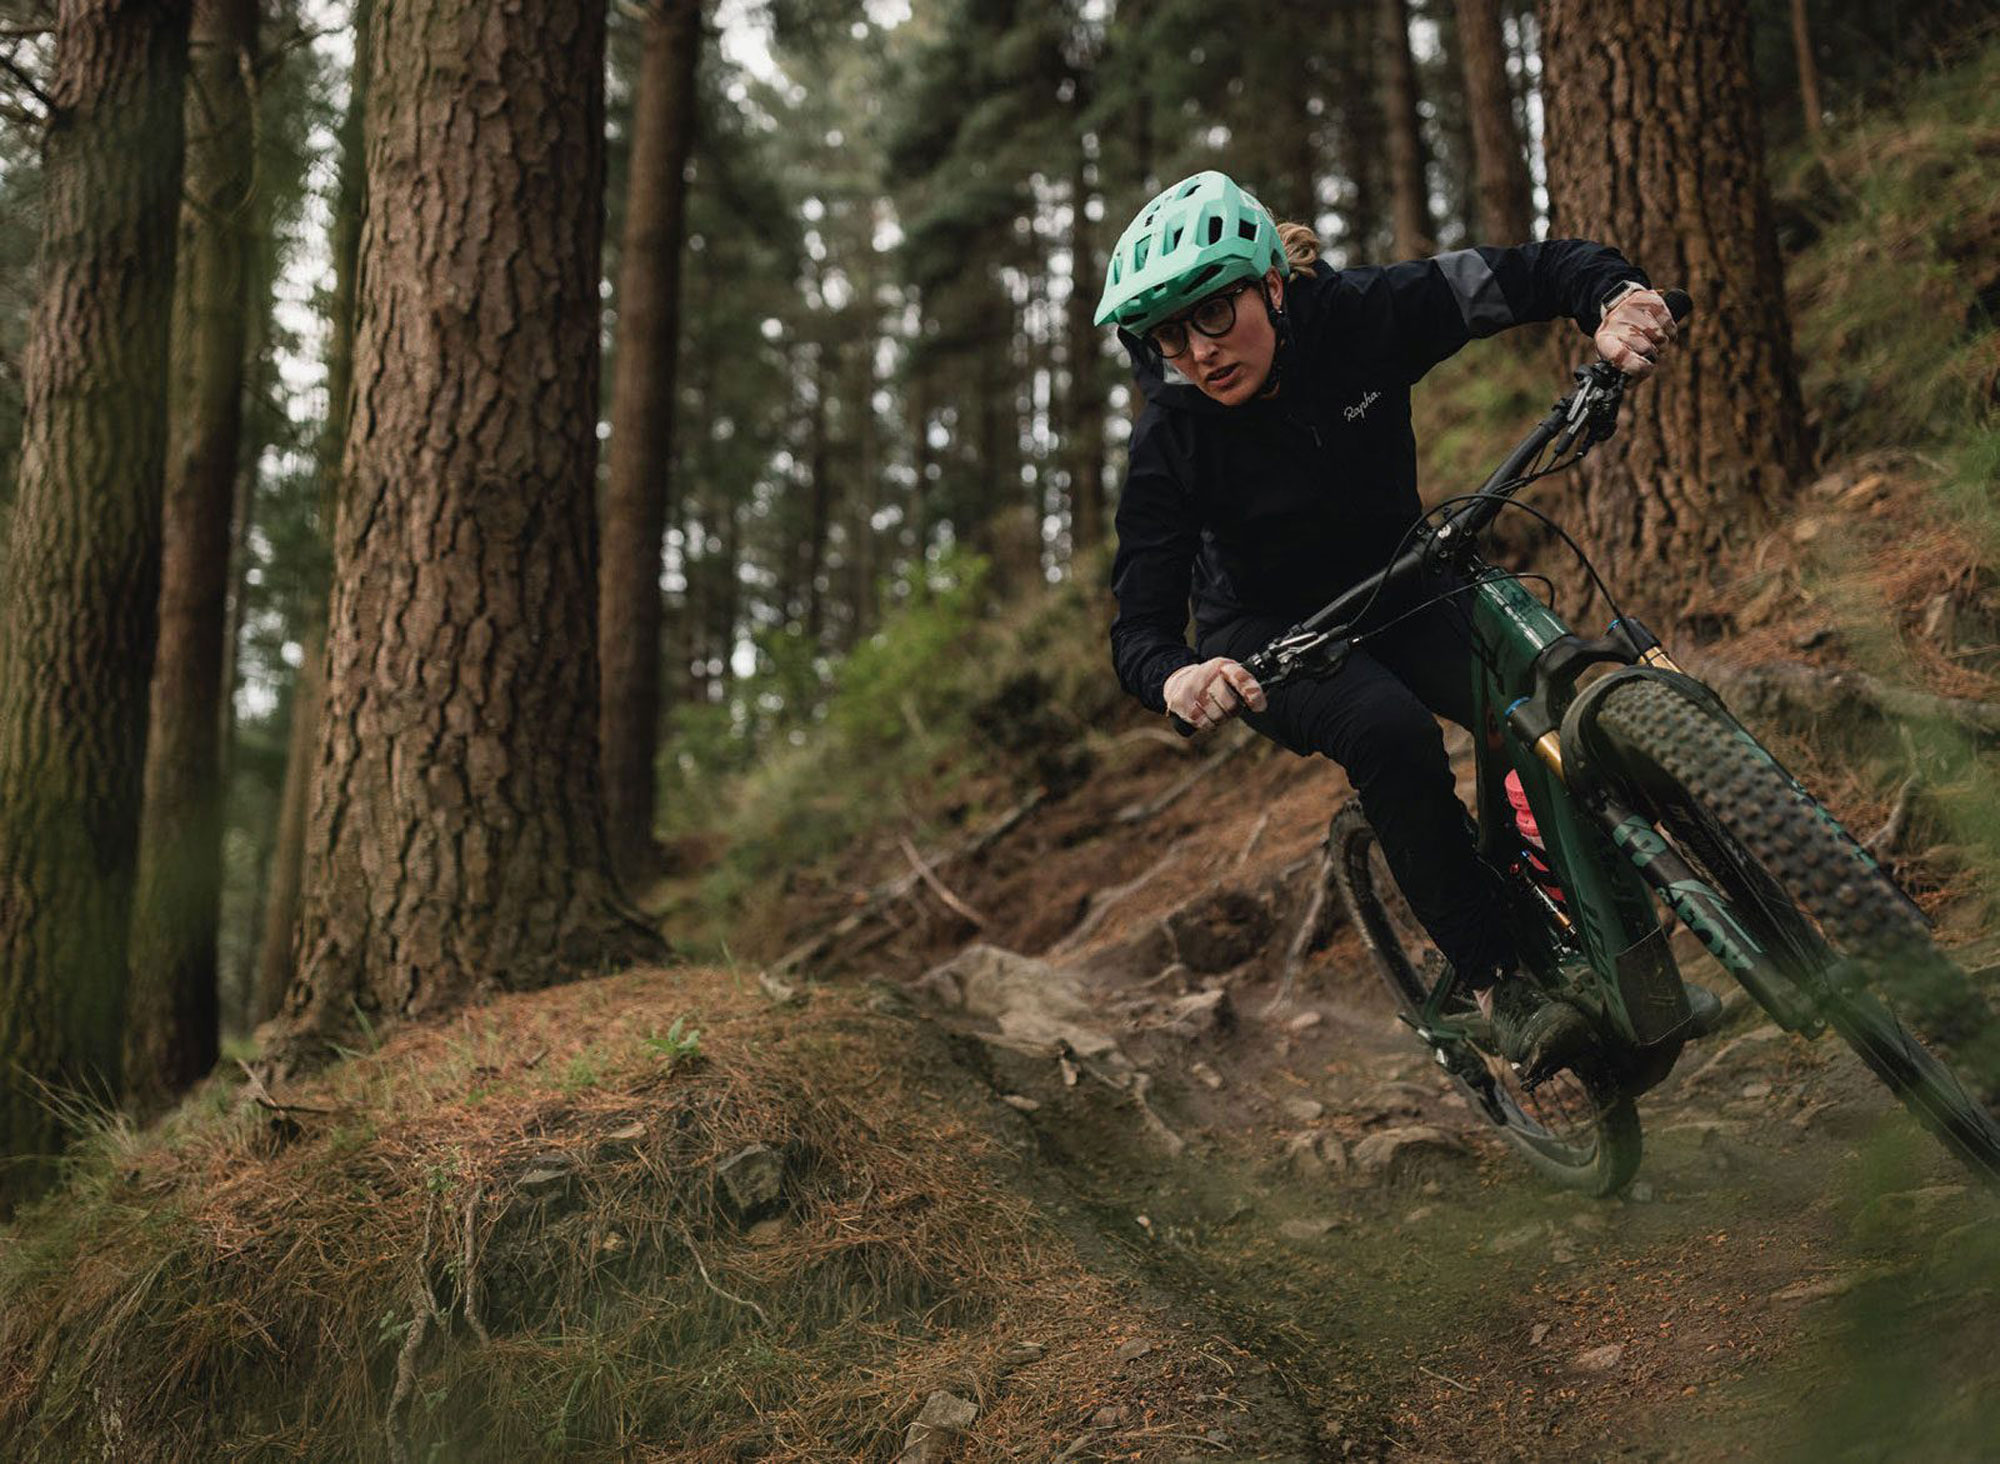
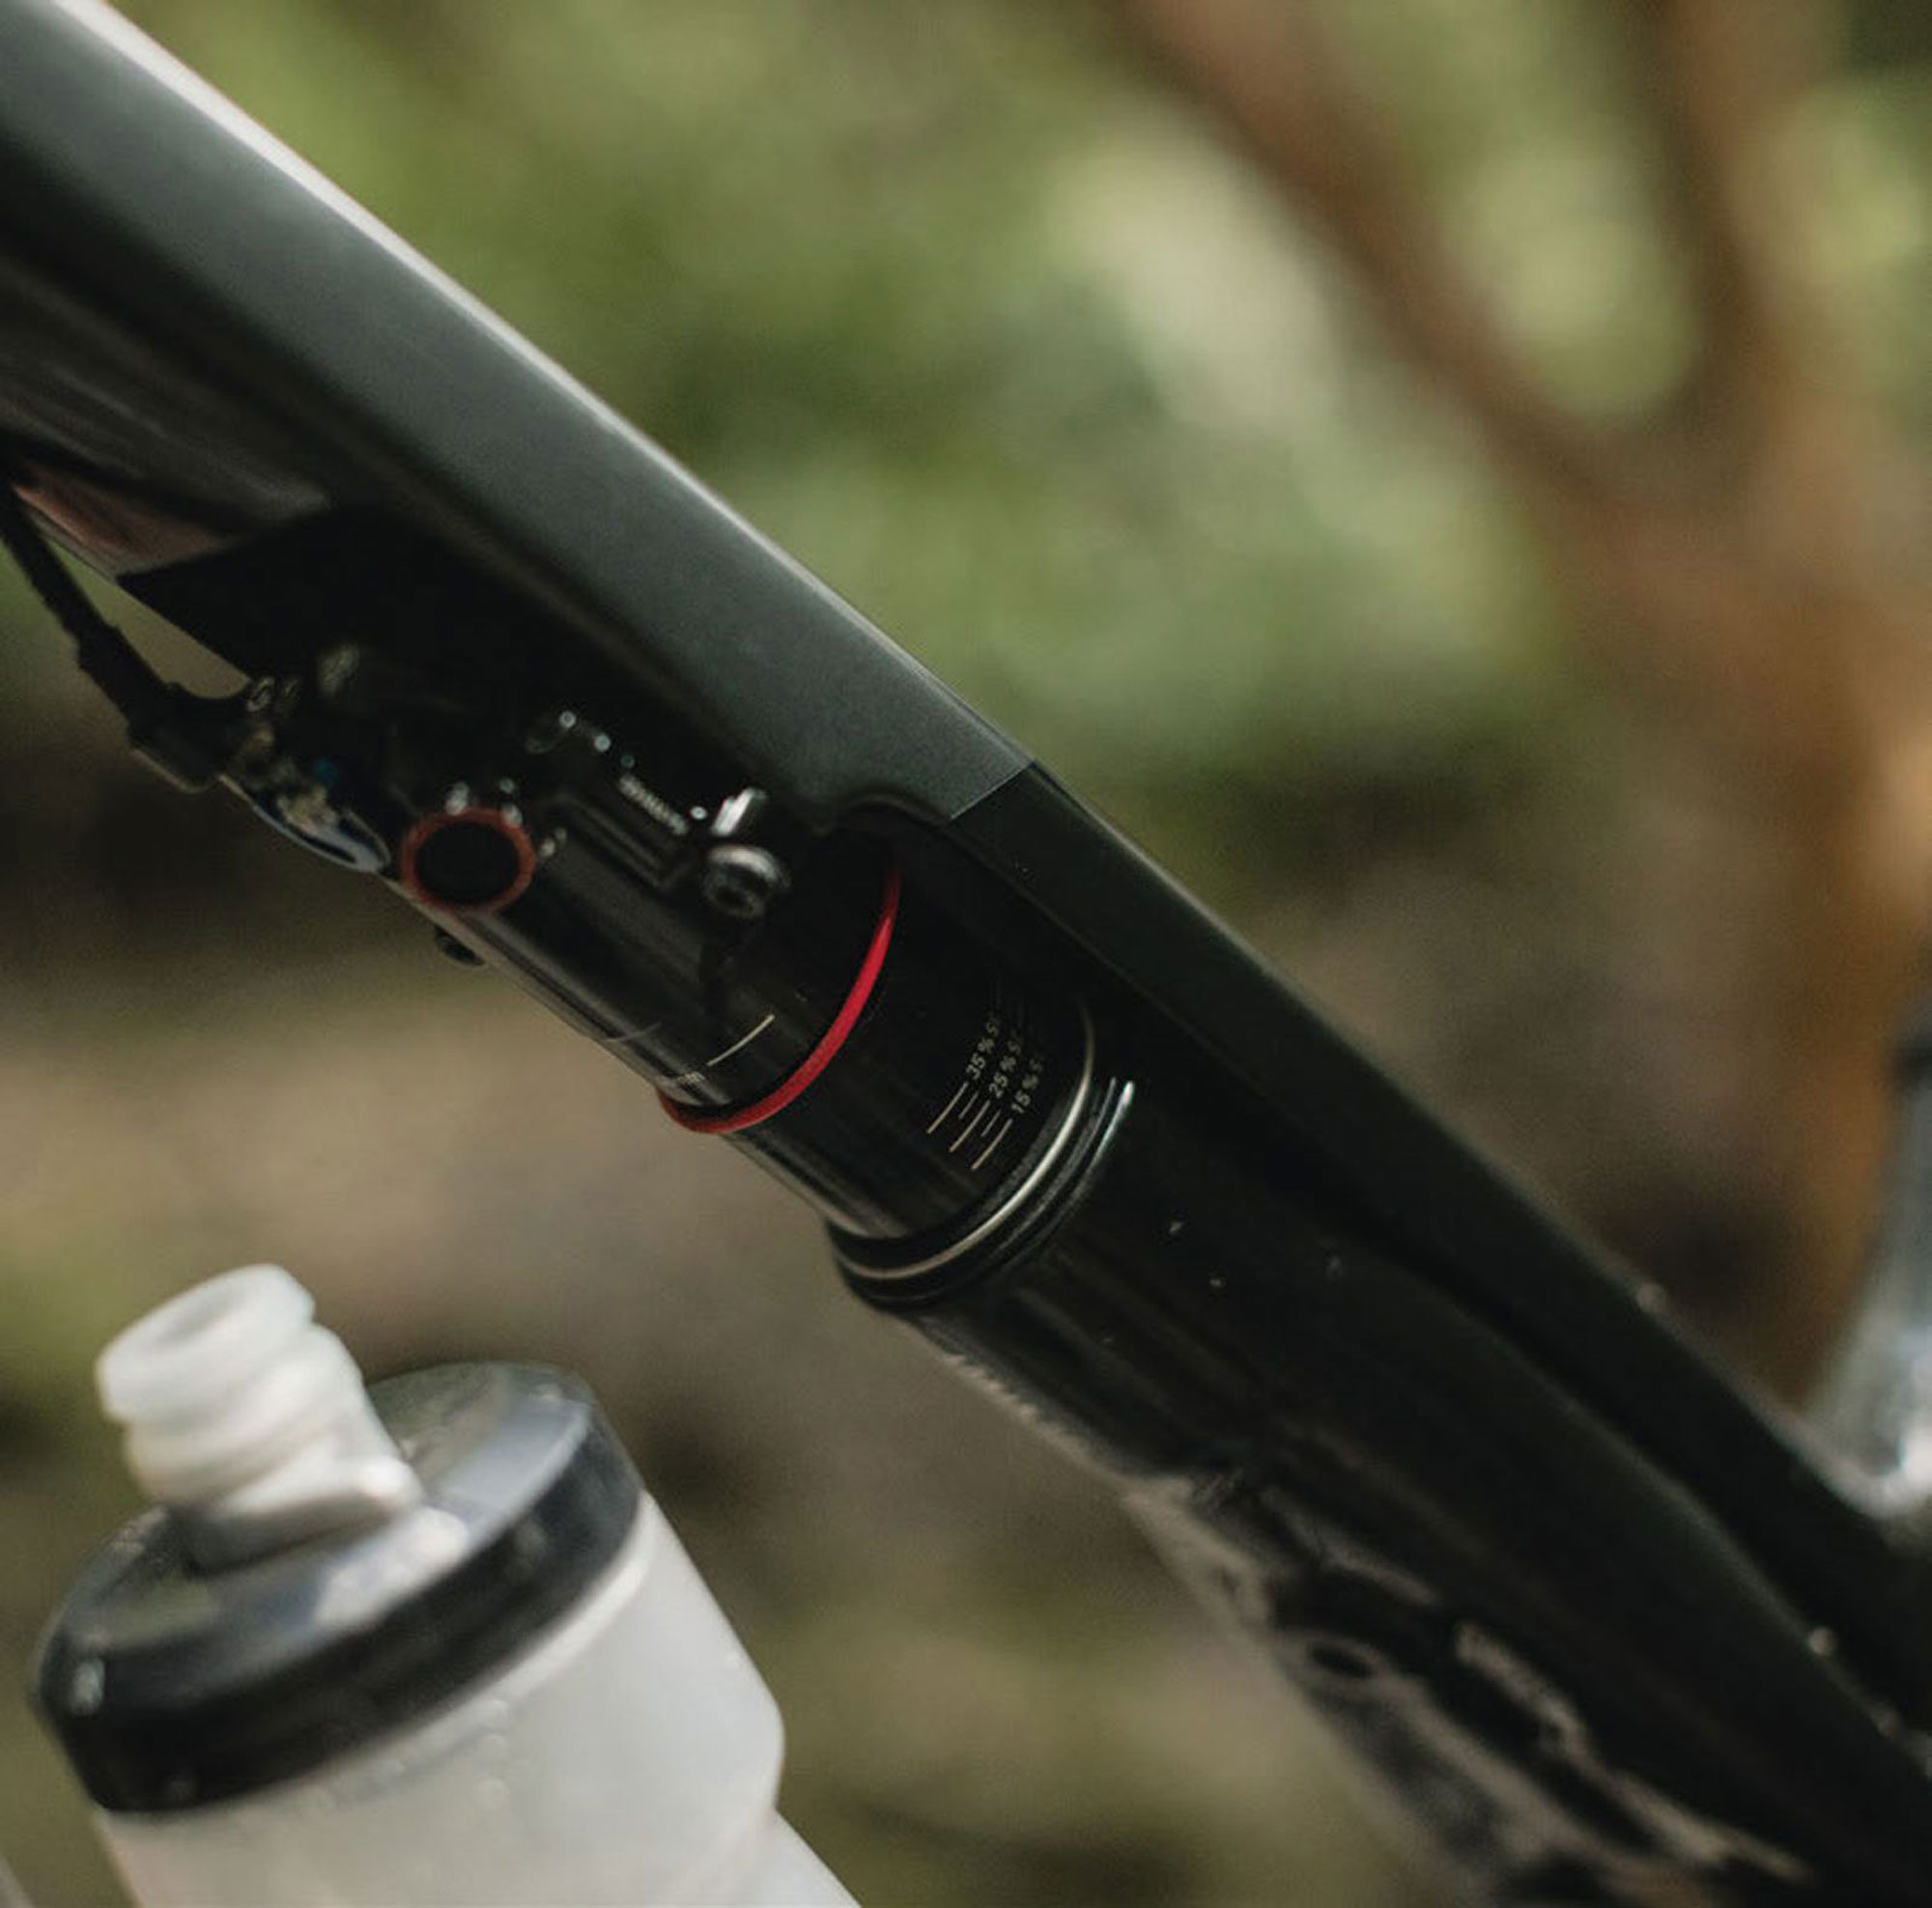
Let’s not beat around the bush – with 170mm of travel and aggressive geometry, the Shuttle LT is a bruiser that excels on chunky, high-speed and technical terrain. The bike tackles chundery terrain with ease, and small bump sensitivity is superb with the Fox Factory E-MTB 38 and Float X being the perfect pairing to its aggressive geometry. Compared to the non-electric offerings in Pivot’s range that I’ve ridden previously, such as the Firebird and Switchblade, the Shuttle LT frame feels a little less stiff on high-speed descents which was actually a welcome surprise, as it off-set the added weight of the motor and gave the bike a more natural feel. In classic Pivot fashion, the Shuttle LT sports short chainstays and a low standover, making it easily manoeuvrable in awkward, tight spots and making the rider feel “in control”, which is particularly important to note on an eBike, as the added weight of the motor can often bring about a “lead weight” sensation akin to the bike doing all the work for you. Add to this the Shuttle LT’s slack head angle, which creates a confidence-inducing “point and shoot” feel on particularly steep descents, elevated further when combined with the bike’s ample braking traction. After riding a range of both lightweight and full-powered eBikes, I have often found that brakes are one of, if not THE, most under-gunned components spec’d on these bikes relative to their weight and required stopping power. So, it’s fair to say the Shuttle LT’s XTR brakes, paired with meaty 203mm rotors, were a welcome addition particularly given the steep, technical terrain the bike excels on. However, I would’ve preferred a hardier tyre than the stock EXO+ Maxxis Assegai on the rear, as this had a tendency to lose grip in loose conditions and roll around unnecessarily, so I ended up swapping this out for a Maxxis Minion DHRII with a Double Down Casing to achieve a little more support under braking. Pivot’s contact points also leave a lot to be desired –from the thin, slippy grips to the low-rise bars topped off with the harsh, uncomfortable saddle. Arguably, contact points and tyre choice are subjective, but when paying $25k you’d hope that some of these finer details would be a little more considered. Whilst the Shuttle LT’s big 756Wh battery does provide ample fuel for all-day adventures, because this sits within a relatively chunky downtube coupled with the angled vertical shock mounting position, It does mean you are left with limited additional frame space for other adventure essentials. On the size medium frame I was reviewing, it was a push to fit my smallest 600ml bottle, and trying to strap anything extra to the frame – such as a small jacket or even an enduro banana – is out of the question. Whilst not a dealbreaker, it does mean you need to be extra conscious before heading out the door that you’ve got enough alternative means of carrying your knick-knacks, and more than an hour’s worth of water. These may sound like minor points, but the irony of all this is that with the beefy battery the Shuttle LT boasts, you’re able to extend your rides, albeit without the ability to carry to essentials one may need to support such missions.

Summary
Whilst the Shuttle LT belongs in the upper-ranks of eBike offerings for its well-rounded capabilities and genre-bending descending characteristics, the little details do impact the bike’s scorecard. If you can look past the angled shock position – yes, I said it – then the Shuttle LT is a strong offering in an increasingly completive segment of the e-market. Whilst there are a lot of small details that have been overlooked – from poor spec choices in the tyres and contact points, to the messy cockpit thanks to Shimano’s reliance on cables – the bones of the bike are solid. A good mechanic – or a 6-pack of beers and a few metres of heat-shrink can overcome the clutter, and things like tyres and grips can be swapped. I’ll let you decide if, for $25,995, you should be having to but, firstly, try one on for size as you may find you’ll want to size down.
SRAM GX Transmission
Words Lester Perry
Images Cameron Mackenzie
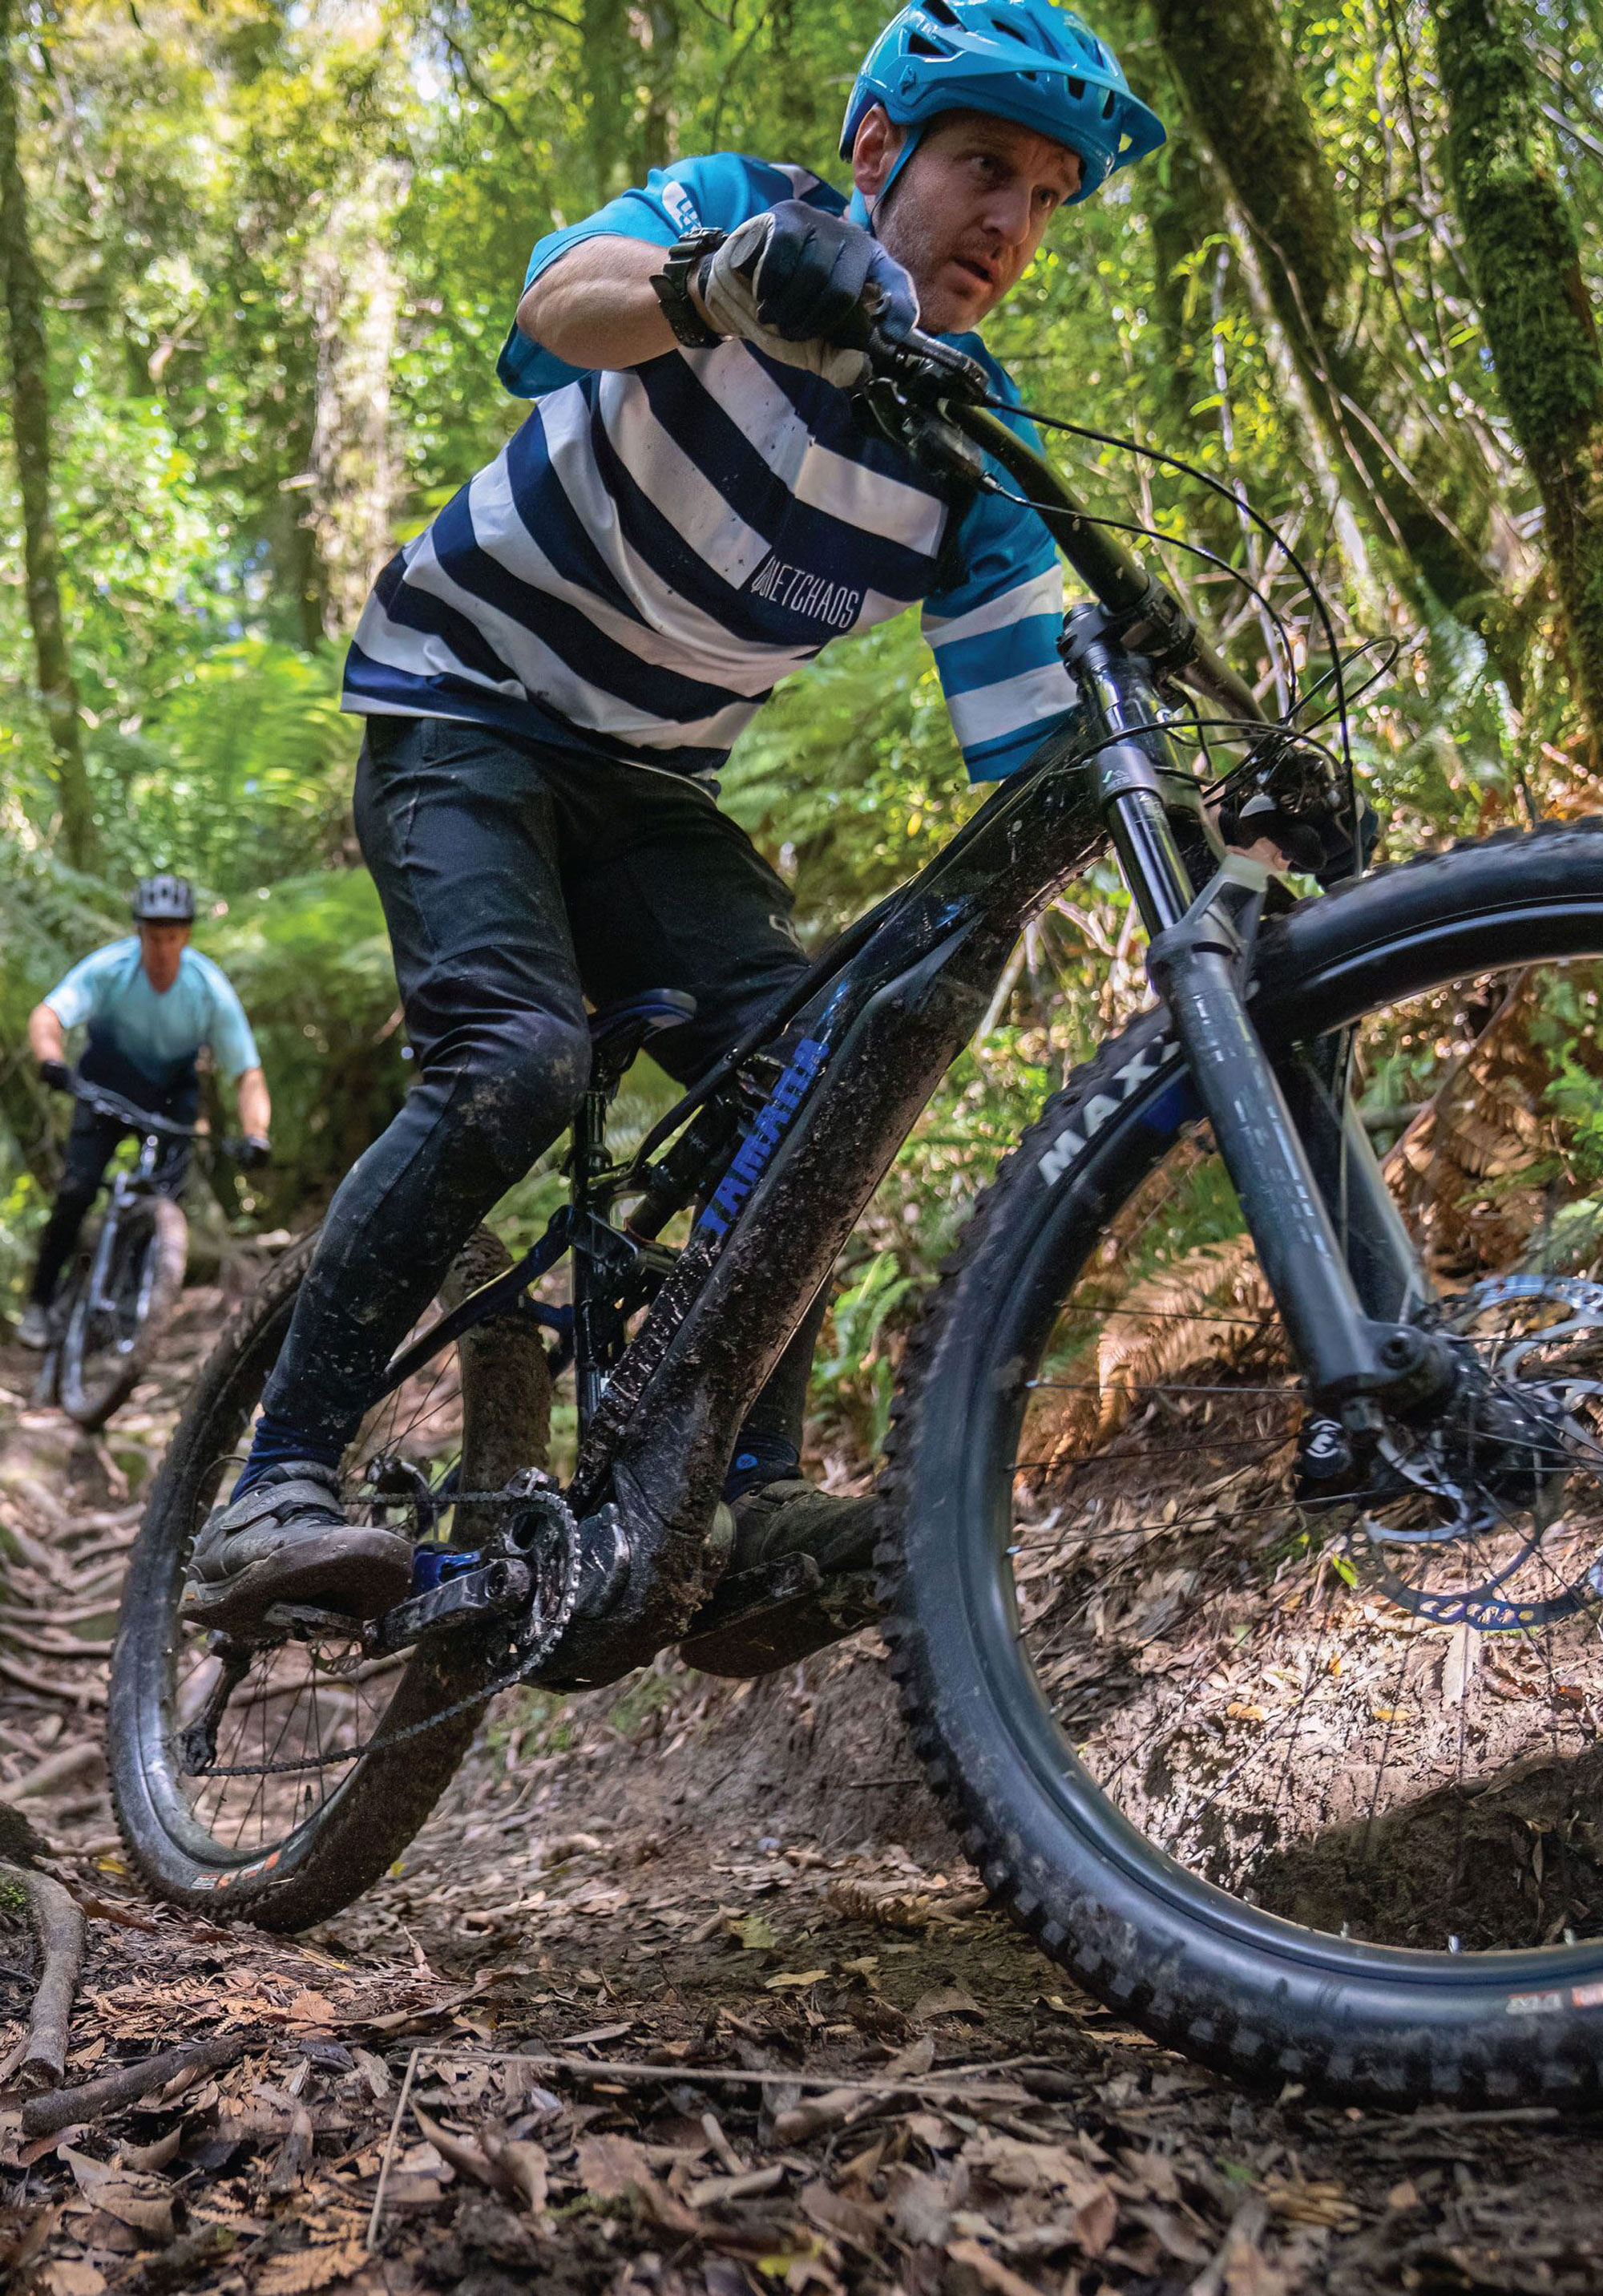
I’ve been aboard the SRAM GX Transmission for a few months now. During that time, I’ve been lucky enough to put this groupset to the test across a wide variety of conditions, on two very different bikes, and on everything from party laps with mates to full gas cross country racing.
My first experiences of the transmission were aboard my Trek Slash. A thoroughbred enduro rig, I’ve held this bike back from its true potential for a solid couple of years and it just keeps on giving. After a summer of just riding short-travel trail and XC bikes, I decided to solely ride the Slash over winter, no other bikes, so it got a good amount of use. I’d changed up a few things in my setup, including running vastly beefier tyres than usual, shorter cranks, and different suspension settings, and loved the changes. At the start of winter, the GX T-type groupset arrived and took the bike to a whole new level of awesome. In our previous issue, I discussed my initial thoughts after a couple of rides, mentioned a couple of minor issues, and was left with some questions about longevity and whether I’d still be so enthusiastic about the groupset after a few months.
A fair amount of literal and figurative water has passed under the bridge since I began riding the Transmission, and I’m confident to say that, for me, it’s a complete winner. But – it does take some getting used to. I sat back on one of my cable actuated geared bikes for a few laps of the street yesterday, just to be sure. Yep, I’m still confident it’s better in most cases.
The Triple Crown is the Rotorua MTB Club’s annual winter enduro; three stages on Rotorua’s finest grade 4+ trails. Rain had dampened the trails, but not to the point of total saturation; Rotorua’s volcanic soil effectively absorbing up most of the rain, leaving just enough puddles in the native bush to get a drive train nice and gritty. Aboard the GX mounted Slash, a quick few laps on the eve of the race to warm up, and over the three race stages during the following day – again highlighting the things I rate about the Transmission.
It’s quiet, the new clutch layout means less chain movement and a much quieter system – particularly when bombing fast, rough sections or hucks-to-flat; way less chain slapping the rear stays.
When racing Enduro, particularly on chunky rough or off-camber sections, you simply can’t get the pedals around everywhere you’d like to – so every pedal stroke counts. Short high-powered efforts, and lots of them; there’s no time for a wasted crank rotation to engage a partially derailed chain and, if you’re exiting a corner and need to be in a different gear, good luck with shifting a traditional setup under full power. The positive, solid feeling Transmission offers just can’t be beaten in this department. Go on, pedal full gas every time, all the time! I’ve been shifting more and throwing meaningful pedal strokes in where previously I simply wouldn’t have bothered or trusted my drive train under that level of aggression.
After my initial rides, I was concerned about smashing the low-hanging ‘Pod’ shifter off its perch – and I sure came close. At the Triple Crown, I managed to wash the front wheel on a root, sending me into a tree and a huge over-the-bars. Handlebars twisted and somewhat confused as to what had happened, I finished the run with a twisted cockpit, and when I went to shift gear into the finish of the trail there was no shifter to be seen. “That’s it, I knew this would happen at some point” was my first thought. Off the bike and about to walk up the track to hopefully retrieve the missing shifter, I realised it had just rotated around the bar and was now sticking out the front. Relief. With a quick twist of the mount, the shifter was back in its rightful place. I generally keep my cockpit controls loose enough on the bars to allow for impacts to rotate them, rather than break them off – and times like this highlight exactly why.
After the Triple Crown was done and dusted, I took delivery of another bike for review, again fitted with GX Transmission. This time, it was fitted to an XC rocket ship – the brand new Trek Supercaliber. With the Whangamata Black Rock XC race looming, I put some solid hours in aboard the bike and again gave the GX a good run.
Late winter conditions on my local Pirongia trails mean wet, muddy conditions and plenty of slop to keep things spicey. More than a few rides left the bike and drivetrain completely covered in mud. I’ve always been sceptical of electronics on bikes when it comes to using them in the wet and, although I haven’t completely immersed the system in water, it hasn’t skipped a beat when tackling numerous hours in very wet conditions -and the subsequent hose-assisted clean-ups. Even with a pretty decent amount of muck on the chain and derailleur, the transmission has performed equivalent to its performance in the dry, at times with a little more “crunch” in the chain than in the dry, but this is no surprise when dealing with a filthy chain.
The positive shifting is welcome in the slop, and I found when either blowing a turn or sliding out, killing speed, the ability to just get on the gas and shift to the correct gear is so awesome. A simple push of the button and it’s there, no need for the ‘throw’ of a traditional lever.
Loading the car to head to Whangamata, I realised I’d never checked the charge level on the GX battery – cripes. Pushing the AXS button I got the dreaded red flash of sub 10% charge. Minor panic set in but I quickly clicked on that I had a USB port in the car, and simply charged the battery on my trip to Whangamata. Too easy.
Racing XC on the Transmission setup over the Black Rock 60-kilometre course was the perfect opportunity to throw a whole bunch of variables at the system. I again found myself shifting more often than on a regular cable- actuated system, and on reflection this let me spin at an optimal cadence more often.
There were a few sections on the course where snapping through gears while standing out of the saddle up steep pinches came in handy. Not needing to ease off the power helped get up the sections quicker and more controlled, without the need to ease off the power to shift and then go again. Consequently, rear wheel traction was more consistent and less likely to break loose; I simply wouldn’t change gears on some of these sections on a “normal” drive train and would have added unwanted fatigue to the legs needing to ‘grunt’ up them.
It wasn’t cold in Whangamata, but had it been a mid-winter epic in brutally cold conditions, I would have been stoked on the Pod shifter buttons over a mechanical style. My hands don’t deal well with the cold and I’ve had issues even changing gear on a cable system in the cold previously.
My time with the GX Transmission has by-and- large been pretty peachy but I’ve had one anomaly. While traversing a section of the Black Rock trace loop, just spinning along I pushed the button to shift up, and nothing happened; pushed up and down a few more times and still nothing. A flat Pod battery perhaps? Nope, those last for ages. Race brain took over and without any other smart ideas I gave the derailleur a firm bump with my heel as I rolled along, it made a couple of “zit zit” noises and everything went back to normal. I’m still unsure what happened, it hadn’t done this before, or since – so I’ll chalk this up to a total random event. It does remind me to read the manual for how to pair the system and reset it after an issue though.
My time on the Transmission is coming to a close for now, but hopefully not for too long. When SRAM’s marketing machine clogged every possible pixel of my online existence as they unleashed the T-type groupsets on the world, I really didn’t want to like it. But, truth be told, no longer do I view electronic shifting and SRAM’s GX T-type groupset as a luxury -more of a workhorse that’s enhanced my ride on multiple subtle levels. I’d gladly part with my own hard-earned cash to purchase a set to have for seasons to come.

Absolute Black Oval Chainring
Words Lester Perry
Image Cameron Mackenzie
RRP $199
Distributor FE Sports
There’s no denying it, an oval chainring is certainly a unique thing to see on a bike. But, why’s it an oval shape; surely the theories supporting their use died out with the old Shimano BioPace chainrings of the late 80’s? The fact is, Biopace rings weren’t true ovals, more squished rectangles with rounded corners.
Shimano’s Biopace and Absolute Black’s oval rings are both trying to achieve the same thing: to eliminate the dead spot in a pedal stroke, maximising the part of the pedal stroke where power is highest, and minimising resistance during the ‘dead’ part of the stroke.
Thanks to modern research techniques and measurement devices which weren’t around when Shimano’s Biopace was being developed, the final outcome in Absolute Black’s case is a chainring that is supposed to deliver smoother power and help a rider spin more effectively while climbing, all without Biopace’s associated knee pain.
Absolute Black claims a 9% increase in pedalling effectiveness, up to 7% less oxygen consumption, up to 15% decreased rate of breathing and up to 10% heart rate drop when using oval chainrings versus round. Some heady stats for sure.
First off, the quality of manufacture is as good as it gets, and there’s a fair bit of CNC wizardry that’s gone into bringing the chainring in at a minimal weight without appearing to have lost any strength (not something I was able to specifically test). The tooth profile meshes perfectly with the SRAM Flat Top chain and, so far, I haven’t had a dropped chain, or issues with the chain-to-chainring interface. There were no fitment issues when mounting the ring to the SRAM GX crank – everything was spot-on and precise. As far as longevity goes, after a number of rides across all trail conditions, I’ve got no reason to think the ring will wear any differently from any other chainring. I guess time will tell.
I tested the ‘do it all’ black version, although, if you’re after something to match the tone of your partner’s eyes (or your bike’s decals) you can also choose from titanium, gold or red.
So, how does an oval ring ride? The first few minutes on an oval ring are a bit weird, and probably enough to put some people off. There’s some sort of a feeling… like your cranks aren’t parallel, or they’re off-centre; it’s a strange feeling for sure. After around five to ten minutes, I find my pedal stroke adjusts to the new feeling and in effect cancels out the weirdness, leaving me with a smooth cadence that feels like I’m actually applying the same power throughout the whole pedal stroke rather than primarily on the down strokes. I haven’t done any hard timing but, anecdotally, I certainly feel like I climb more comfortably for the same power, and with less fatigue; it’s almost like I’m using all my leg muscles instead of just a few, effectively sharing the load (although that’s total bro science, not peer reviewed research by any means!).
It’s difficult to put a pin on exactly what the advantages are in the real world, although one noticeable trait is that it smooths the power delivery, meaning more consistent power at the wheel and fewer traction issues whilst climbing on the loose. In turn, this appears to keep your heart rate lower, or at least more stable, than if you were having to adjust your input to the pedals to stop from breaking traction.
The chainring I’ve been reviewing has been strictly on an XC bike while under review, but, I’ve used an oval ring on my “big bike” – a 160mm travel Enduro sled – too. Initially, I thought an oval ring may not suit a bike which is often being sprinted out of the saddle. My theory was that the oval would feel bizarre or lumpy in this situation – I was wrong. The oval didn’t seem to feel any different while standing and attacking out of the saddle, however, it did make climbing to the top of the hills just a touch more comfortable.
It’s not all beer and Skittles though; depending on what size oval ring you run, and where the top of the ring sits relative to your main suspension pivot, an oval ring can actually accentuate pedal-induced suspension bob, interfering with the bikes anti- squat between the ‘high point’ and the ‘low point’ of the chainring as it rotates. I’ve only found this noticeable on one bike, but it certainly confirms that this is a real thing. It wasn’t a major issue, but if every watt counts (i.e. on an XC bike) it’s worth considering what impact this may have on your specific bike. It’s XC riders who stand to gain the most from using an oval ring, so it’s worth weighing up the possible pros and cons. If I was riding a hard-tail it would be a no-brainer to run an oval.
What it all boils down to: if you want to climb more comfortably with better efficiency, and maintain traction more easily while climbing, all of which may ultimately make you faster and save some energy, then certainly consider an Absolute Black oval ring.
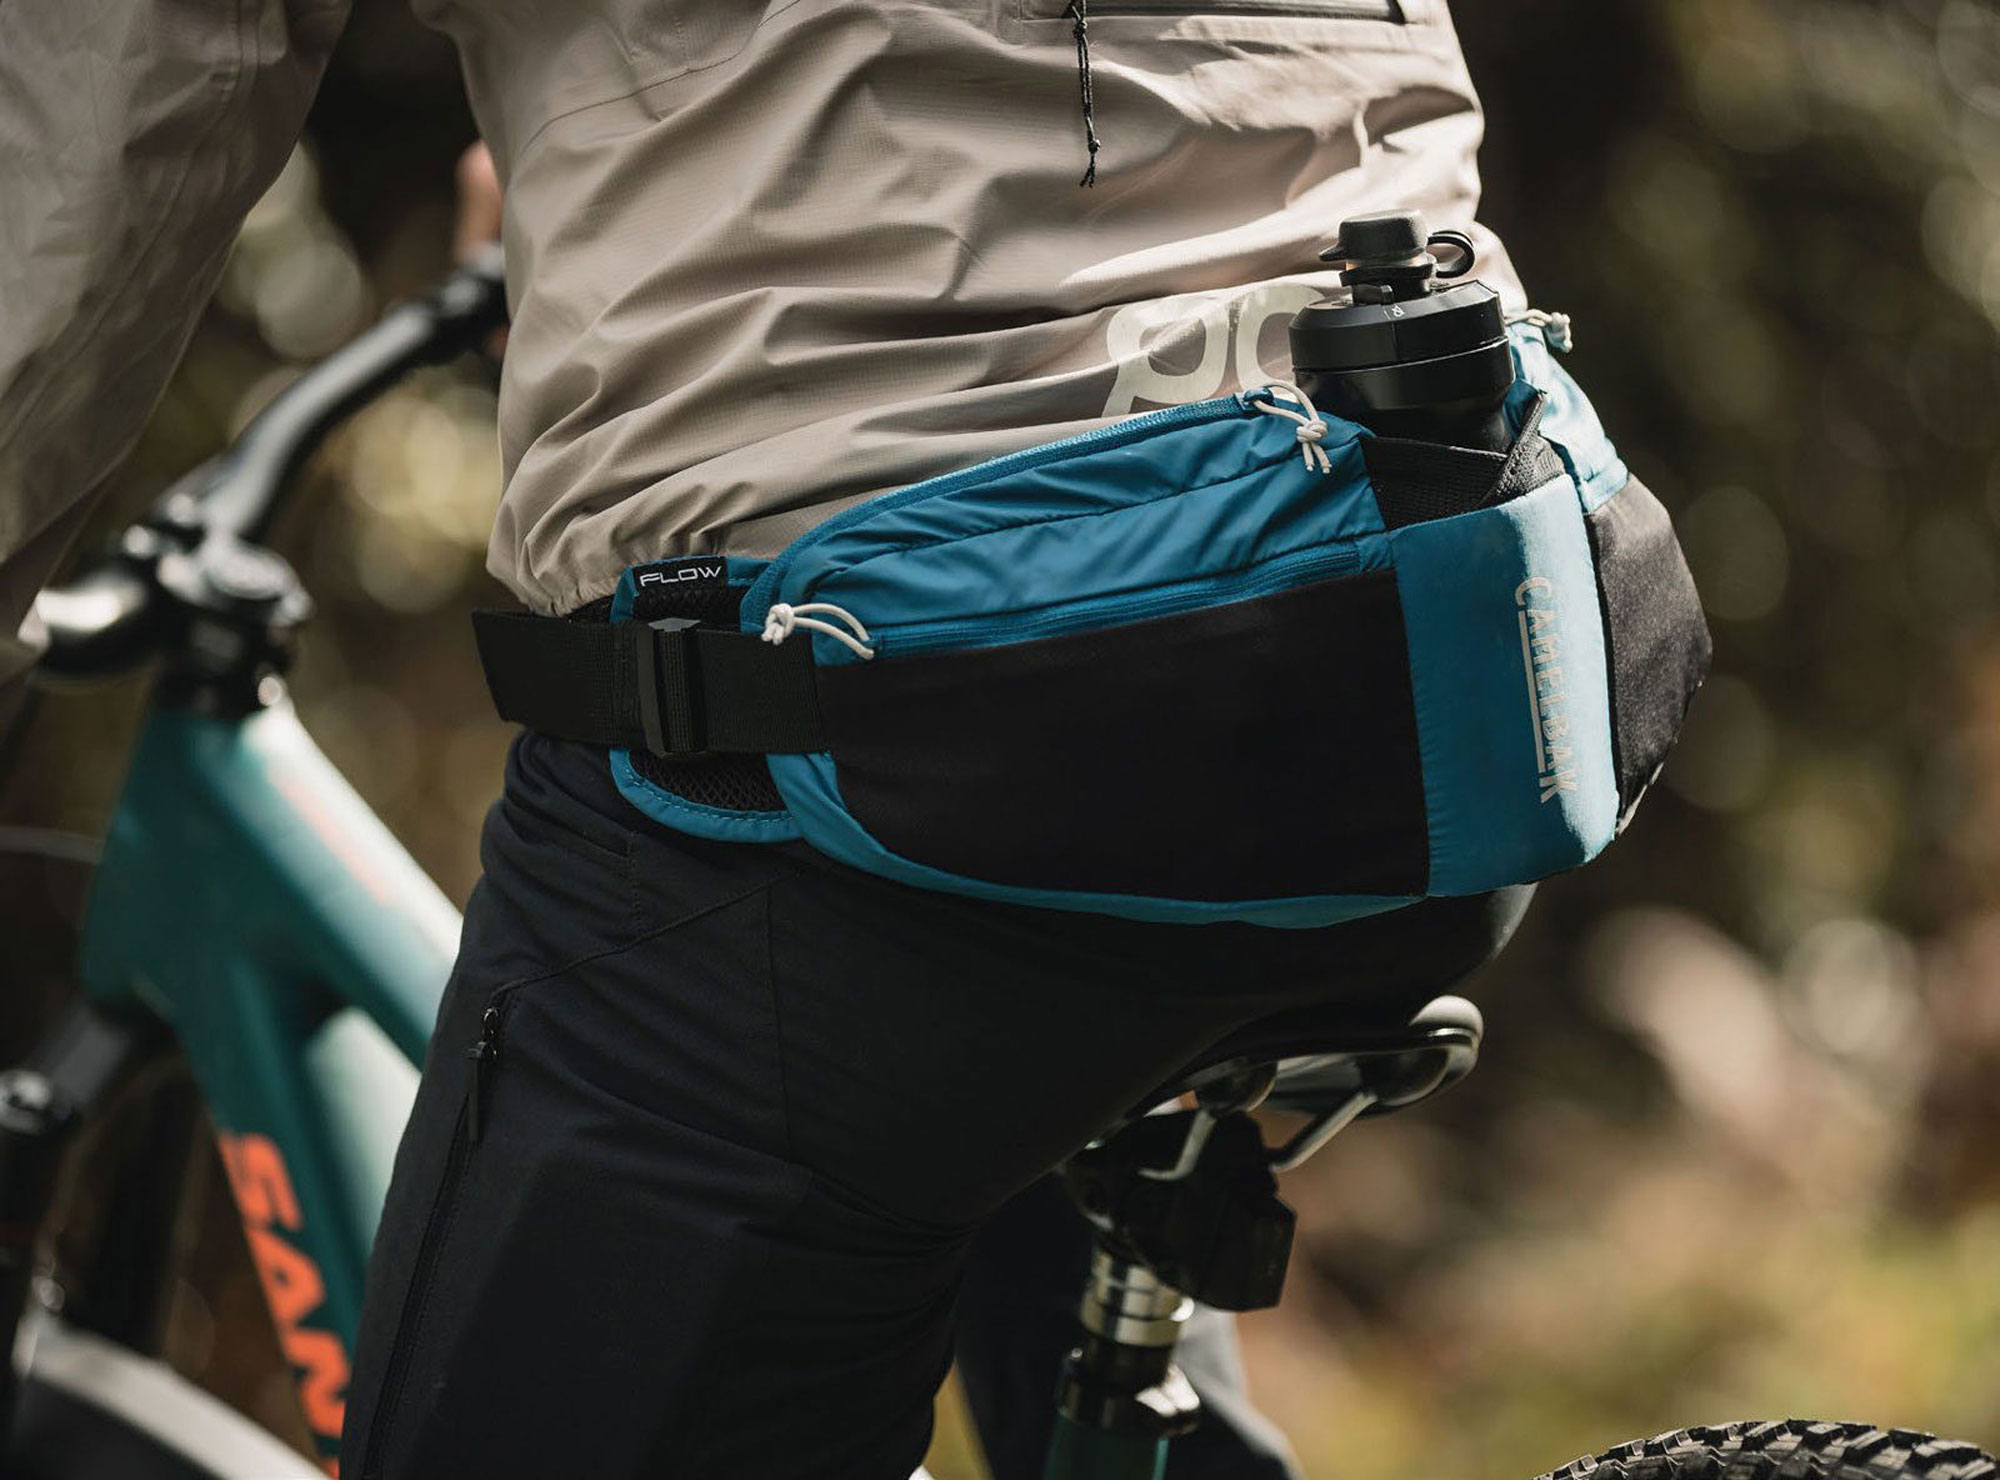
Camelbak Podium 4 Hydration Belt
Words Lester Perry
Image Cameron Mackenzie
RRP $109
Distributor Southern Approach
Imagine, if you will, purchasing a nice new bum bag, fresh off the bike shop wall. You pay the assistant, fit the waist strap in place and waltz out the door with that ‘new bum-bag’ spring in your step. Strangers look sideways at you, the child walking toward you is ushered across the road by its mother. It’s then you realise you’re in a mountain biker version of the old “togs, togs, togs; undies” Tip Top advert, except the undies are, in this case, a bum bag.
Generally not so accepted in normal life, but very common when on a MTB or while sifting around a trailhead. As budgie smugglers would be frowned upon while strutting down the street, equally a bum bag may raise eyebrows.
Not since the mid-1980’s have we seen the prevalence of bum bags that we’re seeing in MTB parks currently. The bum bag moniker is gone, replaced by a more ‘PC’ name: the ‘hip-pack’. They come in all shapes and sizes; some include hydration bladders, others don’t; some have heaps of storage, and others are simpler, slim line and more minimal.
With the prevalence of eMTBs and long travel trail bikes, and their many frame configurations, we’re finding bikes have lost much of their ability to haul enough liquid for a big day in the saddle. Gone are the days of the classic front triangle able to fit two 900ml bottles. Many bikes now will only fit a single 500-600ml bottle or, in some cases, none at all. A full hydration pack is a solid solution, but these come with their drawbacks, and will likely be overkill for most rides. If you’re restricted to either a single bottle or, heaven forbid, none at all, then the hip pack hits that sweet spot between a single bottle hour-long ride, and a half-day epic with the need for a larger, full-blown hydration pack.
The CamelBak Podium Flow 4 Hydration Belt is in the middle of the range when it comes to storage capacity, with four litres on offer. The supplied 600ml Podium bottle fits comfortably in the centre of the pack. To either side, two zippered pockets with internal dividers keep the contents separate and secure. The fabric of each outer pocket is elasticated to effectively compress the load closer to the body and help stop the cargo from bouncing around too much. Throughout its four pockets, there’s enough storage for all your ride essentials, plus a phone and snacks – but not a great deal more; just the necessities. Along the base of the pack, are some loops intended to hold a pump – I’m not sure what sort of pump they used to model these off as I couldn’t get it to work adequately with my pretty standard mini pump.
Loaded up for a ride, the Podium Flow 4 Hydration Belt fits snugly around my waist. I fit it as low across my hips as is practical, to avoid it interfering with my breathing. The buckle closure is low profile and easily adjustable to fit a wide range of waists. Excess straps are kept from flapping around by elastic loops on the waistband, although these could easily be trimmed to suit the wearer. With room for everything in one place, I don’t need to trim the number of any of my tools or spares to be ready for every eventuality -just grab the pack and go.
One thing I rate about running a hip-pack, is how free and airy you feel compared to when wearing a full hydration pack. On a roasting hot day, a full pack limits your body’s cooling ability, a situation where a hip-pack wins out for sure. To maximise breathability next to the body, CamelBak has incorporated their ‘Air Support’ back panel -essentially a panel of open foam that spaces the pack off your back somewhat to help with airflow between the two. I’m a big fan of CamelBak’s Podium bottles, they’ve refined the design over the years and now that the nozzle is easily disassembled for cleaning, they last for years. The ‘dirt’ series bottle included, has the added touch of a rubber cap covering the nozzle – no more trying to blow dirt from the mouth before taking a swig. I like it! With the bottle sitting centrally on the Hydration Belt, it’s simple to reach from either side, although it’s not the easiest to do while riding. Maybe I’m a bit cack-handed, but I find I need to stop moving to reach it comfortably. Fortunately, my bike fits a bottle so, on occasion, I’m not carting a bottle in the hip-pack, instead stuffing a jacket in the bottle holster.
Even while loaded up, I find the Hydration Belt sits nicely on my hips, although, over a long ride there’s a slight creep in the belt and it needs to be retightened to stop it from moving around too much. Riding in a normal, semi-upright position, on a trail or enduro bike, the fact I’m wearing the Hydration Belt barely registers but, in a more cross-country style position – long and low in the front -if I’m breathing heavily, I do find it cuts into my midriff a bit; hampering breathing somewhat, even when worn low on the hips.
If you want to keep all your riding necessities safely in one spot and not be limited to what you can stuff in your pockets, or maybe just need to add to your hydration capacity, then CamelBak’s Podium Flow 4 Hydration Belt is a great addition to your riding kit.
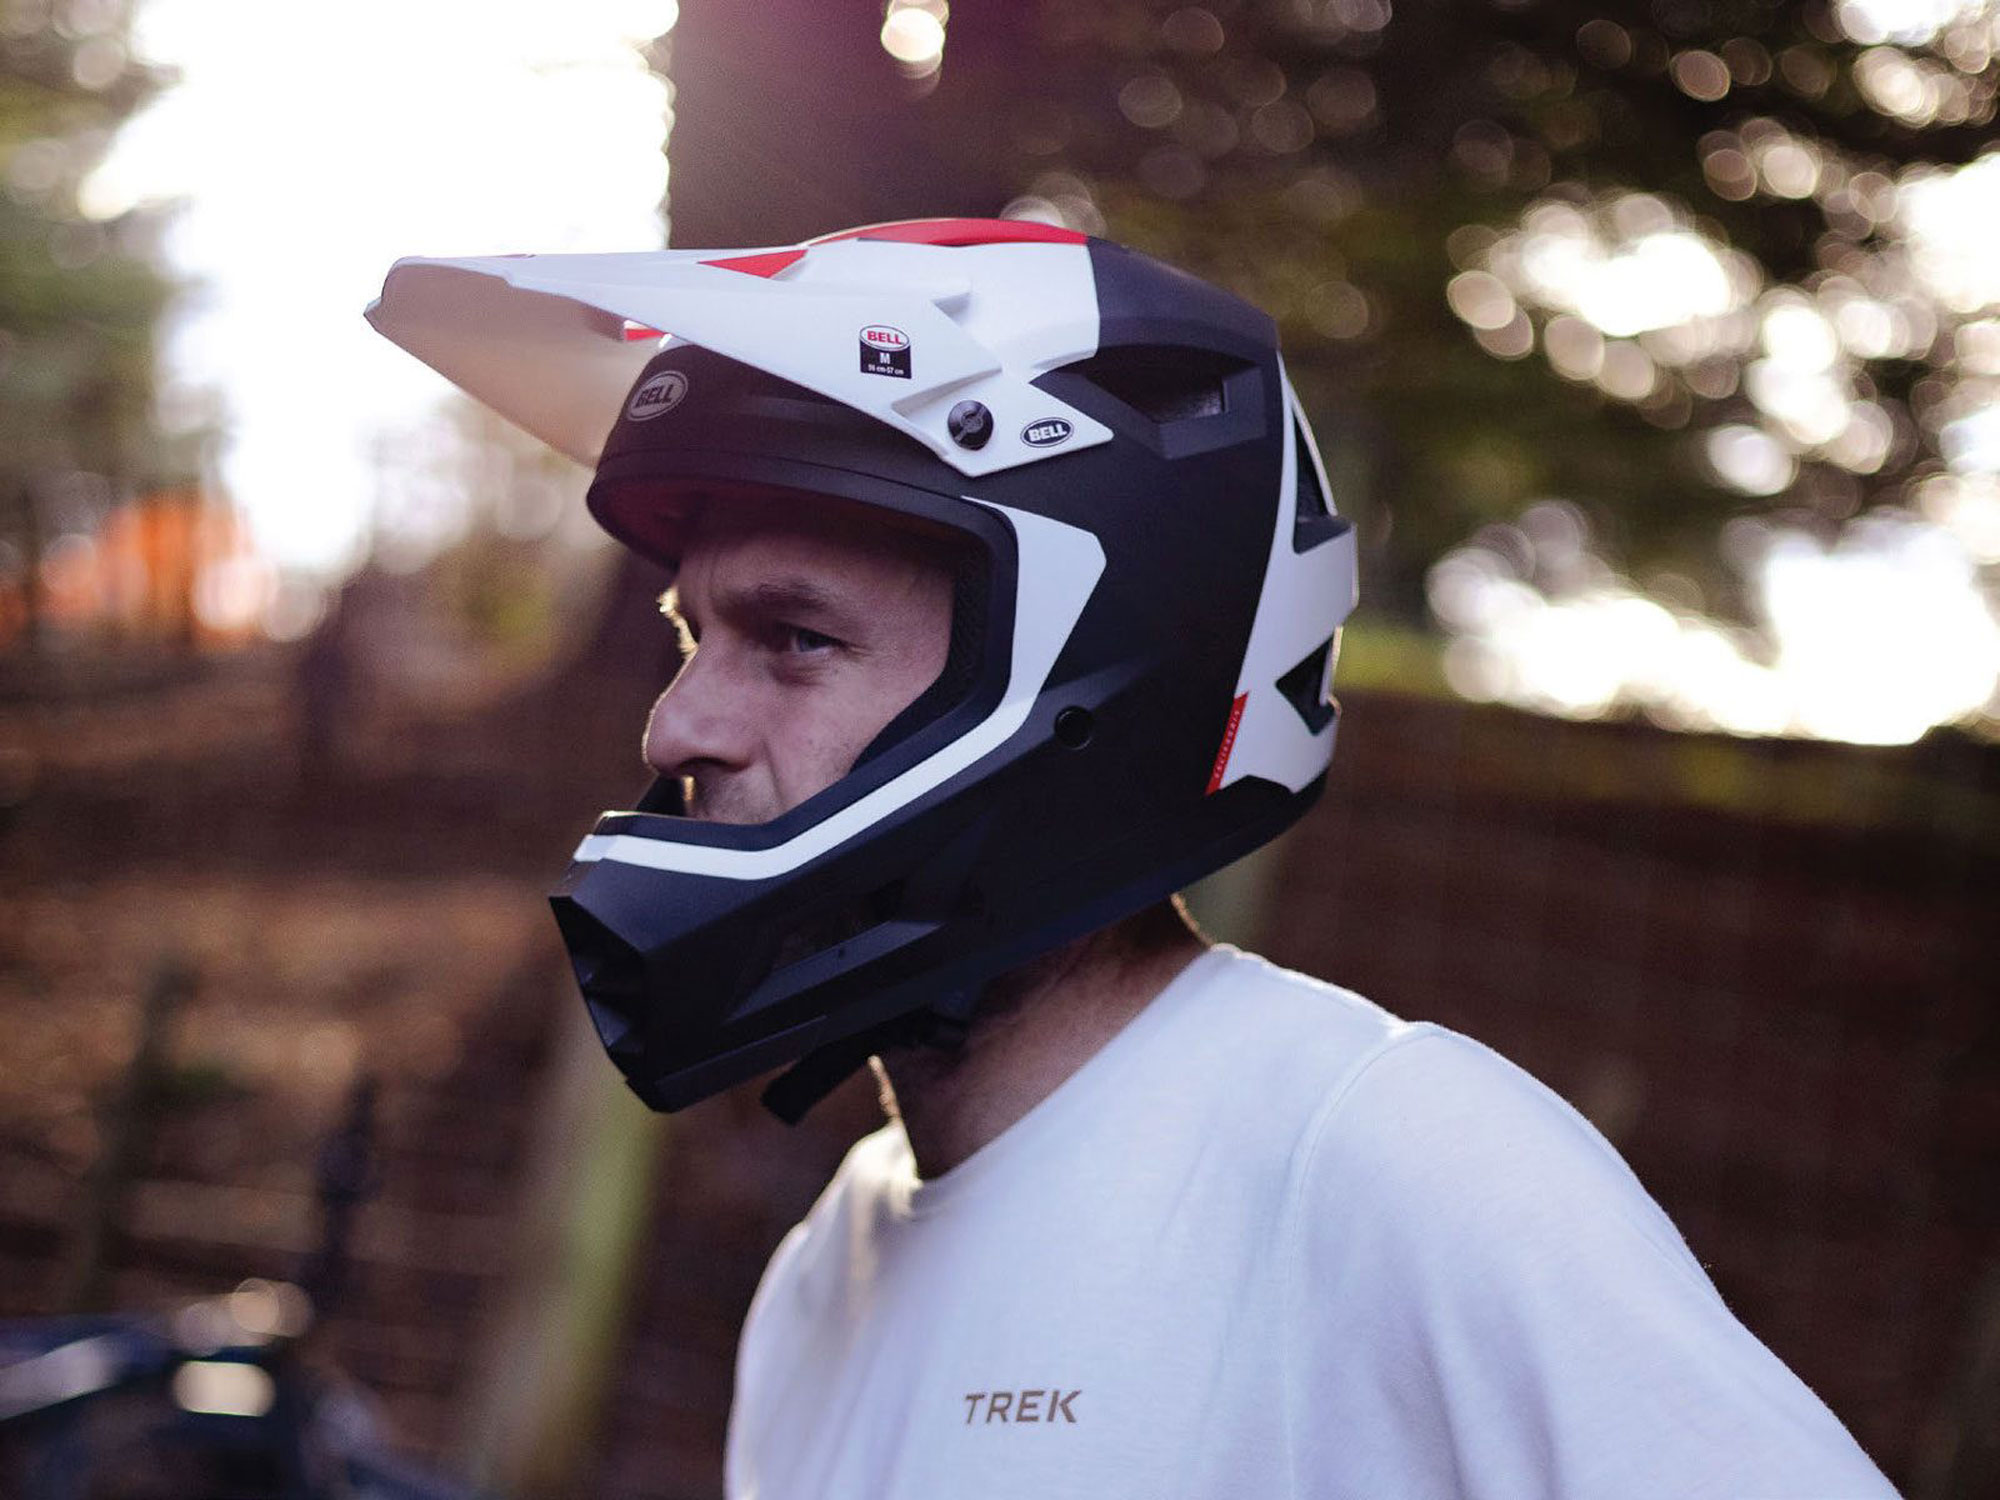
Bell Sanction 2 DLX
Words Lester Perry
Images Savanna Guet
RRP $329
Distributor Worralls
Thumb your way back through the pages of a mid-1950s Hot Rod or car racing magazine and you’ll see Bell’s distinct graphics adorning helmets worn by some of the scene’s most influential drivers.
Years later, during my formative years – back when 4-cross and Downhill were making waves in the early-mid ‘90s – posters plastering my bedroom walls featured riders wearing Bell: Brian Lopes, Cedric Gracia, and even some vintage John Tomac. To this day, their helmets protect some of MTB’s heaviest hitters (heaviest in style and speed, not weight!).
Born out of the desire to create a safer helmet for race car drivers, founder Roy Richter worked with naval pilot, Frank Heacox, taking learnings and technology from other industries and reverse-engineering existing helmets. In 1954, the Bell 500 launched, featuring a Polyurethane Foam liner with a hand-laid fibreglass shell. Bell still draws on this motorsport heritage, incorporating many ties back to the 50’s Hot Rod culture across its modern range.
The original Sanction full-face piqued my interest for all the wrong reasons. I won’t mince words – in my opinion, it was pretty ugly. It’s a real bummer when consumers are put off buying protective equipment because of looks, particularly when it’s a price-point-oriented piece; why can’t cheap stuff also look good?
Fortunately, the newly released Sanction 2 DLX MIPS is a complete redo. Taking design cues from the Full-10, Bell’s heavier-hitting top-of-the-line model, as well as others in the Bell line-up, the refreshed model bears no resemblance to the original. This new lid is aimed squarely at the more value-conscious consumer and, although it hasn’t got all the fancy bells and whistles of its pricier and more tech-heavy cousin, it packs plenty of comparable features into its smaller price tag.
Sliding into the helmet for the first time, I was instantly transported back to being a kid and putting on my dad’s motorbike helmet (he had a helmet, but I don’t recall a motorbike?), the plush padding damped the surrounding sounds and I was transformed from a Regular Old Joe to a Power Ranger of sorts, ready to take on whatever challenges -or trail -lay ahead. I have no complaints about the feel on my head; it fits like a glove. The padding incorporates embedded silver metalised yarn for odour control and antimicrobial properties, helping to keep it stink-free. Cheek pads are easily removed for washing, again helping to ward off the mid-summer stank. Generous padding throughout the helmet makes for superior comfort but likely hampers airflow. On a hot summer’s day, it could get pretty warm, although, with 14 airy vents, it’s likely to only be an issue while at slow speed or standing around waiting for the next uplift. I’m a big fan of the Fidlock magnetic closure. I’ve got no idea how it actually works, but it seems to be a blend of magnets and voodoo magic, with no need for “eye of newt” or a Magic Wand. If you’re dialled, you’ll be able to snap the buckle closed single-handedly, and even the most cack-handed users can pop it open with a flick of thumb and forefinger.
Rotational forces are taken care of by the OG MIPS Essential liner. For the uninitiated, this is a proven technology that uses a ‘slip plane’ to help reduce head and neck trauma during an impact. The DLX model weighs a claimed 1080 grams in the medium size, lighter than some higher-end and more spendy offerings in the market. Riding the helmet is everything it should be; it’s comfortable and doesn’t feel unwieldy. When riding at speed over chunky terrain there’s a small amount of movement in the MIPS system so the helmet can at times move around a small amount. This is a common thing with the MIPS Essential system, but not something that detracts from its use, however, it’s not so evident in the more premium MIPS offerings featured in higher-end helmets.
Googles sit well on the helmet and there’s no interference between the helmet and the goggles themselves. The goggle strap sits tidily in a shaped channel around the back of the helmet. If you want to slide goggles up to your forehead while not in use, the visor moves up, out of the way just enough. Fortunately, I haven’t needed to test Bell’s safety claims but with all the necessary safety standards met, I’ve got complete faith that, should I take a spill, the helmet will do what it should and protect my swede.
A solid mix of styling, protection, and price makes this a worthwhile purchase for anyone in search of a decent full-face helmet, particularly if you see a full-face helmet as a nice-to-have, not a must-have, or maybe you only need one every now and then. Steer clear of the spendier options and save your money for some extra uplifts! A wide range of sizes are available, so if you’re in search of a full-face for a BMX or gravity mad grommet, then this would be a great option.
Abus Cliffhanger MIPS Helmet
Words Lester Perry
Image Cameron Mackenzie
RRP $350
Distributor Southern Approach
Creating a helmet sure is a break from tradition for a company that has always designed and manufactured security solutions. Beginning with padlocks in 1924, and moving on to high-tech security and smart home solutions, these days Abus bike locks are some of the finest around – you’ll even find their locks securing many eBike batteries into their frames.
Beginning their helmet design journey with road helmets, protecting some of the pro peloton’s fastest racers, we’ve recently seen their range expand to offer a wide variety of MTB models. The range has been designed in conjunction with feedback from freeride legend, Richie Schley, and downhill fast-and-funny guy turned commentator, Cedric Gracia. Abus’s Cliffhanger MIPS takes no shortcuts. It leads their trail helmet range with its tech, and style that leans more towards Enduro or gravity riding than light trail or XC. The Cliffhanger incorporates familiar tech you’ll find across many other high-end helmets.
The Cliffhanger’s in-mould shell brings together the outer shell and the inner shock-absorbing foam (EPS) and bonds them as a single piece. The shell has eight air inlets and six exhaust ports which, when coupled with the effective internal channelling, gives the wearer a substantial amount of venting even on the hottest days. Cool air in, warm air out – simple.
Take a saw to the shell and you’ll find the ‘ActiCage’. This is an internal structural reinforcement which not only helps distribute impact force and hold the whole helmet together during successive impacts, but offers additional reinforcement allowing for the use of ample-sized front vents. All edges on the shell are encapsulated by the in-moulded outer shell, adding to the durability of the whole package.
Out front, as with any helmet designed to be worn with baggy shorts, you’ll find the peak (not that there are rules, but IYKYK). In the lowest of the three vertically ‘notched’ adjustments, the peak’s lines flow almost seamlessly onto the main helmet but, once you raise it through the other settings, the lines aren’t quite as smooth. However, it still does its job just fine. In the highest position, there’s plenty of room to house your goggles during a climb if you’re so inclined. I’ve found the middle position suits me best as, when it’s in the lower setting, there’s just a touch too much of the peak visible at the top of my view – maybe that’s just me, though. If it were a couple of degrees higher, without having to go the next click up, it would be spot on, and that second click up just disrupts those smooth lines I mentioned. I’ve seen peaks that snap onto a shell in a similar way to this, which have seemed quite flimsy and wear out after being taken on and off a few times; the Cliffhanger’s snap-on system is well designed and of a quality that appears it will easily last as long as the rest of the helmet, so no need for concern there.
The meat in the three-layer sandwich between helmet padding and EPS foam, is a pared-back MIPS liner. It appears the designers have trimmed the liner, removing any excess or areas which may disrupt airflow. The padding is minimal but comfortable. It feels soft to the skin and wicks sweat well; there’s not much padding at all but, overall, the helmet feels perfectly comfortable. I put a lot of this down to a well-designed helmet shape. The minimalist padding may potentially mean the lid doesn’t fit some as well as others, although with tight 4cm size ranges this may be alleviated. Our test helmet is a Medium at 54-58cm; Small measures 51-55cm; and Large comes in at 57- 61cm – so a decent sizing spread is available.
I’m impressed by the weight of this helmet. It felt light on the head, and I confirmed this by weighing it on a digital scale. It measured in at just 352 grams – at the lighter end of the scale when compared with similar helmets of comparable coverage and equivalent features.
A Fidlock closure takes care of the chin strap and holds the whole helmet comfortably in place. Abus’s TriVider strap system gives a level of lateral adjustability and sits nice and flat next to the skin – a lot lower profile than some of the competition. Out the back, there’s a Boa-esque dial to easily adjust and get the fit just right. The cradle has ample vertical adjustment to help avoid any lumps and bumps, and there’s a nice gap through the centre to let a ponytail flow free, unhampered. The overall silhouette provides ample coverage all around; the deep drop in the back of the helmet hooks forward, hugging comparatively close to the ears and offering loads of protection.
There’s a lot of subtle tech packed into this lid and its looks appear to draw inspiration from several other high-end helmets. It could be said that Abus have taken the best of a whole bunch of helmets and carefully combined elements of each to come up with a really solid competitor in the trail helmet category.
I’ve been loving the Cliffhanger. It’s comfortable, airy, hyper-adjustable, feels secure and solid on the head, and has unique yet strangely familiar looks. I’ve had a hard time trying to pinpoint something I don’t like with this helmet and, while it’s drawing a long bow, all I can find is that, for me, the three adjustments in the peak height just aren’t quite right. I’ve gotten used to it now, but if I had my way they’d all sit a few degrees higher than stock, meaning the peak is never in view… but maybe I’m just picky.
Shimano GF600 Shoes
Words Lester Perry
Image Cameron Mackenzie
RRP $249
Distributor Shimano NZ
Heading out on my local trails over recent years, I’ve noticed a resurgence of people riding with flat pedals and shoes. There’s still plenty of riders choosing to clip-in, but it feels like these people are fewer than before. Some of this has been the change of mountain biking demographics as the number of people just out for a good time, not a fast time, has increased – in part due to the Covid lockdowns and associated ‘bike-boom’.
With an increase in people looking for the comfort and convenience of flat pedals, so too the number of shoe and pedal options on the market has increased. Shimano recently revamped their MTB shoes line and, although it seems like they do this every couple of years, they continually knock it out of the park and have top-shelf, but generally subtly styled, options available – regardless of your riding genre.
It’s not just sticky rubber that makes a quality flat- pedal shoe. A well-thought-out flat-pedal shoe is a sum of all its parts, and if any part is lacking they’ll be heading for the trash heap to join the other 22 billion shoes globally that end up in landfill. I’ve been spending time back on flat pedals after years on clips, and it’s been refreshing to ride flats again – no doubt helped by the new Shimano GF 6 shoes. So far, they’re affirming the “buy once, buy right” adage and it appears they’ll last longer than other flat shoes I’ve seen in the market recently.
The GF6 upper is constructed from hardwearing synthetic ‘leather’. Some texture and reinforcement are added around the front of the shoe for increased toe protection and some styling. The toe box area has a matrix of holes punched in it to help with breathability, and more holes further toward the back of the shoe also help with this. The upper is relatively slim-line – gone are the days of overly-padded heel cups and shoe tongues – replaced by lower profile, but equally (possibly more) comfortable foams. Less padding and the use of modern foam means that in wet conditions the shoe doesn’t become a sponge and get weighed down once sodden. A slightly higher cuff to the ‘inside’ of the shoe offers some additional protection to ankle bones. Following the slim-line trend, the tongue isn’t bulky and sits nicely in place once laced up. Two subtle features on the tongue are worth noting: an elastic loop with a small pull tab for lace storage, stopping laces from snagging on trail debris or coming undone while riding; and the label on the ‘top’ of the tongue is slightly rubberised, offering a bit more grip to grimy hands while pulling the shoes on. These are both minor details that could easily go unnoticed, but these little touches are proof of Shimano’s experience when it comes to developing shoes.
Shimano has utilised a new fit for the GF6: the ‘Volume Trail Last’ gives ample room at the toes for comfortable walking, while from the ball of the foot back the fit becomes slimmer and more precise, ensuring maximum power transfer and bike control. I am regularly a size 9 US in most sneaker brands, but I find Shimano MTB shoes fit a fraction larger than an equivalent Nike sneaker. My feet aren’t ‘Frodo Baggins’ wide, but they sure aren’t ‘Euro-pro XC racer’ slim either – they’re somewhere between the two; pretty regular-shaped Kiwi bloke feet I think (although I don’t go around checking out other people’s feet!). With this in mind, the fit of these shoes is pretty spot on for my hooves; they’re not quite as comfortable as regular sneakers but you forgo some of the sneaker plushness while walking in favour of pedalling comfort and efficiency. The roomy toe box is certainly noticeable -and a welcome change from the clip shoes I’m accustomed to.
Shimano brings yet another rubber compound to the category with the ‘Ultread GF’ sole – which claims to be optimised for gravity riding. I’m unsure why you’d want a different rubber compound for regular, non-gravity riding, but it seems Shimano think you do. I’d imagine the best rubber for gravity-assisted riding would also be the best rubber for less demanding trail rides or eBiking. Whatever the case, the rubber they’ve used on the ‘Ultread GF’ sole is plenty grippy, seemingly a combination of the raised hexagons that form the tread, and the soft, slow rebounding rubber. Why a slow rebounding rubber? Slower rubber doesn’t try to push the pedal pins away, helping to keep it in place until you take the weight off the pedal, a huge factor in how grippy a flat shoe is. There’s ample grip on offer with the GF6’s; I never once slipped a pedal and even during some sketchy moments, the shoes were surprisingly well “locked on” to the pedals. There’s a tricky tread design on the toe and heel areas of the sole that adds some extra bite while walking.
It’s worth noting that a good flat-pedal shoe is only as good as the pedal you’re using them with. Throughout the test period, I used them with a popular ‘large’ sized pedal featuring a slight concave and 10 regular-length pins per side. The downside of so much grip was the complete inability to adjust my feet on the pedals, while even just slightly weighted – I needed to lift a foot to then adjust where it sat on the pedal. This was a slight niggle that’s just a drawback of such an effective interface between pedal and shoe… but if it’s grip you want, then it’s grip you get!
The midsole has a very skate-esque appearance, and the EVA rubber offers some comfort while walking – not heaps, but enough. What it does do, though, is provide a good level of comfort when on the pedal. The midsole also features the ‘Torbal 2’ torsion plate which, according to Shimano, offers increased flexibility on the edges of the shoe, adding control during gnarly descents. In the real world, I can’t really feel the subtleties of what they’re on about, but there’s certainly a welcomed level of stiffness to the sole while pedalling but it still retains a comfortable amount of torsional flex which I’d imagine does help pedal traction whether you’re swinging off the back while tracking over the chunder, or making shapes while shralping turns.
What’s the verdict then? If you can look past all the marketing hype, acronyms and brand names for every shoe feature and simply take into account the comfort and overall level of grip on offer, I’d have a hard time suggesting that anyone would need anything different from the GF6. There are no weak points on the shoe. If they fit your feet properly and you like the subdued style, there’s no need to look elsewhere.
Yamaha YDX Moro 07
Words Lester Perry
Images Darren Stanley
RRP $8999
Distributor Yamaha NZ
I’m always intrigued when a large company enters the Electric Mountain Bike market and tries to take on the ‘Big Three’ (Giant, Trek, Specialized). They come in with a hiss and a roar, take a small share of the market, fight for scraps for a few years, then finally the accountant strikes a big red cross through the eMTB line on their spreadsheet, parking the project and returning them to their core business.
Yamaha has gone about things differently. They developed the world’s first production eBike 30 years ago, and have been building eBikes for the Japanese market for the last three decades. More recently, they’ve supplied motor units to many of Europe’s most popular eBike brands, including international juggernaut, Giant. The YDX Moro 07 is just one piece of their global ‘Switch ON’ strategy which spearheads their move into the world of electric personal mobility and away from fossil fuels. Perusing their international website, you get a taste for Yamaha’s plans: they offer options in almost every category of ‘Power Assist Electric Bicycle’, including models targeting road and gravel (but why?).
The YDX Moro 07’s frame has been around for a few years now and has some unique and eye-catching hallmarks. The ‘Dual Twin Frame’ splits the top and down tubes into two, sharing some visual cues with their motocross bikes. The rear shock tucks comfortably into the split top tube and the battery fits neatly into the split downtube. The key upgrade to this most recent model is the inclusion of Yamaha’s latest eMTB motor, the PW-X3 -their lightest, smallest, and most powerful drive unit. Boasting 85nM of torque, it’s on the money versus the competition and is powered by a 500w/hr battery.
The frame is set up specifically for 27.5” wheels and features 150mm of rear travel, made possible by a custom-tuned Rockshox Super Deluxe Select+ shock. Up front, the bumps are tackled by a 160mm Rockshox Lyrik Select tuned for eMTB use. Nowadays, we’re seeing most bikes in this travel segment with either dual 29” wheels or mullet style, 27.5” rear and 29” front wheels, so this bike is unique in its full 27.5” setup. Fitted with a Shimano XT drivetrain, gear shifts were precise, rapid, and remarkably trouble-free -even under power.
Geometry is what I’d term conservative for a 150mm/160mm travel bike. The head angle sits at 66.3 and the seat tube angle is a vanilla 70.2 degrees. After perusing the Yamaha website and crunching the numbers on the three available sizes – small, medium and large – I determined I’d be best suited to a large frame. The ‘reach’ numbers were somewhat puzzling; a medium at 437mm and large at 482mm – that’s a major step up between sizes and at 482mm I thought the large may feel a bit long, and the medium very short. Yamaha’s sizing chart had me firmly on the medium size but after comparing reach to my personal bikes I settled on the large. At 176cm tall, I was comfortable with the large size but I’d say if you were over 185cm in height you might be too tall for even the large to be comfortable, regardless of Yamaha’s sizing recommendations. Some of these geo figures are quite a departure from modern bikes of this ilk and prove how geometries have evolved in the last few years. With all this said, we all know how a bike rides is more than just specs and numbers.
Assistance modes on offer are ECO, Standard, High, Extra-Power and Automatic, as well as a handy Walk Assist that gently drives the rear wheel when needing to push the bike somewhere. Assistance levels are clearly visible while riding, on the brand’s ‘Interface X’ LED display, and easily adjusted on the fly via the ergonomic remote switch just beside the dropper post lever on the righthand side.
After some initial tweaking of the suspension pressures to suit my weight and riding style, getting used to the bike was a cinch. Some bikes take a good amount of time to feel familiar, but this bike didn’t have that issue and I was quickly tackling trail sections with the same gusto as I would on my regular bike. The comparatively small wheels made initiating turns and adjusting lines quick and easy, and the bike cornered well, even with at times bad technique.
Climbing is where eMTB’s shine; getting up technical and steep climbs that you couldn’t physically manage on a regular bike. The MORO 07 climbs really well most of the time; I found the ‘Automatic’ power mode and its ability to automatically adjust the output depending on the rider’s pedalling input, offered the optimal amount of power for most situations and gave a very natural feel while pedalling. Only when blasting along gravel roads or pedalling up to max speed into a trail feature did I select the Extra-Power mode; in most scenarios it was simply too much and was overly aggressive with the supply of power, causing unwanted accelerations or wheelspin while climbing techy or slippery trails.
Heading downhill brings a huge grin to the face: it’s flat-out, simple and fun aboard the MORO 07. The bike feels well-balanced, and even playful, for a 23.7kg eMTB. It’s composed and stable in most scenarios and, even when compared to its 29” wheeled brethren, the bike has long chainstays which aid stability when descending at high speed and help limit sketchiness through chunky terrain. The downside is that, when combined with the long reach on the large size, it isn’t simple to pull the front end up to manual through deep dips in the trail. Sure, it’s doable, but shorter chainstays would make it easier.
Descending, confidence is boosted by the Magura MT5 4-piston brakes; I’m pretty finicky when it comes to brakes but the solid, woody feel suited me and when coupled with 203mm rotors front and rear there is plenty of stopping power on tap, something that is lacking on many eMTBs, and surely necessary with the extra weight of an eBike, to stay in control while descending.
The large volume 2.8” wide tyres damp trail chatter, inspire confidence, and enable you to hold a good line… to a point. I did find that under big compressions or very hard hits, particularly on steep descents, the tyres could be unpredictable as they warp under the strain. This was a bit unnerving at times but is something I’ve experienced riding 27.5”+ sized tyres previously. This could be helped by running a stiffer casing tyre, or tyre liner like a Cush Core or similar. The pairing of the Maxxis Minion EXO+ DHF 2.8” up front with the Maxxis EXO+ Rekon 2.8” on the rear was good for general use and in dry, hardpacked conditions they hooked up well, but the Rekon on the rear fell short while climbing steep, loose or wet pitches; the knobs simply aren’t up to the task as it’s a small knobbed tyre designed for pedalling speed rather than high torque traction. I would have liked to see a tyre with a stiffer casing and larger knobs specced on the rear, either a Maxxis Minion DHR2 or similar would be perfect with larger, paddle-style central knobs for traction, and stiffer casings for increased stability. Let’s talk about the elephant in the room: the 500Wh battery. Three years ago, a 500Wh battery was considered pretty standard, however nowadays, even at the price level of the MORO 07 full power, eMTBs are generally specced with batteries of 600Wh or higher. The larger batteries usually come with a slight weight penalty at this level, but a couple of hundred grams for another 100Wh at least is probably worth it. With this all said, I’ve been surprised how much more efficient this motor is with its power than some other brands, and the range is reasonable -it’s impossible to put numbers to this but if you don’t go heavy with the max assist you’ll get a good couple of hours riding in before the battery life is an issue.
I’ll be honest, I was pretty sceptical when Yamaha offered up this bike for review, but outside of a few things I’d change, it really surprised me by how fun it is. After spending some good hours on it across multiple rides and trail styles, I find it hard to pin point any deal breakers and it really goes to show that how a bike rides is the sum of all its parts, frame included, not just the geometry numbers and any preconceptions these may bring about. I’d be interested to know how the bike would improve with a 29” wheel up front, some shorter cranks and more aggressive tyres –all of which could be experimented with by a buyer.
Riding bikes is all about having fun and the MORO 07 delivers this in spades. Although $8999 isn’t small change, it’s comparable to the competition and if you’re looking for a quality bike without blowing the budget, this rig packs a good bang for buck and will stand out on the trail amongst the hordes of bikes by the “big three” brands that now flood the trails.
Burgtec Cockpit
Words Liam Friary
Image Cameron Mackenzie
RRP $315 – Bars | $199 – Stem | $54 – Grips
Distributor Everoutdoor
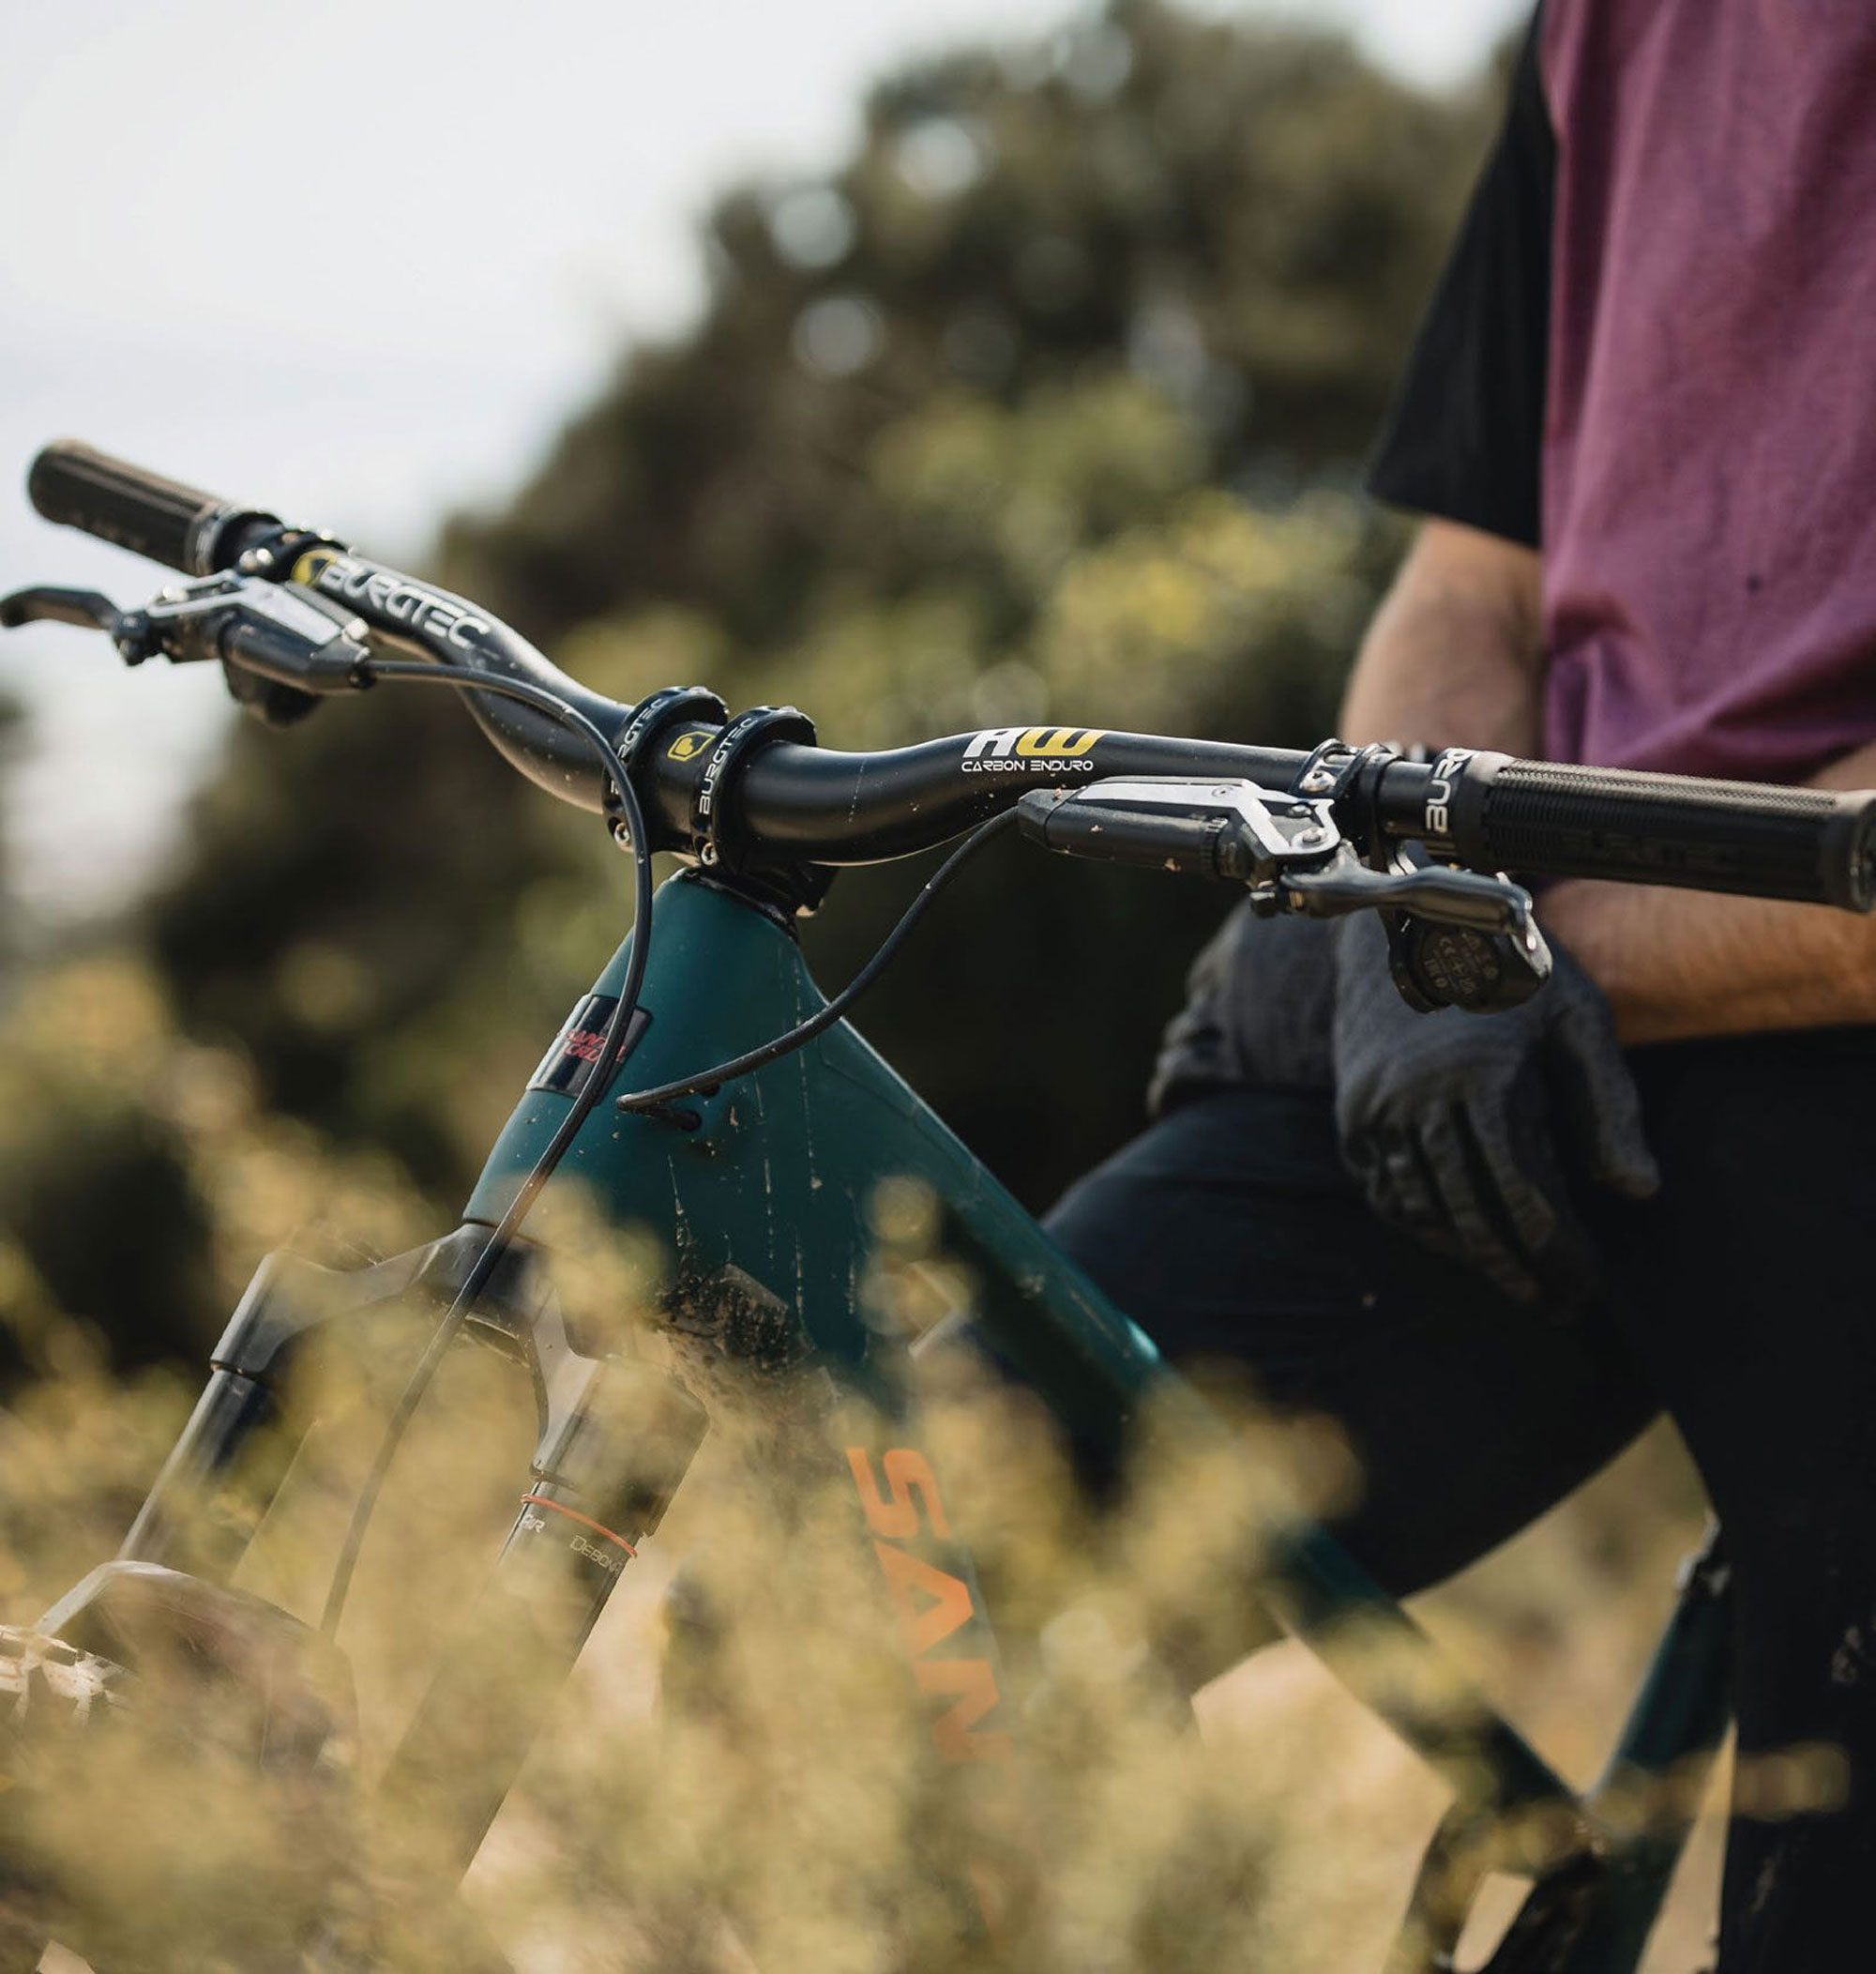
Burgtec Components are well known for their race pedigree. The UK based brand has been synonymous with downhill racing since ‘04. The Santa Cruz Syndicate, 50:01 crew and a large roster of riders have helped push the development of Burgtec’s sturdy component range that can stand high-level racing demands.
I have been riding Burgtec’s cockpit for the last few months. For a new Santa Cruz Hightower build, I went with a Burgtec Ride Wide Carbon Enduro Handlebar, Enduro MK3 Stem and Super Soft Greg Minnaar Signature Grips. Seeing that harsh UK trails helped to develop these products, I thought it would suit our harsh environment back home as well.
The Burgtec Ride Wide Carbon Enduro Handlebar is a full 800mm width bar made from Uni-directional carbon fibre, coming in at a respectable 258 grams. A 9-degree backsweep paired with 5-degree upsweep are familiar numbers to most, with a 30mm rise and 35mm clamp being the only offerings for this model. There are handy cut marks to help you trim ‘em down to whatever width you’d fancy, and some handy torque recommendations are in place to ensure you do not damage them.
The Burgtec Enduro MK3 stem is well suited for the current crop of enduro bikes and riders. Burgtec wanted a stem that offers the best amount of bar-to-steerer precision they could.
So, to stack up to these demands, without adding a heap of weight, Burgtec had to modify their manufacturing to include an initial forging stage, aligning the grain of the 6061-T6 aluminium and improving the strength and fatigue life in the process. Along with that, they added some bulk and length to the steerer interface -the bigger overlap helps with the stiffness.
To finish off the cockpit, I opted for Burgtec Super Soft Greg Minnaar Signature Grip. They enlisted the help of the GOAT who needs no intro. These grips were prototyped through the 2020 season and based on the World Cup winning pattern of the Bartender Pro, as used by Greg along with Nina Hoffman, Danny Hart, and Angel Suarez. The Super Soft is made up of a unique blend which fuses together additional suppleness with an extra tacky compound. It’s all in the aid of avoiding hand pain, even at the bottom of the rowdiest track.
Let’s turn the attention to how the cockpit felt on the trails. I’ve had this bike built for a few months now and every time I finish a ride, I want to get out for another one. Perhaps that’s just my current mood but, when you have good bikes and reliable components, it does bring more joy to your riding. The understated-with-just-enough-graphic- aesthetics of the cockpit is absolutely dialled in my opinion. But the looks do stack up. I found that there’s a nice neutral/natural feeling sweep, to the bars. They also felt nice and compliant – no harsh feel like other similar bars at 35mm clamp, which have felt overly stiff. The grips were damn soft and had a great overall feel with or without gloves.
The combination of the Ride Wide Carbon Enduro Handlebar and Enduro MK3 stem combination provides a noticeably direct connection between the hands and the front end, without a single hint of undesirable twist. As I indicated earlier, there wasn’t a harsh feel – even when venturing down some chunky, rocky terrain in the South Island. When the bike has been boxed up on the back of the rig, and thrown under other riders, the high-quality hardware with good tolerance shines.
The word ‘solid’ comes to mind for the Burgtec Ride Wide Enduro Carbon Handlebar and Enduro MK3 Stem. These are at the higher end of the price spectrum but will stack up to the demands of hard chargers without blowing your wrists apart. Of course, grips are quite personal but, for me, the Burgtec Super Soft Greg Minnaar Signature Grip feel superb and finish off the cockpit nicely. I only hope these don’t have to be returned.
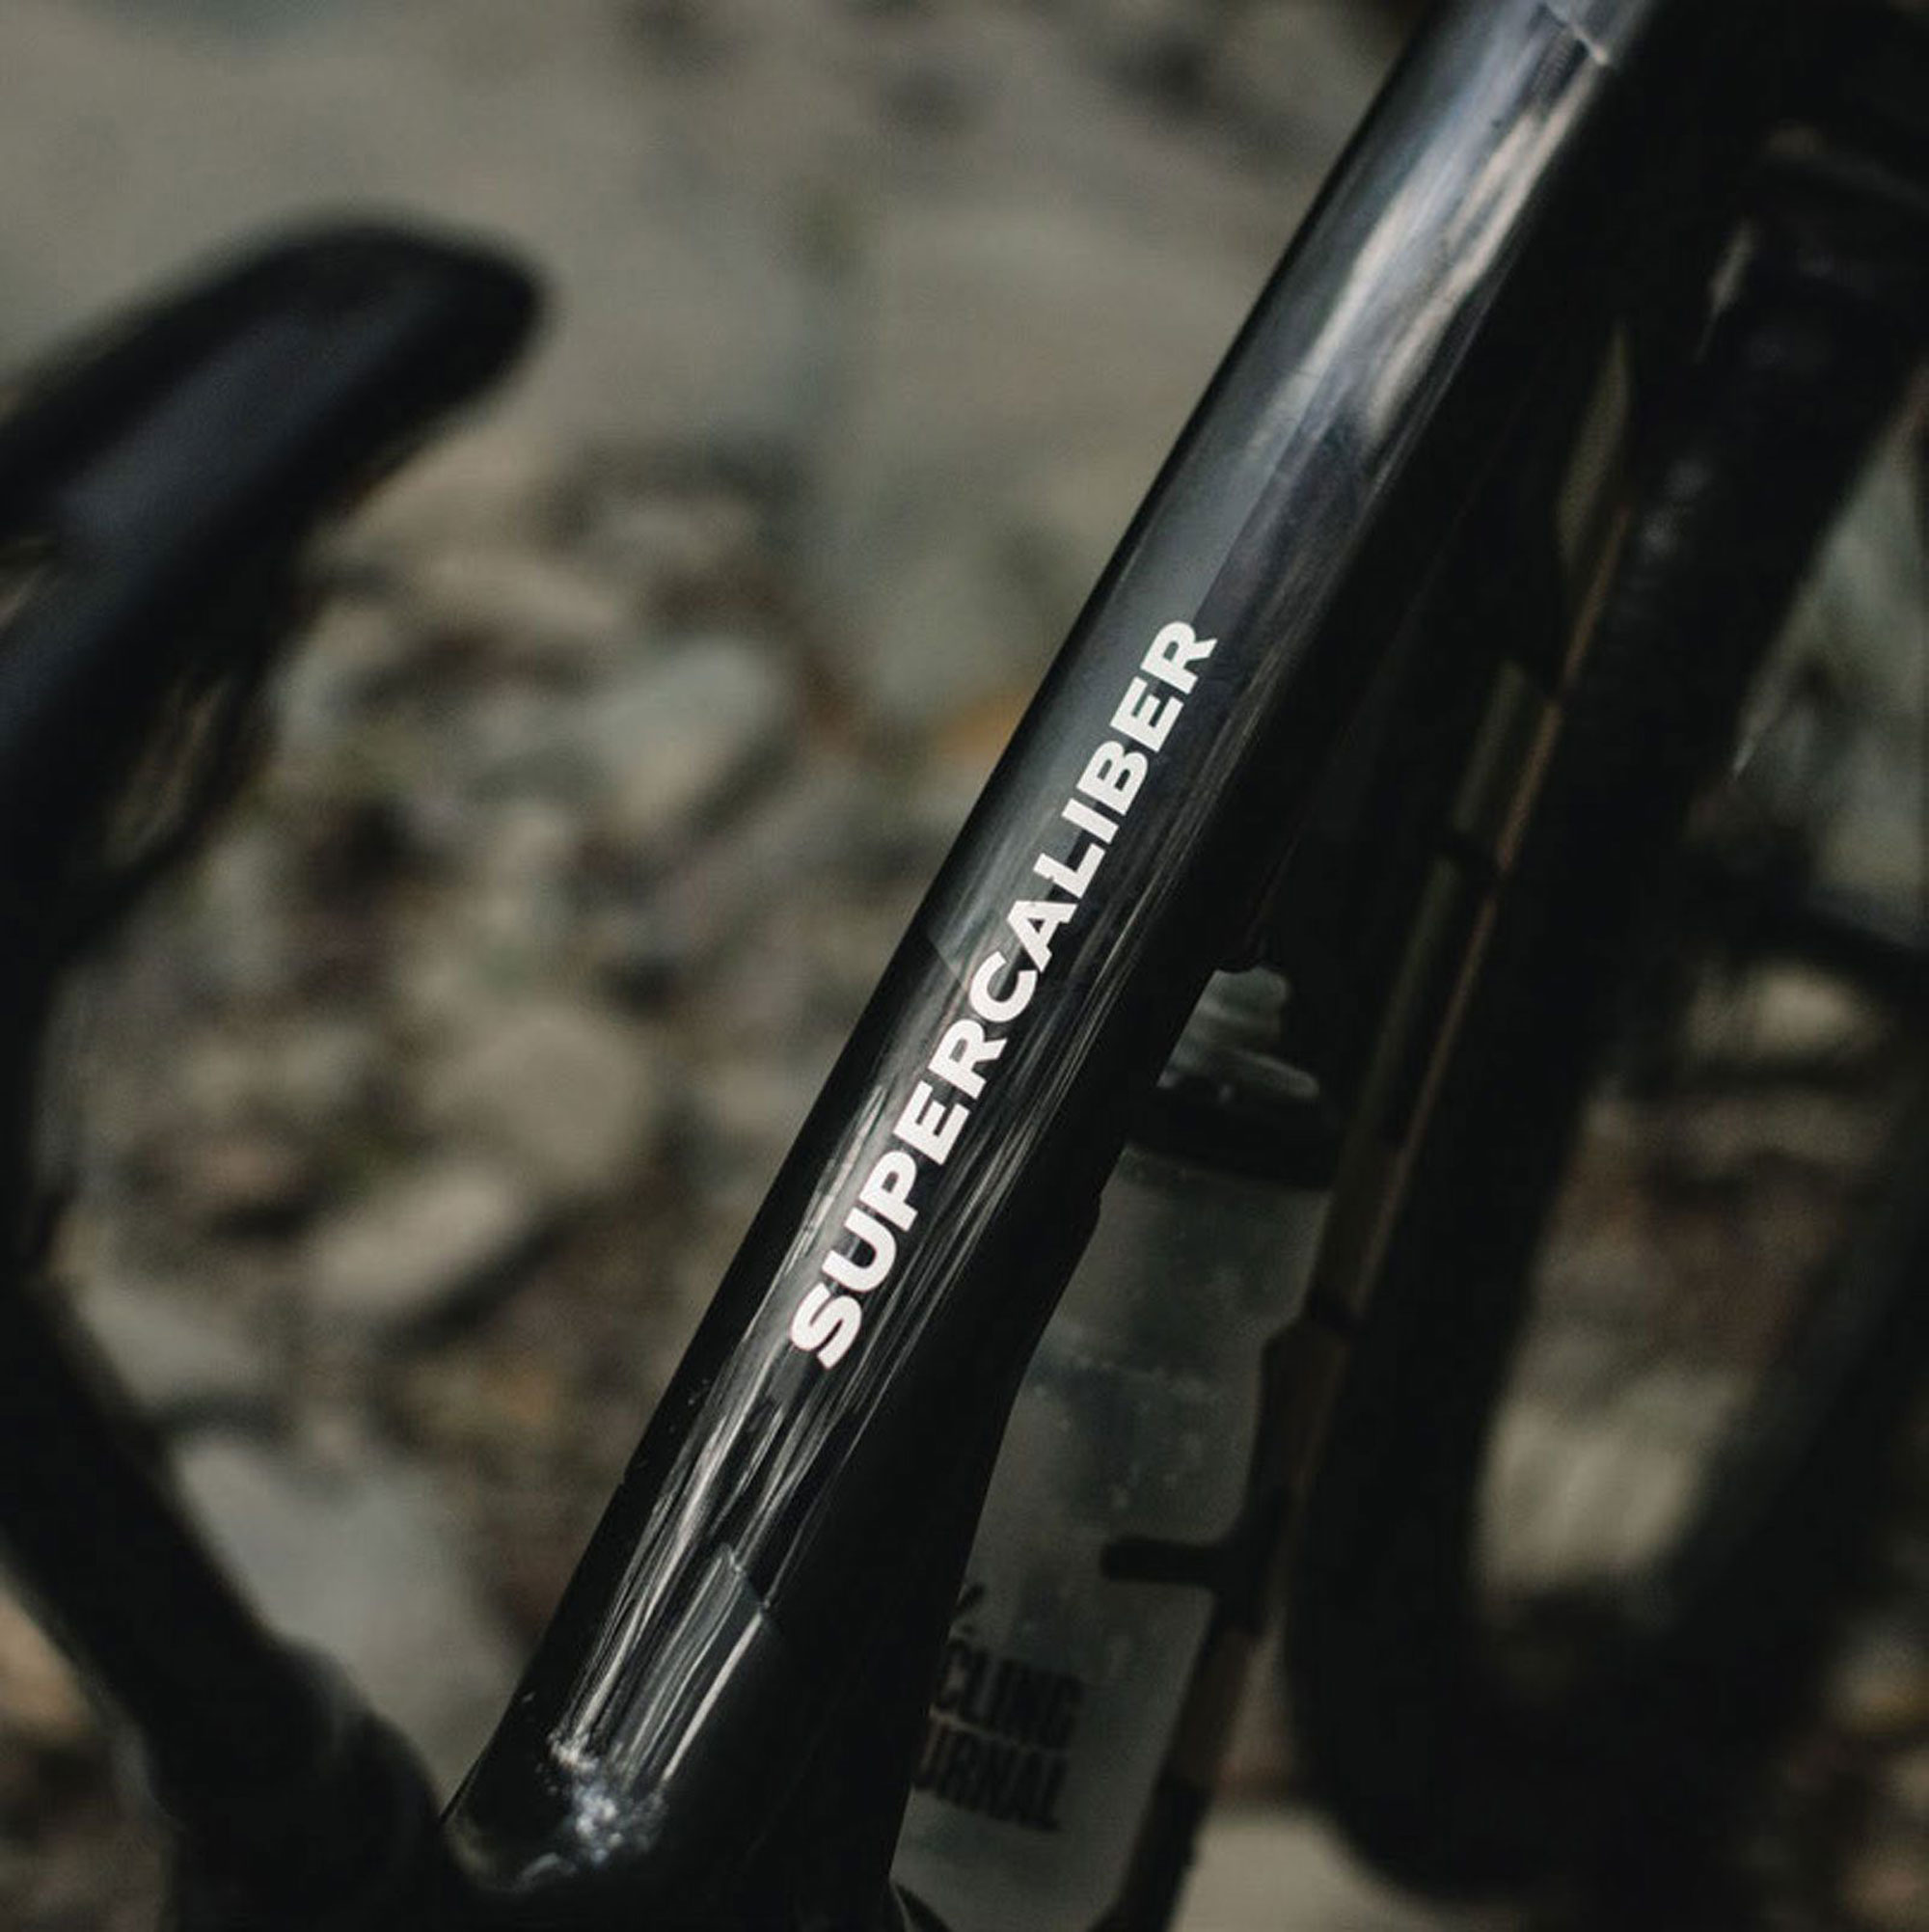
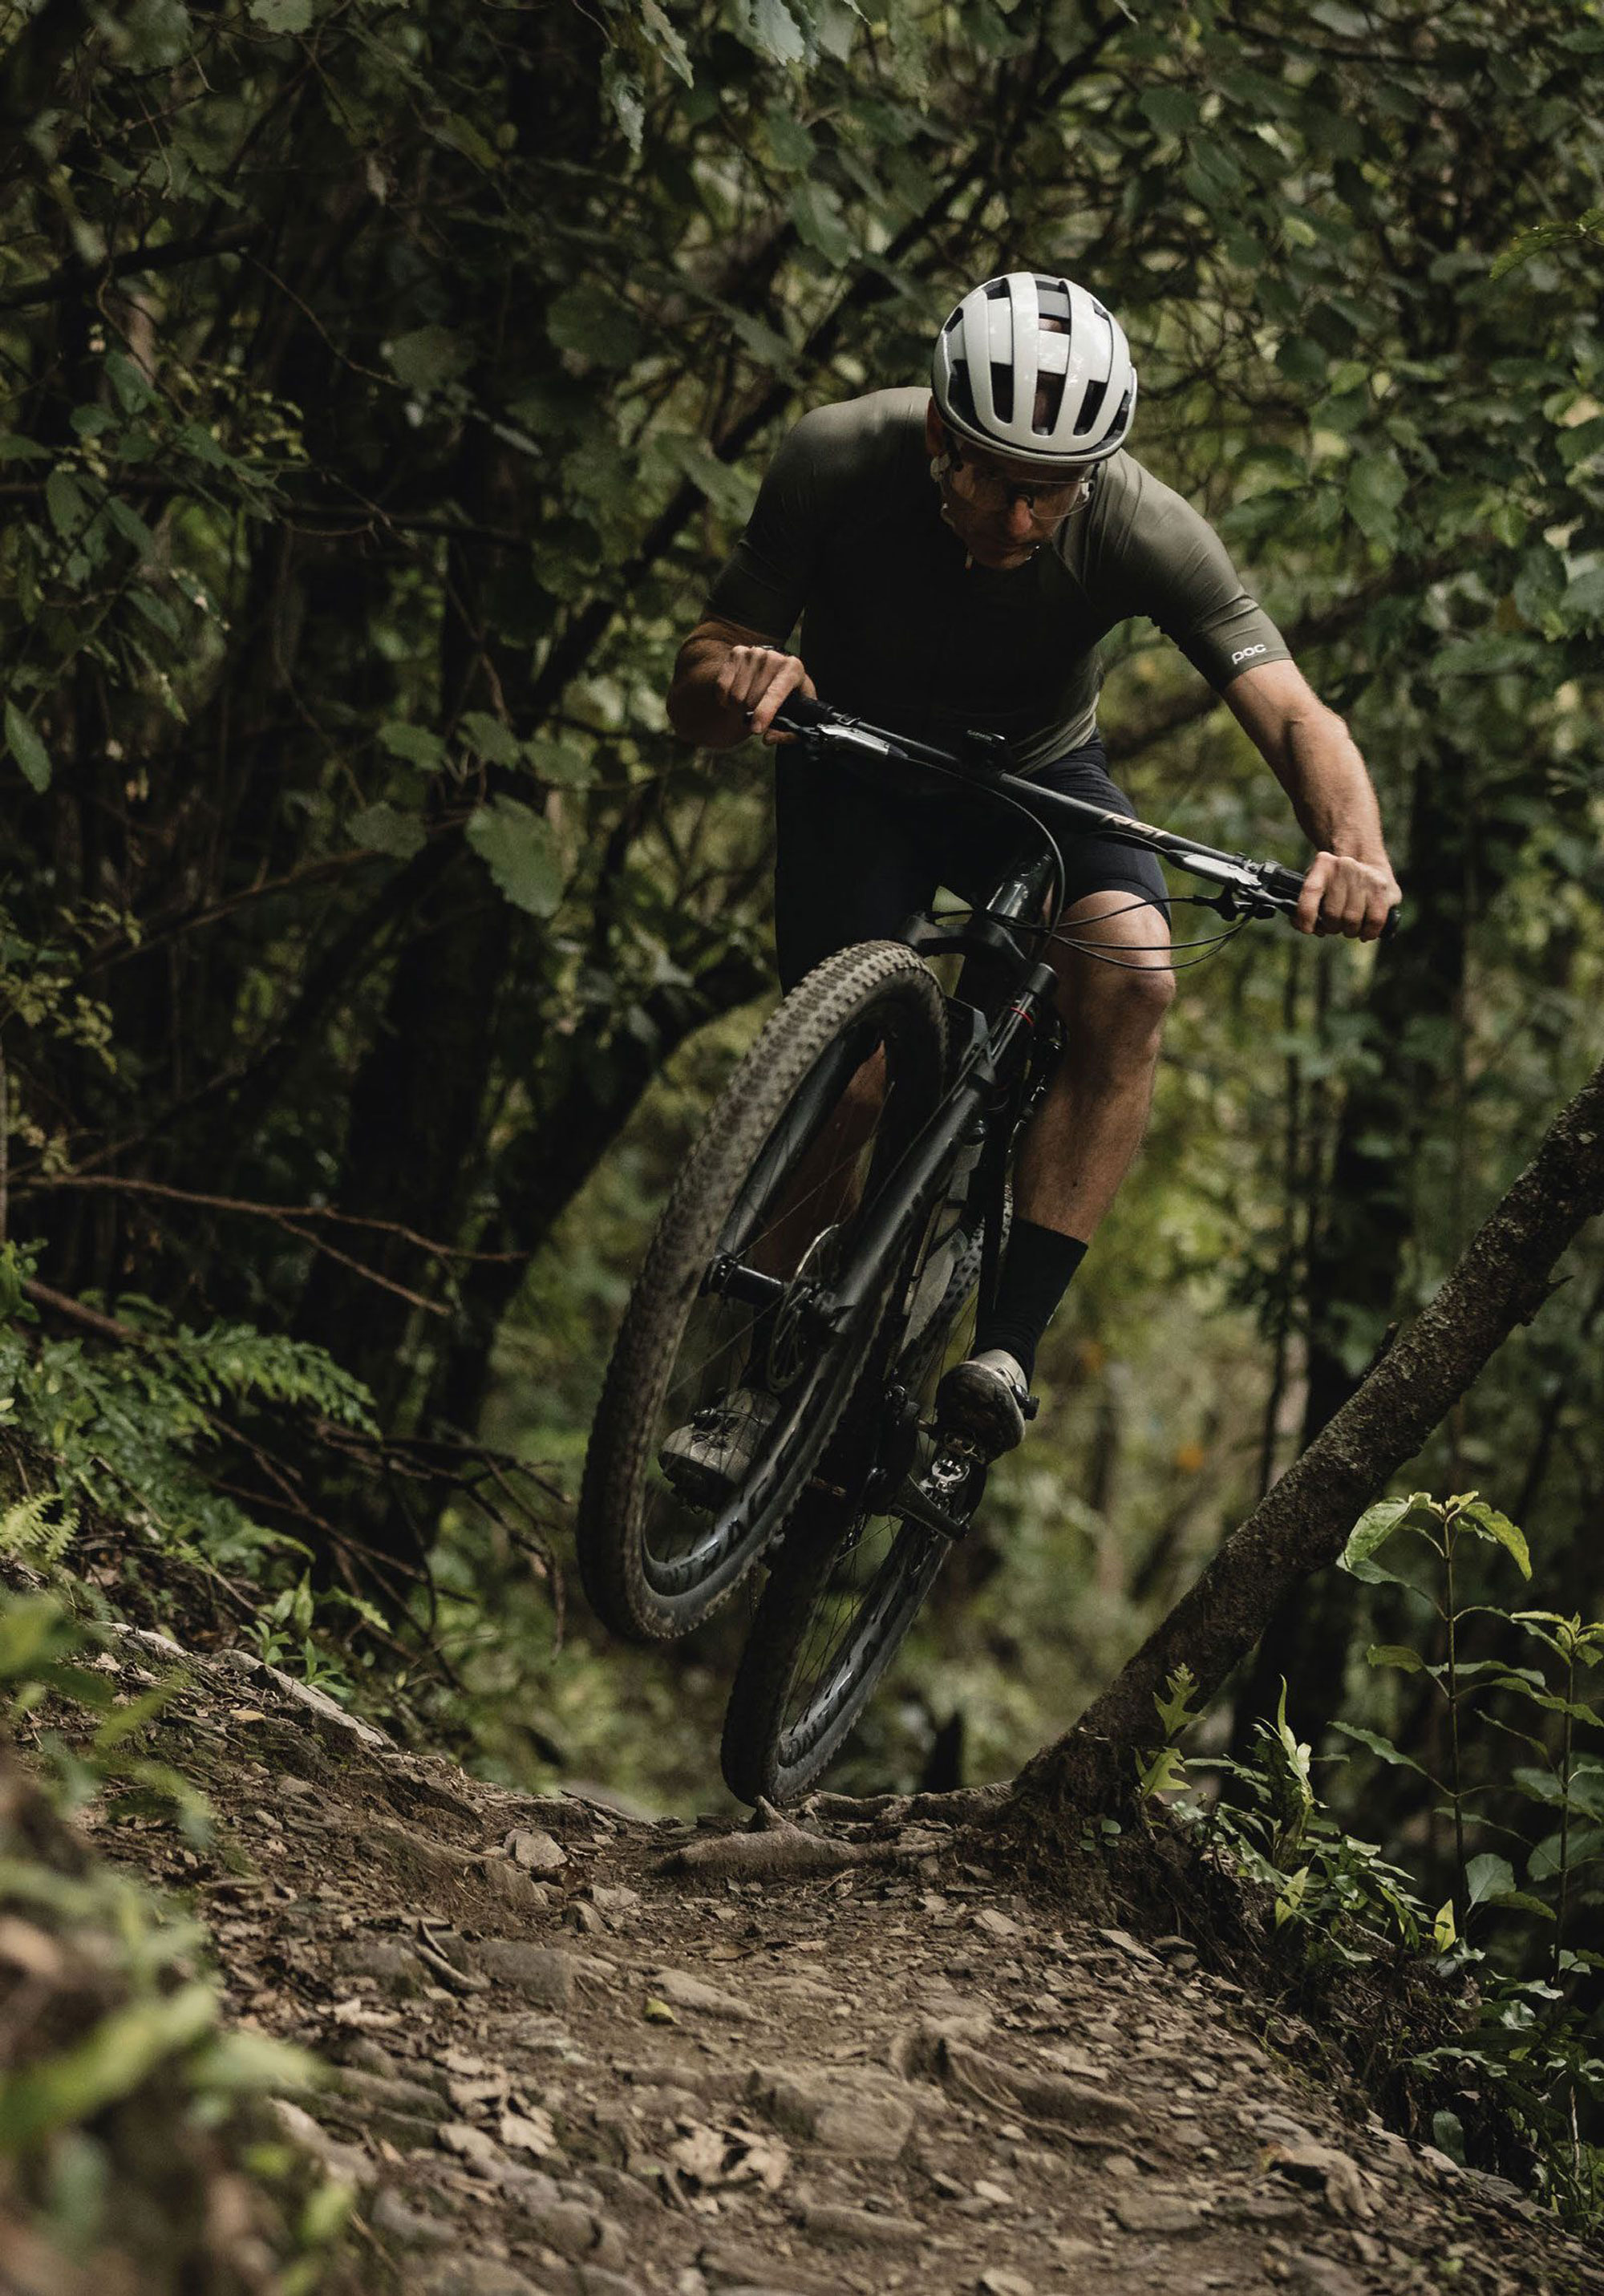
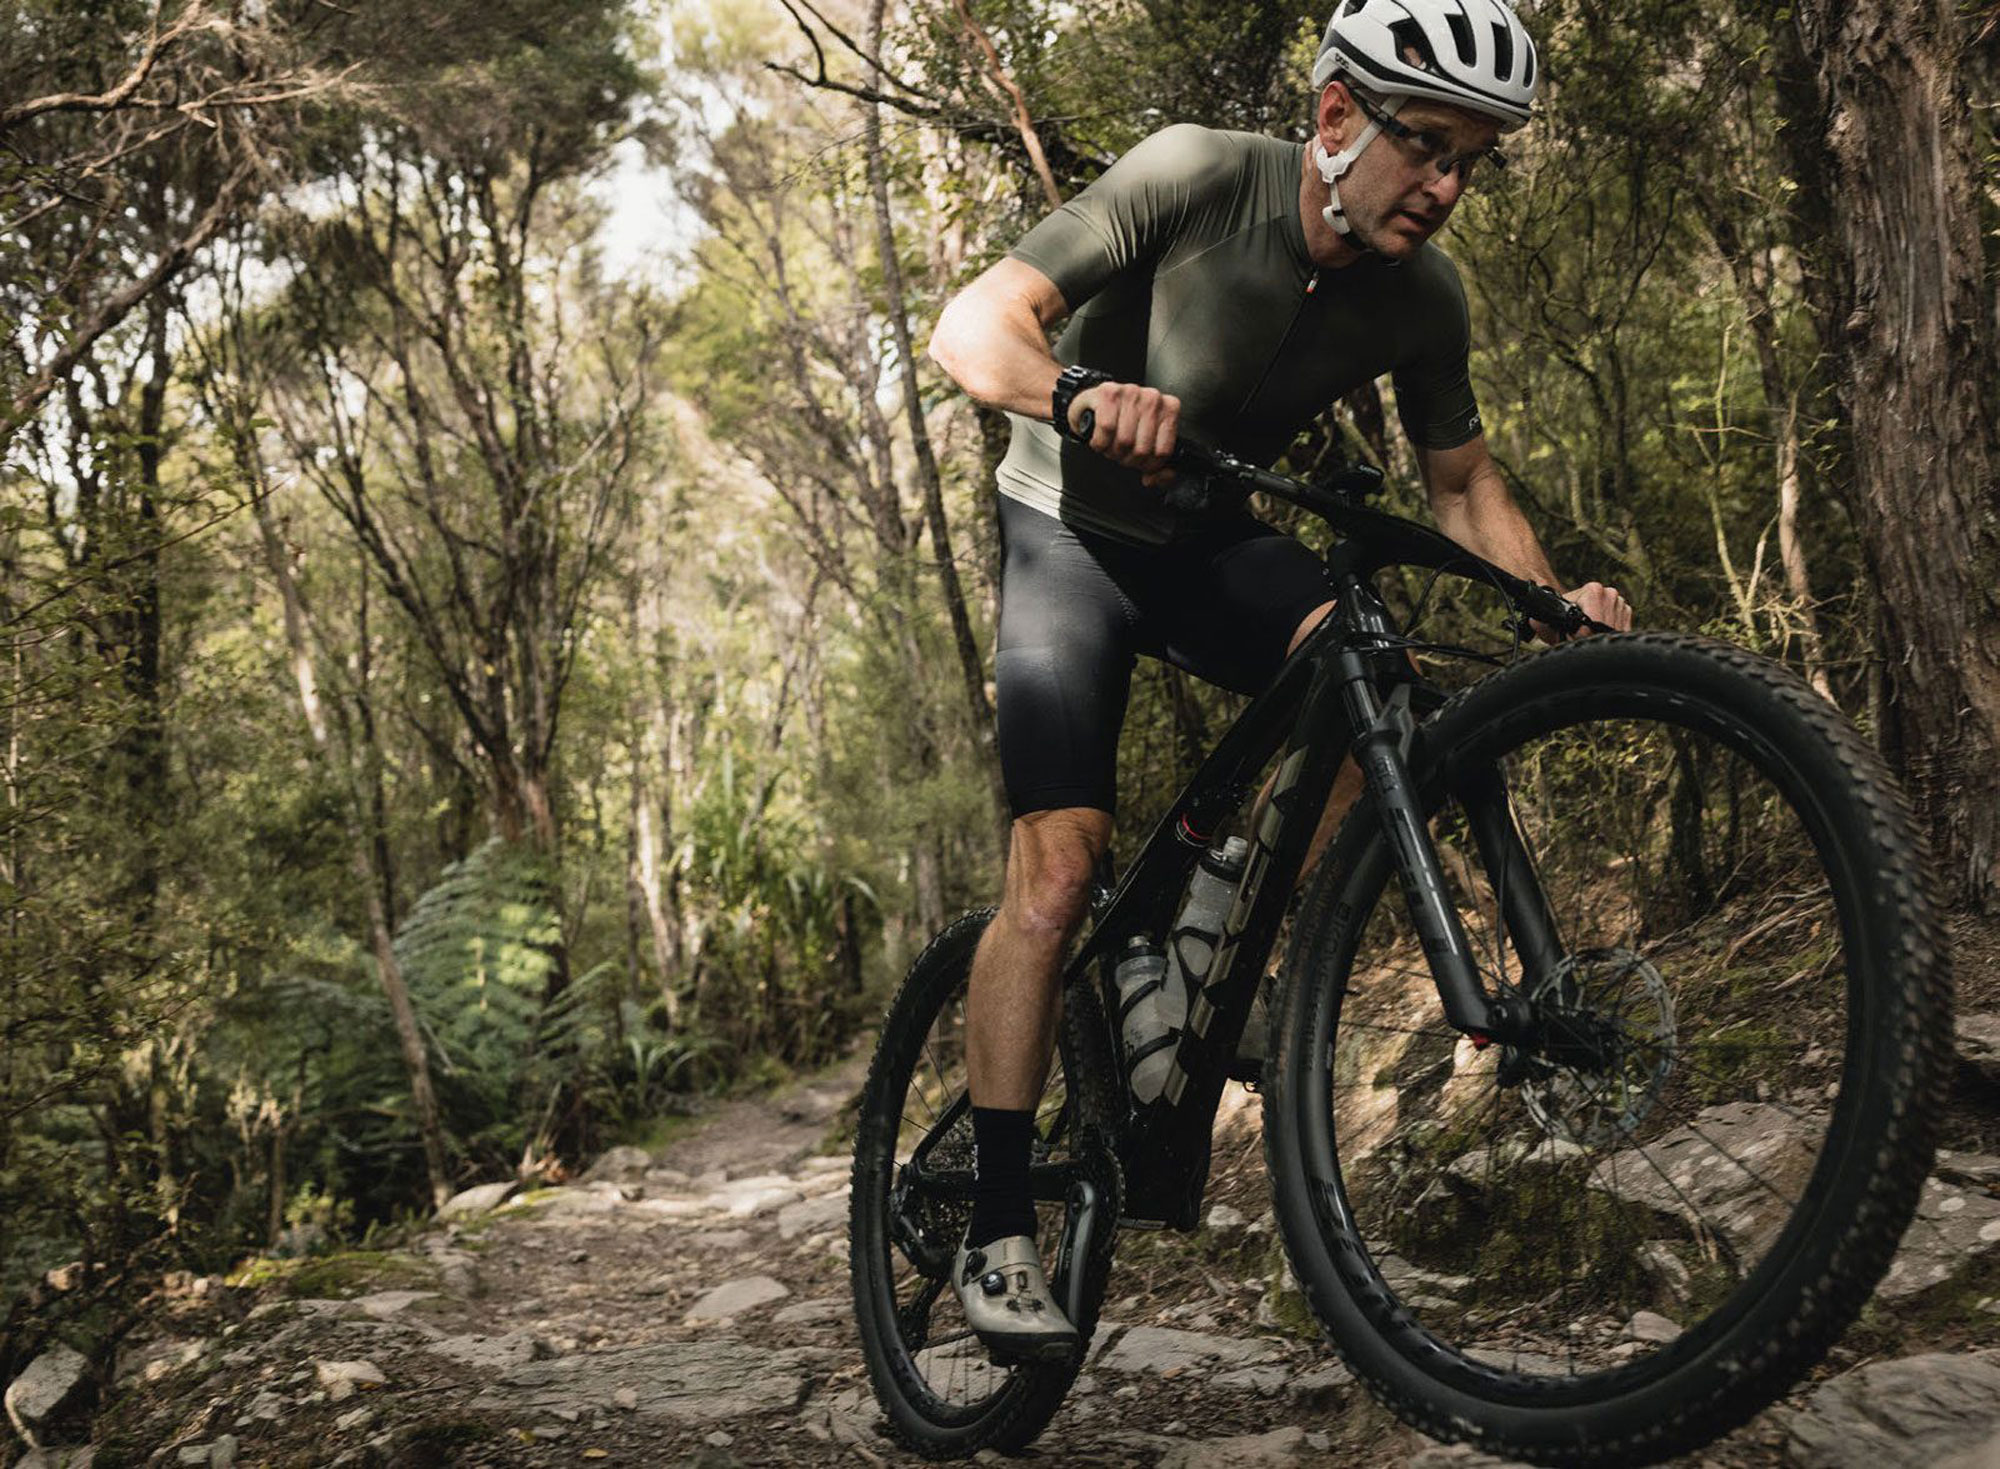
Trek Supercaliber SLR 9.8
Words Liam Friary
Images Cameron Mackenzie
RRP $12,999
Distributor Trek New Zealand
Flick back through your iCal to mid-2019, and the cheese-curd lovers from Trek bicycles in Madison, Wisconsin, would have just launched a category-defying, new cross-country race bike: the Supercaliber. A short-travel, full suspension bike that rivalled the efficiency of a hardtail, but with just enough travel to ease the blow when trails got spicy.
The bike carries the moniker from Gary Fisher’s OG Supercaliber, released for model in the year 1990. The Fisher brand, and Supercaliber name, were eventually acquired by Trek, after which it was filed away for several years, only to resurface on the first generation Trek Supercaliber in 2019.
To the uninitiated, the fresh Gen 2 Supercaliber looks almost identical to the first. The top tube is slightly straighter (rather than noticeably curved on the Gen 1) but the clean, racy lines remain – as does the heart of the bike: the IsoStrut suspension, this time bumped up by 20mm to 80mm travel. Gen 2 has some incremental changes across the frame material used, geometry, and specs. None of these things alone are groundbreaking but, combined, they’ve enabled a leap forward to modern times for the Supercaliber.
As World Cup level XCO courses have become more technical, the equipment used to compete has evolved. Where the previous generation’s 60mm of rear travel and subdued geometry was suitable back in 2019, it’s long been surpassed. Although Gen 1 is still a favourite for racers – and even some bikepackers – here in NZ, a few brands now have similar offerings and the Supercaliber has been left behind. Until now. This redesign brings the bike up to meet the needs of a modern racer while retaining the comparatively short travel and snappy handling of its predecessor.
The Supercaliber frame is now available internationally in two tiers. The premium SLR version features a low Fibre Areal Weight (FAW) achieved by using a higher-modulus carbon lay-up and less overall material. Intended for wireless gearing, the SLR sheds further weight by not incorporating internal cable guide tubes. All Supercaliber models feature the same IsoStrut swingarm and shock.
While visually the lines remain almost unchanged, the geometry has stepped forward into the modern age with the bike getting the now common longer and slacker treatment. Not one to push the boat out too far, Trek have slackened the head tube angle to 67.5 degrees from 69 on the Gen 1, and stretched the reach from 450mm to 465mm on a large size, with scaled increases across the size range. The seat tube angle gets bumped a minor half-a-degree steeper to further centre the rider’s weight, for climbing prowess.
The swingarm is suspended by a frame-integrated RockShox SIDLuxe shock. New to the bike this year, it’s a bit simpler than the previous Fox edition and is now more easily tuneable. The shock is designed specifically for the Supercaliber but shares the same traits – even some hardware – as other Rockshox suspension products. The swingarm itself has no pivot at the rear axle, relying on the tuned flex of the seat and chain stays for its vertical compliance. The shock has 15-35% sag markers anodised on its stanchion, making fine-tuning for specific courses or conditions a simple, one-person affair. That lack of pivots on the rear triangle helps to bolster lateral stiffness and ensures every watt makes it to the wheel.
The back end of a bike is only ever as good as the front; the rear wheel follows the front after all. Up front, we find the new Rockshox SID fork with 110mm of travel – 10mm more than the previous – although the bike is designed to take up to 120mm. With a DebonAir spring and new Rush RL damper, I’ve found this fork more supple and active than my own bike’s previous edition SID Ultimate. I’ve got no qualms saying the new SID is as good as it gets for an XC fork. Stiff enough in all scenarios thanks to its 35mm stanchions, it tracks the ground exceptionally, helping the front wheel track and maintain traction, as well as easing the pain on the hands and arms of the rider.

Both the SIDluxe shock and the SID fork have lockout cables running back to the new TwistLoc Ultimate remote lockout. This new TwistLoc blows the doors off the vulnerable, previous editions. A twist towards the rider to lock, and away from the rider to unlock with a positive click, audible and tactile -perfect. My only comment on this new remote is that the cables exit at 90 degrees from the unit, upsetting the clean lines of the Stealth brakes and cableless AXS shifter – somewhat unsightly compared to the clean brakes, but at least it works well and is trouble-free, so far.
A trait of the IsoStrut suspension layout – and hiding the shock away inside the frame – is that there’s plenty of room in the front triangle for water bottles. I was stoked to see a 900ml bottle fit comfortably on the downtube of the large-size bike, even with a regular cage. A 600ml fits comfortably on the seat tube, although I did need a side loading cage to make it work smoothly. Sure, it would be good to fit a 750ml bottle on the seat tube but at least you’re better off than many bikes with only a single bottle.
Our test bike was a size Large. At 176cm tall, Trek’s size chart would suggest I’m in the middle of the bell curve for their M/L size, at the top end of M and right at the bottom of the recommended height for a Large, so there is some cross-over available depending on a rider’s particular attributes; i.e. leg, arm, and torso proportions.
Surprisingly, the Large size didn’t feel too big and unwieldy for me, although I imagine the M/L’s 15mm shorter reach and consequently shorter wheelbase might have increased how nimble the already snappy bike felt. A minor tweak I made was to swap out the supplied 175mm crank for a 170mm length. This is a somewhat personal preference, but it does seem a lot of top-end riders are going for a shorter crank these days too. It’s great to see Trek speccing a 170mm crank on the Small and Medium sizes, although I do wonder if the M/L should also be fitted with these. It’s nice to see a 34-tooth chainring specced, and there’s room to fit an Anton Cooper-esque 38-tooth if your legs are up to the task!
With the sizing out of the way, it was time to get set up and ride! Consulting the Trek website, their Suspension Calculator gave me some baseline suspension pressures to tune from. The bike was pretty spot on with the suggested settings, but I preferred a couple of clicks slower on the fork rebound, and a click slower on the rear. At the suggested pressure, the IsoStrut-supported rear end sat precisely at 25% sag.
During its maiden voyage, I found the back end a bit harsh over successive hits compared to my regular, more down-country style bike with 120mm rear travel. This was no surprise as it’s a completely different style of bike, so I upped the sag to 30% for my next rides and found this to be nicer for descending but not quite as efficient while climbing, although the lockout did the trick here. My thinking is that around 30% sag is ideal for a long day on demanding, rugged trails, a ride where optimal climbing isn’t the goal, or a shorter XCO track with substantial rough technical downhill sections. For a smoother course, or a marathon-type effort with limited rugged sections, 25% or firmer would keep things efficient and lively, offering enough kush to keep things controlled on the descents, but lightning quick on the pedally bits.
Pedalling efficiency is upped on the Gen 2, by a tweak in the main pivot position, moving it upward a touch and forward slightly. This seemingly small change has raised the anti-squat number considerably, meaning the suspension is less active while pedalling, absorbing fewer of your precious watts. The bike does really get up and go when you lay the power on!
The RSL one-piece cockpit is as polarising as a tyre choice. I’ve had people come up to me and slate the Bontrager one-piece bar/stem setup, and others approach me to tell me how much they like it. As far as the shape goes, I’ve found it fine and although different to what I’m used to, I adapted quickly. The Large bike gets a 750mm width bar moulded to a -13 degree 80mm long stem. The set-up is stiff, that’s no secret, but my gut feeling is bringing a more compliant bar to this cockpit party might change the bike’s handling a bit. The stiffness of the bars is in keeping with the overall stiffness of the frame and wheels, etc. So, while they might not be for everyone, I think given a few rides, correct suspension and tyre pressures, this cockpit helps bring the best out in the bike. I do wonder if the fact you can’t adjust the sweep of the bar by rolling it forward or back, relative to the angle of your arms, may mean that your arms sit at a different angle to the bars than optimal (due to overall setup). If you want to try a different length stem then you’re in for a new stem and handlebar too, but at least they’re simple to change with no crazy stem or headset cable routing here.
Trek’s mountain bikes are renowned for having short head tubes, and the Supercaliber is no different; 10cm on this Large, while XL gets a 12.5cm, and all other sizes a 9cm head tube. This allows riders to fine-tune their stem and handlebar height across a wide range. Go from pro-level slammed, to bike-packer high-rise handlebars with a simple swap of spacers. After my shakedown ride, I switched a spacer and dropped the stem 10mm from stock, putting a little more weight over the front end and seating me in a more comfortable pedalling position, without being too aggressive. I’ll likely drop another 10mm spacer out and lower the front end further as there’s plenty of room for adjustment and experimentation.
Being an out-and-out race bike it would be a waste to just take it out for some rides on familiar trails in an attempt to get an accurate gauge of how it rides. A rig designed to win World Cups is best tested in the exact scenarios where it’s designed to excel and be pushed towards its limits, something that’s not easily replicated outside of an actual race. With this in mind, I entered the inaugural Whangamatā Black Rock XC race. With 60km and 1800m of climbing, the 3-lap course was no joke. Granted, the bike is designed for shorter, punchier XCO-style races, but the reality is that, here in NZ, longer marathon-style events will likely make up a large portion of the race action a bike like this will see. It’s also likely to be popular with the bikepacking crowd, just as the Gen 1 was.
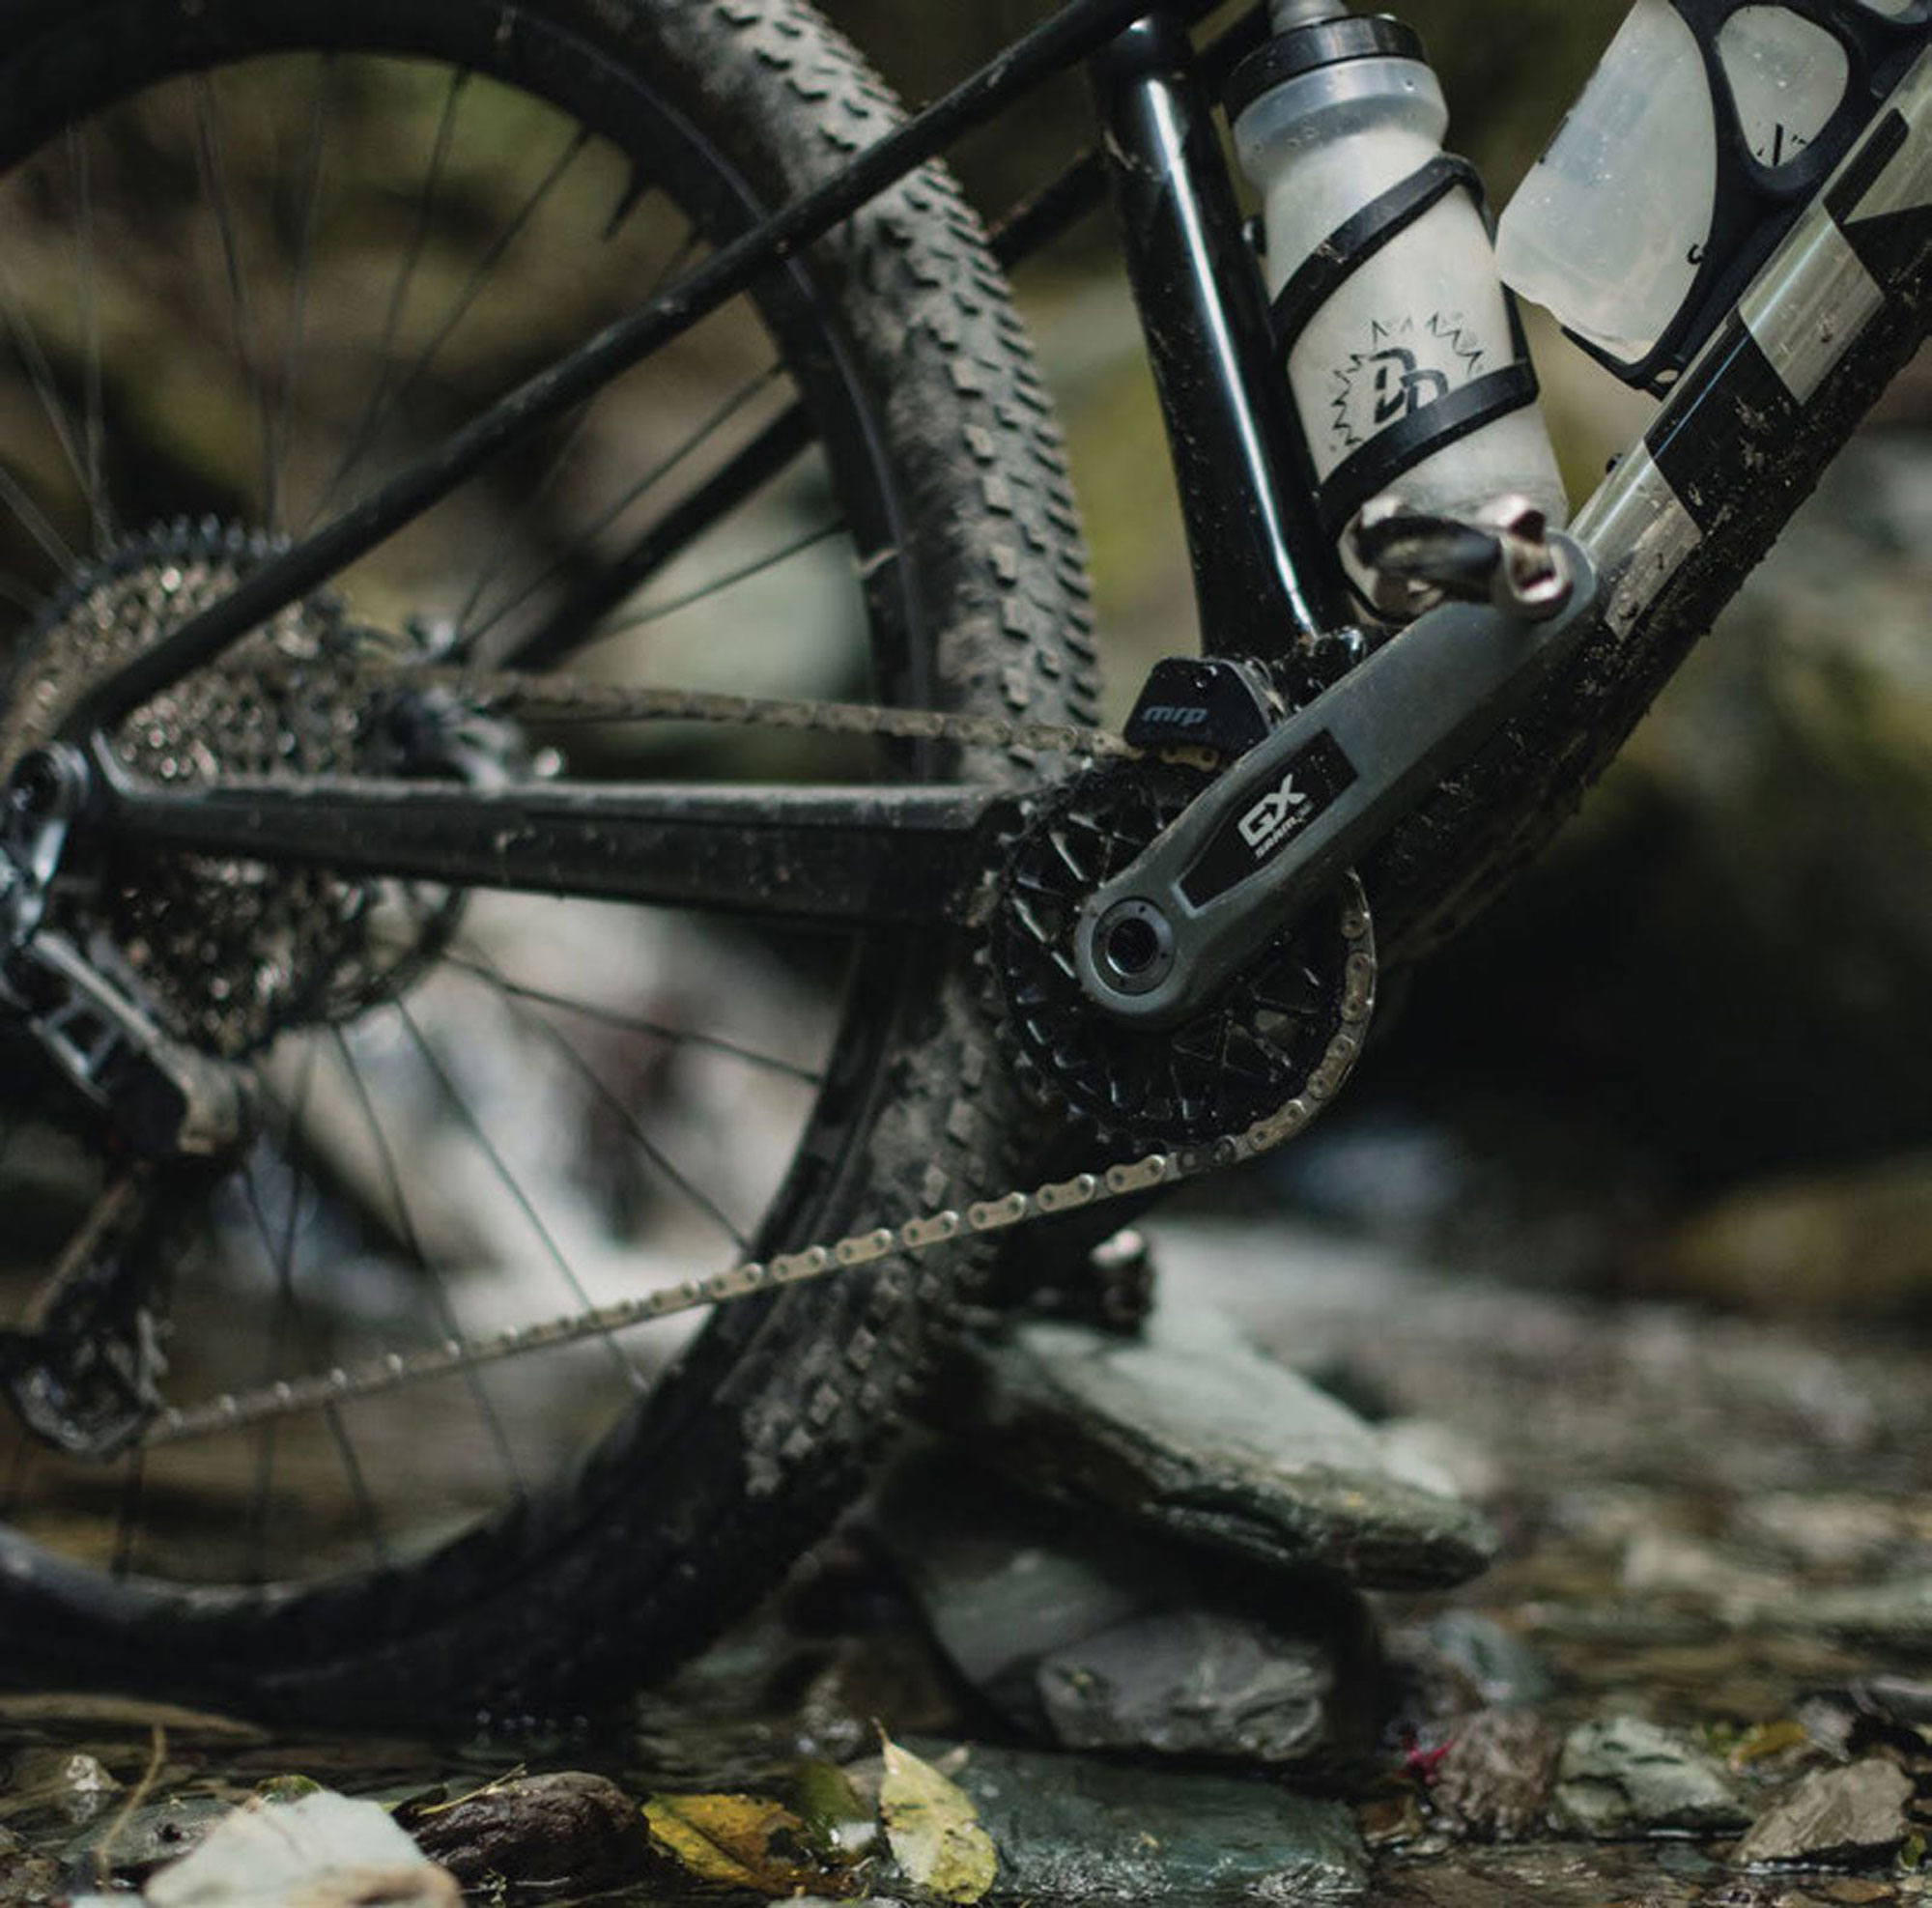
I had a good number of hours aboard the bike before the event, and was feeling pretty comfortable aboard this rocket ship, but actually putting it right in its element really gave me a true appreciation for just how good a bike of this level really is. Out of the start, we were tussling for the first single track, in and out of the saddle, avoiding a near pile up on the first corner. We were strung out entering the first single track climb. The SRAM GX Transmission is ideal in situations like this; whatever unfolds in front of you, you can rest assured that if a gear shift needs to happen, it will. I had no qualms firing through gears under full power, seated or standing.
Most of the trails in Whangamata are clay-based and certainly pretty spicy in the wet! After some rain the day before, I was stoked to see blue skies for race day and, although the majority of the trails were either dry or close to it, enough moisture remained in the dirt, in sections, to make things unpredictable at times. At first glance, I wasn’t sold on Bontrager’s new Sainte-Anne RSL XR tyres. The central knobs are very closely spaced for rolling speed, but the shoulder and side knobs are widely spaced and low profile. I wasn’t expecting much from them, particularly in the damp. Surprisingly, though, they hooked up adequately thanks to the combination of said tread pattern, a 220 tpi casing, dual rubber compounds, and the ability to run low pressures thanks to their large 2.4” volume. Traction was surprisingly good and, even in the few truly slippery sections, the grip was predictable. There wasn’t really any section of trail I felt the tyres were majorly lacking, but they certainly excelled on dry hardpack and gravelled sections, maintaining speed really well. For a properly wet race, I’d be opting for something with deeper tread for sure. The tyre volume, coupled with the Kovee Elite wheels’ 29mm internal width, offered sure footing even under the heavy G-forces when railing some of Whangamata’s seriously good berms at full pelt -no tyre roll or sketchy moments.
There’s certainly something special about the feeling you get from racing a bike like this. When you really put the boot in and power up a short, sharp, technical climb, it just feels like every watt you’re putting into the pedals is propelling the bike forward; no flex, no suspension bob, just pure unadulterated forward momentum. One particular section at the Black Rock was a prime example of this; a climb through a section of forestry slash and up a sharp pinch back into the pines. Turning right into the slash, a majority of your speed was scrubbed off and you were presented with 100m or so of partially covered logs and scrap, creating steps and obstacles to navigate your way across, up and over. Rapidly laying down the power, the bike shoots forward, the transition hopping up a step to full-gas pedalling nearly instantly thanks to the Freehub’s 108 points of engagement. I’m a huge fan of the Bontrager hubs; simple and effective. The overall light weight helped me hop over obstacles and up over the final pinch – again, out of the saddle, under full power and on a loose clay surface. The bike was well and truly designed to dominate techy sections like this, and the momentum I could carry quickly extended the gap to the riders behind.
Climbing gravel roads, or smoother consistent- grade trails, is undoubtedly a strength of the Supercaliber. Its low weight, suspension kinematic and prime seating position combine to create deadly efficiency that helps you stay on top of your gear for longer. Coming off my longer-legged, heavier bike the difference was considerable and over the length of the Black Rock XC, climbing was where I made most of my gains in the field – most unlike me. With that said, it never gets easier… you just go faster! As efficient as this bike pedals, I found locking the suspension out on smooth sections helped get the most out of every pedal stroke, particularly when running the 30% sag, and there’s enough give whilst locked out to not beat you up too much.
Descending from the top of the main climb, we had the choice of two lines: to the left the A-line, a fall-line style section with no clear main line and a snake pit of roots crisscrossing the entire descent – and it was plenty steep. To the right side of the A-line is the B-line – a clean, digger-built, flow-style trail; it’s longer but faster and, overall, the time difference between the two lines is negligible. On the first lap, I took the left line. Having not pre-ridden any of the course, I wasn’t sure what to expect. This A-line was where I started to figure out what this bike is about on the downhills, and it highlighted that descending isn’t just about suspension travel. When it’s pushed, its minimal-yet-effective 80mm of travel has enough forgiveness to confidently hold a line. Aided by how stout the entire package is, and its modern geometry, the bike holds a line well and is balanced and stable while descending. No wet-noodle, flexy XC frame here. In these exact scenarios, I’ve ridden longer-travel bikes which handle much worse and suck your confidence by flexing and twisting under the heavy braking and the hits they’re taking. Situations like this are where the stiffness of the one-piece cockpit shines; a distinct lack of flex helps you keep things pinpoint and accurate. On this descent, I was thankful for the dropper post. It’s 150mm travel allowed me to get the saddle right out of the way on the steeps – props to those pro guys who still run fixed posts on gnarly trails! My only gripe on the Bontrager dropper post, is that the remote doesn’t integrate well at all with the SRAM brakes. It functions fine, but the clamp does interfere with the Stealth Brakes master cylinder, limiting how much adjustment you have with the remote. I couldn’t quite get it where I wanted it, but made it work.
For the laps following the first one, I opted for the B-line: a smoother, safer option while fatigued. This line was the highest speed section of single track in the race and gave a great indication of how the bike was at speed. The entire package felt solid through the upper highspeed berms and predictable off the jumps that followed. Further down the descent, however, some choppy gave a real-world example of the shortcomings of short travel. Under heavy braking, and through a section of braking bumps, the rear suspension felt somewhat harsh, causing the tyres to break traction and skip across the tops of the bumps. It wasn’t a big issue as this was basically a straight section of trail but, if it was much wetter, the lack of traction could have been a real issue coming towards the corner at the bottom of the section! This situation does highlight how the bike is bred more to take the place of a hardtail than be a supple descending machine – the suspension travel certainly has a damped feeling, as it needs to be with only 80 millimetres of it.
On the subject of braking; I was glad to have some time aboard SRAM’s new Level Bronze brakes, particularly their new Stealth levers. I’ve never been a huge fan of SRAM’s XC-oriented brakes, the lever feel was hard to get right and once you finally achieved a good, powerful feel, it only lasted a few rides then you needed to tune them again. Touch wood, but so far I’m impressed with these new units. The lever shape is familiar, but the feel when braking is more positive than previous and overall there’s plenty of power on offer when needed, if they’ve sorted the longevity issues these are a winner.
A small, partial floating brake mount is used on the rear, feeding the braking force to the chainstay and rear axle, keeping the braking forces from interfering with the flex in the swingarm. This brake mount seems to work effectively, but there is more torsional flex under braking than there would be from a traditionally mounted calliper. This doesn’t appear to affect the braking power, although at times it does affect how the brake feels. The front brake has a 180mm rotor stock, which is welcome, as many XC bikes are fitted with 160mm rotor up front. The rear rotor is 155mm stock, the max size allowable being 160mm. I’d personally like the ability to upsize rotors on the rear; giving heavier, real-world riders more stopping power, and helping slow down fully laden bikes when loaded for bike-packing, although it looks like there’s simply no clearance to do so.
The Supercaliber gave me an appreciation for how good bikes are getting these days and highlighted how it’s no one thing that makes a bike like this excel, but the sum of everything; frame, components, and geometry. The engineering team at Trek appear to have designed the bike as a whole system, with all parts complementing each other rather than designing a frame and haphazardly speccing it out. Had any of the elements been lacking I think the experience could be different.
The Whangamata Black Rock race was an awesome experience and, with its varied terrain, was a great way to put the Supercaliber under real-world review alongside training on it in the buildup. Although the Supercaliber has been designed more for the punchier 1.5 hour efforts of World Cup competition, it was well suited to the endurance-type effort of the Black Rock. If you’re looking for a race bike for any breed of XC race here in NZ, the Supercaliber would sure do the trick – don’t be put off by the small travel number as the geometry and handling well exceed bikes of longer travel.
If it were mine: I’d ride the M/L size, throw a set of 170mm cranks on there, have a set of gruntier tyres for wet racing, and try a standard stem and handlebar to see what difference there is. I’d fit a dropper remote compatible with SRAM’s brake lever clamp and a handlebar-mounted rear vision mirror so I could watch my competition as they disappear behind me!
Unfortunately, this bike removes any excuse for poor performance but, at least nothing is holding you back from that podium… aside from your own fitness and skill.
That’s a big tick from me on the Supercaliber. It’s not perfect – but it’s pretty damn close. The team at Trek might have a hard time prying it from my greasy mitts!