

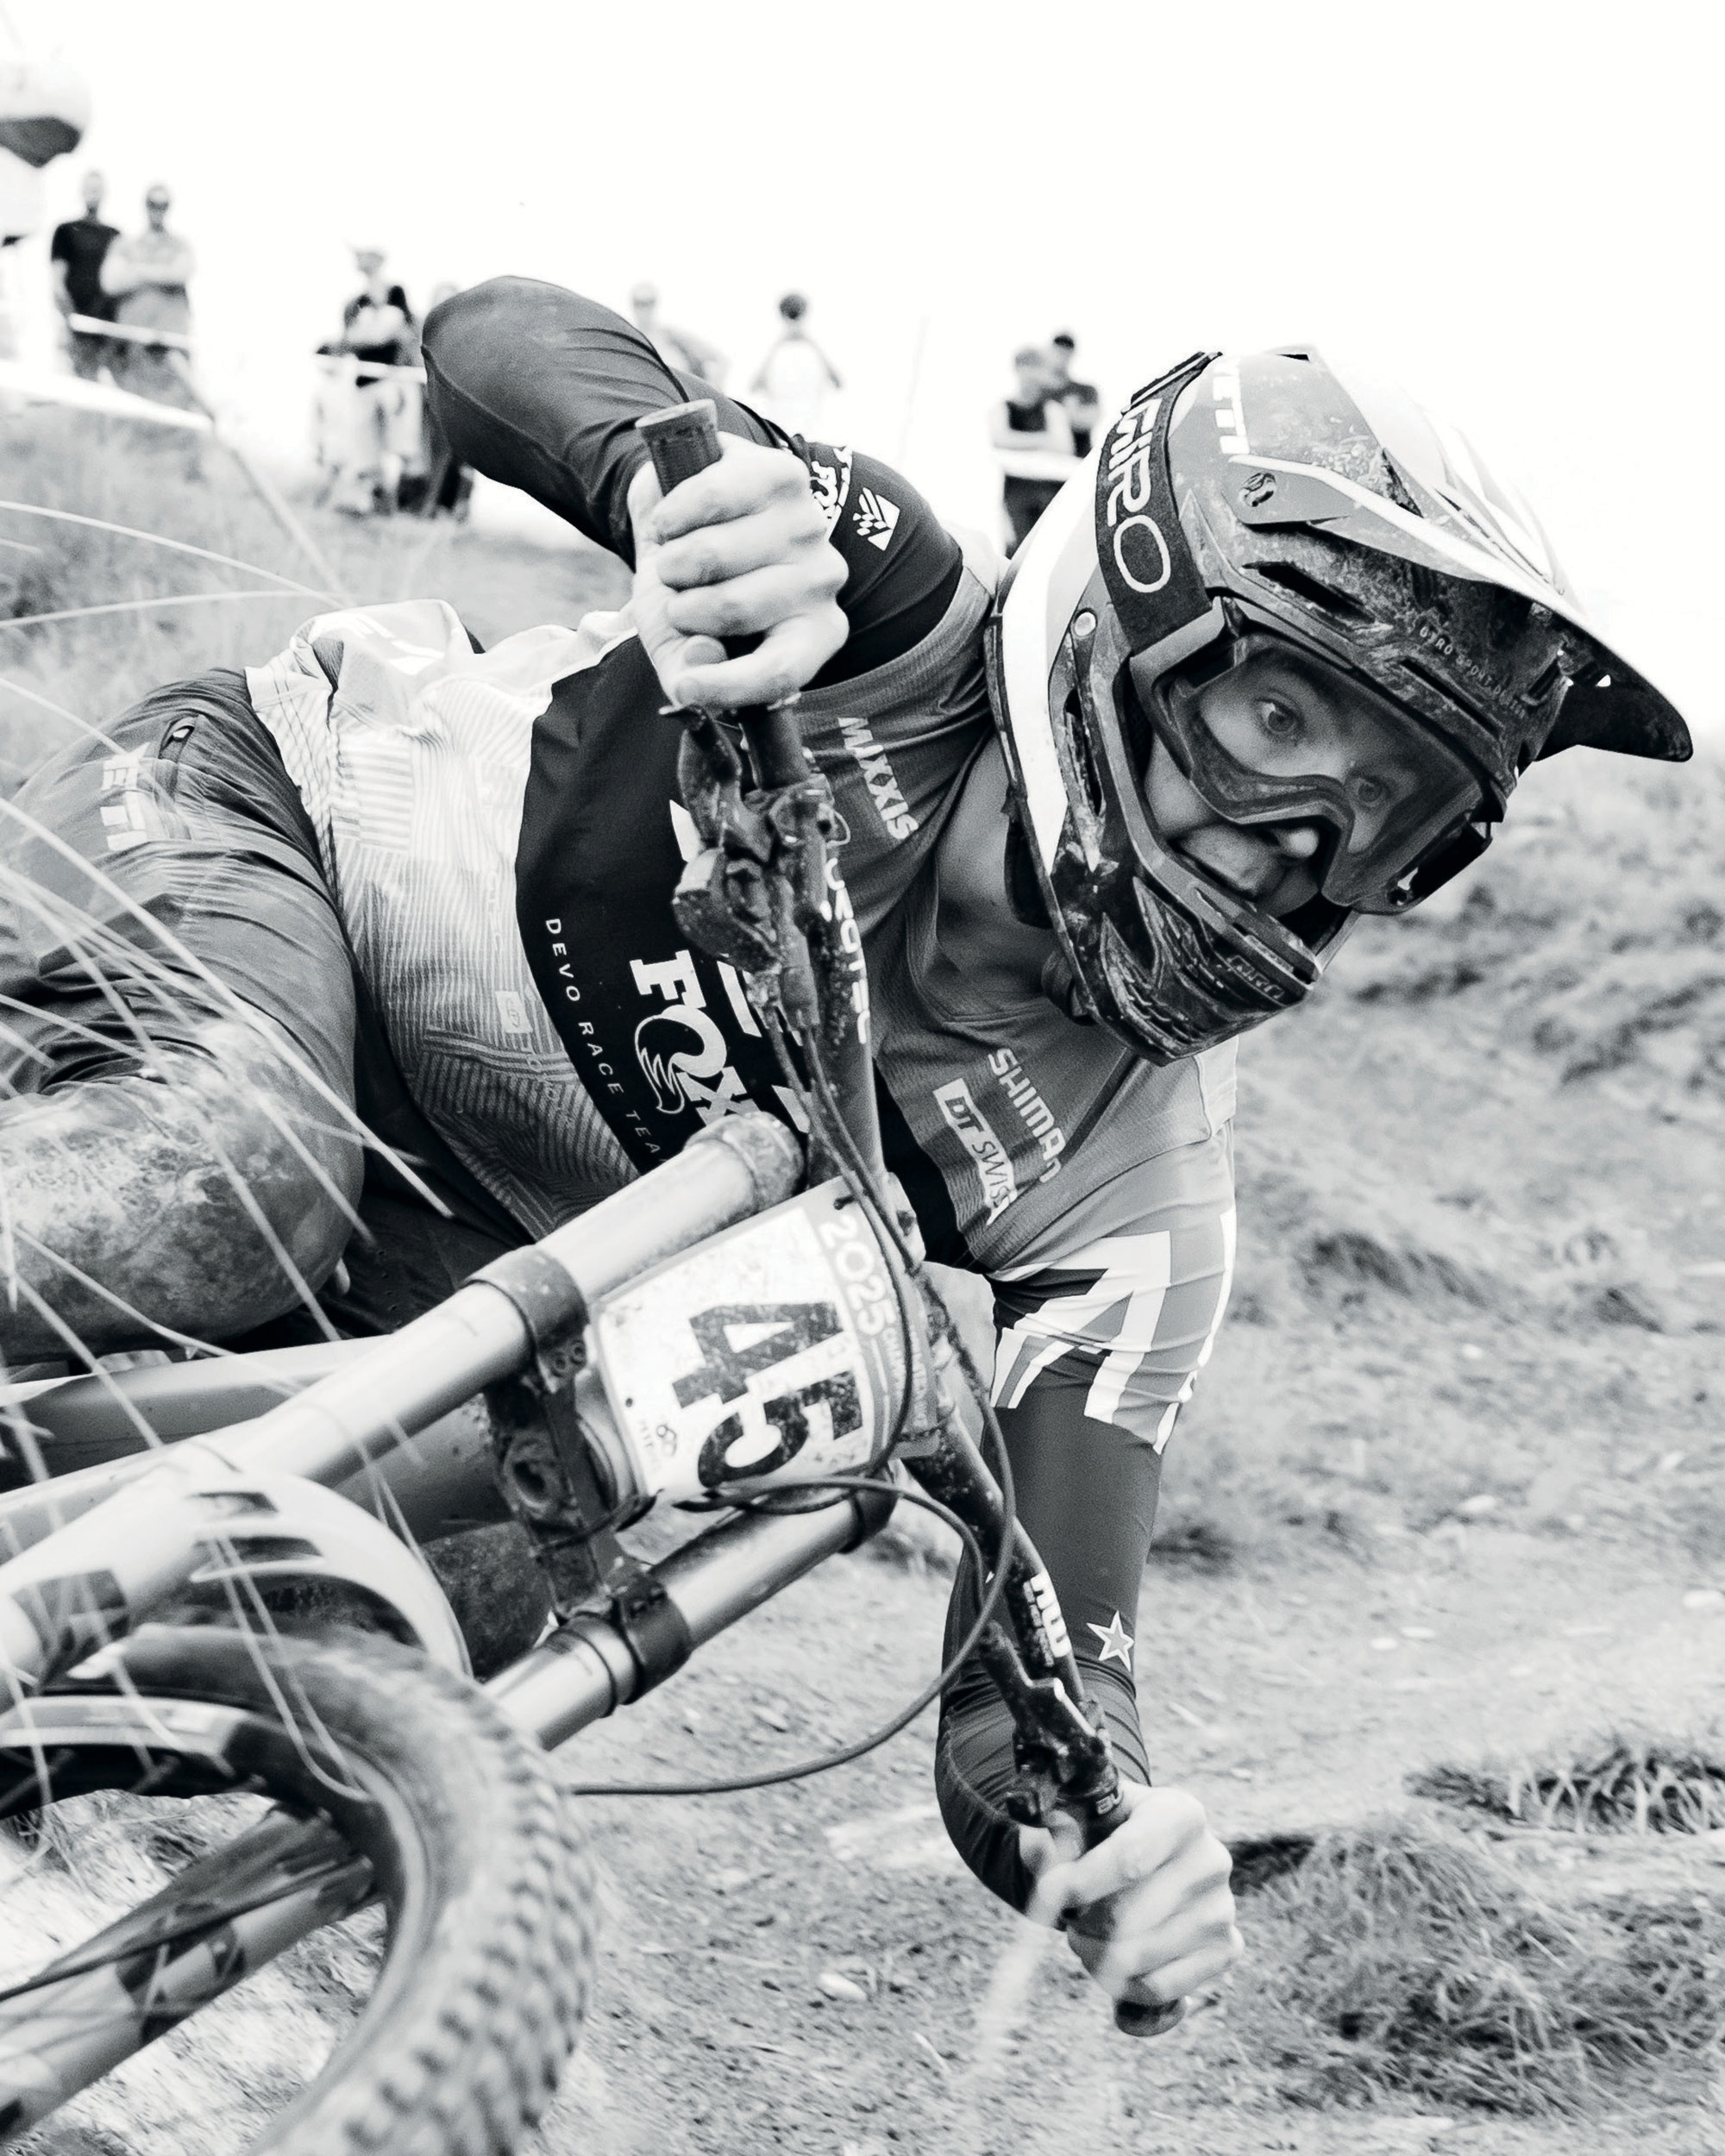
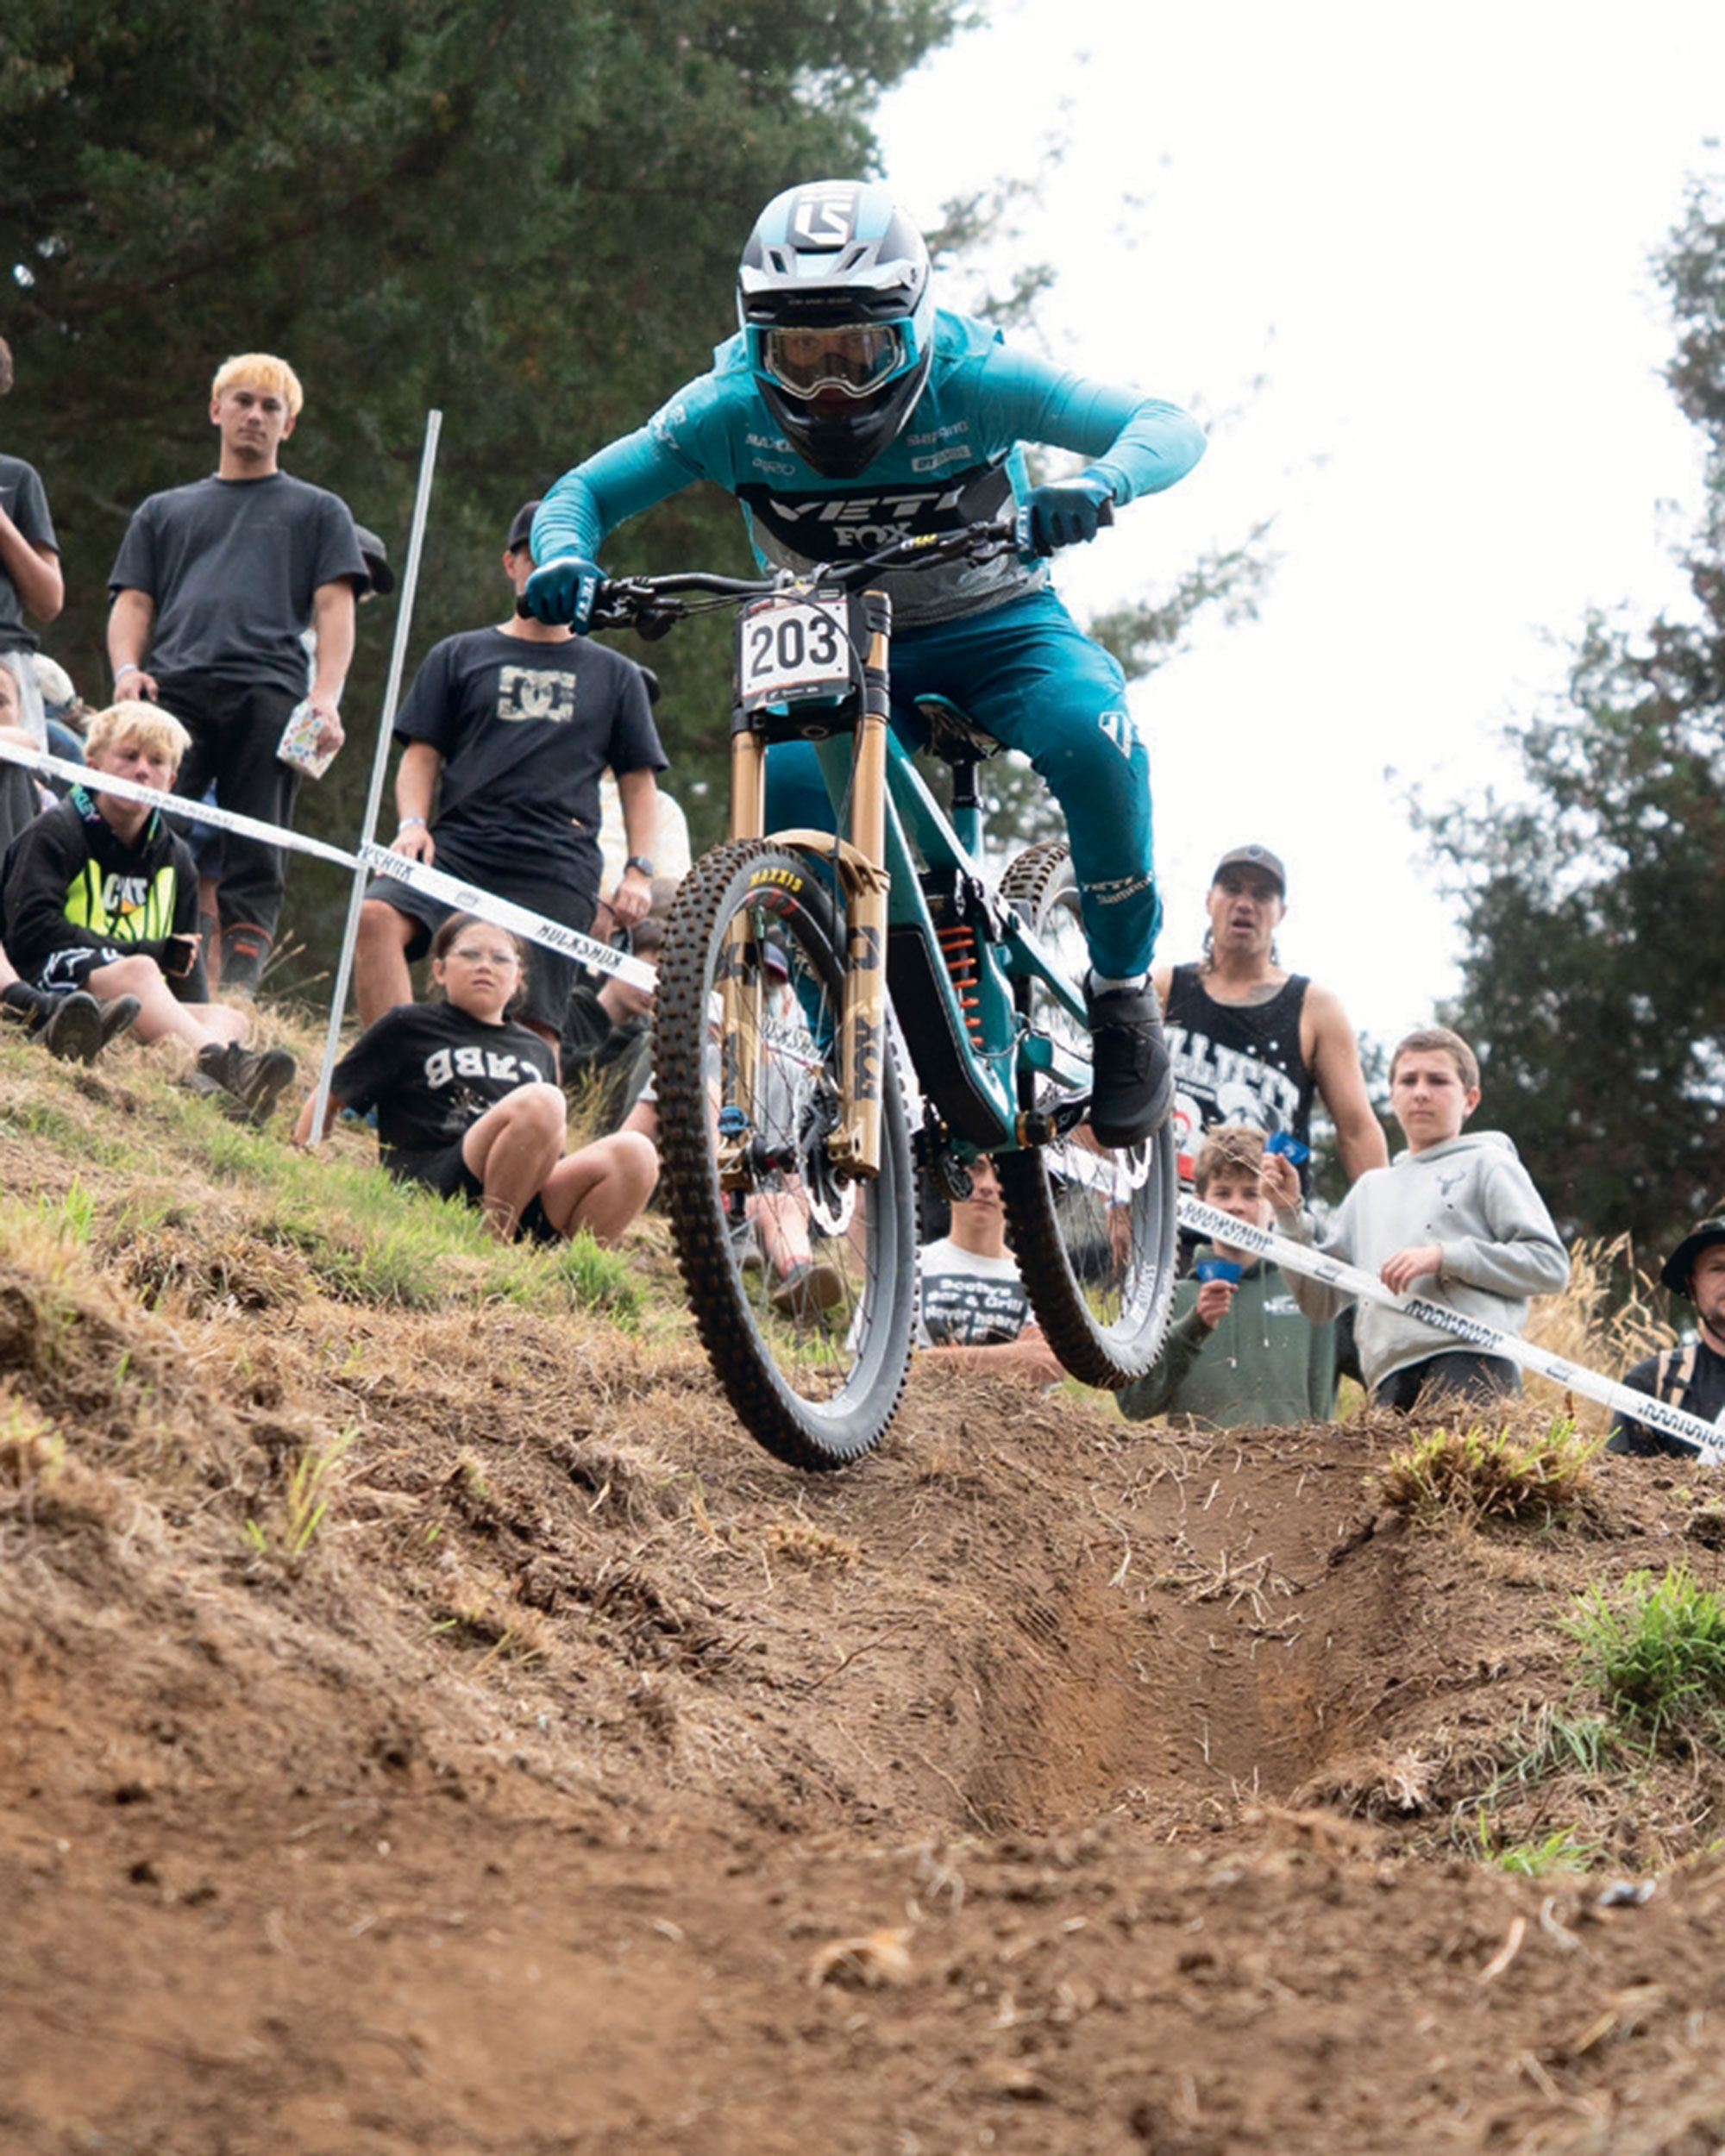
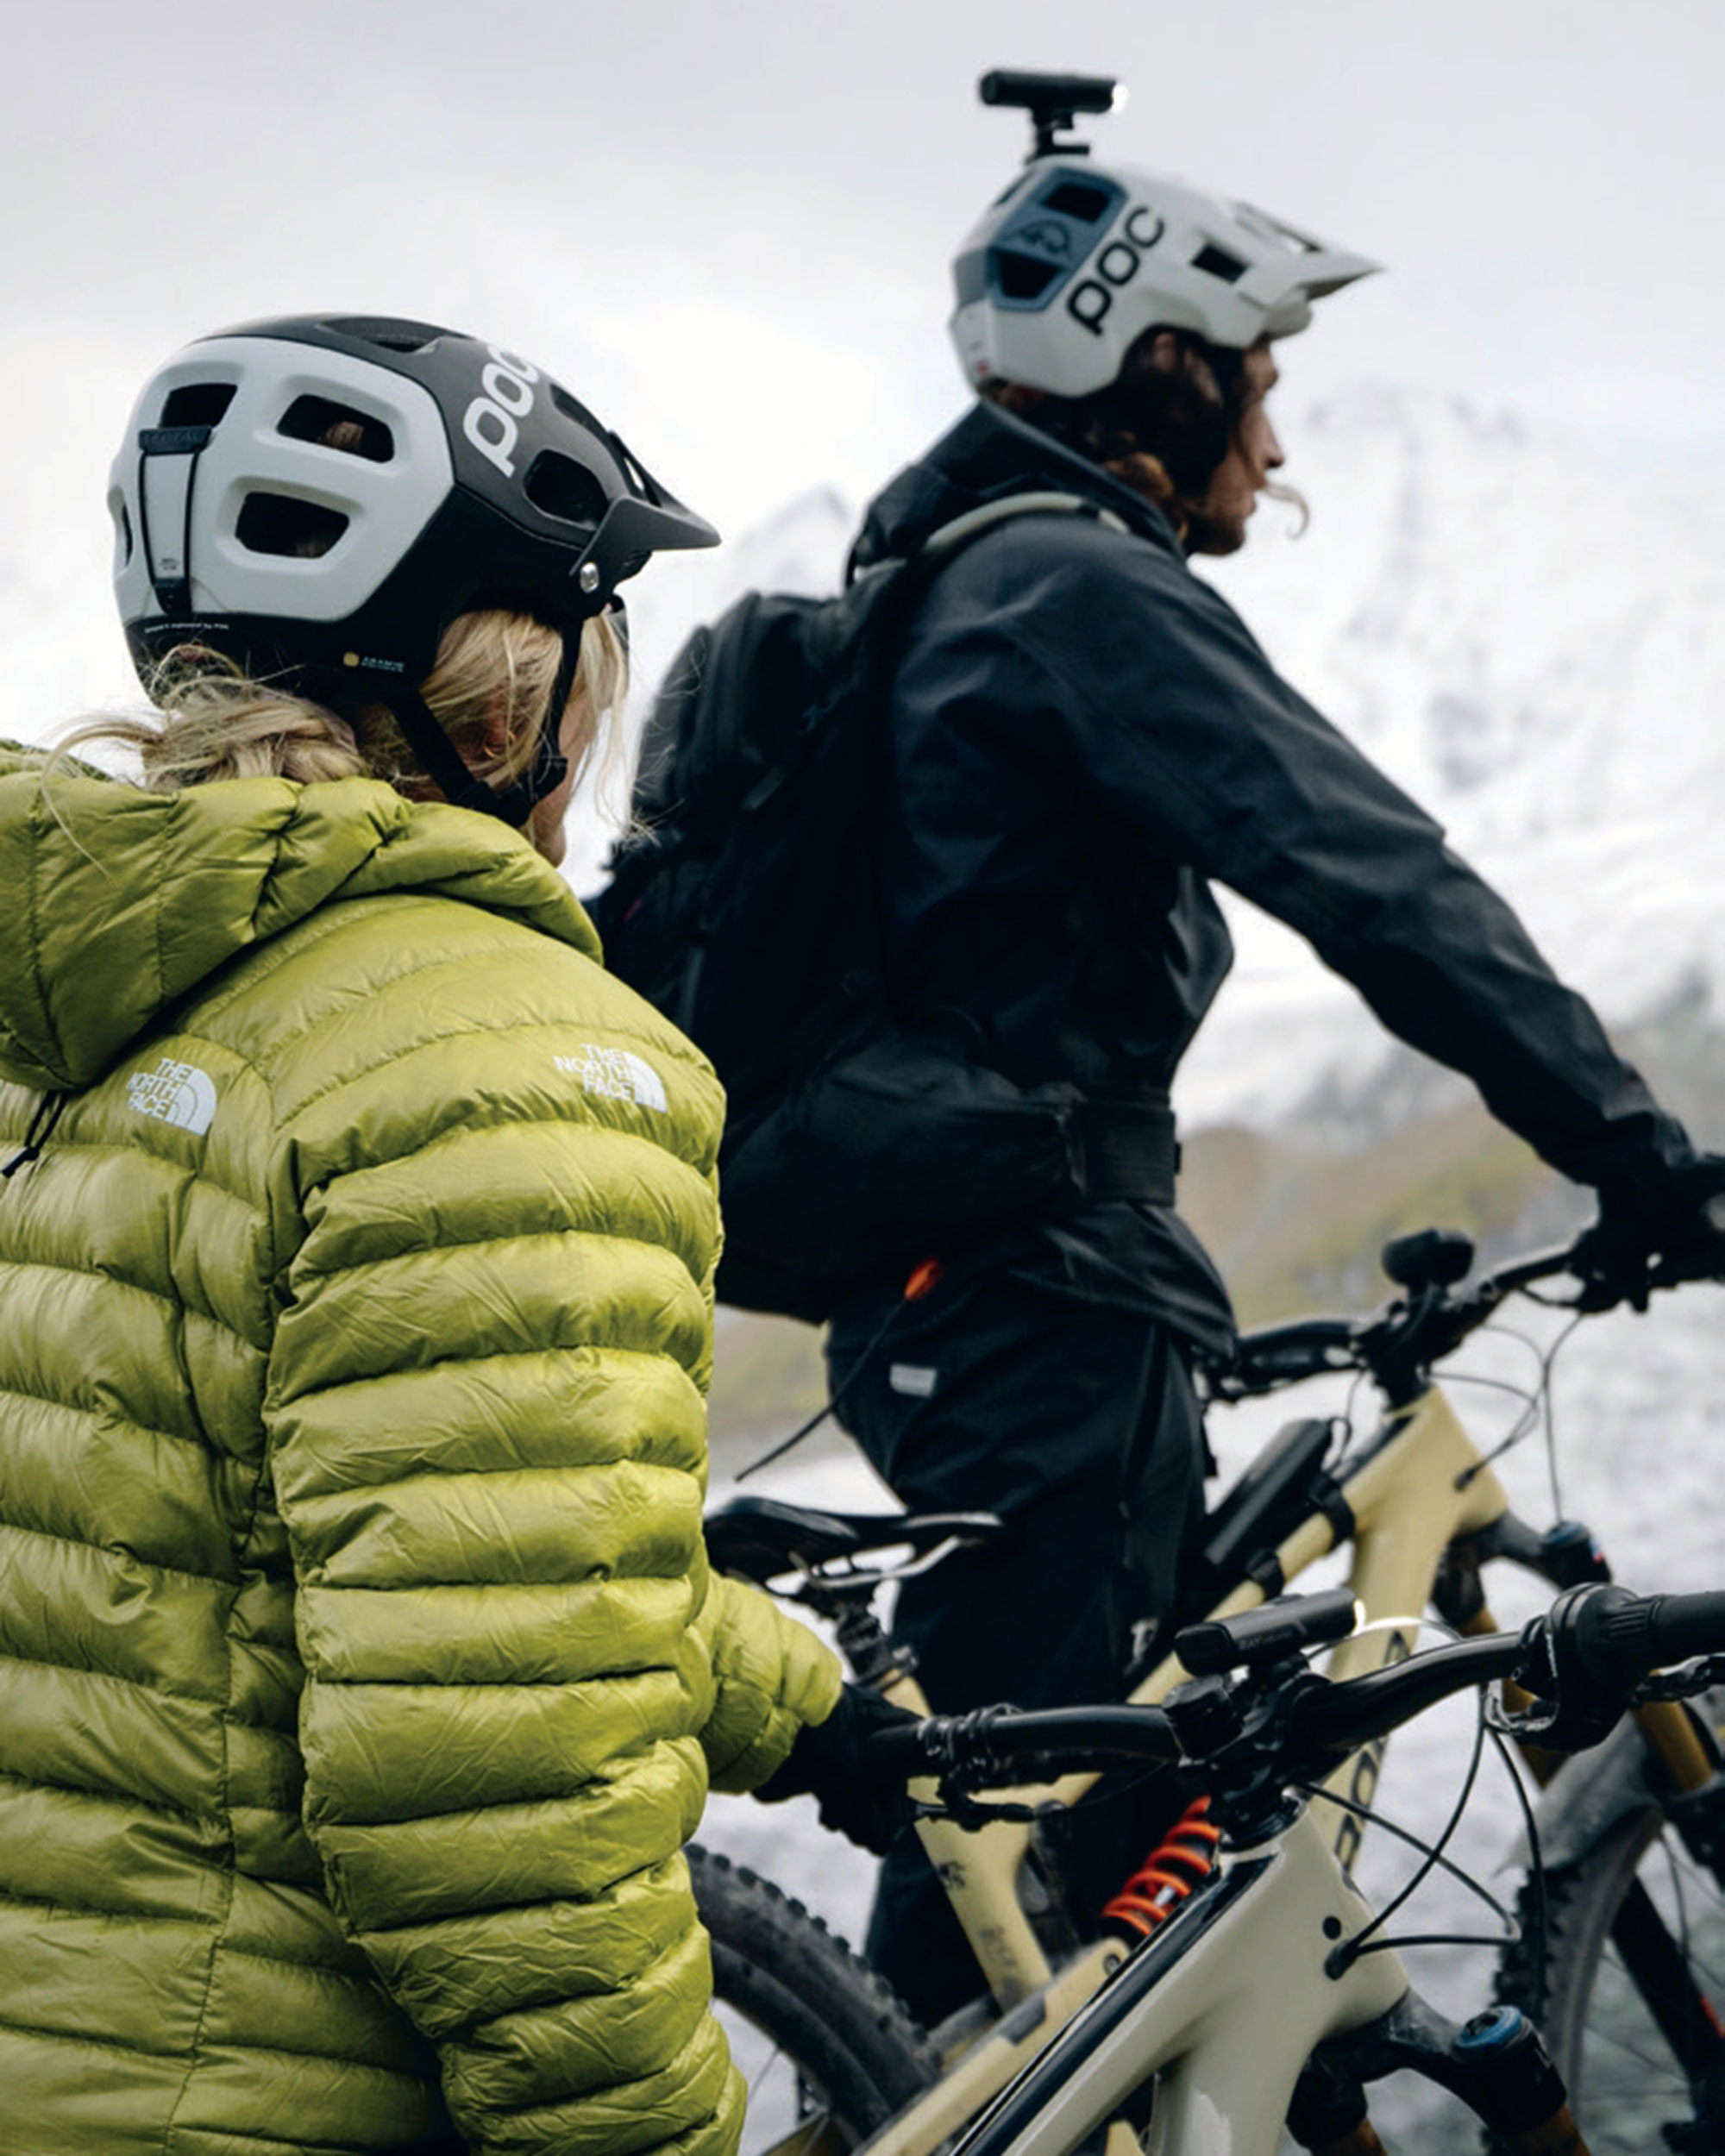
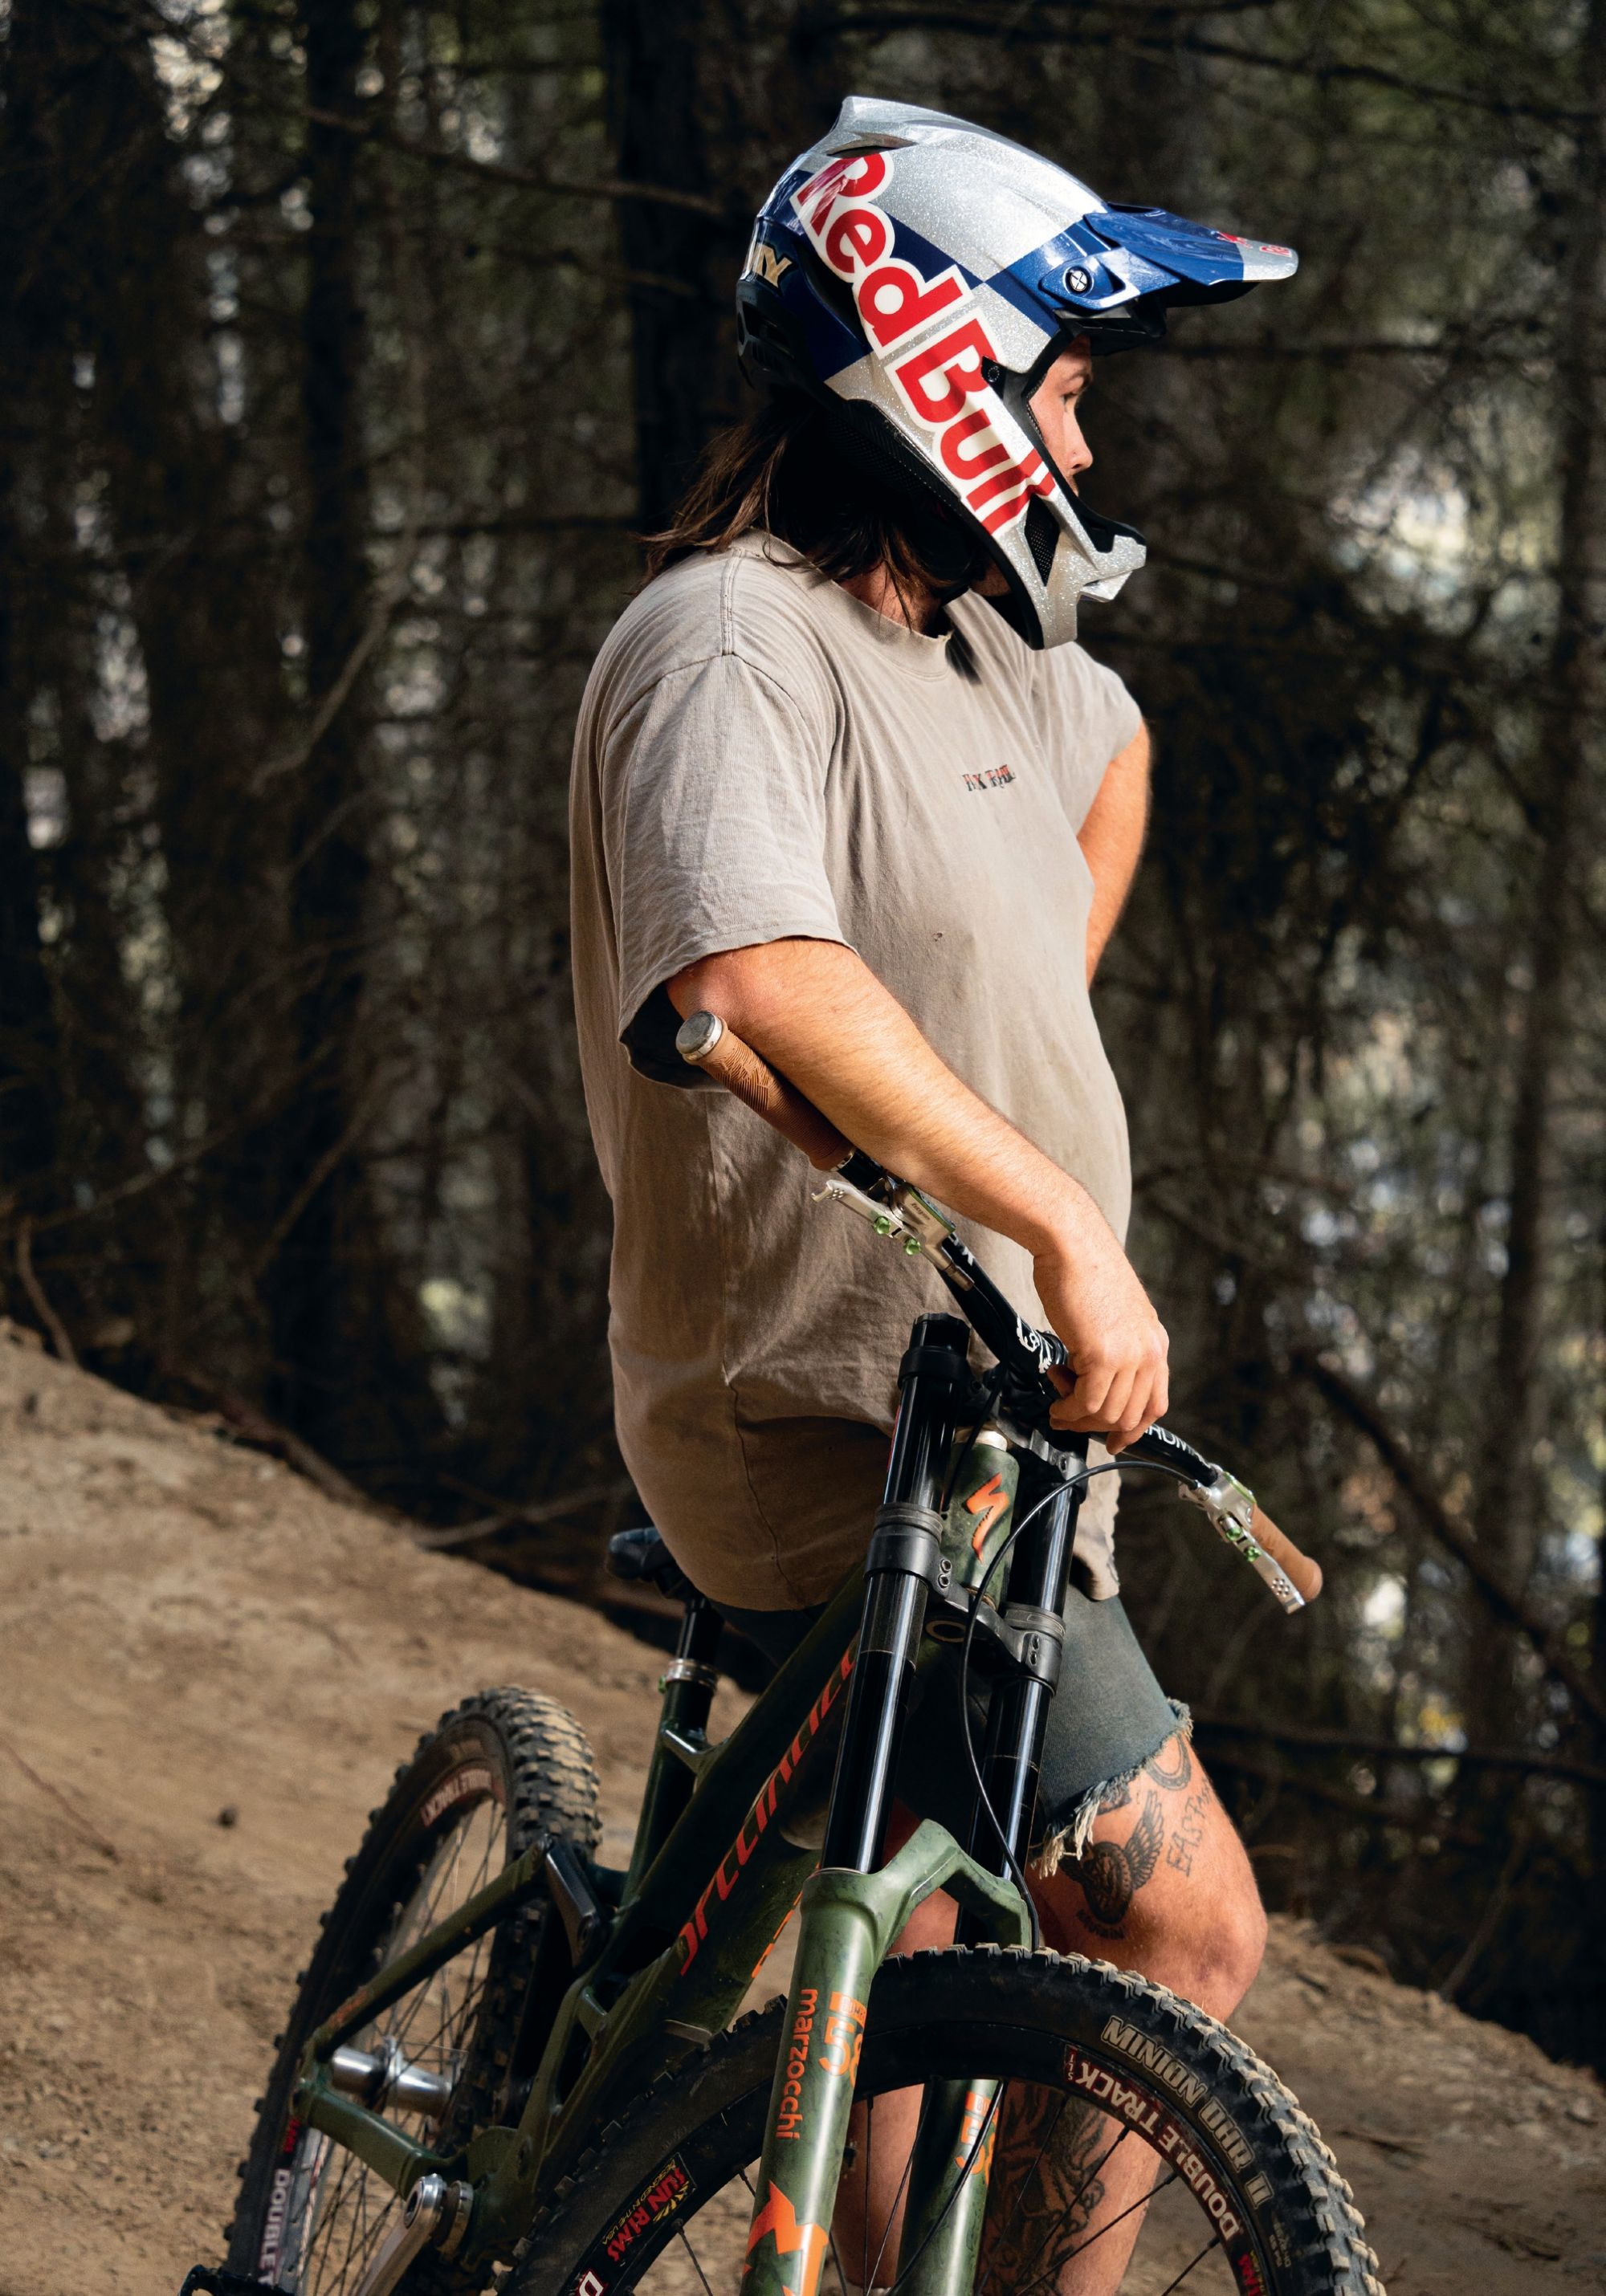
Crankworx Summer Series
Words & Images Liam Friary
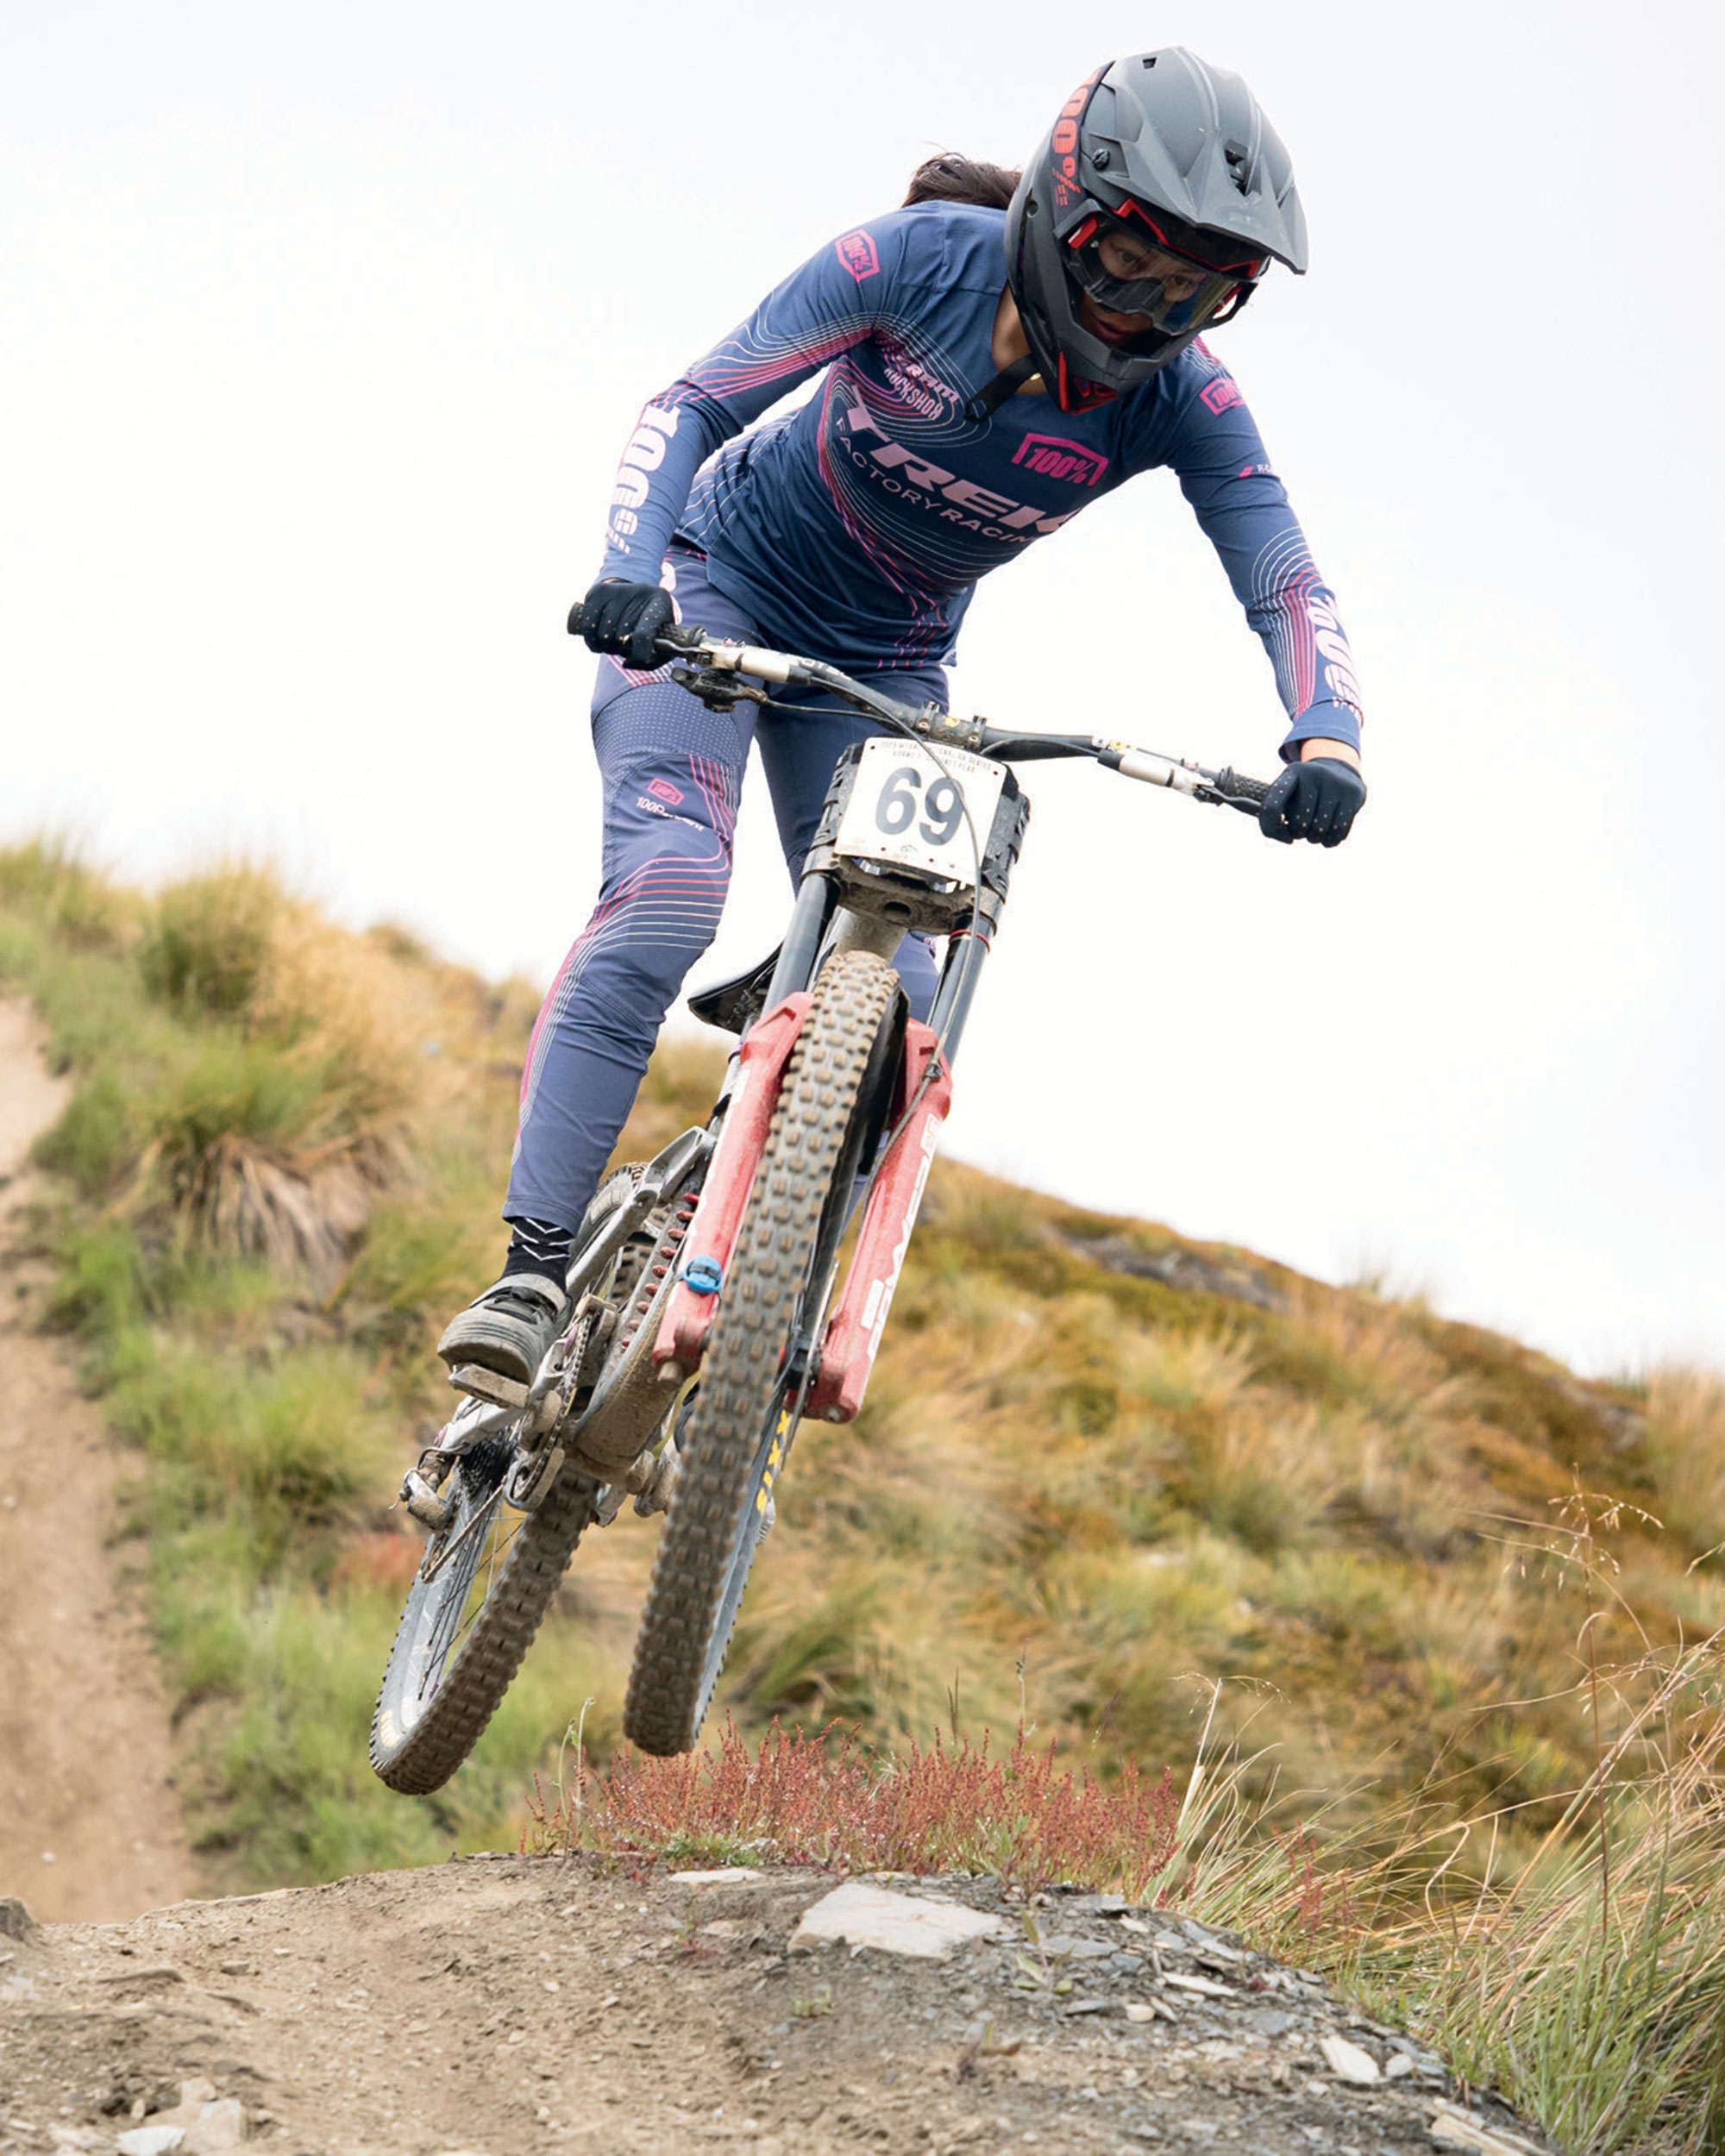
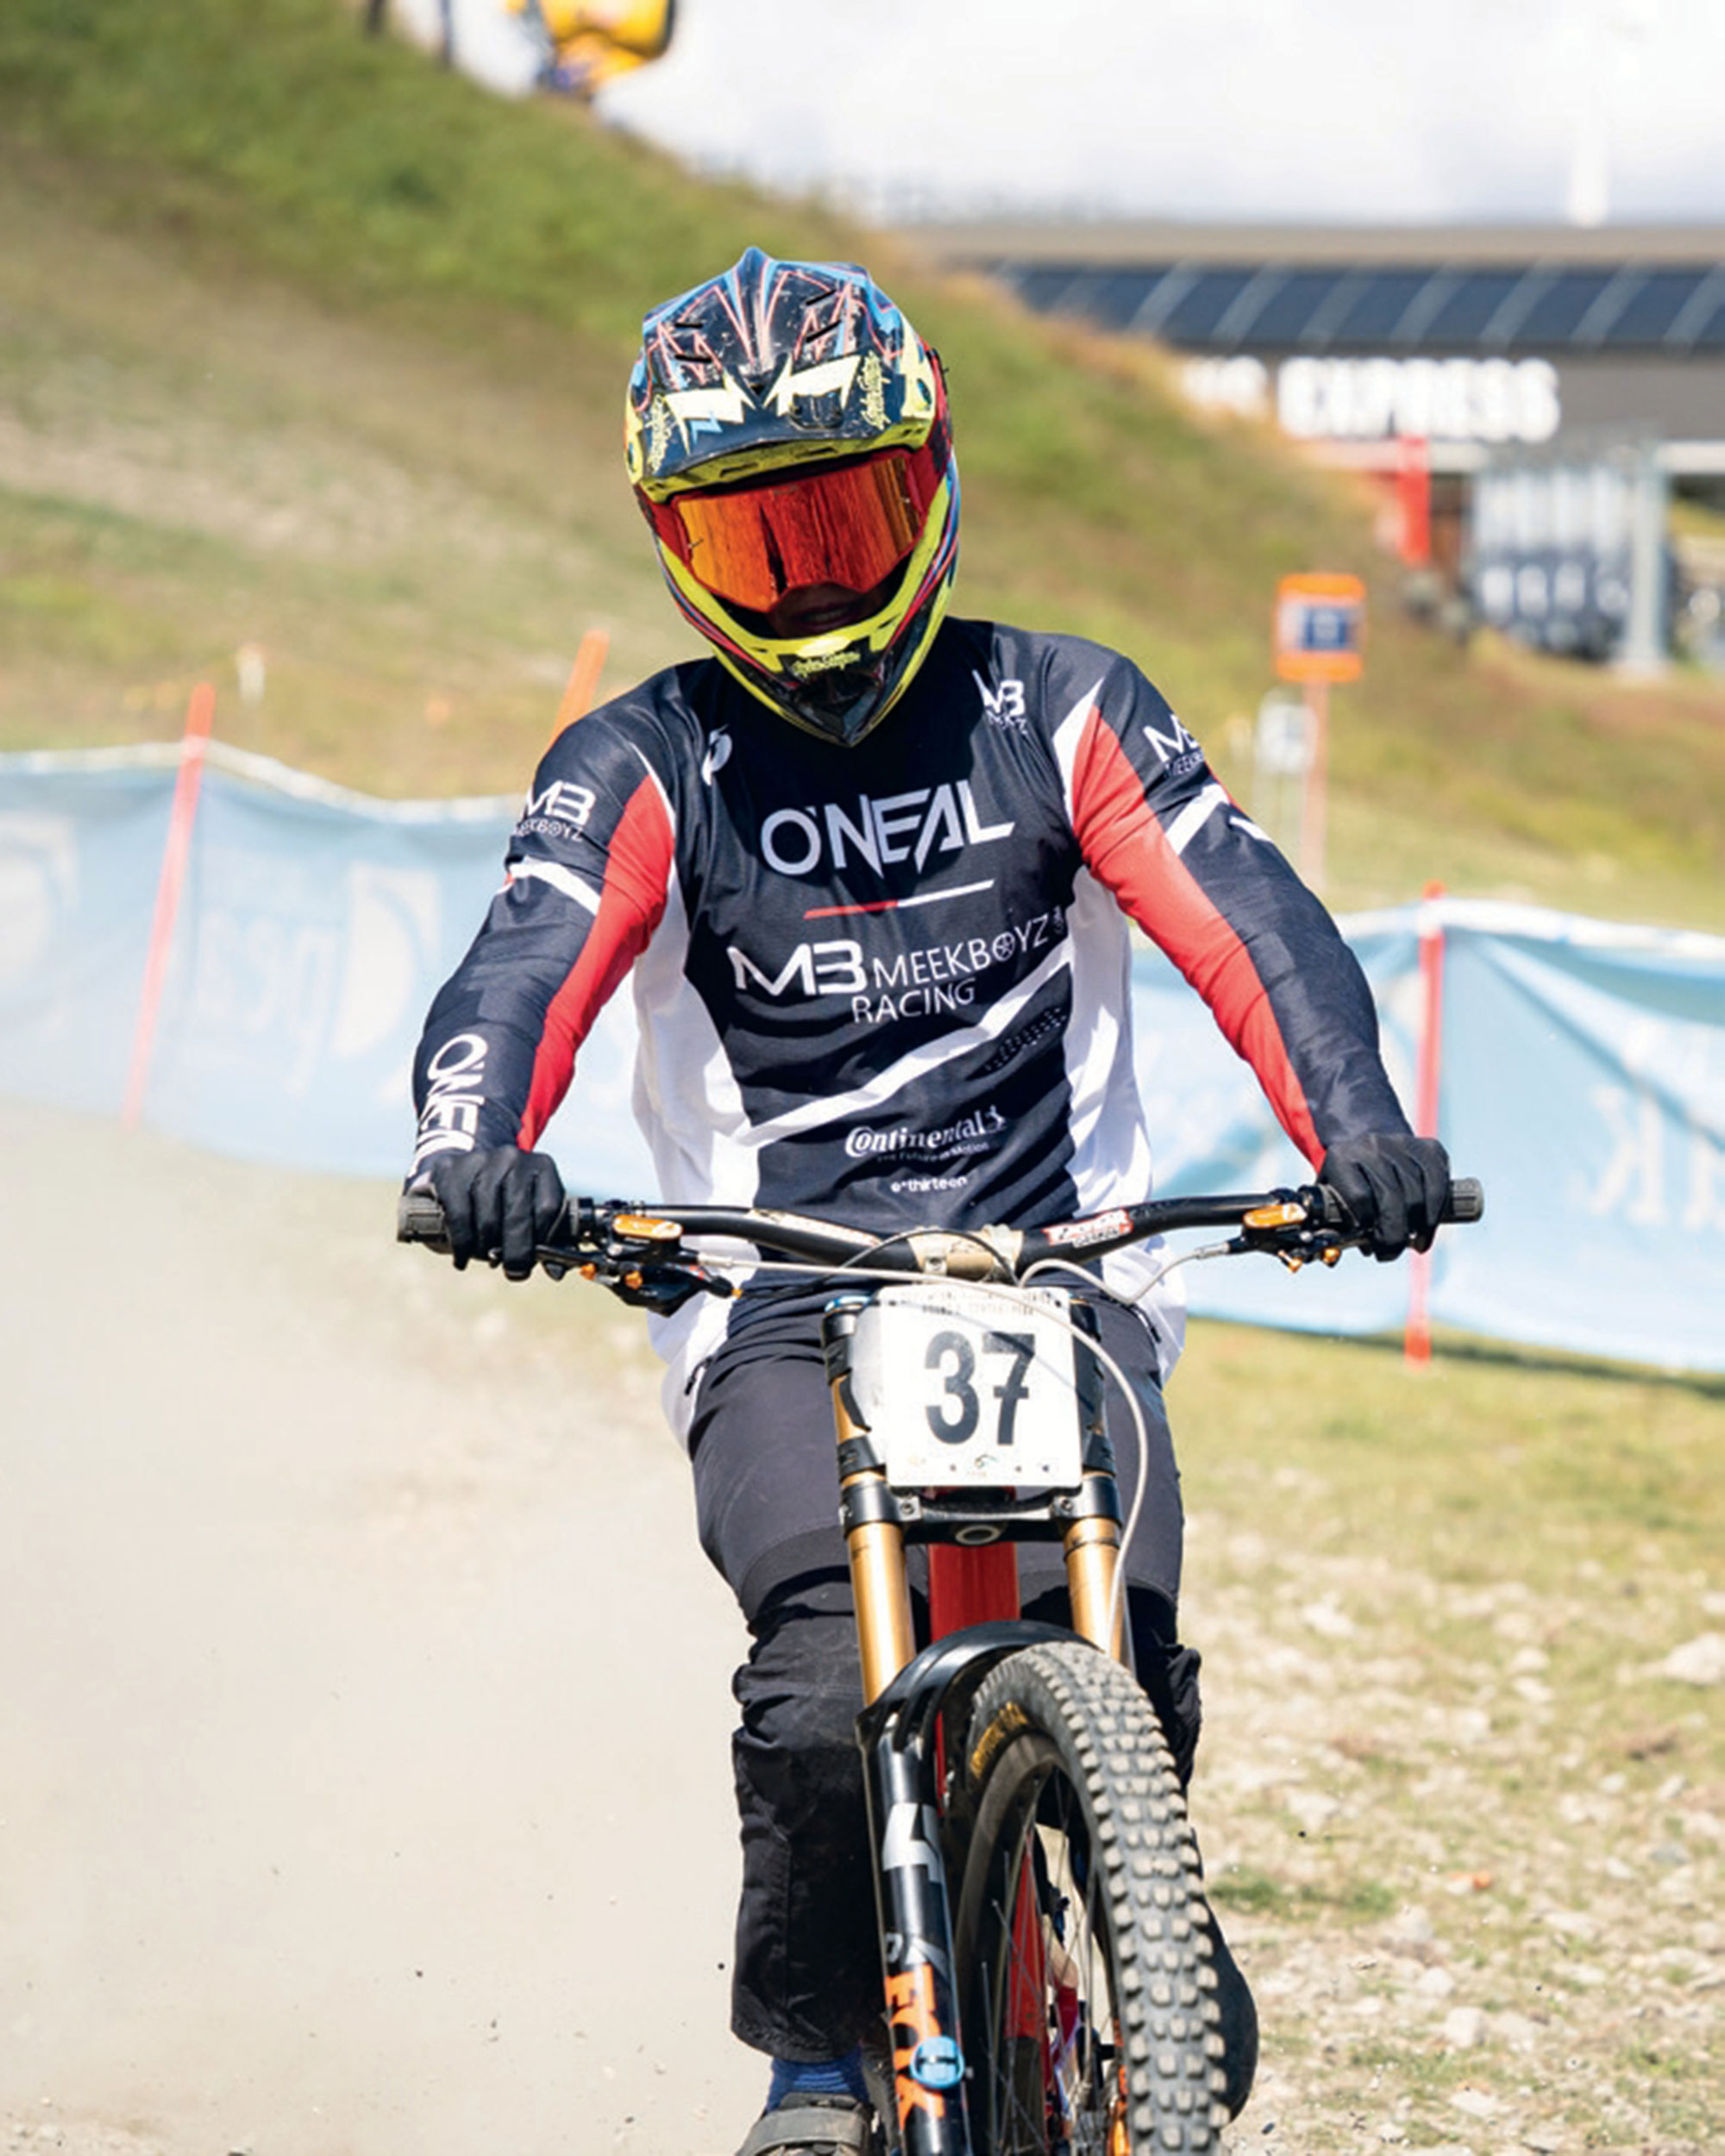
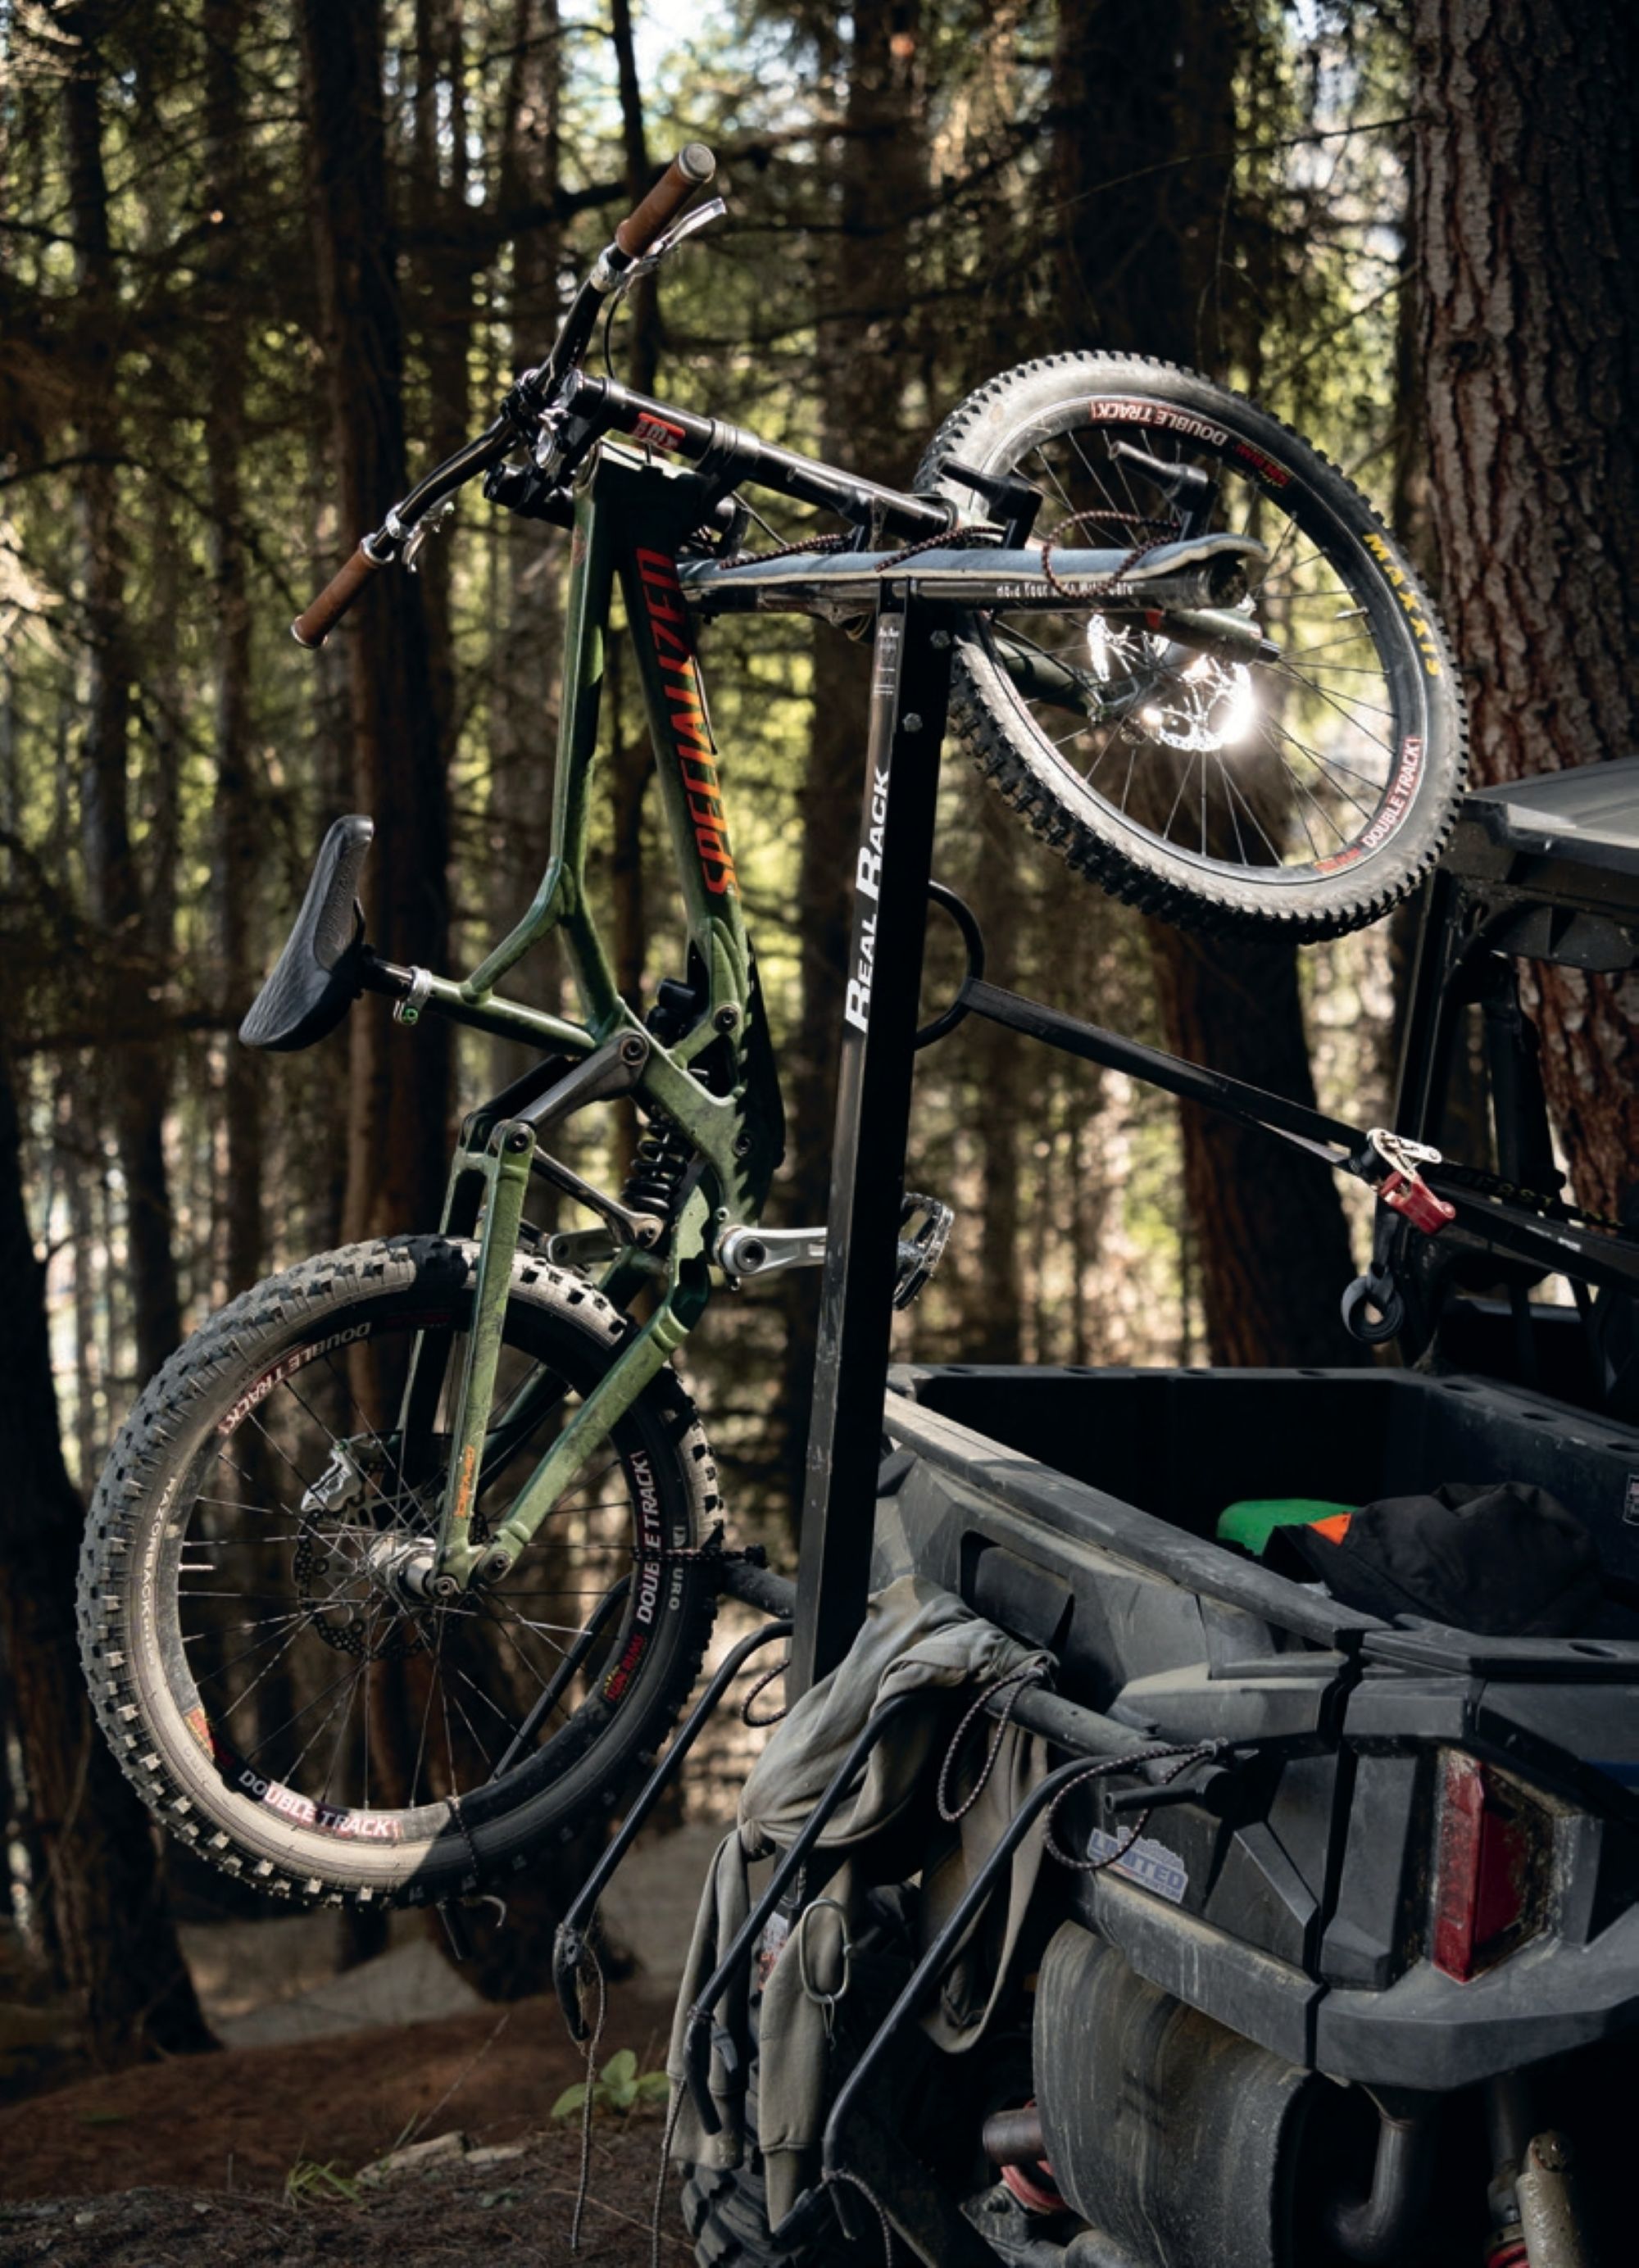
The magnetic pull of Aotearoa’s southern landscape never fails to captivate my spirit. When the invitation arrived to journey to Christchurch for the Crankworx Summer Series, there wasn’t so much as a moment’s hesitation in my response. I packed my gear and threw in a 35mm point-and-shoot film camera – an Olympus MJU II – to capture it.
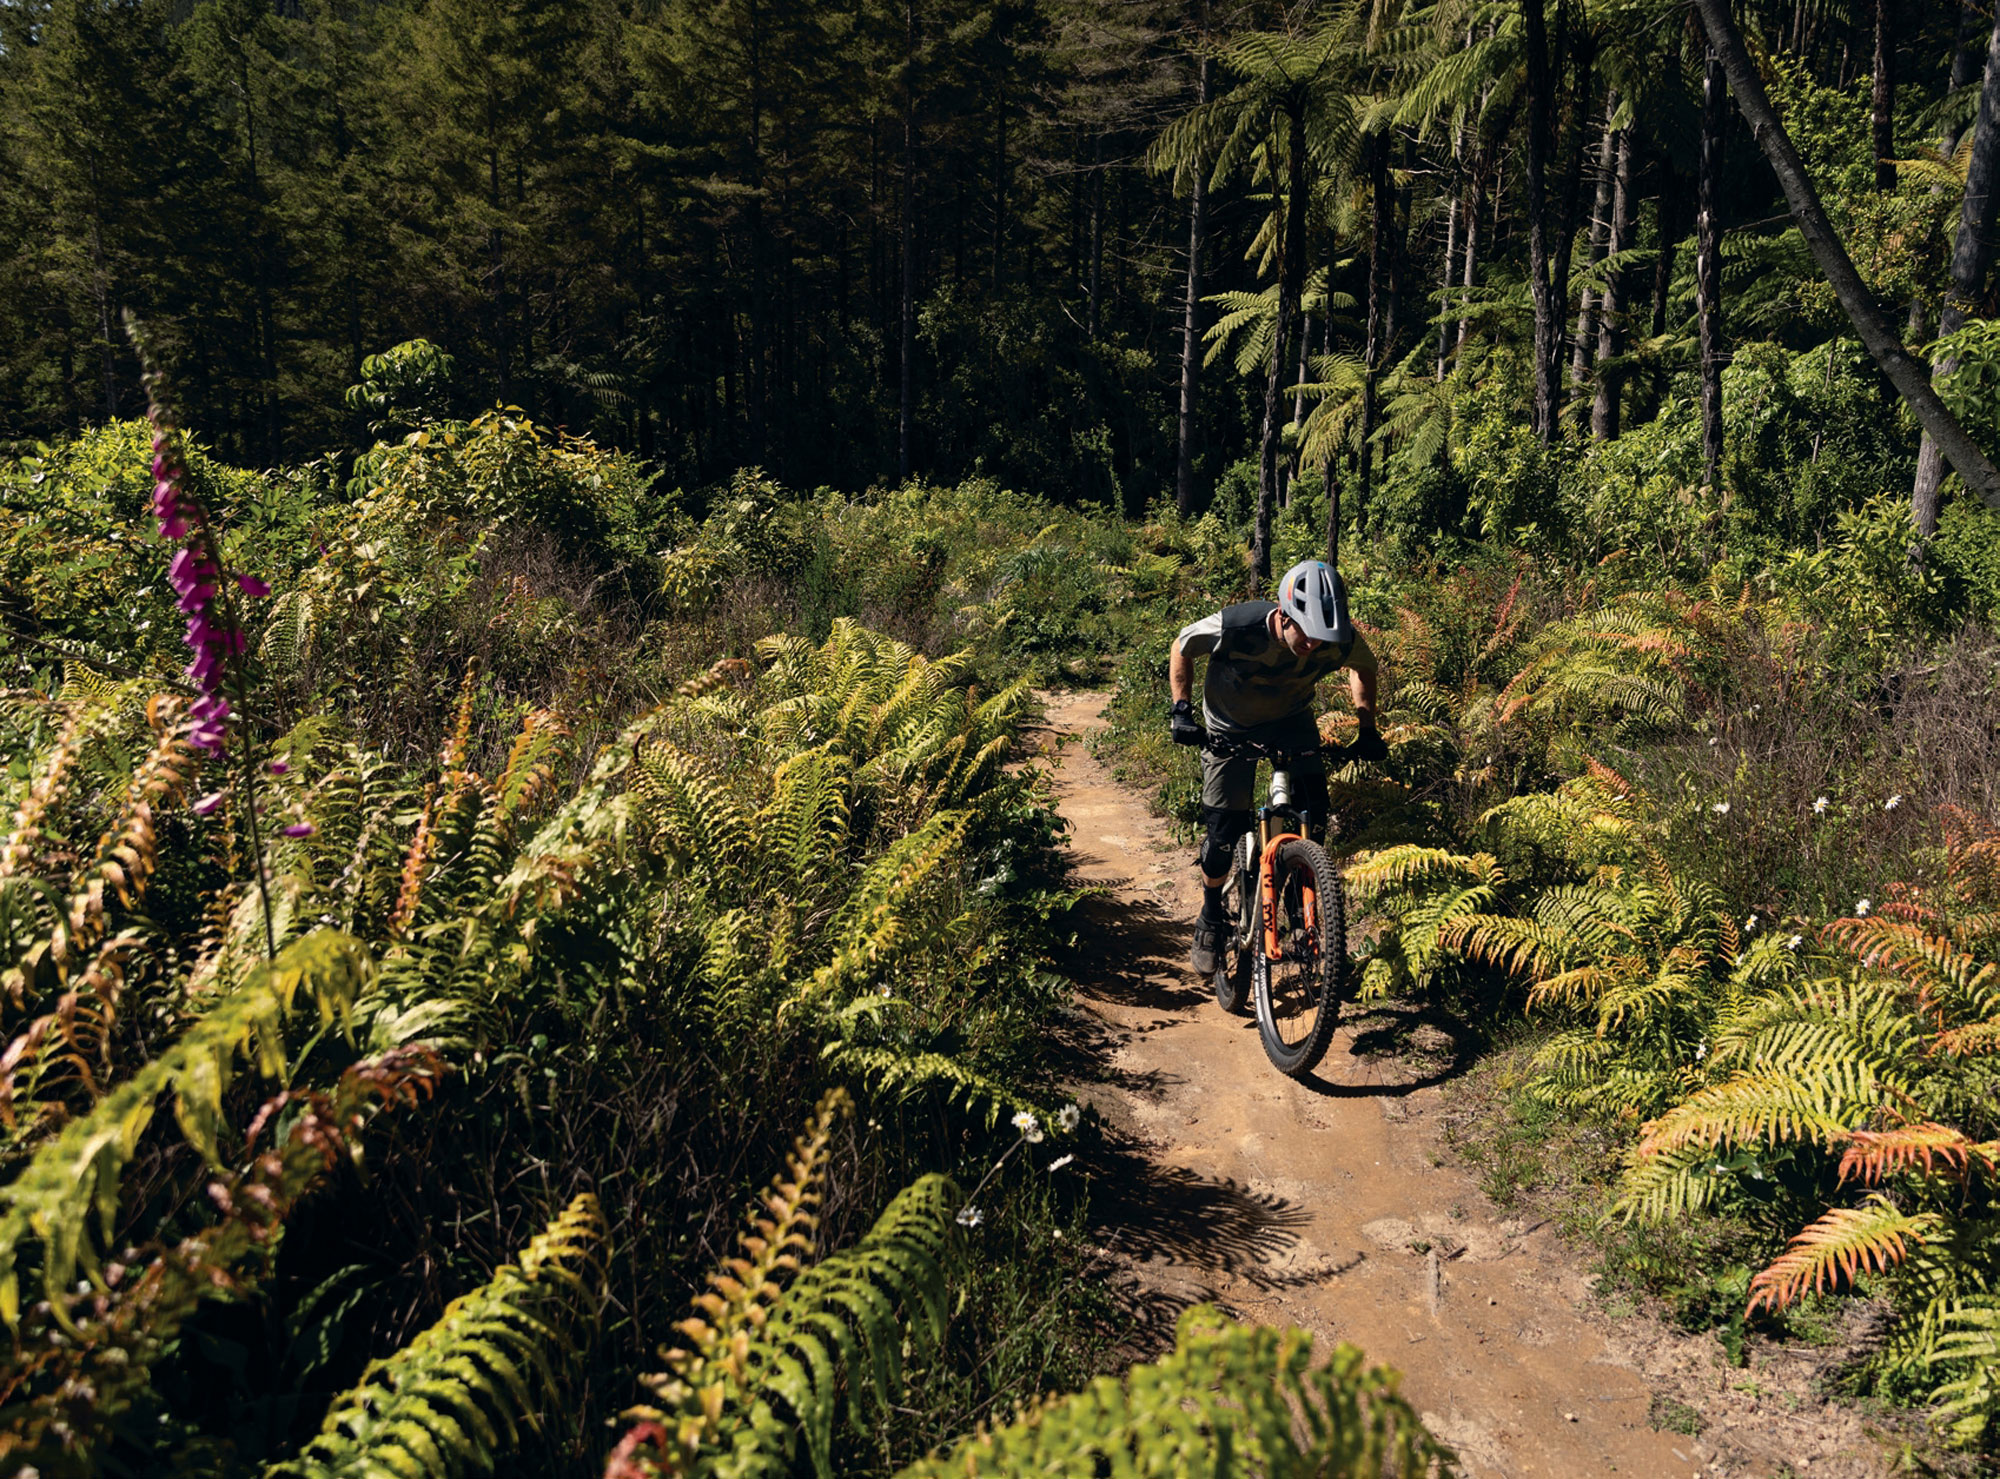
The thriving mountain biking community in Ōtautahi continues to expand impressively and leaves me in awe each time I return. Within hours of touching down, I found myself pedalling up the Port Hills and into the trails of Victoria Park; it wasn’t long before I was lost but, luckily, a smartphone makes pinning locations easier. After that I stayed not far from the back wheel of the local guides. The hours flew by and as the sun dipped we headed for some grub and beer at Moon Under Water. True to form, the place was absolutely chocka, with barely room to squeeze through the animated crowd of riders and locals. The telltale collection of mountain bikes stacked haphazardly out front proves this is indeed the place where the biking community congregates.
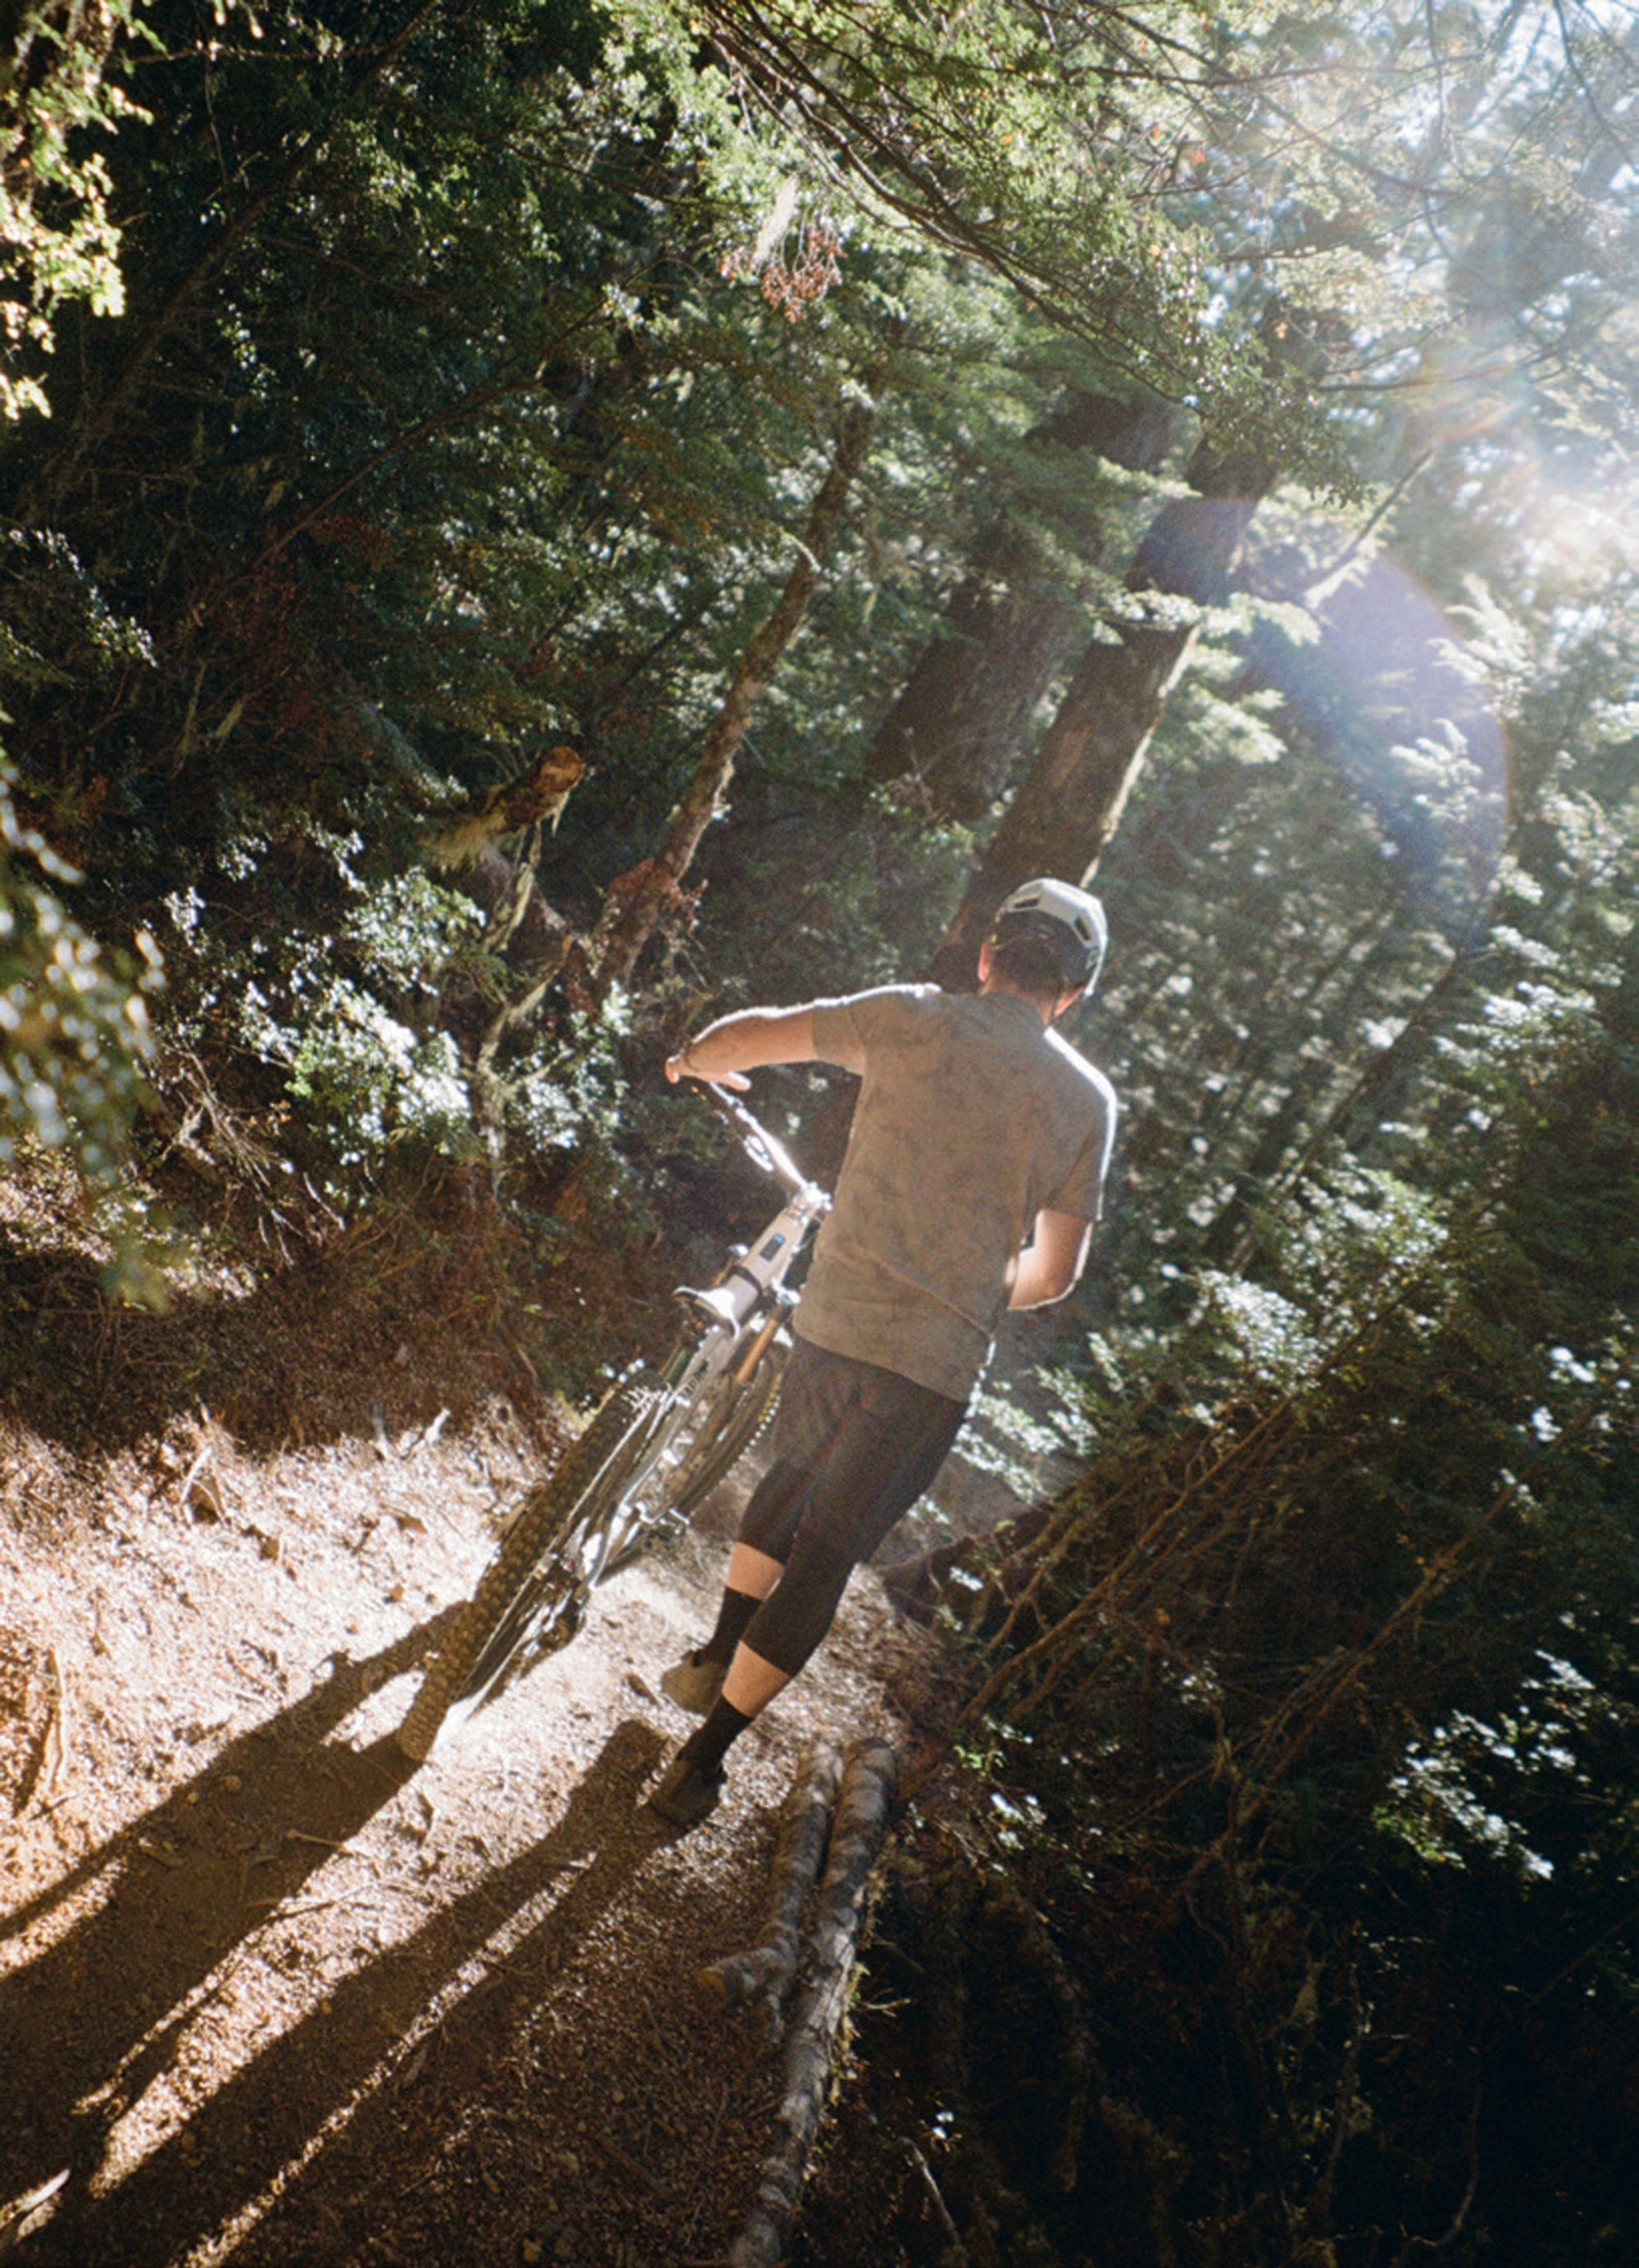

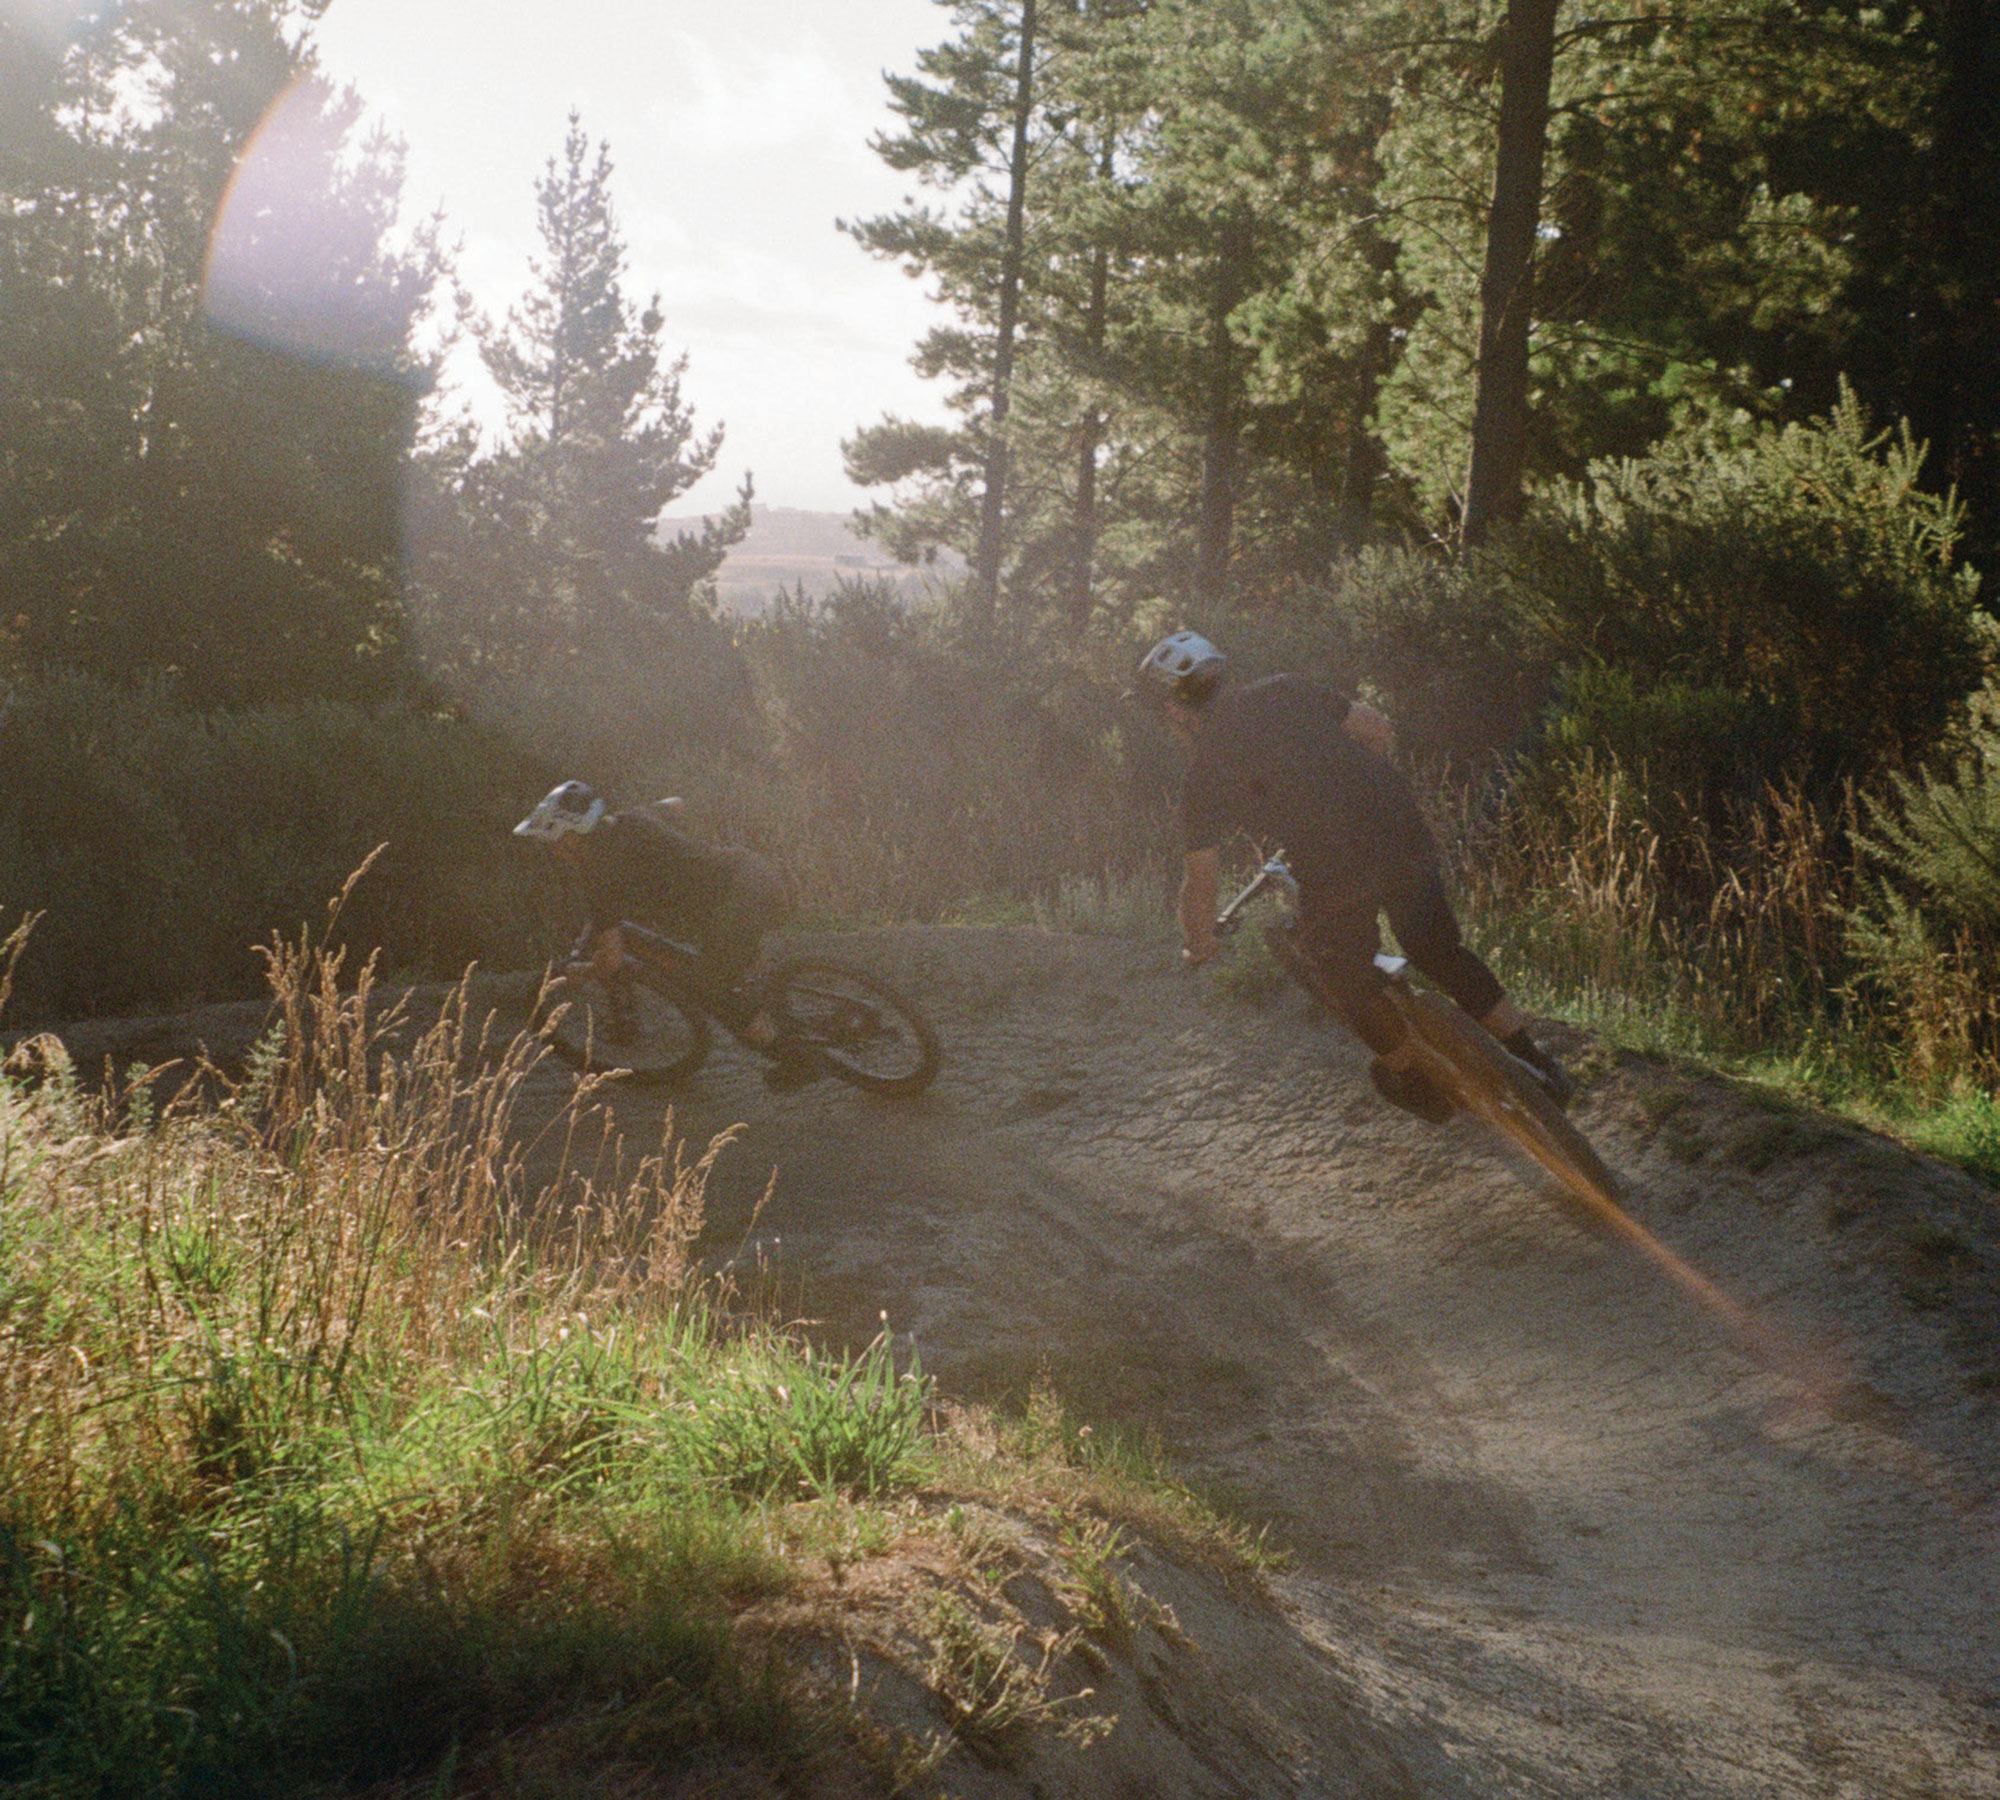
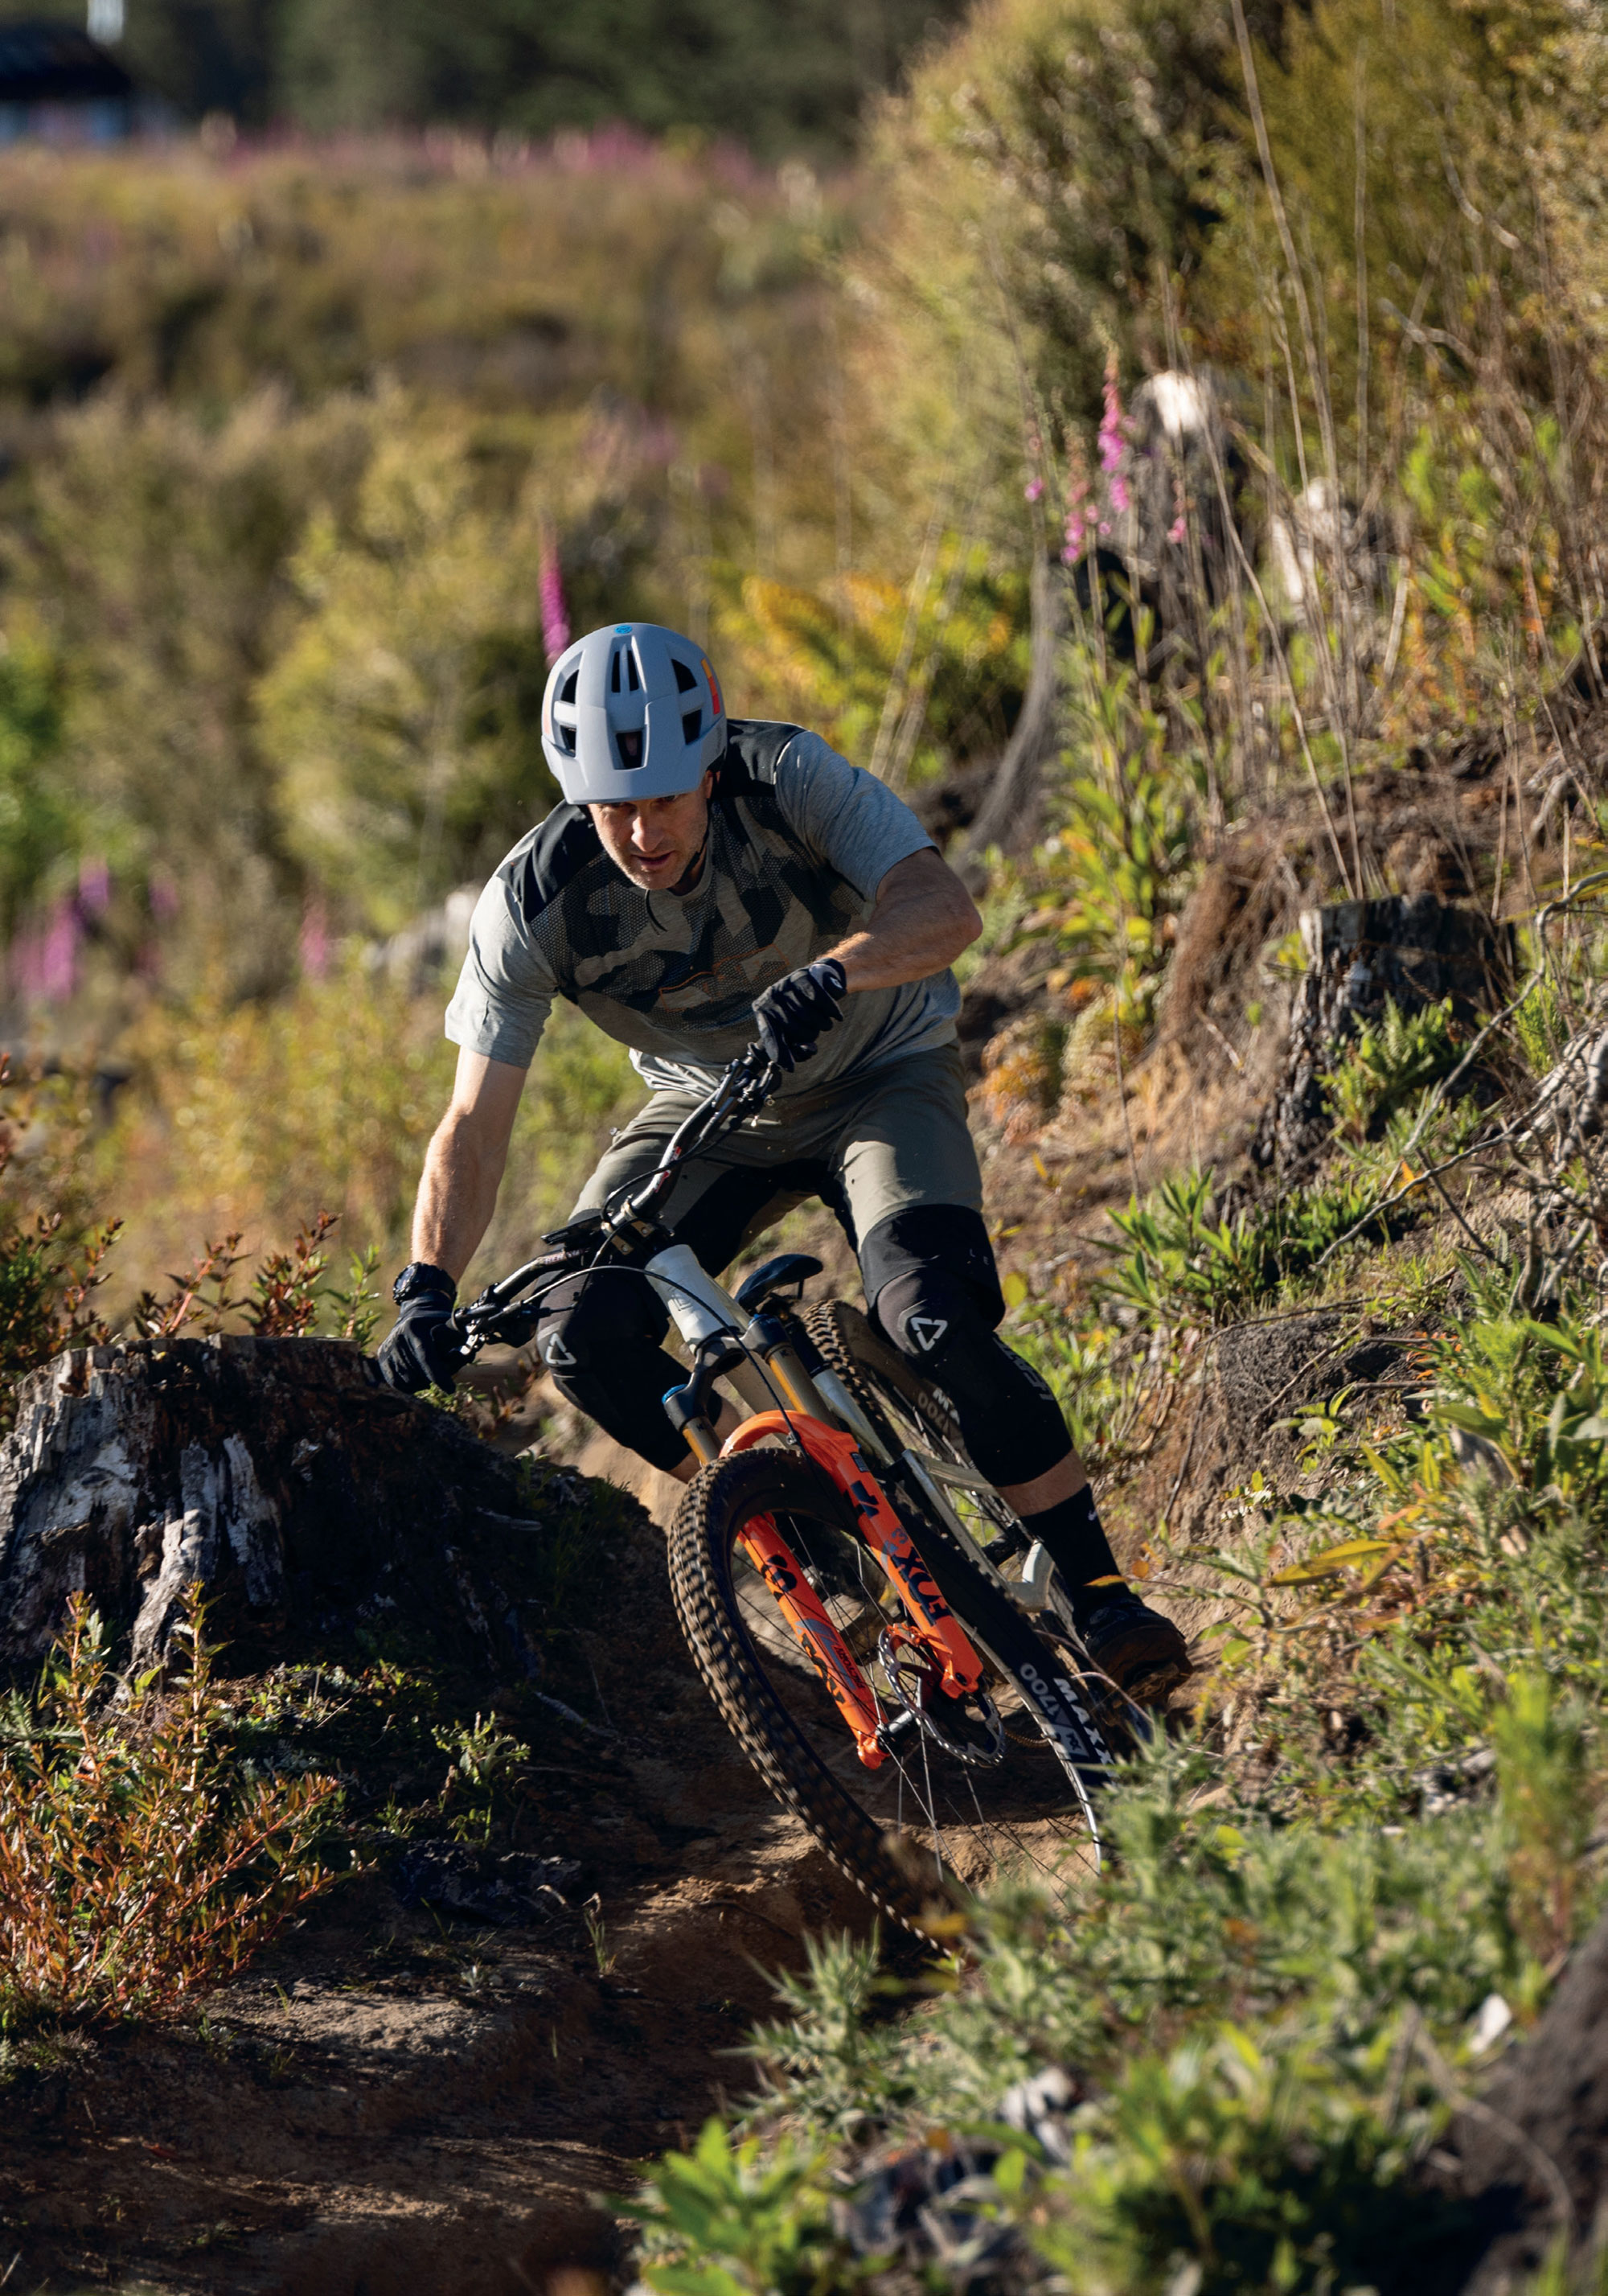
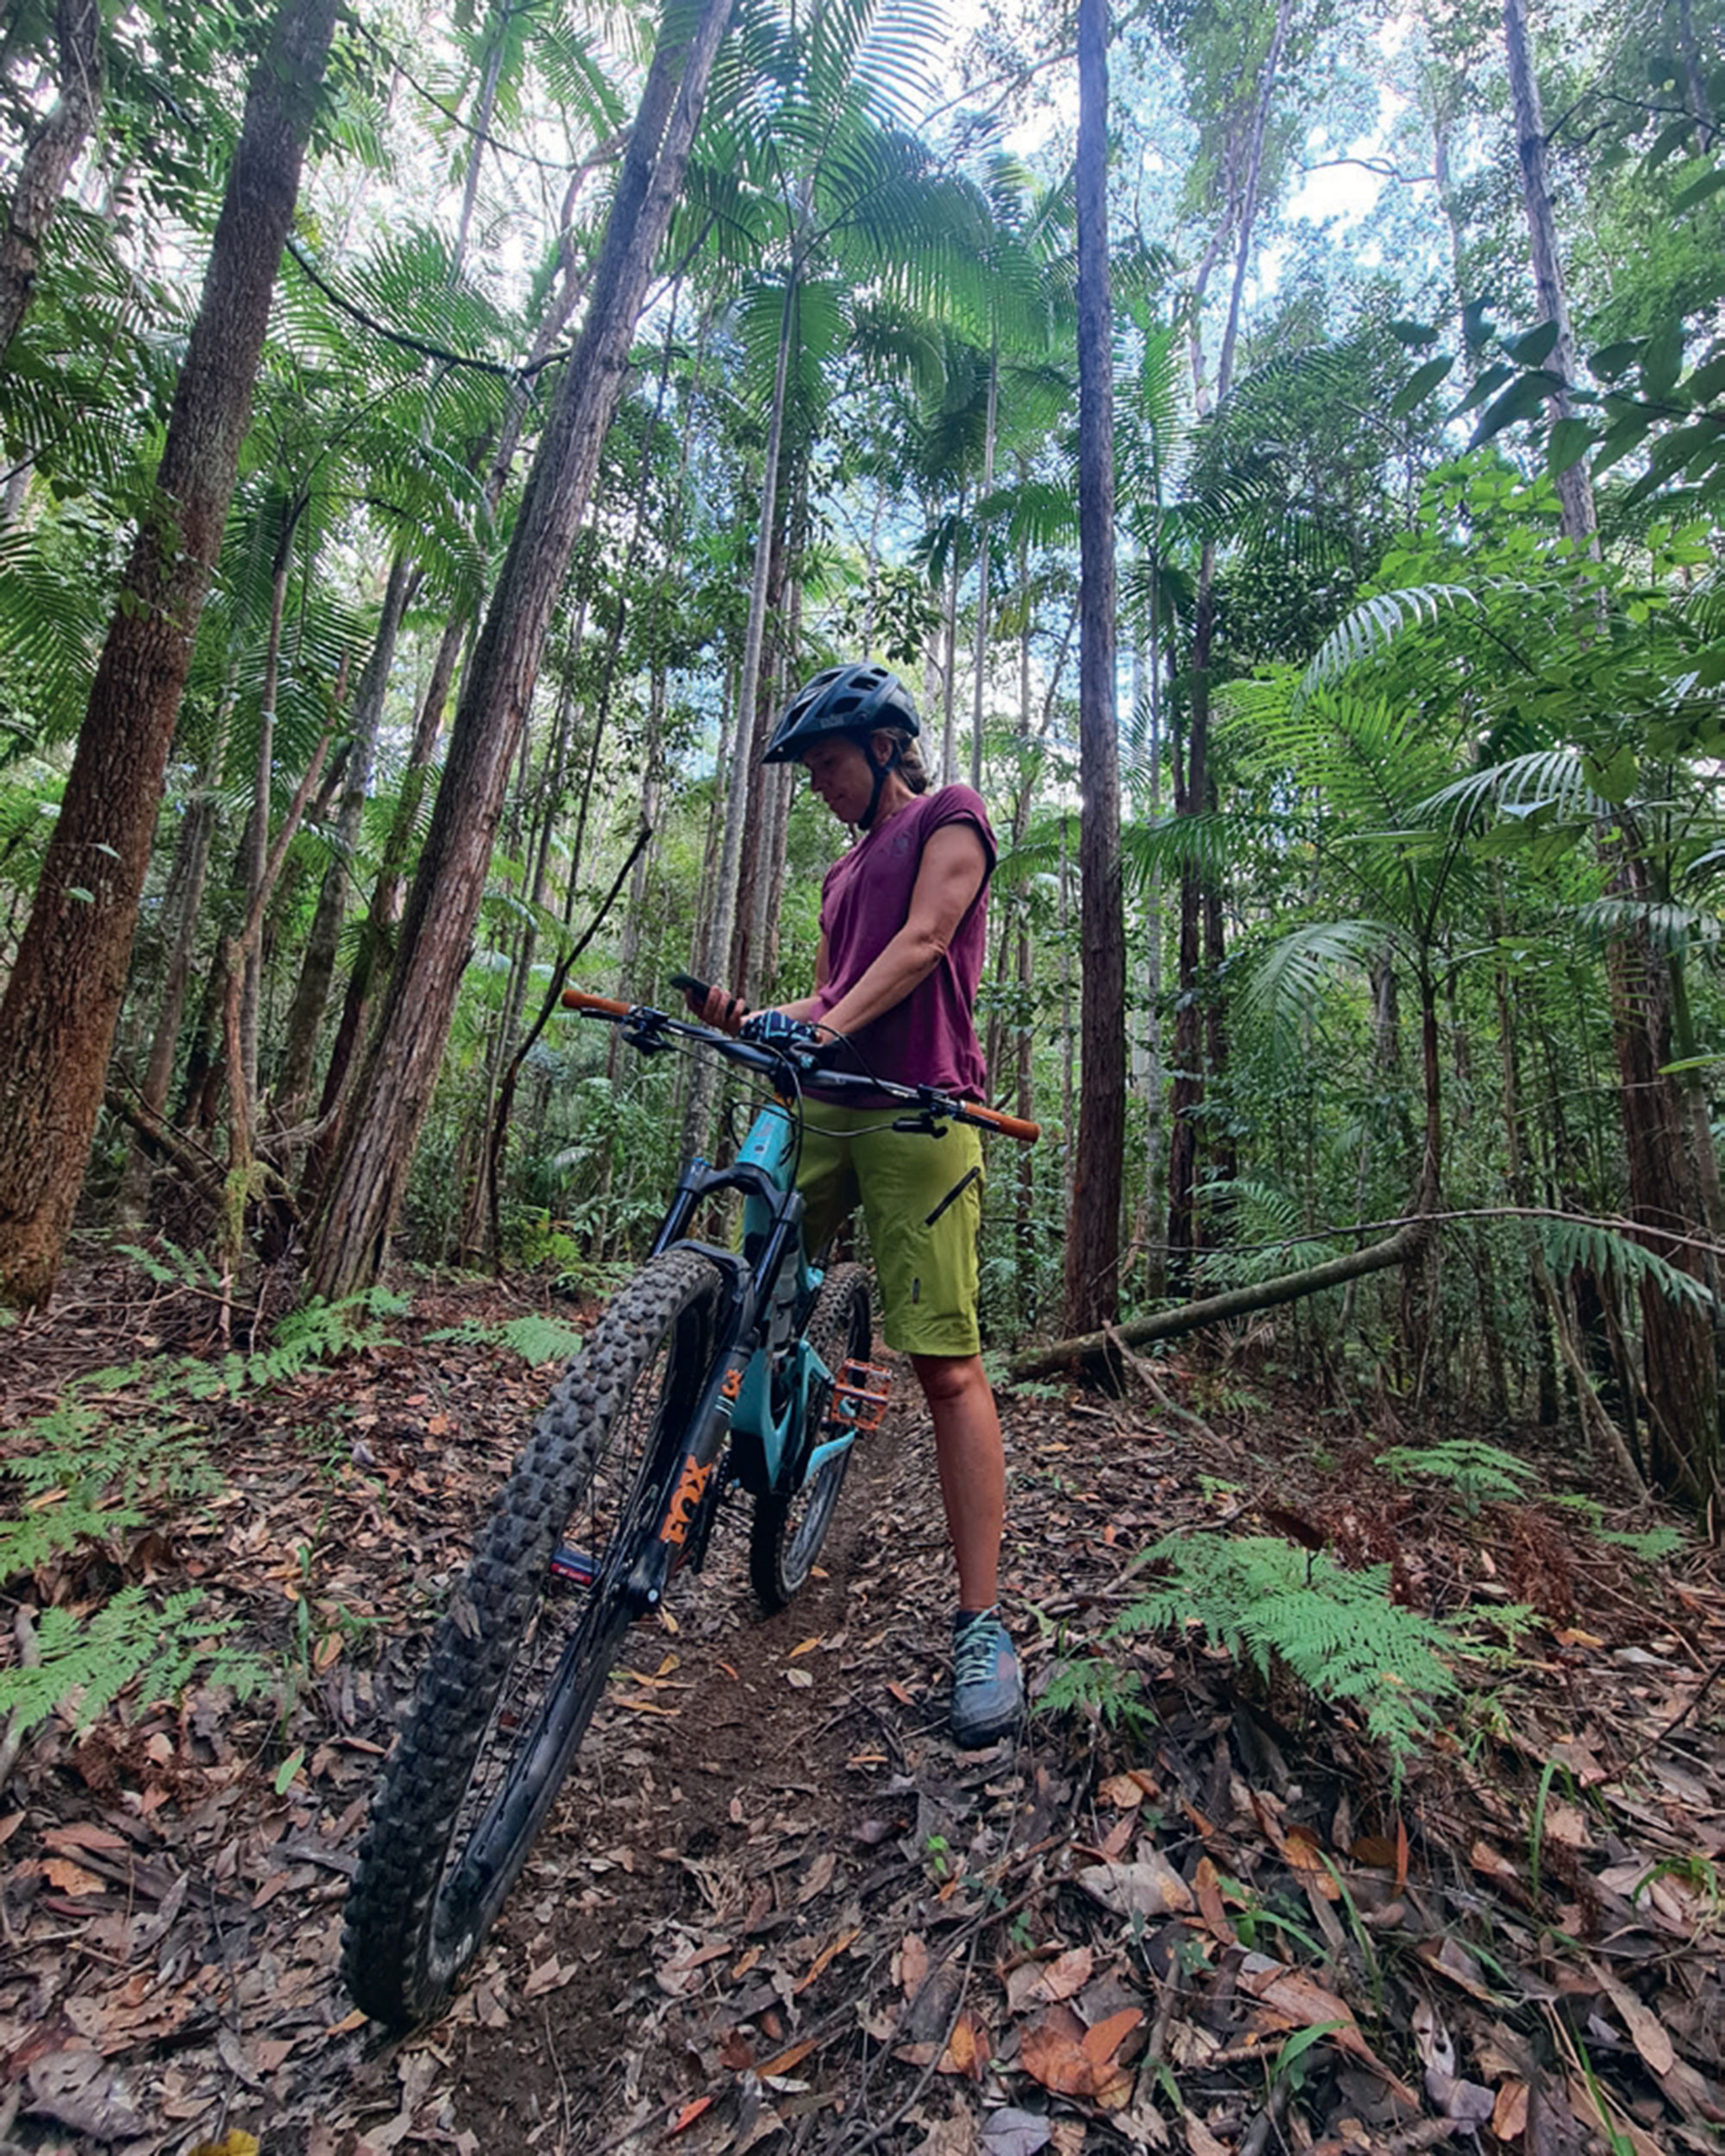
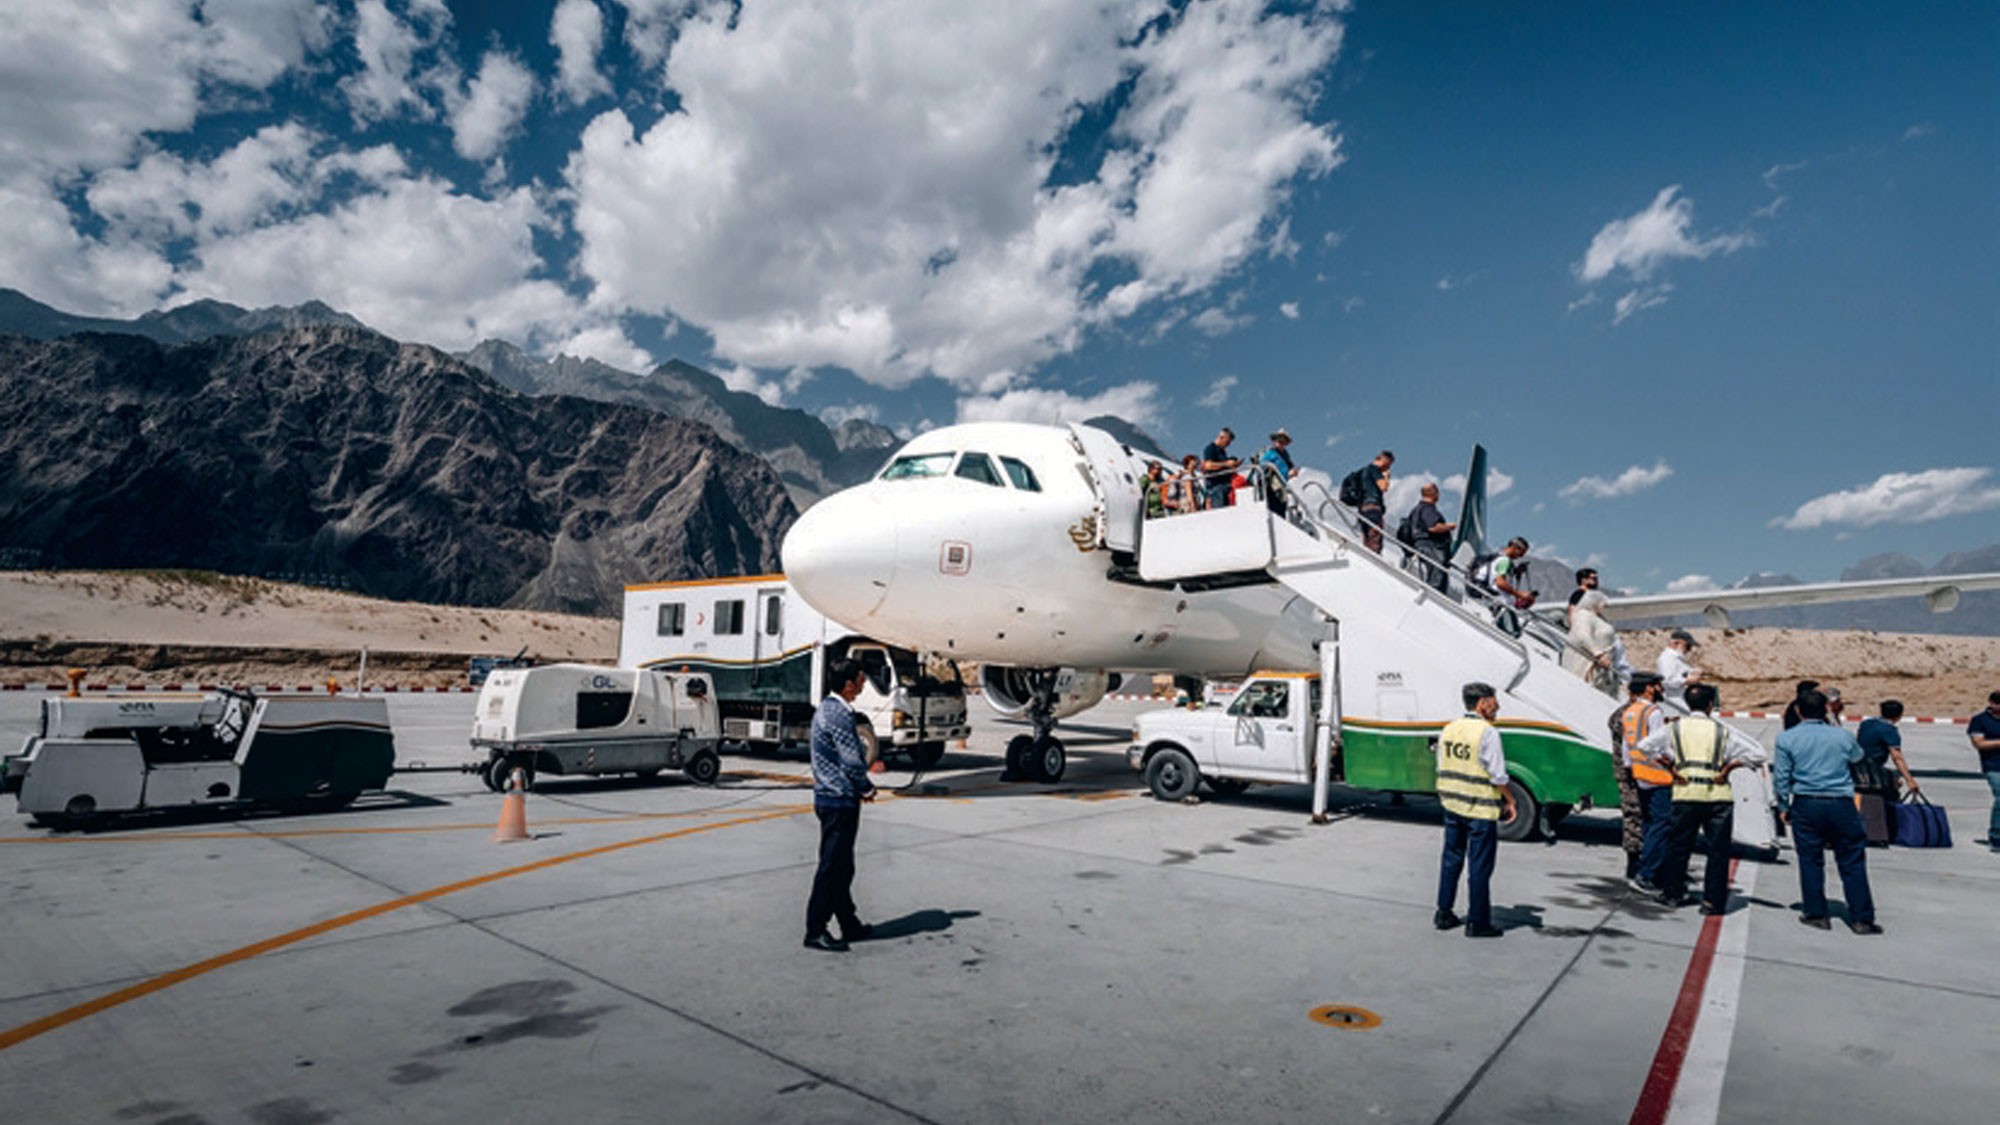
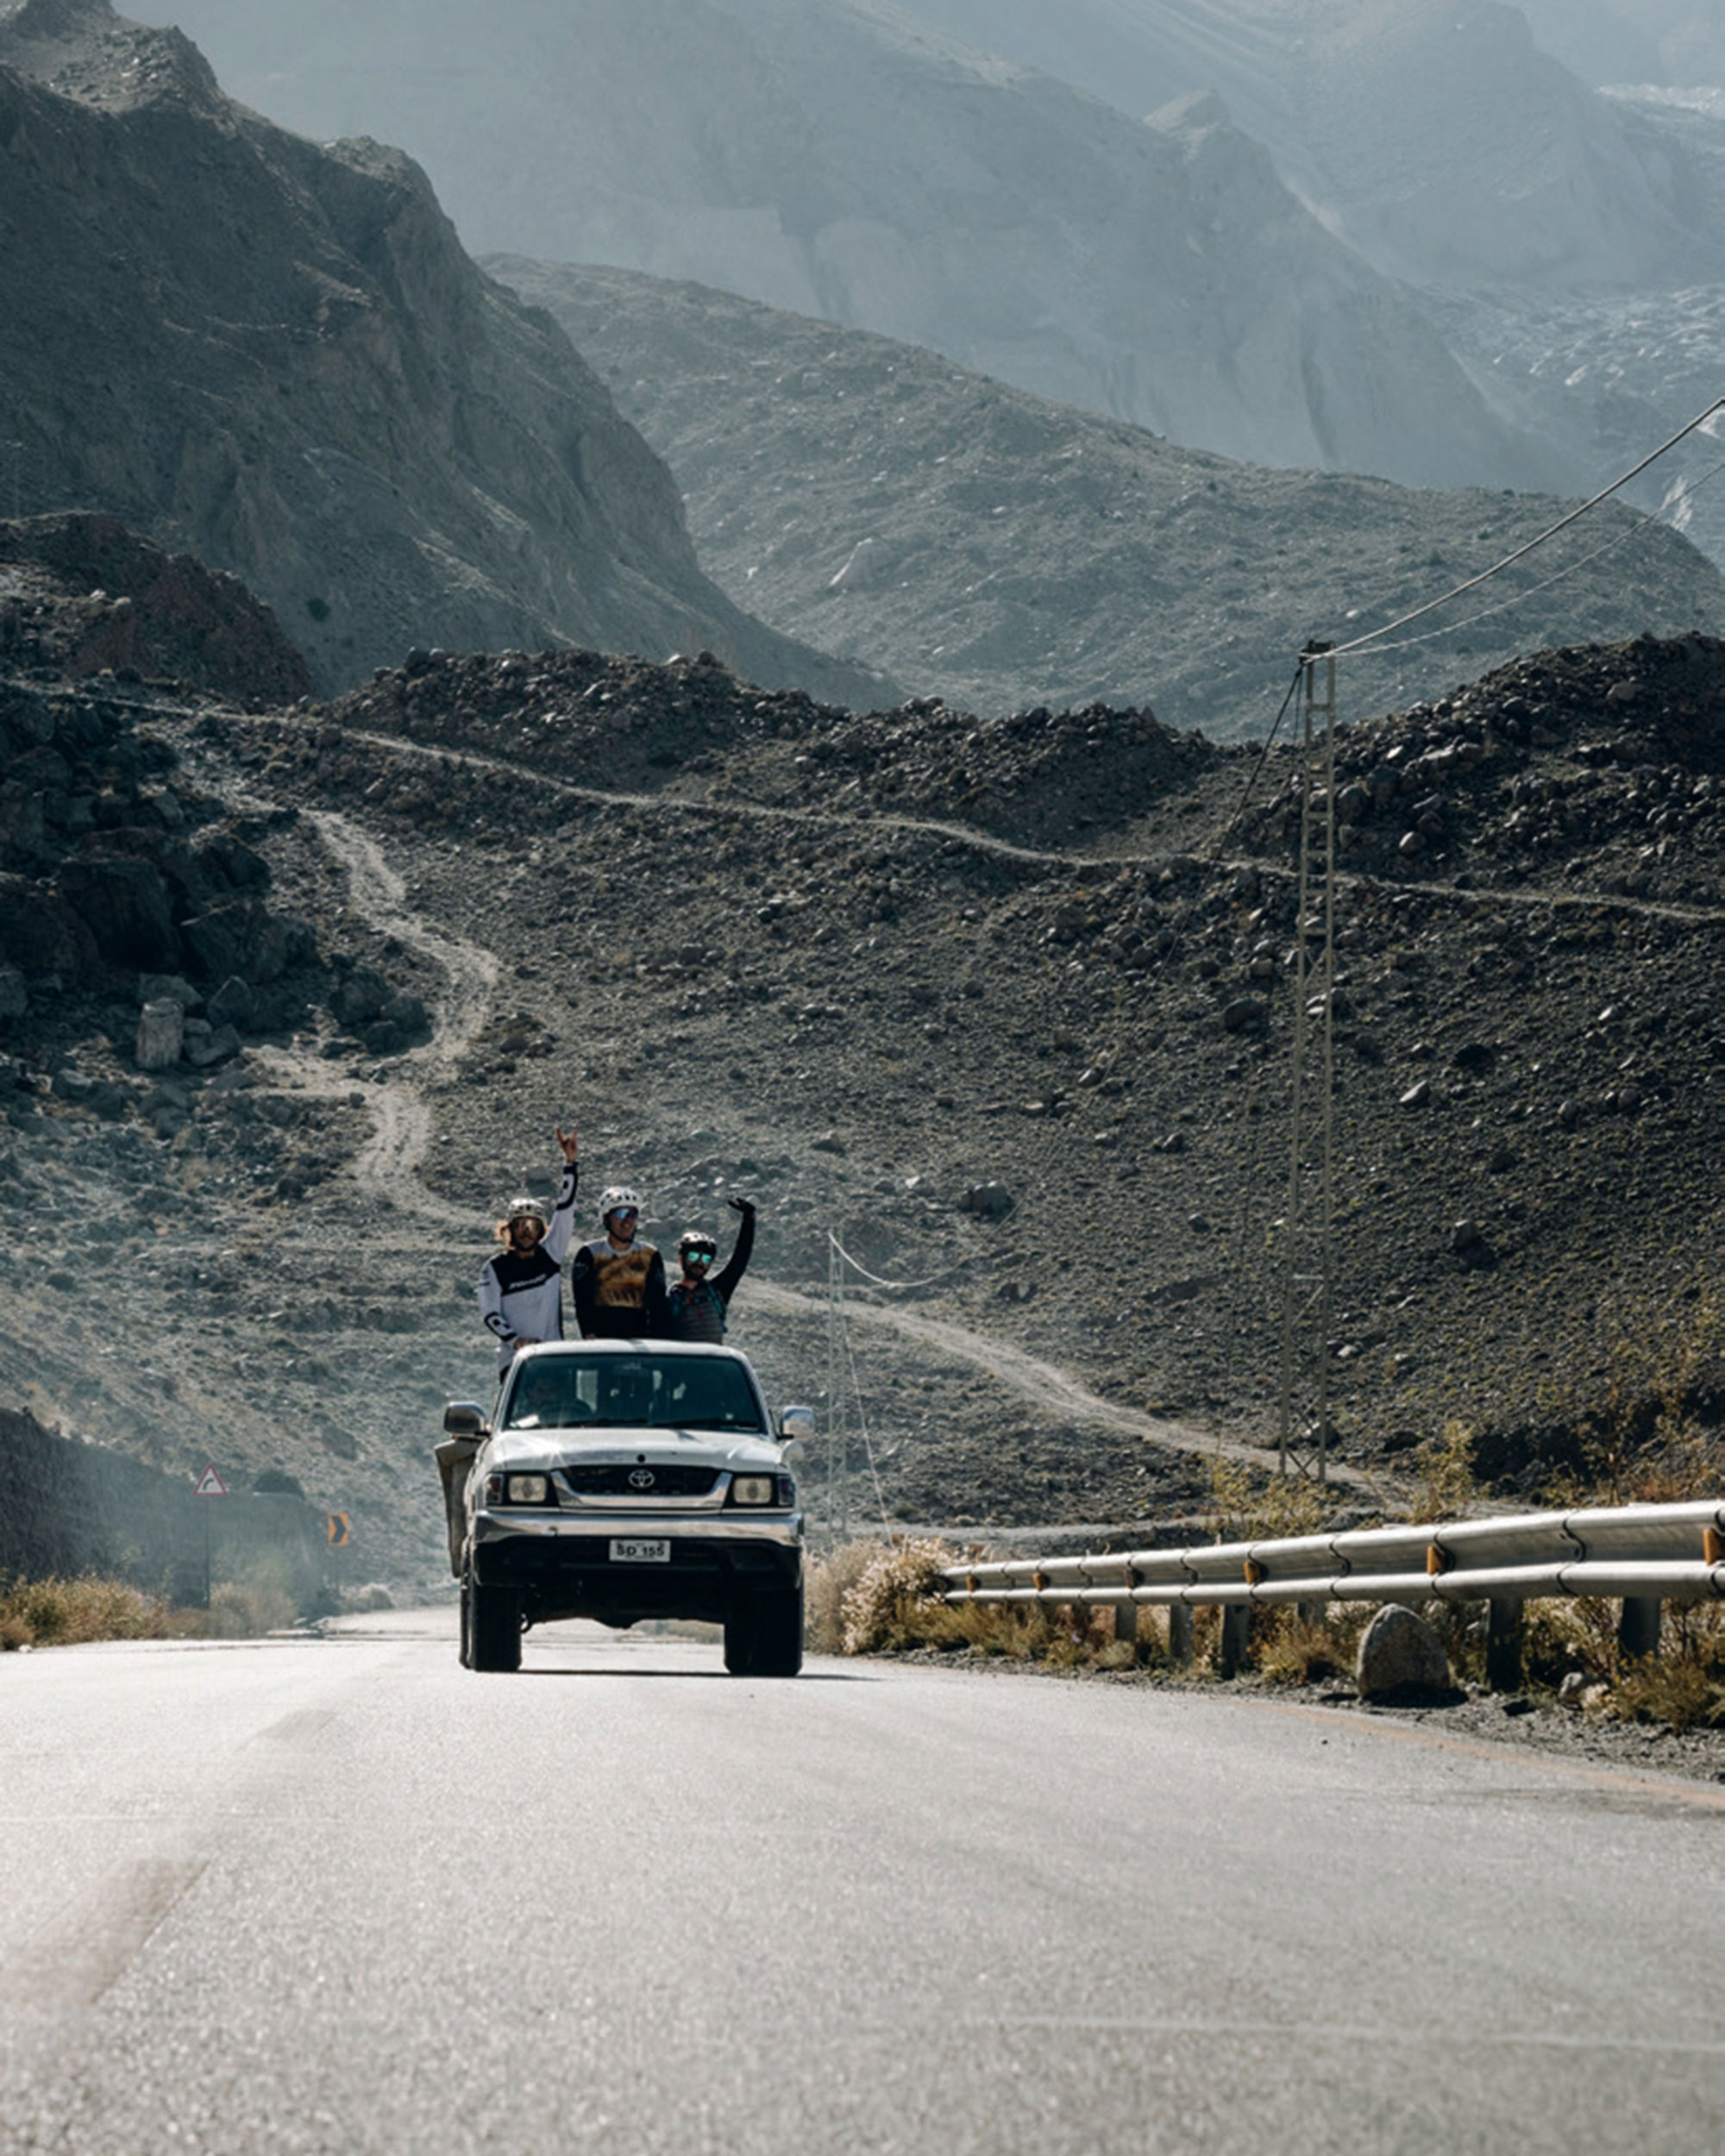
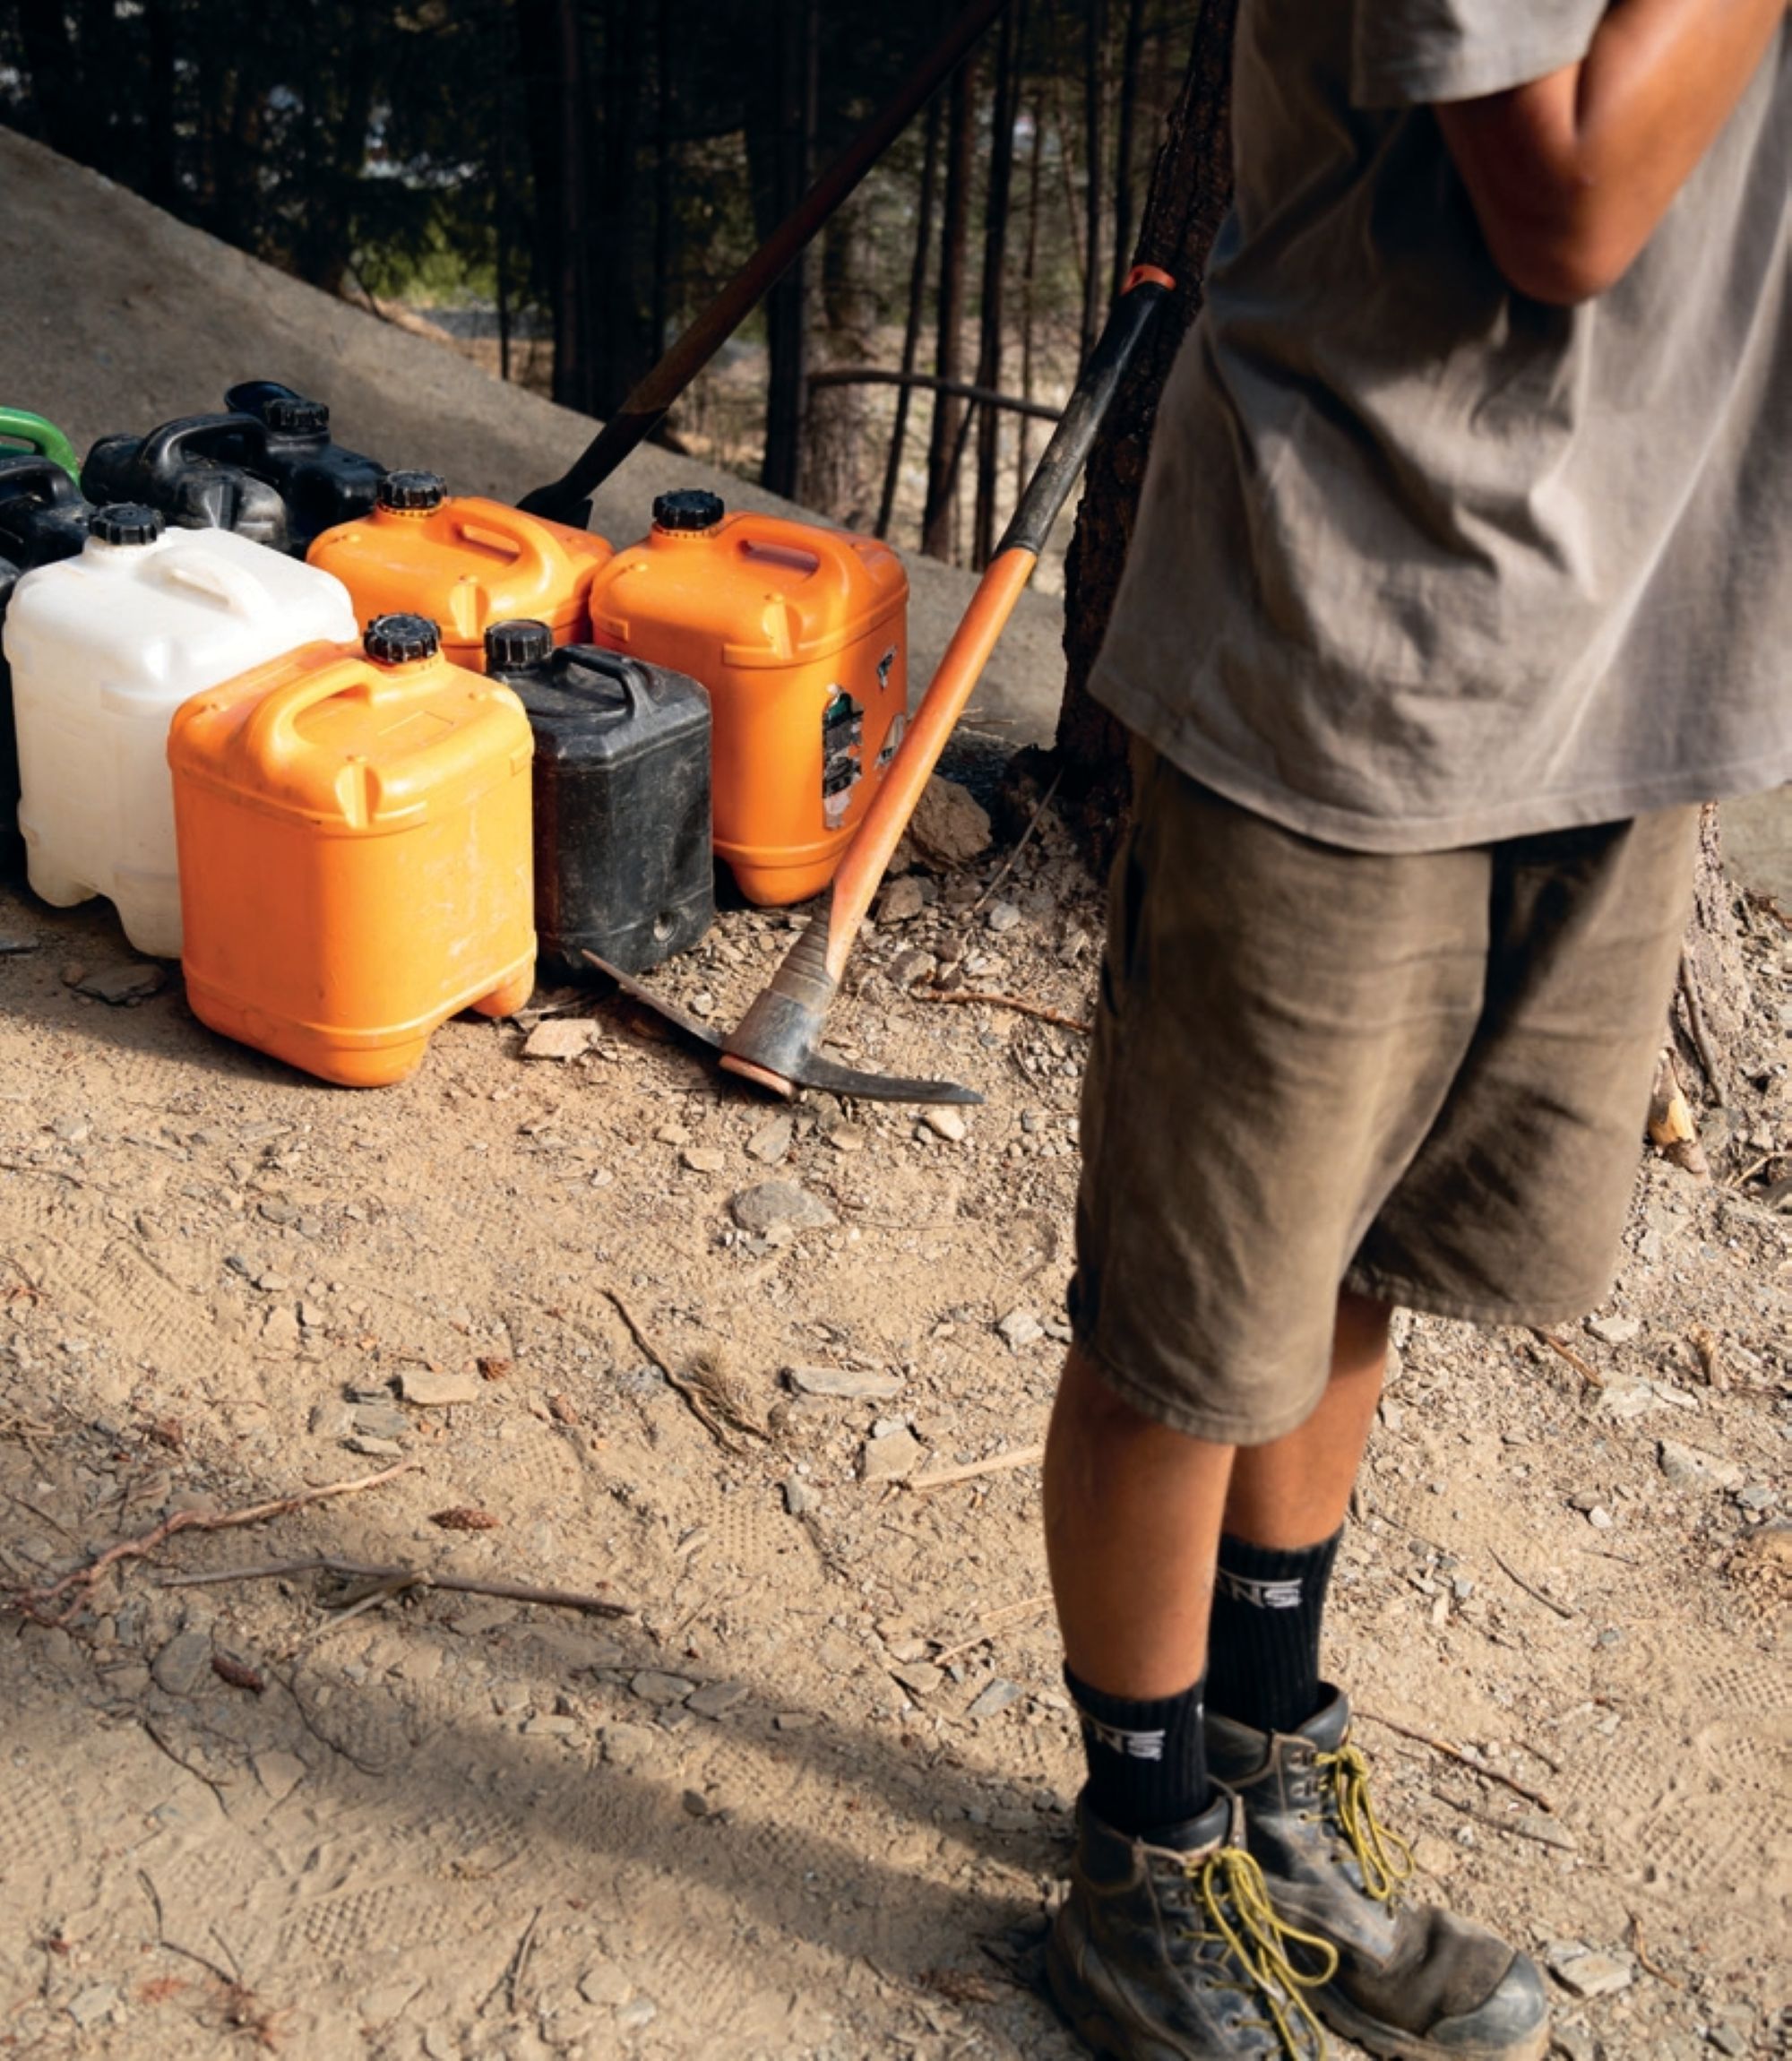
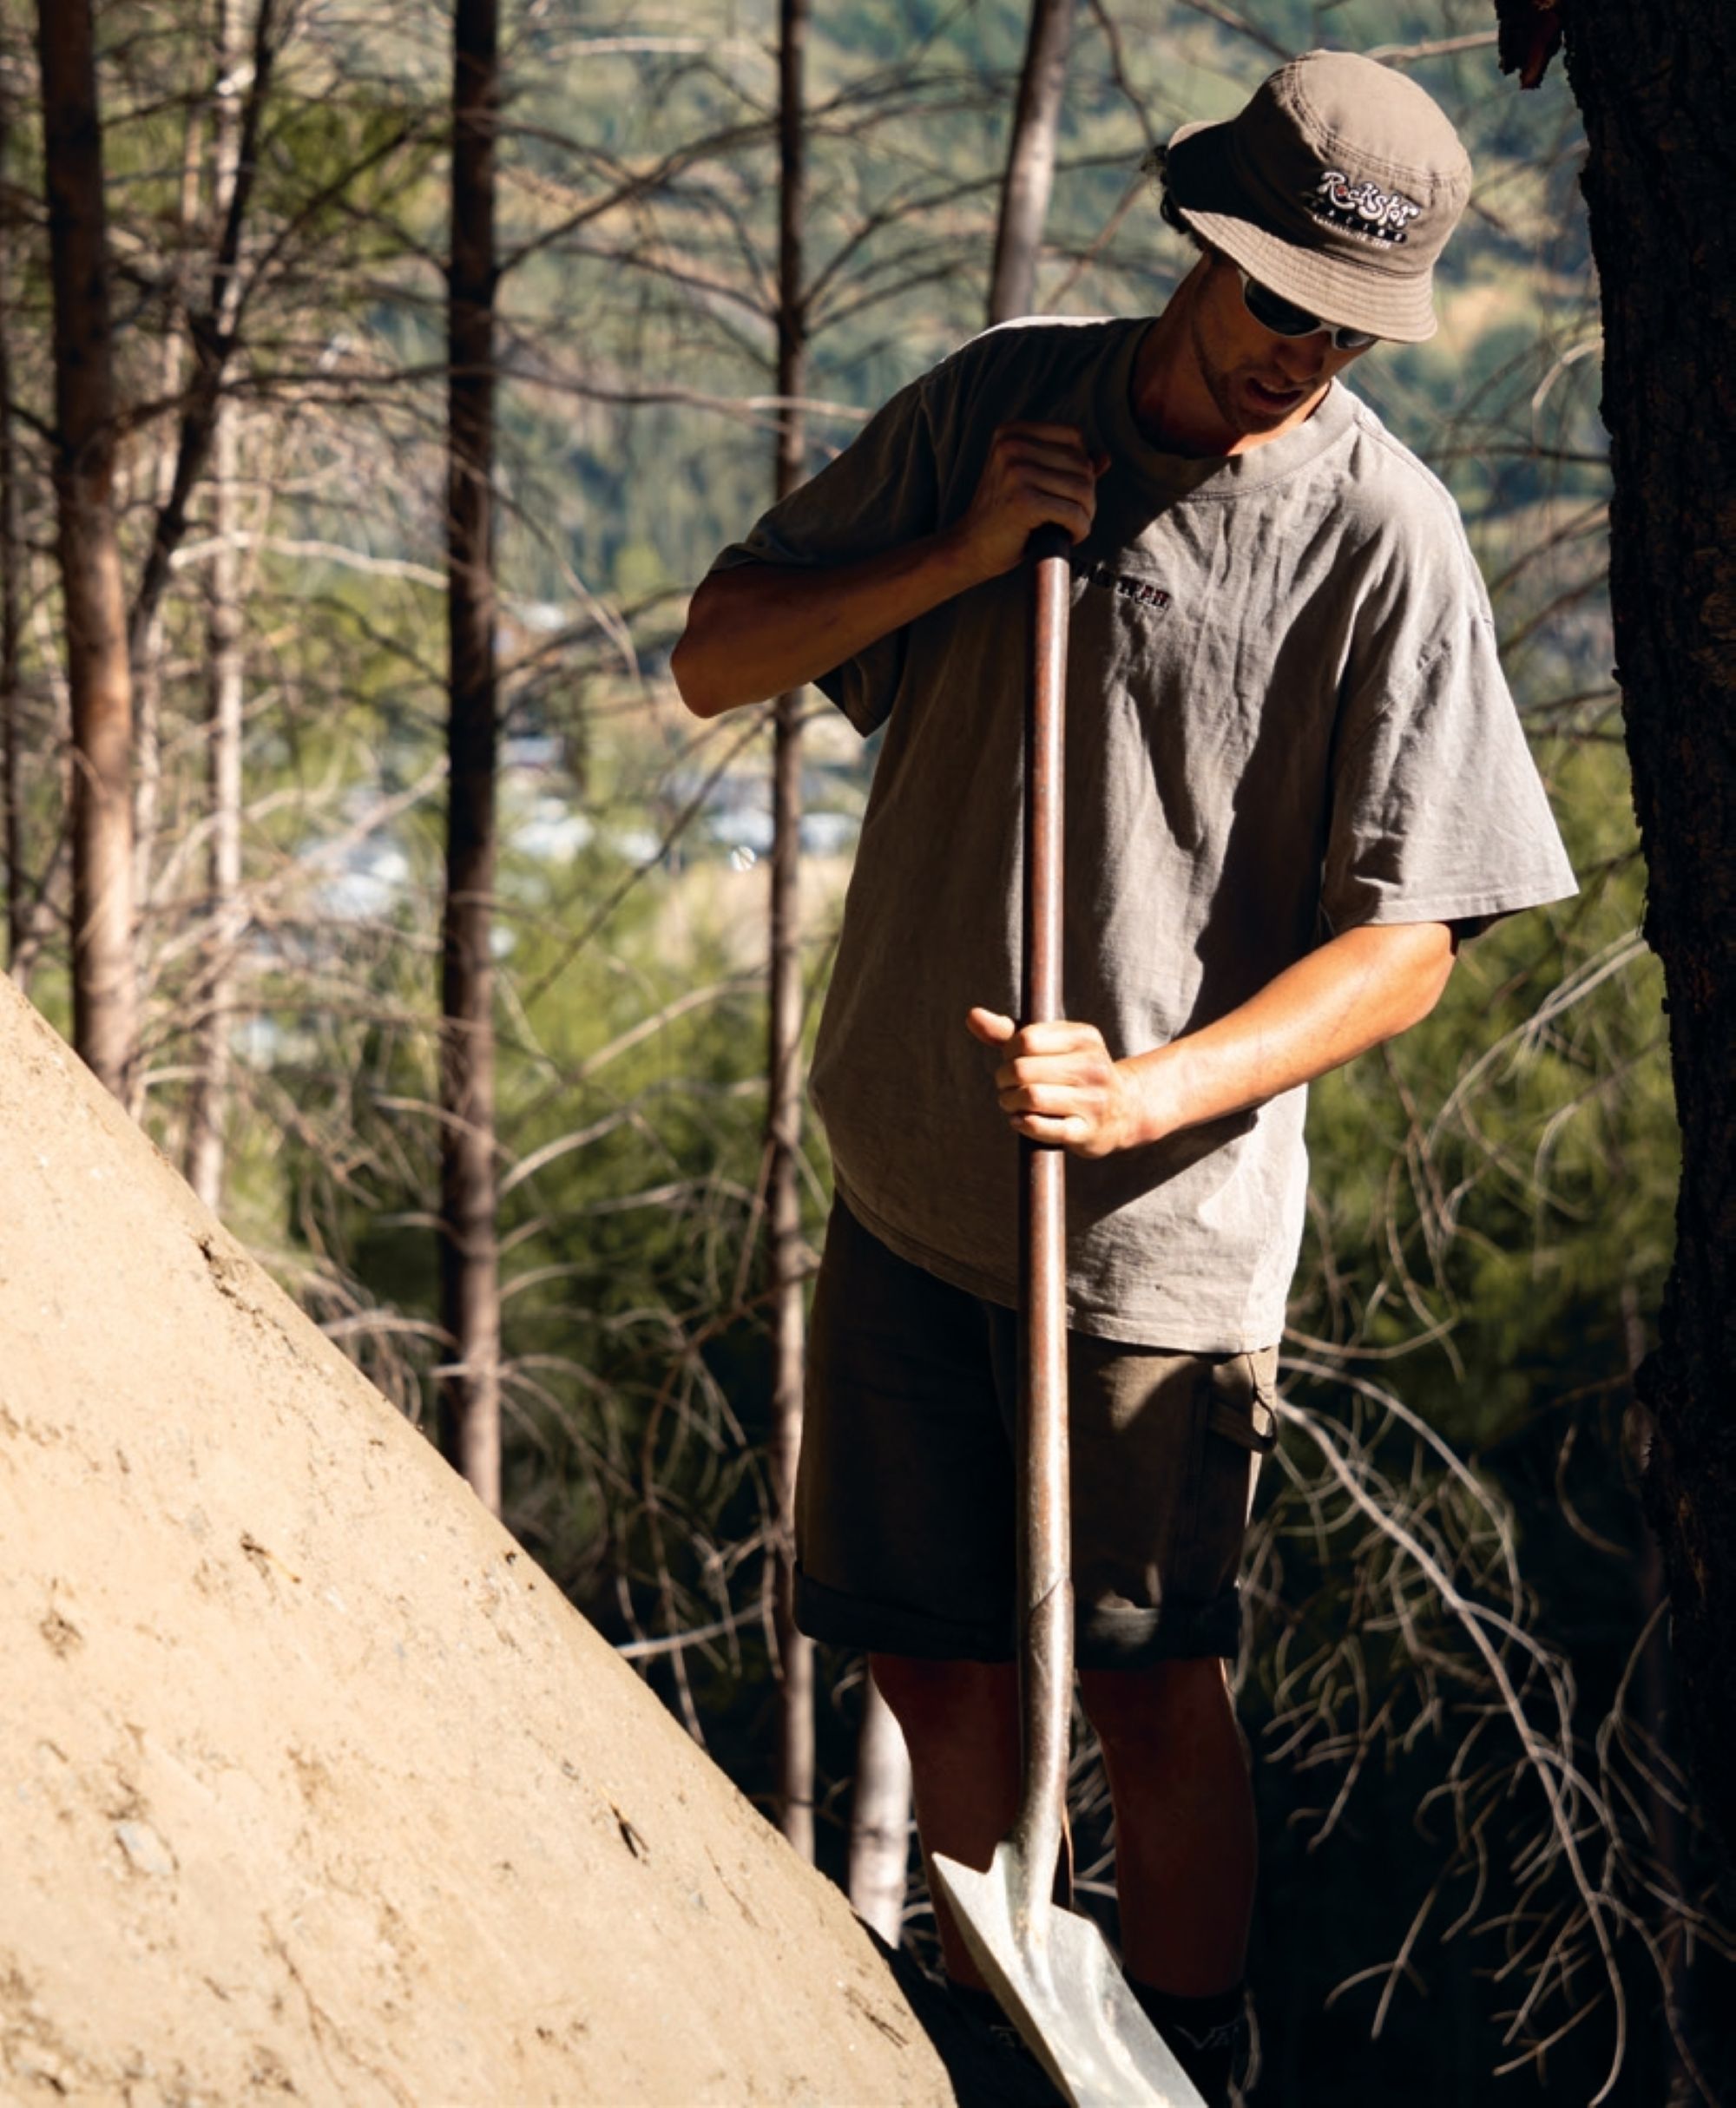
Before immersing myself into the Crankworx spectacle, I ventured deep into the backcountry. I like to ride before I watch riding as it gives a good energy. The alarm screamed, I ran a quick shower, and we were off before the first light of dawn—heading out to Craigieburn for a couple of hours of riding. The best way to get the most out of the trails is on an eMTB so, with the help of a local guide, we did the ‘classic hits’ of Craigieburn. It was so damn lush through the beech forest, with the mountains peeking out every so often. The trails keep you on your game with technical rooted features, exposure, and flat out fast sections—where I was hauling a bit too much at some points. Towards the back end of the ride, we filled our bottles with water from the river and washed our faces. The stoke level was high as we pedalled back and I cracked up when my eMTB ran out of juice just before reaching the truck. The legendary Sheffield Pies warranted not one but two visits, to fuel and refuel my energy stores. After a quick wash at my digs I managed to arrive at the Crankworx event in time to catch the afternoon’s competitions.
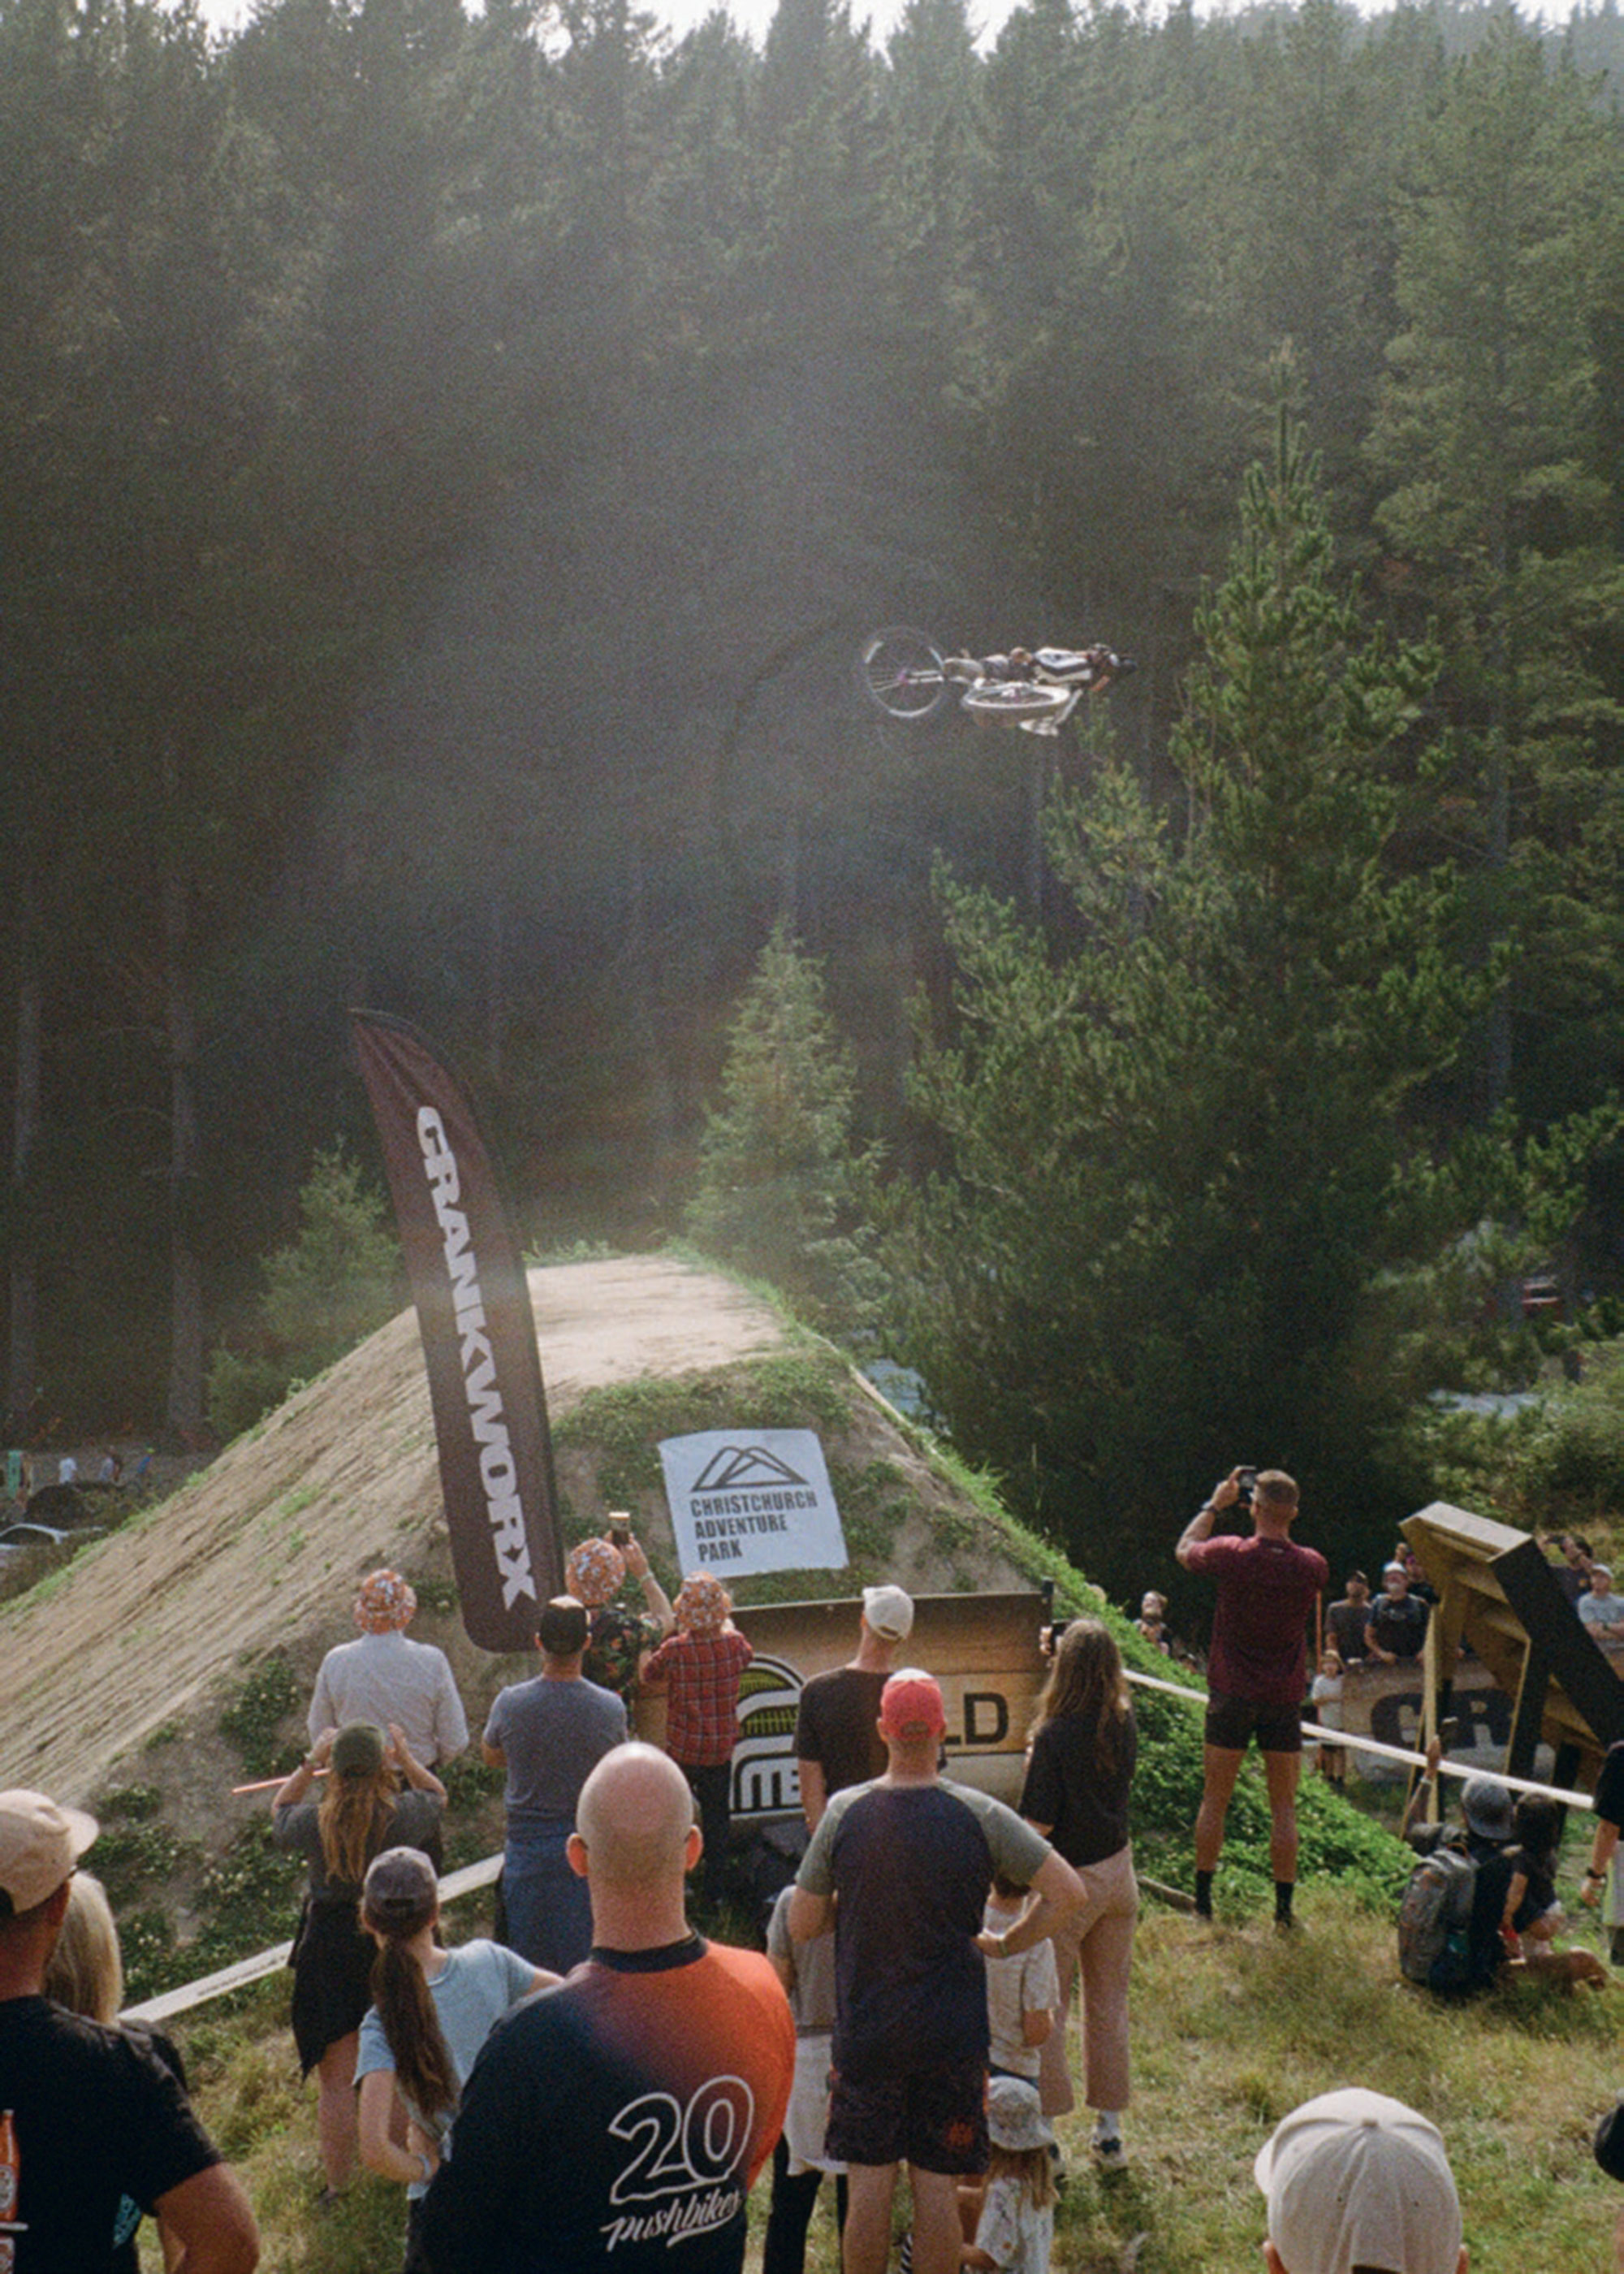
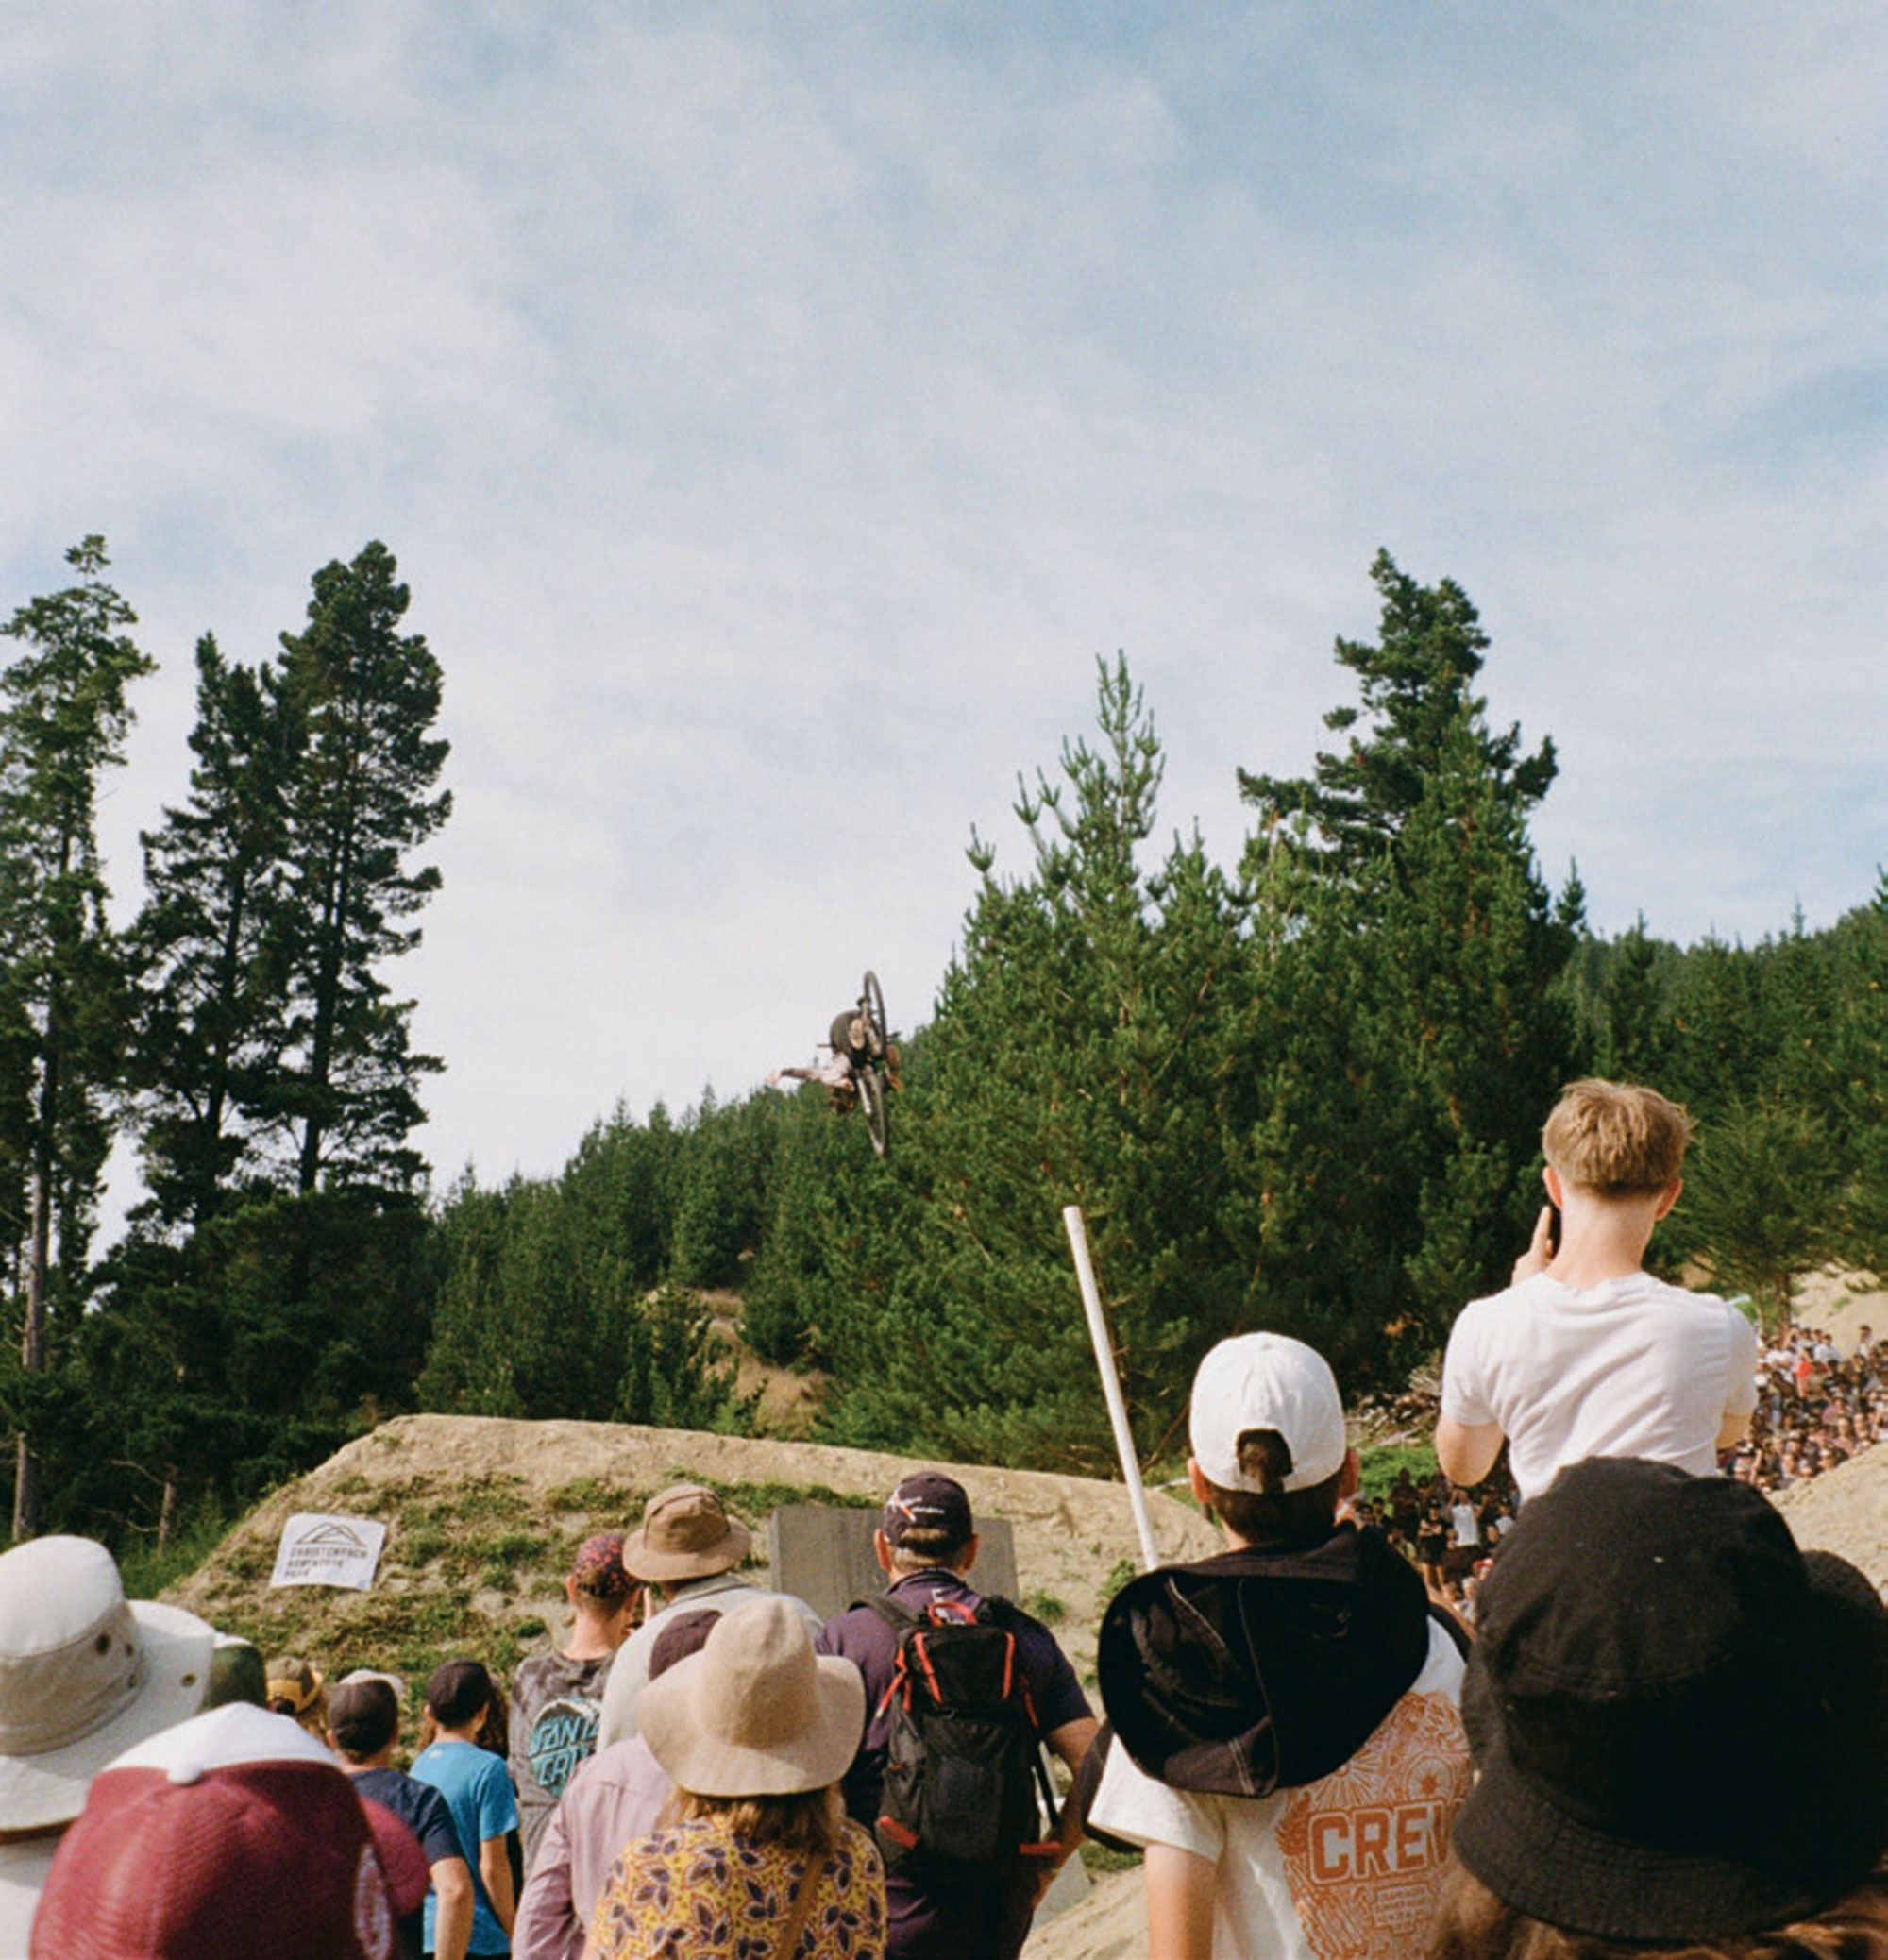
After the disappointment of the inaugural event’s cancellation, anticipation had built tremendously for this second attempt. The electric atmosphere was felt from the moment the Uber driver drew up close to the event. This was a real vibe, with groms left, right and centre, frothing. The industry’s prominent presence, combined with the genuine excitement of the locals celebrating this event in their hometown, created an infectious energy. I walked around chatting to people from the biking scene and it reminded me that we are a strong community. I mean bikes are a bloody good tool for bringing people together. The crowd was a wide spread of age groups with heaps of families. It makes me think these events keep the next generation inspired. The crowning spectacle of the Crankworx Summer Series is the Slopestyle competition. The wind had been playing a bit of havoc during practice so it was decided to move the event to early Sunday morning. I walked up the hill—the crowd was littered everywhere, in high spirits waiting for the next rider to drop. The hillside hype was infectious and being a part of live sporting action is something really special. The athletes really threw down and this grassroots event even managed to rival its bigger brother. Those few days immersed in the Crankworx Summer Series, combined with a quick trip into the backcountry, reminded me just why bikes—and the mountain biking community—are so bloody good.
Metronomic Meditation
Words & Image Gary Sullivan
“It gots to be accepted;
That what? That life is hectic.”
C.R.E.A.M. by Wu-Tang Clan
Although they’re all credited with writing their legendary song, C.R.E.A.M., I’m pretty sure it didn’t take all of the Wu-Tang Clan’s nine iconic members to write that lyric from their debut 1993 album. Whether they all pitched in, heads bobbing as they gathered around a smoking ashtray, behind a mixing desk, or if it were just a single MC with a pencil and notebook scratching notes while on a grimy subway, one thing is for sure: there was one purpose. Whether a posse of nine or an army of one, single-mindedness helped create the masterpiece, confirming we need to accept that, indeed, “life is hectic”.
It’s how we deal with our hectic lives that matters.
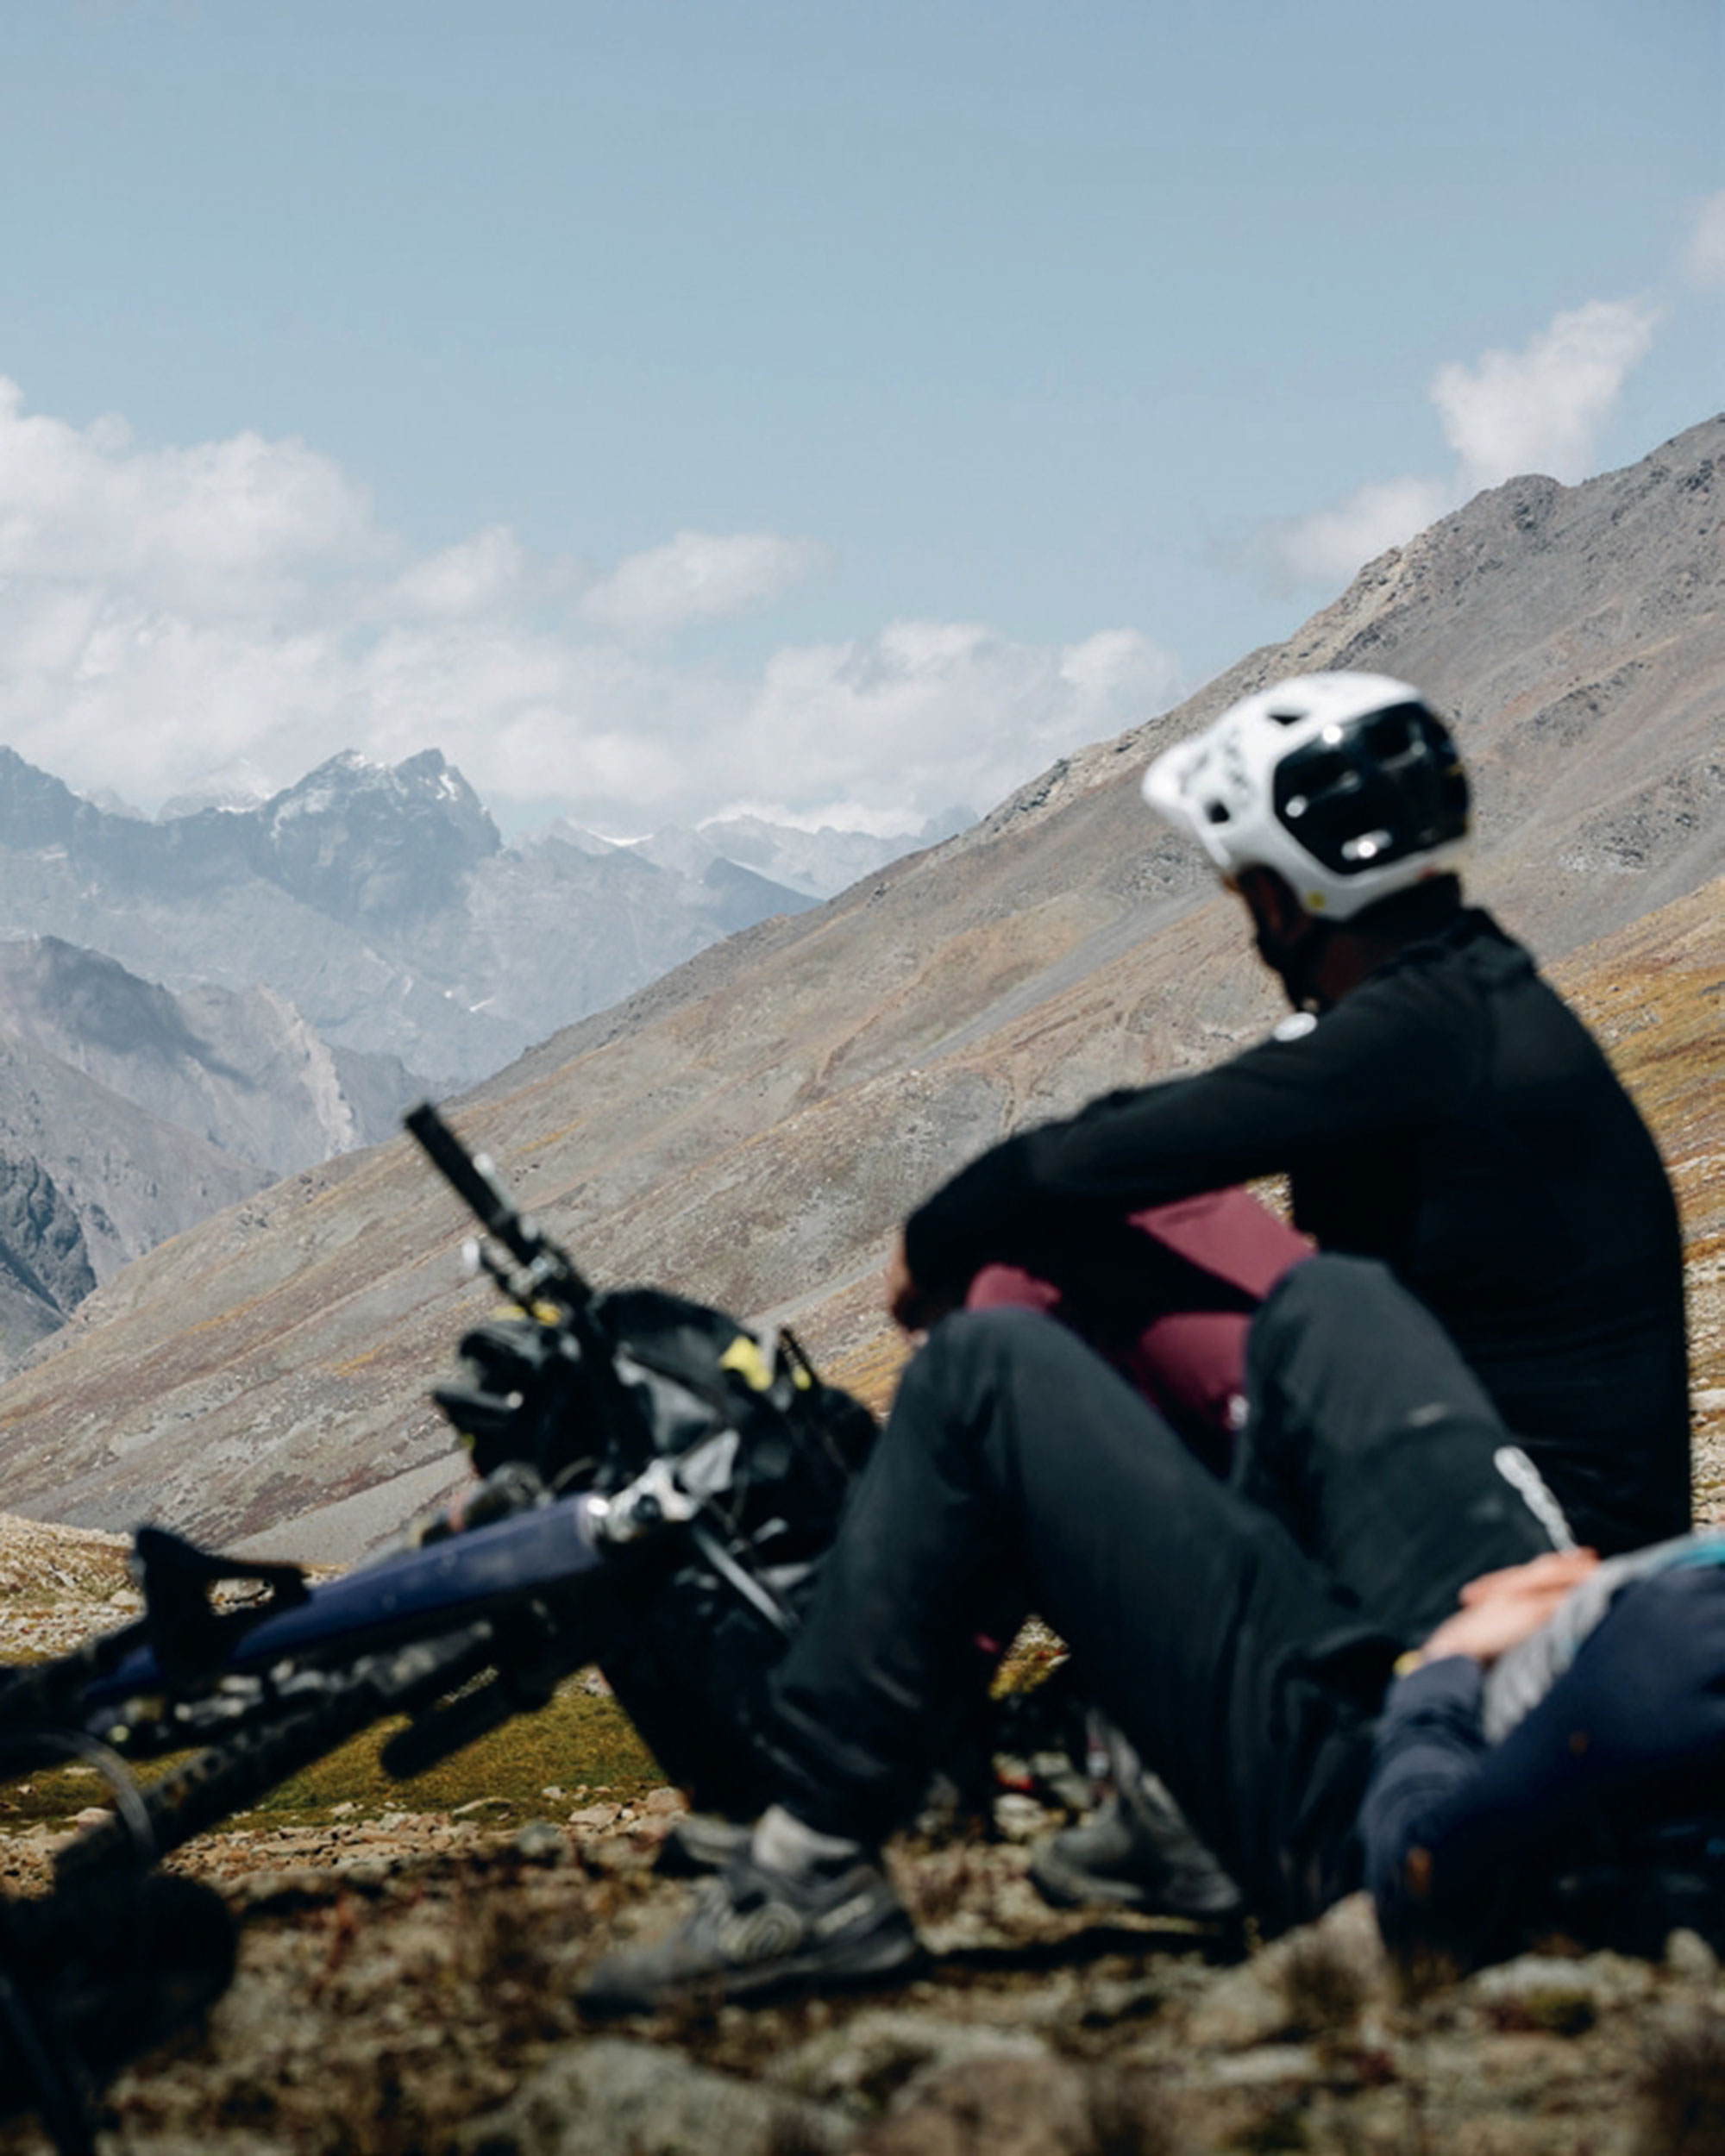
And there are many ways to deal with how hectic life has become recently. For most, it’s a combination of different things that take their mind off the busyness of life; for others, it’s singlemindedness, or a single act, that calms them, enabling a refocusing of the mind—away from the stressors of daily life. If you’re reading this magazine, I’m sure that—for you—one of these things is probably mountain biking; a single-minded act. I know for me, personally, at times, riding is more than just a sport; more than just an activity to fill a couple of hours. It’s a meditation of sorts: a metronomic meditation.
Metronomic meditation. I didn’t come up with this phrase but, when I first heard it, it struck a chord. Meditation is “a practice that involves focusing or clearing your mind using a combination of mental and physical techniques”. Both are things that mountain biking requires. Particularly on a technical descent or fast-but-flat singletrack, focus is paramount. I can think of countless times where, had I not been 100% focused on the task at hand, I’d be down a bank, over the bars, or have slid out on an ice-like, wet clay surface. That need for focus means clearing my mind of clutter and forgetting the day-to-day. There’s no space for thoughts other than those required to keep the ship upright, and should my mind wander back to ‘normal life’ even just a little, the consequences could be painful.
Several factors add the metronome-like aspect to mountain biking. Firstly, the pedalling. Stop pedalling while on the flat or going uphill and we fall over; it’s pretty simple. If we’re out for a big day on the bike, the metronome- like effect of pedalling can last hours with only a marginal variation of cadence. It’s simple to ignore, but we’re often pedalling 80 times a minute—multiply that by three hours and 14,400 rotations, which is no doubt metronomic. Then there’s the metronome of our breathing, which is directly related to our pedalling cadence and power. Both affect our breathing, how deep it is, and its frequency.
Boil it all down and it’s pretty basic, really. Between our 100% focus on the trail and the subconscious metronome of our cadence and breathing, we can slip into a trancelike state. Now I think about it, some might call this the ‘Flow State’, but for me, ‘Metronomic Meditation’ is equally adept because we essentially remove ourselves from reality and are forced to cleanse our mind of the day-to-day—a ‘mind bath’ perhaps.
As much as I’m a mountain biker at heart, I spend a lot of time on my local roads, asphalt or gravel. This riding ticks the sporting and physical aspects of riding for me, but I find it’s only partially metronomic meditation. Roads are wide, and I don’t need to pick a cautious line between obstacles or weight my pedals just right across an off-cambered section. I can just concentrate purely on pedalling and staying on my side of the six-inch wide white line, still able to contemplate my daily problems and figure out what I’m having for dinner. There’s undoubtedly some metronomic pedalling and breathing happening, but it’s hardly meditation.
Life is hectic. It’s fair to say, at least for me, mountain biking is the truest form of single- minded metronomic meditation that eases that hecticness (is that even a word?!), if even just for a few hours a week.
Give it time
Words Lester Perry
Image Henry Jaine
Some bikes are ridden so often, and in so many moments and places, that to part with them becomes almost impossible.
They develop value to the owner which has no connection to reality, so selling them is not only unsatisfactory from a financial perspective, but an emotional wrench that can be too difficult to execute.
Same goes with cars.
Our relationship with our vehicle is kind of like the way we treat drivetrains. There are essentially two ways to do that: keep it fresh by replacing the chain every thousand kilometres; keep an eye on the chainrings and replace them when necessary—and hope that doing those things will make the cassette last longer than it may otherwise. Or the other way, which is ride the stuff until it more or less dissolves, then replace the lot in one mad spend-up after a couple of years.
The more traditional among us get a nice set of wheels when they are able, then trade in or up as often as once every couple of years. The alternative lot buy a vehicle that ticks the required boxes and drive it until it dies—or they do.
That has been my style and, so far, I have outlived half a dozen of them—not counting the odd ones I owned briefly in my youth, and the more sensible ones I have shared with my partner.
The last three have been Toyota HiAces. These venerable buses are examples of what I would argue is the Kombi of the South Pacific. These days, actual Kombis are like high end bicycles: their price bears no relation to their functionality. Don’t get me wrong, they are cool things. In their primitive way they will still be clattering along when cockroaches inherit the planet. But, for everyday abuse and long- lived up-for-itness, the HiAce is hard to beat.
Also hard to kill.
The late 80s white example we caned for a decade, had a slipping clutch for at least five years, which Glen used to repair using positive thinking. Just when we thought it wasn’t going to get whatever pile of stuff we’d loaded into it to the top of the next hill, she would send it kind thoughts and it would take another deep breath and soldier on. Some dear friends took it off our hands and toured the country in it, before selling it to a wrecker in Christchurch.
The one I almost wear as a totem is called a Regius, but it is a HiAce at heart. Sidebar: I reckon a good career, if I was a younger man, would be as a consultant to Japanese car companies, helping them to avoid coming up with names like ‘Regius’. And HiAce for that matter. But, I digress. I have heard this model referred to as a “Loser Cruiser”, but it has carted me, my partner, numerous bikes, a kayak, and a caravan over a quarter of a million kilometres around our country and still goes like it did when I got it.
I have just replaced it. I decided that if I get a decent HiAce now, it will probably be the one that stays on the road longer than I do. I took delivery of it last week, and told a friend about it that evening. I honestly thought she was going to cry. In her view, the old van is part of me. “Surely you can’t be going to sell it!” she exclaimed.
Well, that is the plan.
That was the plan. Now? I am not so sure. Yes, yes, I am. Out it goes.
So what’s the attraction for me, in a HiAce? Mainly; that it’s a van. You can drive around in it. You can keep a bike in it. You can get changed in it, take a nap in it, take shelter in it. You can cart a collection of bikes and people, a pile of rubbish, or half a house load of furniture. You can go camping in it—at a pinch, you could live in it. We have done all these things and more.
I prefer to get one that is past the number of kilometres travelled where problems would have cropped up if they were going to. It is best if the thing already has dents and scratches in the usual places. That means any imperfections I add to it will be pleasant memories of tight spots or straight fuckups, not heartbreaking blights on what was a virgin body.
The new one (well, new to me) has very little personality. Personality will develop, as bits of bark get scrubbed off the corners, bicycle tyre marks get added to the interior, kilometres get added to the clock and resale value slowly becomes irrelevant because with any luck I will never sell it.
Like one of my road bikes, it will become so valuable to me, it will be more or less priceless.
Give it time.
Join Trail Fund as a member to support our advocacy efforts!
Words Meagan Robertson
Image Callum Wood
Not another mountain bike club membership!? Yes, we know. There’s a lot of hands out asking for your money these days, and a lot less money going around. That said, there’s also a lot of debate and drama over trail users, trail guidelines and trail etiquette – and if Trail Fund is going to continue to put its hand up and suggest some strategic ways forward, we need to be able to prove how many people believe in our cause.
What is our cause?
Trail Fund is the only national body that represents and funds trail builders throughout the country. Over the past 13 years, our volunteer- run organisation has distributed more than 120 grants, totaling more than $300,000, to 50 clubs around the country. We also made sure mountain bikers have a seat at the table when it comes to trails on public conservation land, by joining forces with Federated Mountain Clubs and New Zealand Deerstalkers Federation in 2014 to create the Outdoor Recreation Consortium (precursor to the Backcountry Trust).
Our advocacy representative, Jimmy, has also been working tirelessly for six years to realign DOC’s re-classification of bikes on public conservation land as ‘vehicles’, in 2018. It caused significant delays to projects around the country, leaving several passionate volunteers feeling defeated. It also meant that iconic trailsincluding several Great Rides – did not comply.
It’s been a slow process but Jimmy and representatives from various other local clubs are finally gaining traction, and earlier this year he prepared the Trail Fund submission for the Department of Conservation (DOC) on the modernization of conservation and management. This submission can be found on the Trail Fund website and recommends adopting an effects-based approach, improving resource allocation within DOC and ensuring a more equitable concession system.
Back to the money and membership.
As above, we aren’t doing this for the money – we’re doing it for the memberships, and we will have two different levels – individuals and clubs.
Individual memberships are $8 and include a Trail Fund member sticker – or free when you purchase any Trail Fund item in our online shop for the next two months.
Club memberships – which automatically translate to individual memberships for every club member – will be $25. Clubs will need to be members to apply for funding rounds going forward.
That’s the gist. No drama, little money, big impact.
We look forward to welcoming you to the club – officially!
April funding round now open!
Got your membership sorted? We have two ebarrows and ten Weapon of Mass Creation tools up for grabs – so get your application in now. Applications will be accepted until 15 May.
Learn more:
trailfund.org.nz/products/trail-fund-nz-membership-2
Leatt Products
Words Lester Perry
Images Jamie Fox
RRP $249—ProClip 4.0 Shoes | $119 — Velocity 4.0 MTB X-Flow Iriz Goggle $69 — Glove MTB 2.0 X-Flow Stealth
Distributor BikeCorp
I remember wandering the expo at Crankworx 2020, in Rotorua, when I was called over to the Leatt booth with the promise of seeing something exciting. I was indeed excited as I checked out Leatt’s first range of MTB shoes. It wasn’t perfect, but it showed glimmers of hope that Leatt could become a legitimate player in the MTB footwear game, completing their head-to-toe ethos.
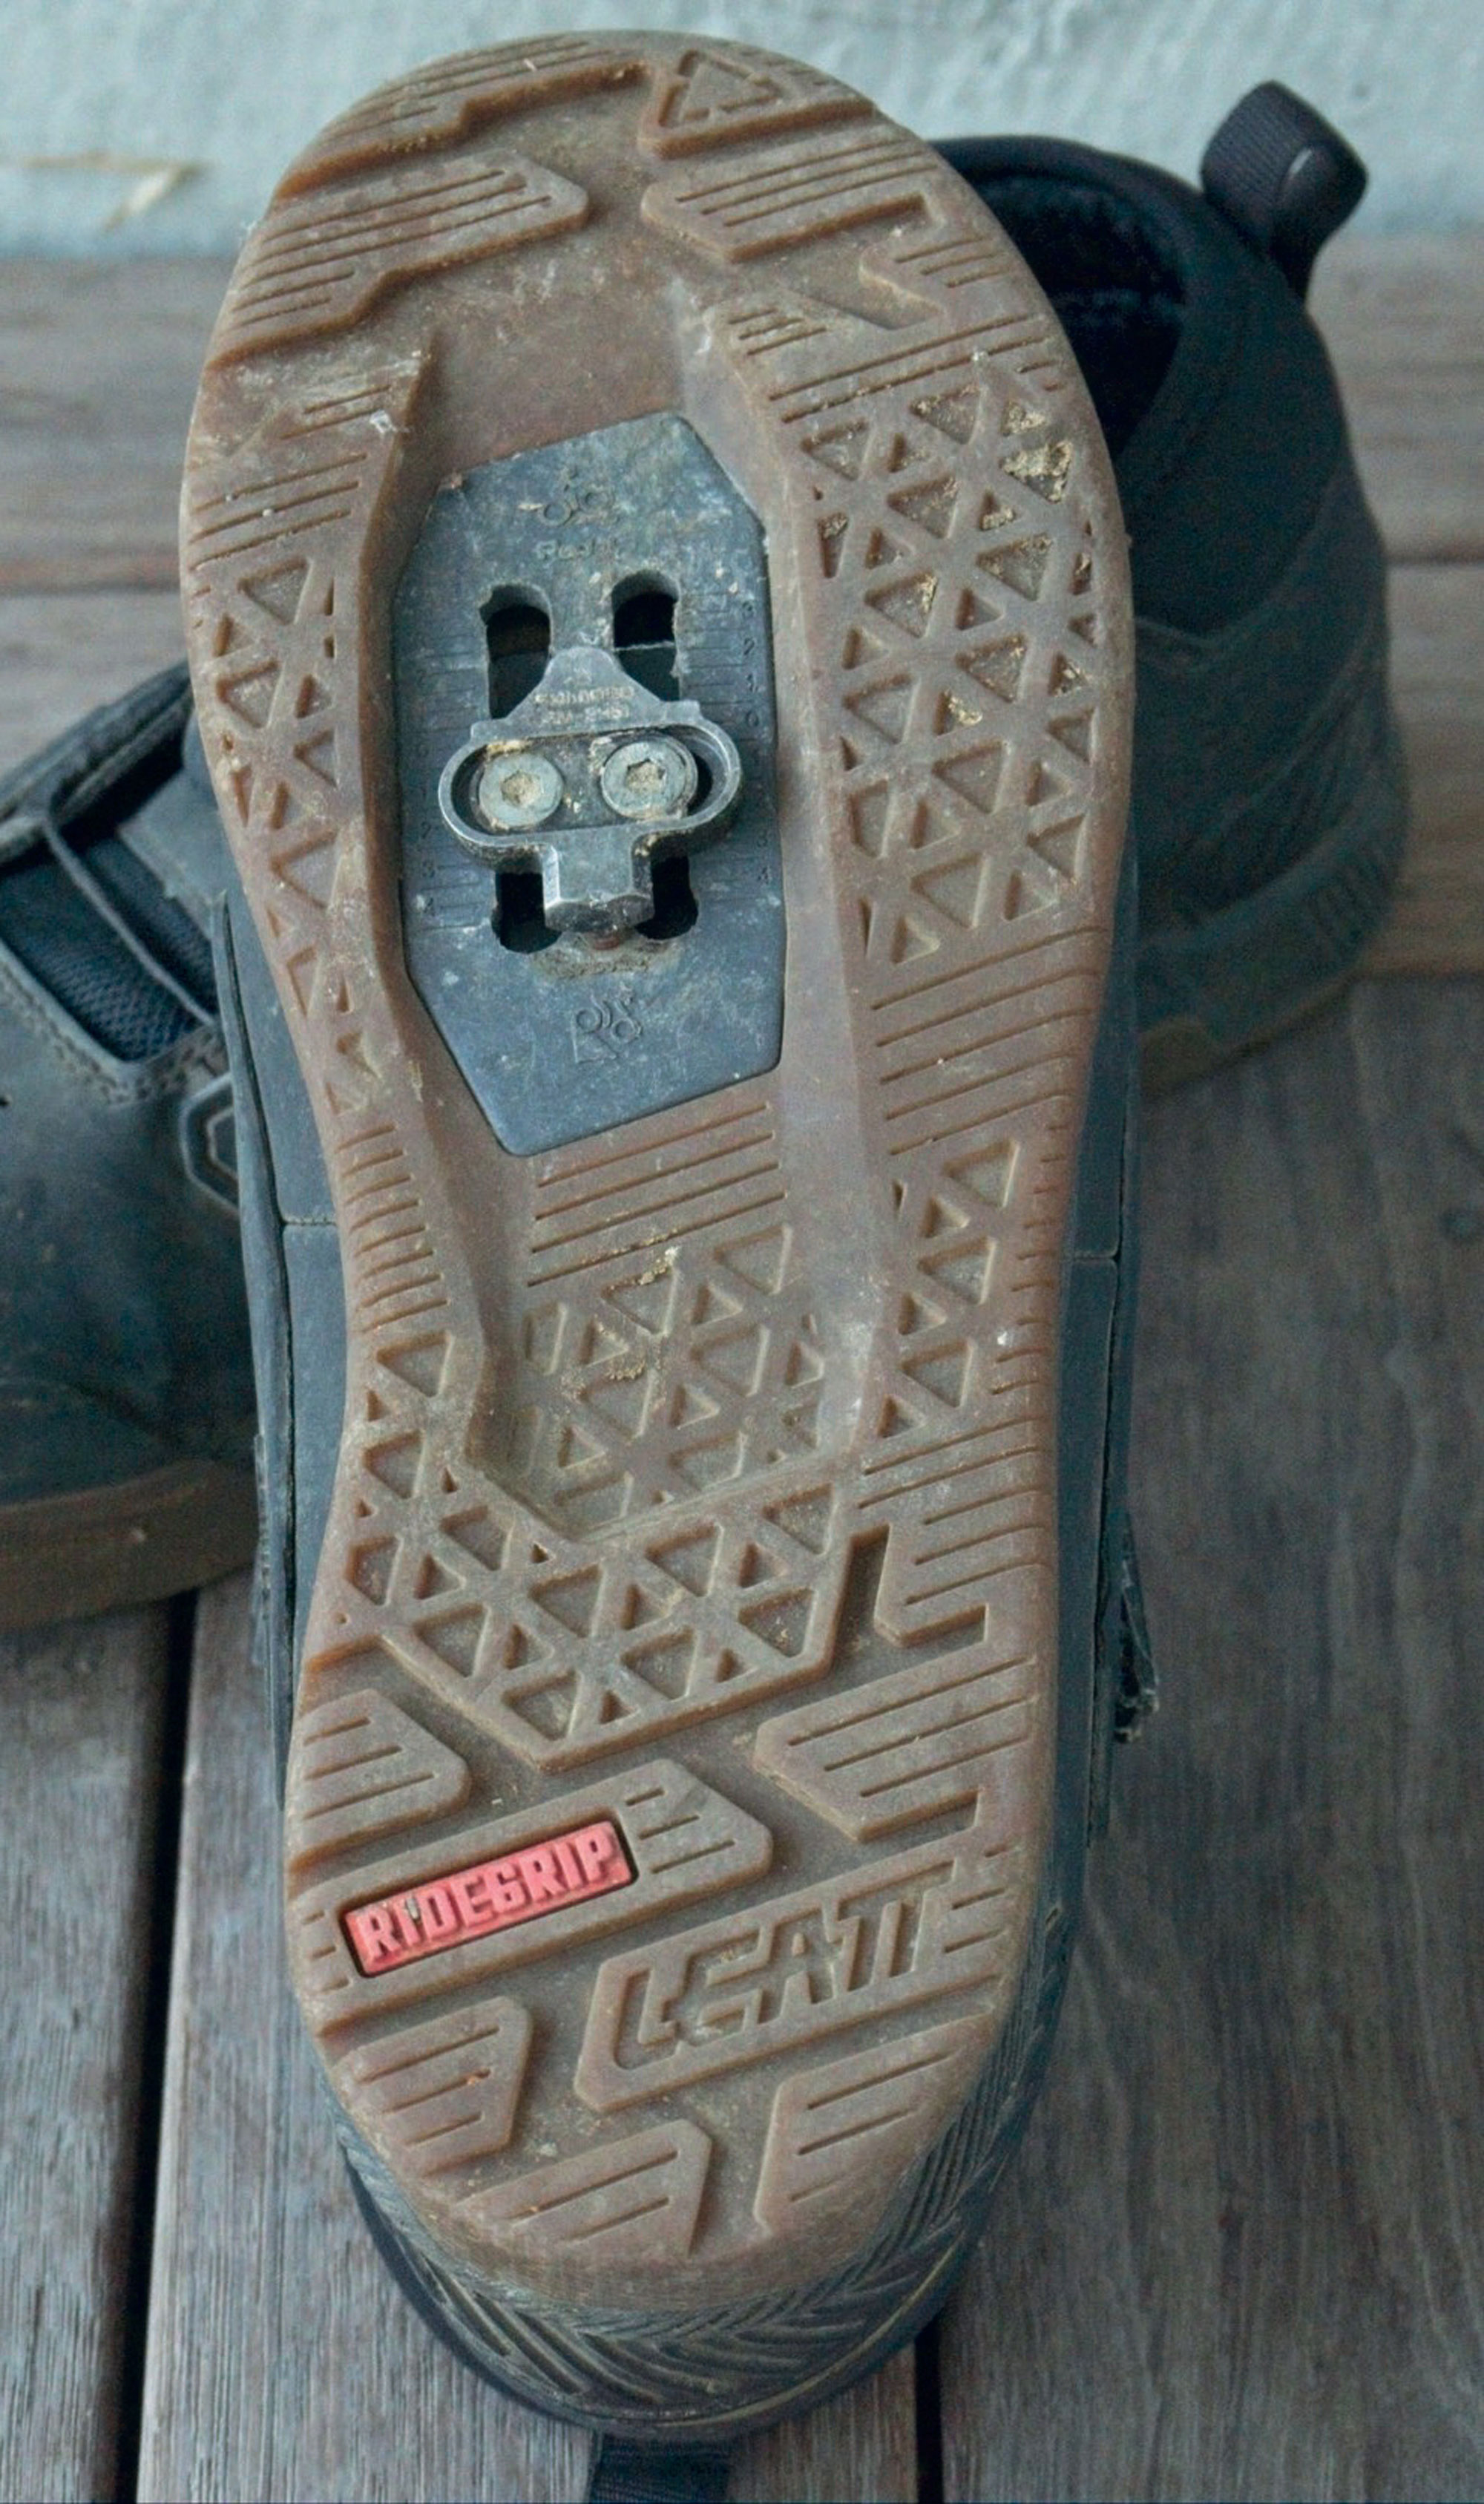
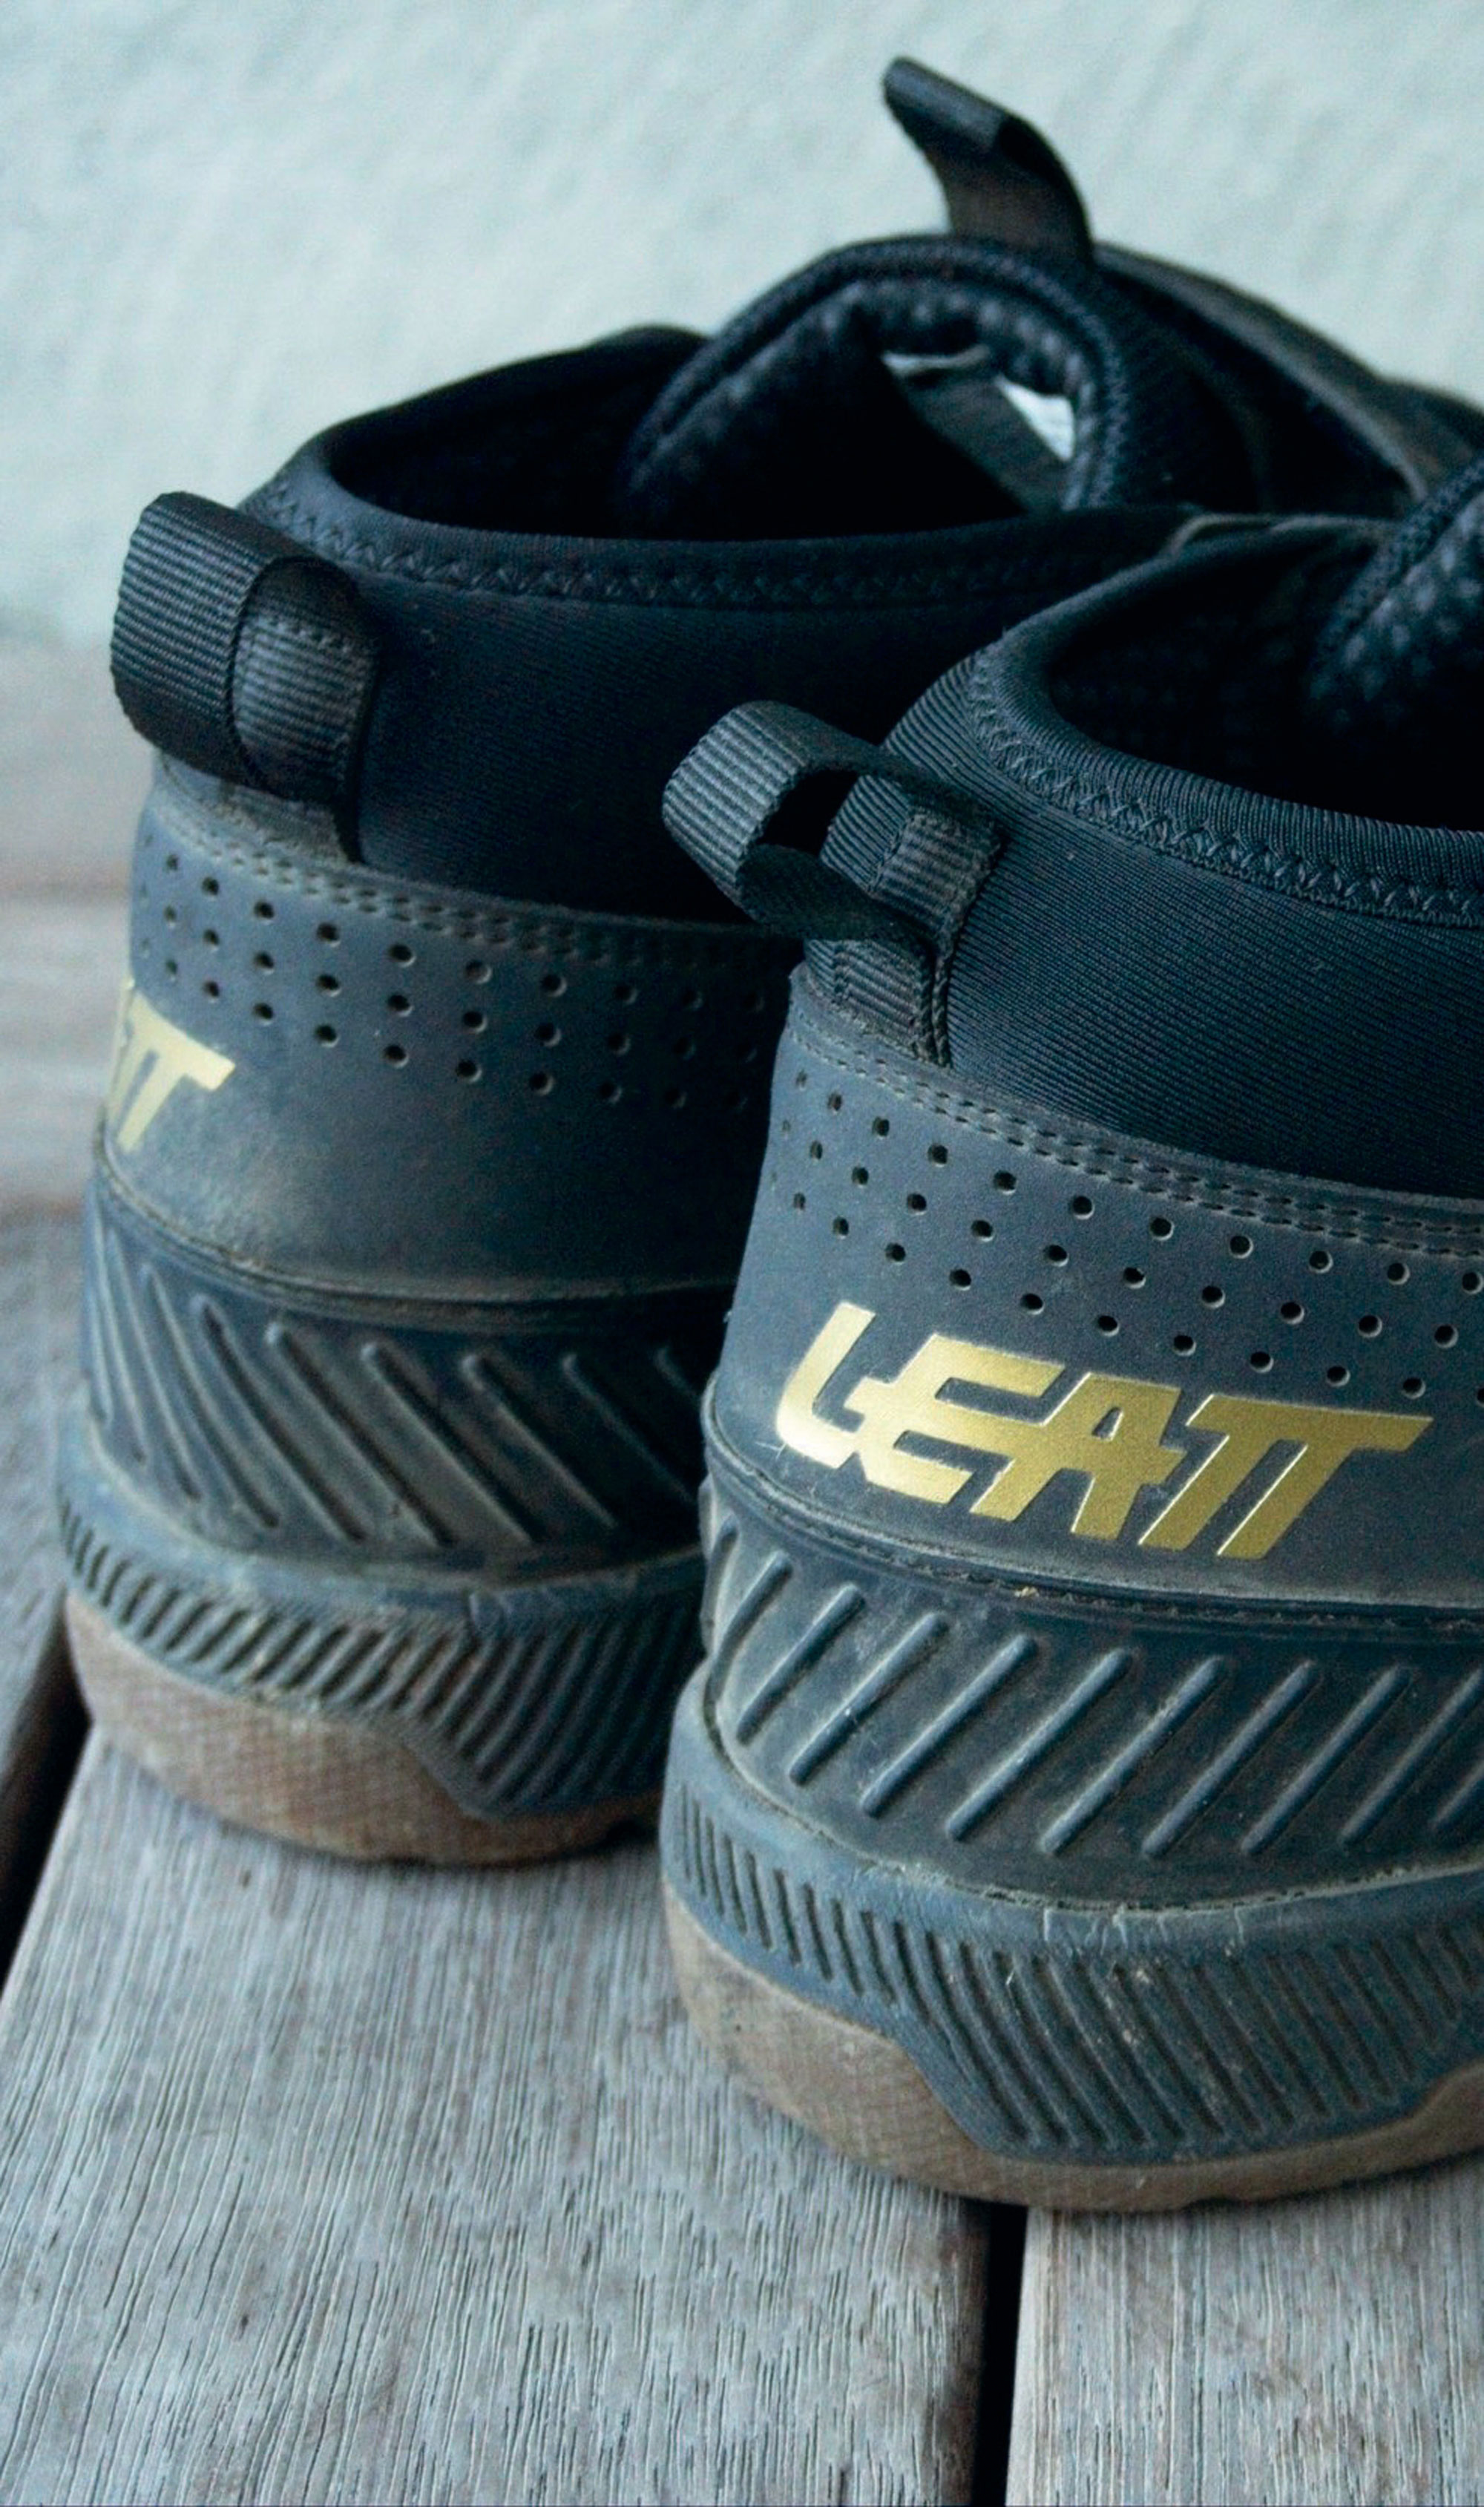
ProClip 4.0 Shoes
Fast-forward five years and I’m rolling deep in a fresh pair of Leatt ProClip 4.0 shoes to review. The 4.0 ProClip is a gravity-focused shoe that aims to protect – rather than be lightweight – without detracting from pedalling performance or power transfer.
There’s no missing the MOZ dial cable lacing system at the front and centre of the tongue. MOZ allows micro-adjust tension, with a pull to release its complete tension. The system makes for an easy-on, easy-off shoe. The dial is simple to use and has a decent rubberised outer edge, allowing it to be tensioned as tight as you’d ever need. I’ve encountered some dial styles that don’t have enough grip to grunt on them, but they work well. Over the front of the foot seems to make more sense than the all-too- common venerable dials on the side of shoes.
My only comment on the MOZ would be that it would be nice to see micro-adjust for tension release rather than the pull release that dumps all the tension in one go… but perhaps I’m being a little picky, and it’s by no means a deal breaker. A nice firm Velcro strap tensions the ankle area; there’s no stretch in the strap, so I can pull it nice and tight. I need to get it in just the right place to give perfect tension as there is no ‘give’ in the strap, meaning once it’s in place, it stays firm.
Visually, the shoe takes cues from the classic skate shoes of the 90s. The ProClip 4.0 doesn’t strike a slim silhouette; they’re a protective item, so we wouldn’t want a shoe that’s too slim. There’s no excess padding to absorb water; once wet, they dry pretty quickly compared to some. The outer is a mid-cut with a higher neoprene cuff to keep the loam and niggly pebbles from entering the shoe. It works great and has the nice touch of being slightly perforated to help with breathability. Heel and toe reinforcements offer some peace of mind that your tootsies should come out unscathed after those sketchy moments when you’re dabbing feet, or clipping a sniper root with your toes.
The gum sole is oh-so-hot right now. It features a familiar waffle pattern throughout most of its length, with strategically placed lugs under the toes and heel for walking grip. Thanks to the RideGrip rubber compound, the platform is surprisingly stable when not clipped in, assisted by a shallow concave section under the arch. A soft EVA midsole makes them comfy on foot while walking or hiking. The EVA does a noticeable job of absorbing chatter and vibrations, helping to reduce fatigue in the feet and lower legs. Traction for walking is reasonable in the dry, and the rubber is tacky enough to offer confidence, although scrambling around in the mud is as slippery as you’d expect; these are riding shoes, not hiking or “all-mountain” shoes. Pedalling stiffness is similar to the pair of Shimano GE-700s I recently reviewed, with a good medium flex for efficient pedalling and comfort for standing in lift queues or hiking jump lines. The 4.0 ProClip could take the win for having the most extended cleat channels in any shoe I’ve seen – there’s a serious amount of fore and aft adjustment, allowing for an almost mid-foot through to under-the-toe cleat mounting if you so desire. Gravity riders rejoice.
Size wise, I found these run on the larger size compared to most, so you may be able to downsize. As with almost all footwear: try before you buy.
Overall, the ProClip 4.0 is plenty comfortable and offers great protection for all eventualities. I like the mega cleat channels; it’s the first shoe I haven’t had to slam my cleat right back on. They aren’t the lightest or stiffest shoes out there but, if you’re more suited to cutting downhill laps, riding shuttles or just goofing off on the bike rather than pedalling significant distances, you can’t go wrong with these.
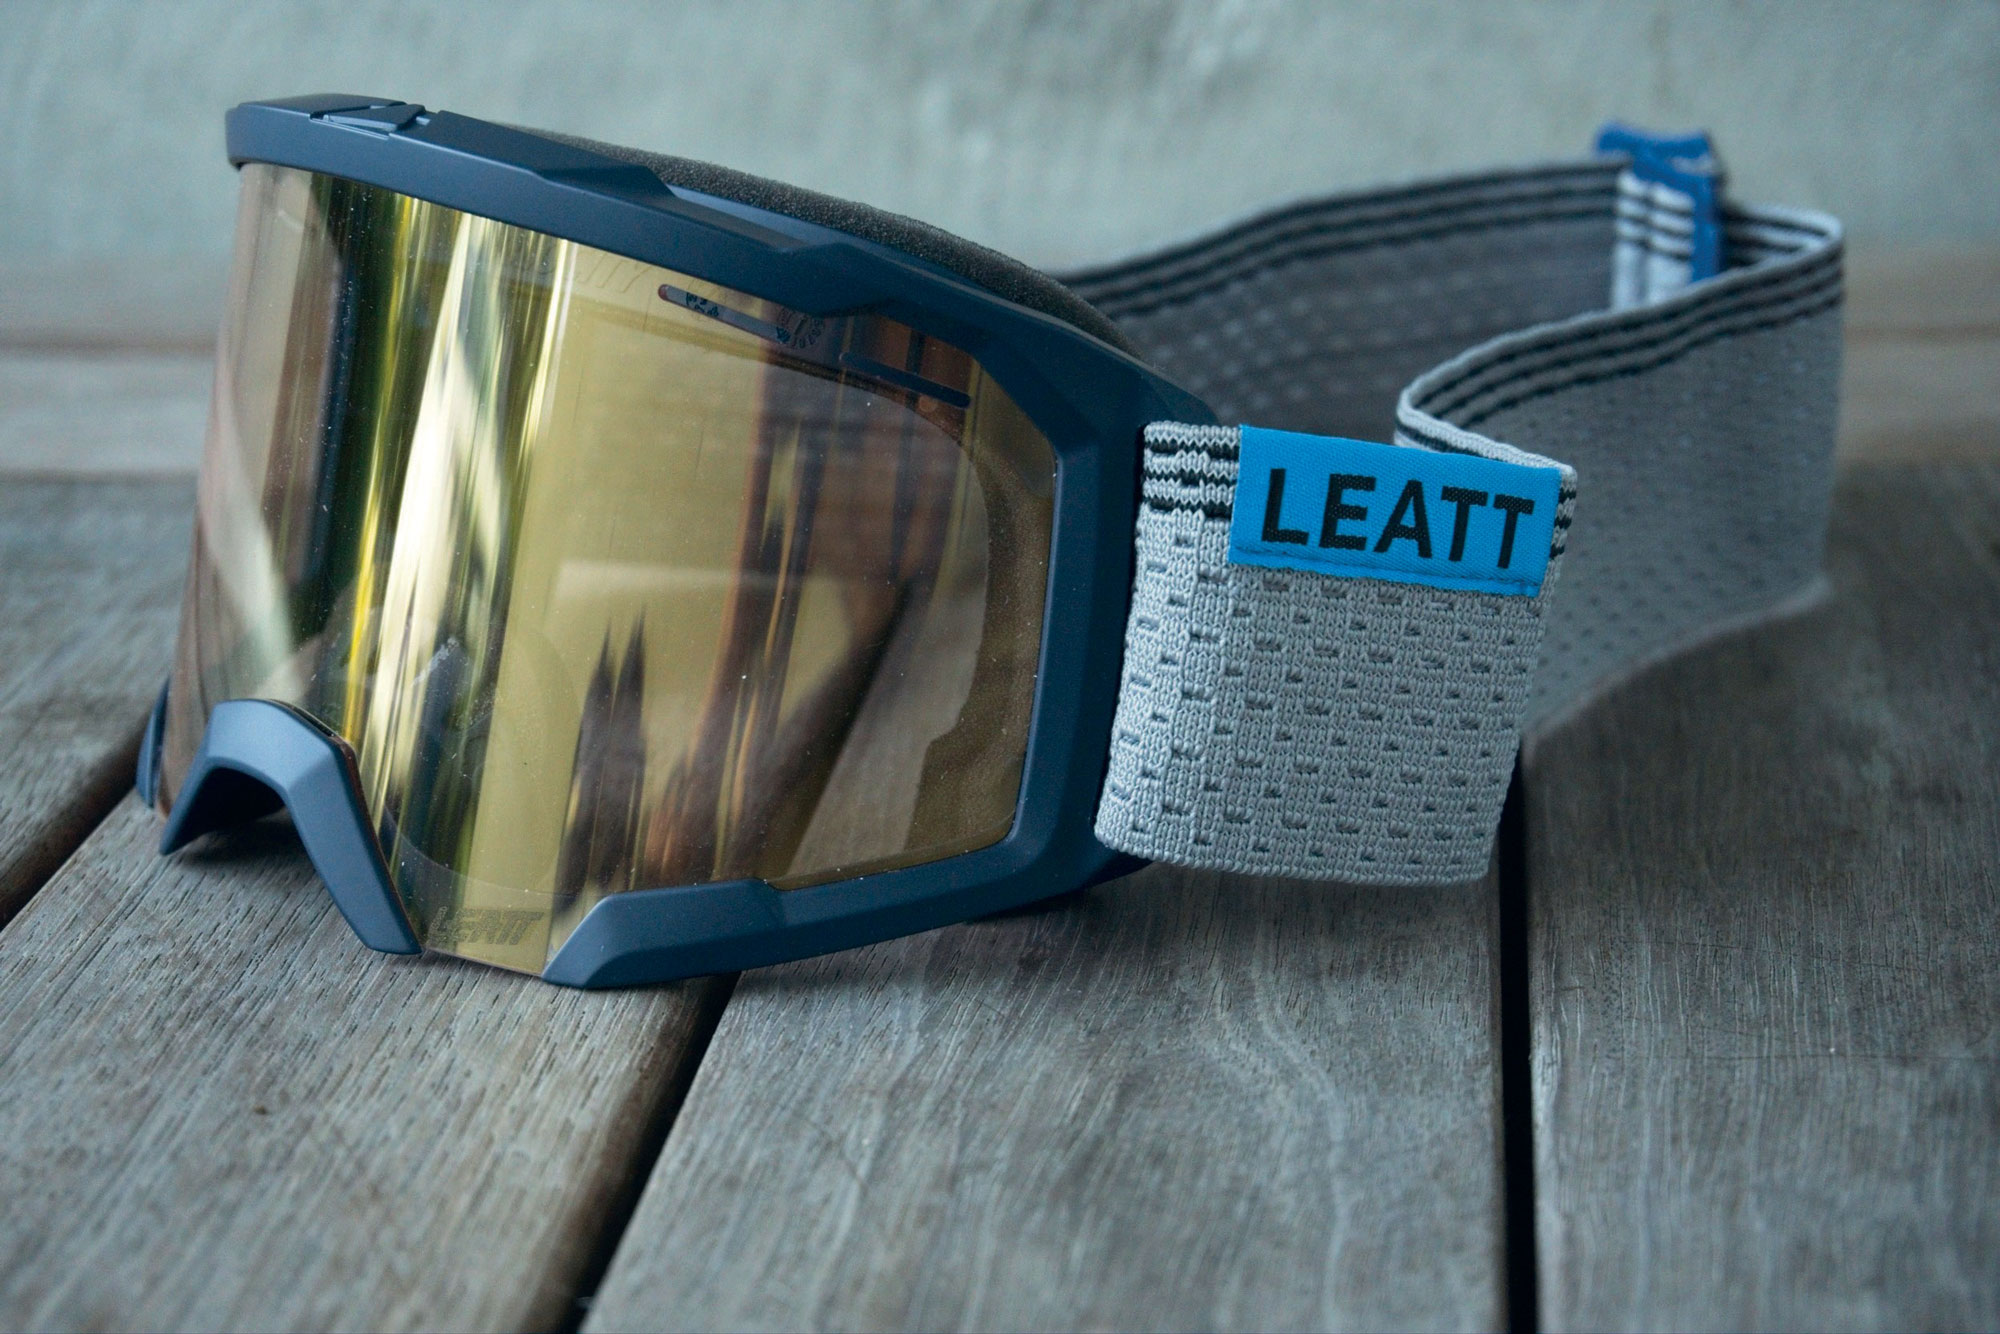
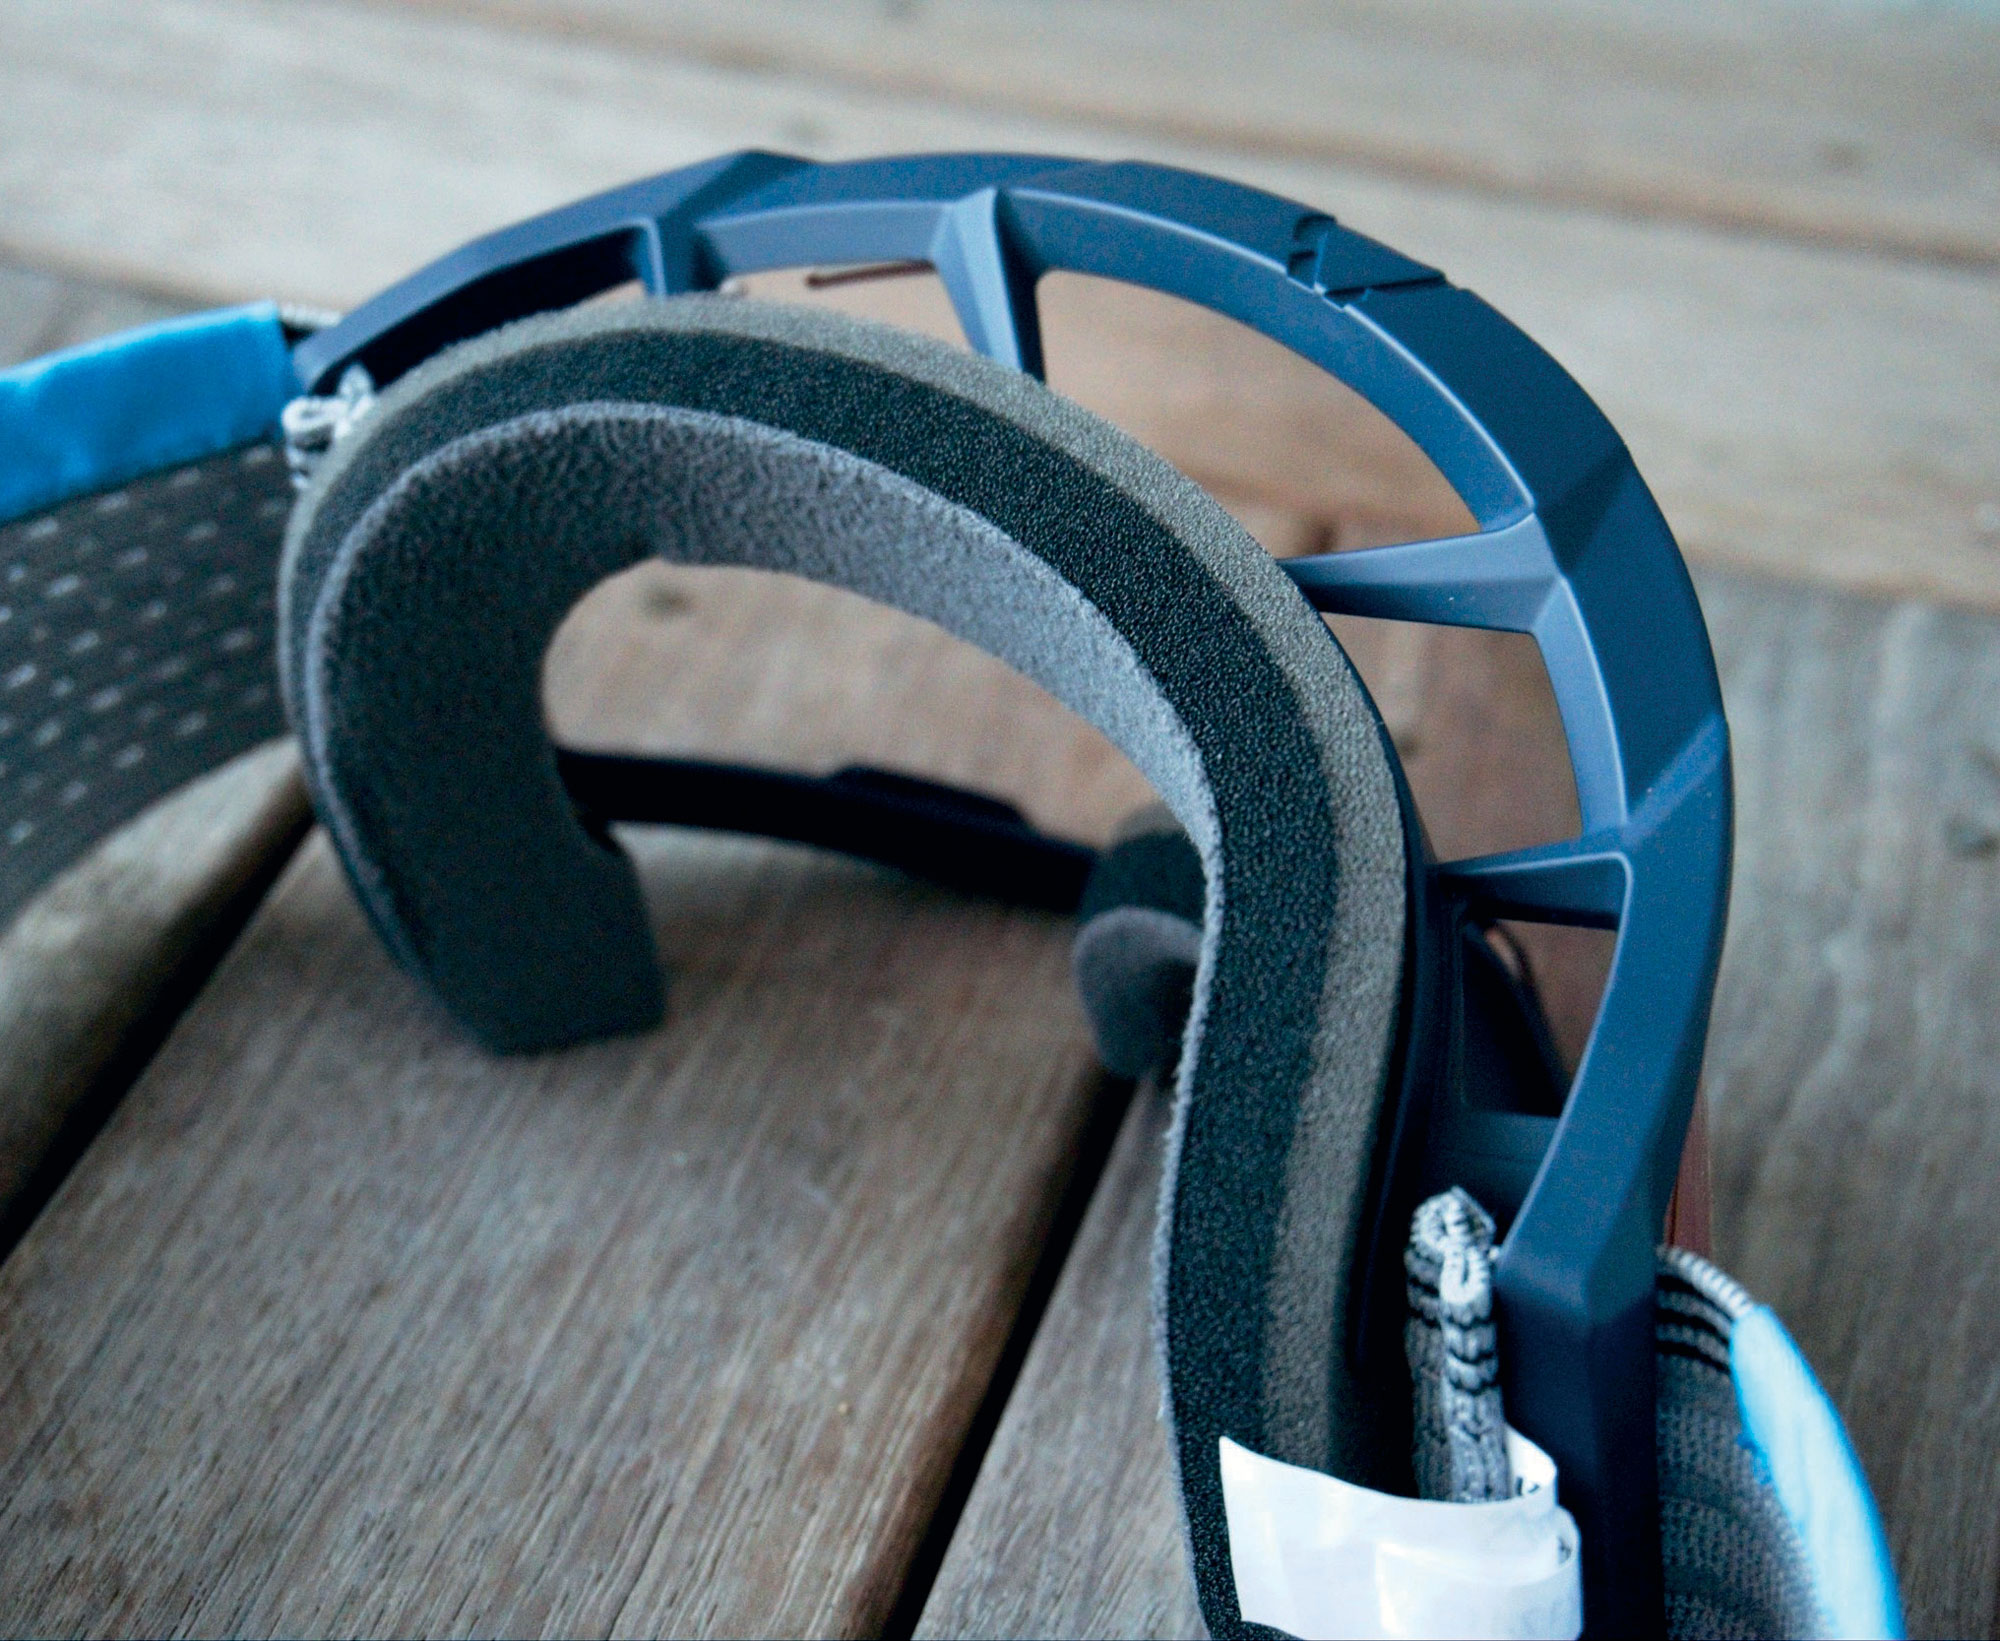
Velocity 4.0 MTB X-Flow Iriz Goggle
Ask anyone who’s gone over the bars and landed on their face if they think goggles are an essential part of their protective kit, and I’m confident you’ll get a resounding “yes”. Speaking from experience and a nice scar down my cheek, I’d agree. On a hot January day, while practising for a downhill race at Cardrona, in the early 2000s, I stopped on a corner to remove my goggles as they were saturated in sweat and stifling my face. As I rolled back onto the track my front wheel caught a rock, and I was pitched headfirst down a bank. A rock shot the gap in my full-face and got me just beneath my right eye, splitting my face open like a tomato. Fortunately, I sustained no lasting effects other than a scar, but the doctors determined the cut was millimetres from causing severe damage to my eye. The funny thing is, had I been wearing the Velocity 4.0 X-Flow goggles, I’d probably not have overheated and would have kept the goggles on rather than hanging them off my handlebars, and likely walked away from the crash with just a bruised ego and scratched goggles. Goggles or glasses? I’m not entirely sure what to call these. They have advantages similar to glasses but with the extra cushion and a more secure fit. They also have the protection and field of view of goggles, which is, to some degree, the best of both worlds. Mountain bike riders generally don’t see the same speeds as motocross riders, and there’s seldom debris or dust flung from a rider in front, so in the form of the 4.0 X-Flow, the traditional moto goggle has been tweaked to suit mountain biker’s needs.
The use case for wearing goggles has become much broader with the advent of the Velocity X-Flow series from Leatt, which has ruled out – or at least minimised – the downsides of wearing regular goggles. The minor trade-off of having open areas in the frame is that debris could make it into the goggle cavity. I haven’t experienced this, but I imagine it could happen, particularly in the wet, when worn with an open-face helmet.
The fit is similar to that of a good pair of goggles, with a twist. Leatt designers strategically removed sections of the foam padding, allowing for a vast amount of breathability from the top and bottom of the frame. They also nailed the look by keeping them looking like a pair of goggles, rather than the more polarising hybrid goggles/glasses style of some competitors.
The Rideviz lens features permanent anti-fog and scratch-resistant coatings and meets the ‘Military Ballistic Impact Standard (MIL-DTL- 43511D)’ – so the rock that pierced my face wouldn’t stand a chance against this lens! The Iriz tint strikes the sweet spot between being too dark and too light; I find it spot on for almost all conditions, taking the harshness out of the light on open trails but not dark enough to dull the scene too much when in the bush.
My first outing with these on my face was a jaunt aboard an eBike on a muggy, blue sky spring day, not the usual conditions for me to reach for a pair of goggles. The increased airflow over a regular goggle was immediately noticeable. My face didn’t feel sealed in a hot box, and air flowed between the lens and my face, controlling the temperature. The field of view is mega and no different to a quality set of goggles.
The top foam absorbs sweat, which is excellent until it becomes saturated; at that point, I occasionally experience a drip of sweat down the inside of the lens. On a stinking hot day, the X-Flows are still warmer than sunglasses, but not by much. Since the lens sits further from the face than on glasses, they collect less sweat on the lens, and there’s a significant increase in protection, too. The mesh strap is a nice touch, theoretically allowing some breeze to pass through into the helmet vents—a hard one to quantify, but I see no reason it wouldn’t be the case.
I’ve become a fan of these goggles. I appreciate that they resemble traditional goggles, and Leatt has nailed it regarding breathability. I now wear them in situations or rides where I wouldn’t have even considered it with regular goggles—thumbs up.
Glove MTB 2.0 X-Flow Stealth
Is it me, or have gloves become a consumable, throwaway item? Back in the early 2000s, a pair of gloves would literally last me seasons, and my riding volume was probably twice what it is now. Since then, quality gloves seem more and more difficult to find, particularly if you’re chasing something lightweight and breathable that will last more than a summer. The stitching, particularly on the fingers, is usually the first to go, and there are only so many times I want to restitch and bodge them to be usable. I didn’t get too excited when the Leatt 2.0 X-Flow gloves arrived for review last year.
I’m pretty finicky about what gloves I’m comfortable in. A minimal palm is key, and I find the fabric tension across the back of my hand needs to be just right—not too tight to restrict movement, but with enough support to keep them snug and avoid bunching. More importantly, they must help keep the palm taut and in place. See what I mean? Finicky.
With a stretch fit and slip-on design, these take a little technique and patience to put on, but once on, the medium size fits my medium-sized hands perfectly; snug throughout with no firm points or obvious pressure points. Fingers are explicitly tailored to minimise bunching when wrapped around a handlebar, and are stitched with a specific thread to aid longevity. The main body fabric is a Leatt X-Flow material, a 4-way stretch mesh that helps with breathability and fit. Knuckles and pinky fingers get an extra layer of thin rubber material for added protection and reinforcement, adding negligible weight or bulk. The backs of the thumbs have a terry cloth wipe.
The palm is made from a single piece of Leatt’s NanoGrip material. It’s nice and thin and has a slightly furry, almost cat-paw-like surface, which gives superior grip in all conditions. The handlebar feel is exceptional, possibly the best of any gloves I’ve worn. Some wizardry in the fabric means the fingers are touchscreen compatible, which is a bonus whether you’re filming ‘shreddits’ with your mates or calling for help after a crash.
After about four months of wearing these gloves, I’m pretty impressed, and they’ve become my go- to. The X-Flow fabric has kept its shape and firm stretch, and all seams are still intact. Although the palm has some stains, it is holding up well with no signs of wear. A resounding clap for Leatt for continuing to make gear that works well and lasts the distance. There is no fast fashion here.
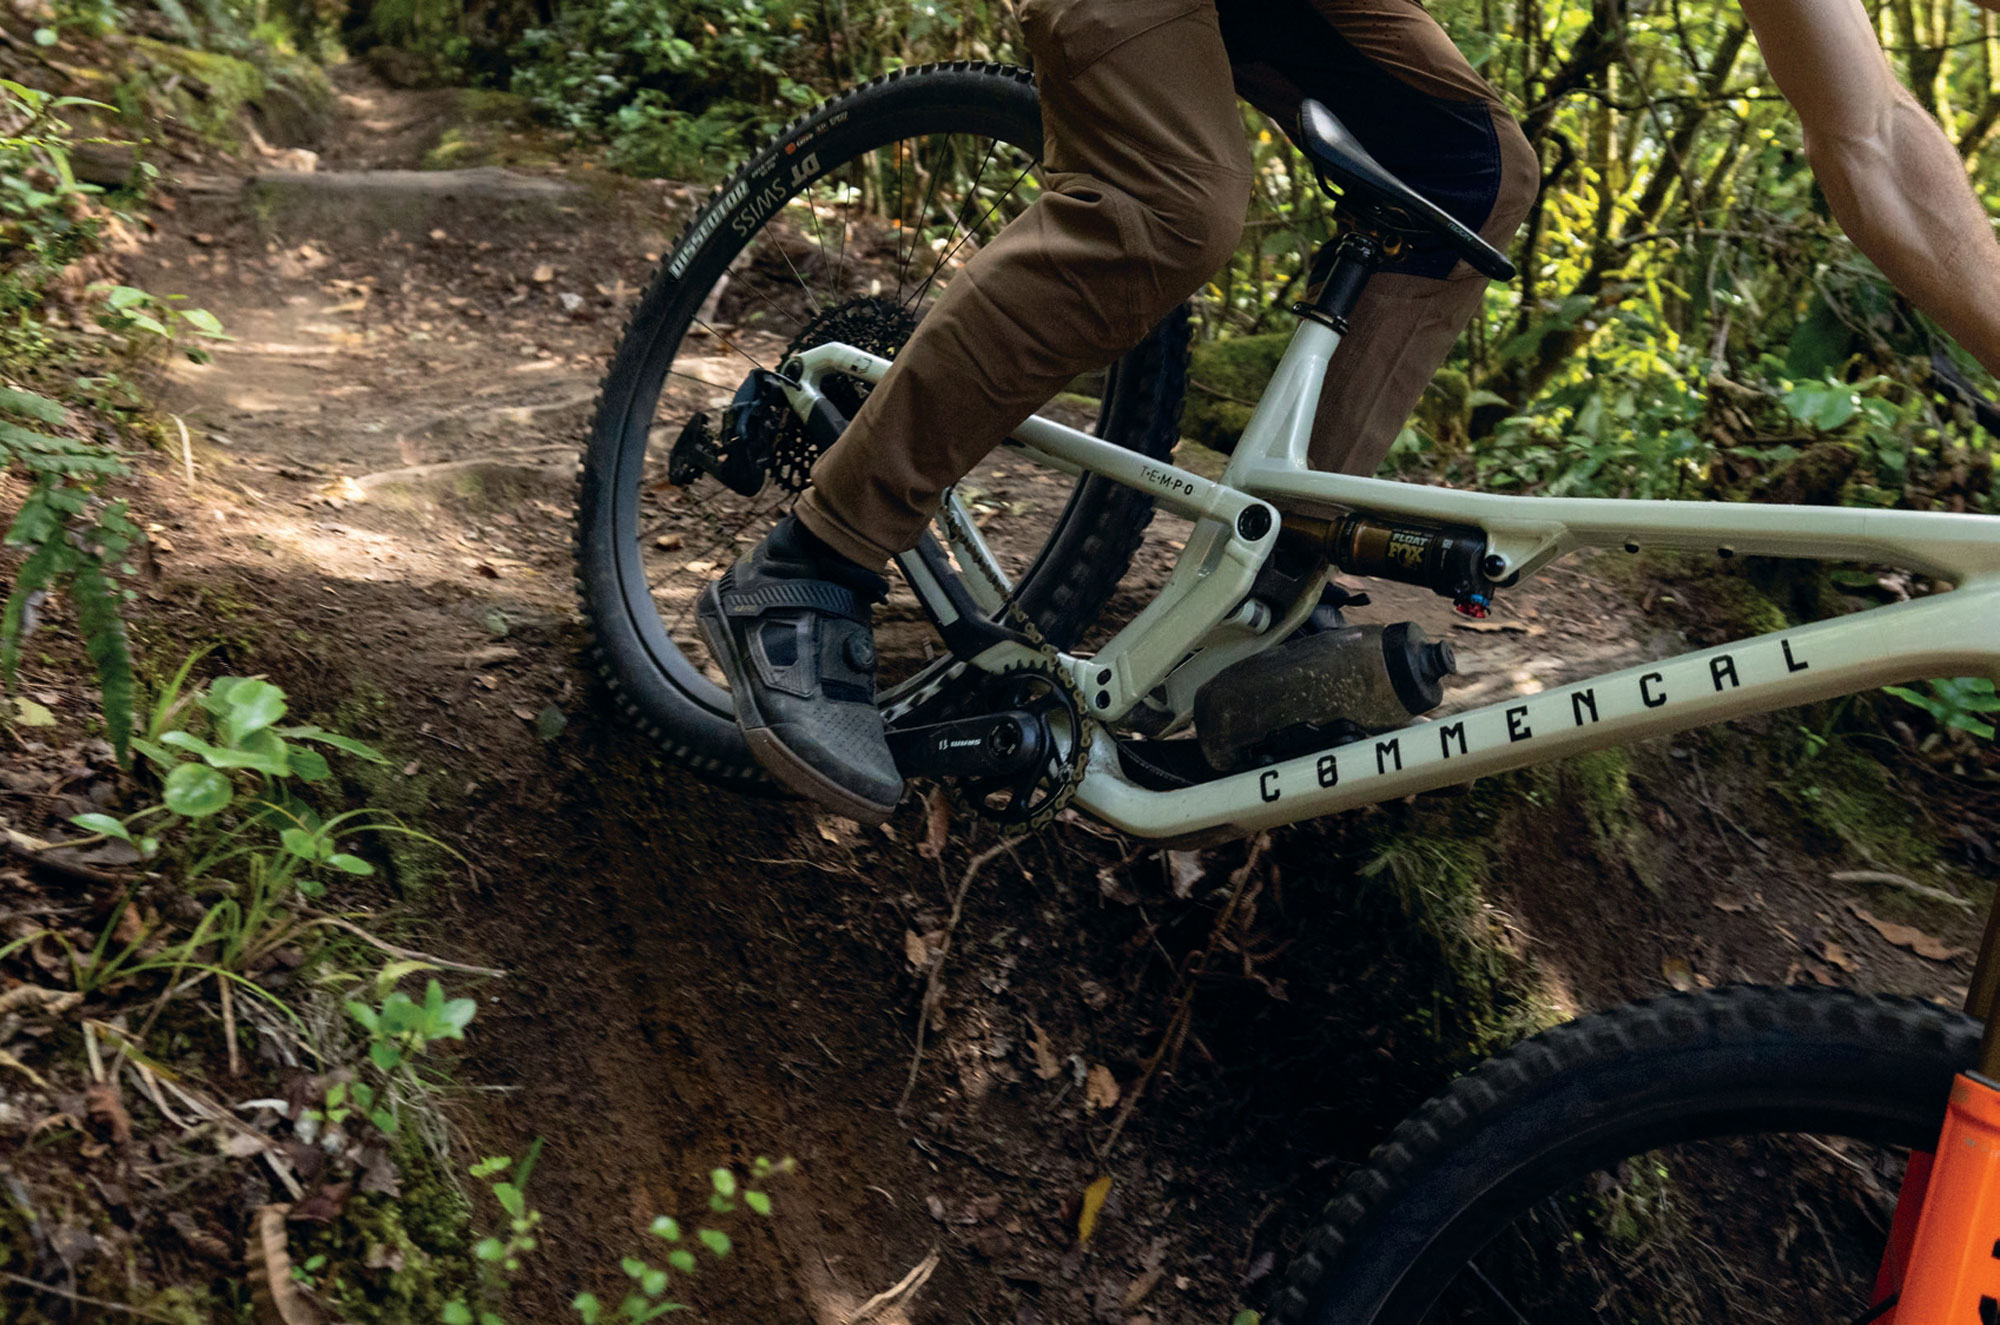
Commencal T.E.M.P.O. Signature
Words Lester Perry
Images Jamie Fox
RRP $9,200
Distributor Commencal NZ
Imagine this: The year is 2020. On a wall in the Commencal design office, there’s a mood board for a bike they’re developing. It’s covered in images torn from magazines and printed by the office laser printer, the products of quick-fingered Google image searches.
Amongst the chaotic collage of images, there’s a jet boat, a compass, a Pyrenean Ibex, a steam-roller with a big red X marked across it, one of those kid’s playground rides with a seat mounted atop a big spring, a metronome with a green tick scrawled over it, and a picture of Eli Tomac mid-whip over a motocross finish jump. Each image highlights a trait of the TEMPO—for example, the snappy handling of a jet boat and the climbing prowess of the Ibex. You get the idea.
Rumours swirled about an upcoming release after a prototype frame was teased online. With a distinctly lightweight XC build and ridden by none other than Pauline Ferrand-Prévot, would the new bike be Commencal’s entry into XC World Cup racing, piloted by PFP herself? Come 20th November 2022, speculation was put to rest as the bike officially broke cover in its final guise, under Hugo Frixtalon, in what is still one of the best bike launch videos I’ve ever seen. A short travel trail bike that would help define the category and embody all the inspiration from that design studio mood board.
Over the last five years or so, there’s been somewhat of an evolution in mountain bike geometry. Before this, if someone was searching for a bike to push their riding—and was into technical, aggressive trails—then a 150-160mm frame was the way to go. This was a necessity, to find the geometry that would be optimal to offer the rider confidence and control when tackling whatever trail lay before them. Nowadays, there’s been a pronounced shift in how designers think about geometry, and we’re finding bikes with travel in the 120-130mm region with geometry that is more suited to how most people want to ride. These bikes sit alongside those with similar travel numbers, but more cross-country-targeted geometry, on bike shop floors—an interesting dichotomy that not so long ago wasn’t the case. Rather than lugging around suspension travel (and associated weight), riders can now choose the geometry they want, coupled with their preferred suspension travel: a ‘Goldilocks porridge’ bike that is focussed on precisely what they want, rather than compromising on geometry or suspension travel.
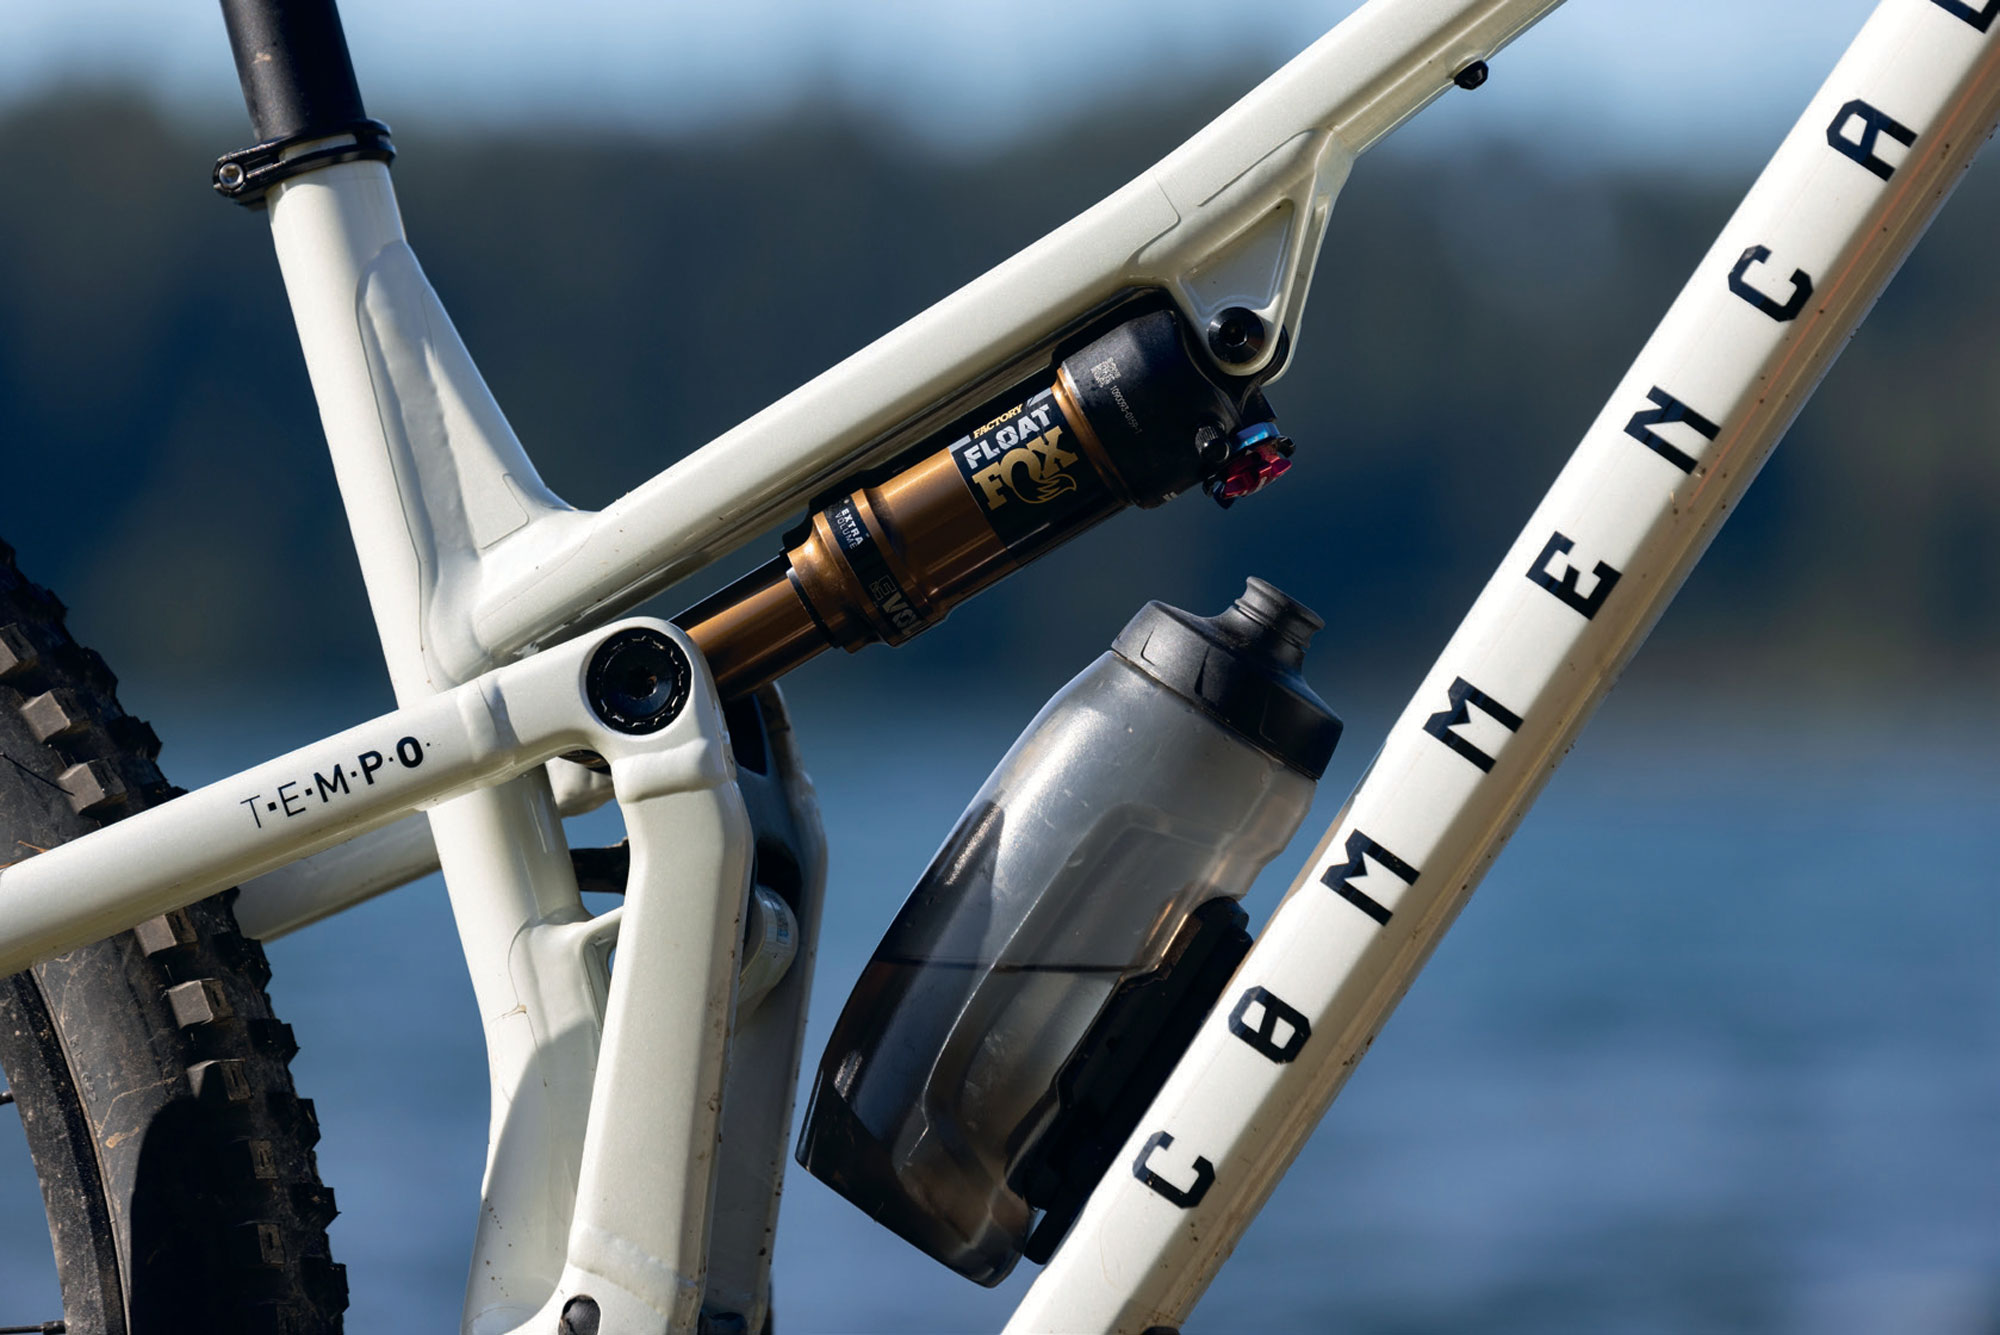
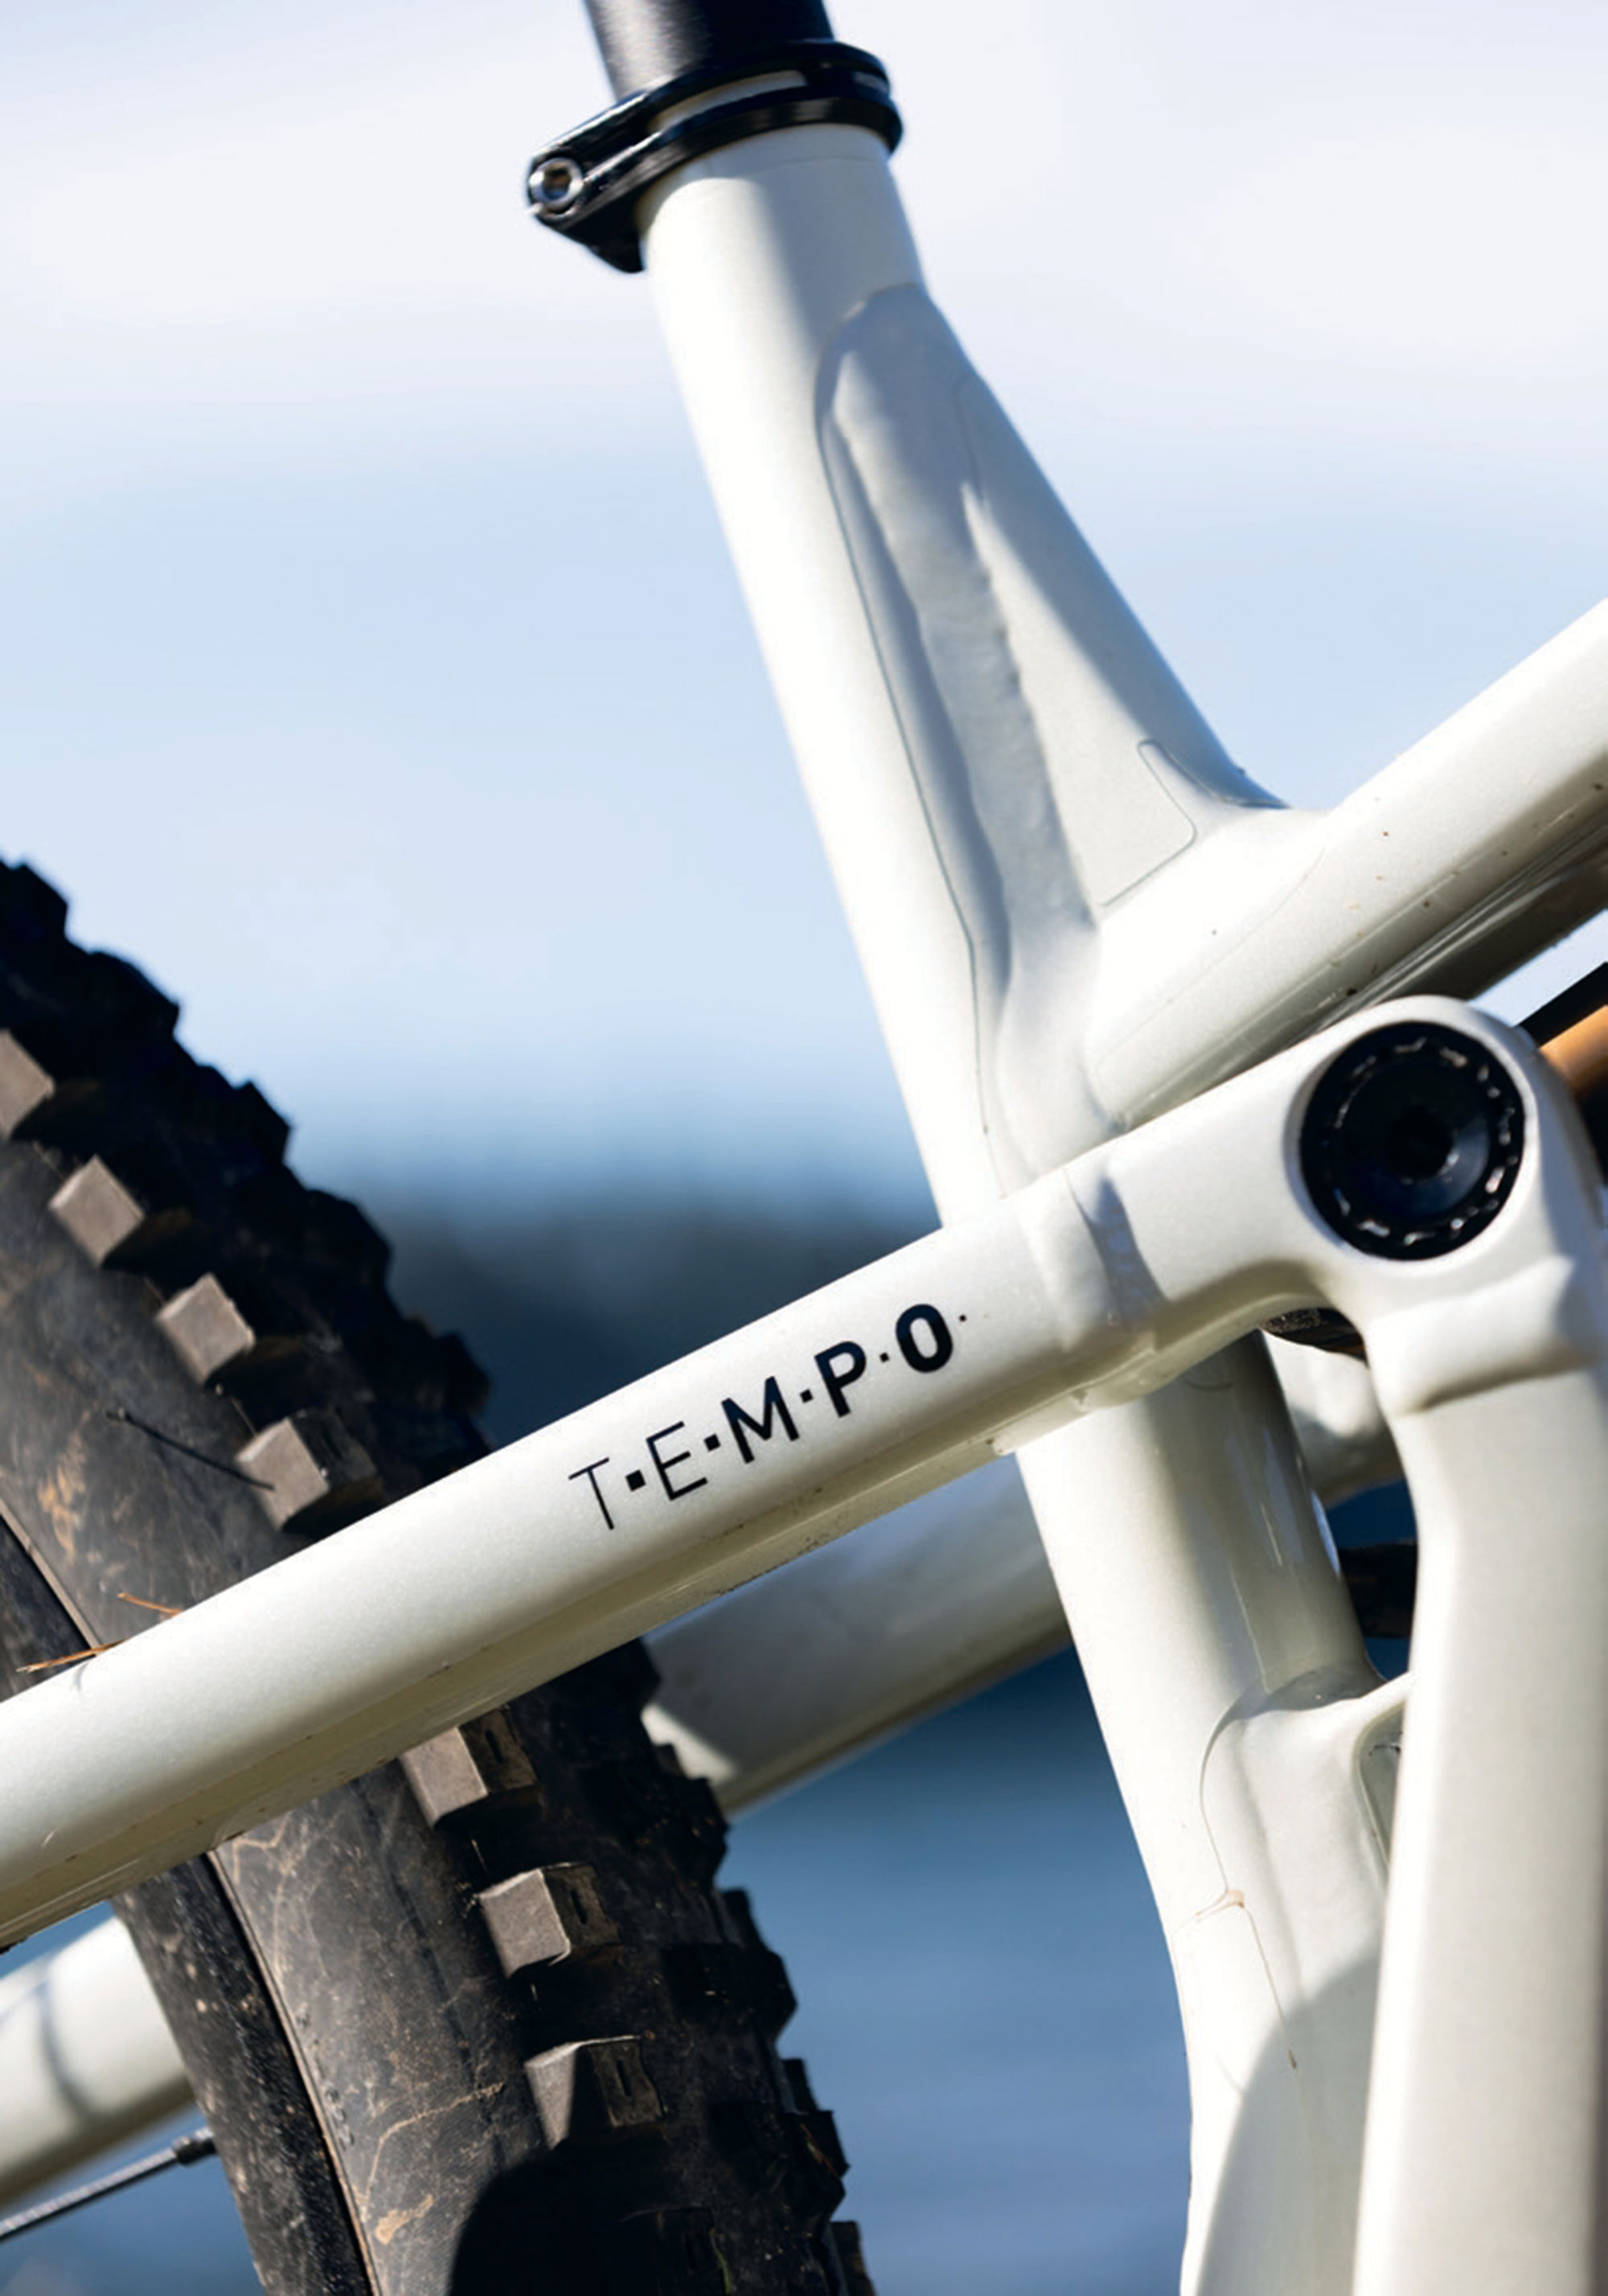
Enter the Commencal TEMPO: A big bike personality in a small travel package. Designed for pedalling efficiency while retaining the ability to tackle whatever trail is thrown at it. The bike’s metronome graphic points to a key aspect of the bike: pedalling—like a metronome, tapping out a cadence and covering kilometres. Its geometry speaks to its gravity roots.
There’s a lot to like about the Tempo.
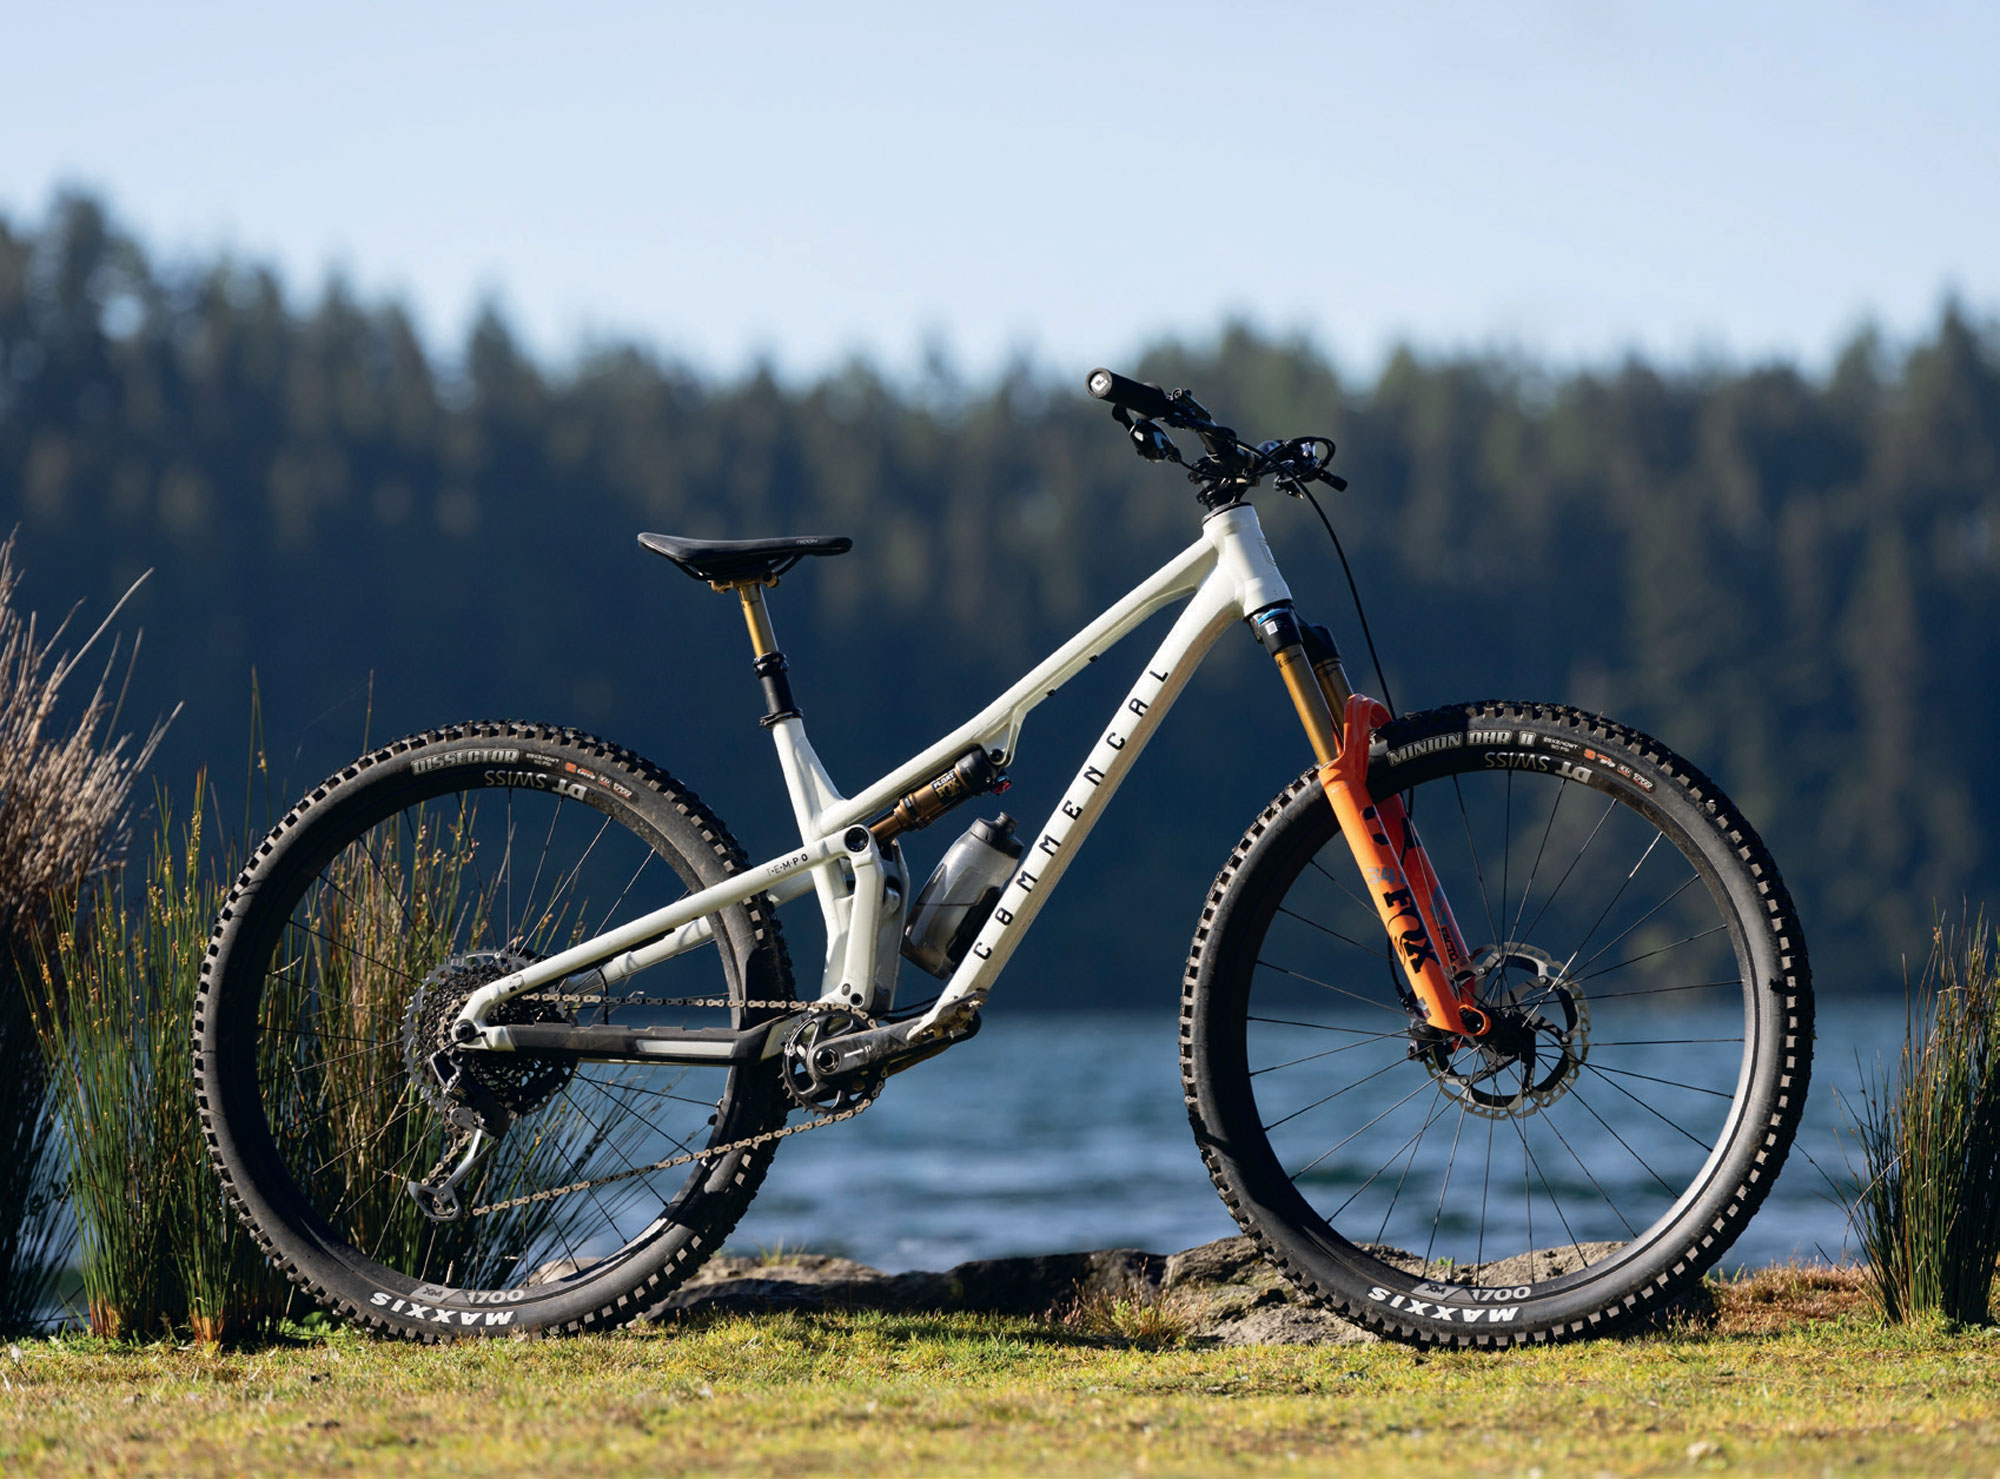
Frameset
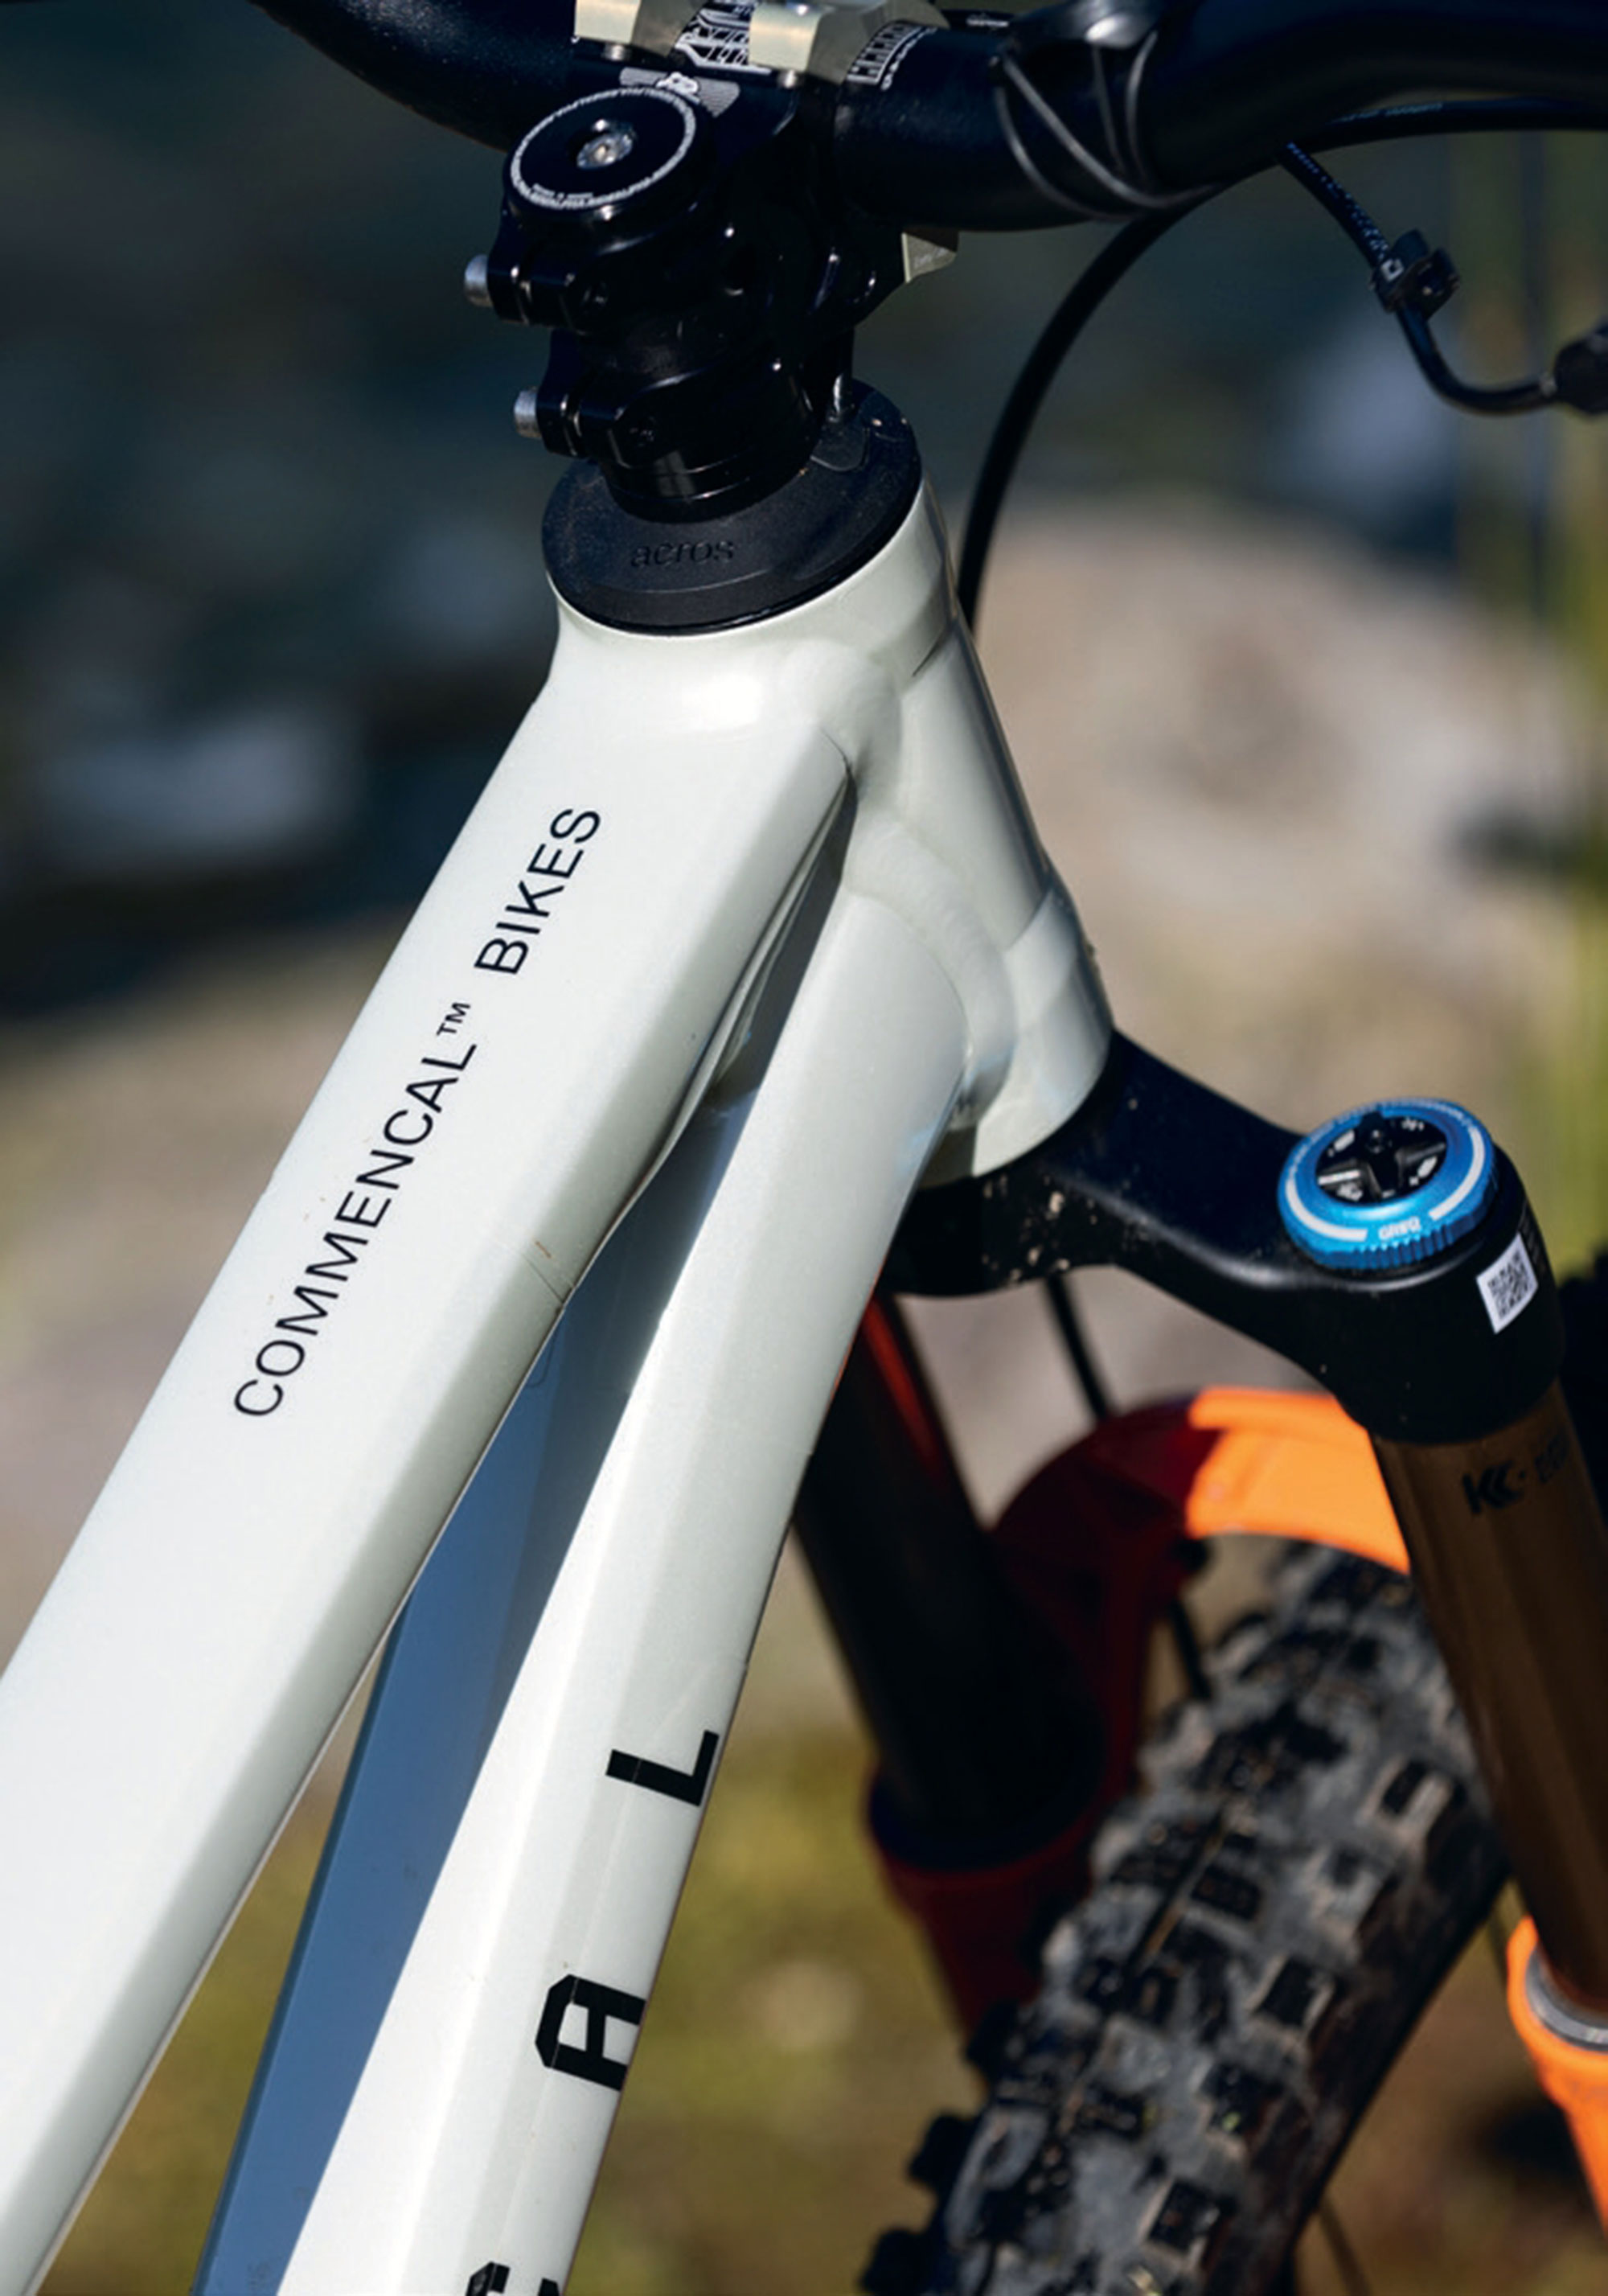
The Tempo is based around 125mm of rear travel and a 140mm fork, aiming squarely at the short travel trail bike segment. Offered only in Aluminium, the frame stays true to Commencal’s commitment to avoid using carbon fibre, due to concern about its environmental impact.
The Tempo shares the sleek look of the Meta V5. The frame’s lines flow seamlessly from the headtube down to the rear stays. The low-slung top tube gives ample room for a rider to move around the chassis and helps keep the centre of gravity low.
Designers borrowed the Virtual Contact System (VCS) suspension linkage from the Tempo’s big brother, the Meta V5, which I reviewed in a previous issue. While maintaining the same overall function, the VCS is simplified slightly to suit the Tempo’s smaller suspension package. This virtual pivot design suits the TEMPO to a tee, allowing a reasonably supple start to the stroke, while retaining satisfactory pedalling efficiency.
Linkage pivots are all ‘through axle’ style with an expander cap to help keep them tight. They performed admirably and not once did I need to tighten any pivot point. Bearings are all manufactured by ‘Enduro,’ so I’d expect these to last longer than many OEM options. Three months in, I haven’t had any cause for concern, although most of my riding has been in the dry over summer, so time will tell.
At the end of the chainstay is the now obligatory UDH derailleur hangar, making an upgrade to a T-type drivetrain a no-brainer; a worthy upgrade for sure to get rid of one of those headset-routed cables!
There’s no funky, proprietary stuff happening with the Tempo, we find Boost 148mm spacing in the rear, a 31.6mm seatpost, and a BB92 press-fit bottom bracket—all bog standard, in a good way.
Rubber bumpers across the drive side seatstay, chainstay, and on the lower downtube, help mute unwanted noise and protect the frame from nasty chain chips or debris. Just like the Meta V5, the Tempo is surprisingly quiet on the trail, thanks in part to these bumpers.
Geometry
The geometry numbers on the Tempo are modern but not extreme, striking a comfy middle ground between an Enduro bike and a cross country bike. The ‘medium’ size I rode has a middle-of-the-road 450mm reach, a category-topping 628.5mm stack, and an almost vanilla 435mm chainstay (440mm on L and XL bikes), while the seat tube angle is “better than most” at 76.6 degrees steep. The head angle is “steeper than some” at 65.5 degrees, but quite normal for a bike in this travel bracket. All that is to say; much like the Meta V5, the Tempo has a very balanced feel, with rider weight feeling like it sits slightly further back than on the Meta V5 (which has a 10mm longer reach in size medium).
Cockpit
A complete Renthal cockpit features a ‘Fatbar Lite’ 31.8-mm handlebar that is 760mm wide and has 30mm of rise. It’s clamped in place by a Renthal Apex 40mm-long stem. This setup has a nice balance of weight, performance and value, and the fact that they specified a 31.8mm clamp bar gets a big tick in my book. Not to mention my favourite grip: the ODI Longneck.
Wheels & Tyres
The party bus rolls on a set of DT Swiss XM 1700 rims on DT 350 hubs. As I’ve mentioned in other reviews, I’m a big fan of DT Swiss wheels—and these never skipped a beat. They’re not the lightest, at over 1800 grams, but given the price point and intended use, at least a rider won’t need to give their wheels a second thought as they are burly enough to handle some heavy hits. Their 30mm internal width pairs perfectly with the specced Maxxis EXO casing tyres. Up the front, the DHR II 29” x 2.4” WT with soft 3C MaxxGrip rubber compound is a savvy choice, offering exceptional grip across most scenarios. It rolls nicely, considering the level of grip and soft compound, and is an asset to the Tempo when trails get spicy. The Dissector 29” x 2.4” WT 3C MaxxTerra on the rear rolls well and has enough grip to keep things under control in most scenarios. It’s not a fantastic tyre, but it does suit general ‘trail bike’ type riding – although, if I were riding more on loose, rocky trails, I’d be reaching for something with a bit more bite.
Brakes
A tried-and-true pair of Shimano XT M8100 two-piston brakes help slow the Tempo down and, although they’ve proved reliable, the product managers missed a trick by not speccing a pair of lower-end—but more powerful—SLX 4-pot brakes. The M8100 brakes are okay on short descents, thanks to the MT905 Ice-Tech Freeza rotors, but they suffer on long descents, and I found myself having to haul on the levers more than I’d like. Simply changing to some 4-piston callipers would make a huge difference.
Shock
The Fox Float Factory, in its stock format, suited me perfectly, and no tweaking was required from Commencal’s initial recommendations. There’s a lockout lever in easy reach while riding and I used this a lot while climbing on gravel roads or smooth trails. A dial also offers two additional compression levels when the shock is ‘open’. I played a bit with these but found the bike’s overall feel much nicer in the lowest setting. It certainly pedalled better in the second or third setting than when fully open, but the added compression stunted the feel and was only a bonus on smooth trails where I’d throw the lockout anyway.
Fork
Front suspension is handled by a Fox 34 Factory with 140mm travel. There’s all the adjustment one would want, with low and high-speed rebound and compression dials. Interestingly, the spec sheet listed the fork as having a 51mm offset, something that I thought had gone away almost entirely these days in favour of 44mm versions. I initially thought maybe it was a typo but, sure enough, the bike turned up with the 51mm offset fork. Perhaps smaller travel bikes suit the larger offset? Whatever the case, I never gave it a second thought. Once I was out on the trail, it turned out that a bike still handles fine without the much-hyped 44mm offset. Who would have thought?! (I say this in jest!)
I was stoked on this fork; anything less would hamper the bike’s overall performance, and the 34 took everything I could throw at it. I’m 80kg, so not a lightweight, but I didn’t notice any untoward flex and, regardless of the trail, the fork was controlled and felt well damped. They say something works well if you never have to give it any thought, and this fork was proof of that. I backed off one click of highspeed rebound from recommended and called it good.
Drivetrain
The combination of a SRAM GX Eagle derailleur, shifter, cassette and chain takes care of shifting. While this stuff does the job, it wouldn’t be my first port of call for an upgrade on this bike, given the accessibility, accuracy and reliability of electronic derailleurs these days.
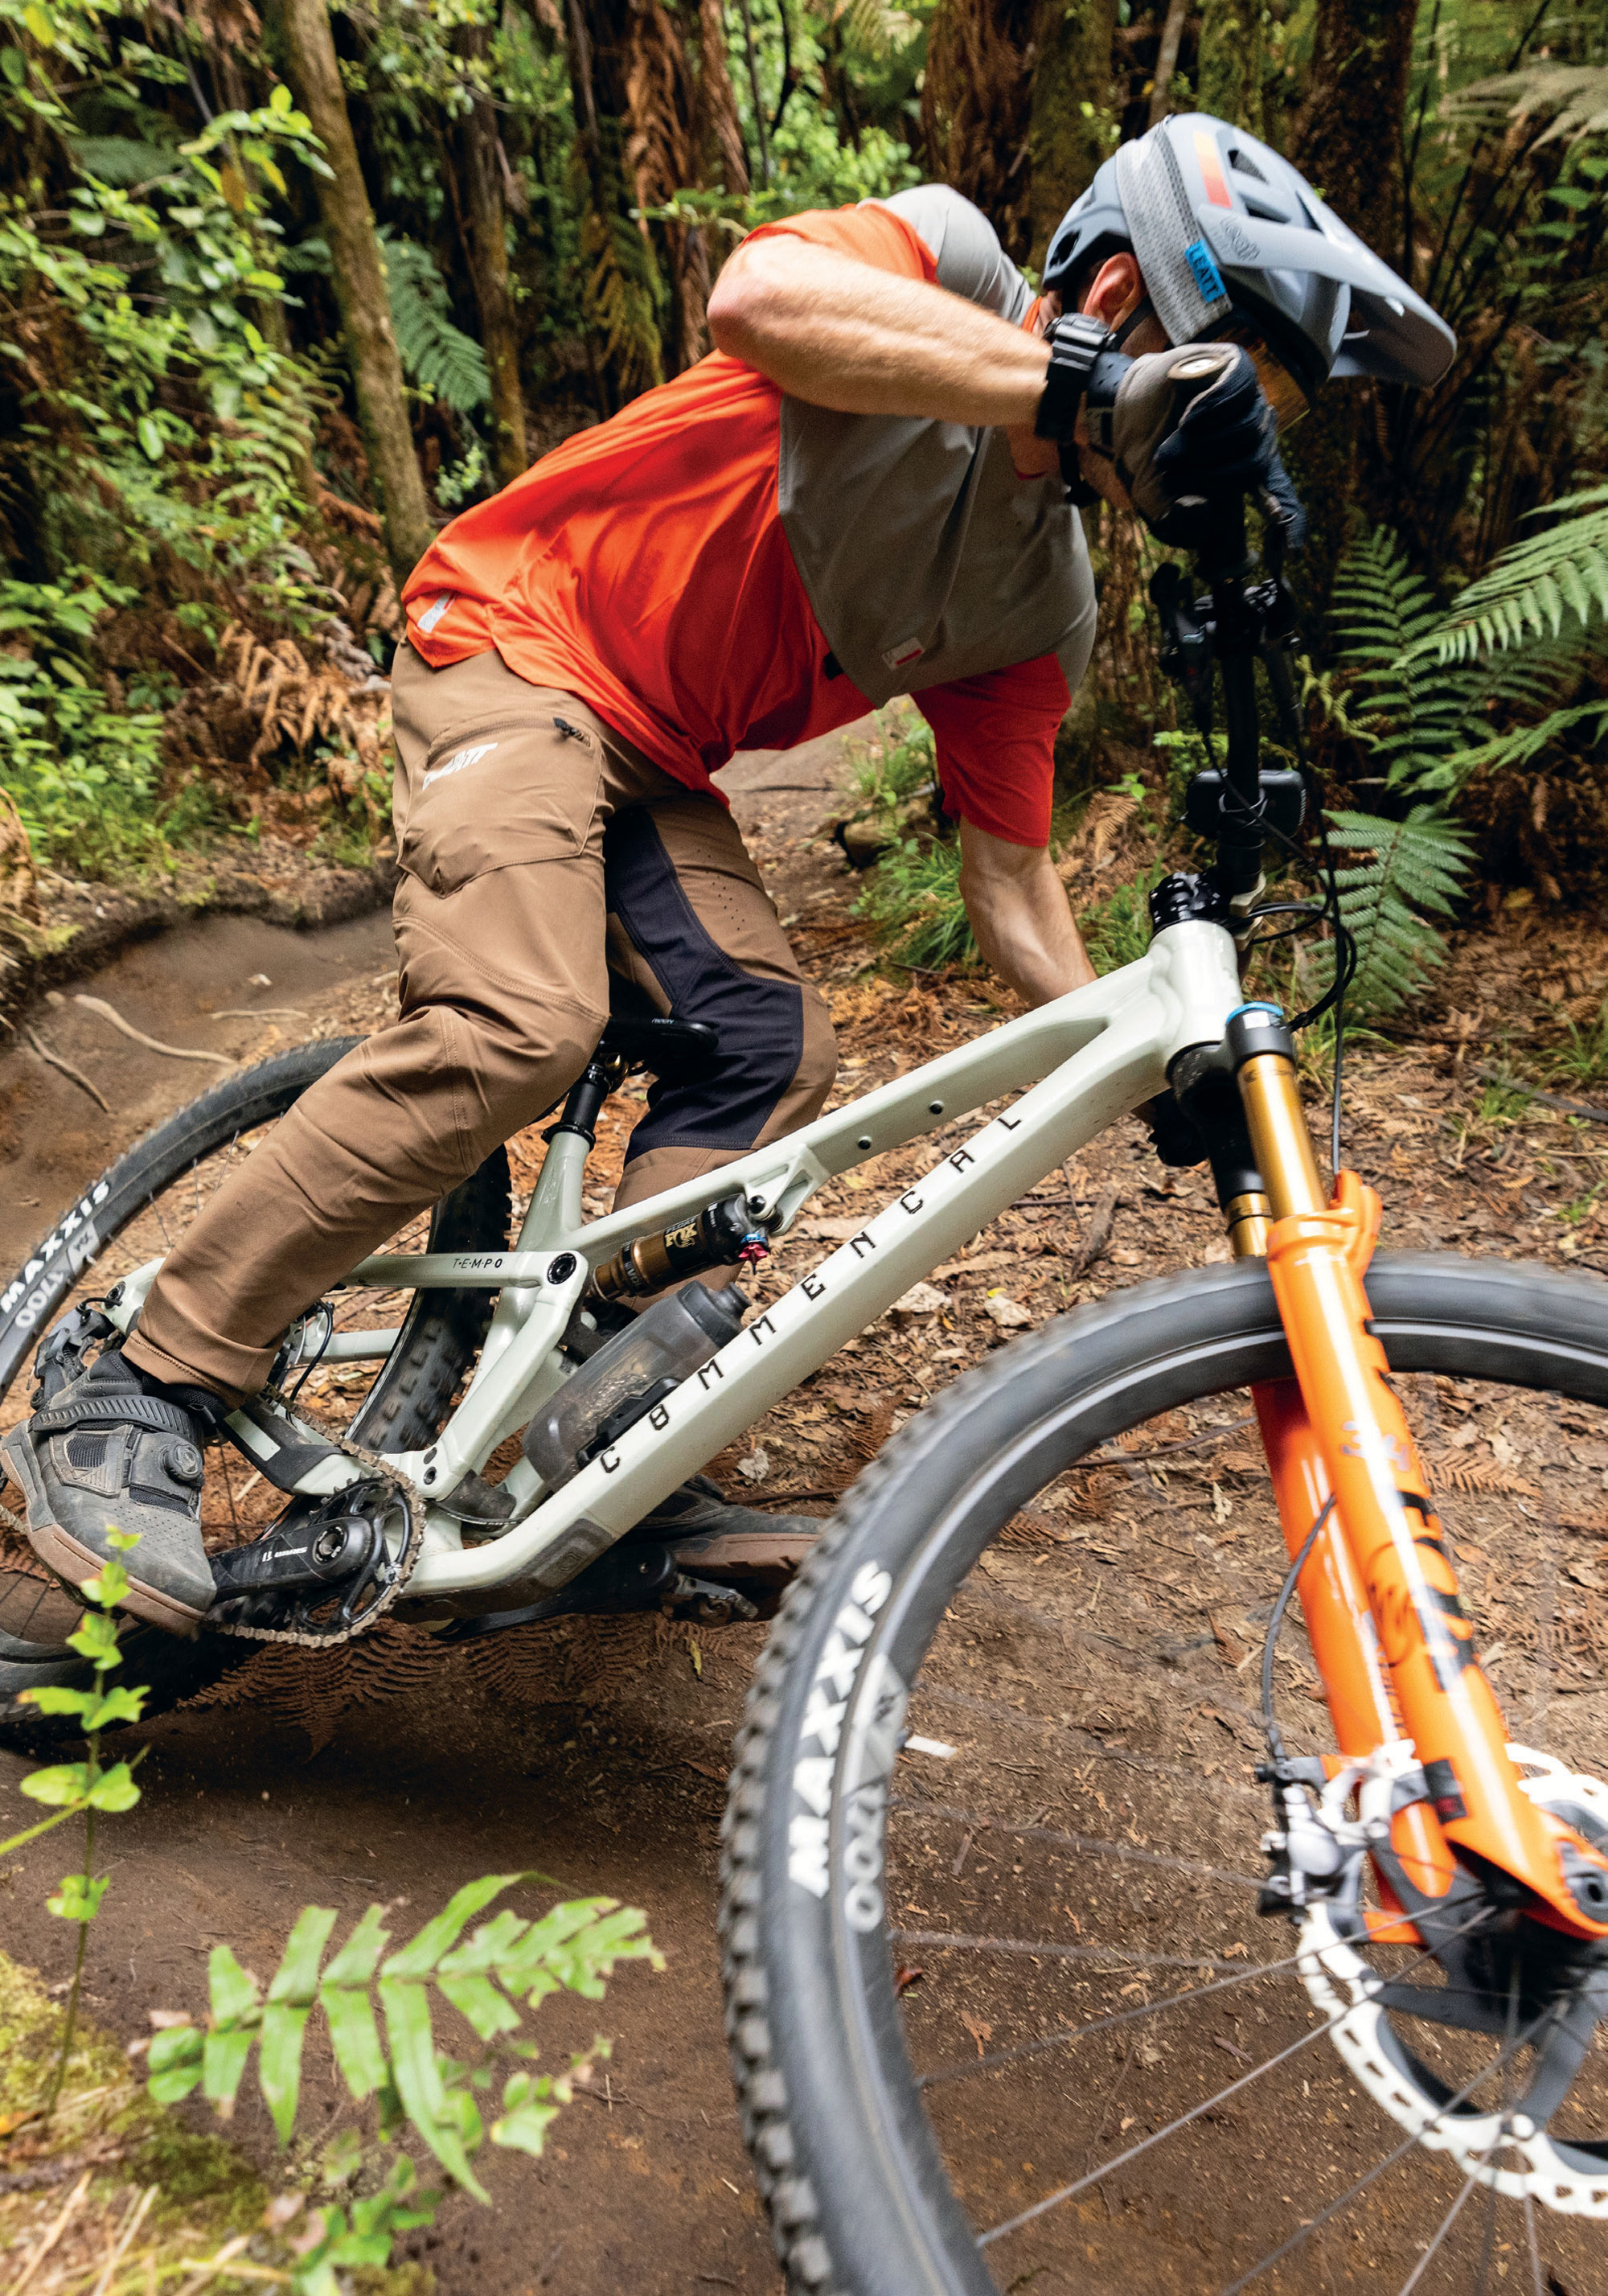
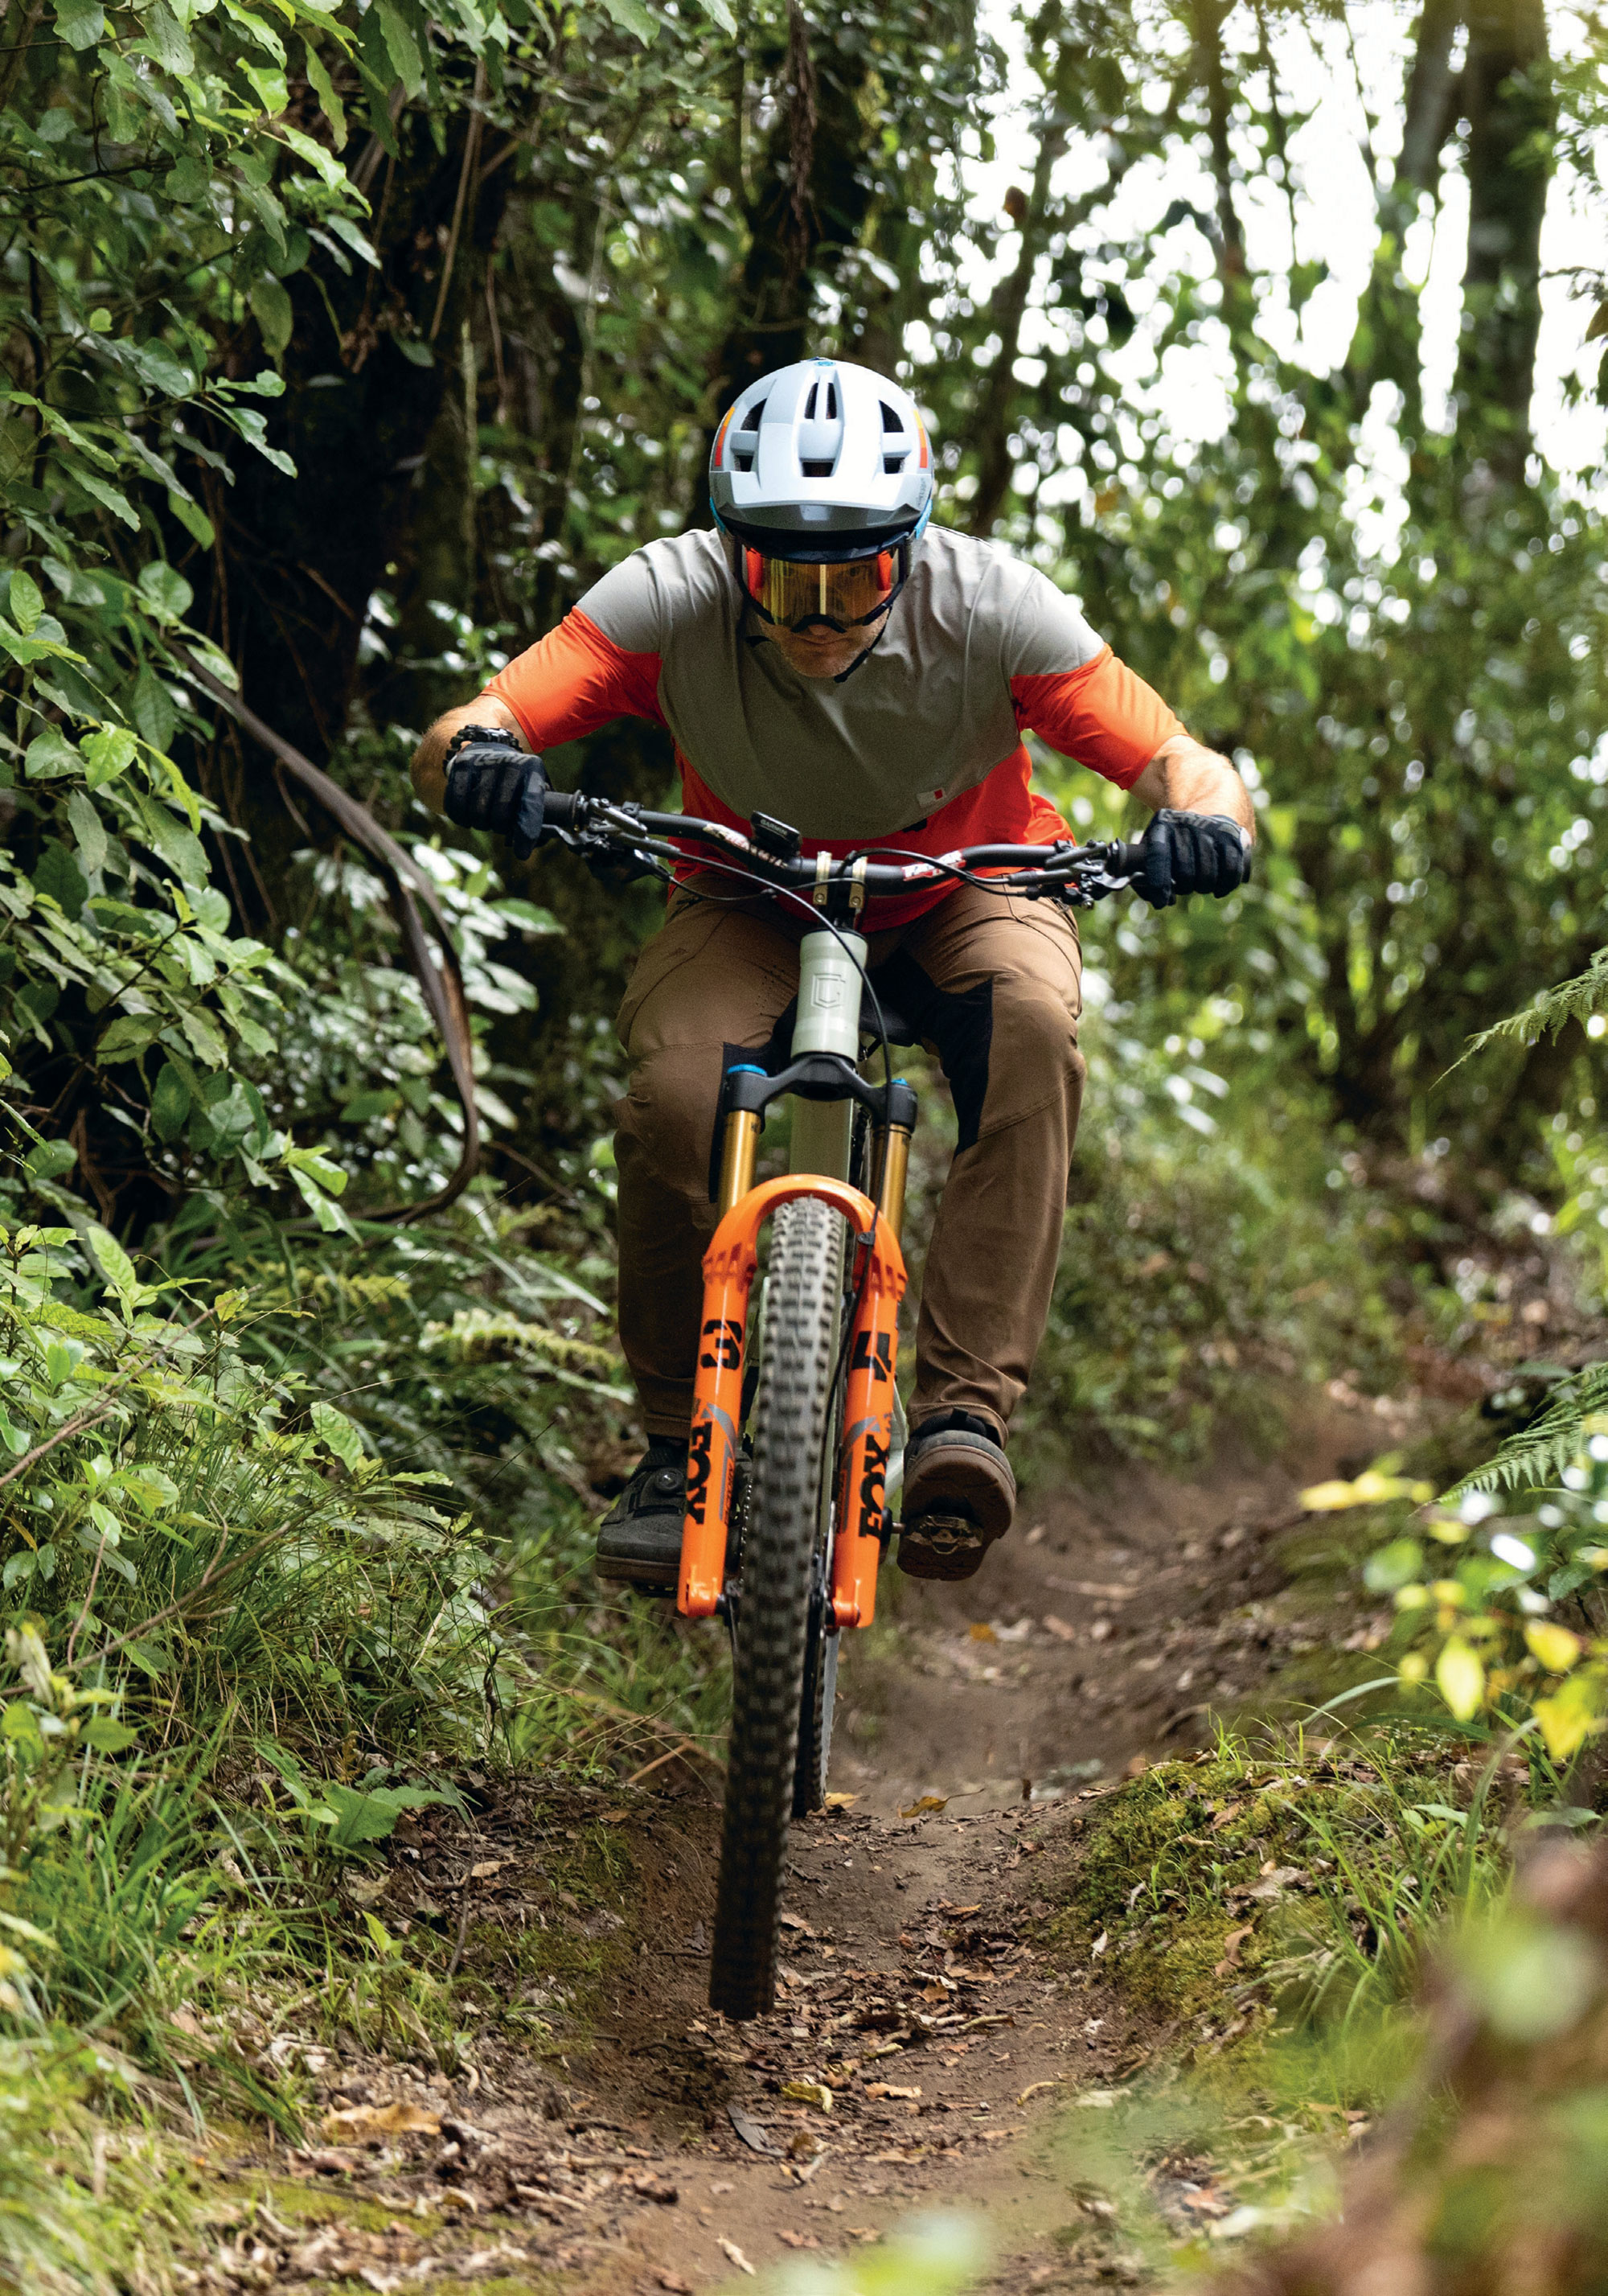
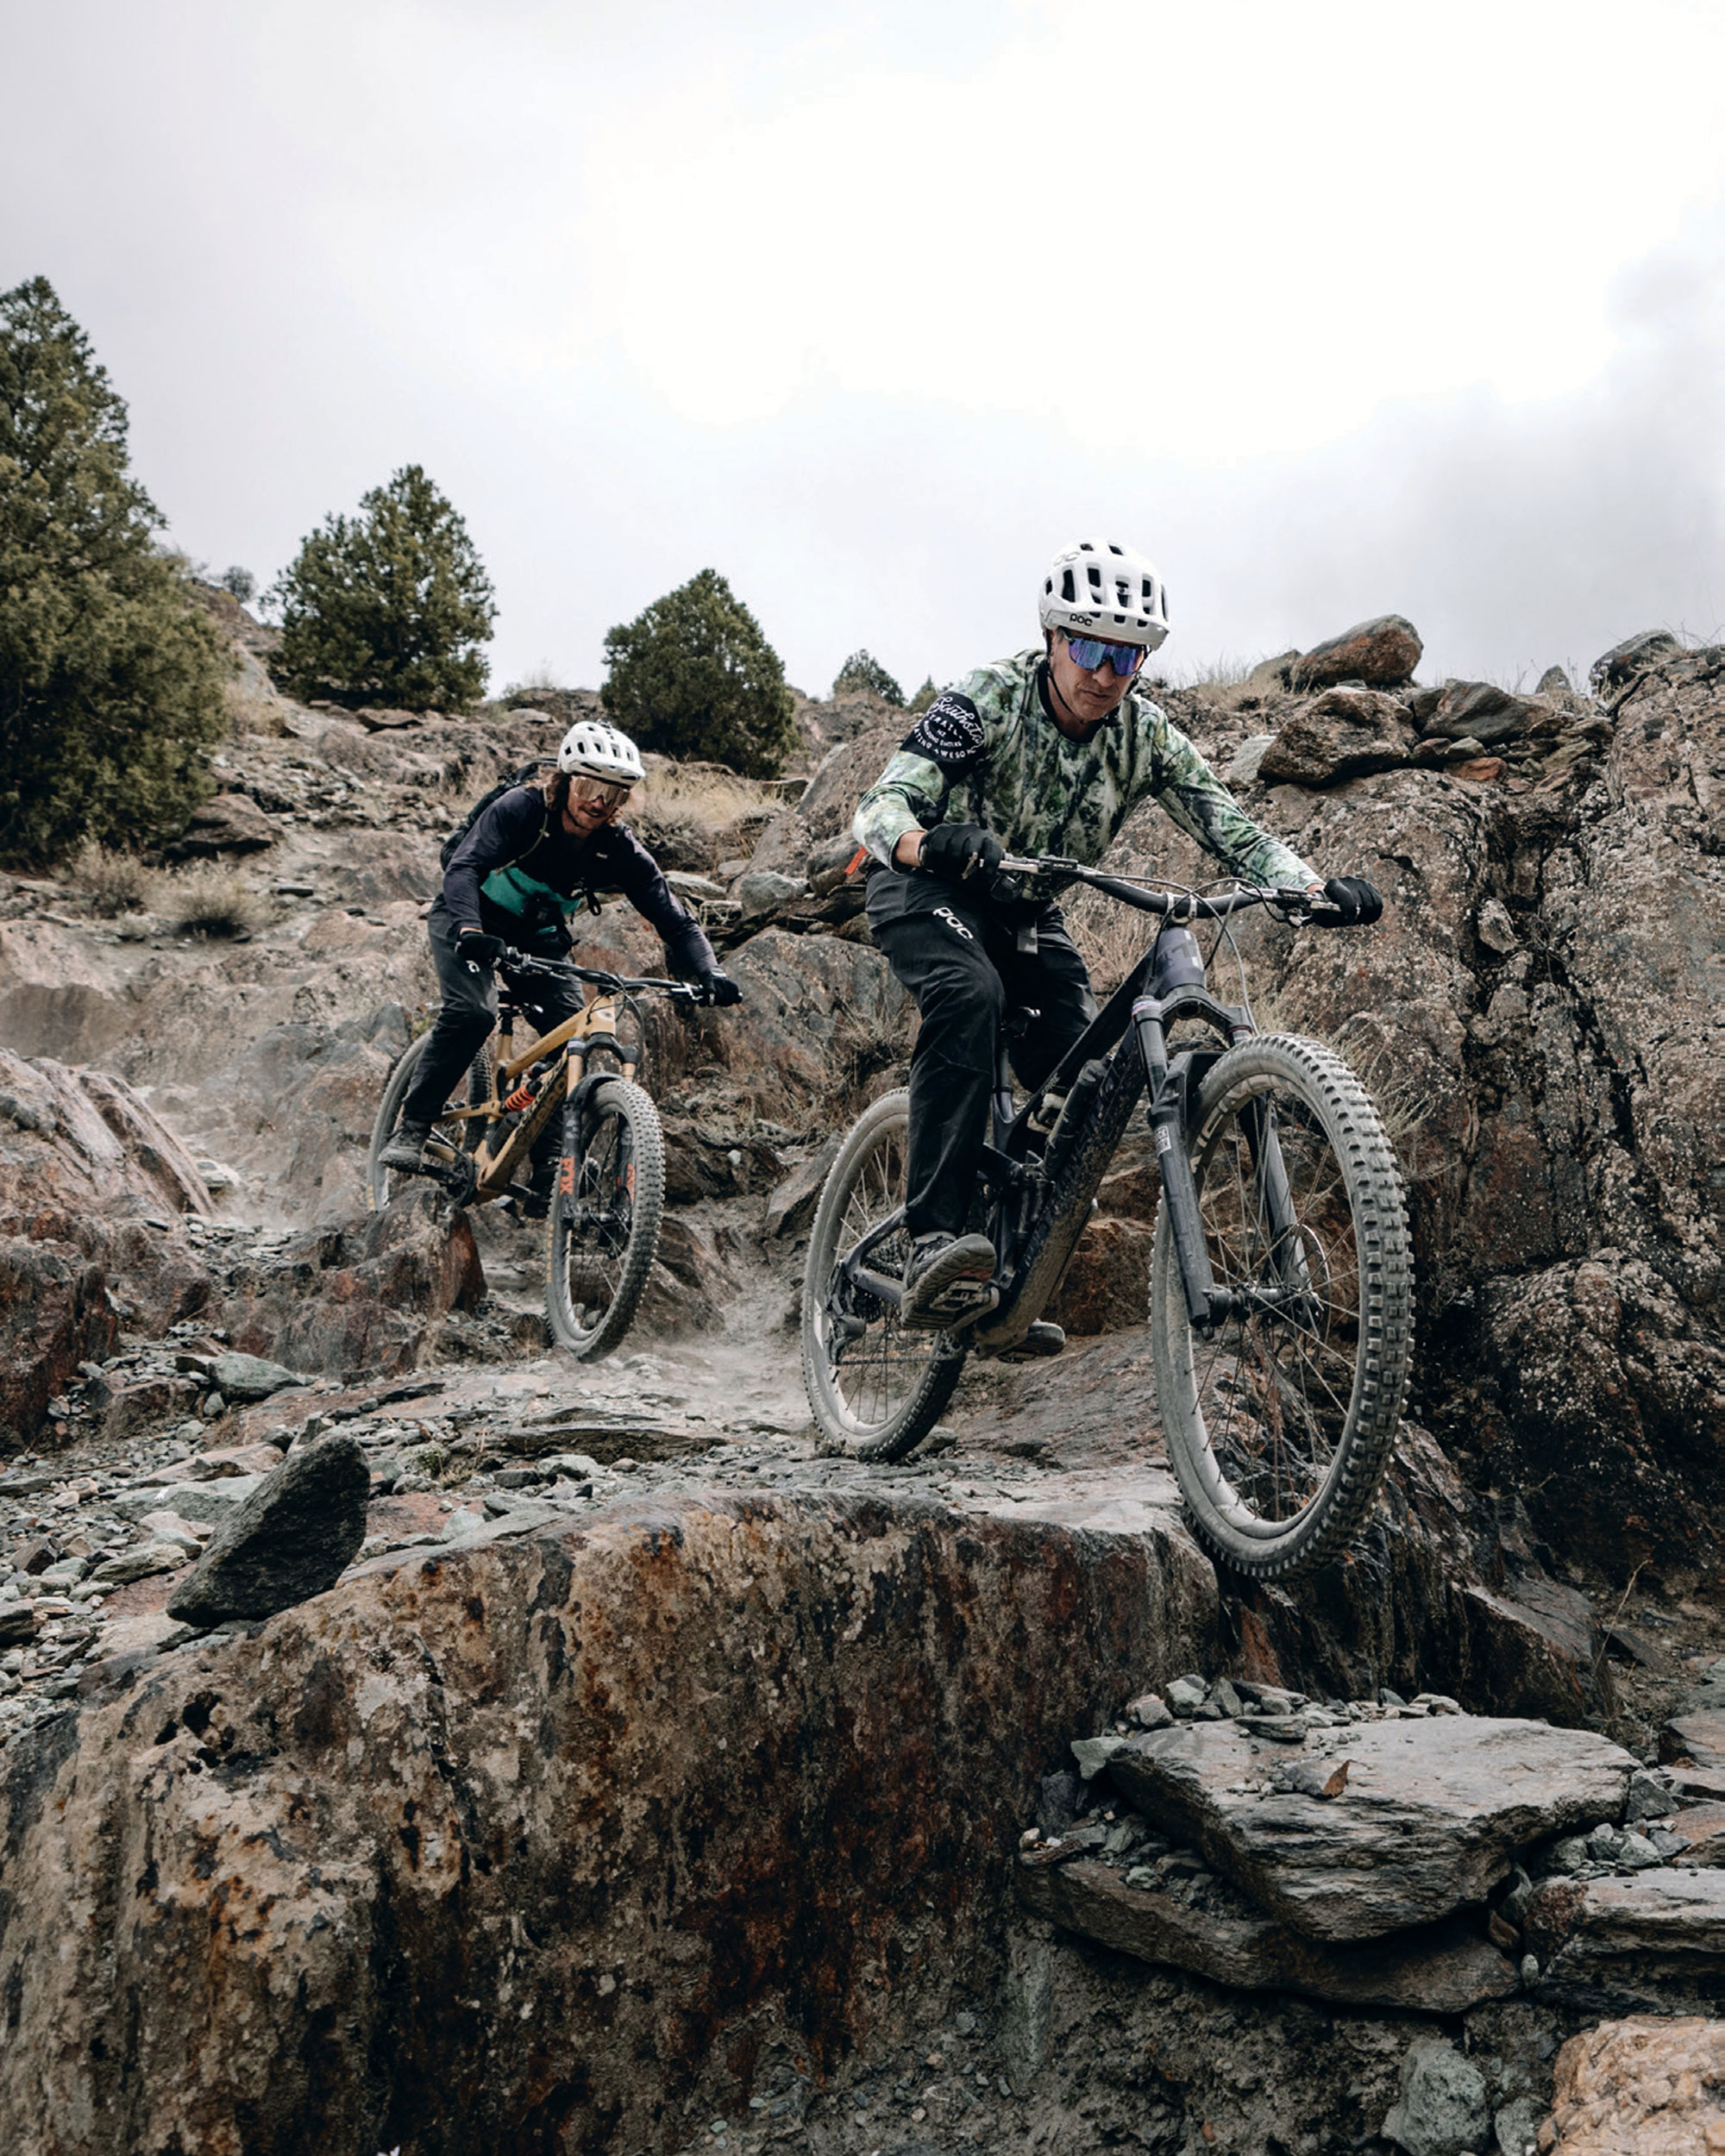
The Ride
From early 2024 until I took possession of the Tempo in October ‘24, I’d been getting about on either a 160-170mm travel Enduro bike or a full-gas XC race bike. So, I was keen to get on board a modern, short-travel trail bike, hoping that it would be more suited to how and where I ride most of the time.
As is the norm for me on many brands, I sit between the medium and large recommendations on the Tempo, so I chose to size down rather than up. With the steep seat tube and short reach (450mm), the bike felt short when seated but put me in a nice central position between the wheels, and the ample stack combined with the 30mm rise bar put my hands up relatively high, giving me a distinct feeling of confidence; helping the bike feel like it would handle more than it’s suspension travel numbers would first suggest.
I’d convey the vibe of the bike as “playful”—akin to a big wheeled BMX in many scenarios. It excels when you’re being creative on the trail and allows for a super dynamic riding style; jumps, manuals, Scandi flicks and nose bonks are all in the Tempo’s remit, but it’s equally at home just cruising around in more of a ‘cross country’ mode.
Seated climbing is excellent. The steep seat tube helped put a good amount of weight on the front tyre, helping retain control when threading the needle between obstacles or up steep switchbacks or steps. Climbing steep pitches out of the saddle, the suspension extends nicely, giving a firm platform to push against and a relatively snappy feel. At over 14kg, and with components designed for longevity rather than light weight, it’s unlikely a rider would be getting any climbing KOMs on the Tempo. Still, at least it gets you to the top of the hill efficiently and without feeling like you’re dragging an anchor.
I commented in my Meta V5 review about how easy it was to change directions and drive through turns, and the Tempo retains this feeling. It straight-up rips turns—flat or bermed. I have fond memories of blasting through successive steep berms at the Whangamata MTB park, surprised by how it transitioned from one to the other. The only drawback of short travel like this is that rough and loose corners take a little more finesse to maintain traction; less travel means less sag and, ultimately, less traction.
Snapping out of turns, and under power while coming from a dead stop, the bike gets up to speed well and there’s no excessive loss of energy to the suspension.
Descending on the Tempo is surprising. It’s not the first small-travel bike to ride like it has more travel, but it would be one of the better ones, leaving nothing on the table. With only 125mm of travel, it can’t offer a big bike ‘buttery’ feel as it sits into its sag, but it does a great job of quieting the chatter on the trail. It doesn’t blow through travel to an uncontrolled or harsh bottom out during larger hits or g-outs.
The Tempo is stable at speed, although the nature of its shorter travel means it’s not as planted as the Meta V5 or other similar Enduro bikes, and needs more brains and less brawn to deal with rough terrain. Aboard a bigger bike, one could essentially point and shoot, standing on the pedals and having the bike do all the work—the Tempo isn’t that sort of bike…. it’s true that you can’t have your cake and eat it too.
The 125mm of suspension is enough—until it isn’t. Over my three-month stint with the Tempo, there were a few times I came into a rough section a bit hot and really had to keep my wits about me as I used every millimetre of the travel, then relied on strength, skill and (possibly more so in my case) luck, to keep the ship upright. These situations were few and far between, but it’s worth keeping in mind that there’s not the safety net that a full enduro bike would offer. Although that’s not what anyone riding this bike would be after anyway.
I like a big day in the saddle, under my own steam, and I don’t like to feel like my fun is hampered by my choice of bike – regardless of whether I’m headed up or downhill. Living in the Waikato, the majority of my riding (all within a couple of hours’ drive) is on trails tending more towards the mellow end of the spectrum. Lots of digger-built trails and not so many gnarly, steep, rocky, “heck, I hope I can make this” sort of trails—unless I’m away in Nelson or Queenstown, which is once or twice a year, if I’m lucky. With this in mind, I’ve settled on the fact that a bike like the Tempo is realistically all I need: the ability to cover a decent amount of ground, climb effectively up hills, and be able to bomb back down whatever trail I choose without feeling like I’m being held back by inactive suspension or pucker-inducing handling.
Although I didn’t need to faff with the linkage at all, if I needed to—due to the layout of the VCS linkage and pivots—accessing the bottom shock bolt or pivot bolts can be a bit niggly; needing to remove some pivot bolts to access others. Not impossible, just time-consuming. If something in the back end comes loose while out on the trail, you’ll be holding up your riding buddies for a few minutes while you get it sorted.
The internal headset cable routing is the most polarising feature of the Tempo. Cables for the rear derailleur, dropper post and rear brake all squeeze their way through the headset top cap and down through the top bearing. There’s a bit going on up front. I’m yet to have a review bike long enough to need to replace a headset bearing and, if I had, I’m sure I’d do myself the favour of taking it to a bike shop with a mechanic who has far more patience than I do to complete the procedure. It’s fair to say that simply cracking the headset open, cleaning everything, popping off the bearing seal and re-lubing it once a month or so (depending on riding conditions) would drastically increase its lifespan. Spending 15 minutes doing this periodically is easier than a bearing replacement, which could take upwards of an hour.
Final thoughts
It’s taken some time for manufacturers to get little bikes ‘right’, but it seems they’re finally getting them dialled, bringing a shift in the mountain bike market as people realise a bike with “just” 125mm travel can handle everything they throw at it. Depending on where people ride, they probably don’t need a big travel bike as their daily rig. I’m now one of these people, and I’ve had an absolute blast riding the Tempo over the summer. I still have questions about headset routing and pivot bearing servicing over a longer term and through a winter of riding but, so far, I’m grinning.
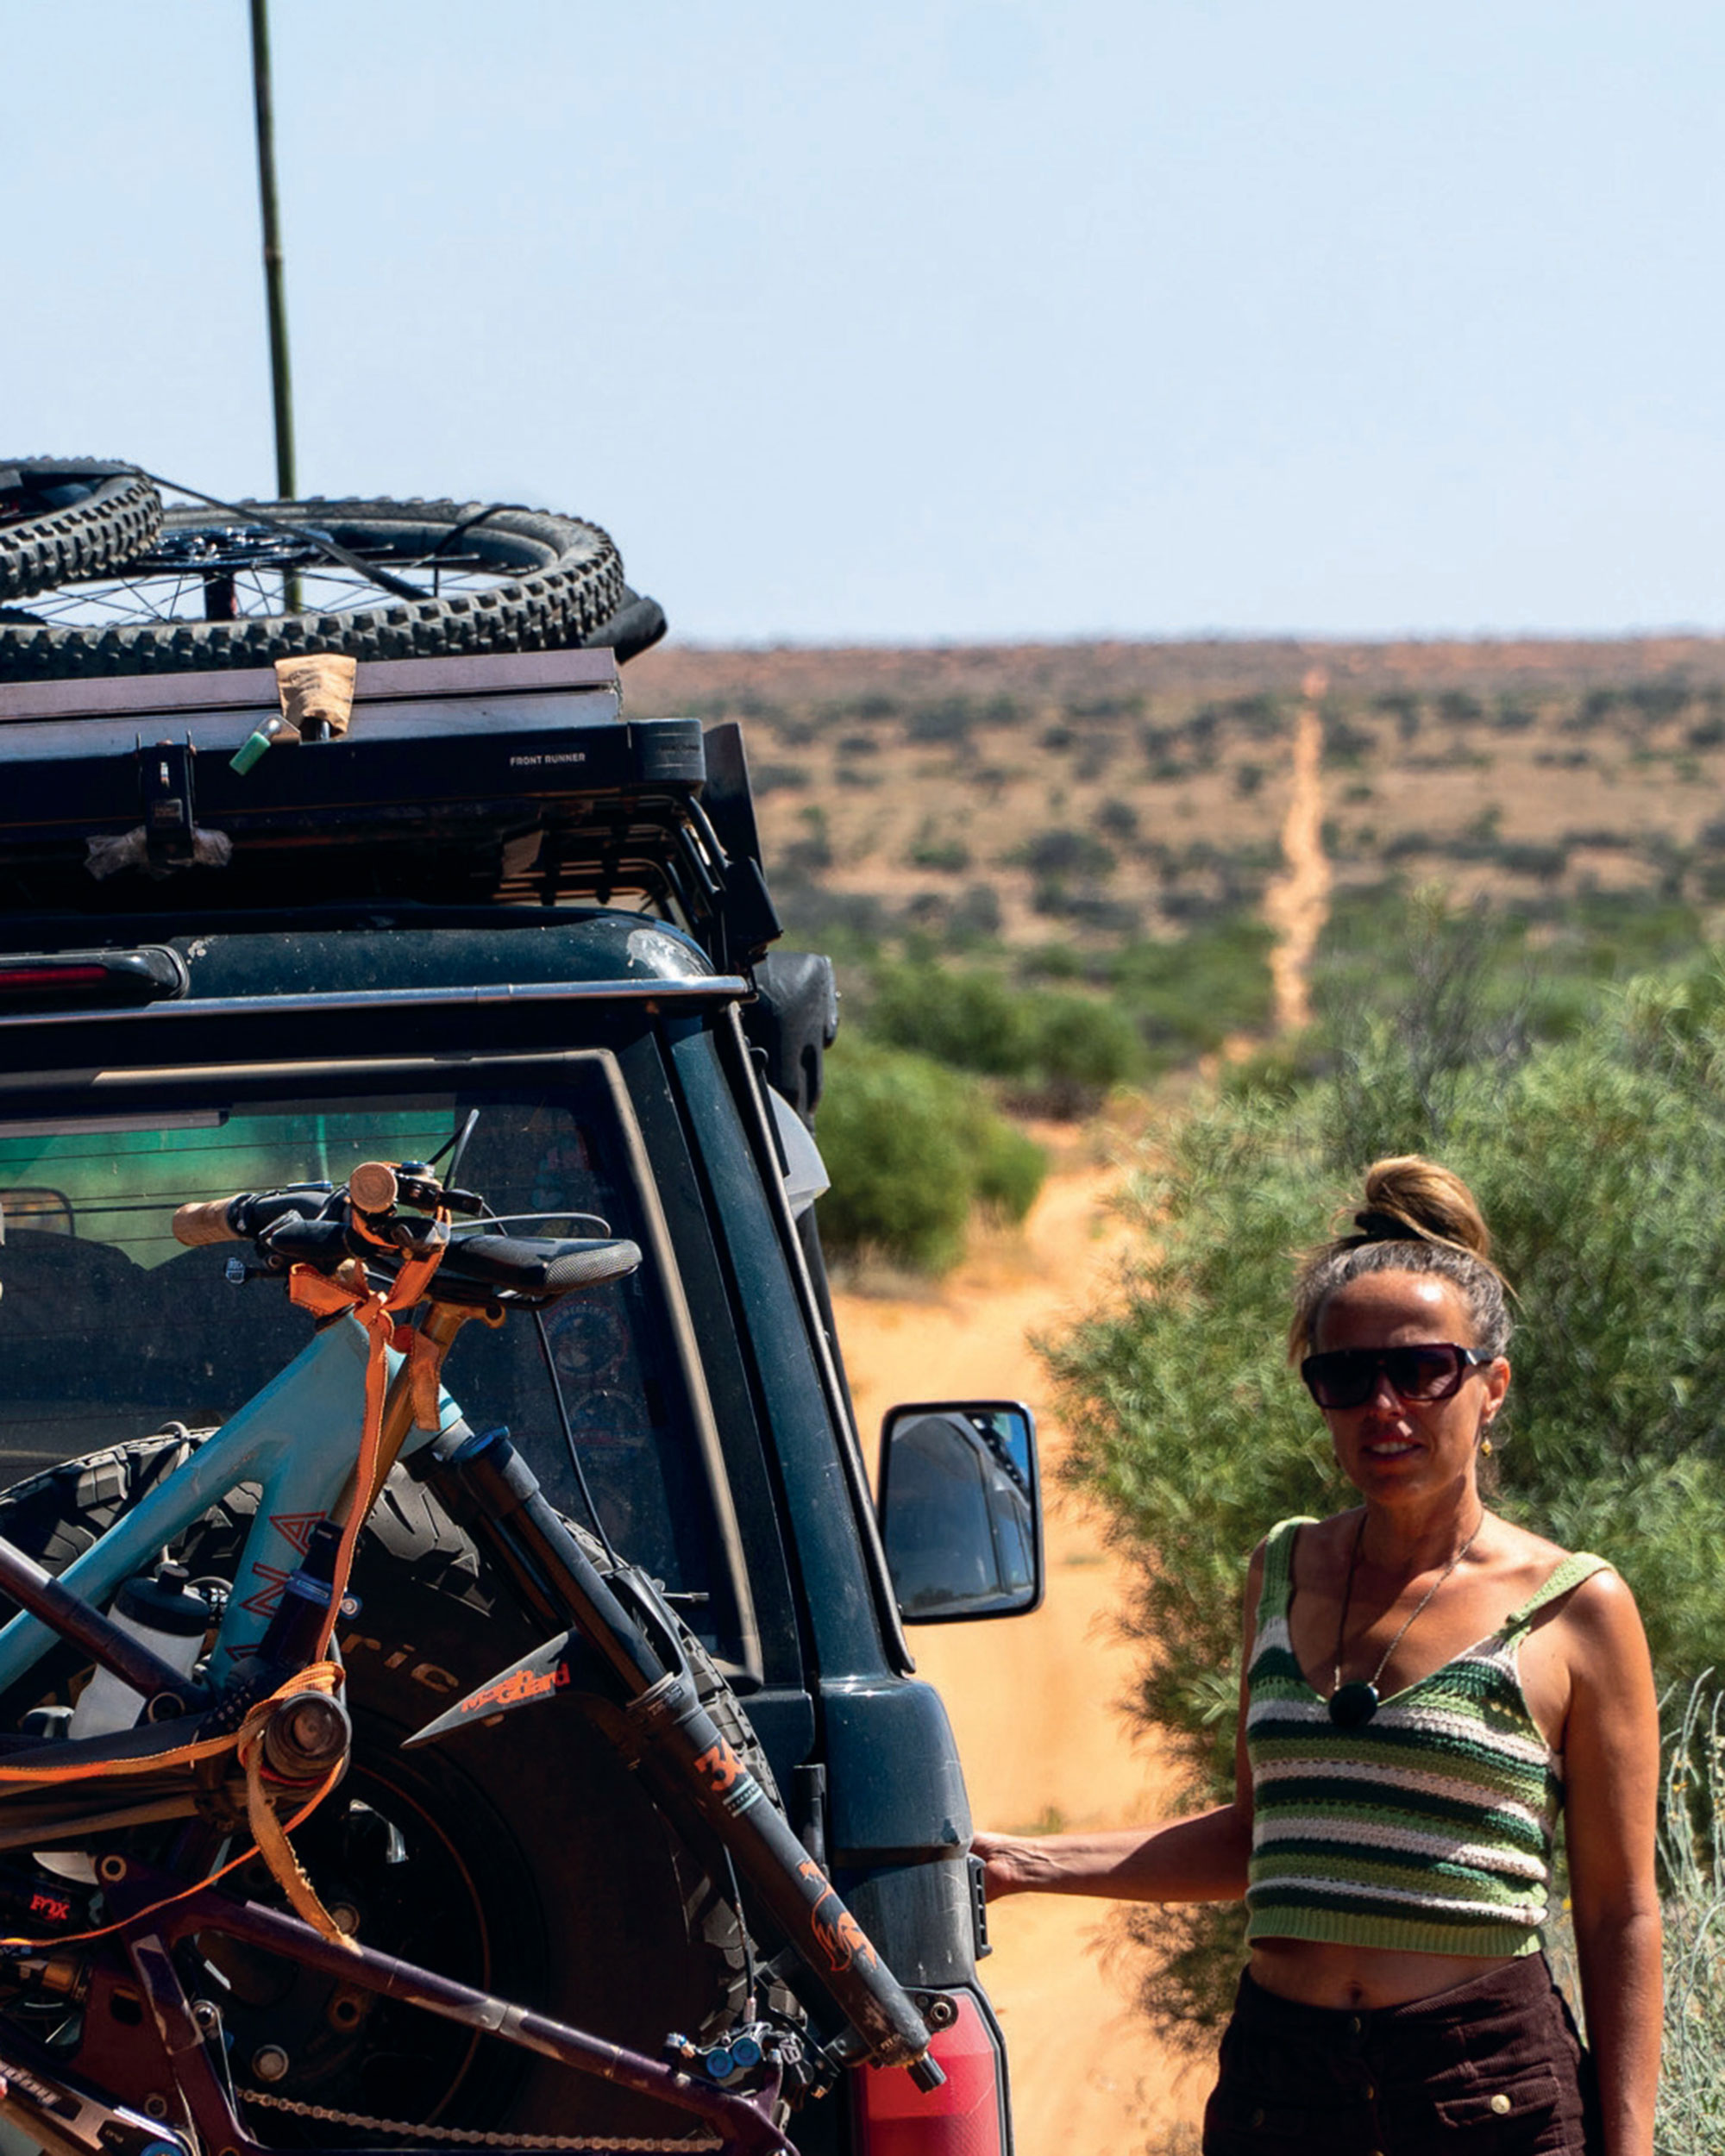
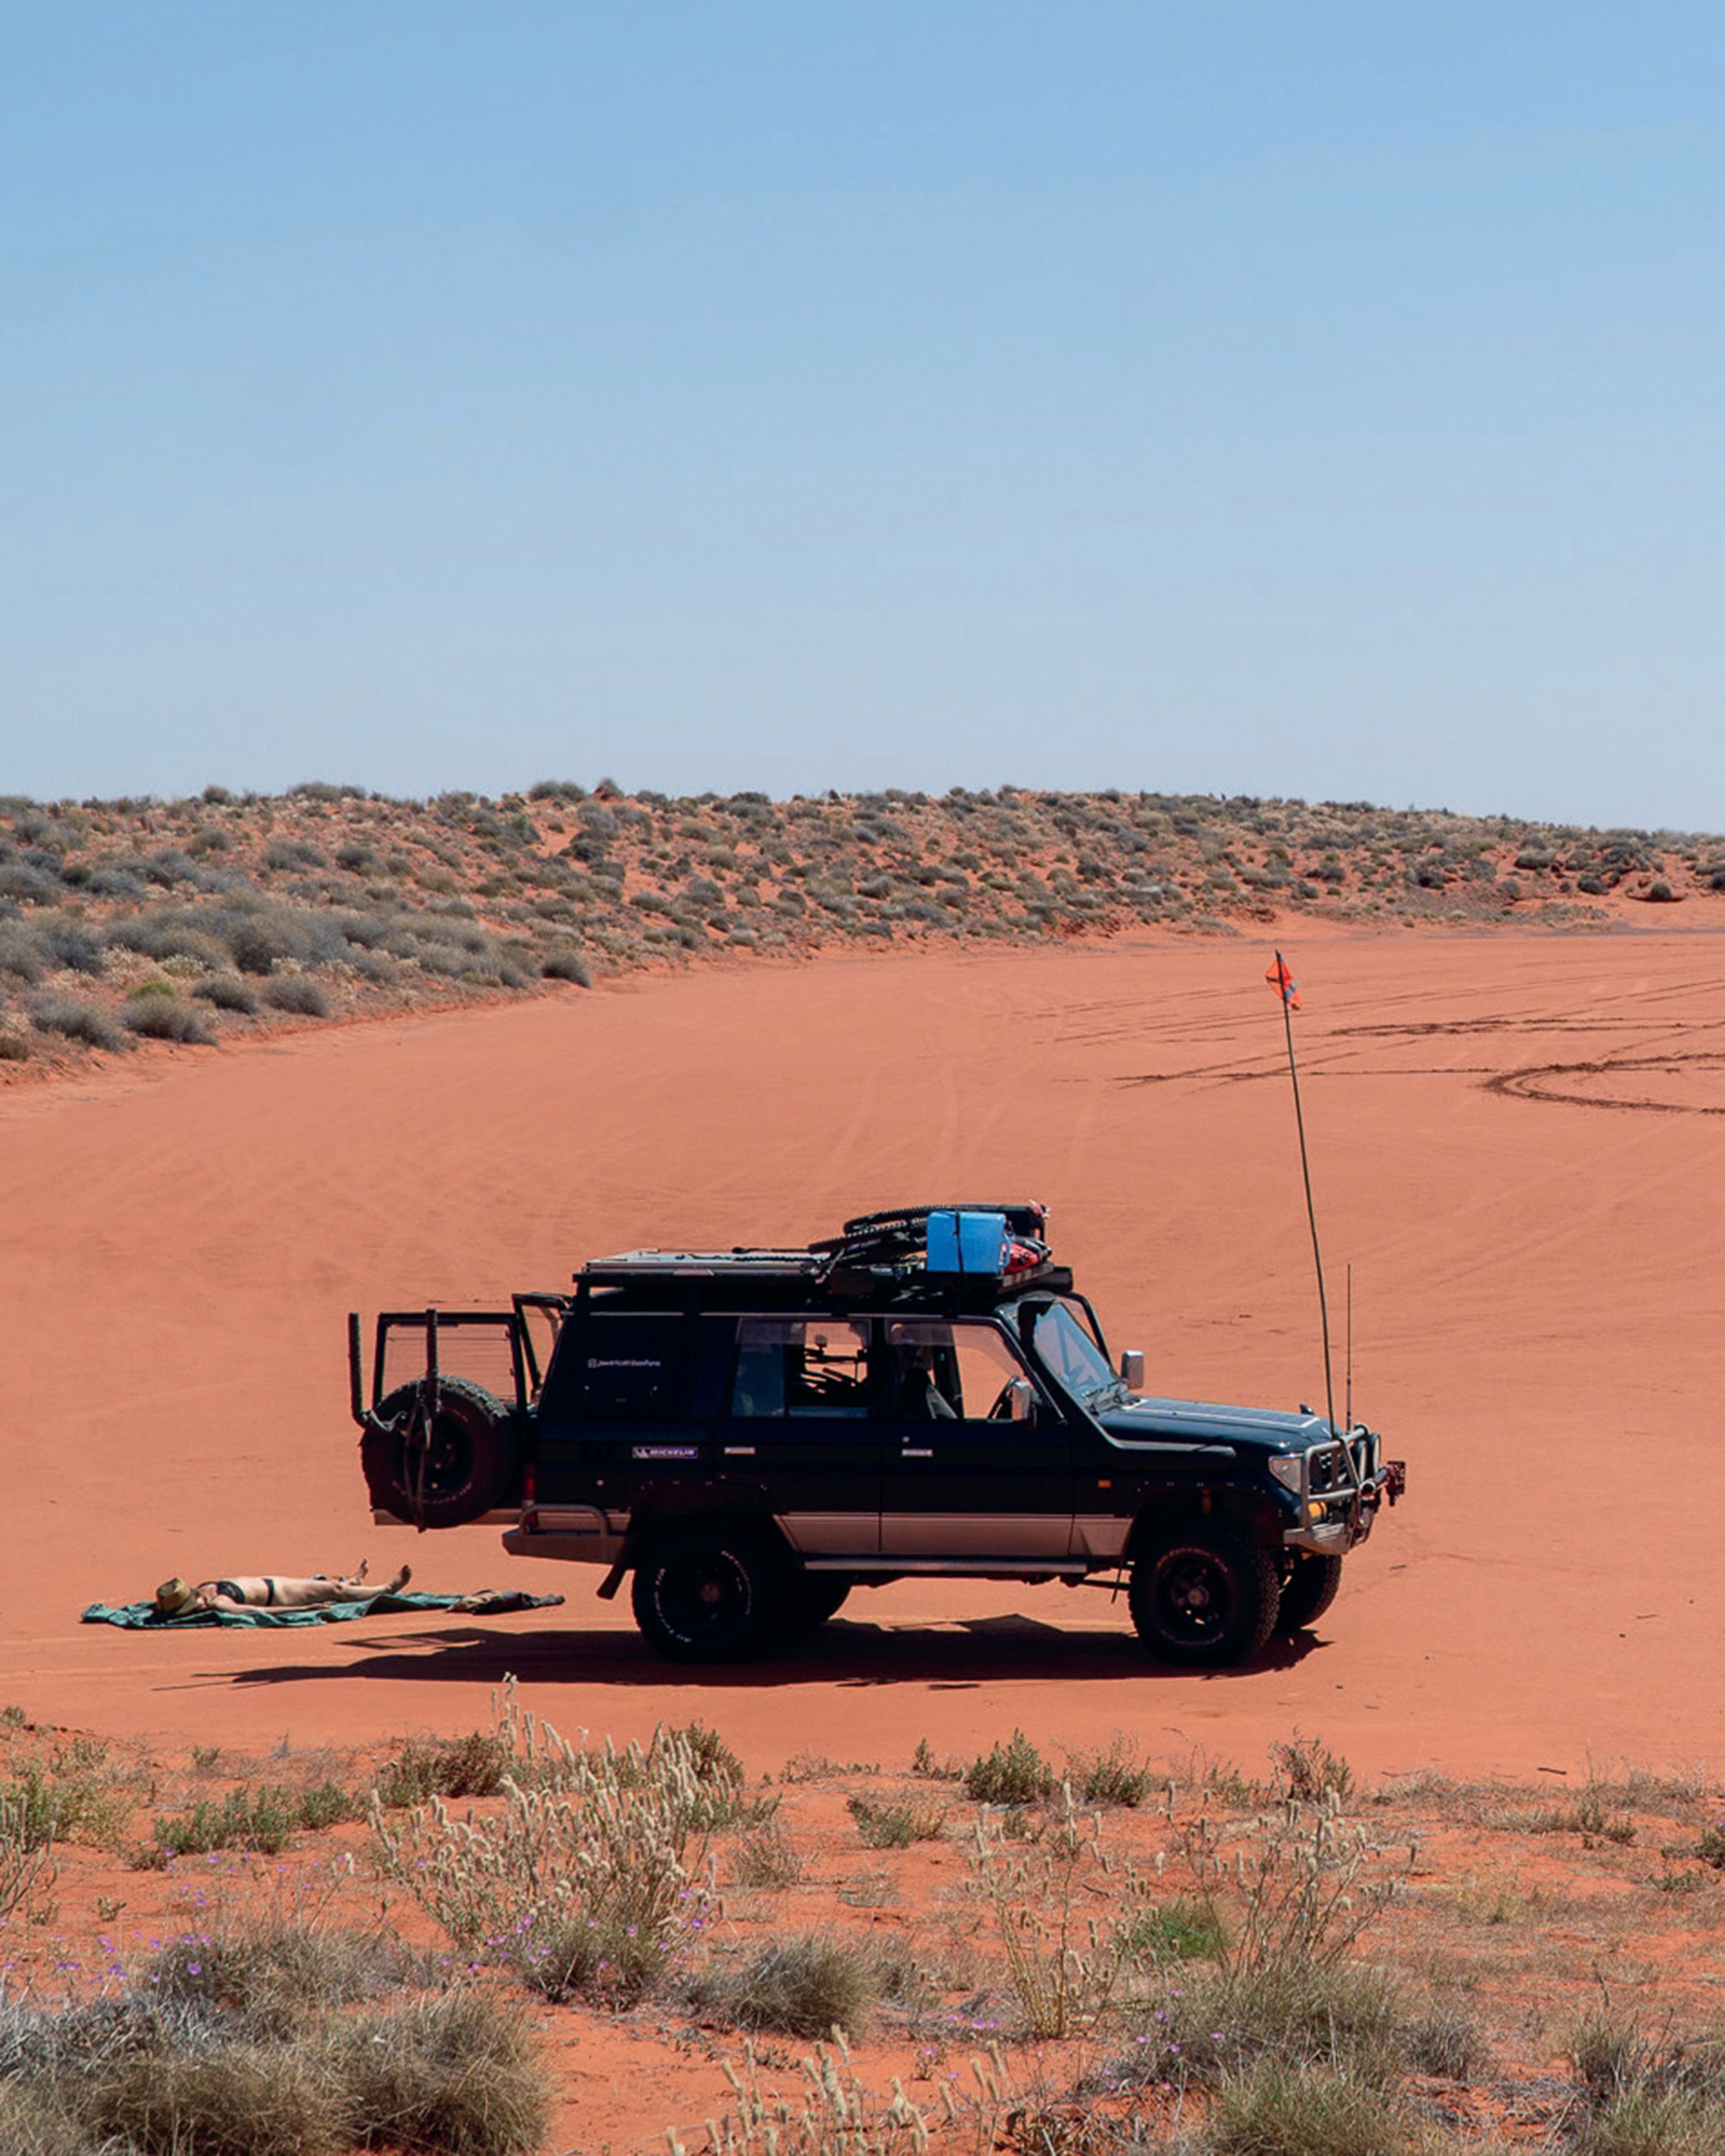
Straya: Trails and tales from the Aussie Outback
Words & Images Jamie Nicoll & Anja Foley
Imagine: hot, red desert sand; endless horizons; crimson balls of sunset; hot springs; bike-length lizards; crocodiles and sea turtles cruising around the turquoise Timor Sea; flocks of green budgies; waterfalls crashing over bright orange cliffs; ancient Indigenous culture; camping under the stars–and stillness. “Castel like” serenity! This is Outback Australia. This is where our bikes have taken us.
Along with Collin the Landcruiser, we (Jamie and Anja) have returned to Australia for a second stint of overlanding adventure with the continued mission of riding in remote and unusual places.
Arriving at our friend’s place in Coffs Harbour, New South Wales, we were so excited to be reunited with Collin and rejoiced in the comforts of our all-in-one adventure vehicle—Collin had been parked at our friend’s place on the East Coast for the past six months. We immediately jumped on our bikes and headed out for a few rides at the local Saw Mill trails—a simple little park with sand-based trails. We enjoyed the nice flow and the fun log rides scattered throughout, but it was soon time to fuel up (a cool 250 litres), fill the water tank, restock our provisions and complete some maintenance before heading off. This year’s mission was to head into the Red Centre, crossing the Madigan Line, the most remote track in the Simpson Desert, before taking a northern course to Arnhem Land via Kakadu National Park just east of Darwin.
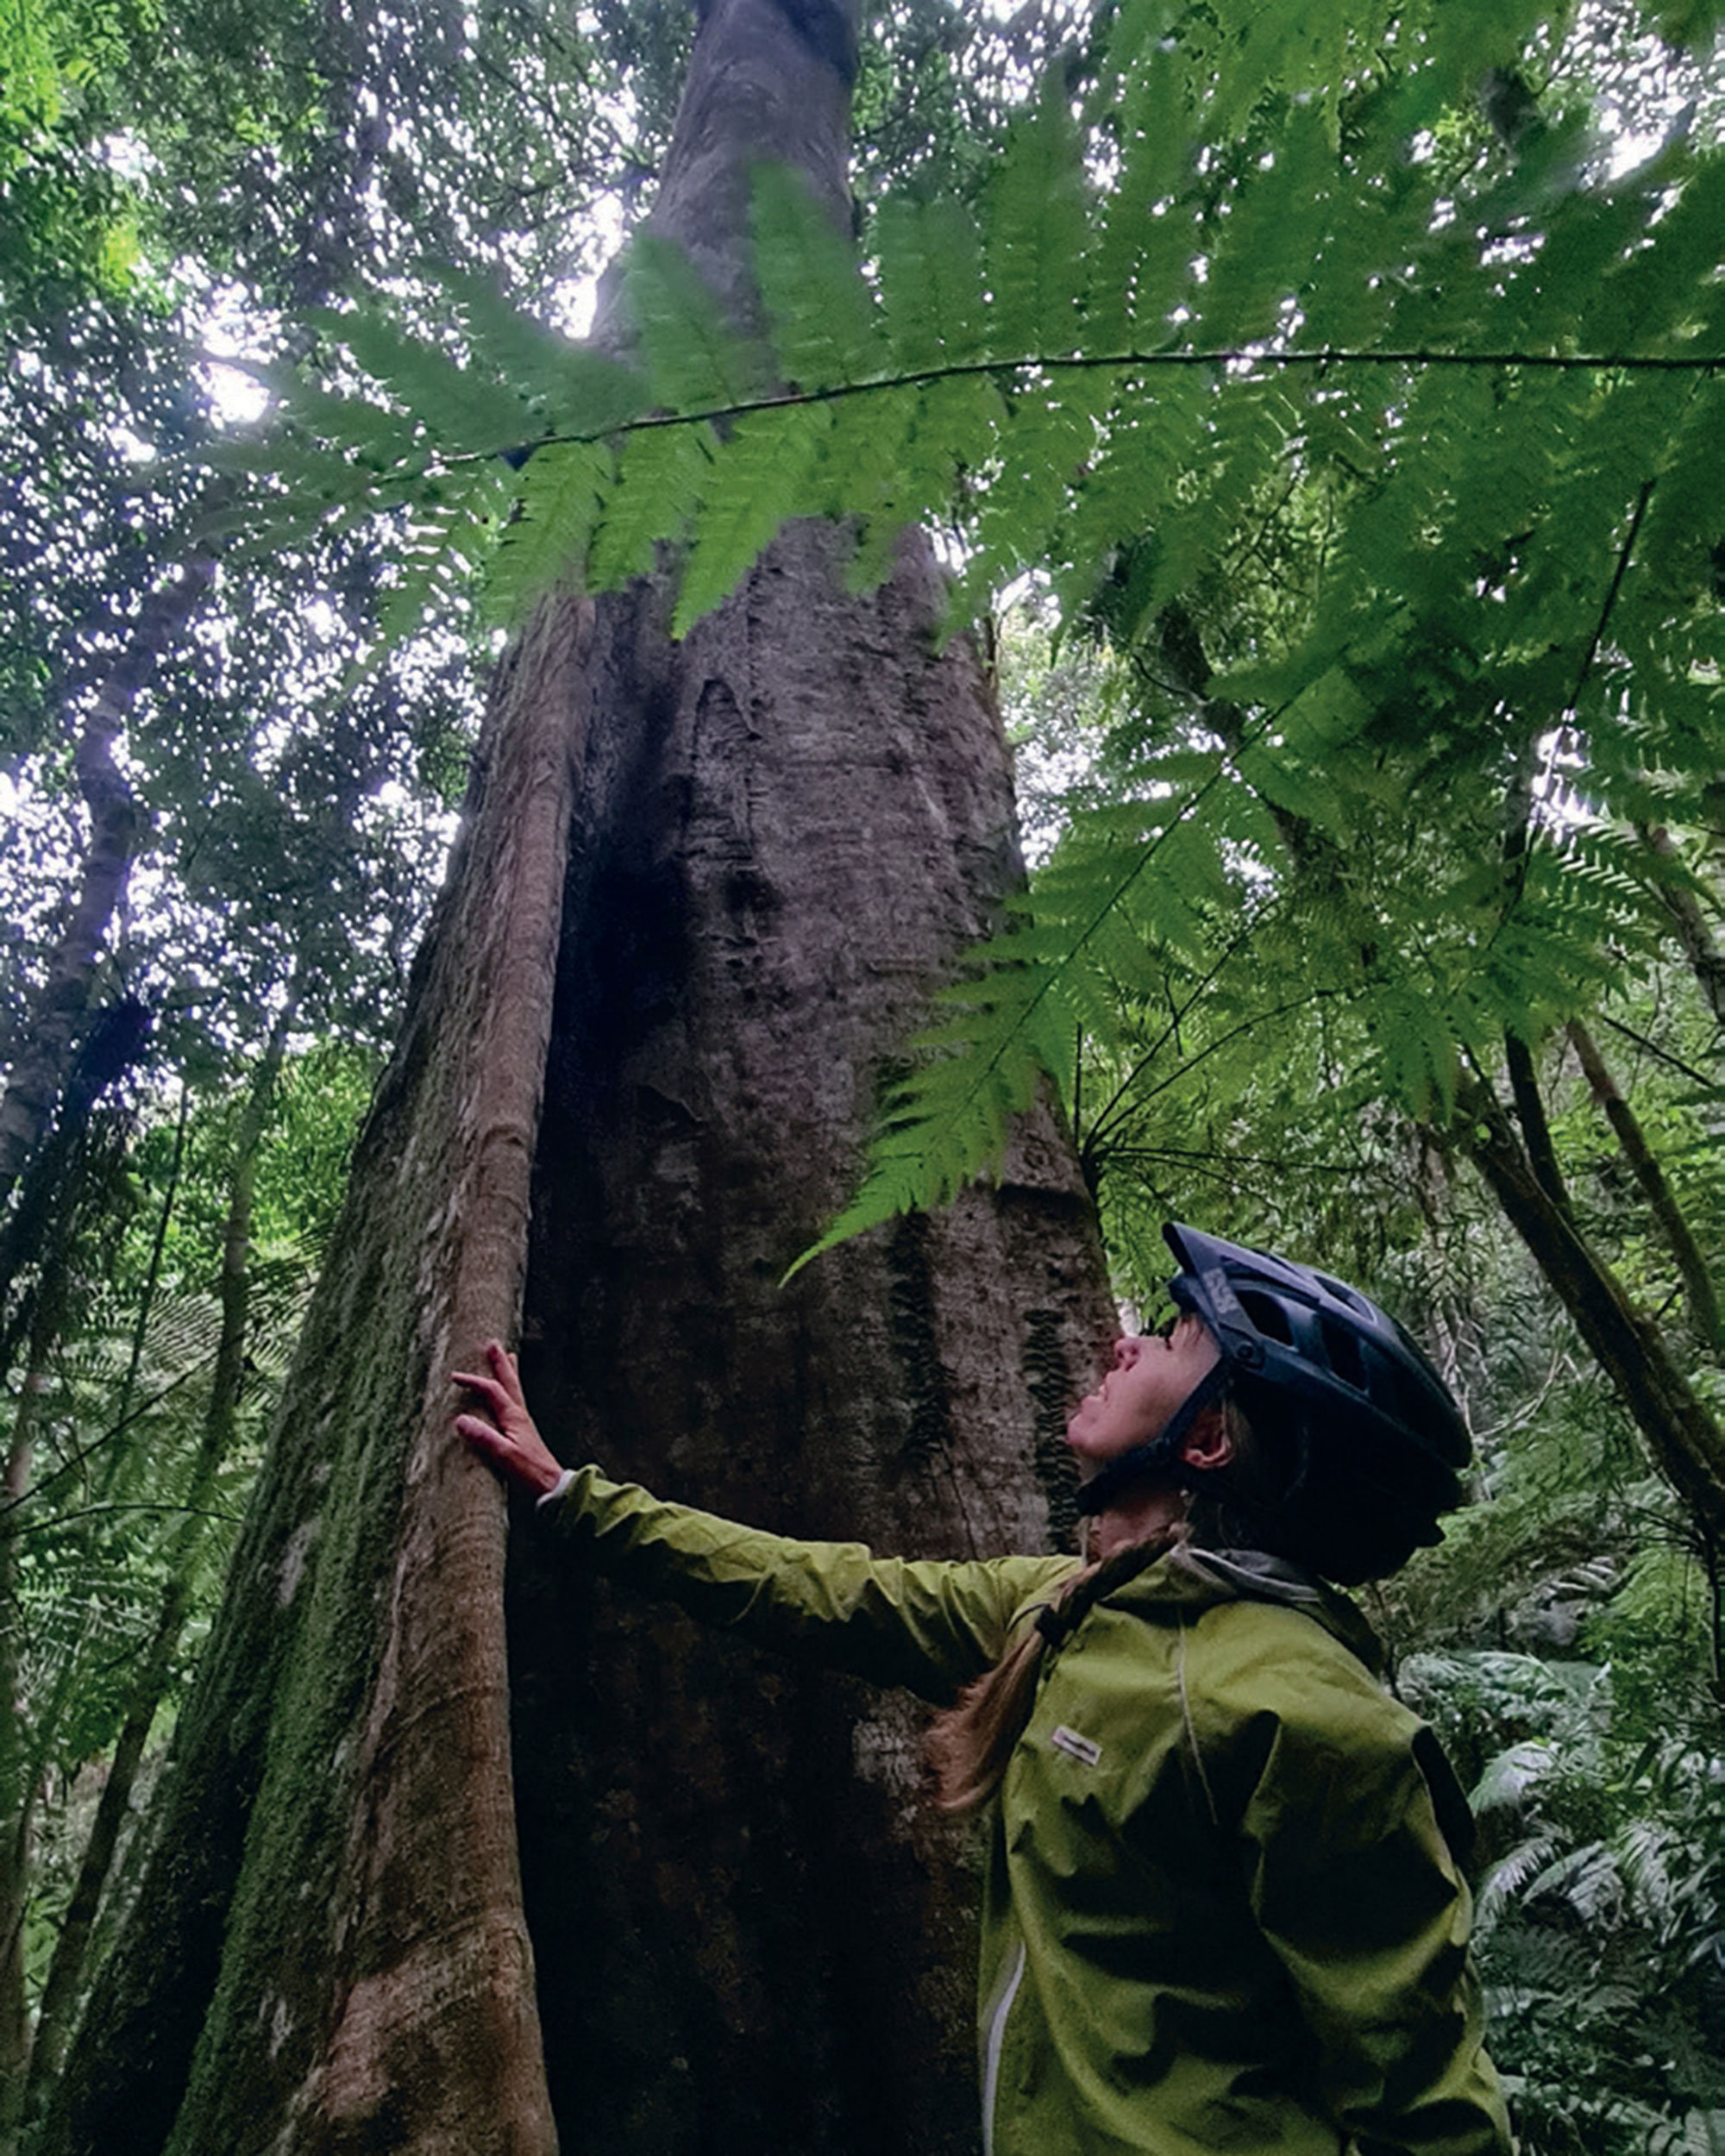
A day’s drive from the coast, we stopped at Durrigo National Park; a ride that feels like being transported back in time. We checked out the rainforest trails, sitting at roughly 1000 metres in elevation. Durrigo is known for its remnants of ancient forests that are linked back to Gondwana Land.
The Rosewood trail, a shared track, was a superb ride with its exhilarating fast flow and technical creek crossings. A speedy traversing descent on steep terrain made for high concentration, and staying wary of the numerous vines hanging across the track. We stopped so often, captured by the tall ancient trees with huge buttress roots. We climbed around waterfalls flowing down massive boulders and even jumped into the ice-cold river for a very quick morning dip.
A couple thousand kilometres later, we were at Tibooburra, a very remote outback town on the edge of the Strzelecki Desert. It is best known for its 450-million-year-old granite tors. This was a quick ride, but great to stretch our legs on the long drive. Heading up this loop track set amongst a field of ancient granite boulders, provided a mix of smooth track and very technical rock manoeuvres. It was scorching hot too and our daily cold banana smoothies were calling.
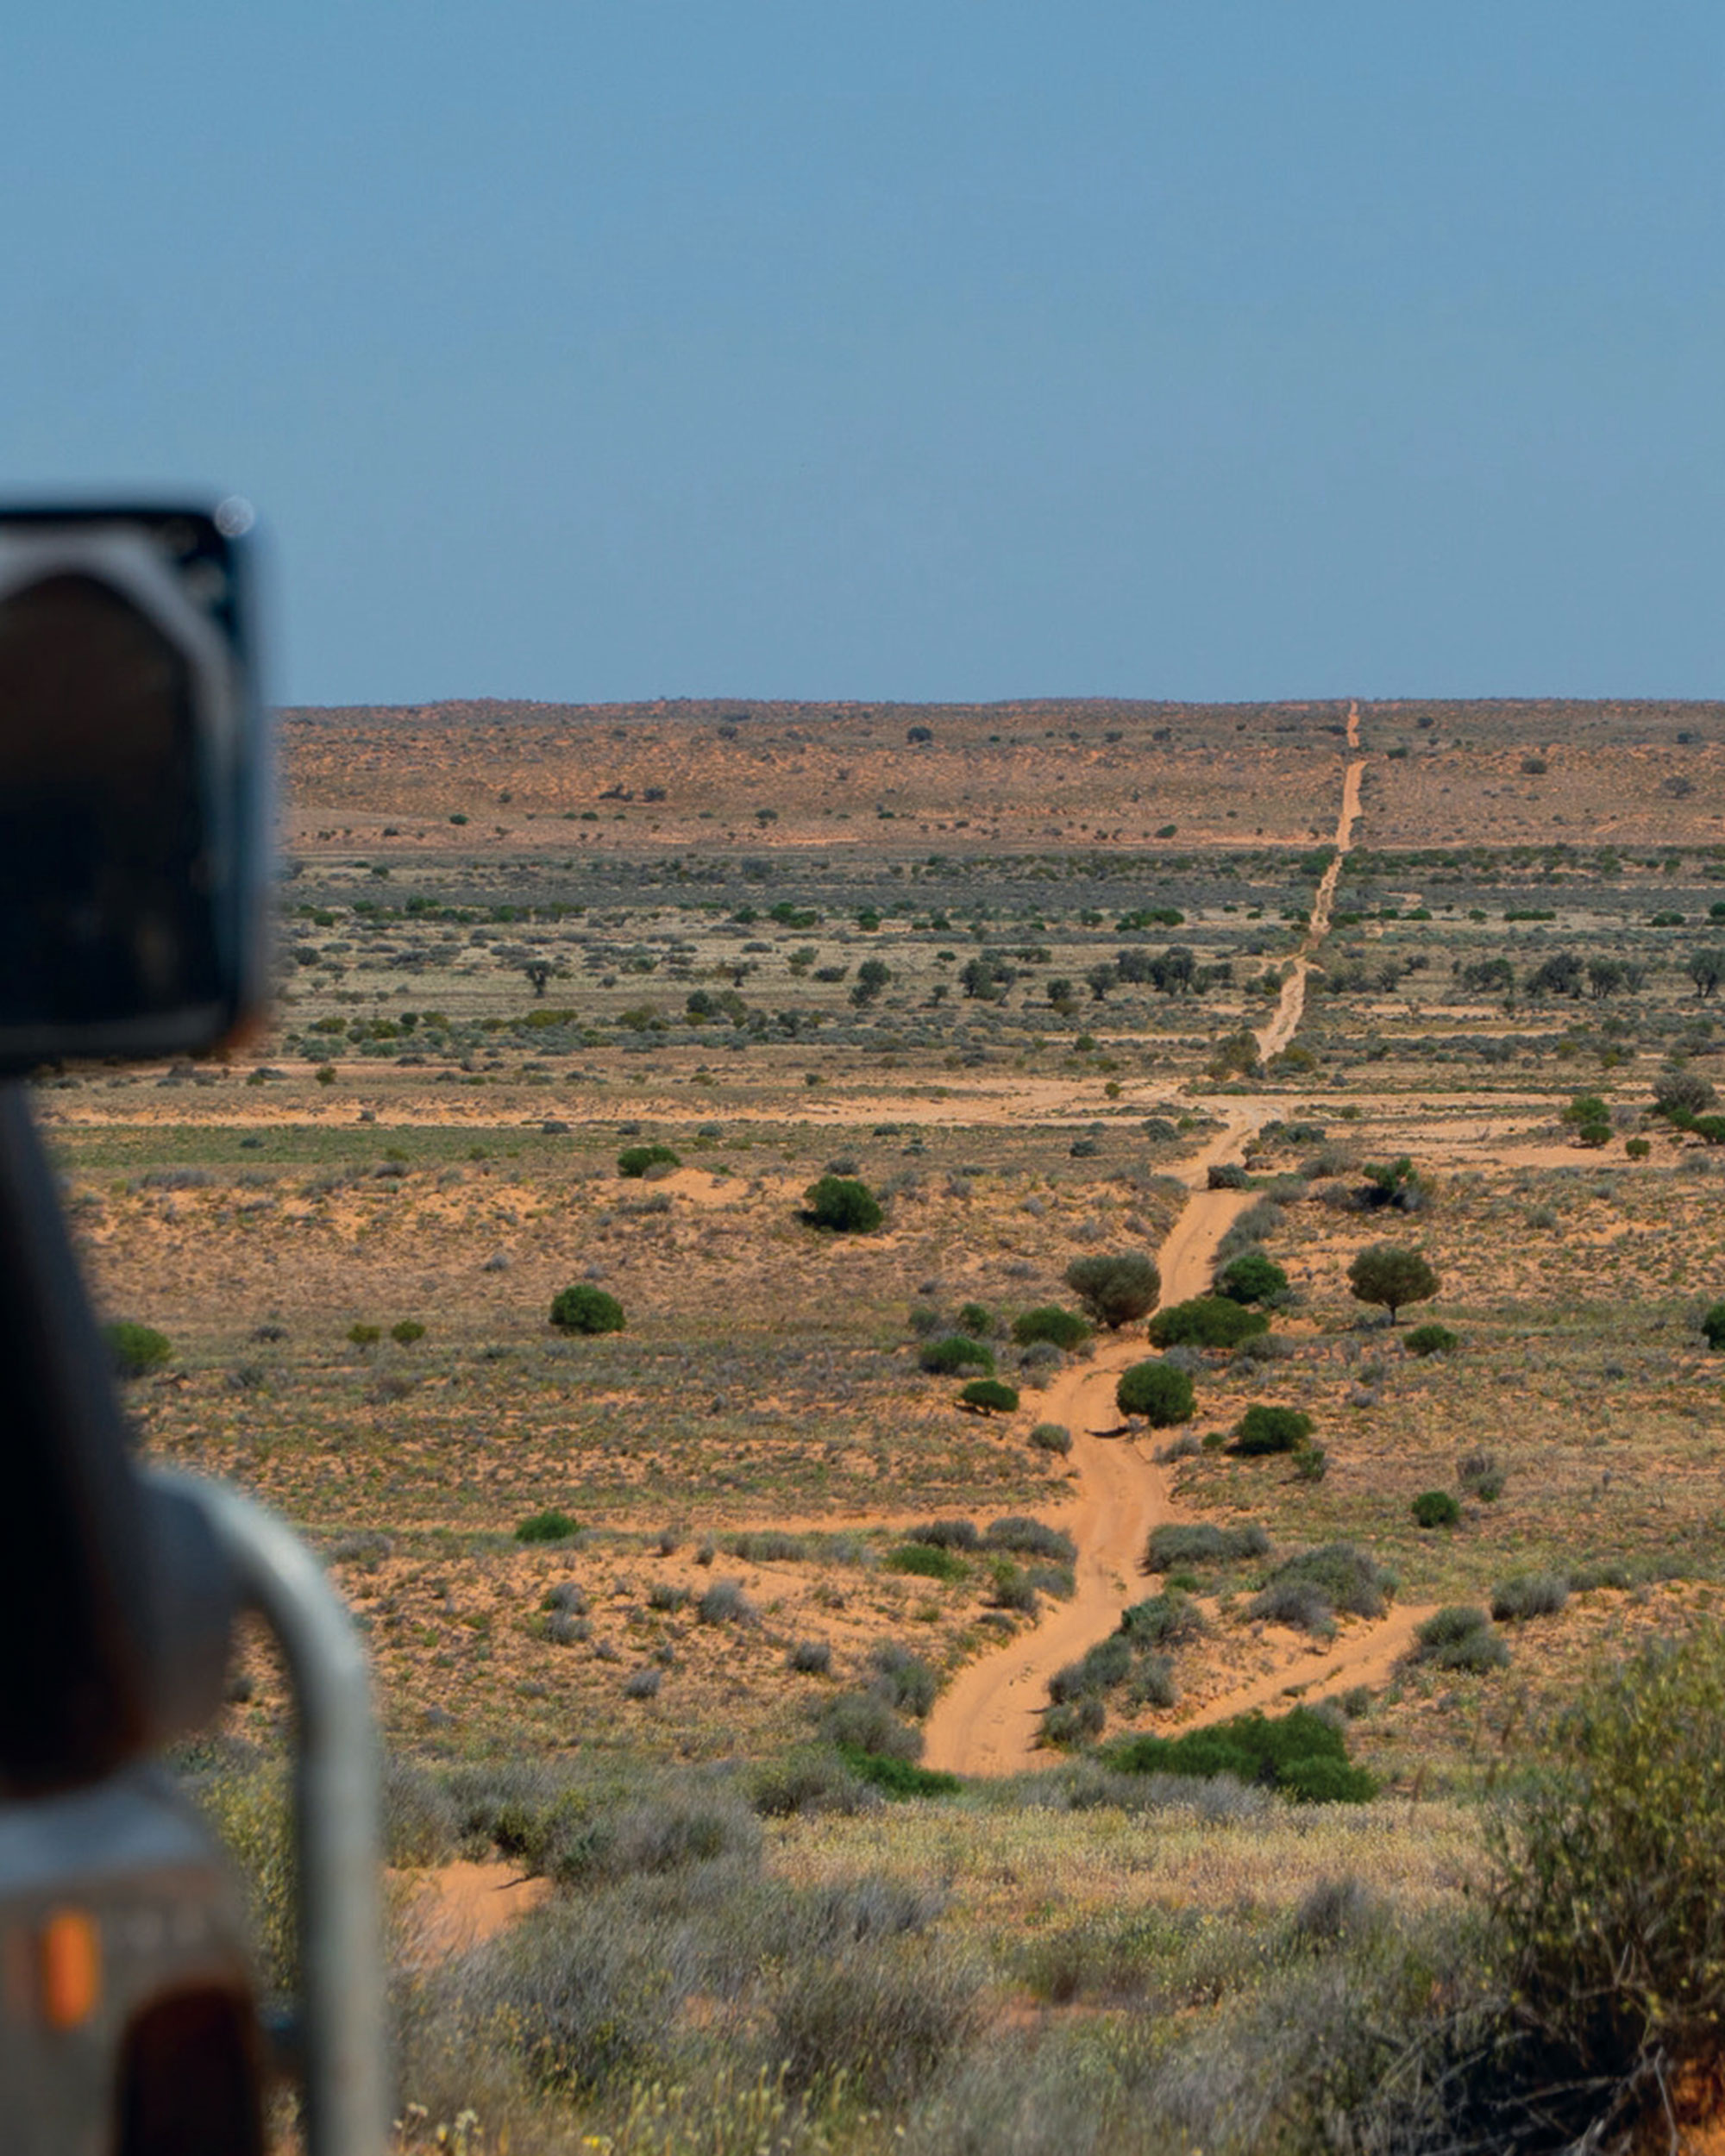
The riding was hugely spread out as we crossed the massive continent. We had already woven our way across the Strzelecki and Stuart Deserts using the abandoned Walkers Crossing to get us near to Birdsville, the edge of the next big nothing. As we wanted to explore more of the outback, we now had the huge Simpson Desert to cross to get to our next riding destination: Alice Springs.
The Madigan Line, our most direct route, also meant a lot of sand and over 1,100 dunes to scramble up. Red sand flew as the low-pressure tyres searched for traction, with low-range gears in full use and the right foot deeply engaged. Bouncing around for hours, and then arriving at camp, there is nothing quite like the stillness, the crimson sunsets and sunrises, and sleeping around campfires under the stars.
Pulling into Alice was a chance to restock and do maintenance after the extremely rugged outback crossing. It is one rough crossing that’s for sure, with uncountable bottom outs on our new and raised suspension and heavy corrugations battering everything for hours on end. Our mountain bike community was right there behind us, and we were able to use addresses to receive parts with others welding up cracked bike racks and providing us with a camp spot and hot showers. One of them, Chris, has been the most excellent man to know. He rang up and offered to show us around a new trail network while we were there.
Some 30km of trail, all built by one man, Mark’s network sits near Owen Springs, southwest of Alice. Many Alice Springs riders haven’t even heard about these trails, let alone ridden them. They’re well suited for eBikes as the additional speed creates a lot of fun on less gravity- orientated sections. Rocketing along on flat sections, and weaving our way through narrow stands of trees, we followed dry river beds up and down rocky outcrops, and long spinifex grass, constantly careful of tyre placements on the many abrasive slab rock sections.
Darwin sits on the coast, 1500km directly north of Alice. East of Darwin is a traditional Aboriginal area called Arnhem Land. On this route north, just outside of Katherine, we pulled into Nitmiluk NP – the bike trails here are built on the escarpments, high above the Katherine Gorge. The tracks weave between boulder fields and over playful slab rock sections, leaving us smiling, with descriptive chatter flowing. To finish, we dived into the sparkling thermal steam in town, leaving us stoked and refreshed. And, if that wasn’t enough, our new friend Andrew, the local MTB club president, turned out to be an ex-crocodile hunter who back in the day would jump on the backs of up to eight-foot-long saltwater crocs and bring them up to a boat for scientific research tagging. He regaled us with stories of his youth, diving—yes, diving not jumping—from 200-foot (61m) towers into the sea at Port Darwin, and even his time on the set of Crocodile Dundee. Being an ex-park ranger with excellent storytelling skills, Andrew is a walking encyclopaedia for all things nature-related. He was so entertaining that his stories distracted us on even the longest climbs.
Arnhem land and the Cobourg Peninsular, as a riding destination, are not mentioned anywhere that we found, so we thought it sounded like a great start. Once again, this meant filling the full 250 litres of diesel to make the distance there and back on these remote roads.
Arnhem Land has been an Aboriginal stronghold for over 65,000 years. British colonizers struggled to create a lasting presence here due to the extreme tropical conditions, leaving the indigenous population and their way of living comparatively undisturbed. Aboriginal elder of the area clan, Violet Smith, quotes; “Long ago we Jawoyn lived here. The old people have passed on. It’s okay for you to go around here. You stay maybe two nights, then you go back to your country”.

Our efforts to get the correct permits would test even the most tenacious administrator. Getting into Arnhem Land from the west means traversing the Kakadu National Park with its stunning rock gorges and deep plunge pools. Even the accepted swimming spots are somewhat “at your own risk” as from time to time a saltwater croc has made its way into these pools undetected, avoiding the purpose-built traps and monitoring. Oh, but these pools are so delightfully refreshing—we were now well into the 40-degree zone with high humidity which makes any type of exercise, including a leisurely bike ride, feel like a workout.
The border to Arnhem Land is via the famous ford at Cahills Crossing on the East Alligator River, most famous for its large saltwater crocs swimming around on either side of the vehicle—as you can imagine, it is not a place to get stuck that’s for sure. We counted 12 crocs in the water around us as we drove across the river, all waiting for the fish to come over the rocks with the tidal shift. From our camp, there was a sweet 40km bike ride around Smith Point, the northern tip of Garig Gunak Barlu National Park on the Cobourg Peninsula. With the vastness of the Timor Sea in the background, Olive Ridley sea turtles coming on shore to lay their eggs, and an epic UNESCO wetland, the ride became a well-rounded experience.
After an epic trip through the most remote parts of Australia, Jamie and Anja are planning on shipping Collin over to South Korea, to access Russia, Mongolia, and many of the Stans, en route to Europe. Stay tuned for more adventures.
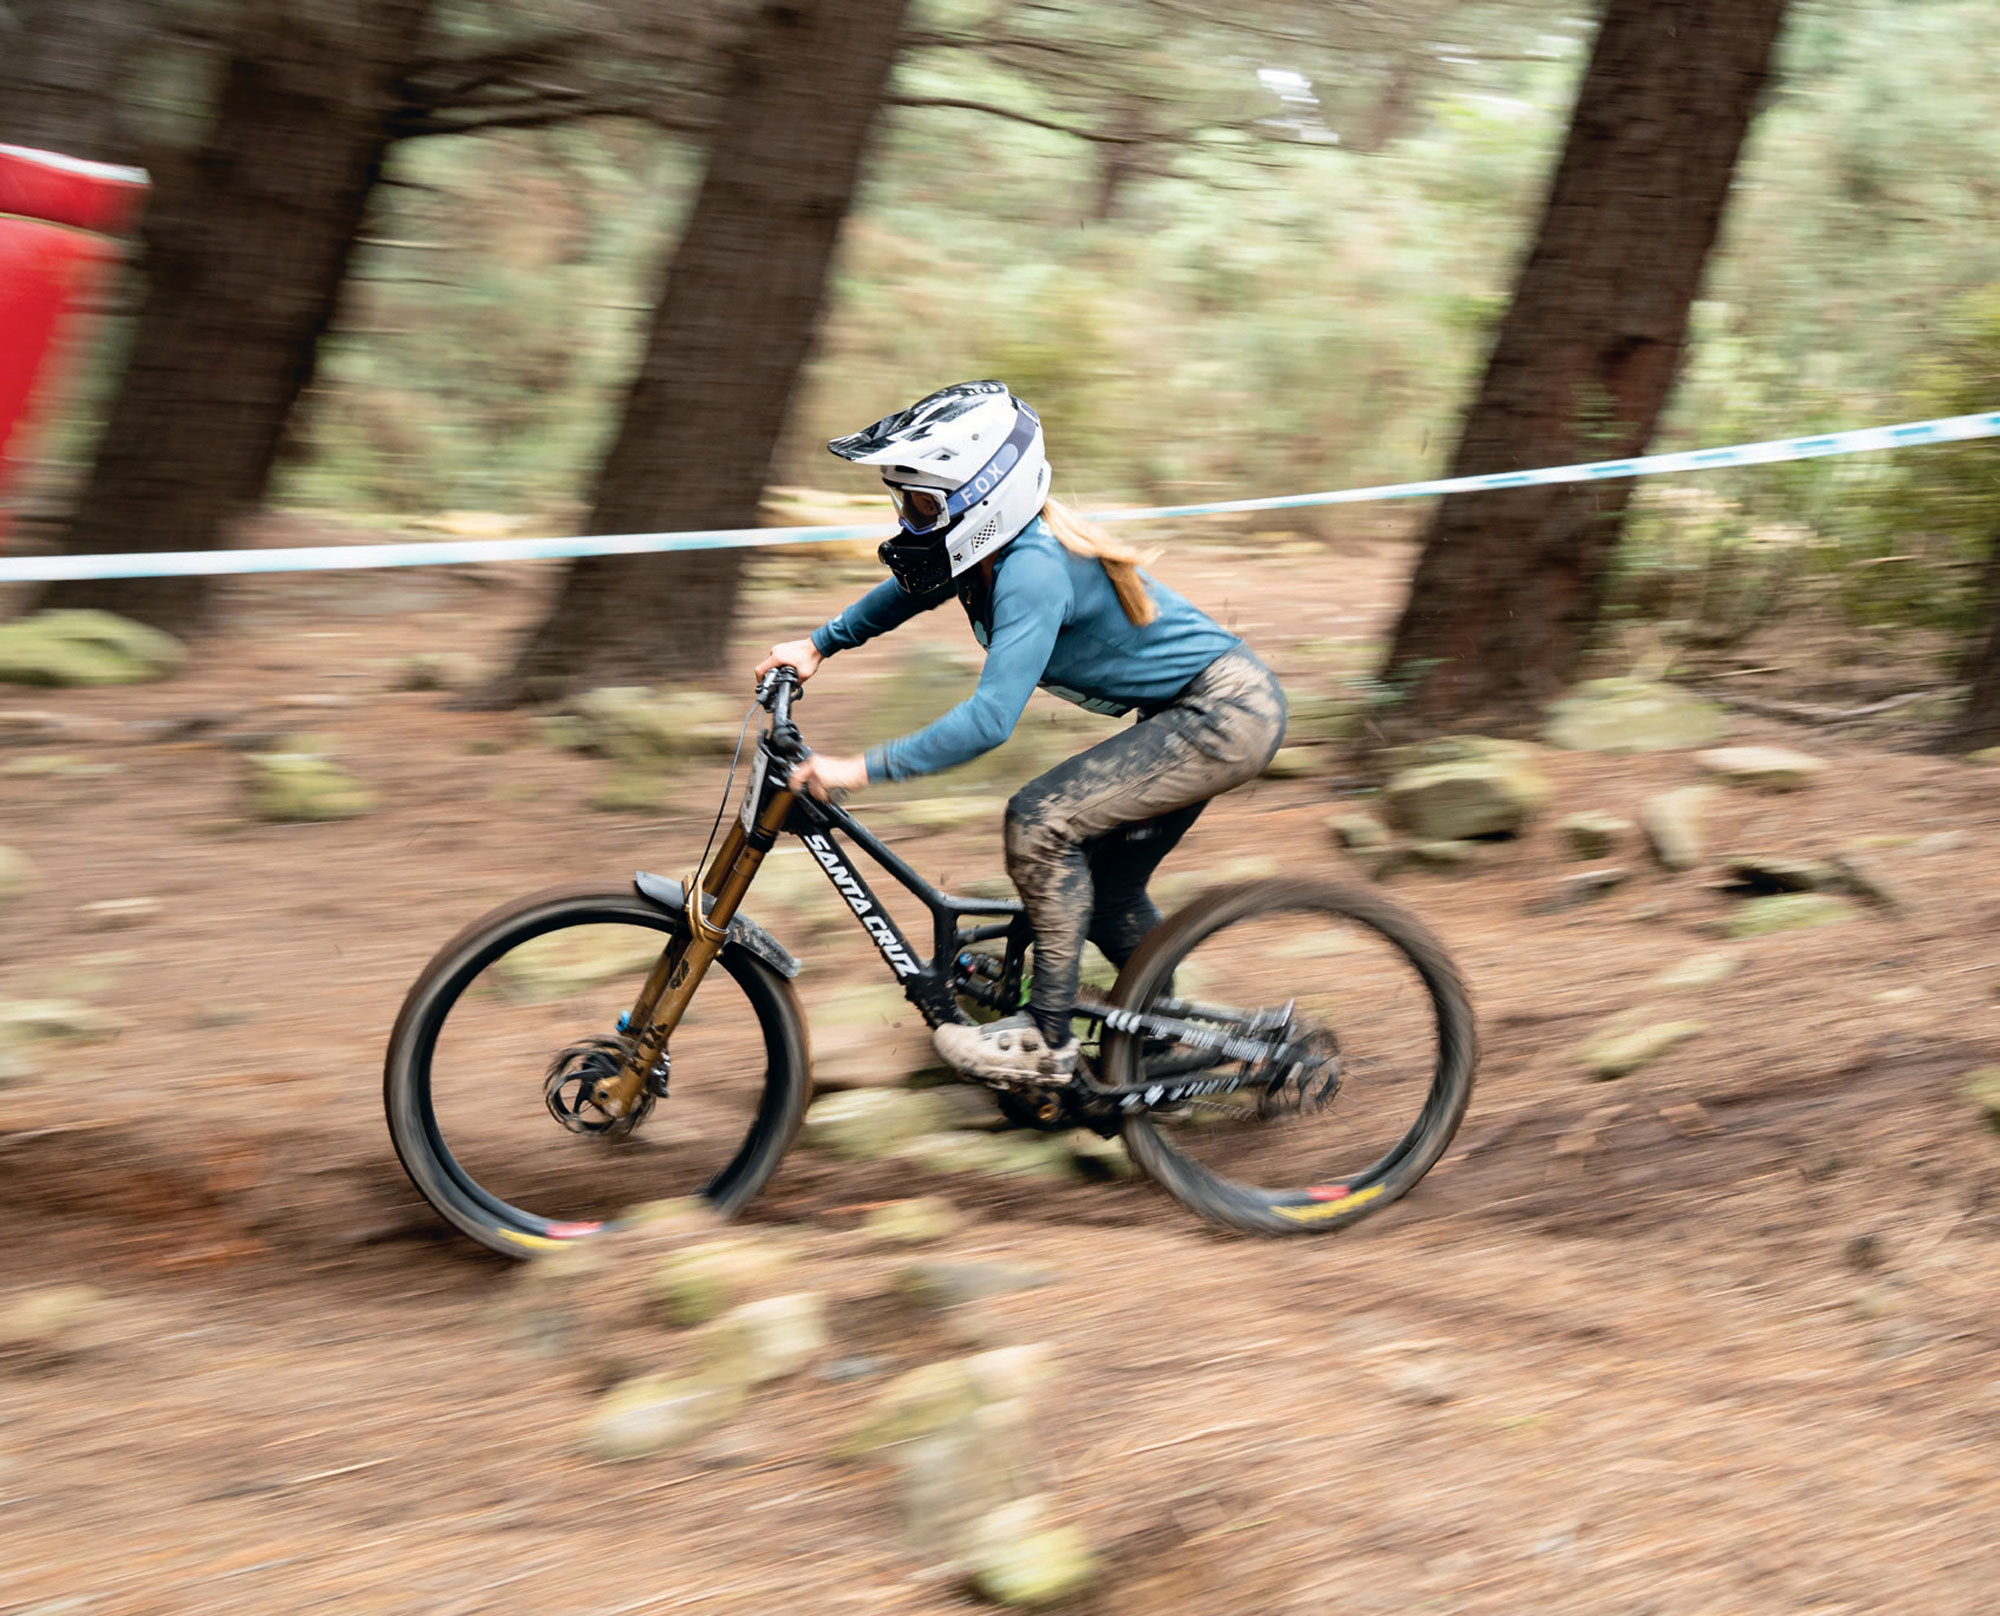
Leaders of the New School
Words & Images Riley McLay
New Zealand has recently experienced a golden age of downhill racers, putting our small country on the map as a powerhouse of talent. Originally, it was riders like Brook Macdonald, Sam Blenkinsop and Wyn Masters who stood out for their raw speed mixed with a relaxed outlook on racing, creating an international reputation that showcased the spirit of New Zealand’s mountain biking culture.
The torch was then passed to the VANZACS, where the talent pool increased with the likes of Eddie Masters, George Brannigan and Matt Walker redefining what was required to find racing success. This was the era of incorporating the DIY mentality of getting the job done by any means necessary with a lifestyle-based approach to building their careers. While both cohorts of talent found success at the World Cup level, New Zealand has since experienced a noticeable gap in racers transitioning from juniors to elite success. Now, however, New Zealand is home to an influx of junior talent already making waves globally.
Aotearoa has always had a strong racing scene at the grassroots level, but breaking onto the international stage comes with significant challenges. Kiwi racers have consistently faced two major barriers to competing internationally. One being the fact that, as you can imagine, chasing the World Cup circuit isn’t cheap; and two, our geographical isolation, making travel something of an ordeal. With the sport largely based in Europe, traveling back and forth from New Zealand isn’t practical for most people. Instead, riders must base themselves there for most of the season, which can be three to four months. The financial burden is high even before racing begins, not to mention when you factor in race fees, insurance, spare parts and essential nutrition. The mental strain of just getting to races isn’t ideal when a racer is chasing good results. This is why external funding and sponsorships are so crucial for success.
As the sport becomes more professional, privateers are increasingly being pushed out of competition. This makes securing a spot on a factory team more important than ever. Recent UCI rule changes have made it even harder for privateers to qualify for a World Cup, so riders must now earn UCI points through a new feeder series called the Continental Cup. Finishing in the top five of any Continental Cup Series grants access to the next World Cup on the calendar. Alternatively, winning their country’s National or Continental Championship guarantees automatic entry for the season. Confusing, I know. And yet another hurdle for Kiwi riders, making strategic race planning more critical than ever.
New Zealand riders have been fortunate to hone their skills on some of the world’s best downhill tracks, contributing to the development of top-tier talent. Over the years, as mountain biking’s popularity has grown, there’s been a collective effort to expand and improve existing networks to meet increasing demand. As a result, New Zealand has become a go-to destination for the world’s best riders to train during the Northern Leaders of the New School Hemisphere off-season. We’ve all seen clips of the likes of Ronan Dunne and Jackson Goldstone going full throttle down the Coronet DH track. With social media being so accessible, having the world’s best riders on our shores not only provides incredible exposure for mountain biking in New Zealand, but it also inspires a new generation to take up the sport. As more kids get into biking, many want to try racing and push their own limits—so much so that the Secondary School Nationals have been sold out year after year.
Honing talent at an early age is the best way to develop habits for success, but balancing race results with the need to play into the social media game to get noticed, can be tricky. Marketing yourself as a junior rider has always been challenging, but the landscape has shifted with new changes to the UCI World Cup format. Now, junior riders not only have their runs televised on race-day broadcasts, but their UCI points are also valued equally to those of elite racers. As a result, teams see greater value in including junior riders—not just for long-term development, but also for securing enough points to qualify their team for the season.
Talent seems to come through in waves, and a new generation of Kiwi downhill racers is already making its mark on the world stage. It all kicked off with Jenna Hastings bursting into the spotlight, winning the Junior World Championships in Les Gets in 2022. Then, in 2023, New Zealand stole the show once again with a clean sweep of the podium at World Champs, thanks to Erice van Leuven, Poppy Lane, and Sacha Earnest. Erice went on to become a back-to-back Junior World Champion and overall series champion in 2024, securing a sought-after contract with one of the biggest teams on the circuit, Norco Race Division. Sacha’s impressive efforts didn’t go unnoticed either—she was picked up by Trek Factory Racing. Young phenom, Eliana Hulsebosch, impressed by securing a deal with the Santa Cruz Syndicate after a breakout season in 2024 on The Union. Eliana consistently finished in the top five and clinched her first World Cup win in Val di Sole, Italy.
In the junior male category, several Kiwi riders have been making a strong impact on the World Cup stage, with Oli Clark and Rory Meek standing out with a number of impressive top 20 finishes in 2024. After missing over half the season due to injury, Tyler Waite made a strong comeback, finishing fourth at the World Championships, second at Loudenvielle, and third at Mont-Sainte-Anne to round out the season. Being part of a powerhouse team like Yeti Factory Racing, with the experience of riders like Richie Rude and Camille Balanche to learn from, he will undoubtedly have plenty of eyes on him in 2025. Finally, Luke Wayman was the epitome of consistency last season, securing second place in the UCI World Cup junior overall and never finishing outside the top 10 in any race. In 2025, Luke will be riding for Continental Atherton Racing—a team led by a legend of the sport, Gee Atherton. Also, becoming teammates with 2023 World Champion, Charlie Hatton, will provide the perfect environment to build into his first year in the elite ranks.
Development race teams are not a new concept, but Envision Racing aims to expand its rider’s opportunities—not just in racing, but by helping them build connections for careers beyond the track. Founded by Cam Cole and Liam Jackson, the team provides industry support to help riders compete while also teaching them the expectations of becoming professionals in the sport. Cam’s experience and connections as a former World Cup racer, and Liam’s marketing expertise, helps mentor riders to understand their value to sponsors while still being appreciative of the opportunities given. While raw speed gets you on a team’s radar, Envision Racing values a combination of attitude and work ethic above all else. Envision Racing’s goal is to minimize upfront costs for their riders by supplying them with a bike and gear for the season. Riders can then sell their previous setups to fund travel and chase races. The 2025 race season has already delivered strong results for the team. Rider Cole Hulsebosch claimed victory in the Under 17 category at the National Championships in Rotorua, a perfect way to kick off the year as he prepares for his Northern Hemisphere season. Meanwhile, Jonty Williamson’s standout performances have earned him a contract with Yeti Factory Racing for 2025. This marks a major success for the Envision Racing team, whose mission is to serve as a steppingstone for opportunities like this. Inspired by top development programs overseas, Envision Racing remains committed to identifying and nurturing young talent, helping them reach their full potential.
The NZ MTB Academy offers a fresh alternative to the traditional development team model, bridging gaps in an athlete’s progression to help them succeed on the international stage. Founded by Sam Thompson, the academy draws on his extensive experience running mountain bike programs and coaching in the gravity space, equipping Kiwi riders with the knowledge and support needed to navigate the World Cup racing scene more effectively. What sets the academy apart is its flexibility. It works with riders, whether they are on a team or not, fostering lasting relationships for the future. It also provides opportunities for senior riders, such as Tuhoto-Ariki Pene, to take on mentoring roles, passing down firsthand knowledge that they have learnt to the next generation. Being competitive in New Zealand is one thing, but succeeding internationally requires a deep understanding of training, nutrition, and sports psychology to gain an edge. The academy primarily targets junior riders who demonstrate the right attitude, a genuine willingness to learn, and a passion for racing—not just the lifestyle that comes with it.
This past October, the Academy hosted one of its largest camps yet, with around 40 kids in Rotorua. Their future goal is to support as many riders as possible as they progress in the sport, not only during the off-season but also by providing logistical support on the ground while they compete overseas. This structure will ensure that future waves of young Kiwi riders can continue to make their mark on the world stage, and carry forward the legacy of those who came before them—proving that New Zealand will remain a force to be reckoned with for years to come.
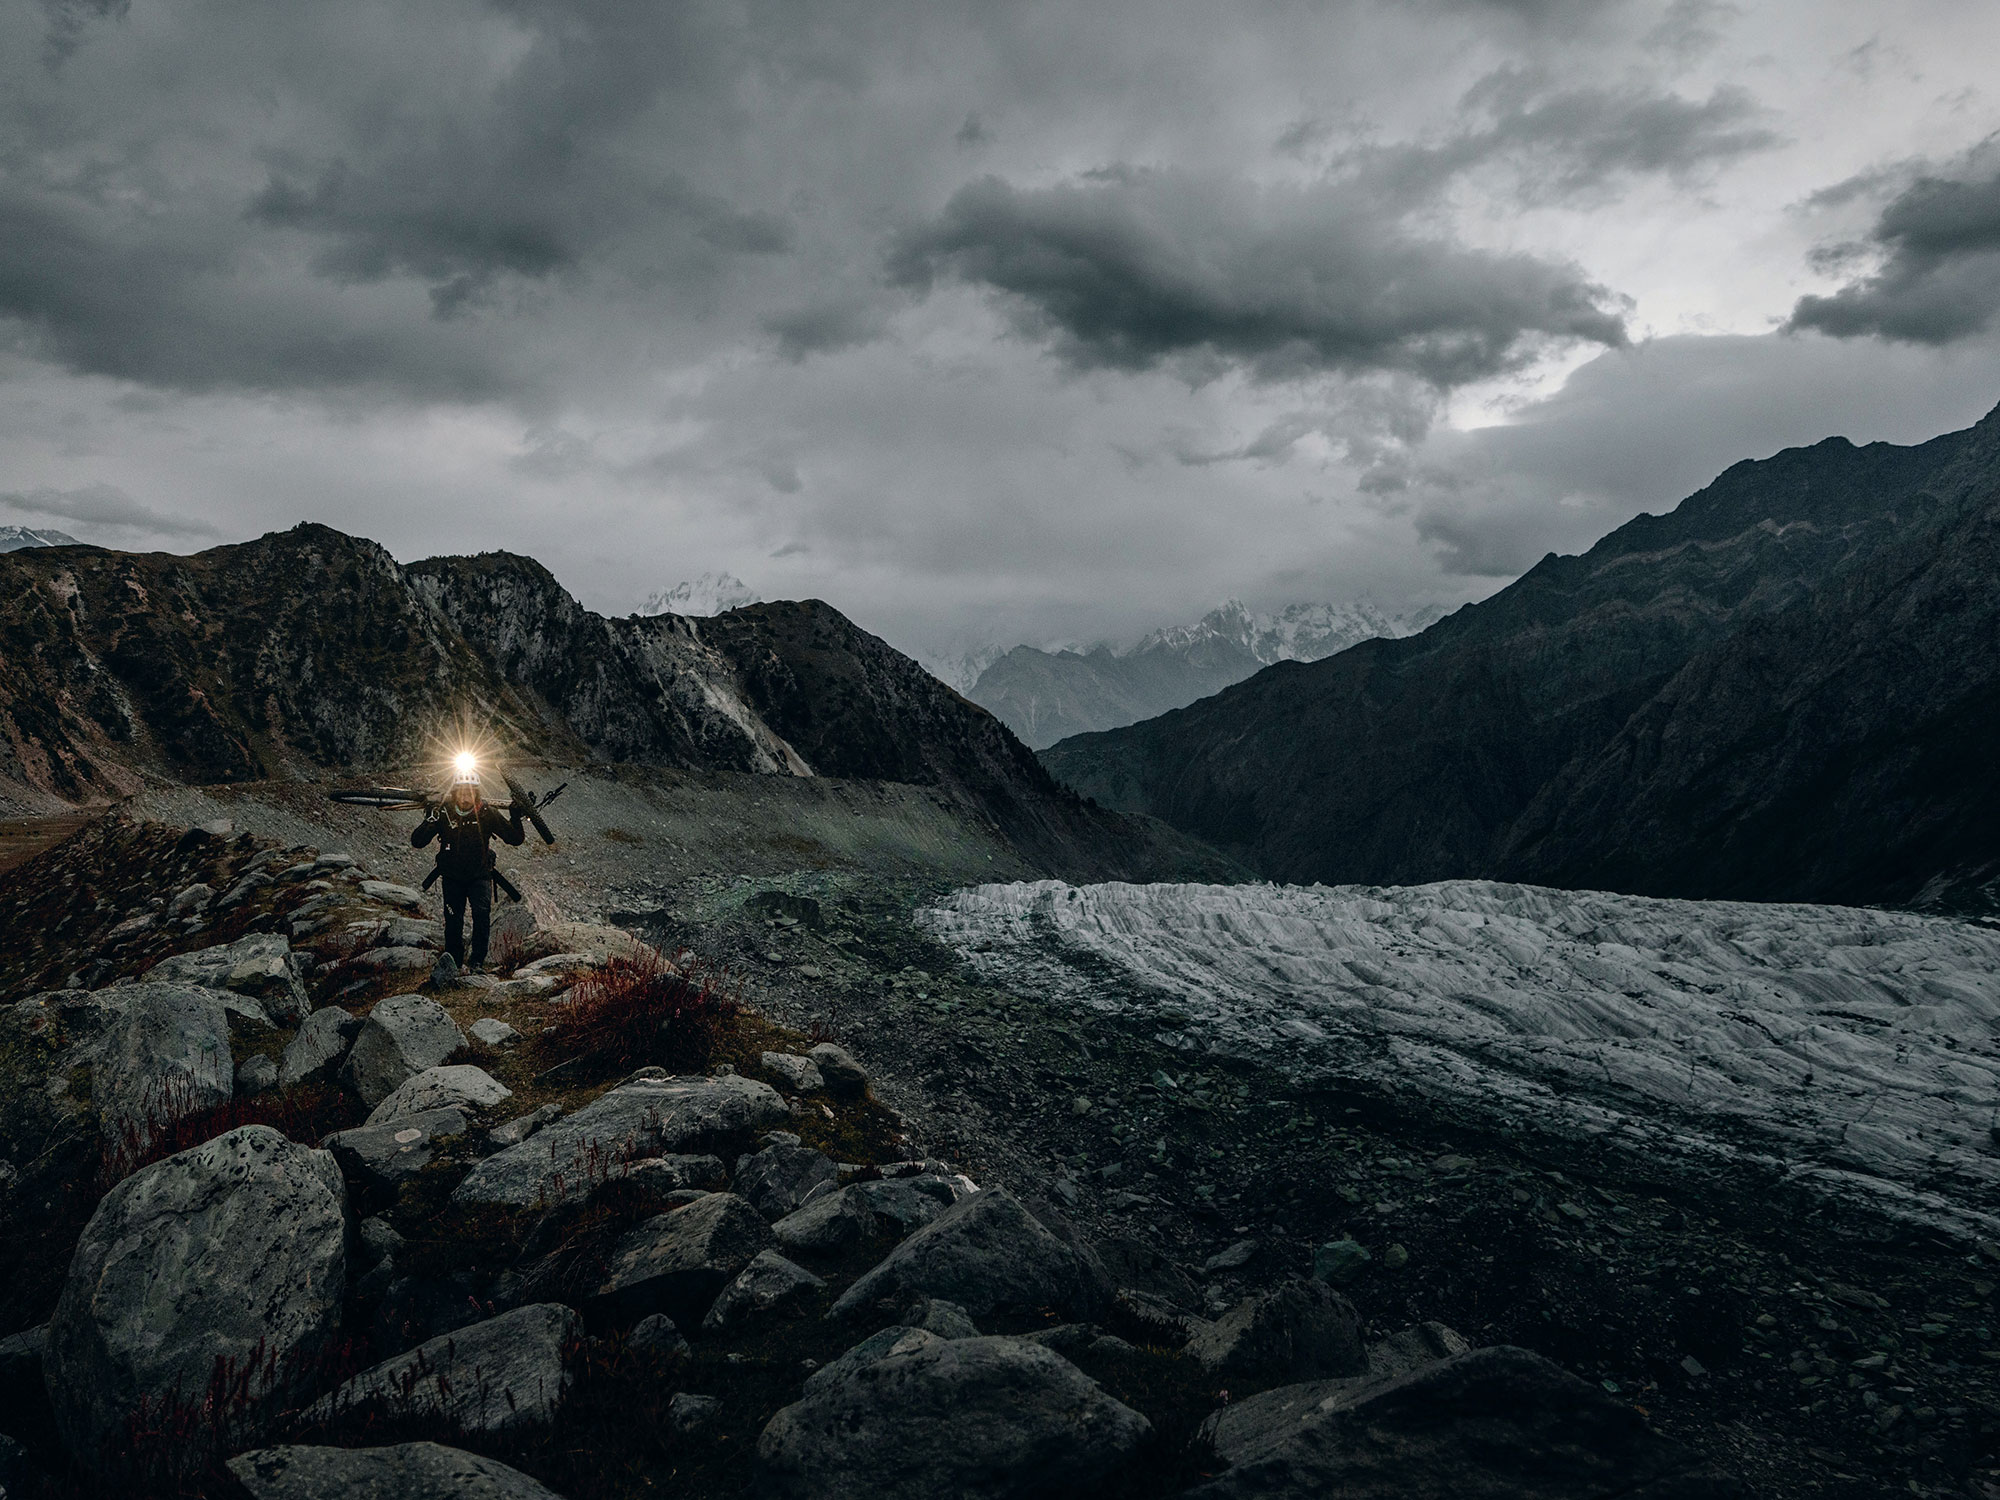
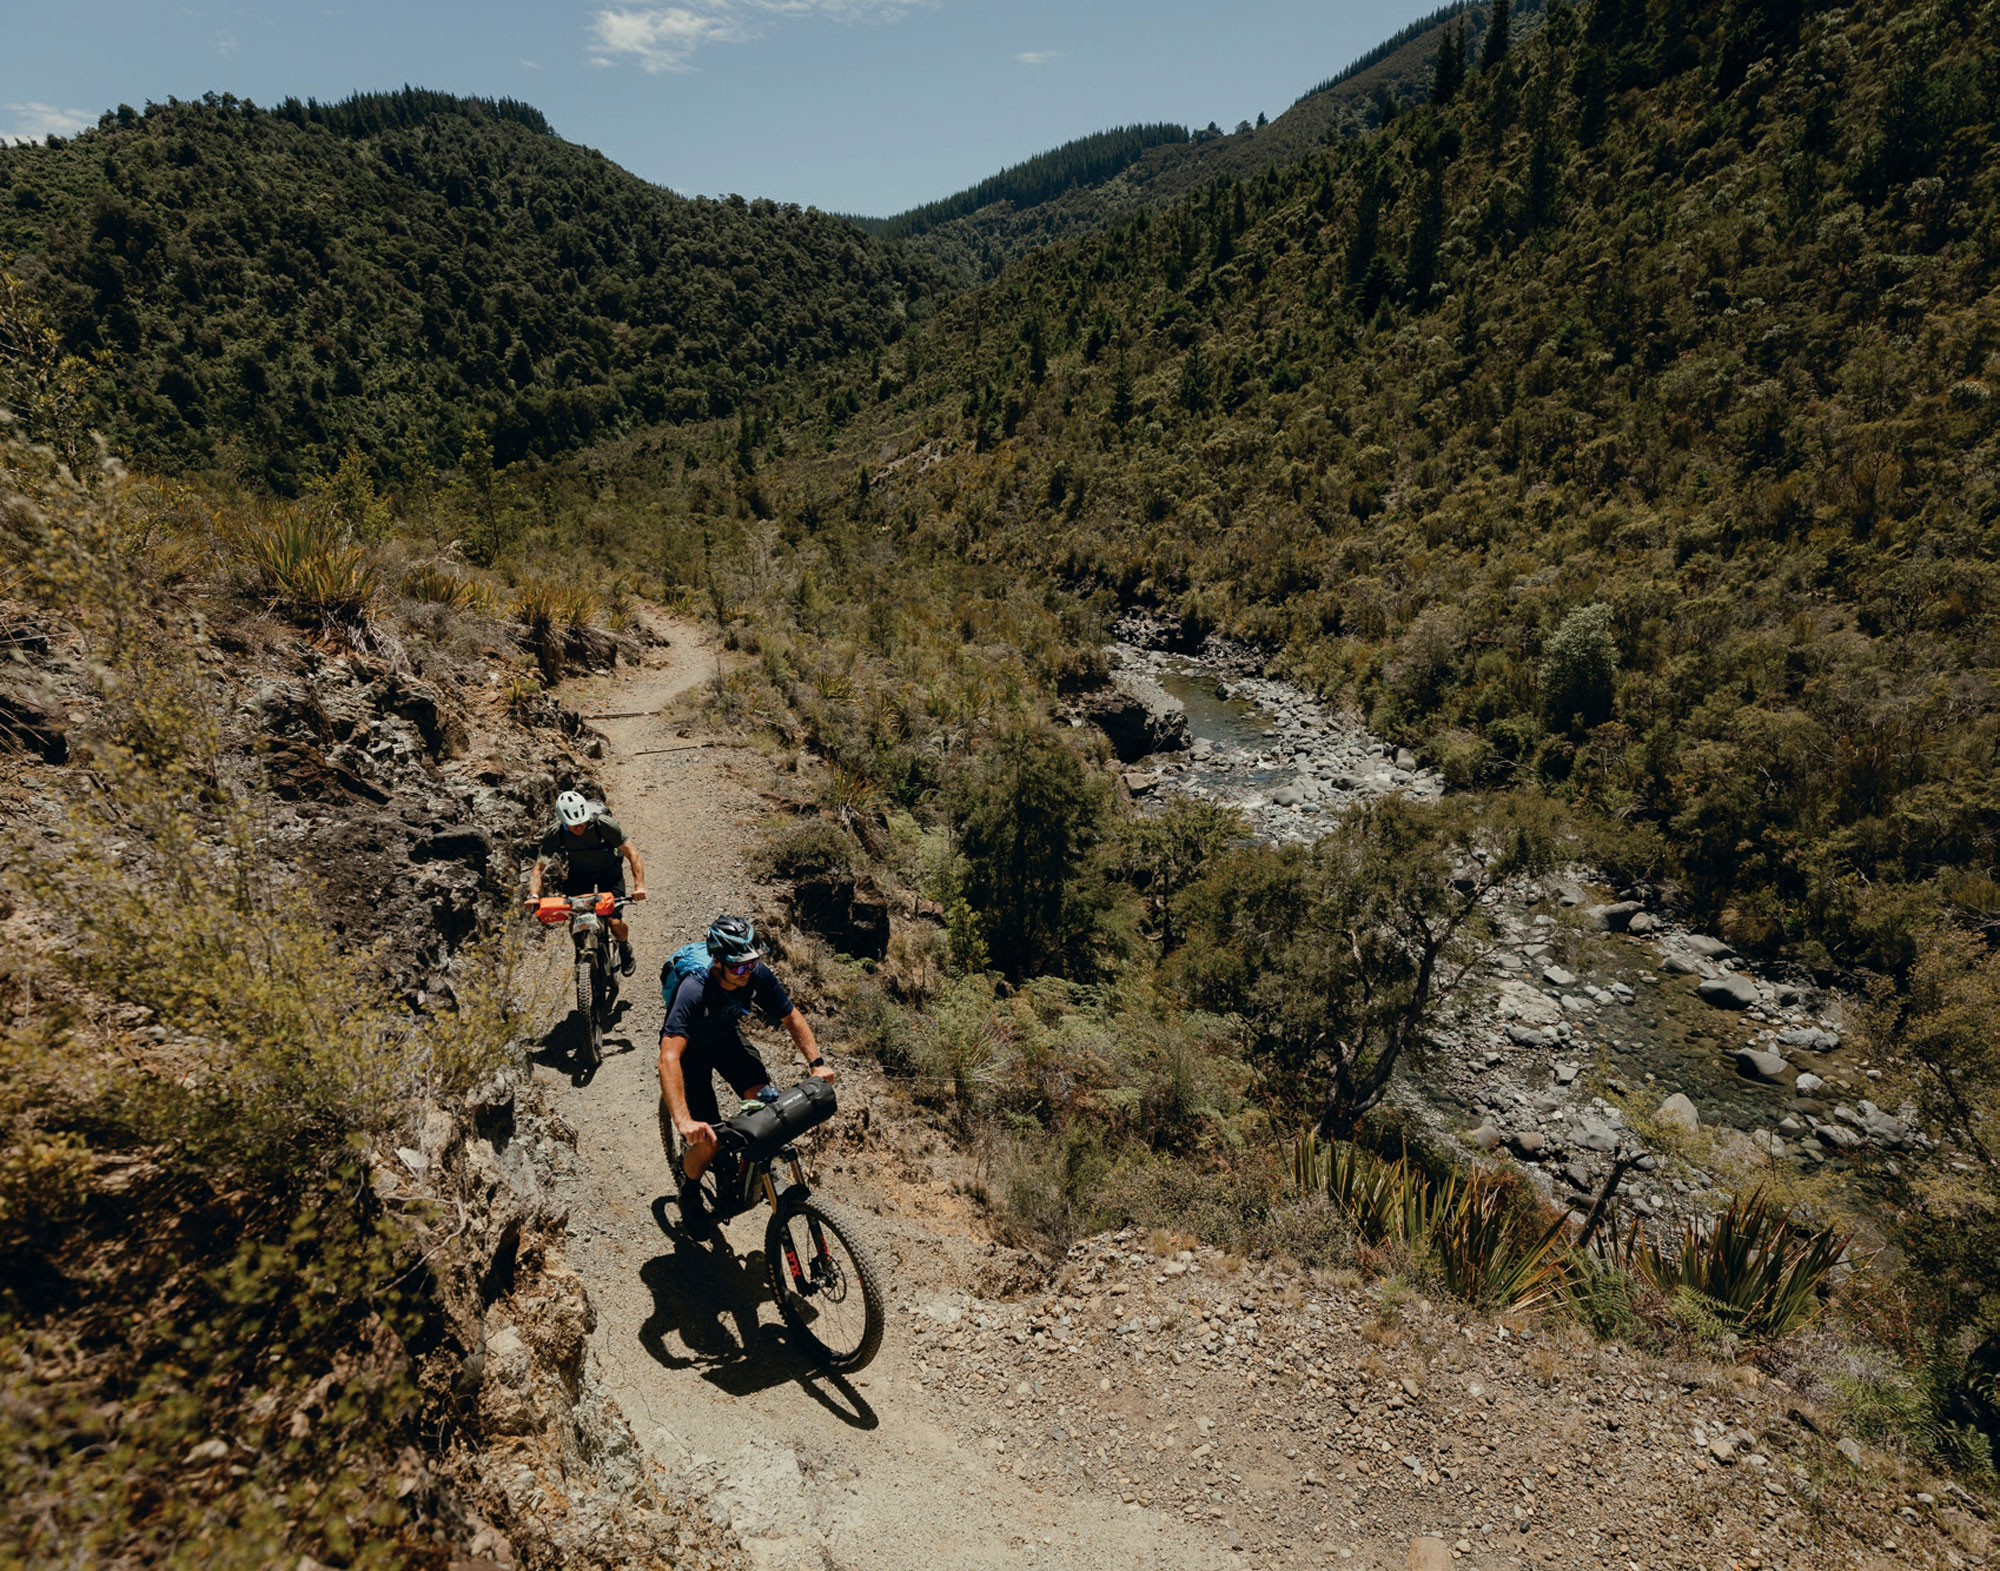
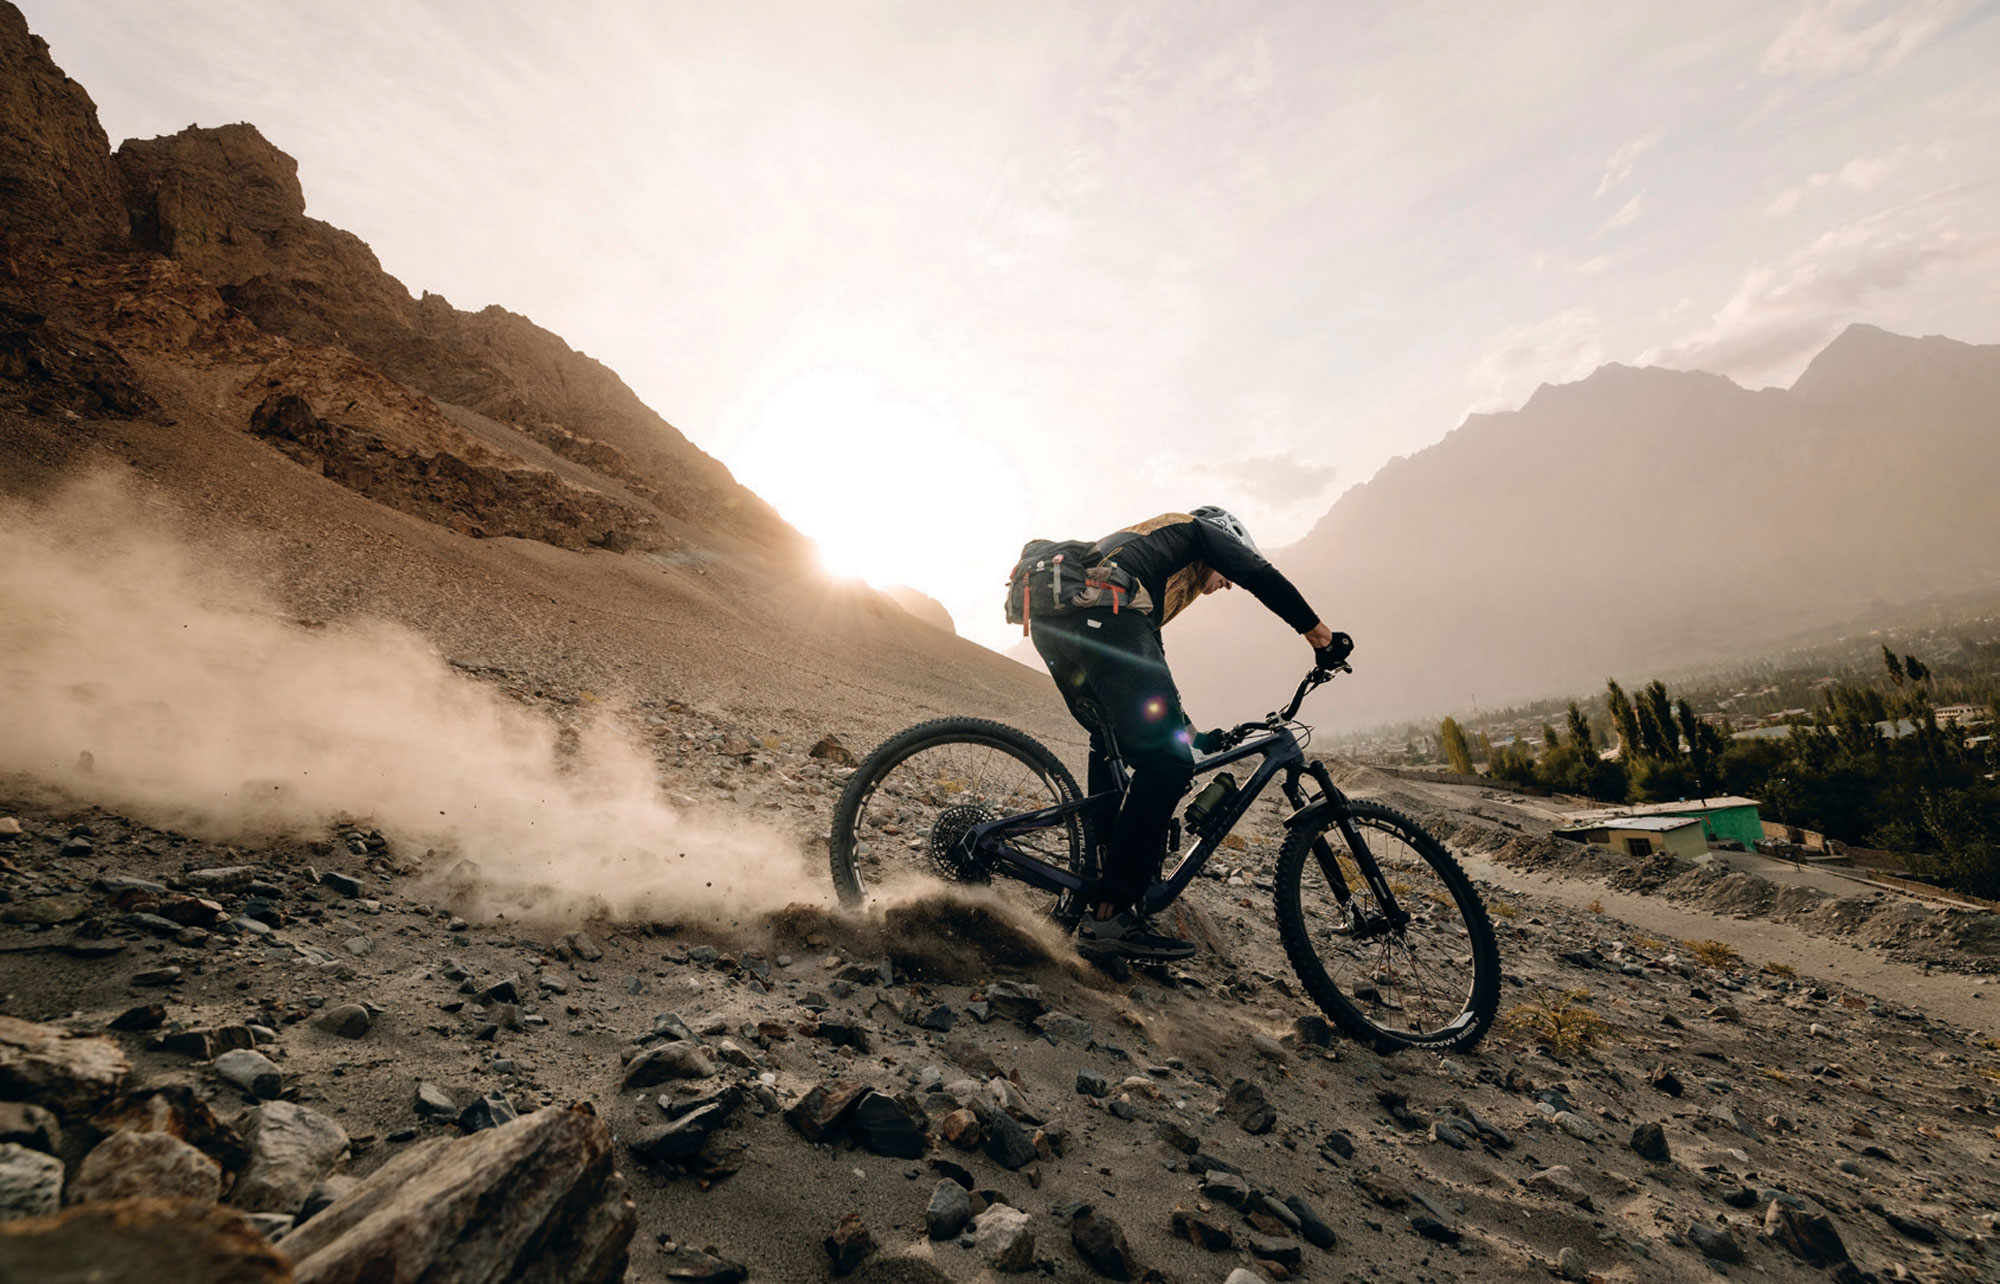
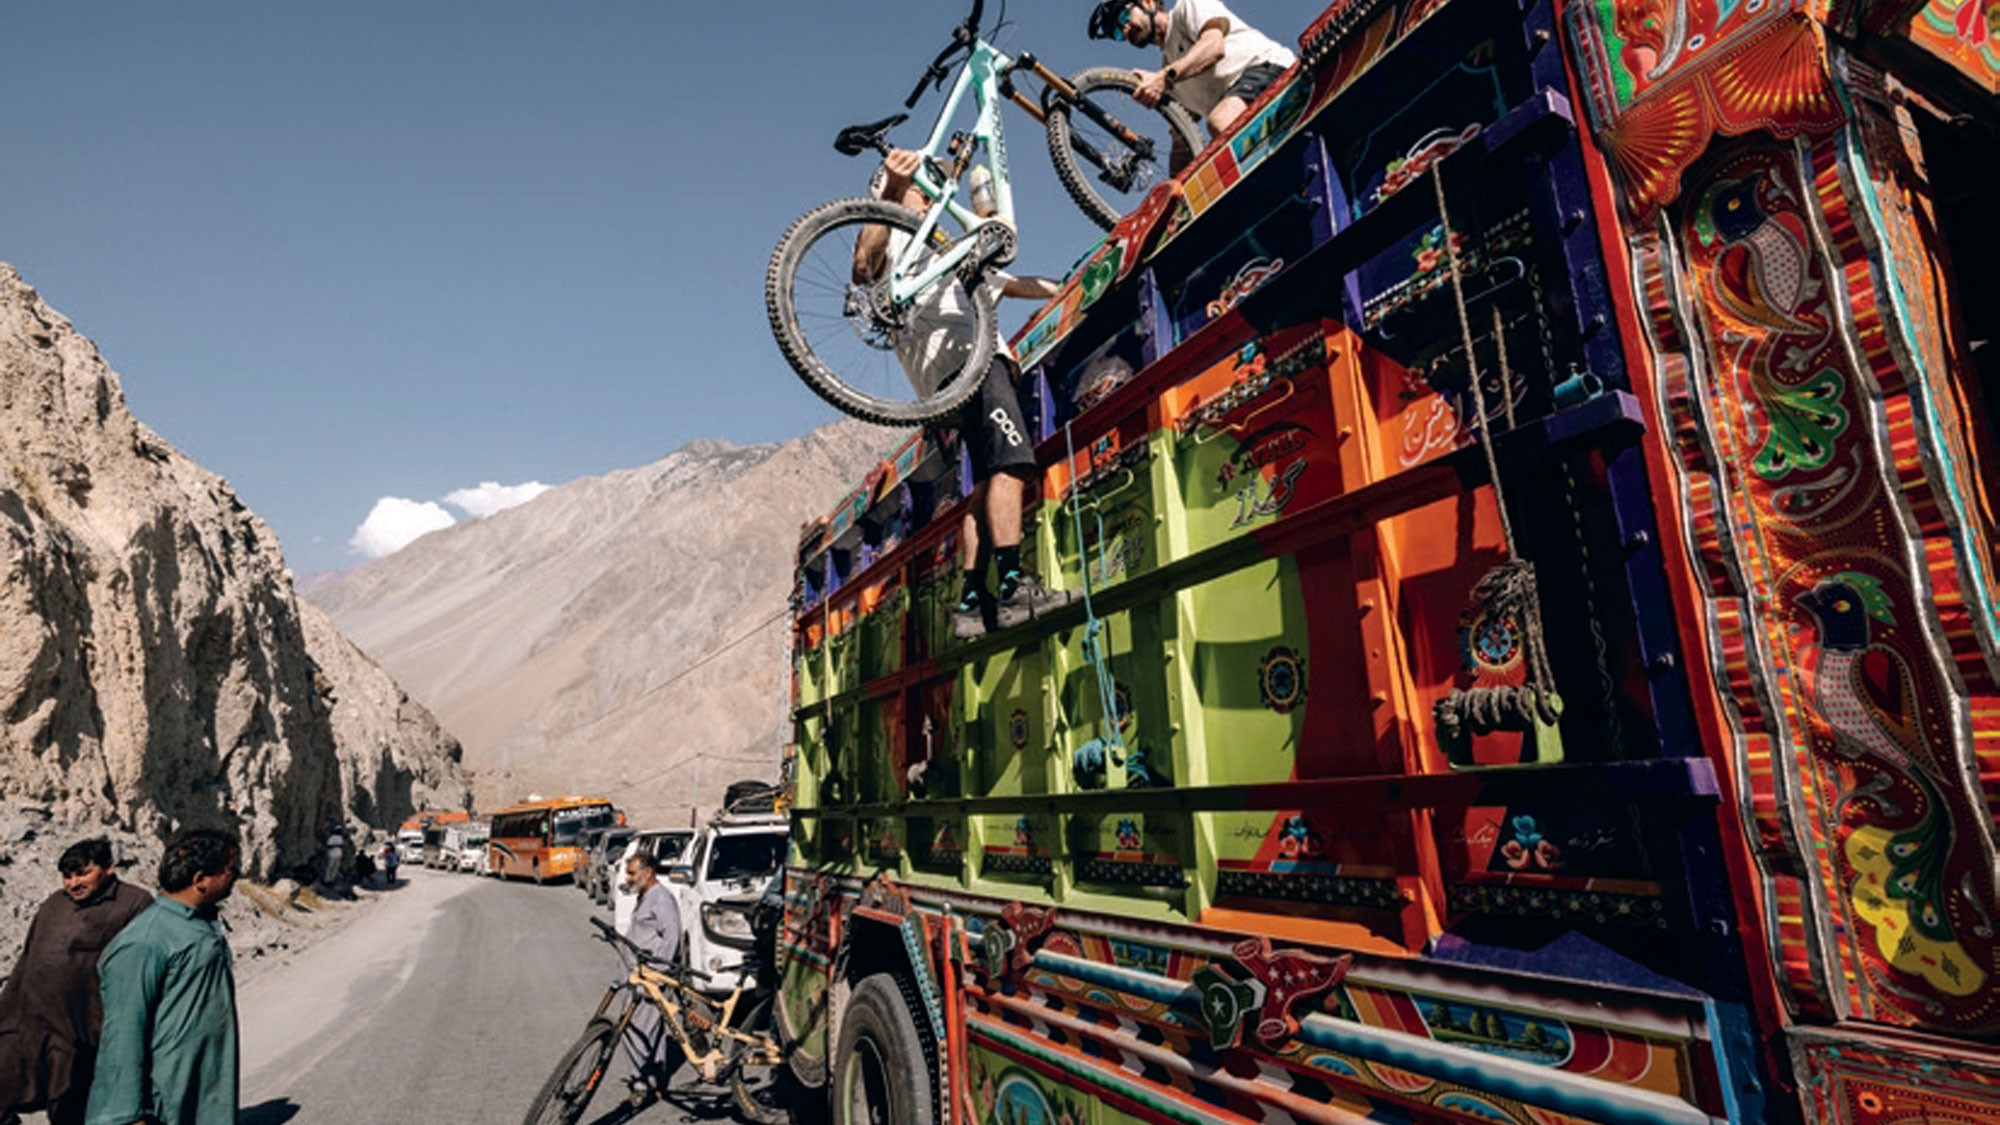
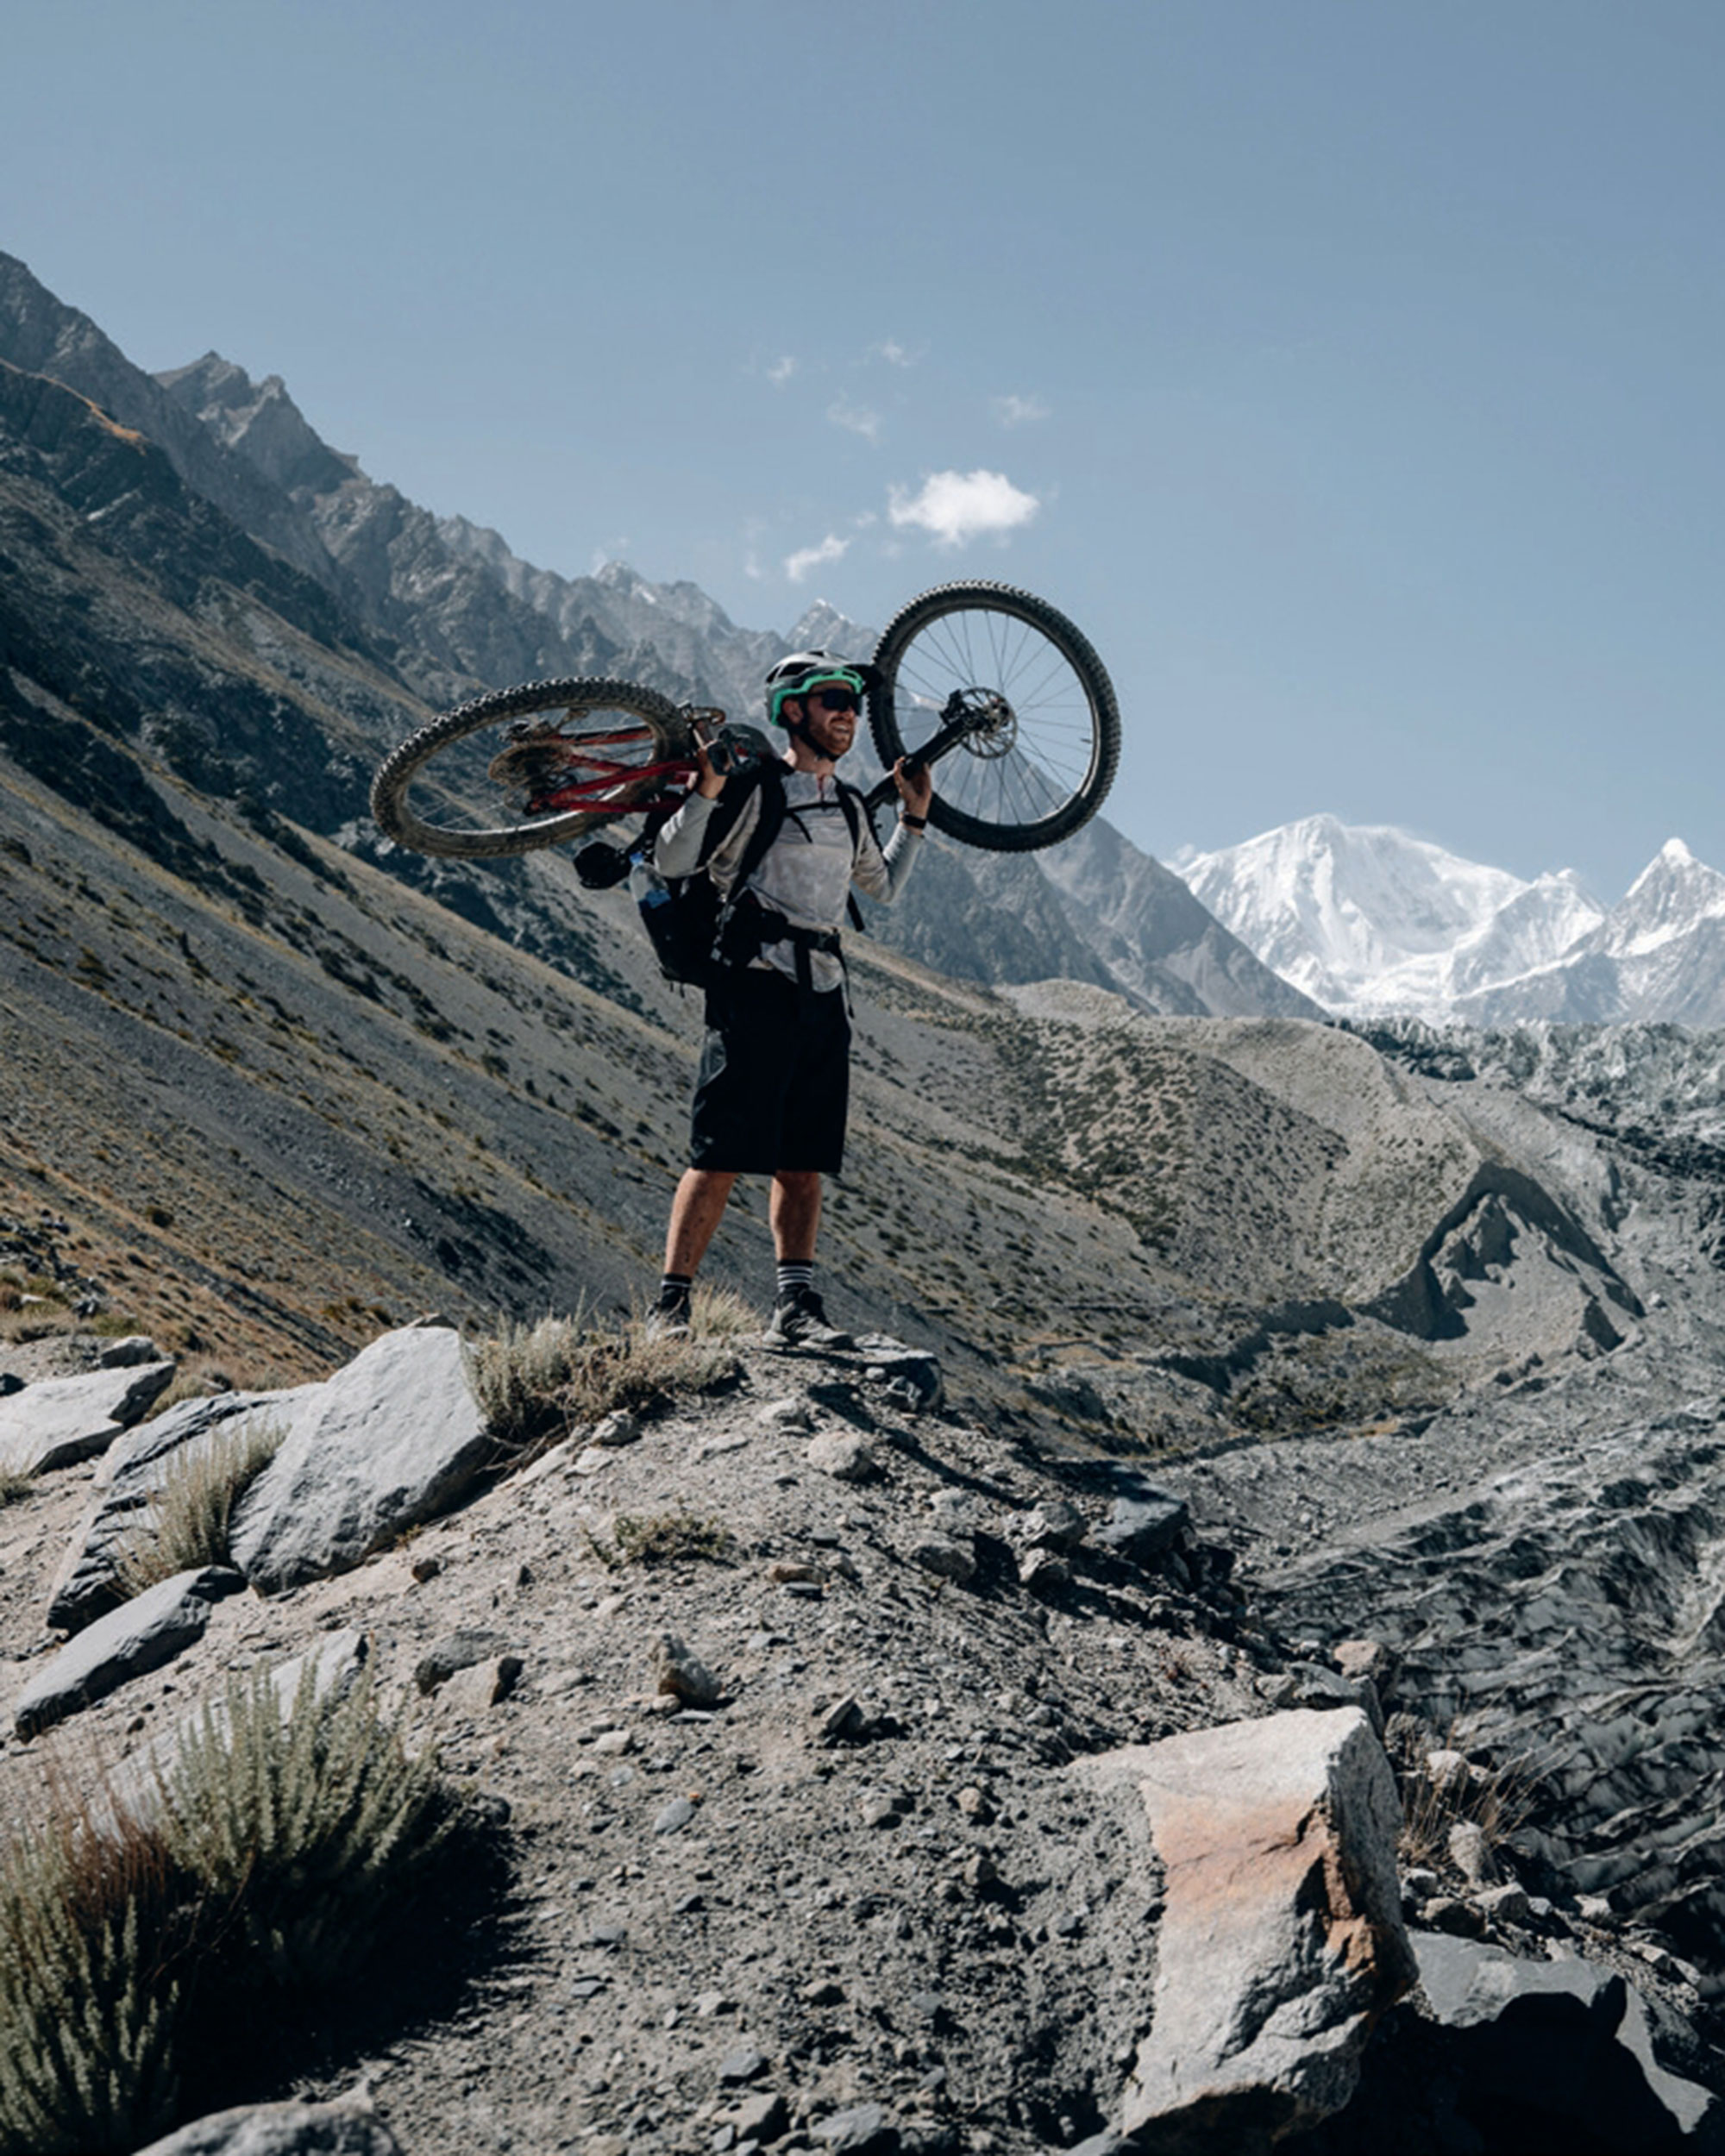
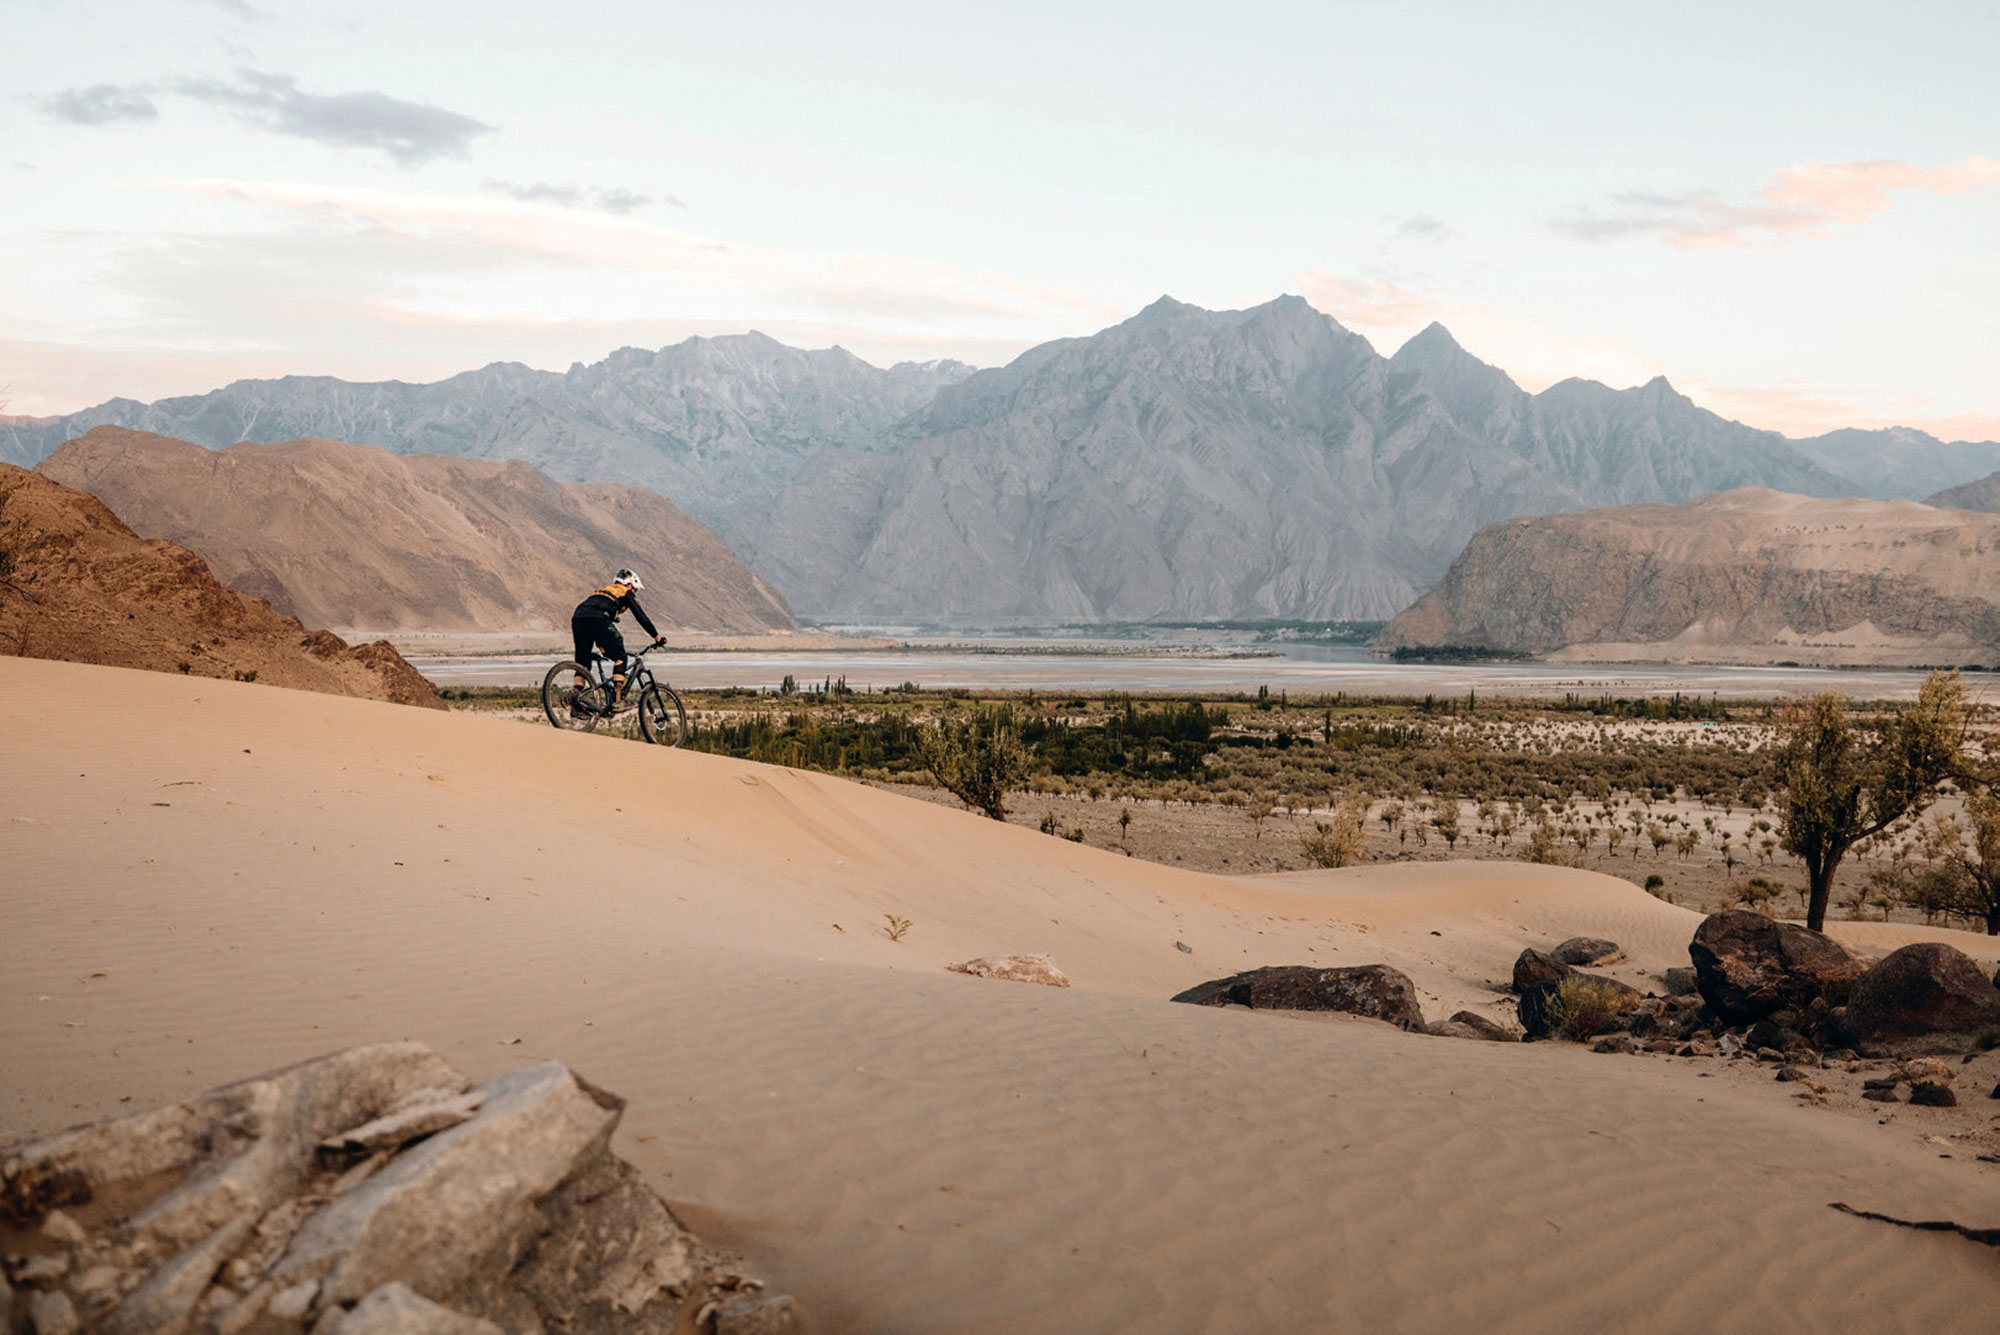
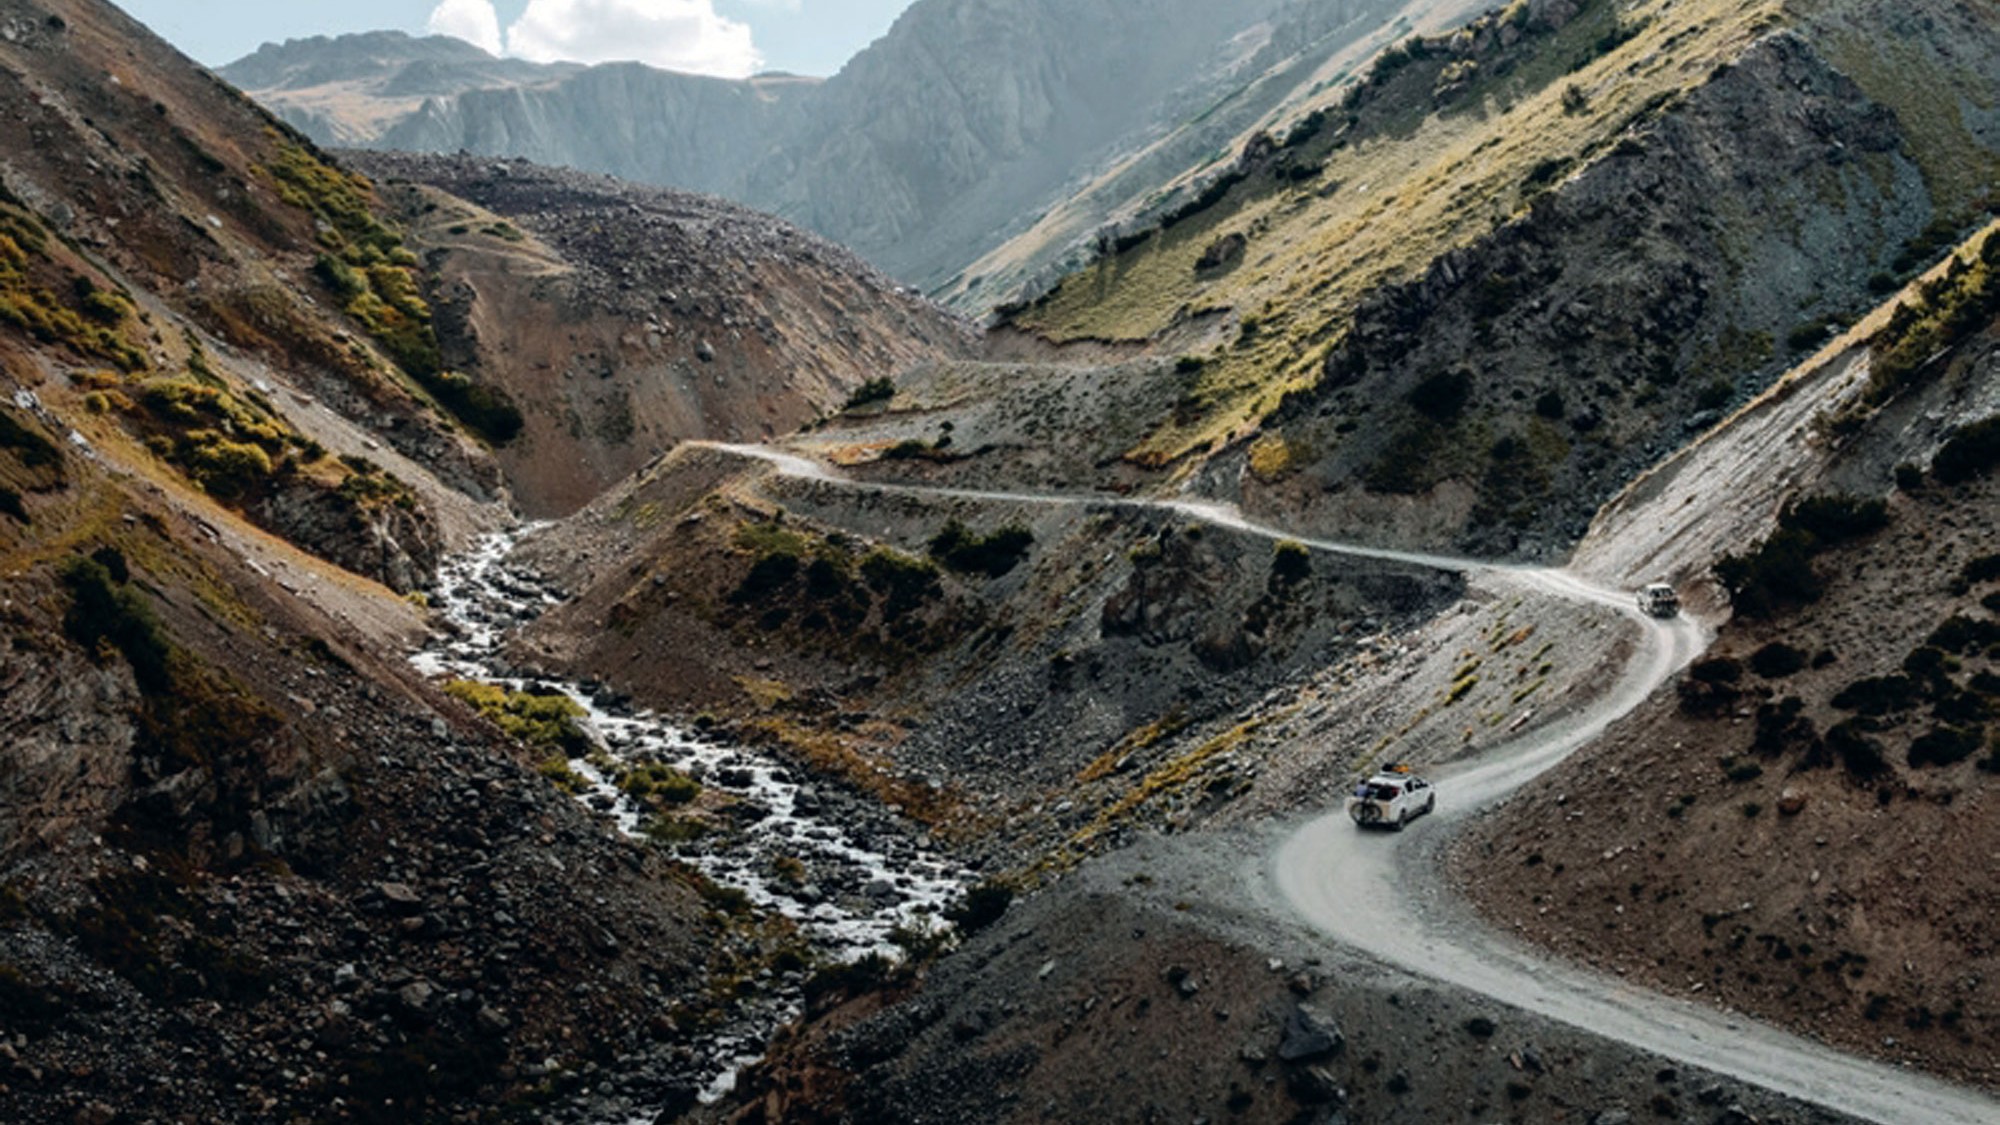
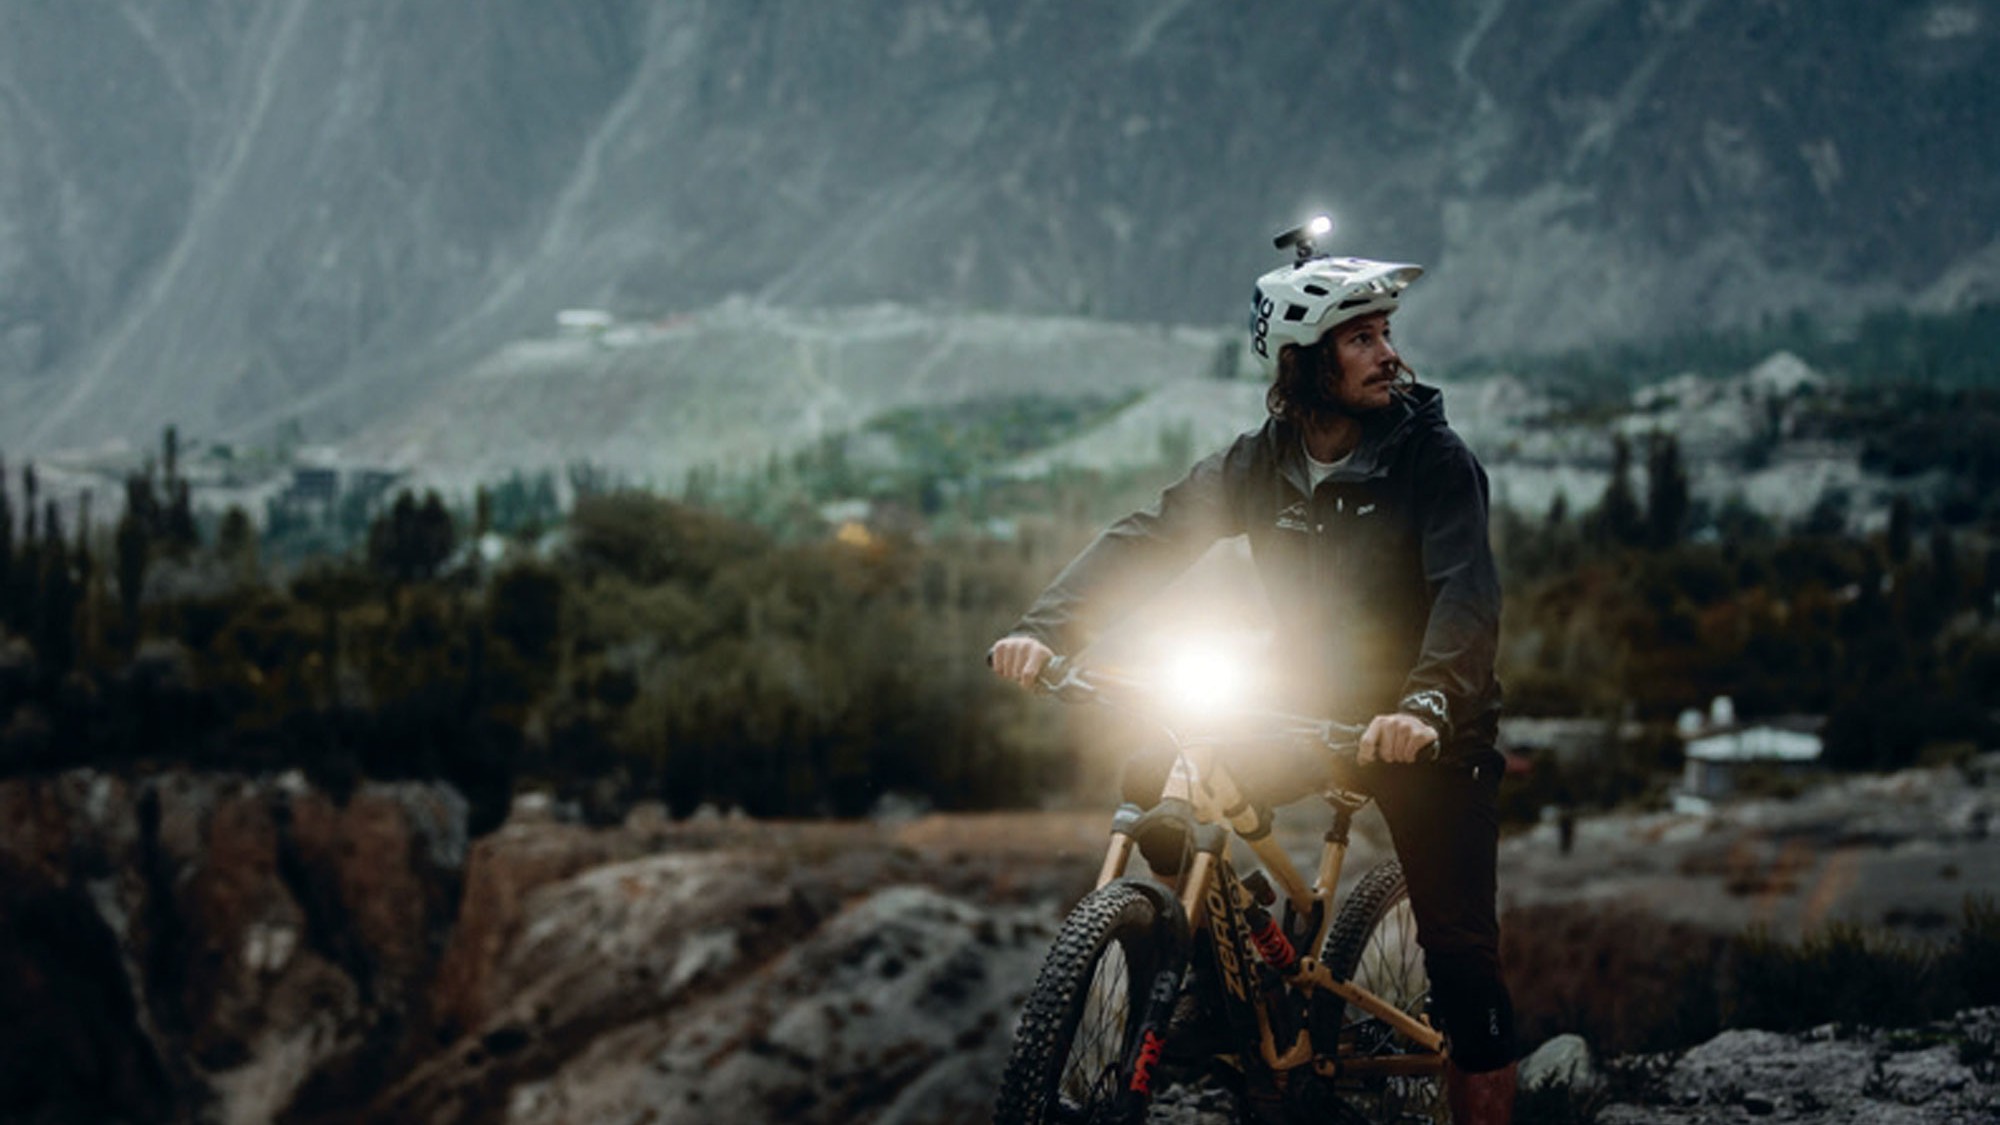
Expedition Pakistan: Riding Gilgit - Baltistan
Words by Mike Dawson
Images by Adam Kadervak
The idea for this mission kicked off in classic style; a post-ride beer session in Rotorua, talking big dreams and wild ideas. Ideas like:
What if we rode Pakistan? The thought of biking a region bordering the Himalayas, Hindu Kush, and Karakorams, with its mind-blowing scenery and raw, undiscovered trails, was too good to ignore. Fast-forward months of meticulous planning, permit wrangling, and local connections, and we were on a plane bound for Skardu, ready to ride where few had ridden before.
Pakistan is rarely the first place that comes to mind when you think of world-class MTB destinations. But that’s exactly what made it so intriguing. This wasn’t a place packed with bike parks and guidebooks—it was terra incognita, a place where every trail was a new discovery and every ride an exploration. This was adventure riding in its purest form, with no safety net.
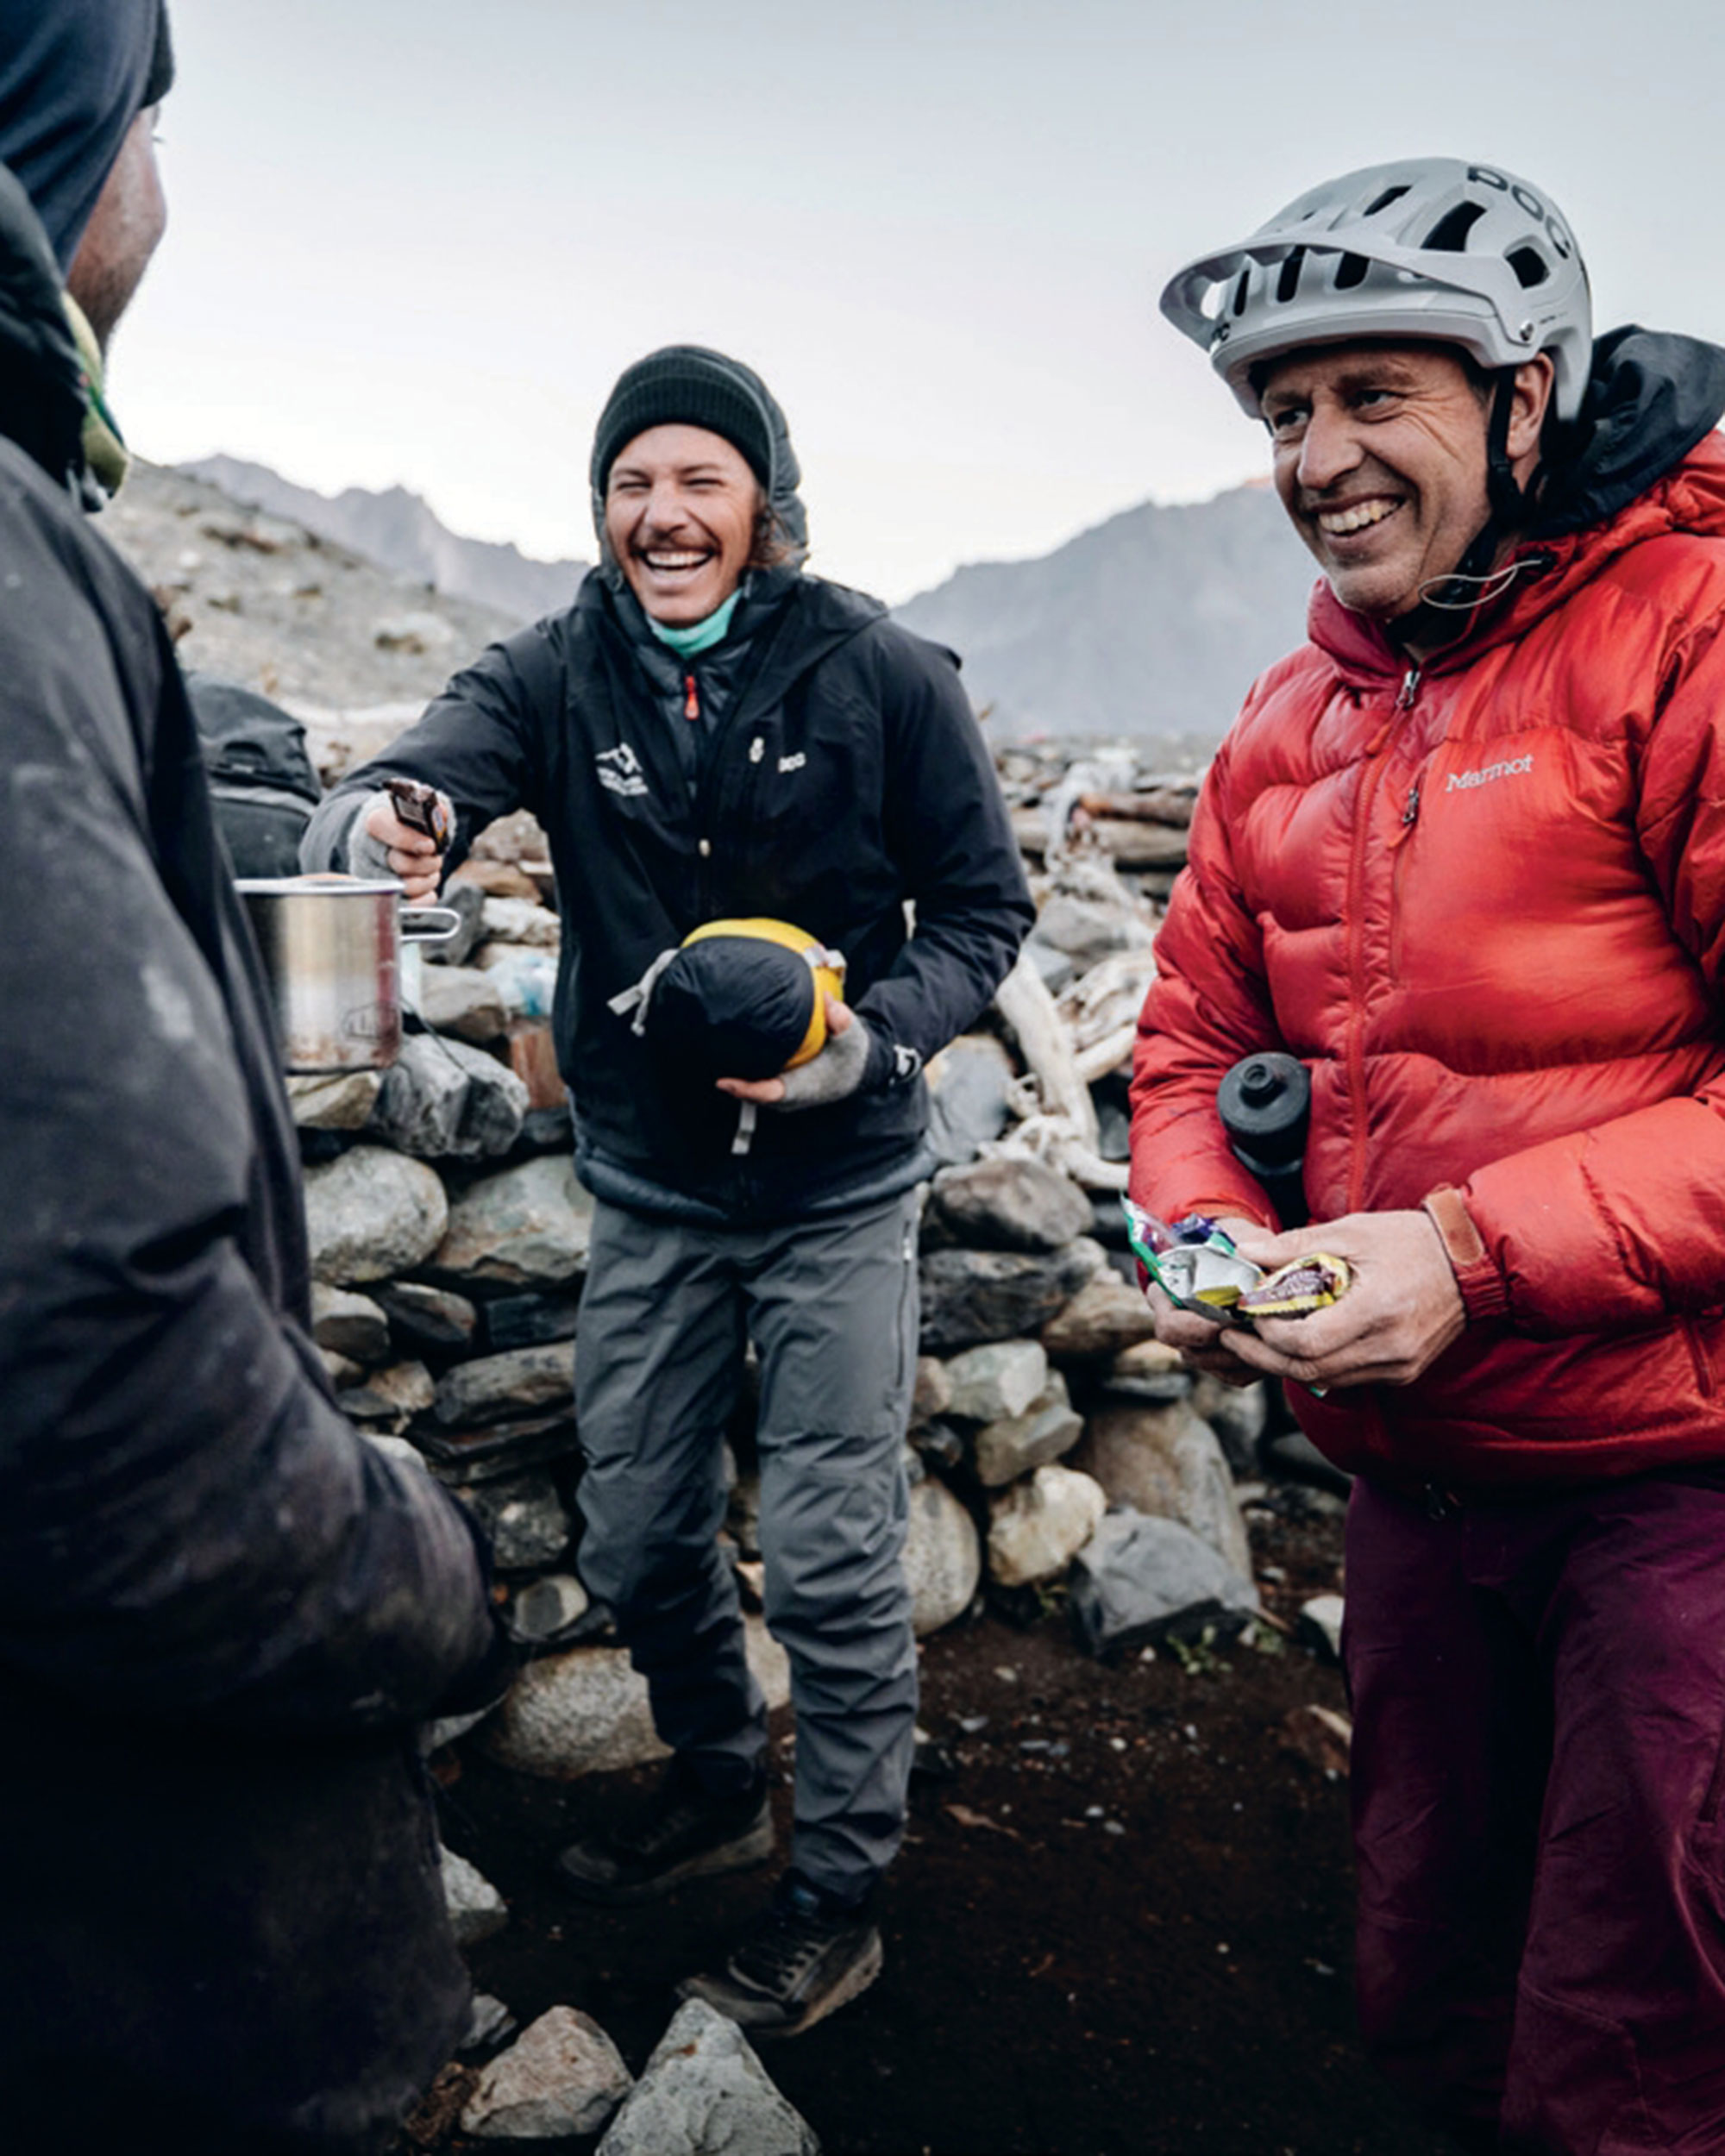
Our dream team was made up of a killer crew of riders from Rotorua, New Zealand, bringing the perfect mix of skill, stoke, and a positive attitude. Leading the charge was Jamie Garrod, mastermind behind New Zealand Mountain Biking, whose guiding expertise was invaluable.
Matt Miller, the tech wizard and founder of Brake Ace, pushed gear performance to the edge, while Jeff Carter, a world-class trail builder, had an unmatched eye for perfect lines. Adam Kadervak, the cinematic genius, captured every insane moment through his lens, ensuring the adventure was documented in all its glory. Rosie Clarke, a Rotorua ripper, was ready for the ultimate challenge, bringing fearless energy to the group. Rounding out the squad was Mike Dawson, a whitewater kayaker turned MTB explorer, diving headfirst into the unknown.
Rolling into Skardu, the gateway to the world’s highest peaks, was the moment it all got real. The town buzzed with life and rich culture, dwarfed by 7,000m+ peaks standing like ancient giants. Local hospitality was next-level—warm welcomes, endless chai, and curious smiles on weather-hardened faces set the tone.
We loaded a couple of old Toyota Hiluxes, using a little local ingenuity (plus some sleeping pads and carpet), and had the bikes strapped in. The road to our first trail was an adventure all on its own— leaving Skardu, we ascended onto the Deosai Plateau in a chaotic mix of dust, rocks, and sheer drop-offs that kept us white-knuckled the whole way. Our local crew, Taju and Hamish, navigated the hairpin bends with the casual confidence of people who’d done this a thousand times, dodging cows, boulders, and the occasional landslide as we climbed higher into the mountains.
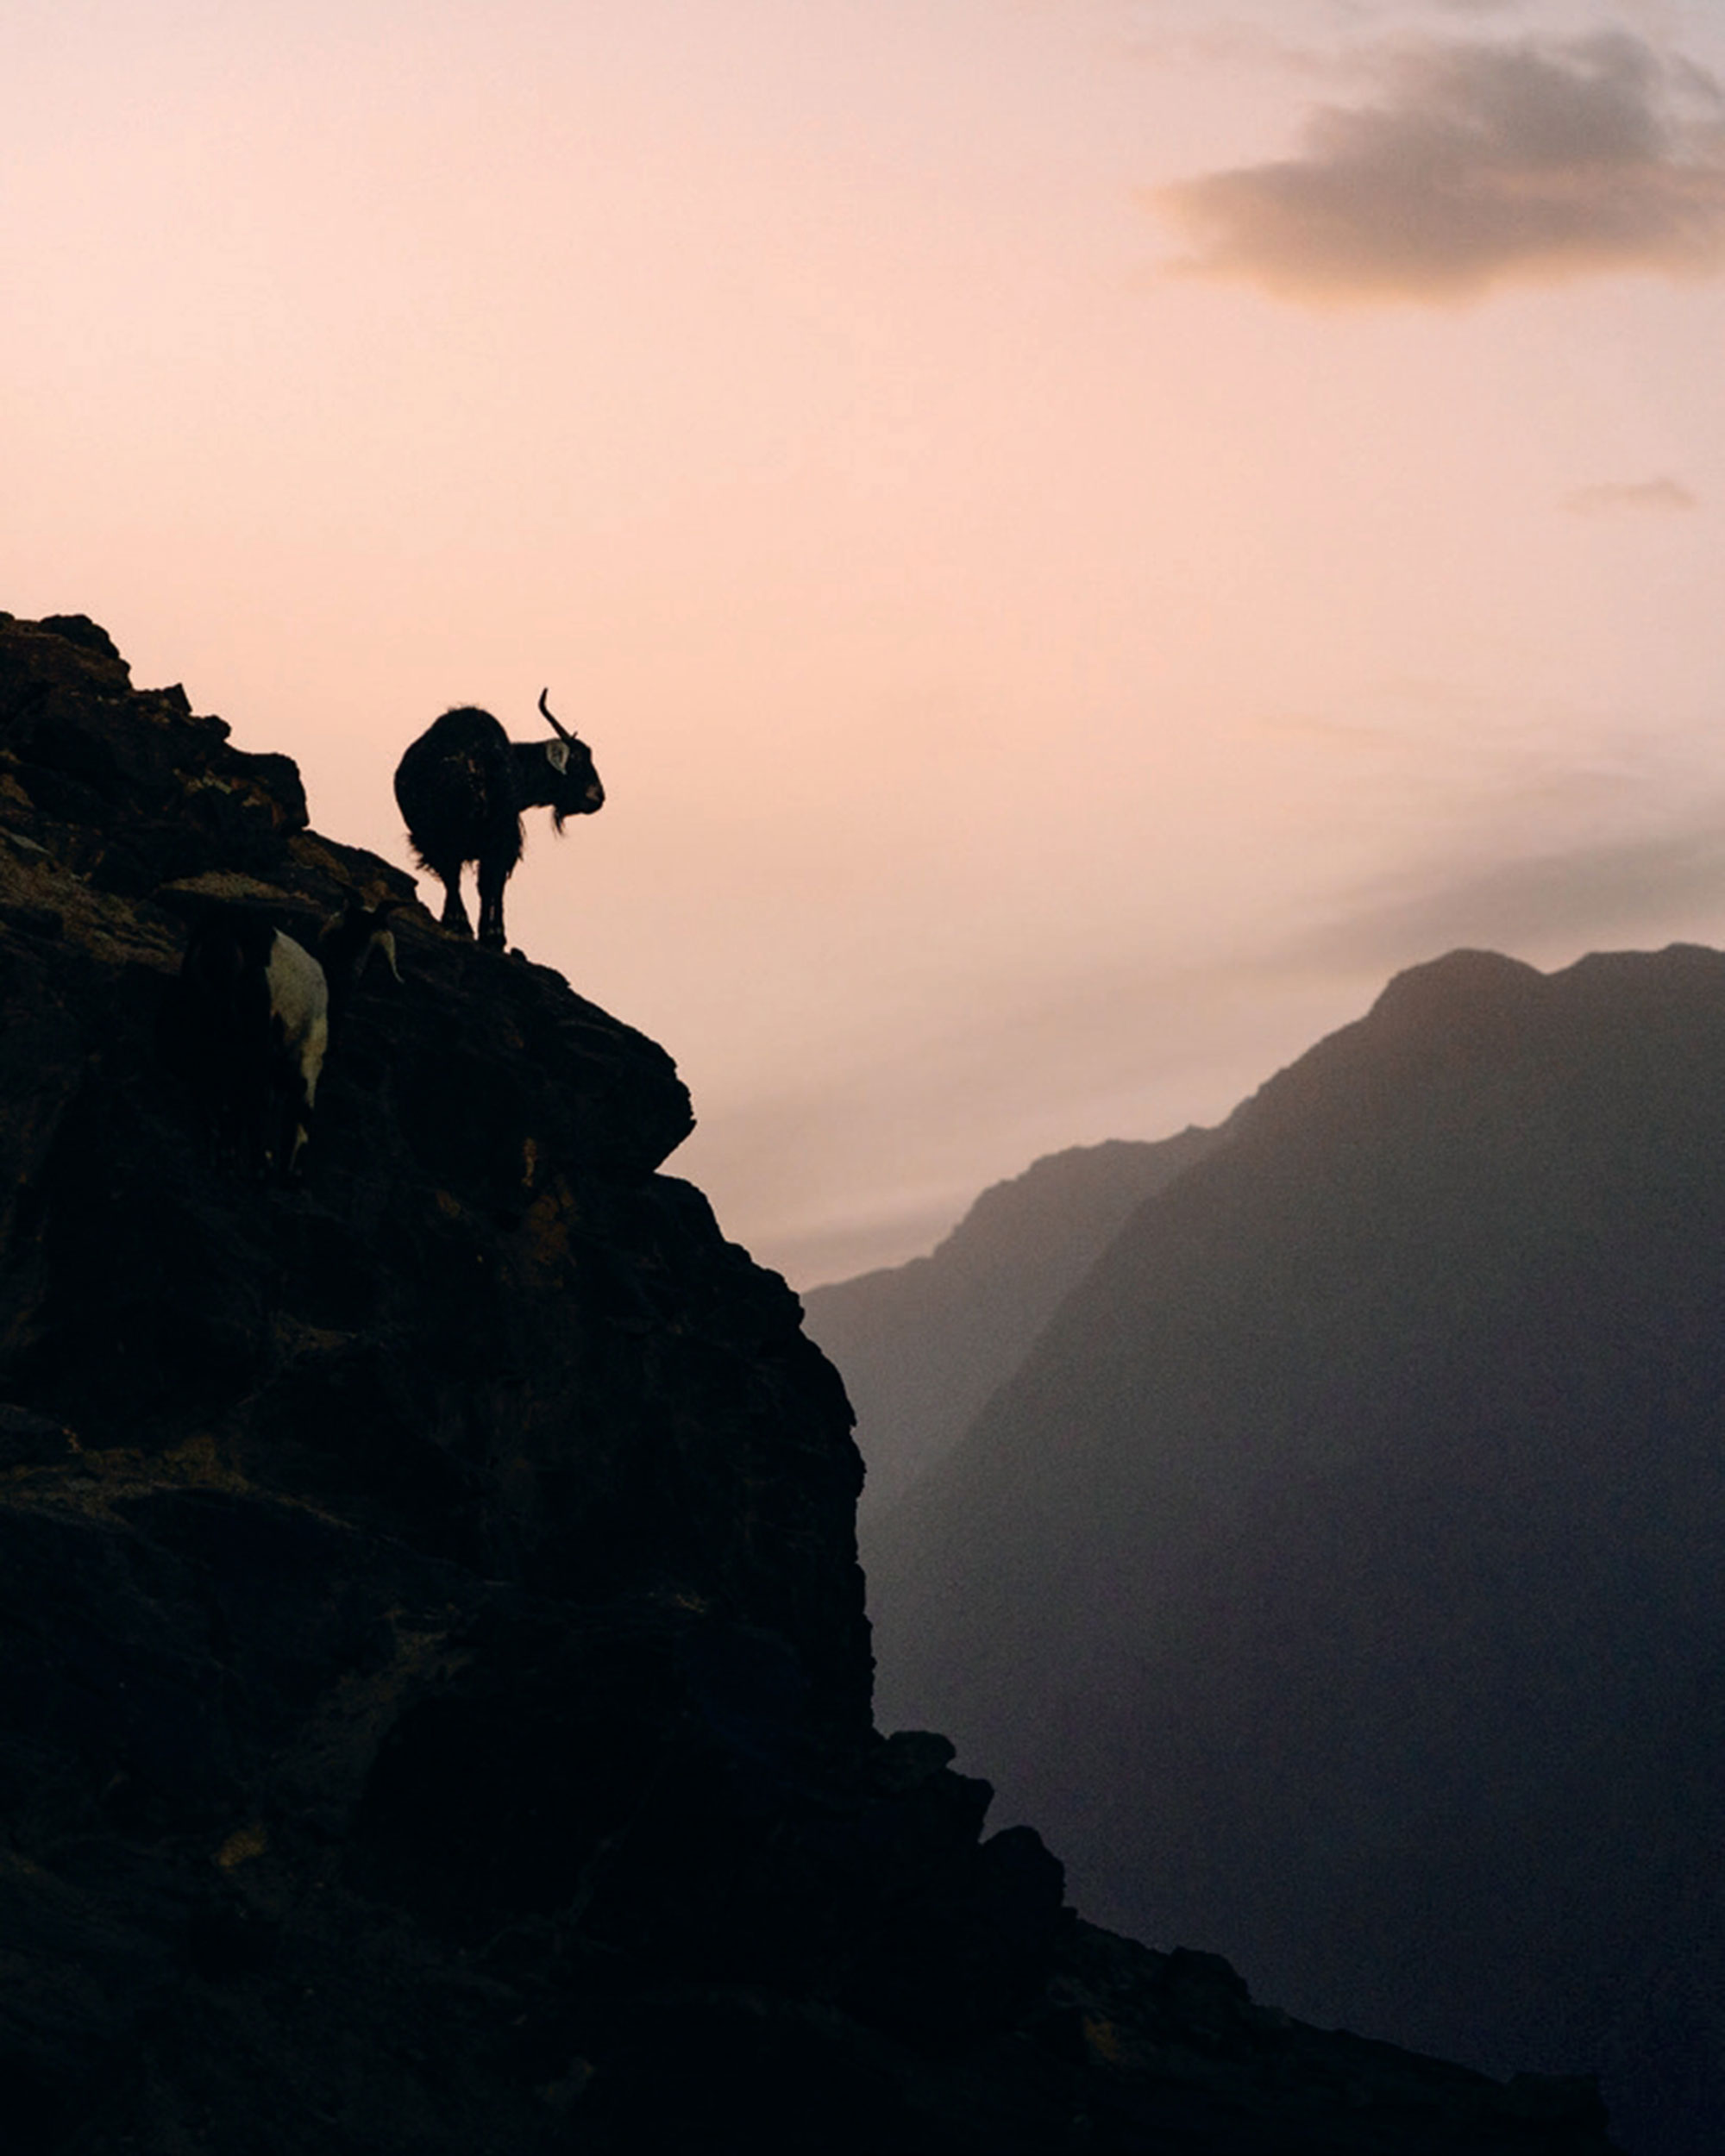
Our first taste of Pakistan was an ordeal. From the Deosai Plateau, we had spotted a faint shepherd’s trail climbing over a high pass, dropping into the Sok Valley and tracing the river from its mountain source thousands of metres down into the Indus Valley. It looked like an absolute dream—an untouched descent of epic proportions.
But reality hit us hard.
Almost immediately, the altitude kicked in like a hammer. We crawled up the climb, battling brutal headaches, stomach discomfort and waves of nausea. It was survival mode—legs like lead, lungs burning, bodies completely unacclimatized to the thin air. The higher we climbed, the worse it got. Finally, we crested the pass, convinced we were about to drop into endless hero dirt. Instead, what lay ahead was a nightmare of boulders, relentless bike carrying, and scattered sections of rideable trail barely enough to keep our spirits alive.
Darkness fell and suddenly we were lost; cold and dangerously unprepared. No proper food, little warmth; our bodies running on empty. Desperation kicked in as we stumbled upon a derelict rock shelter, where we built a small fire and huddled for the night, teeth chattering against the harsh alpine air.
Morning brought a new mission: survival riding down to Sok Valley. Sore, exhausted, but driven by sheer necessity, we began our descent. With every metre we dropped, the trail transformed—what started as a mess of scree and loose rock slowly turned into bedded-in singletrack, winding through exposed ridgelines and sheer drops. It was technical, sketchy and terrifying—but also completely exhilarating.
Later that afternoon, we finally rolled into the first village; drained but stoked beyond belief. It had been one hell of an introduction to Pakistan—a brutal, beautiful lesson in what adventure really means. This was definitely Type 2 fun.
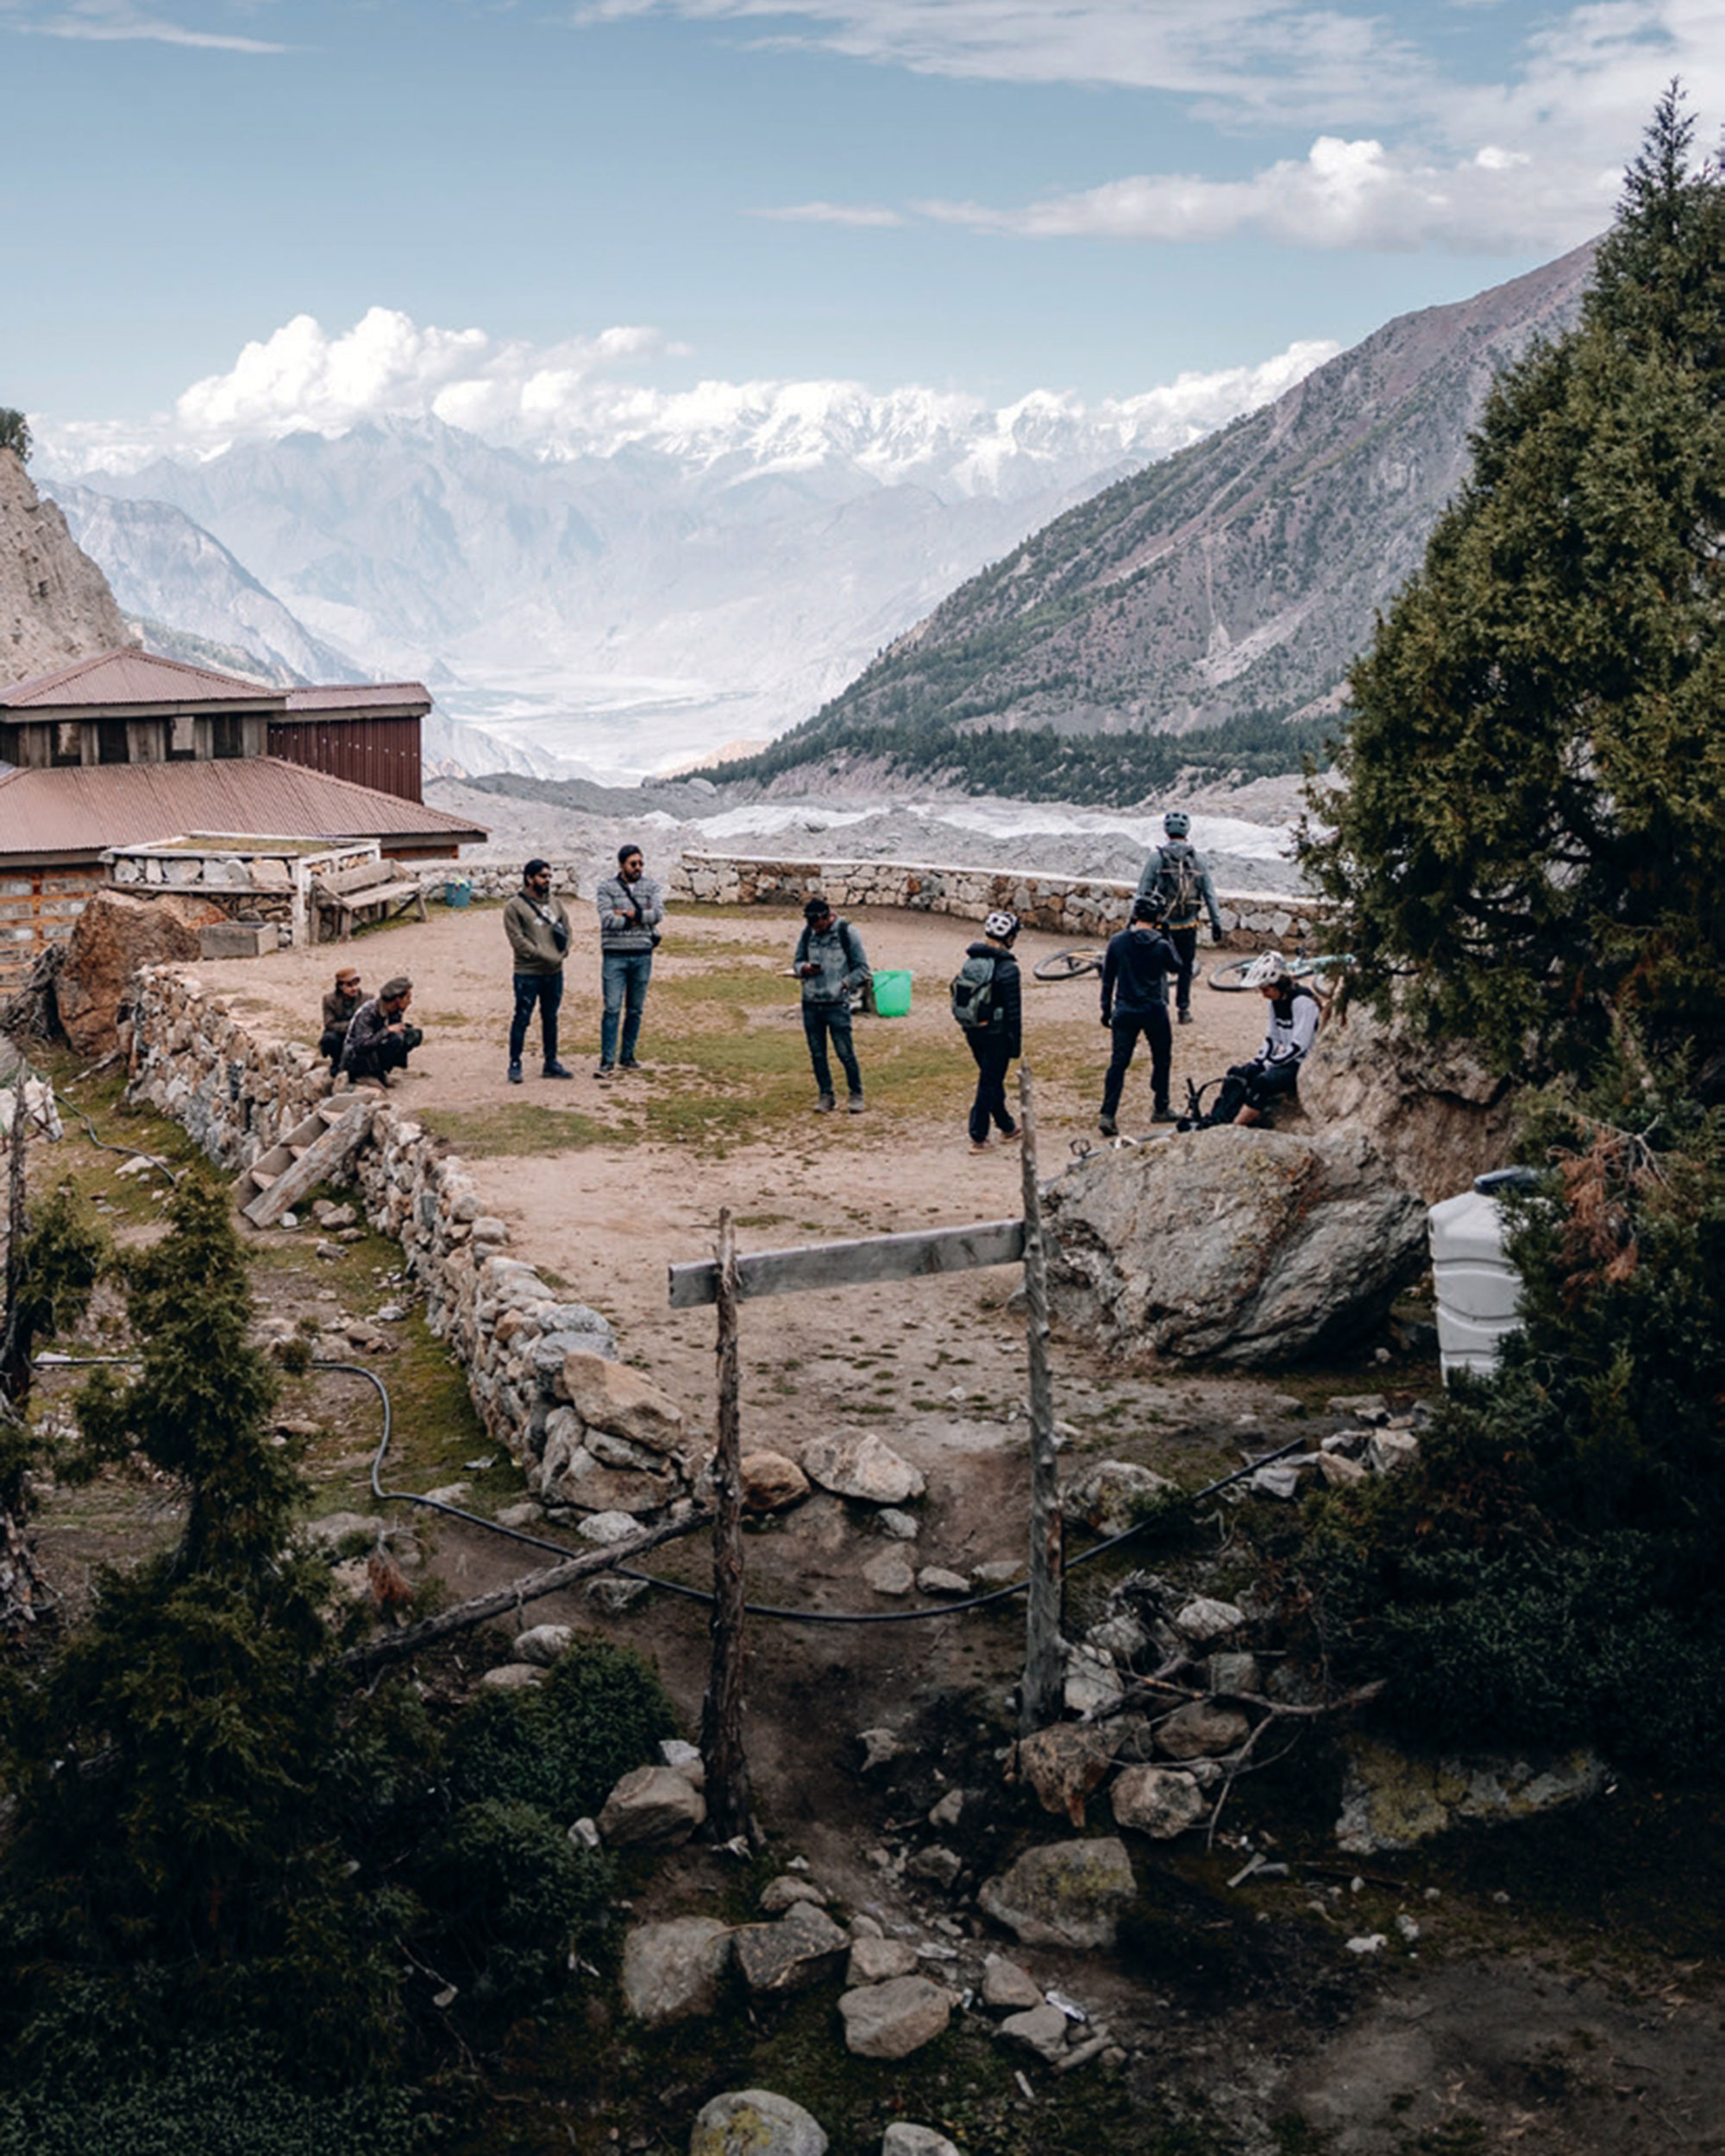
We continued on our mission, driving through the Indus Gorge to the Gilgit Valley for our next stop: Rakaposhi (7,788m)—climbing to the base camp of one of the most stunning peaks on Earth. After a rest day exploring the dusty town of Gilgit, we pushed deep into Hunza Valley, arriving in Minapin. From here, we shouldered our bikes and began climbing. The ascent was brutal—endless switchbacks, scorching sun, lungs burning. But our altitude adaptation was improving, and our excitement fueled us forward. Alpine meadows gave way to glacier-fed rivers, scree slopes, and ridgelines begging to be ridden.
After a night at high altitude, we woke to sun-drenched peaks and began perhaps the best descent on the planet. Over 1,500m of drop, over 10km of wild singletrack. The mix of fast, flowy sections, steep rock gardens, and tight technical moves kept every rider on their toes. This was raw, natural riding—nothing built, nothing groomed— just pure stoke at the discovery of an epic trail.
After refuelling on slow-cooked lamb curry and a few Cokes, we set off for our final mission—Fairy Meadows; the legendary alpine pasture beneath Nanga Parbat (8,126m).
The journey up was insane—2,000m of elevation gain, bikes strapped to the back of tiny Jeeps, inching up a sheer cliffside road. By nightfall, we were hiking in complete darkness, and the altitude was hitting us hard.
The payoff? Waking up to an unreal sunrise over Nanga Parbat. Then—time to ride. The descent was absolute madness—natural flow sections, chunky rock gardens and exposed ridges. Donkeys popped out of corners, the views were unreal. By the time we hit the valley floor, high fives were flying and stoke levels were through the roof.
Pakistan delivered the adventure of a lifetime. Gilgit-Baltistan is an untamed paradise for mountain biking—huge elevation, jawdropping scenery and raw, technical terrain. But this trip was about more than just trails—it was about the people. The hospitality of northern Pakistan was unmatched—locals welcomed us like family, sharing their food, stories, and endless cups of chai.
As we packed up and boarded our flight out of Skardu, still covered in trail dust, we knew this had been no ordinary adventure. It was a fullblown expedition into the unknown—one that redefined what’s possible on a mountain bike.
The trails are untouched, the mountains are calling, and the next great ride is waiting.
Dig. Ride. Repeat
Words by Lester Perry
Images by Cameron MacKenzie & Jim Topliss
Name a sport more diverse than mountain biking. From downhill to cross-country, slopestyle to freeride – the list goes on. Each discipline demands its own unique blend of skill, fitness and creativity – yet for years, competition was the only viable way for riders to make a living, with no alternative to fall back on.
With the rise of social media, however, everything has changed. Riders were suddenly able to diversify and build their own platforms, allowing them to market themselves, promote the brands that support them, and even create their own in the process.
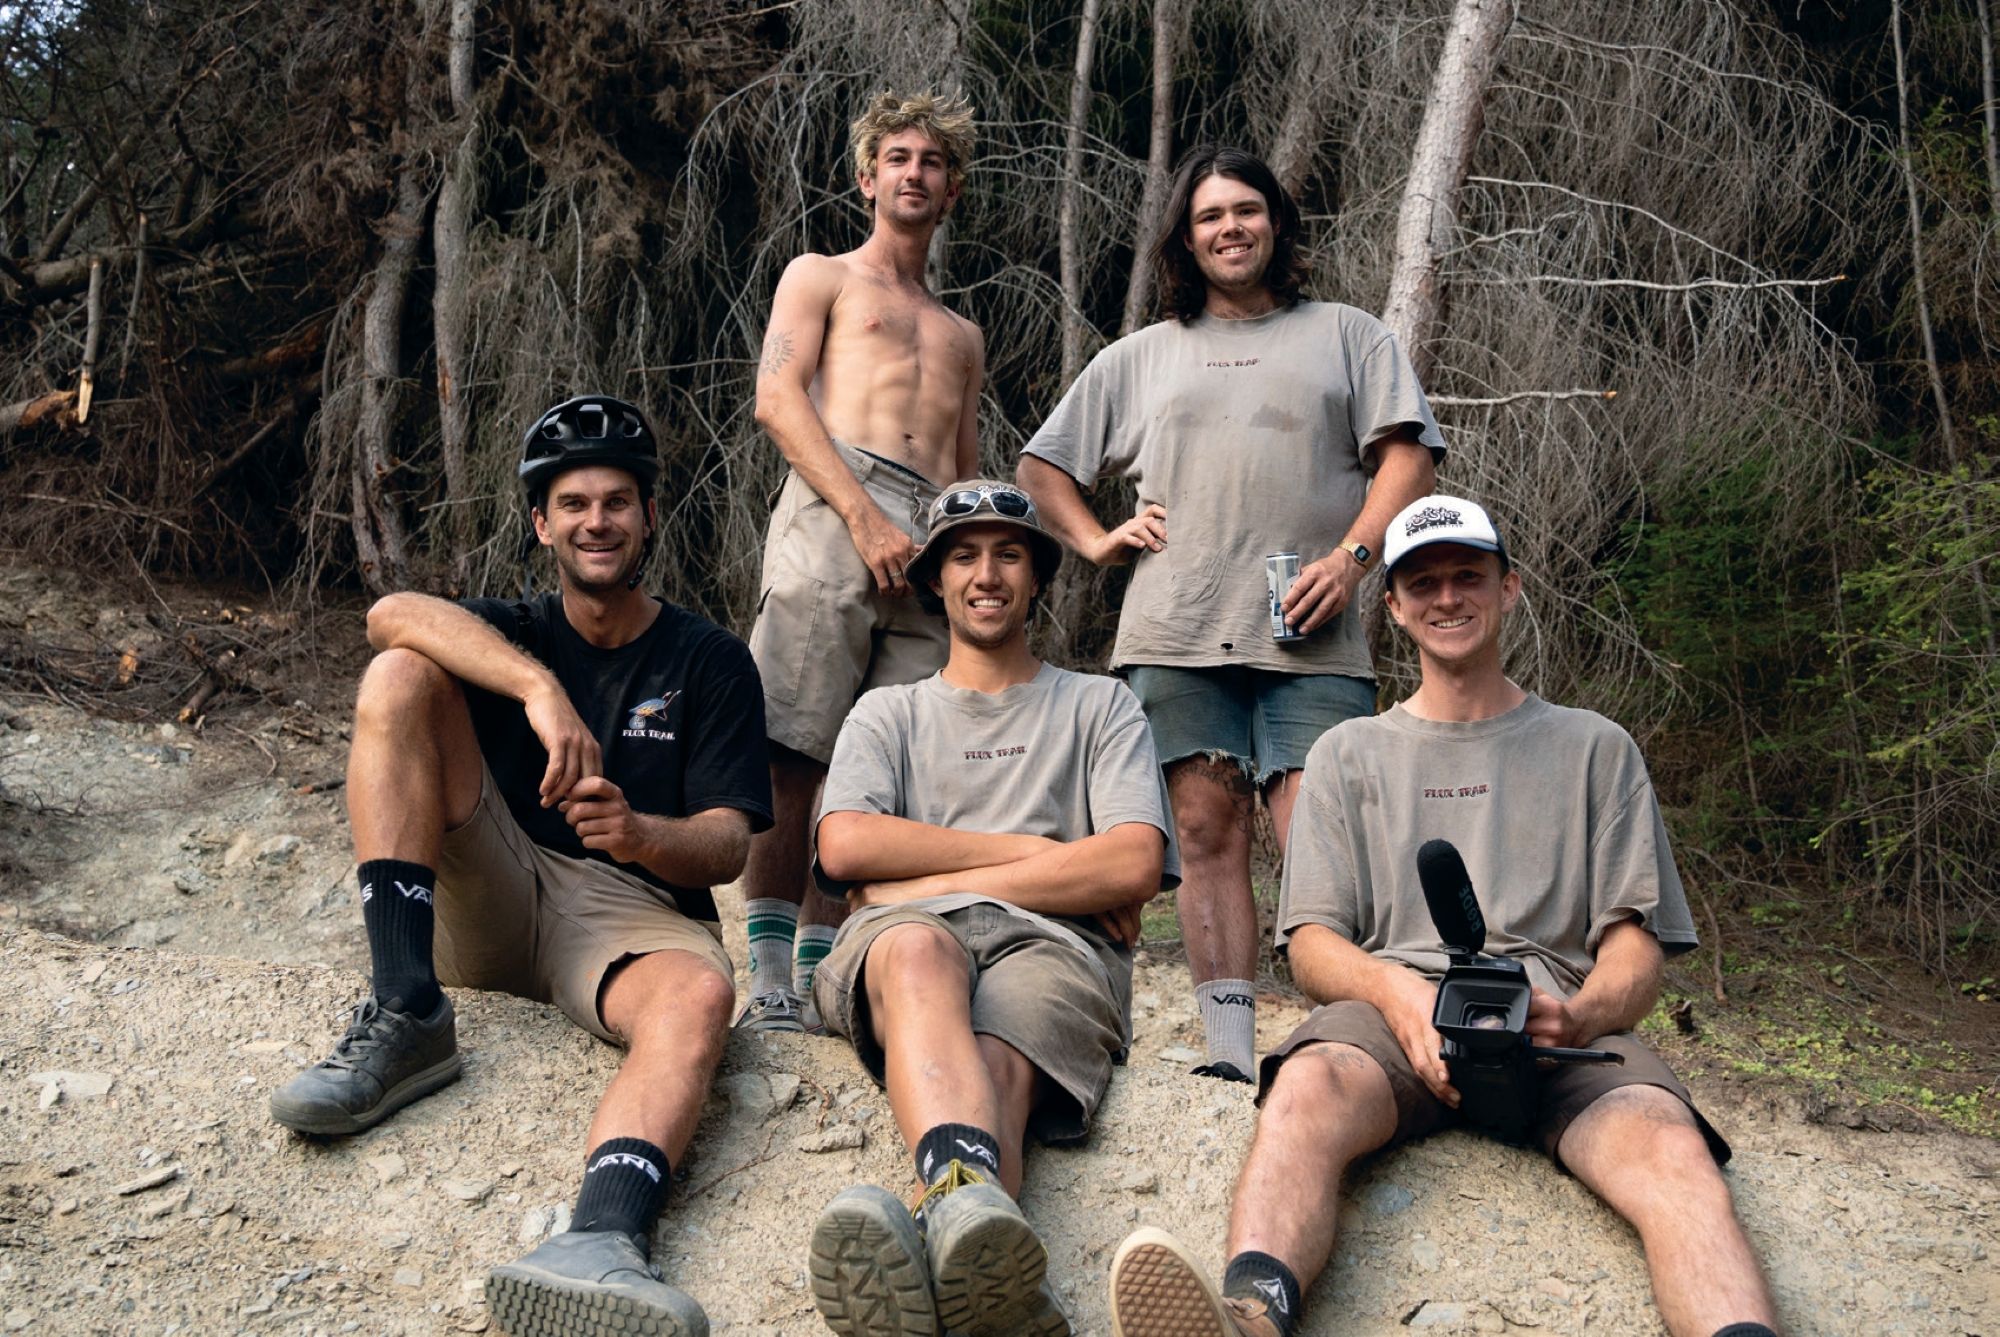
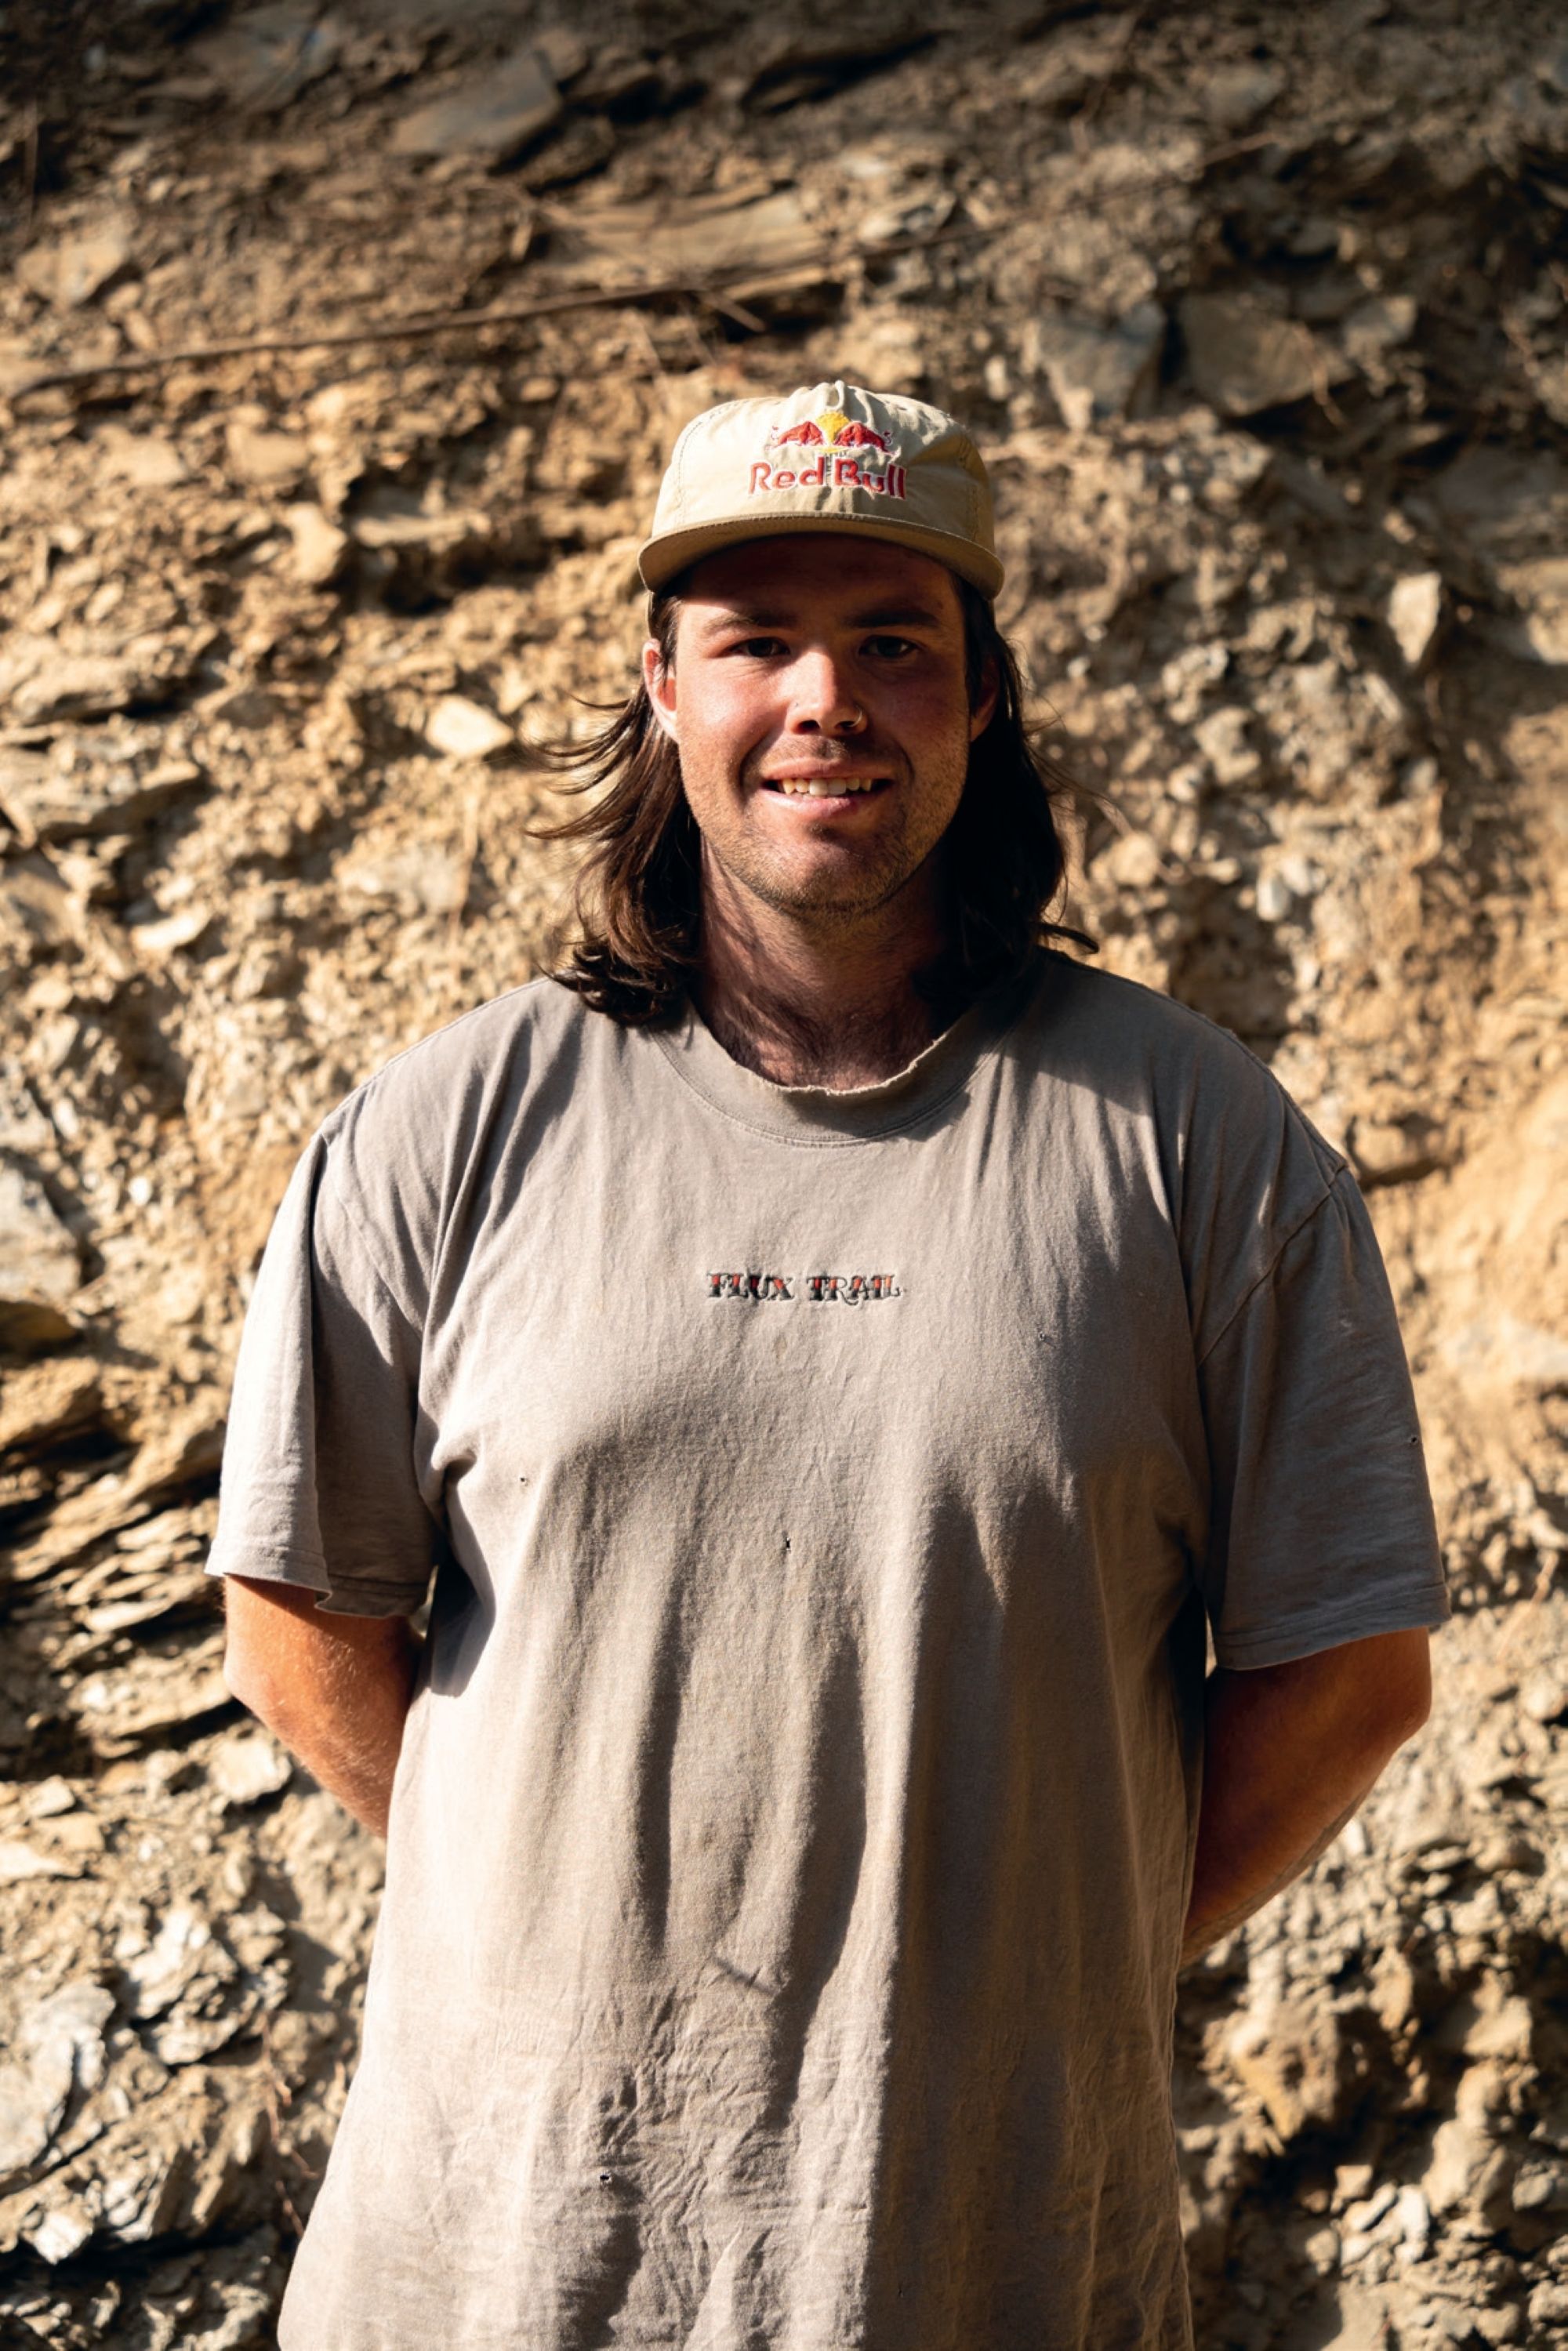
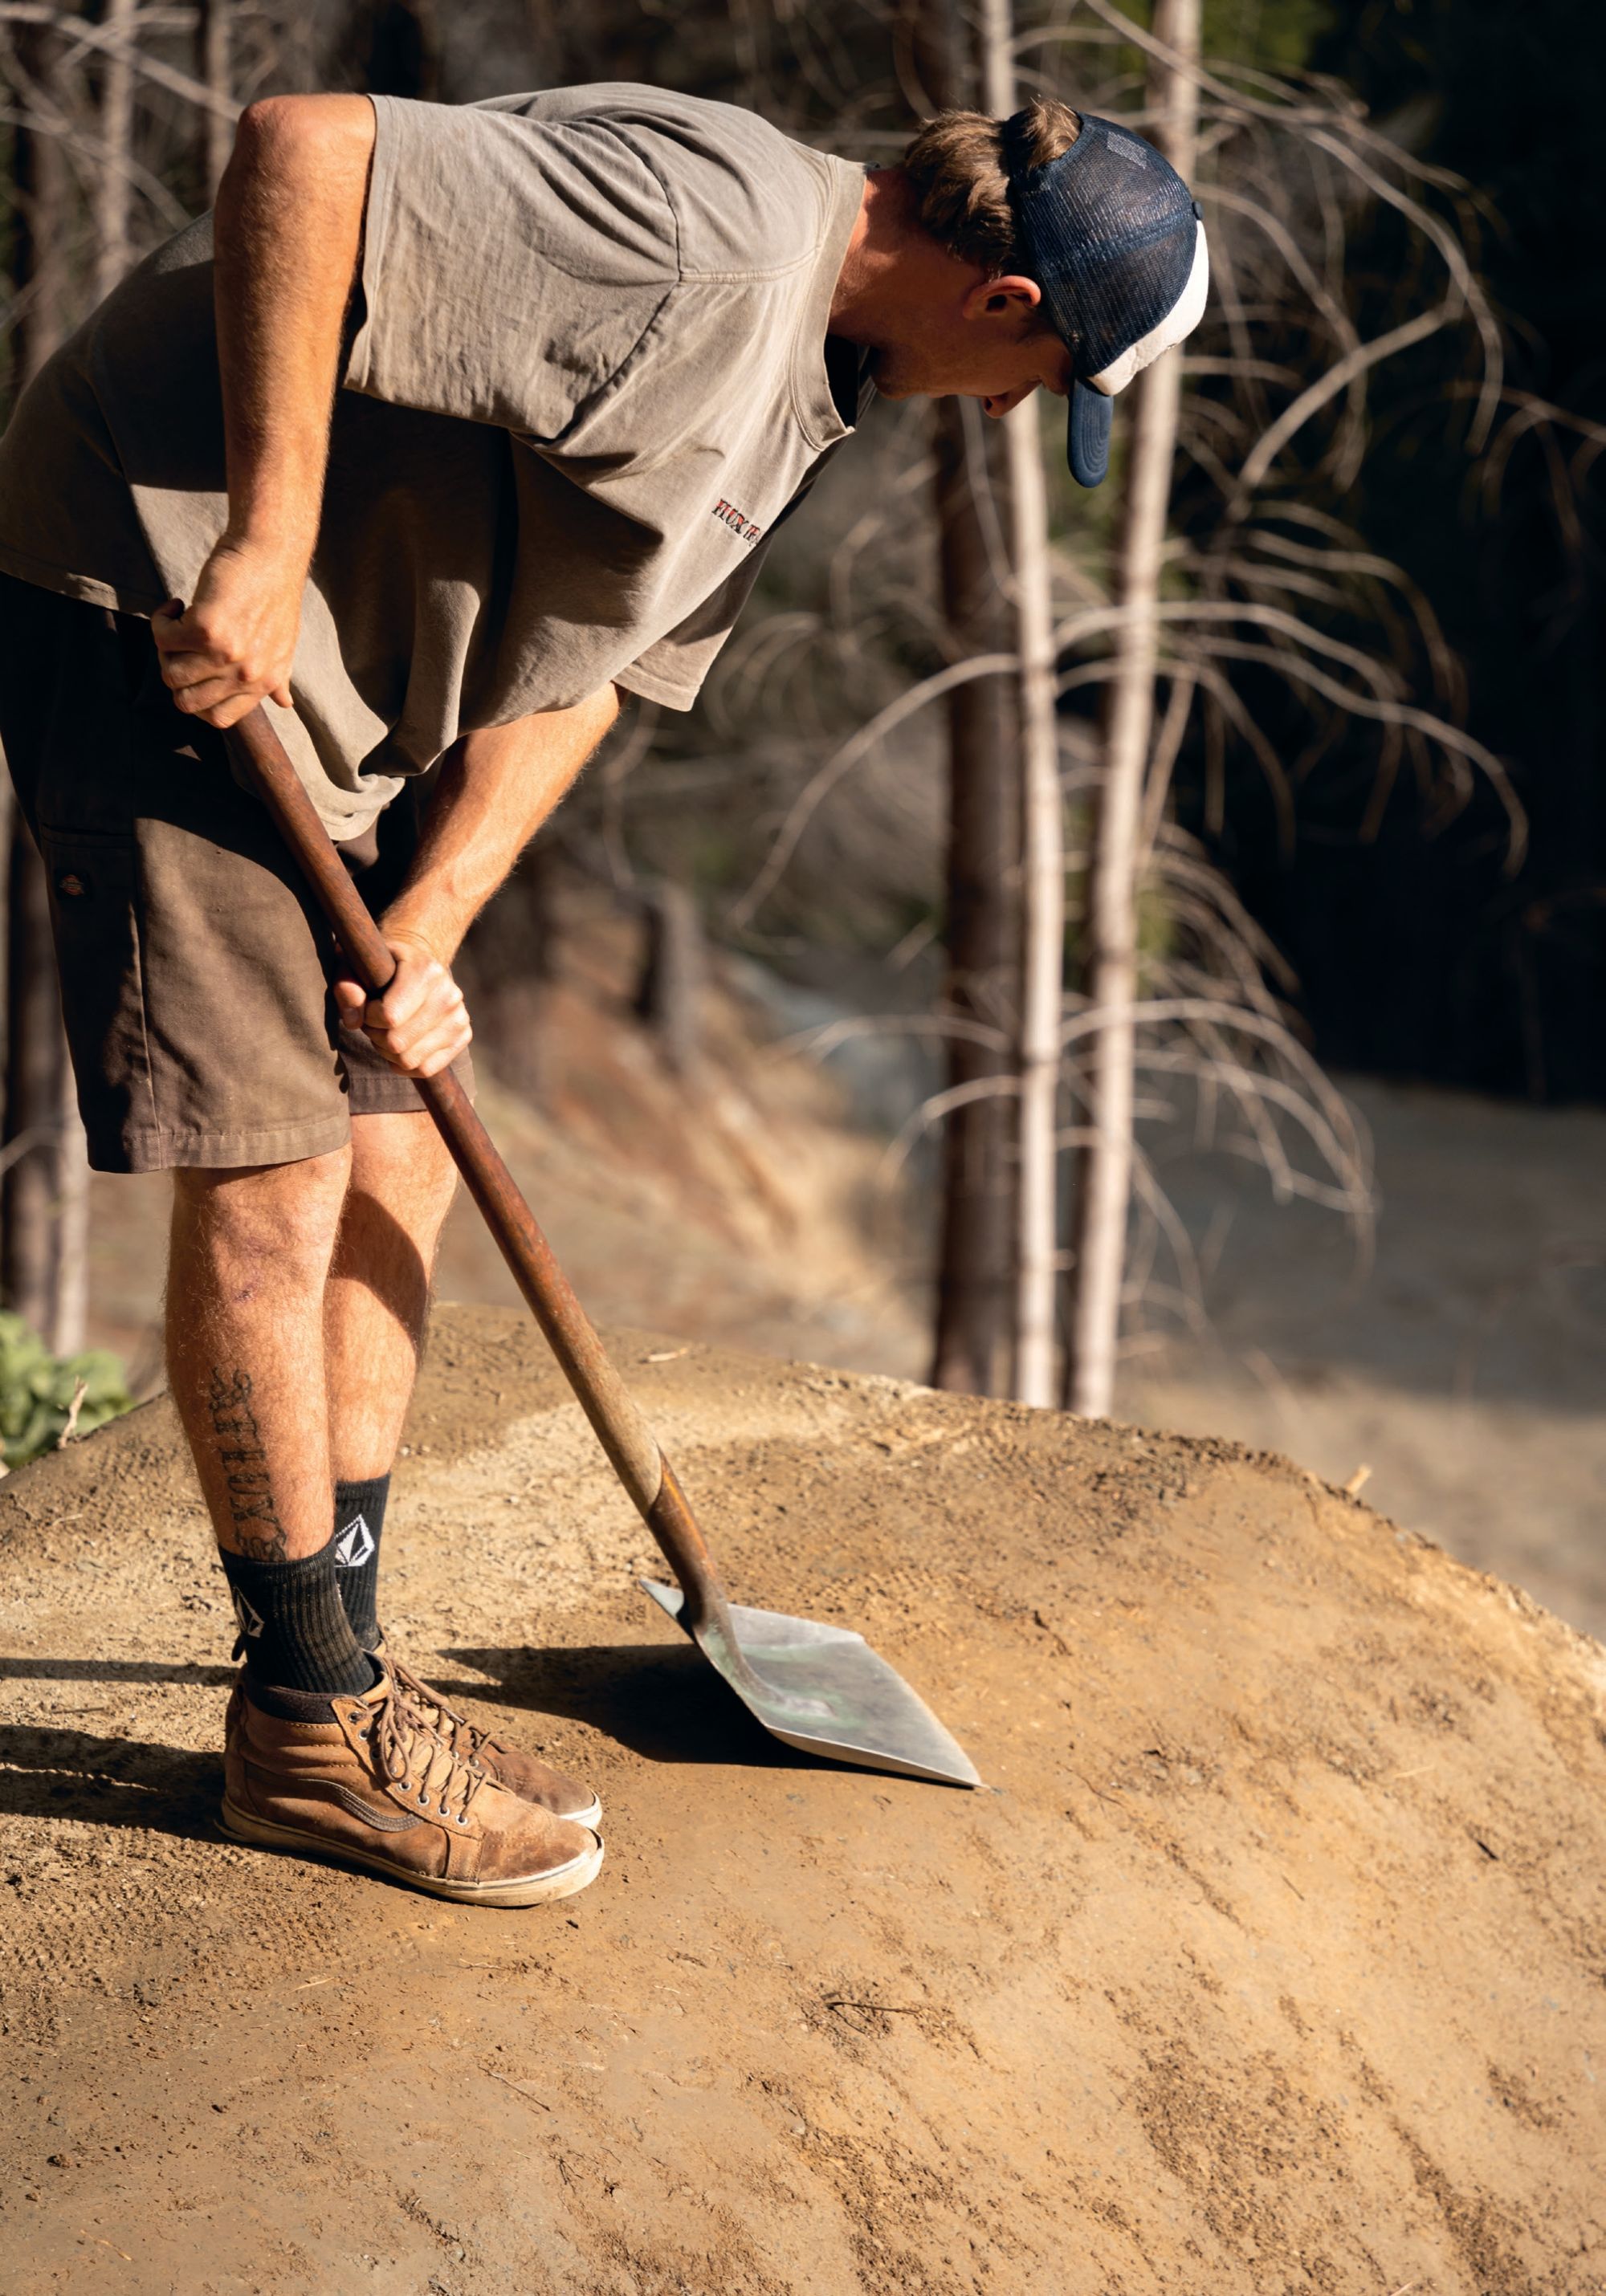
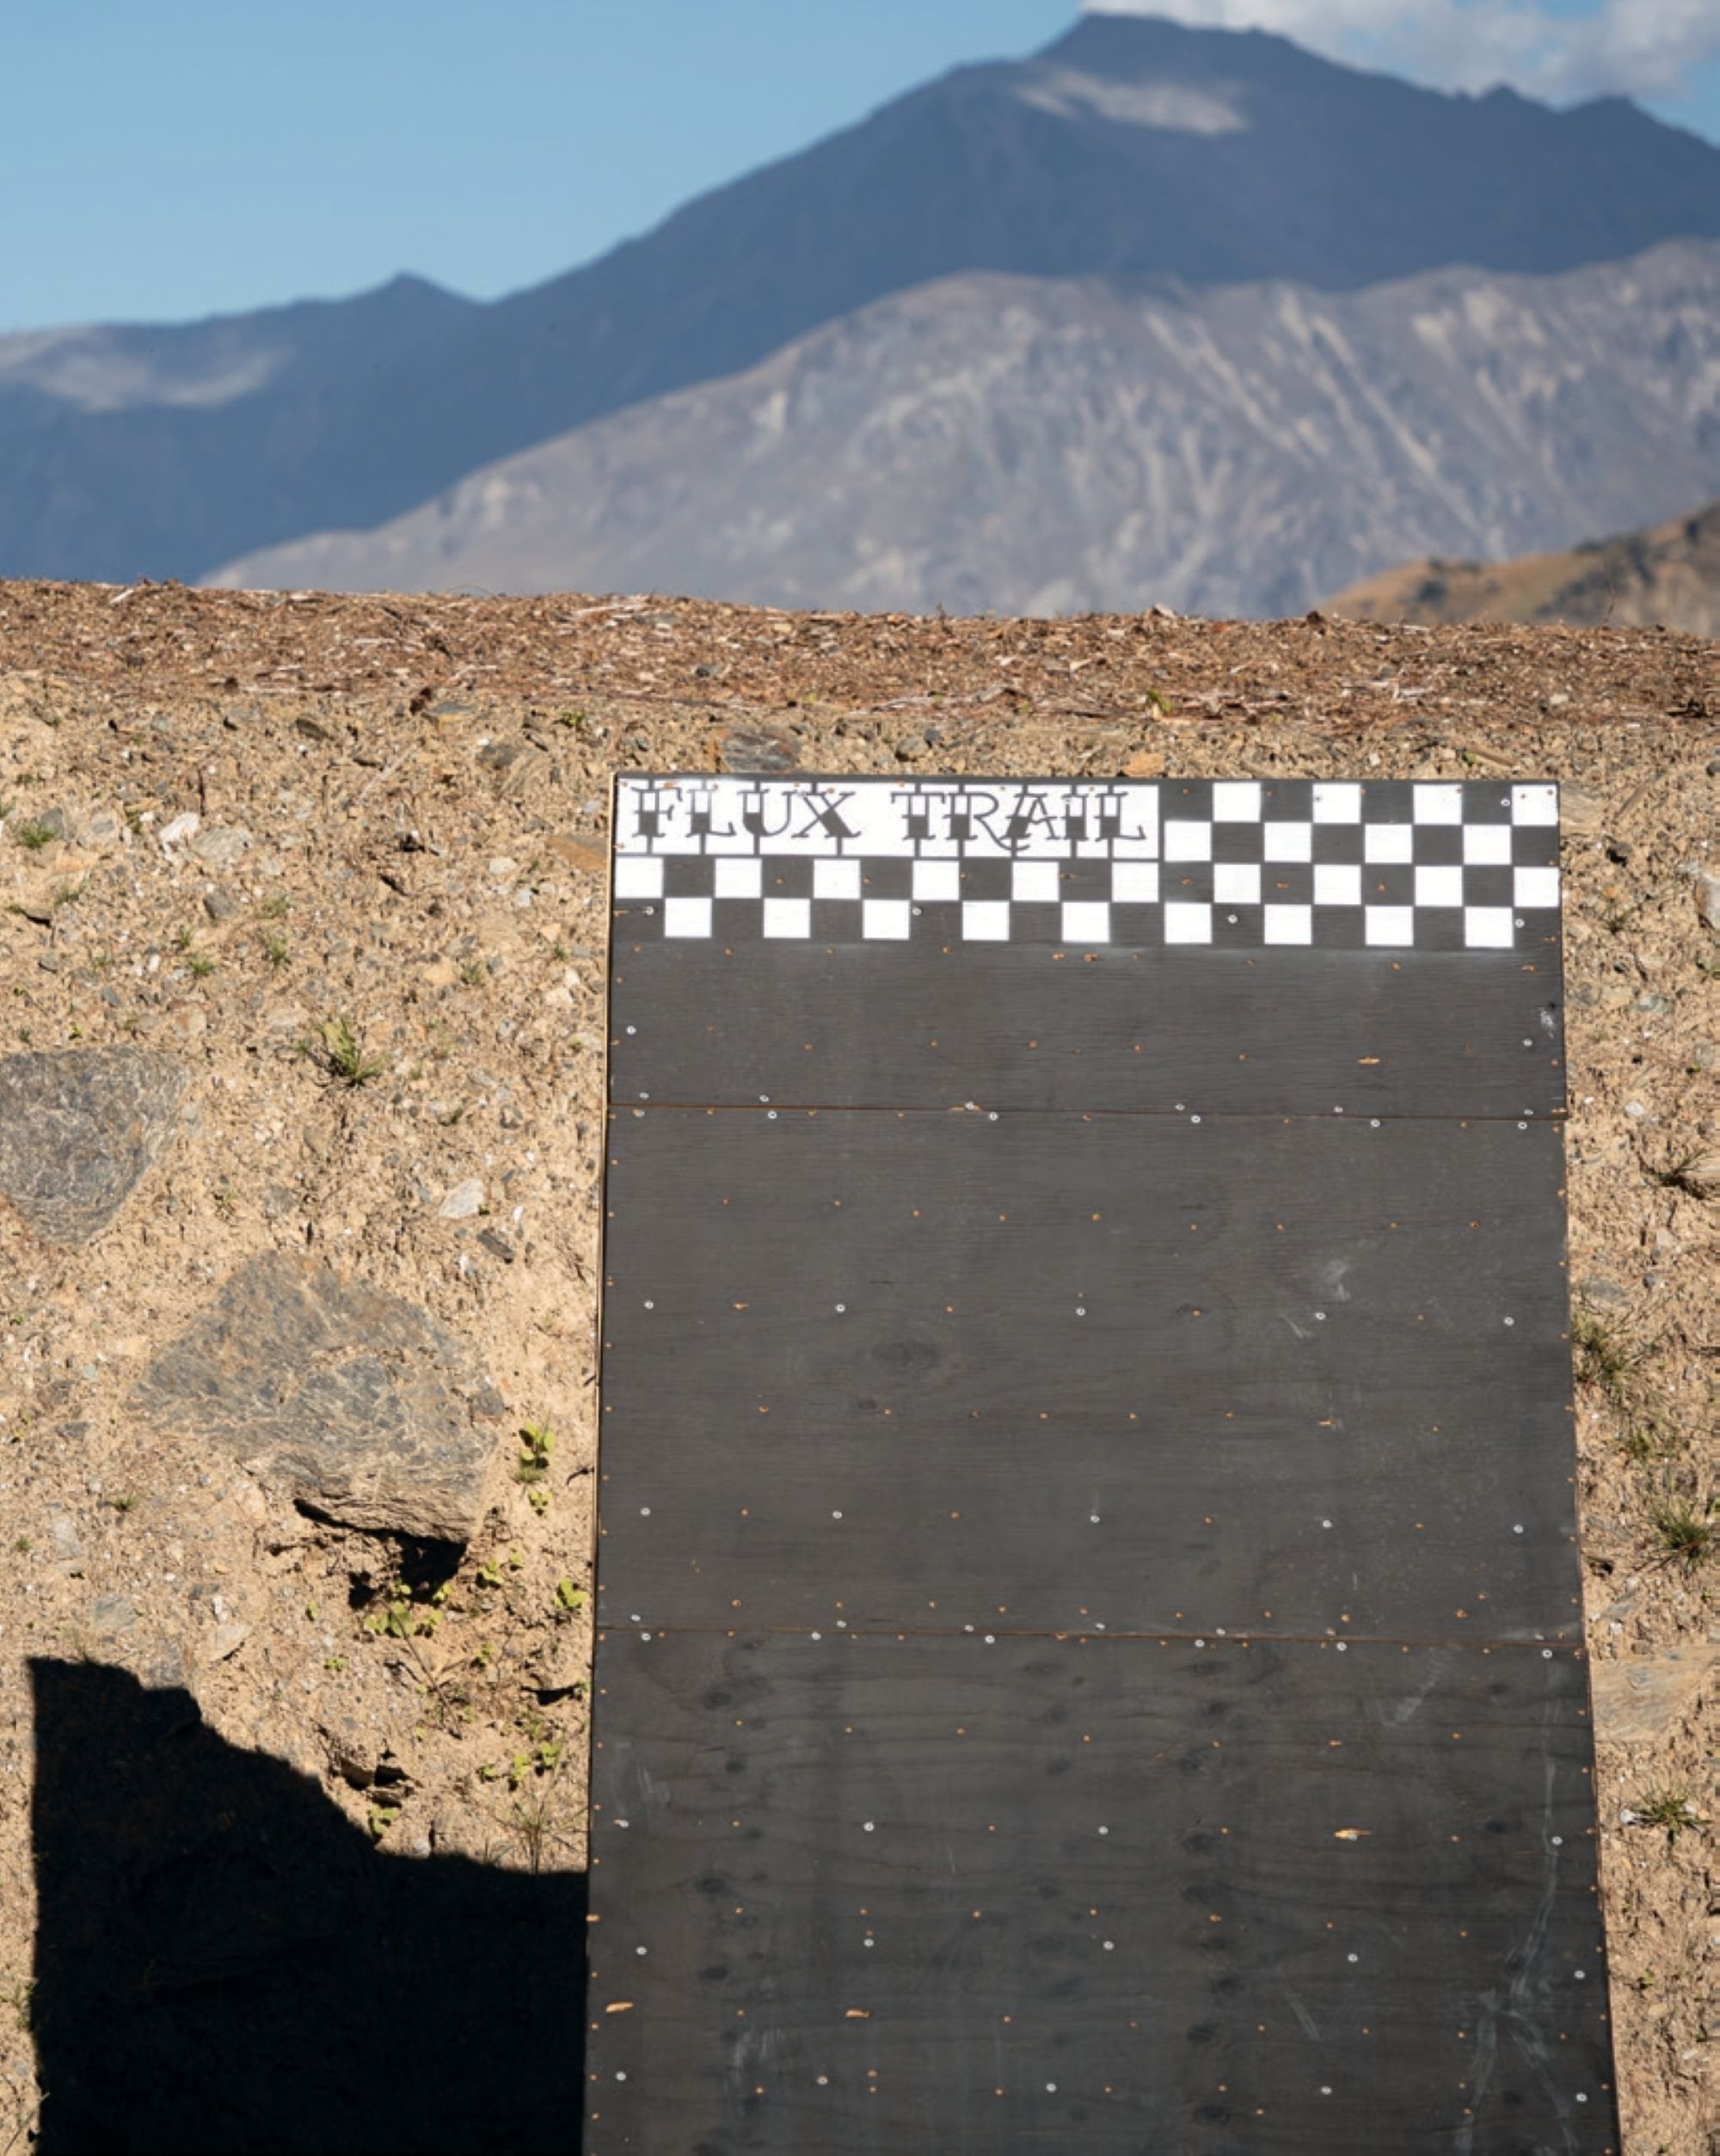
Flux Trail was an early adopter of this concept, leveraging their collective following and reputation to build a business with its own identity—one that combines their passion for digging and riding. Headed by Remy Morton, Jacob O’Donoghue-Price and David McMillan, this group of friends set out to fill a gap in the market while still carving their own lane in the culture, embracing the digger-rider lifestyle that has helped them to continue their careers as professional athletes.
Remy Morton’s life has revolved around bikes from the very beginning. He started racing BMX at just three years old and quickly became a prodigy. His weekends were soon spent chasing races up and down the east coast of Australia, dominating the competition at every turn. In his spare time, he began digging jumps and trails in the backyard, always looking for ways to go bigger. The backyard acted as a training ground for Remy but also allowed him to hone his own style as a rider. His passion was so infectious that even his father, Jim, got himself a bike just to keep up with the fun. Remy’s love for riding soon led him to downhill racing where, at just 11 years old, he made such an impression that the state championships had to create a new category just so he could compete. This is where Remy flourished. No longer just trying to outpace his older brother at local races, he soon found himself in Europe, competing against some of the best at World Cups. He stood out not only for his impressive results but also for his relaxed signature style on the bike, quickly becoming a favorite of the media on the track. In 2017, Remy’s love for big air and wanting to push his own limits found him at Loosefest, a freeride event in Belgium. Unfortunately, Remy overshot one of the final features on the course, resulting in a career- altering crash. The injuries he sustained meant that pursuing racing was no longer an option.
After taking some time to reflect on the accident, Remy packed up and moved to Queenstown to reset himself. He had always aspired to be the best rider he could be but, without racing, he wasn’t sure what that would look like moving forward. Inspired by the likes of Nico Vink, Loosefest founder and former World Cup racer, Remy used the social media following he’d gained from racing, along with his passion for digging, to grow a framework where he could balance creating riding content and building trails to make a living. Recognising an untapped niche in the content space, Remy began to market himself as a ‘bike park’ rider, creating edits and content for social media while simultaneously gaining more professional digging experience. In 2019, with the help of Tom Hey, Remy had the opportunity to join the Elevate Trail crew, contributing to the Crankworx Innsbruck build. While he was over in Europe, he also had the chance to work on the Loosefest build with Nico and the crew. Not only did he get redemption by riding at the same venue where he had his accident, but he also walked away with the King of Loosefest Award.
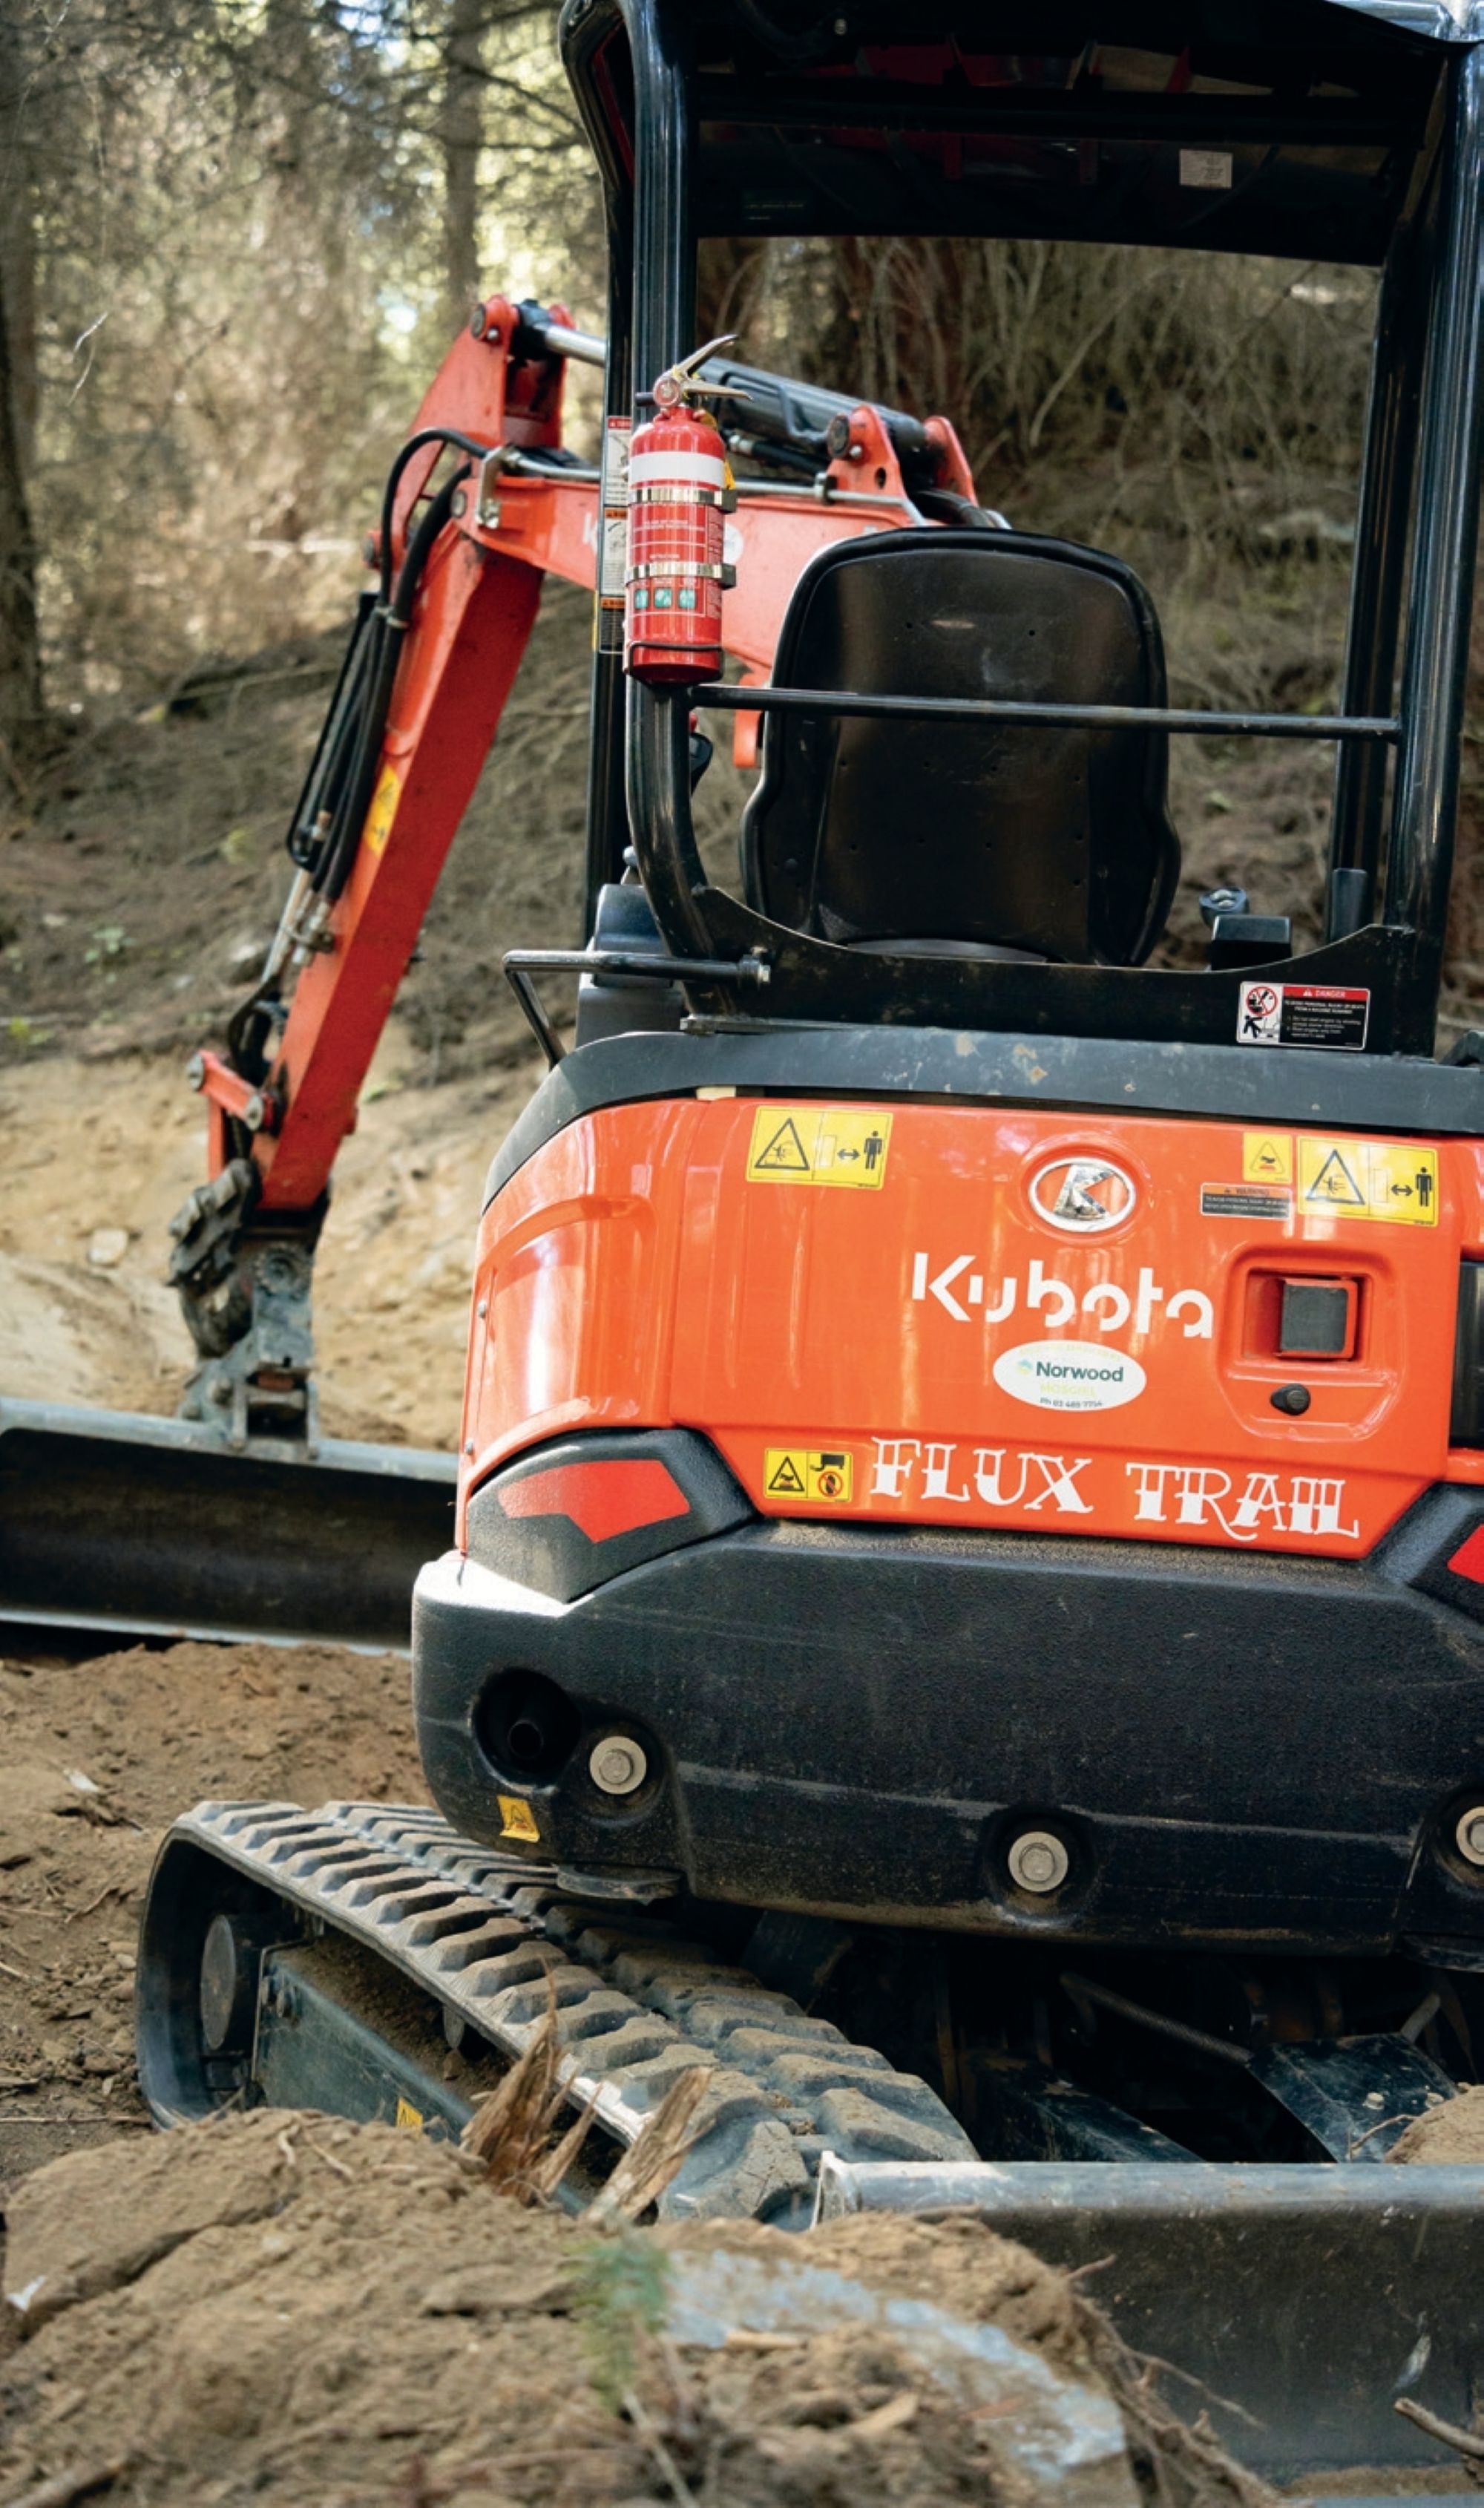
It didn’t take long for sponsors to take notice of this new lane he was carving for himself, most notably with Remy securing a deal with Red Bull in 2020. However, it wasn’t enough for him to stop working. When Covid hit, like many of us, he found himself rethinking the future. Over a few beers, he and Jacob O’Donoghue-Price brainstormed ways to fund the lifestyle they had always dreamed of. The result? Flux Trail. They set out with a goal to elevate the quality of trails in New Zealand, inspired by the world-class tracks Remy had ridden in bike parks in Europe and Canada. The timing couldn’t have been better, with several trail network expansions planned for the Queenstown area, it was the perfect moment to knuckle down and go for it. While both had trail-building experience and Jacob having worked on the Skyline Bike Park trail crew, neither had any idea about how to run a business. They also had to learn how to operate machinery themselves, as hiring an operator wasn’t feasible. Finding labor was never a challenge, however, as they could always rely on their extended group of friends to hop on board to tackle any project at hand.
One of the first to join them was David McMillan, a close friend with a similar upbringing to Remy. He’d also spent much of his youth building not- so-legal trails and jumps around his home just outside of Canberra. Dave had always dreamed of turning biking into a career which, like Remy, led him down the racing path. Competing in World Cups, he dedicated years to chasing the circuit but eventually realised his speed wasn’t quite at the level needed to win races. Rather than stepping away, he shifted his mindset—if he couldn’t win the race, he’d try to win the practice sessions by drawing as much media attention as he could. This, along with filming videos for the VANZACS brand, kept sponsors engaged and eager to continue working with Dave. However, he too found himself needing extra income to maintain a comfortable life. Wanting to stay in the industry and seeing the opportunities that trail building can bring, he bought into the company and became a co-owner of Flux Trail. Already knowing Remy from their time in the racing scene, and Jacob from summers spent in Queenstown, it was a perfect fit.
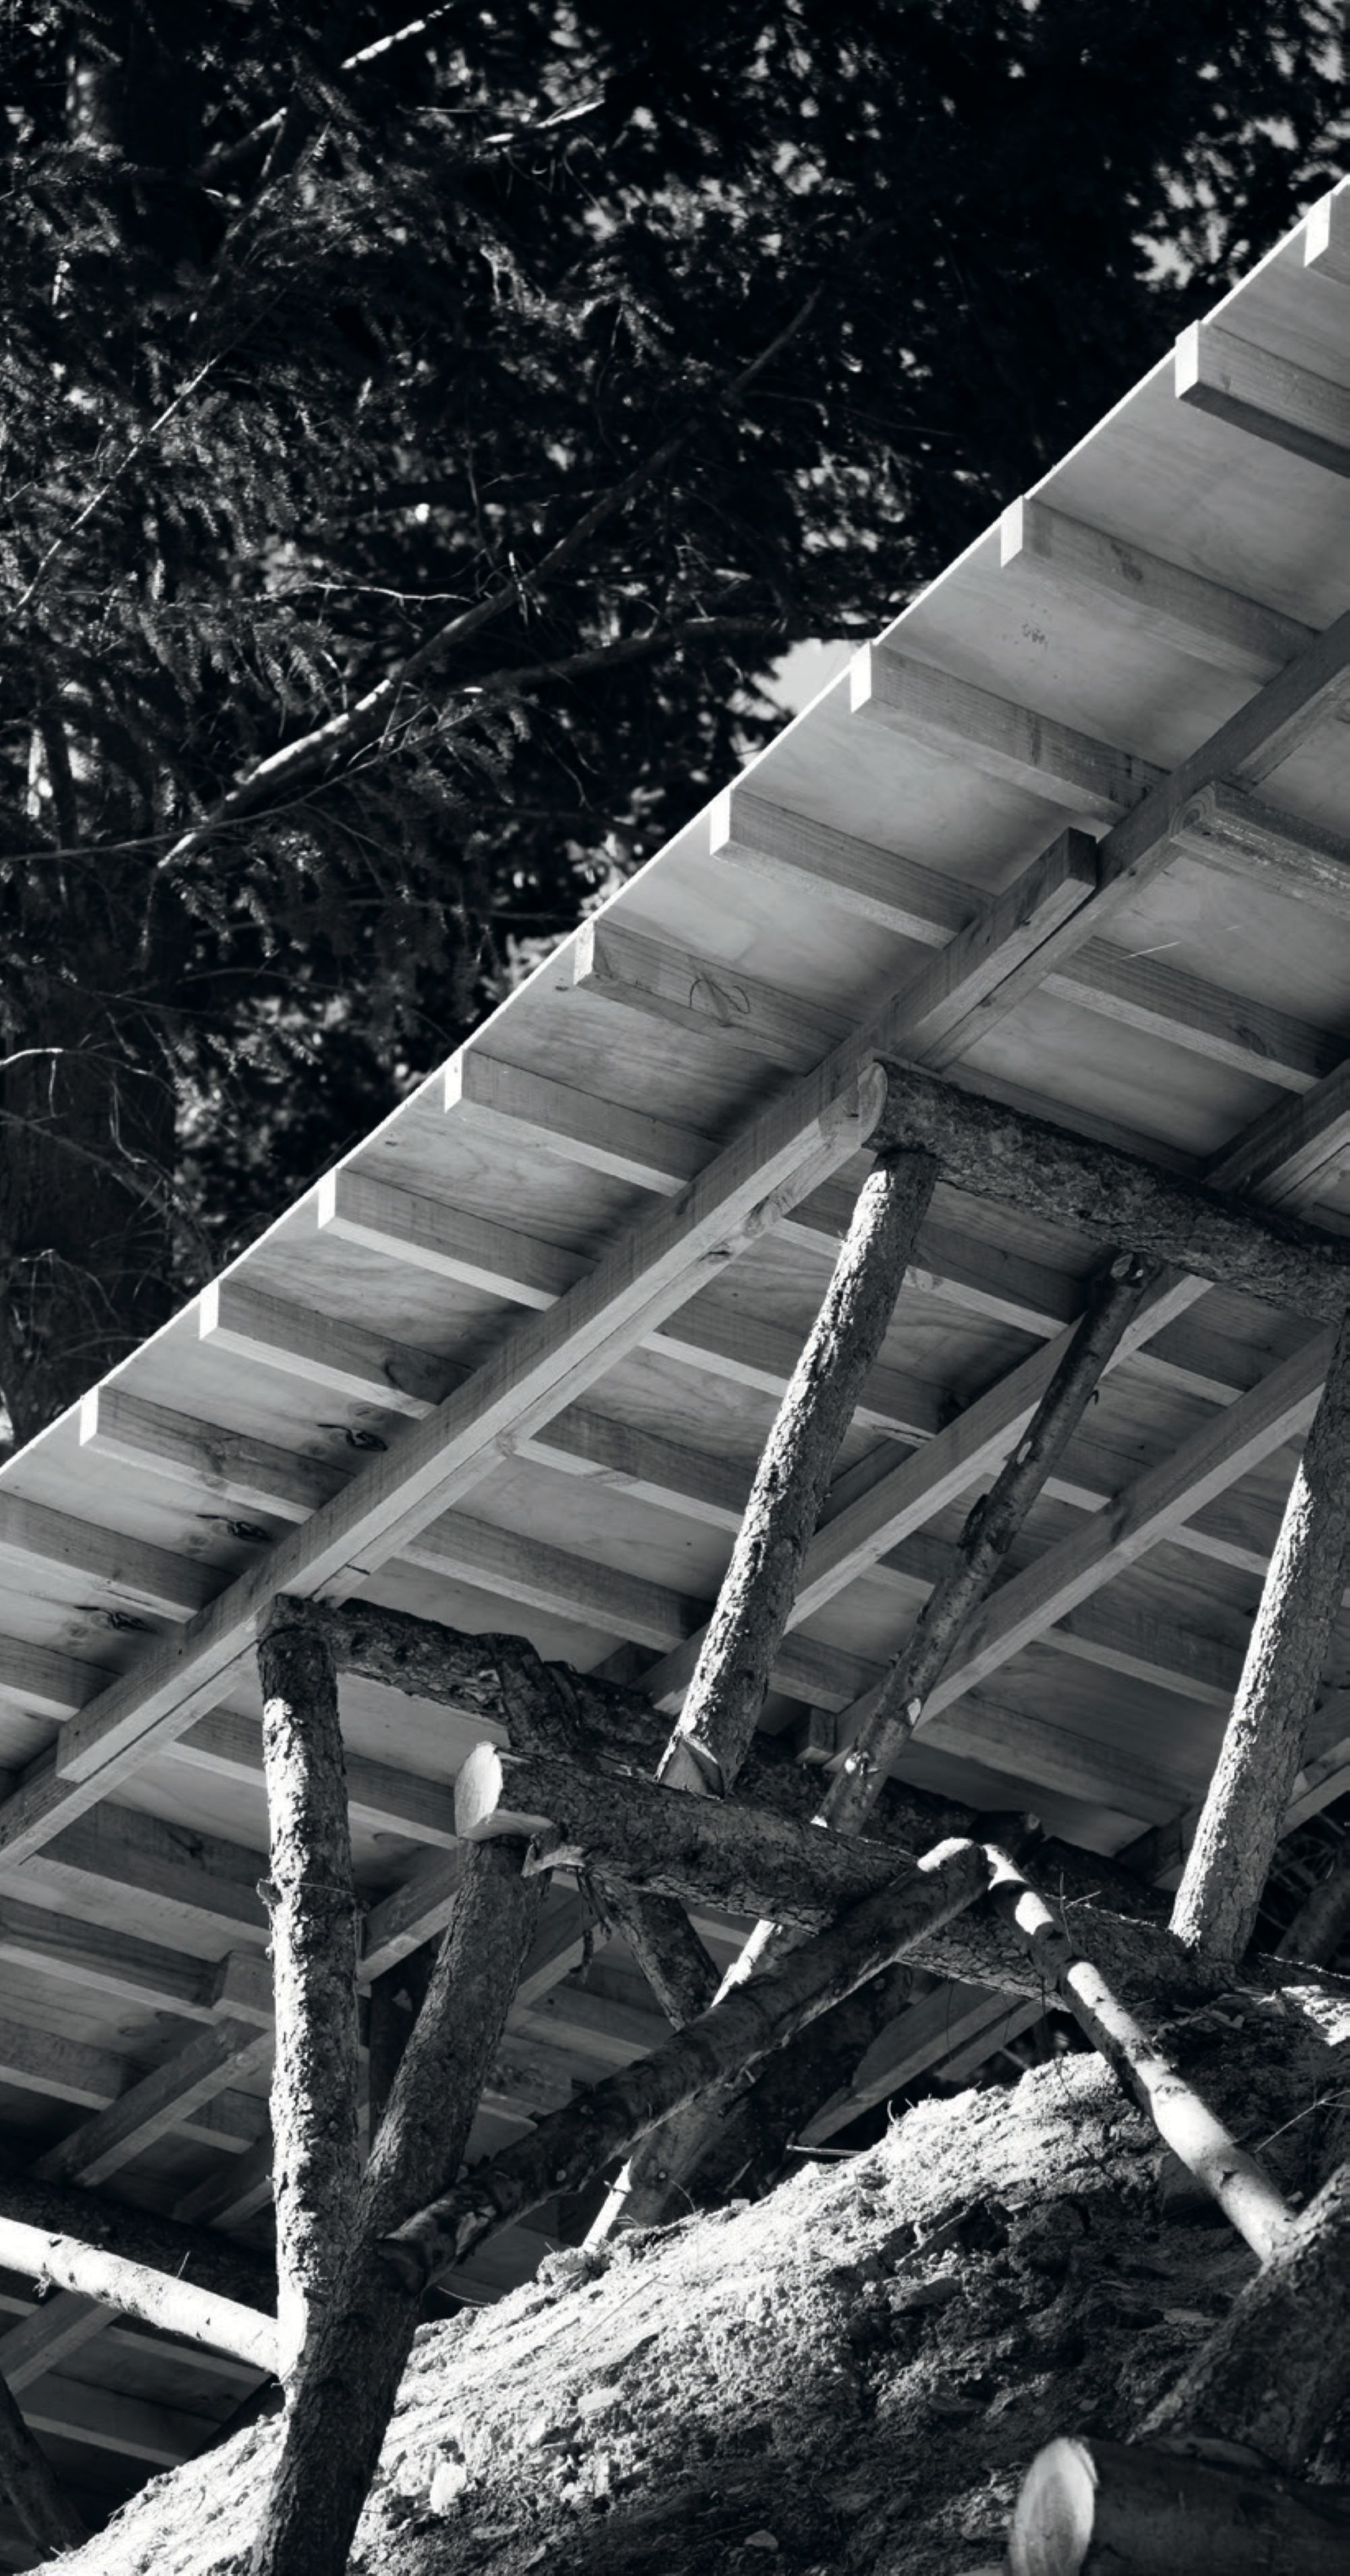
In 2021, the crew was approached by Red Bull to do a build for a video project with Remy; Seven Days and 7k. They were tasked with building a ‘DHT’-style trail from scratch, which would later be donated to Boomerang Farm Bike Park, near where Remy grew up just outside of the Gold Coast. DHT is a style synonymous with Flux Trail, blending the flow of BMX trails with the larger air of downhill riding. This was the first real test for Flux, as they had never had to work within such a tight deadline and budget. Remy’s experience with digging in this environment allowed them to leverage his knowledge of the terrain, creating a trail that was not only thrilling to ride but also visually captivating for the audience. The boys knew they really had to rip in and, after seven grueling 14-hour days, the trail was complete–all that was left was to film the segment and enjoy the fruits of their labour. This opened their eyes to what the team was capable of, not only serving as the perfect first piece in their portfolio, but also providing reassurance that they could build high-quality individual features and seamlessly connect them into a functional and cohesive trail. Confident in what they had learned in Australia, Flux took on contracts to apply their unique approach to trail design, bringing their fresh perspective to the existing networks of Skyline and Cardrona Bike Parks. The team wanted riders to flow down trails as smoothly as water on a waterslide, drawing much of their inspiration from water parks such as Wet ‘n Wild. This is where the name ‘Flux’ comes from; representing the action or process of flowing.

Flux quickly started to make a name for themselves, but what truly set them apart from other trail crews was their ability to design and build custom trails—not just for their own film projects, but for other athletes as well. One of their most ambitious projects to date came when they were once again approached by Red Bull to create a tailor-made downhill track that matched the raw style of World Cup racer, Brook MacDonald. Not only was it a dream project to collaborate with someone the team had long admired, but it was also an opportunity to showcase Flux’s work on the world stage. It was the first top-to-bottom trail they had built on a raw hillside, but the opportunity to work on an iconic video was one that couldn’t be turned down. The boys may have been slightly out of their depth taking on a project of this size, but they believe that stepping into challenges like this is the best way to grow. The exposed hillside posed a significant challenge when it came to operating machinery, especially when factoring in unpredictable weather conditions and varying terrain, however, the ability to balance these challenges while still creating a product that seamlessly and sustainably integrates with the environment has become the cornerstone of their work. The trust athlete’s place in the trail’s safety and functionality is crucial, as they know the Flux crew draw on their own riding experience to design trails they would ride themselves. This formula continued to evolve with Flux Trail using these build projects as an effective way to market their services. They went on to work on builds for Harriet Burbidge-Smith and were even scouted to contribute to a segment in Brendan Fairclough’s Death Grip 2 movie. This served as a point of recognition for both the company and Dave, who was featured in the segment riding the very features he had built.
Flux Trail has come full circle, once again securing the contract for the Crankworx Cairns build in collaboration with World Trail. This time, they’re not designing a course for just one athlete, they’re creating multiple courses for over a hundred. With plenty of opinions to navigate, ever-changing plans, and the need to adapt on the fly, the team embraces the challenge while understanding the immense pressure that comes with a job like this. Millions of dollars are on the line with an event of this scale, meaning missing a deadline is not an option. Collaborating with a world- renowned organisation like World Trail allows them to learn from their years of experience in the industry, continuing to raise their own standards and pushing their limits as builders. Remy has always stood by his goal of changing sport, but he also wants to make a lasting impact on the trail-building industry. Seeing the results Flux has achieved, he and his team recognise the business model’s potential for the future. Their vision is to build an organisation at the forefront of an ever- evolving sport—one that brands can trust and return to for delivering the highest quality trails possible. All while progressing their own riding to become the riders they have always aspired to be.