Bosch Performance Line CX Upgrade & Kiox 400C
Words Lester Perry
Images Thomas Falconer
RRP $2975
Distributor Shimano NZ
The electric mountain bike landscape moves at breakneck speed—literally. Often, it’s hard to keep track of the near constant changes but, as riders, we’re the ones who benefit from these shifts. Recently, Bosch eBike Systems has delivered significant performance upgrades. The German engineering giant has not only listened, but delivered exactly what riders want from modern eMTBs.
Performance Line CX Upgrade
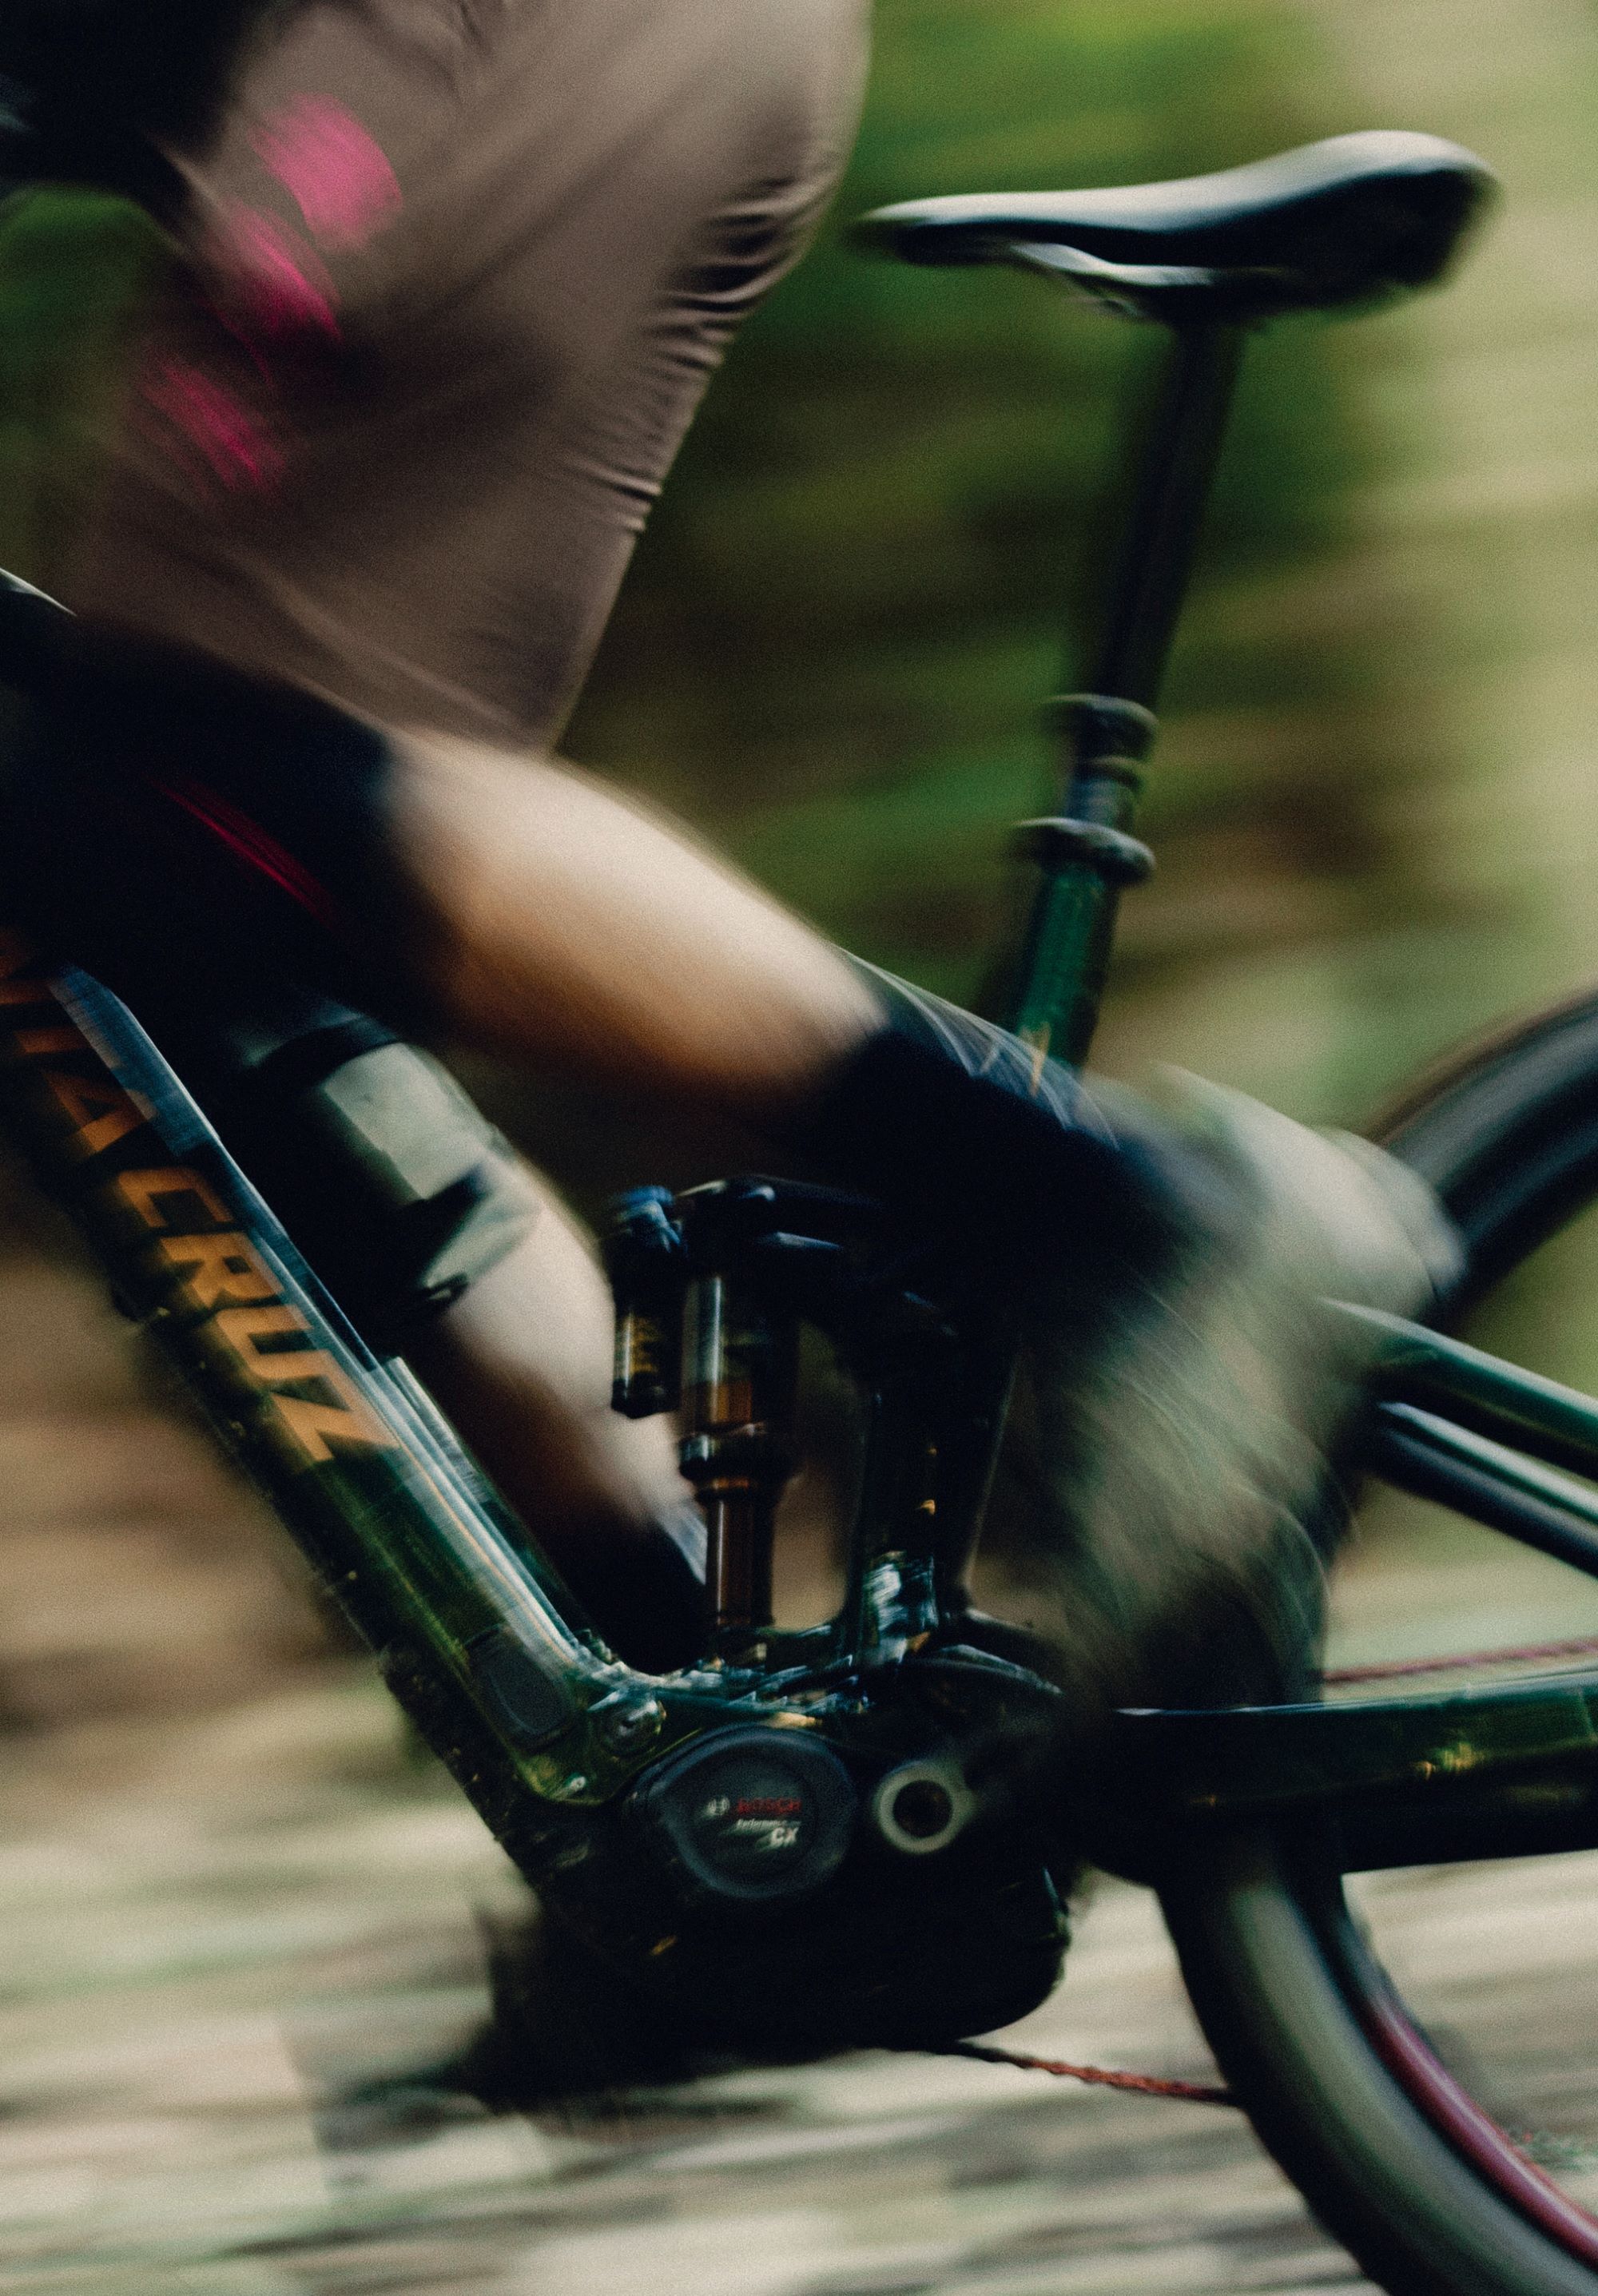
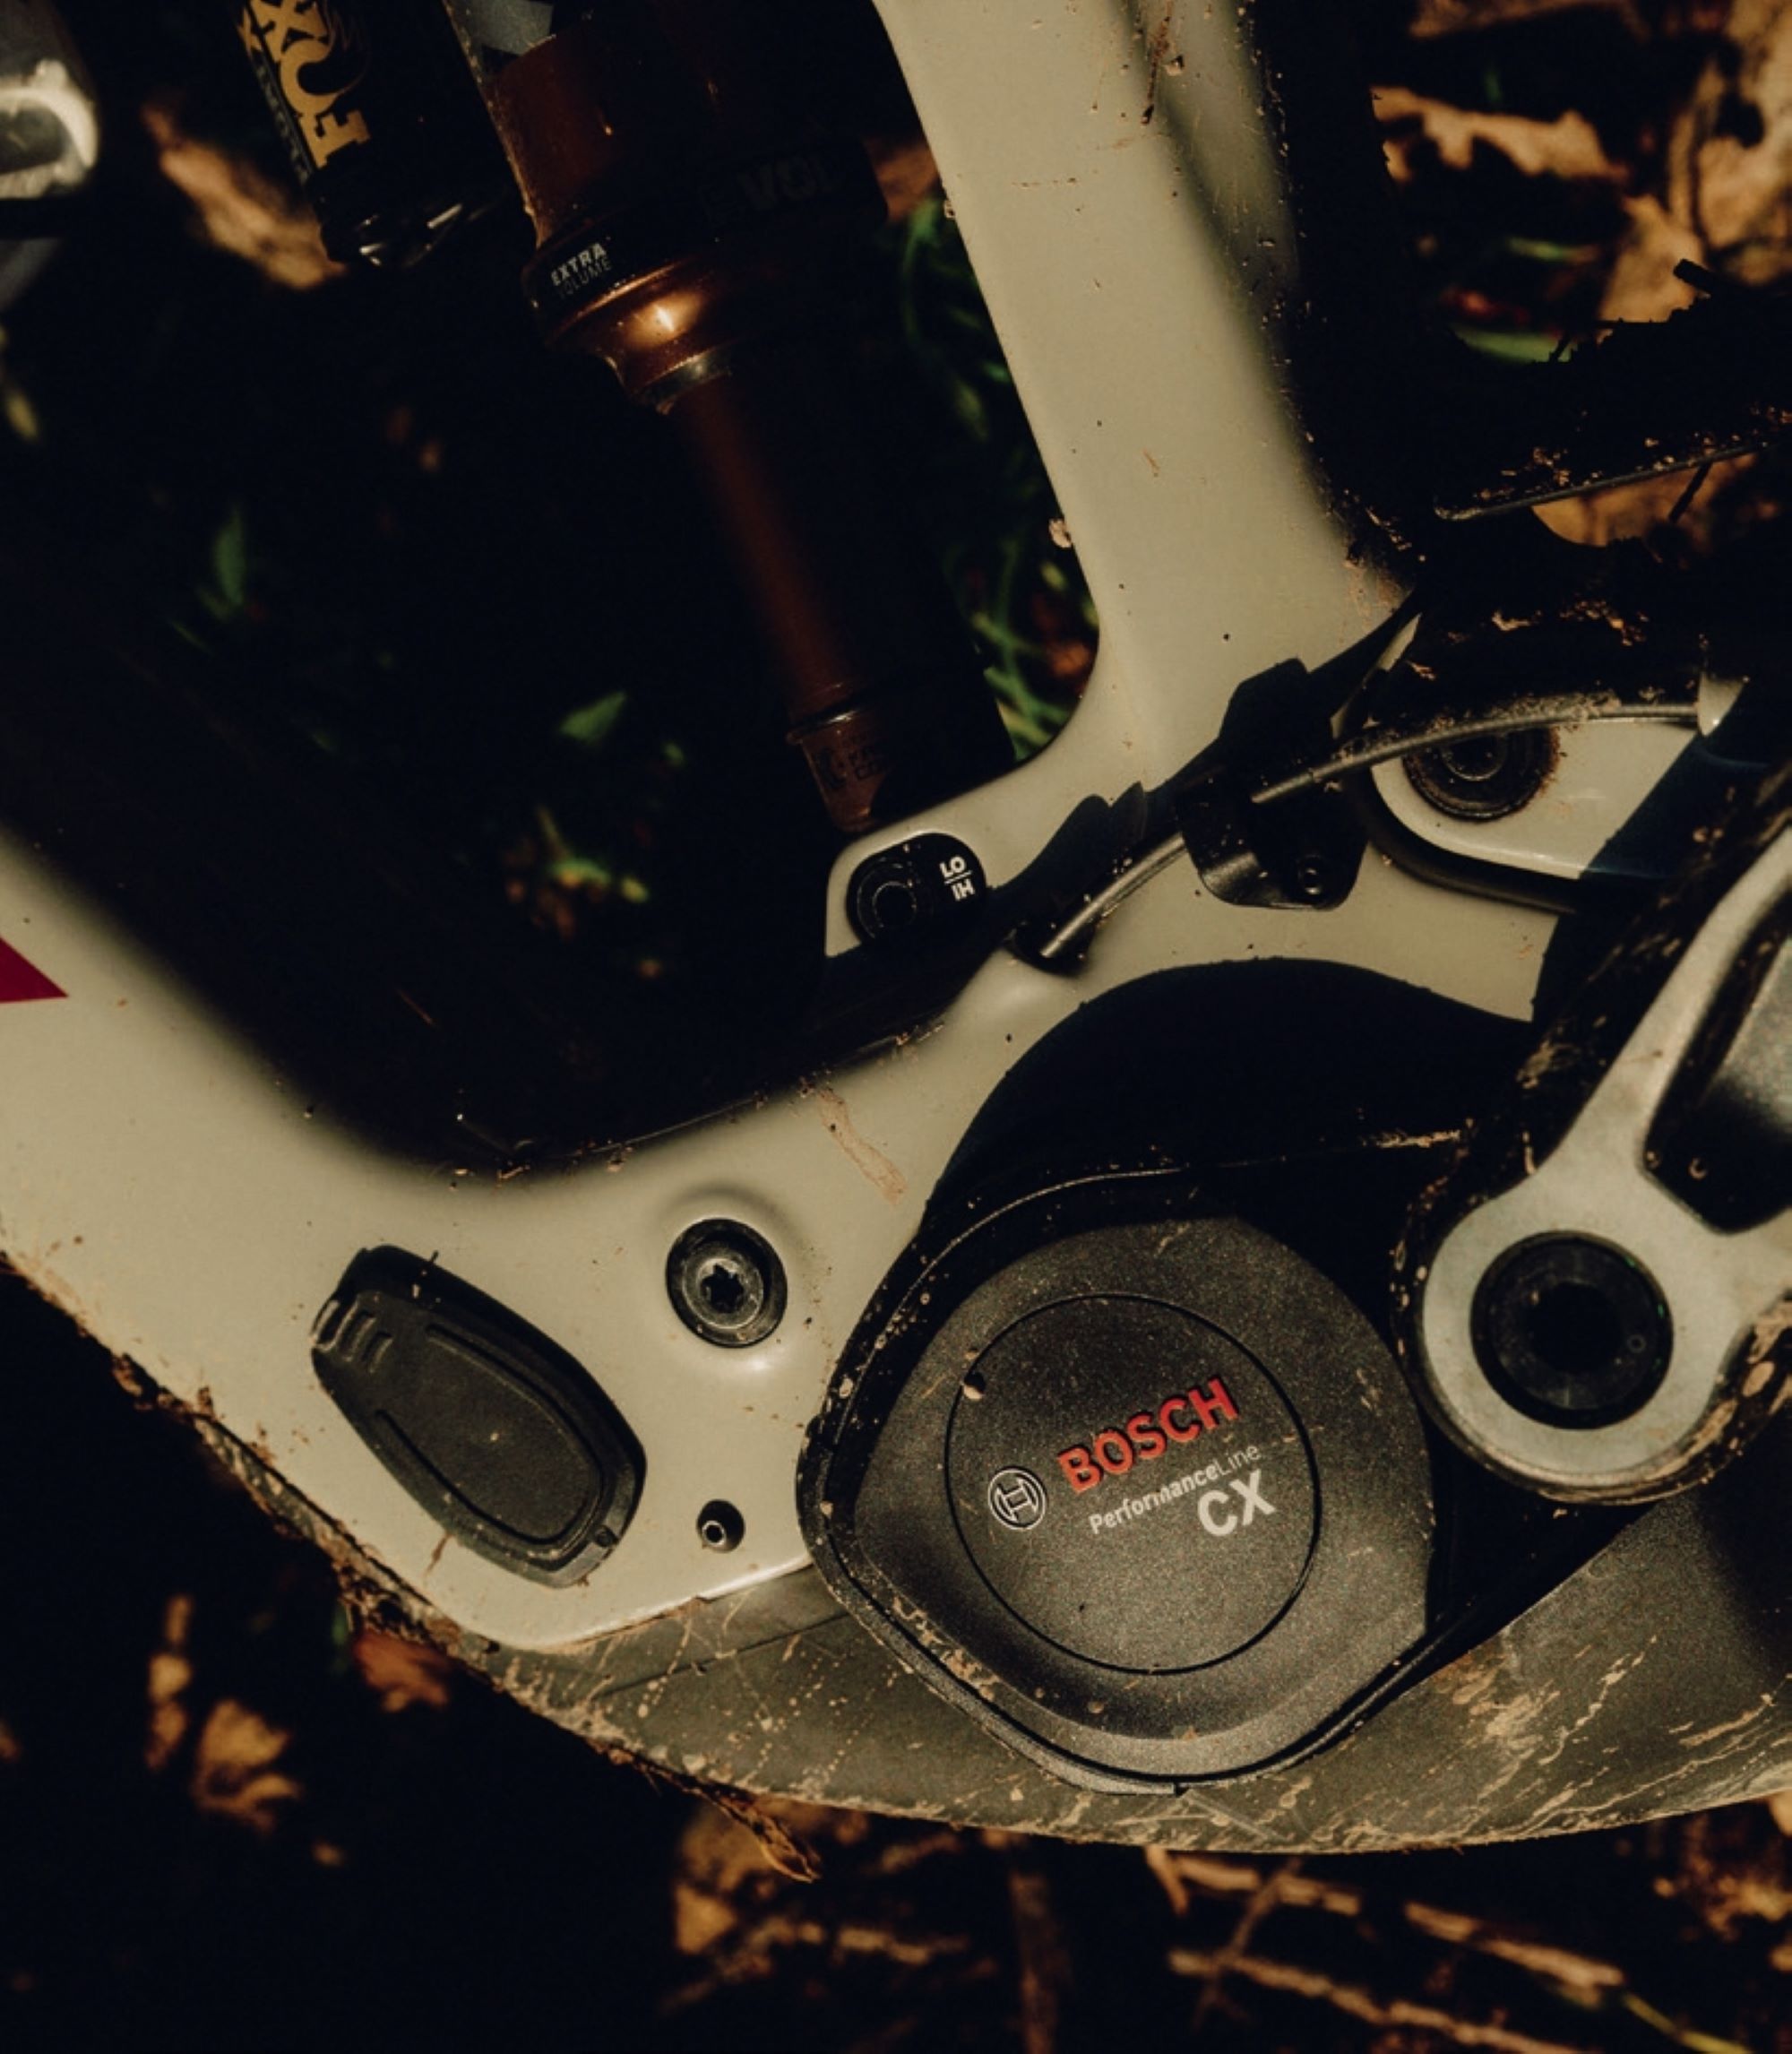
The Performance Line CX’s (BDU384Y) upgrade to 100 Newton metres (Nm) of torque, represents a substantial leap from the 85Nm standard. The upgraded system now delivers up to 750 watts of peak power while maintaining support levels of up to 400 percent of pedal input. This power enhancement becomes available through a software update for the latest Generation 5 motors—excellent news for current Bosch Performance Line CX Gen5 owners, as it essentially future-proofs your eMTB investment.
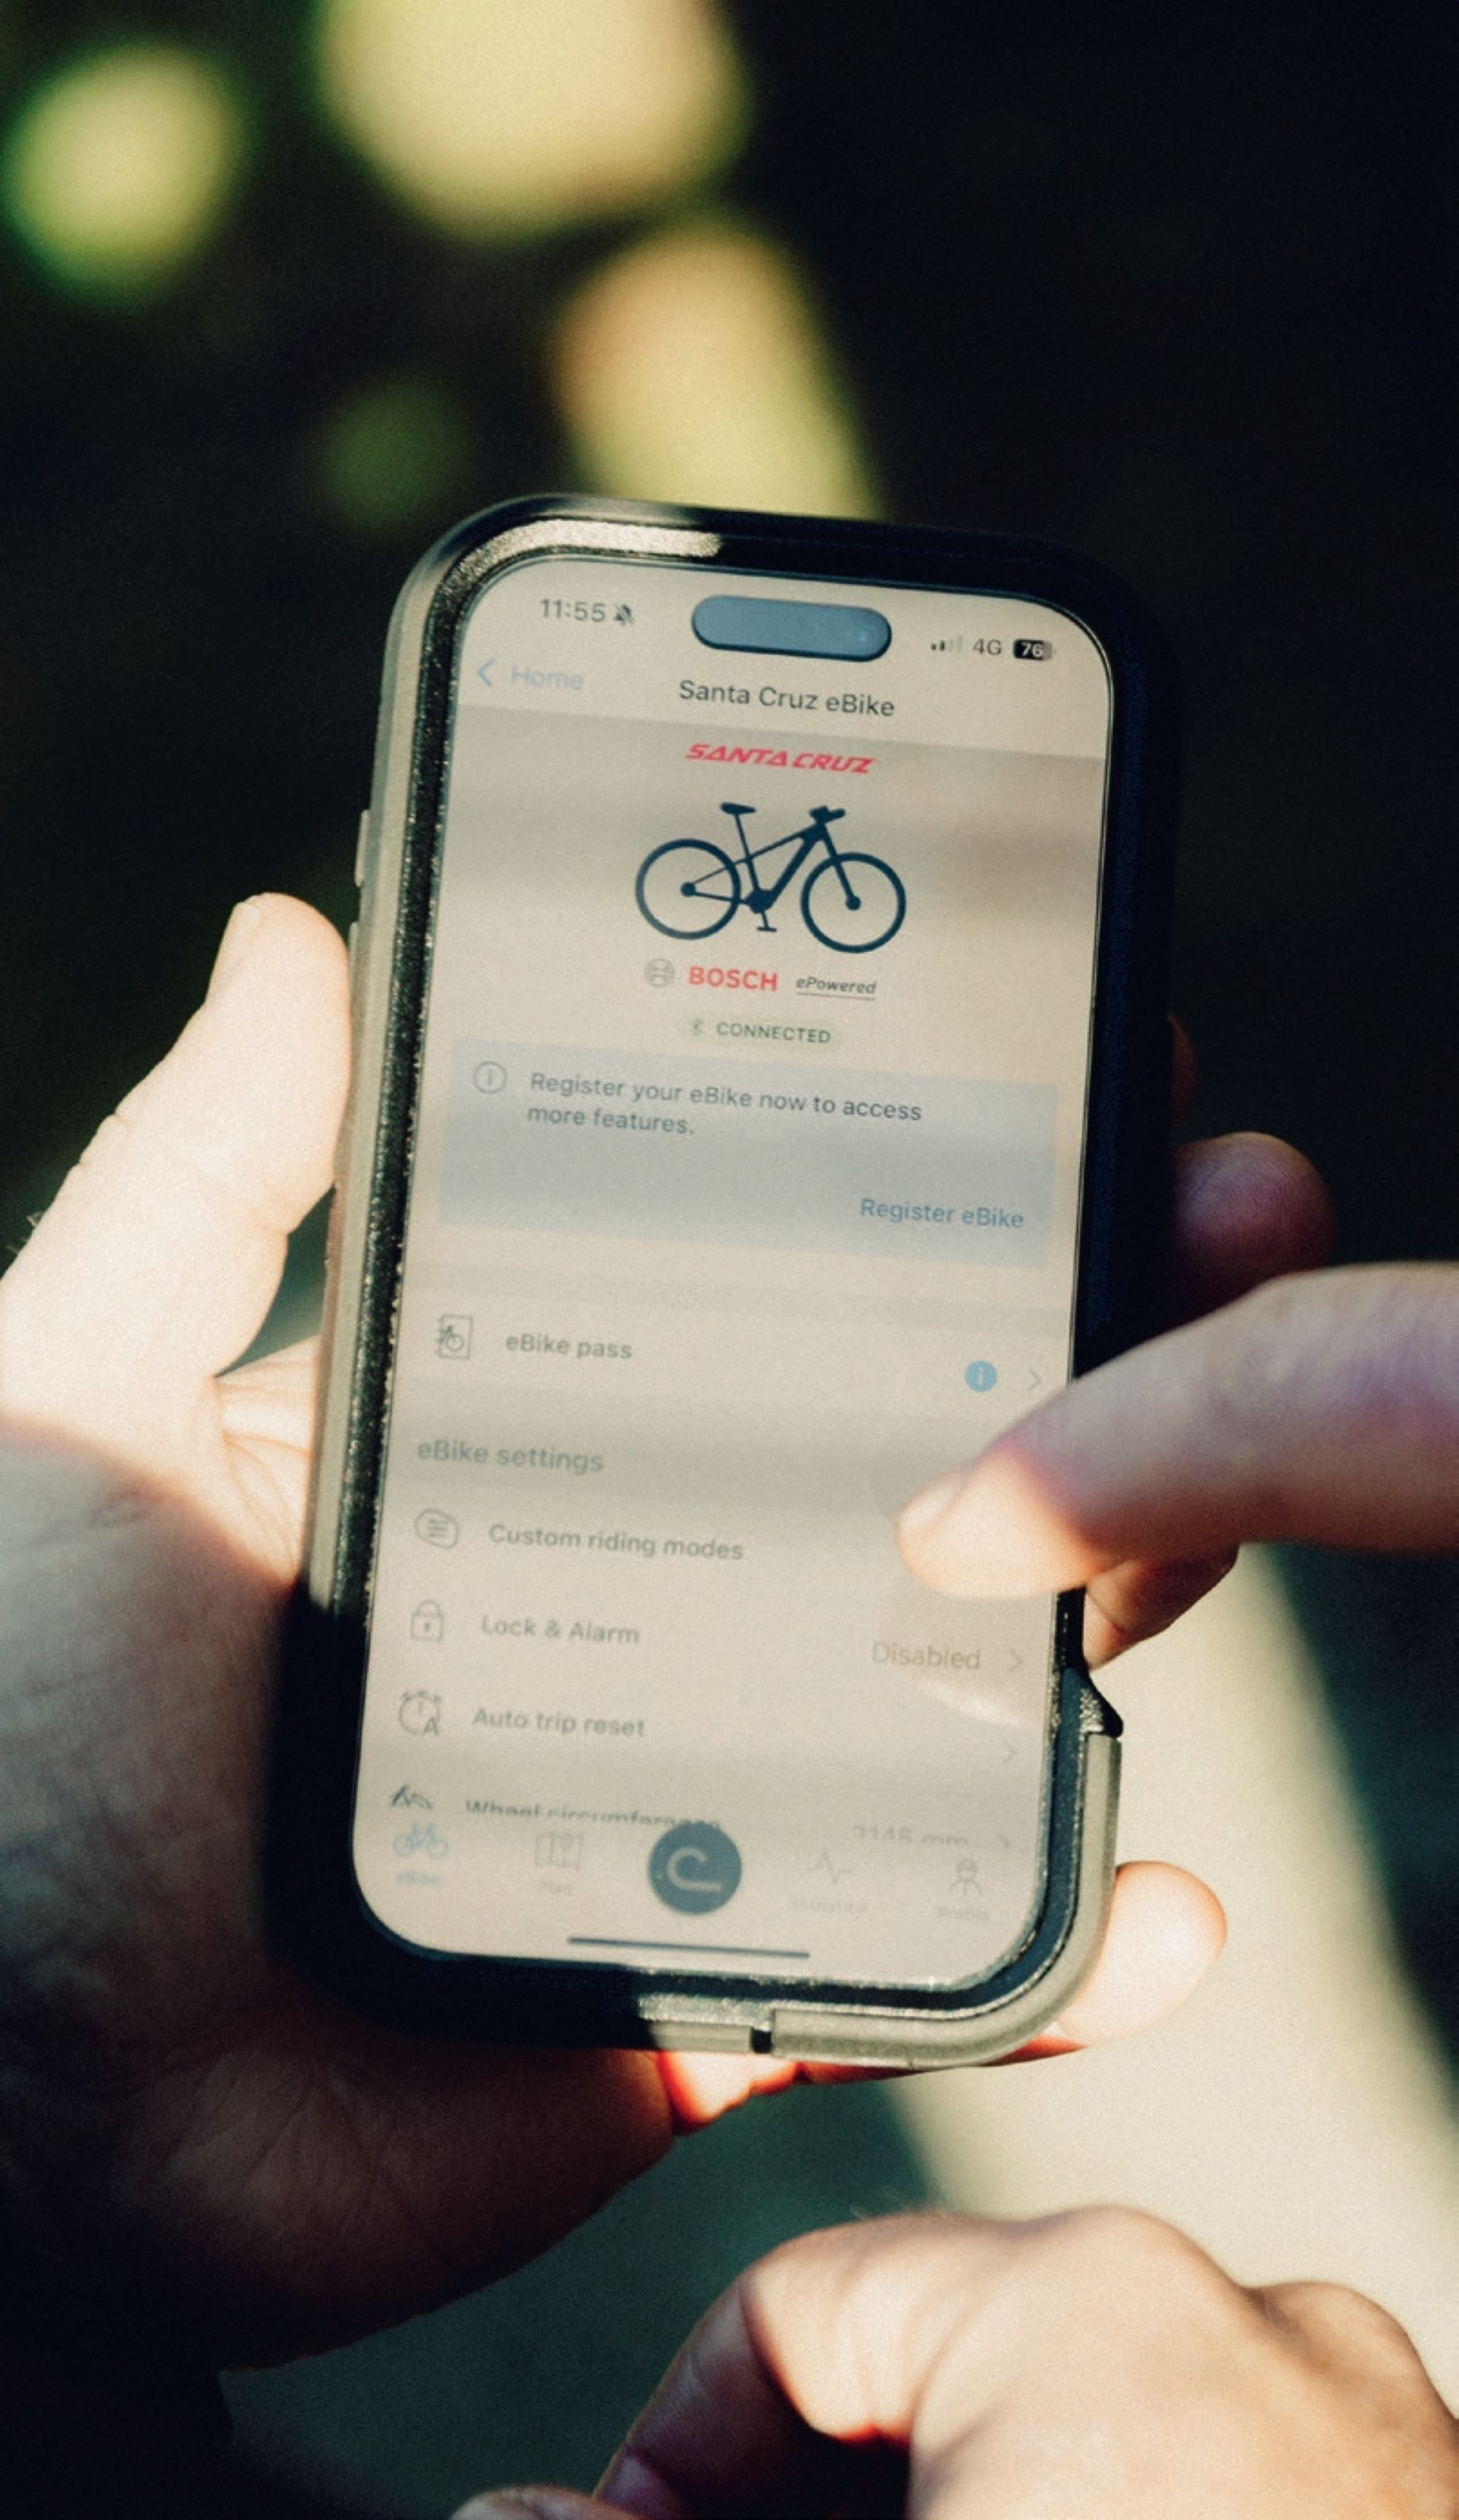
The best part? This upgrade can be done seamlessly via the Flow app, where you can customise power delivery characteristics to match your riding style and terrain preferences. Another key element of this upgrade is the introduction of the new eMTB+ mode, which leverages advanced algorithms to deliver power with what Bosch describes as “sensitive precision exactly when the rider needs it”. This represents a significant shift from simply providing more power, to providing smarter power distribution.
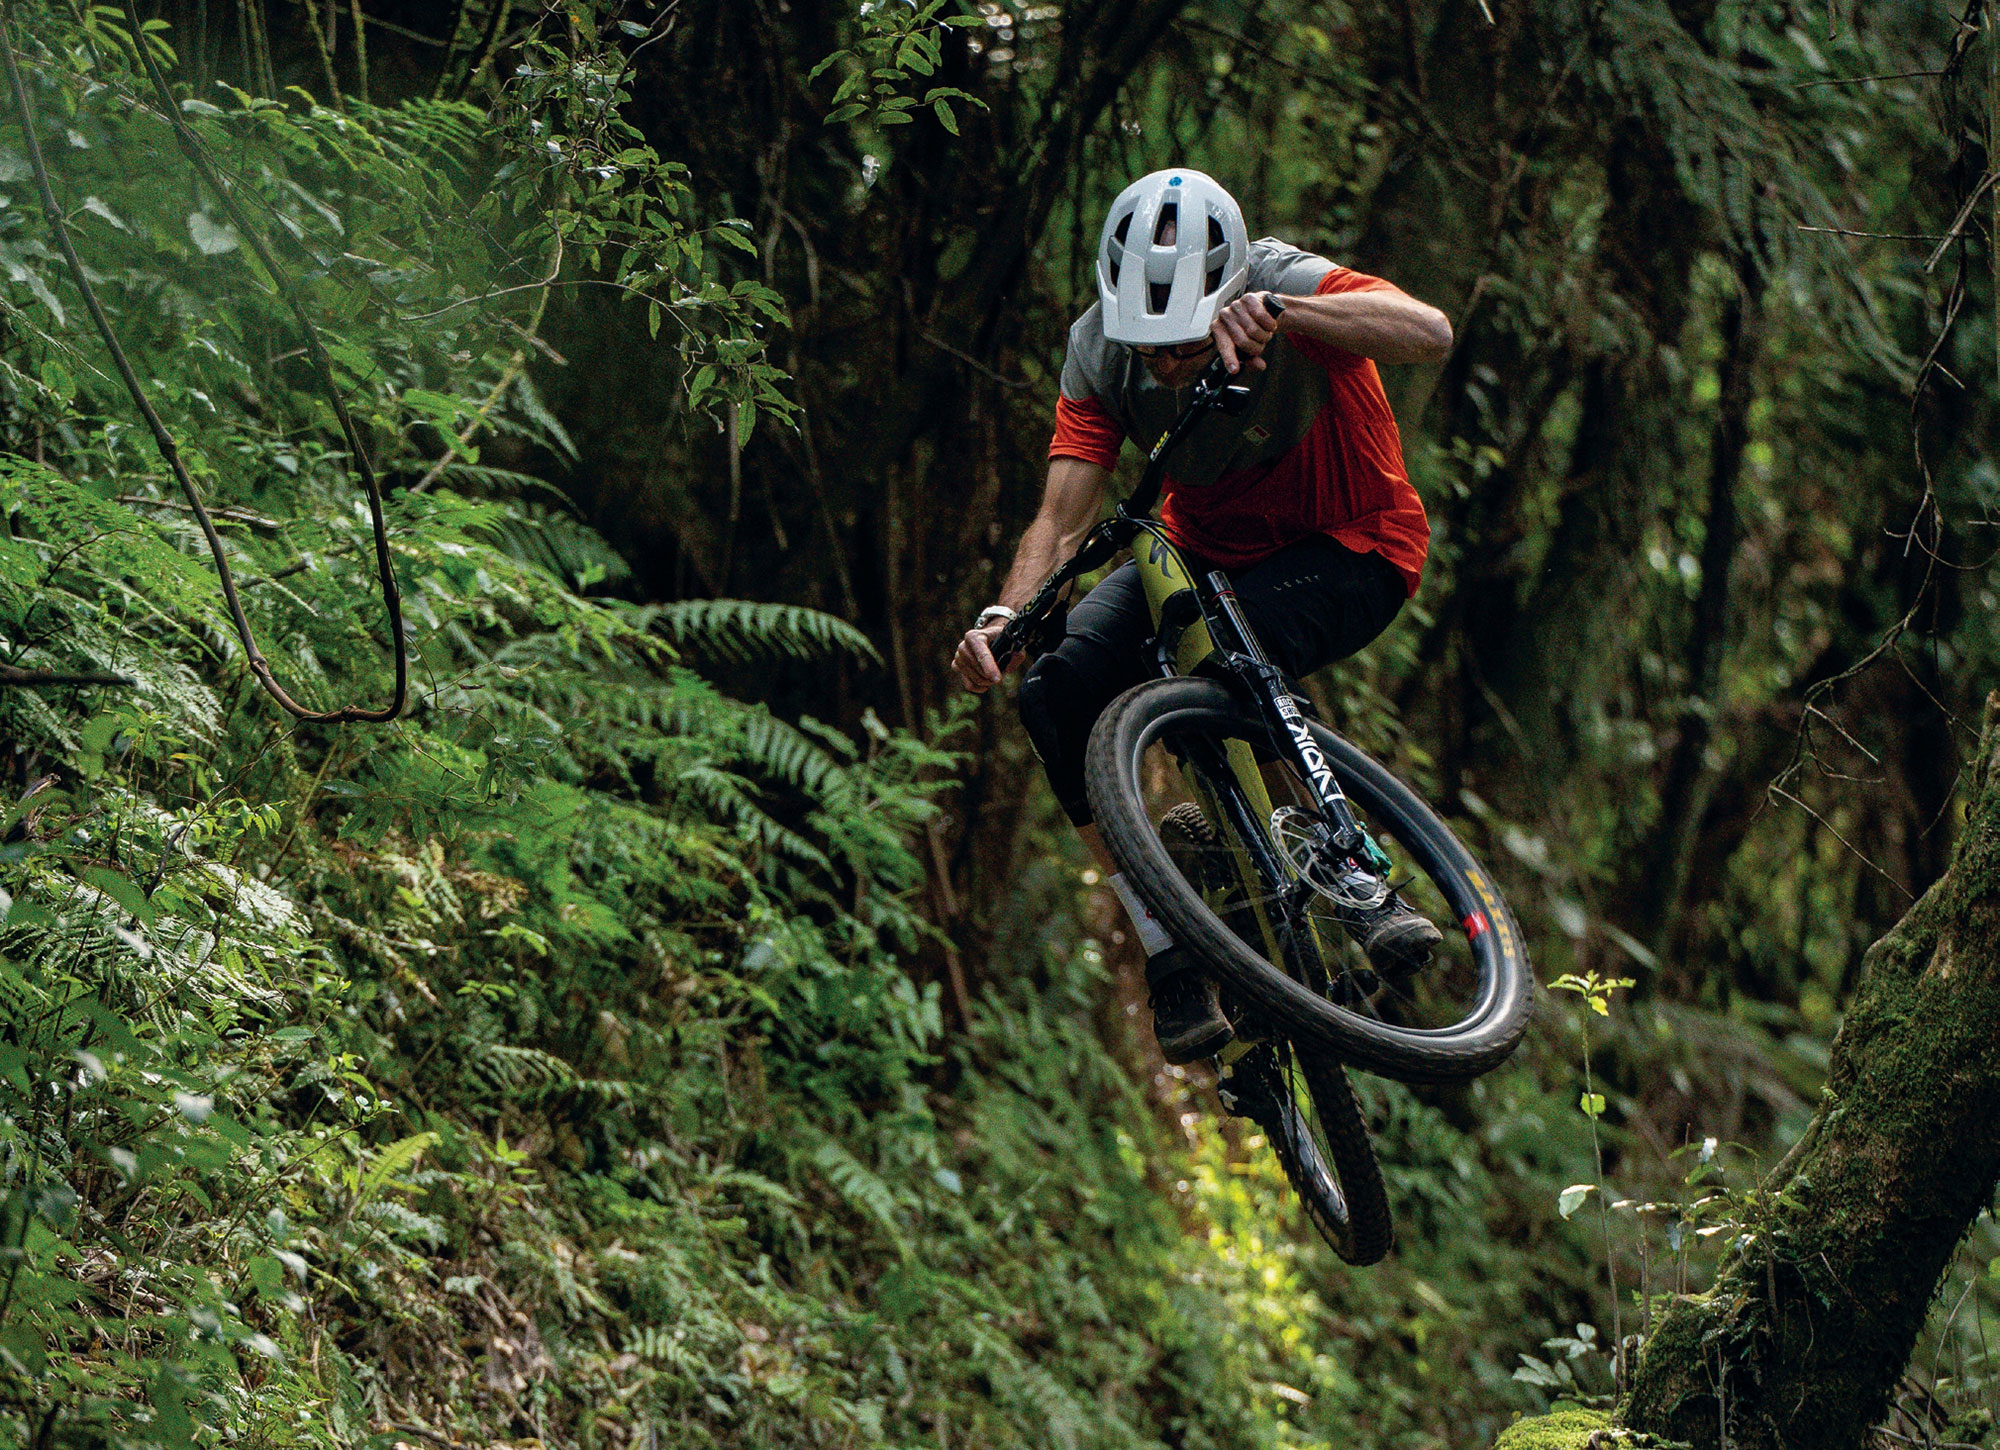
I tested this upgrade on a Santa Cruz Vala during a trip to Silvan Forest MTB Park (featured in this issue). First, the update was simple via the Flow app, and what immediately impressed me was its intuitive nature—neither under- nor over-compensating, just enhancing my riding. It adapted to my cadence and provided a boost when needed over tricky obstacles. Some other eMTB systems I’ve ridden rely heavily on higher cadence, especially with lightweight models, but that’s not the case here.
The clear standout for me was the new eMTB+ mode. I didn’t need to toggle between any other modes at all. The technical difference between eMTB and eMTB+ is 15Nm of torque and a maximum power output difference of 150W. This difference is definitely noticeable, though as a heavier rider the benefits might be more pronounced for me. Riding in eMTB+ mode, the power delivery felt intuitive, and I appreciated that extra assistance and traction when hitting steep inclines.
This isn’t simply about raw numbers—it’s about the intelligent delivery of power that adapts to the rider’s demands with superior sensitivity.
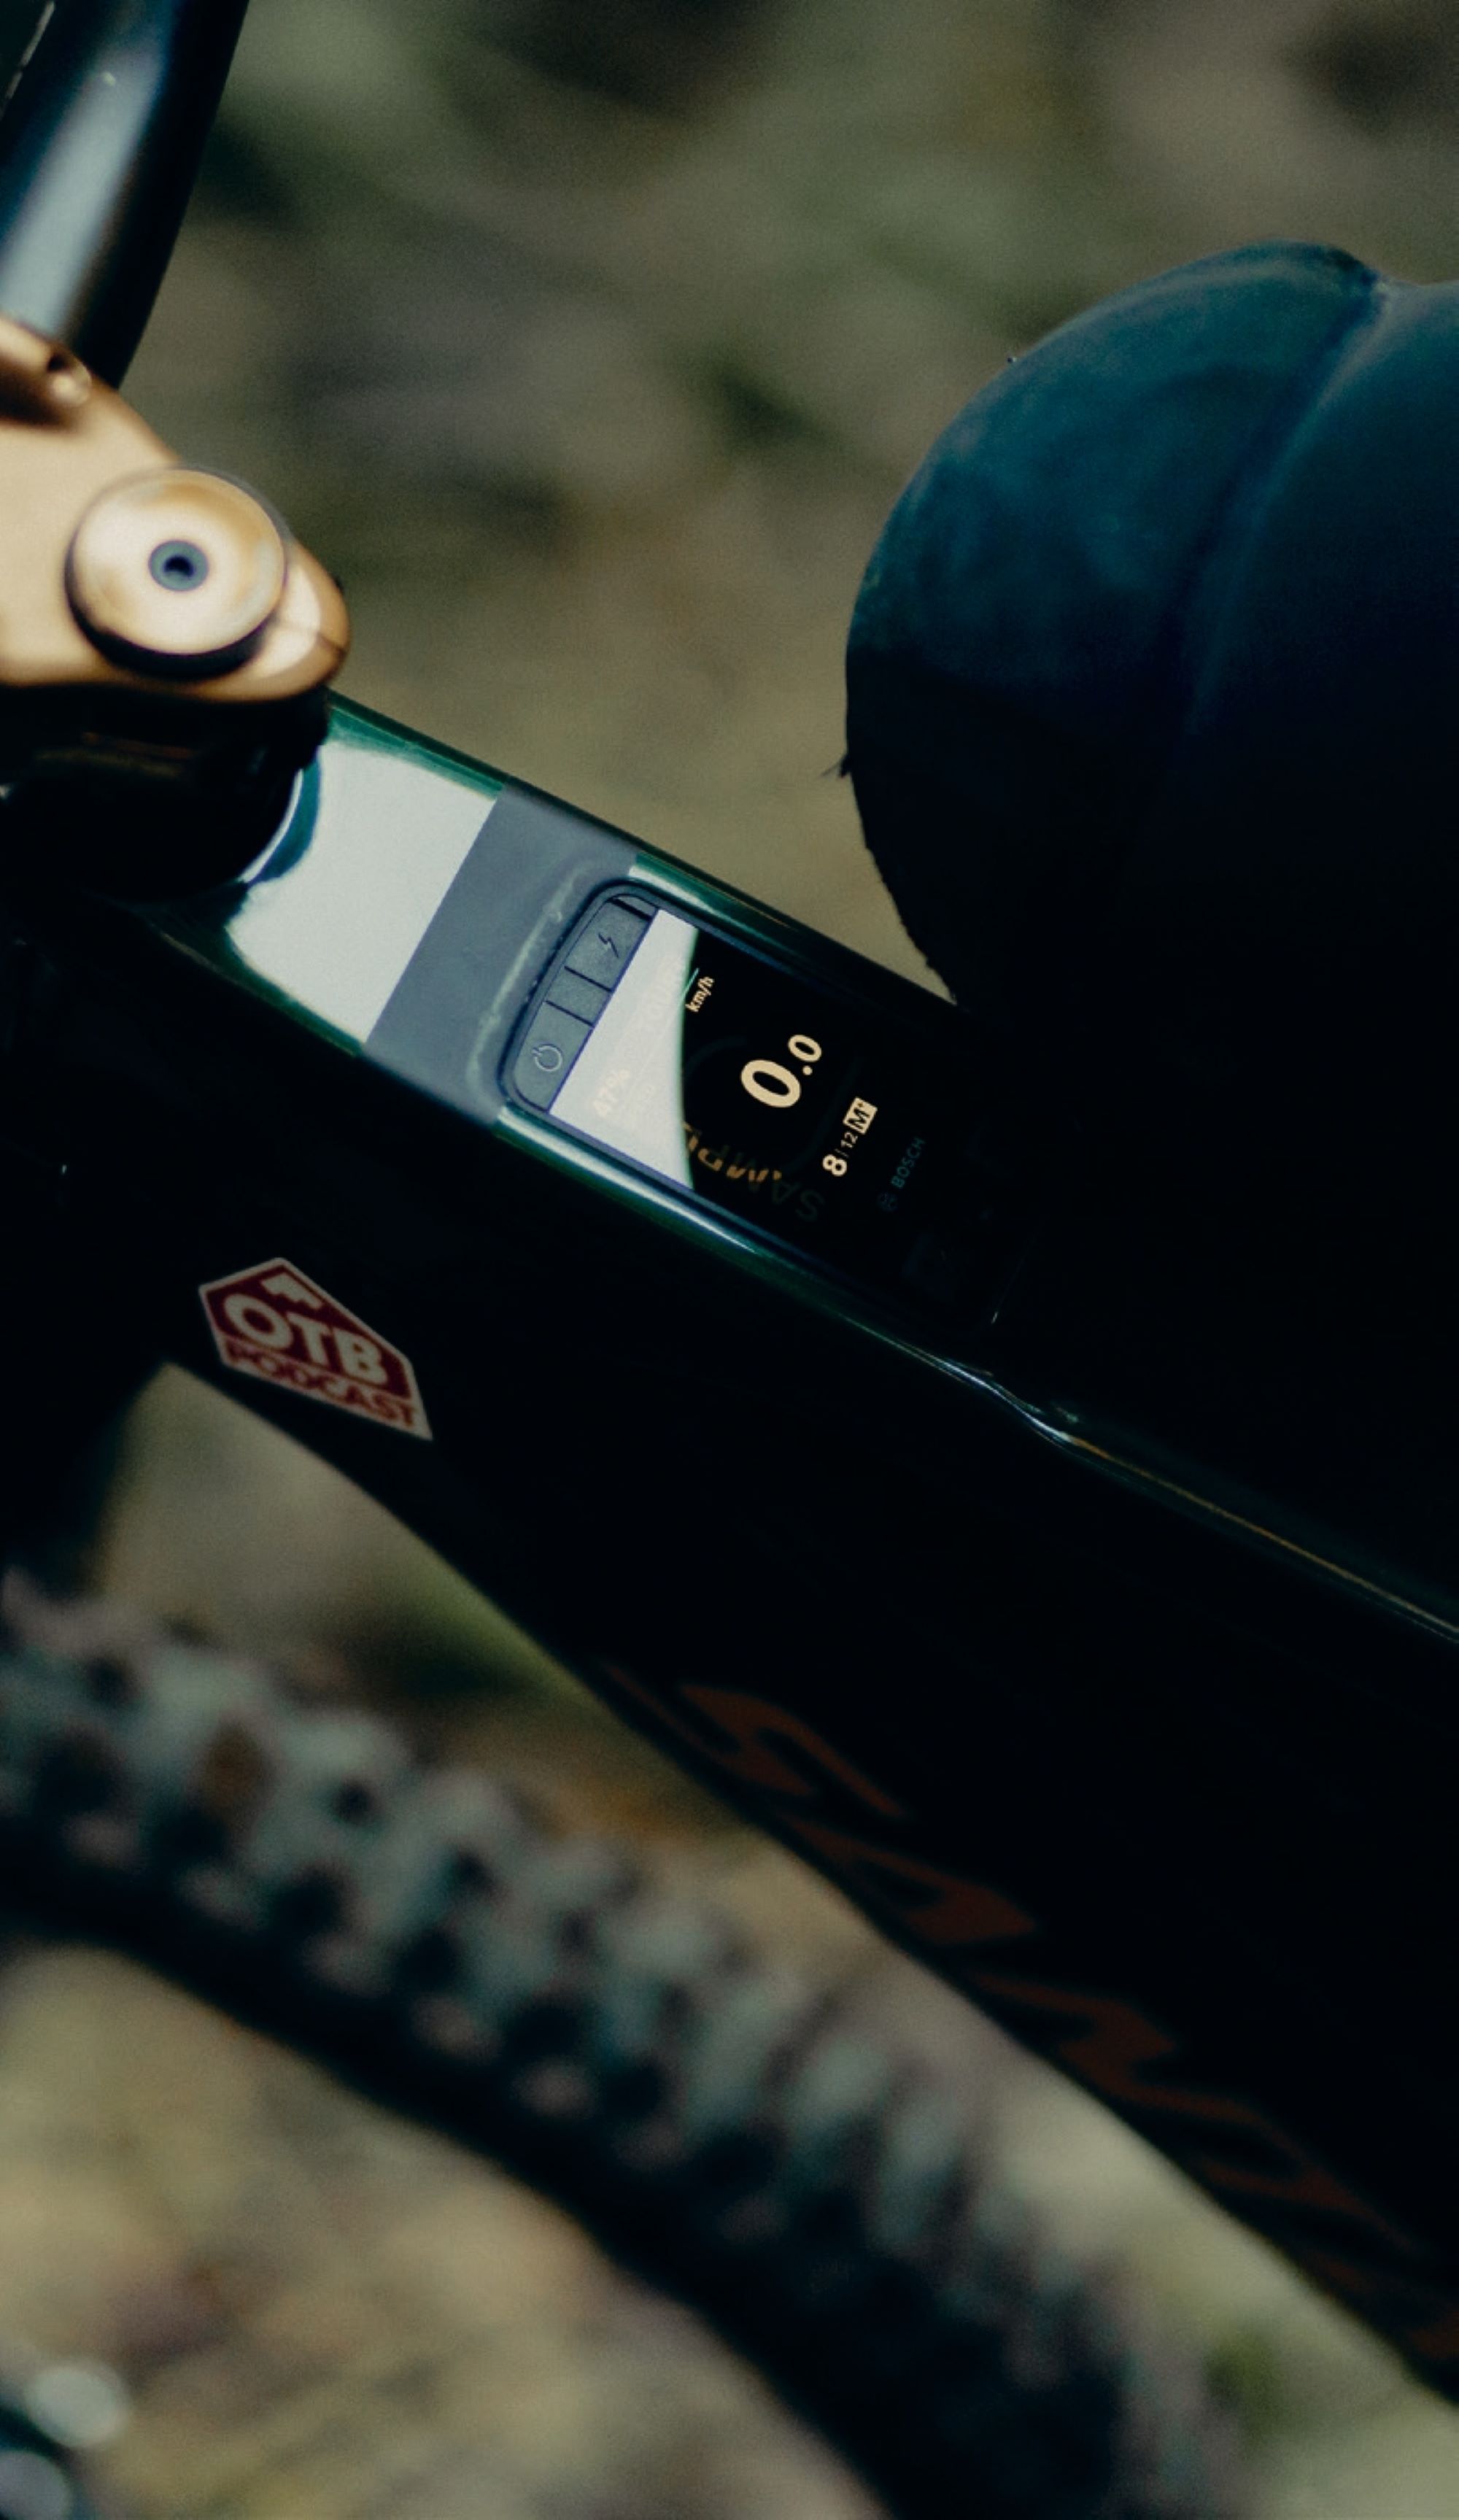
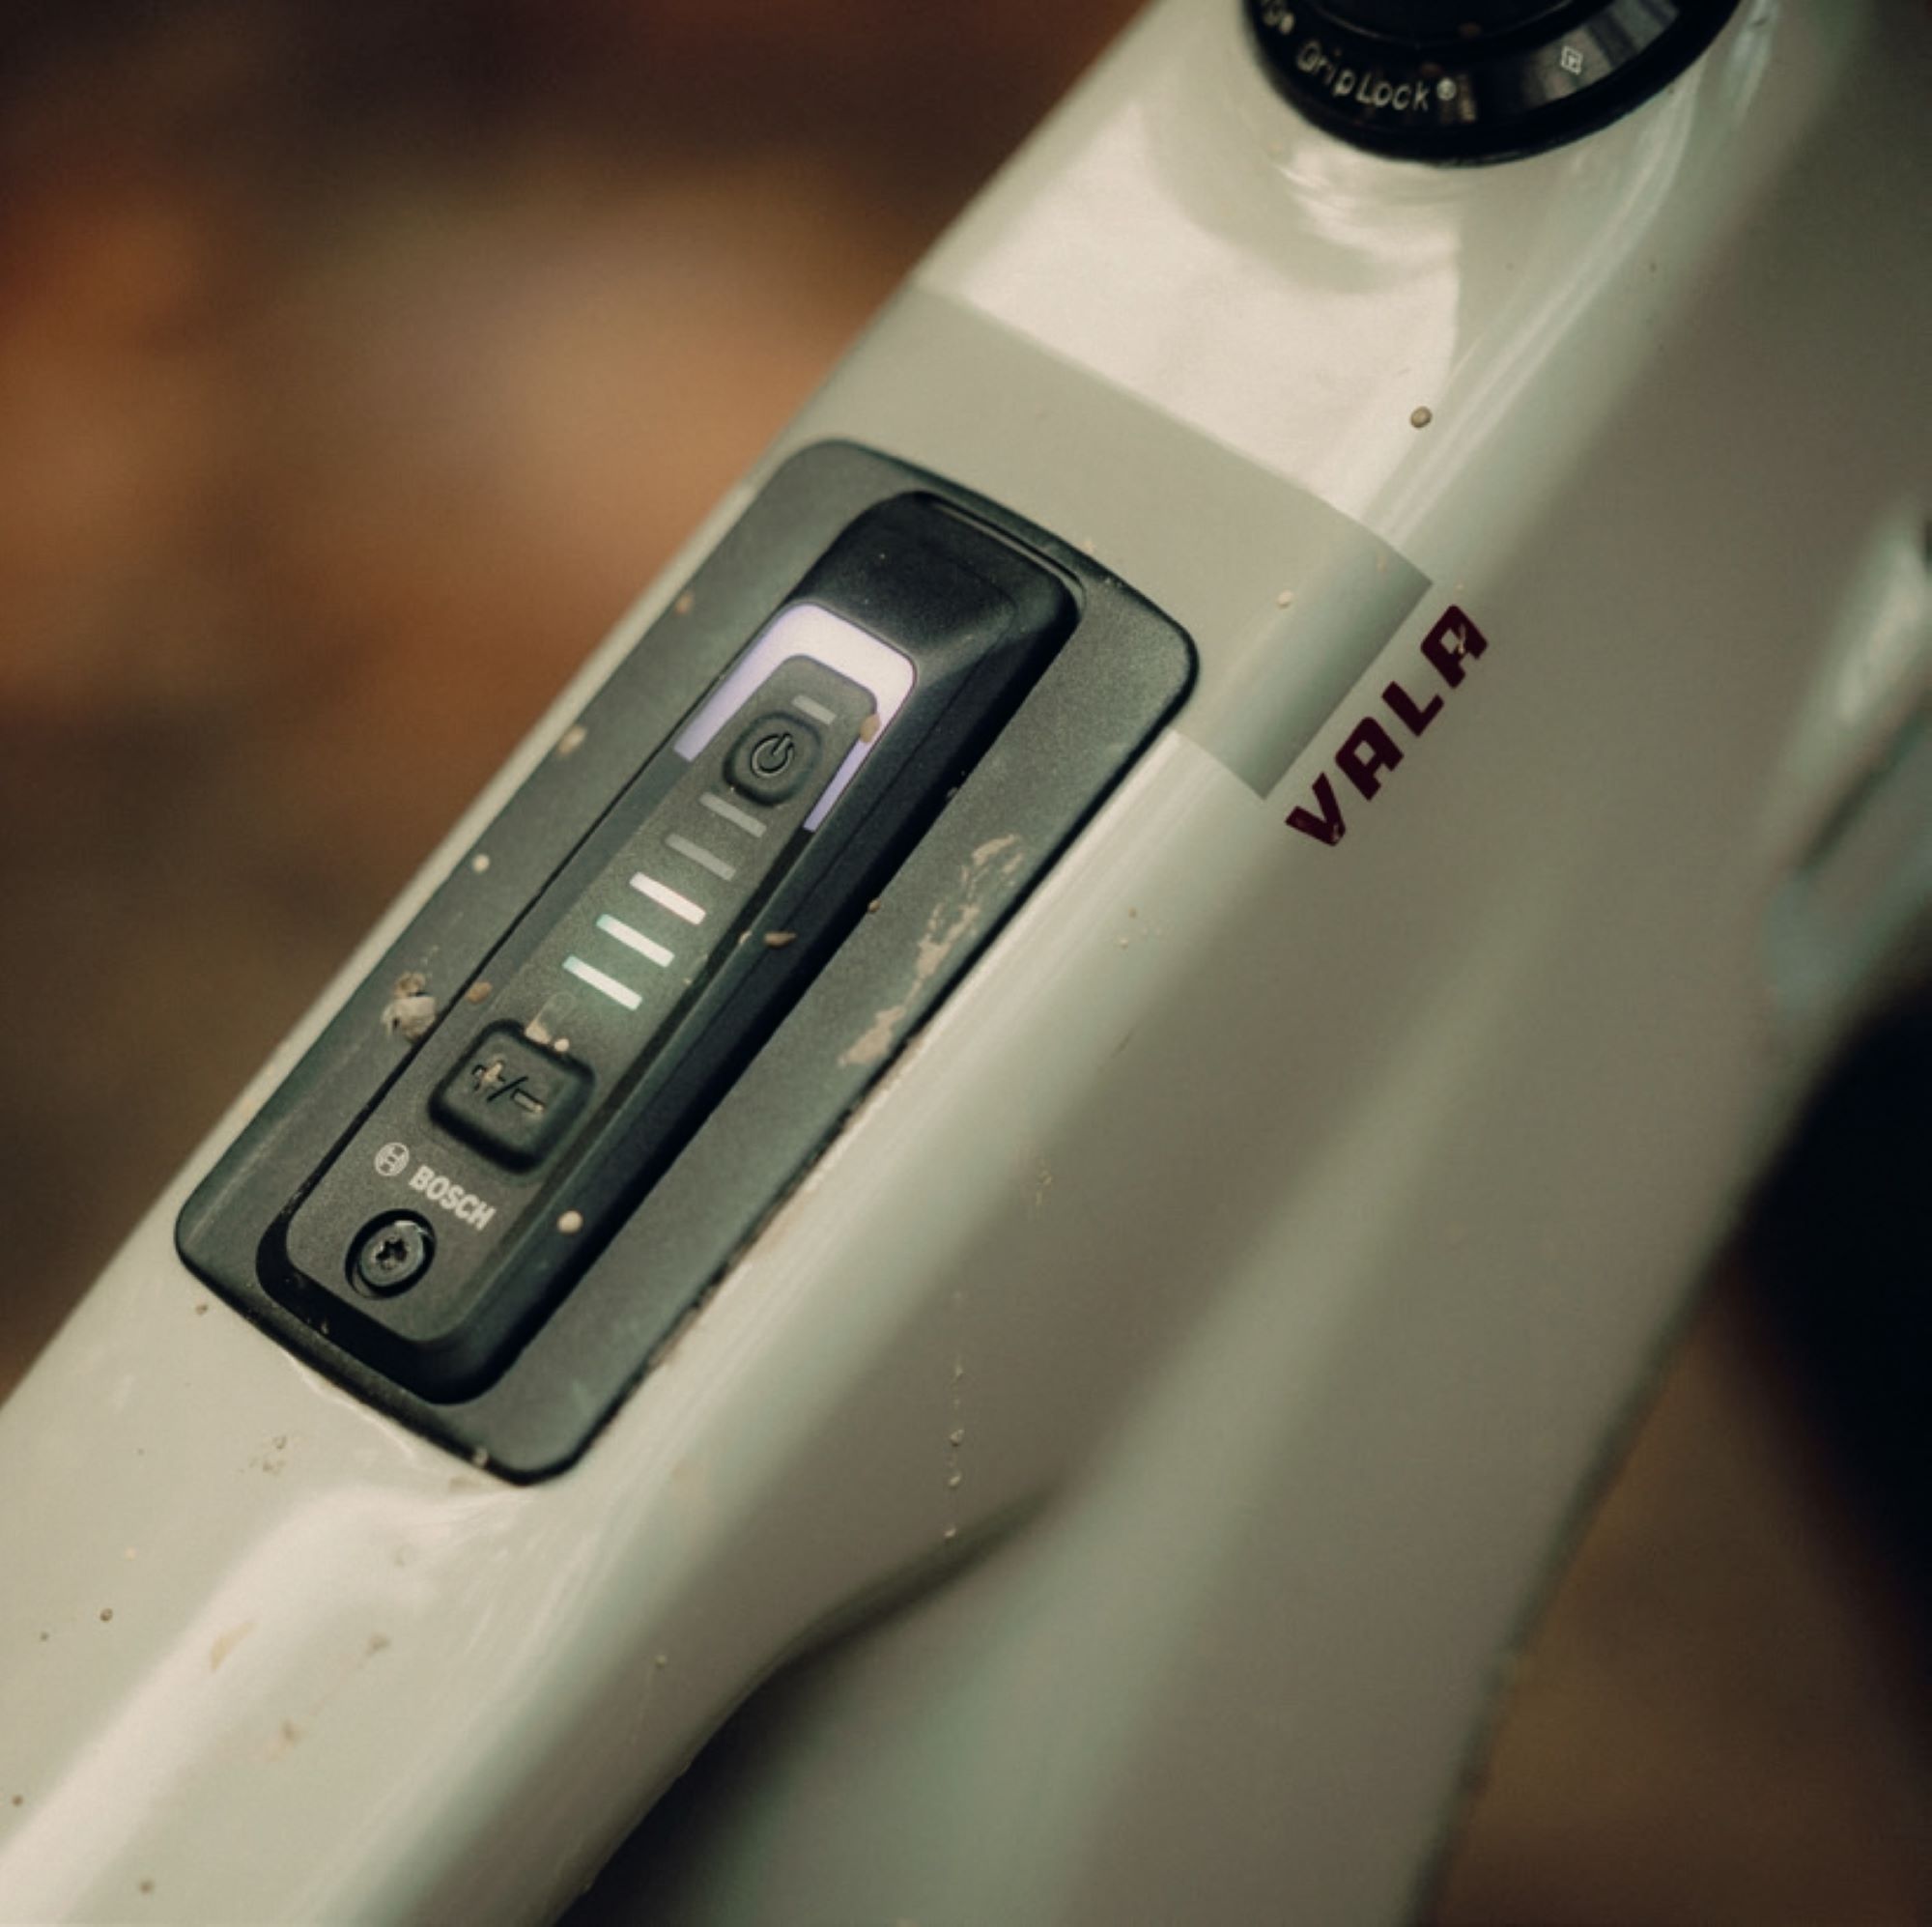
Kiox 400C
The Kiox 400C represents Bosch’s vision for the next generation of eBike displays, moving beyond basic readouts to become the command centre for modern eMTBs.
Designed for integration into the top tube rather than handlebar mounting, the Kiox 400C offers a cleaner cockpit aesthetic while maintaining full functionality. The display features customisable settings and automatic brightness adjustment, addressing one of the persistent complaints about previous generation displays that struggled in varying light conditions. Tactile buttons provide direct control, while the optional bar-mounted Mini Remote ensures riders can maintain proper hand positioning during technical sections.
Perhaps most significantly, the Kiox 400C includes an integrated USB-C port, finally addressing the evolving needs of modern riders who rely on multiple devices during extended rides. The system also supports navigation functions, transforming the display from a simple readout into a genuine trail companion.
On the trails, the Kiox 400C remained perfectly readable in all light conditions, and perhaps its best feature was the dynamic screen cycling. Essentially, various Bosch Smart System algorithms detect what you’re doing—like tackling a climb – and automatically display the most relevant screen for that situation. I appreciated the simplicity of having the display show only the most pertinent data, which helped me stay focused on the ride itself.
The sleek display’s integration into the top tube creates a much tidier cockpit, which is certainly appealing from both aesthetic and functional perspectives. And having the Kiox 400C’s ability to charge USB-C devices like my iPhone during a ride proved super handy—no more dead phone anxiety on longer adventures.
The Bigger Picture
Bosch has taken a measured approach to rolling out these innovations. The Performance Line CX software upgrades are available now, accessible through both dealer updates and the Flow app for end users. This dual-path approach ensures accessibility while maintaining professional oversight for riders who prefer dealer support. The Kiox 400C, while designed for 2026 model bikes, offers retrofit compatibility with select 2025 models from participating manufacturers. The backwards compatibility of both the Performance Line CX upgrade and Kiox 400C is a solid addition—especially valuable if you’ve recently purchased a Bosch-powered eMTB.
The timing is particularly significant as the eMTB market continues its rapid expansion, with riders increasingly demanding sophisticated performance. These developments signal a new maturity in motor technology, where software updates can deliver meaningful performance improvements and where display technology finally matches the premium level of the power systems they control.

Patagonia Kit
Words Lester Perry
Images Thomas Falconer & Jamie Fox
RRP $229 Men’s Dirt Roamer Bike Shorts 12″ | $349 Dirt Roamer Liner Bike Bibs
Distributor Patagonia NZ
“Don’t buy these shorts”
In 2011, the brand Patagonia made headlines with their “Don’t Buy This Jacket” ad campaign in The New York Times. This was a shout out to anti- consumerism and their lifetime repair program that aims to ensure garments last forever, rather than be turfed on a rubbish heap and replaced.
Let’s rewind the clock back to the 1950s. Yvon Chouinard, a blacksmith, was producing a line of reusable Pitons (climbing anchor points) for local Californian climbers. By the early 1970s, climbing was booming and Chouinard pivoted, launching the Patagonia brand to offer climbing and outdoor soft goods with a focus on sustainability and durability, which he felt were lacking in the market at the time.
By the early 2000s, Patagonia was not only covering mountain sports but also starting to dabble in water sports, initially making some wetsuits for its staff. Then, in 2008, they launched a range of non-neoprene wetsuits, using limestone-based rubber, reducing dependency on petrochemicals and adhering to the company’s eco-friendly ethos.
In 2012, the team took another leap forward, offering an entirely plant-based rubber wetsuit range. By 2019, Patagonia was beginning to dabble in a different type of surfing: dirt surfing, AKA mountain biking, and by 2021 they had a tight but comprehensive range.
Around the same time as MTB apparel was breaking cover, Chouinard announced the transfer of Patagonia’s ownership to a trust and nonprofit to fight climate change, their $100 million+ yearly profits now going to environmental causes.
Drawing on experience and technologies from their existing ranges, they now offer quality, durable and eco-conscious shred-ready gear at a price. They’re sticking to their tried- and-true block colours and aren’t diving too hard into the latest trends—no garish “this will last a season” all-over prints here; just dependable, timeless silhouettes and colours.
There’s a reason Patagonia has been referred to as “Pata-Gucci”: their gear trends towards the premium end of the spectrum, not just in quality, but in price. If you can look past the price tag, there’s a lot on offer with Patagonia MTB gear, but you need to be prepared to take advantage of what’s on offer to really get the most from your investment. It requires a mind shift to buck the current industry trend of fast fashion. First off, if it doesn’t live up to the hype or expectation, take advantage of their “Ironclad Guarantee” for a refund, replacement or repair. Ripped a hole in a crash? Worn something out? Check out their free repair program, and you can either DIY repair with a patch kit—which they’ll send out—or send your gear in for repairs.
Patagonia’s strong environmental and social stance steers each decision made during garment production. Beginning with the goal to create better gear that lasts longer, meaning consumers buy less of it. With a key business goal being “cause no unnecessary harm”, their efforts to reduce environmental impact sometimes seem counterintuitive, but I guess this proves they’re walking the talk. Prioritising recycled, organic and plant-based materials, over 80% of Patagonia’s range is Fair Trade Certified, and their factories ensure staff receive a fair, legal wage and working conditions. Each part of their supply chain is optimised to ensure minimum environmental and social impact, while publicly available data ensures transparency, keeping them accountable.
Back to the MTB range. Split into two streams, the “Dirt Roamer” is lightweight, breathable and designed for big backcountry days in the saddle, while the “Dirt Craft” collection puts more focus on durability and less on lightweight, lending itself more to heavy-trail and bike park use.
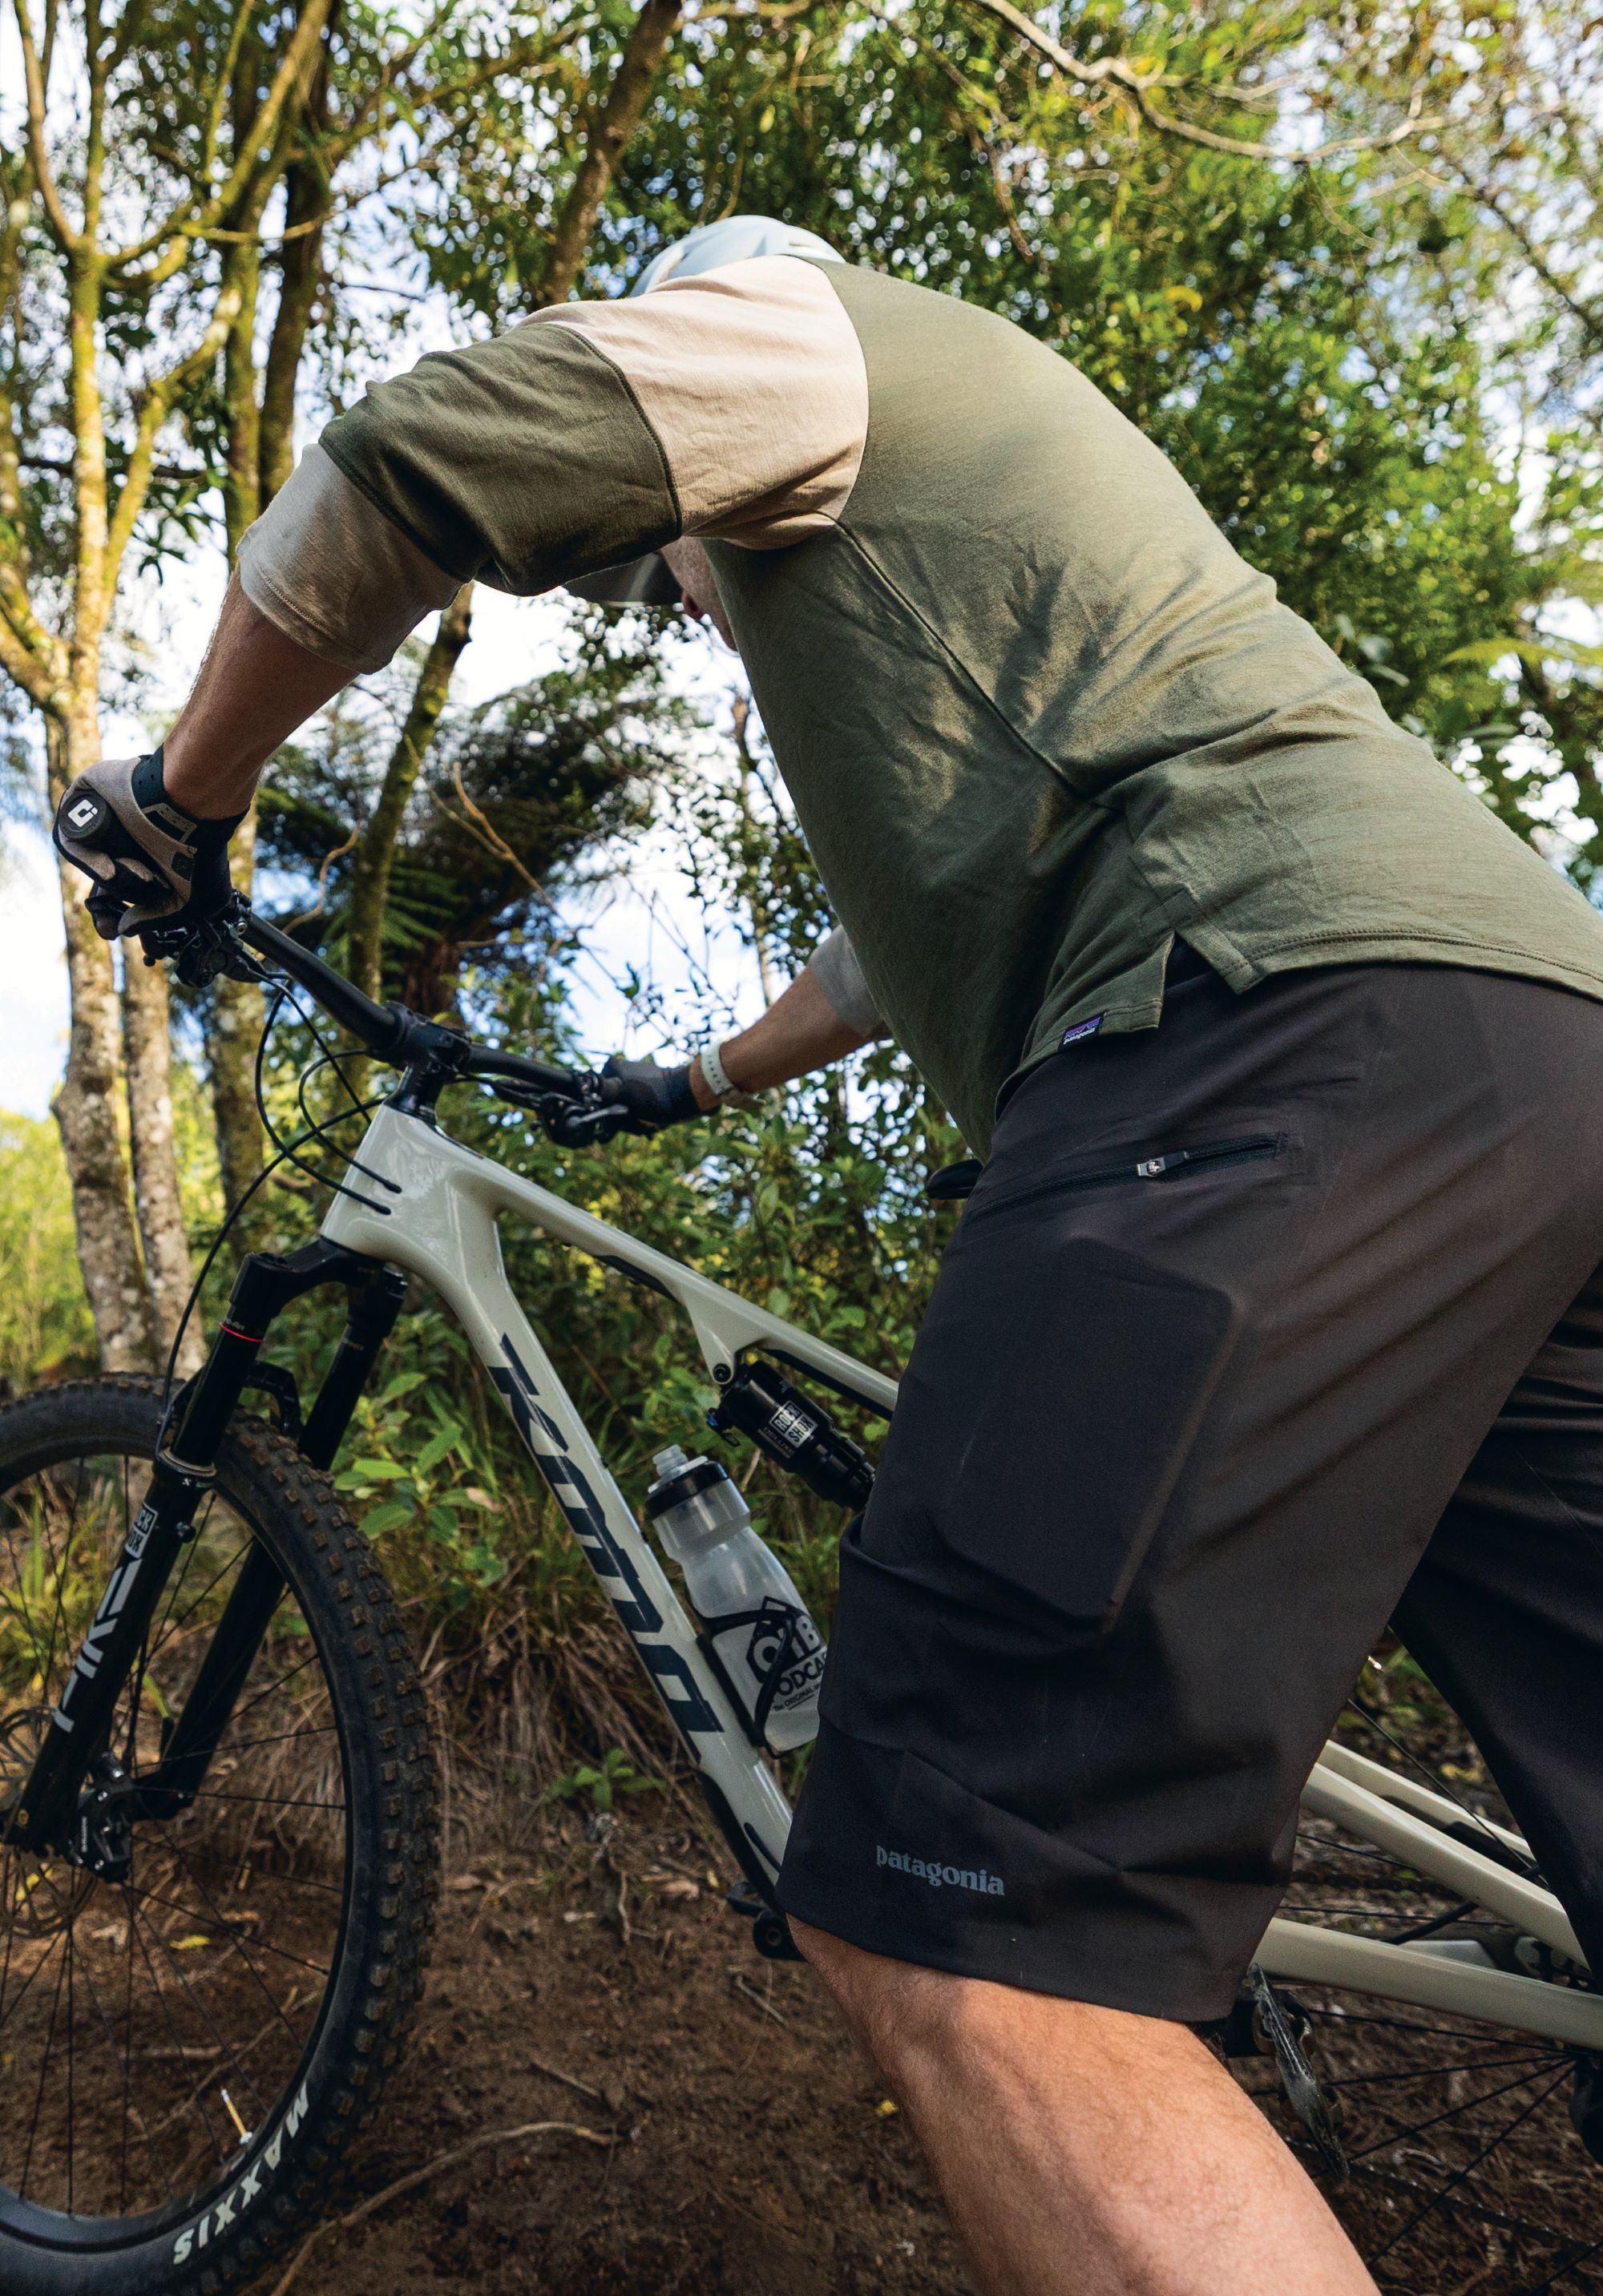
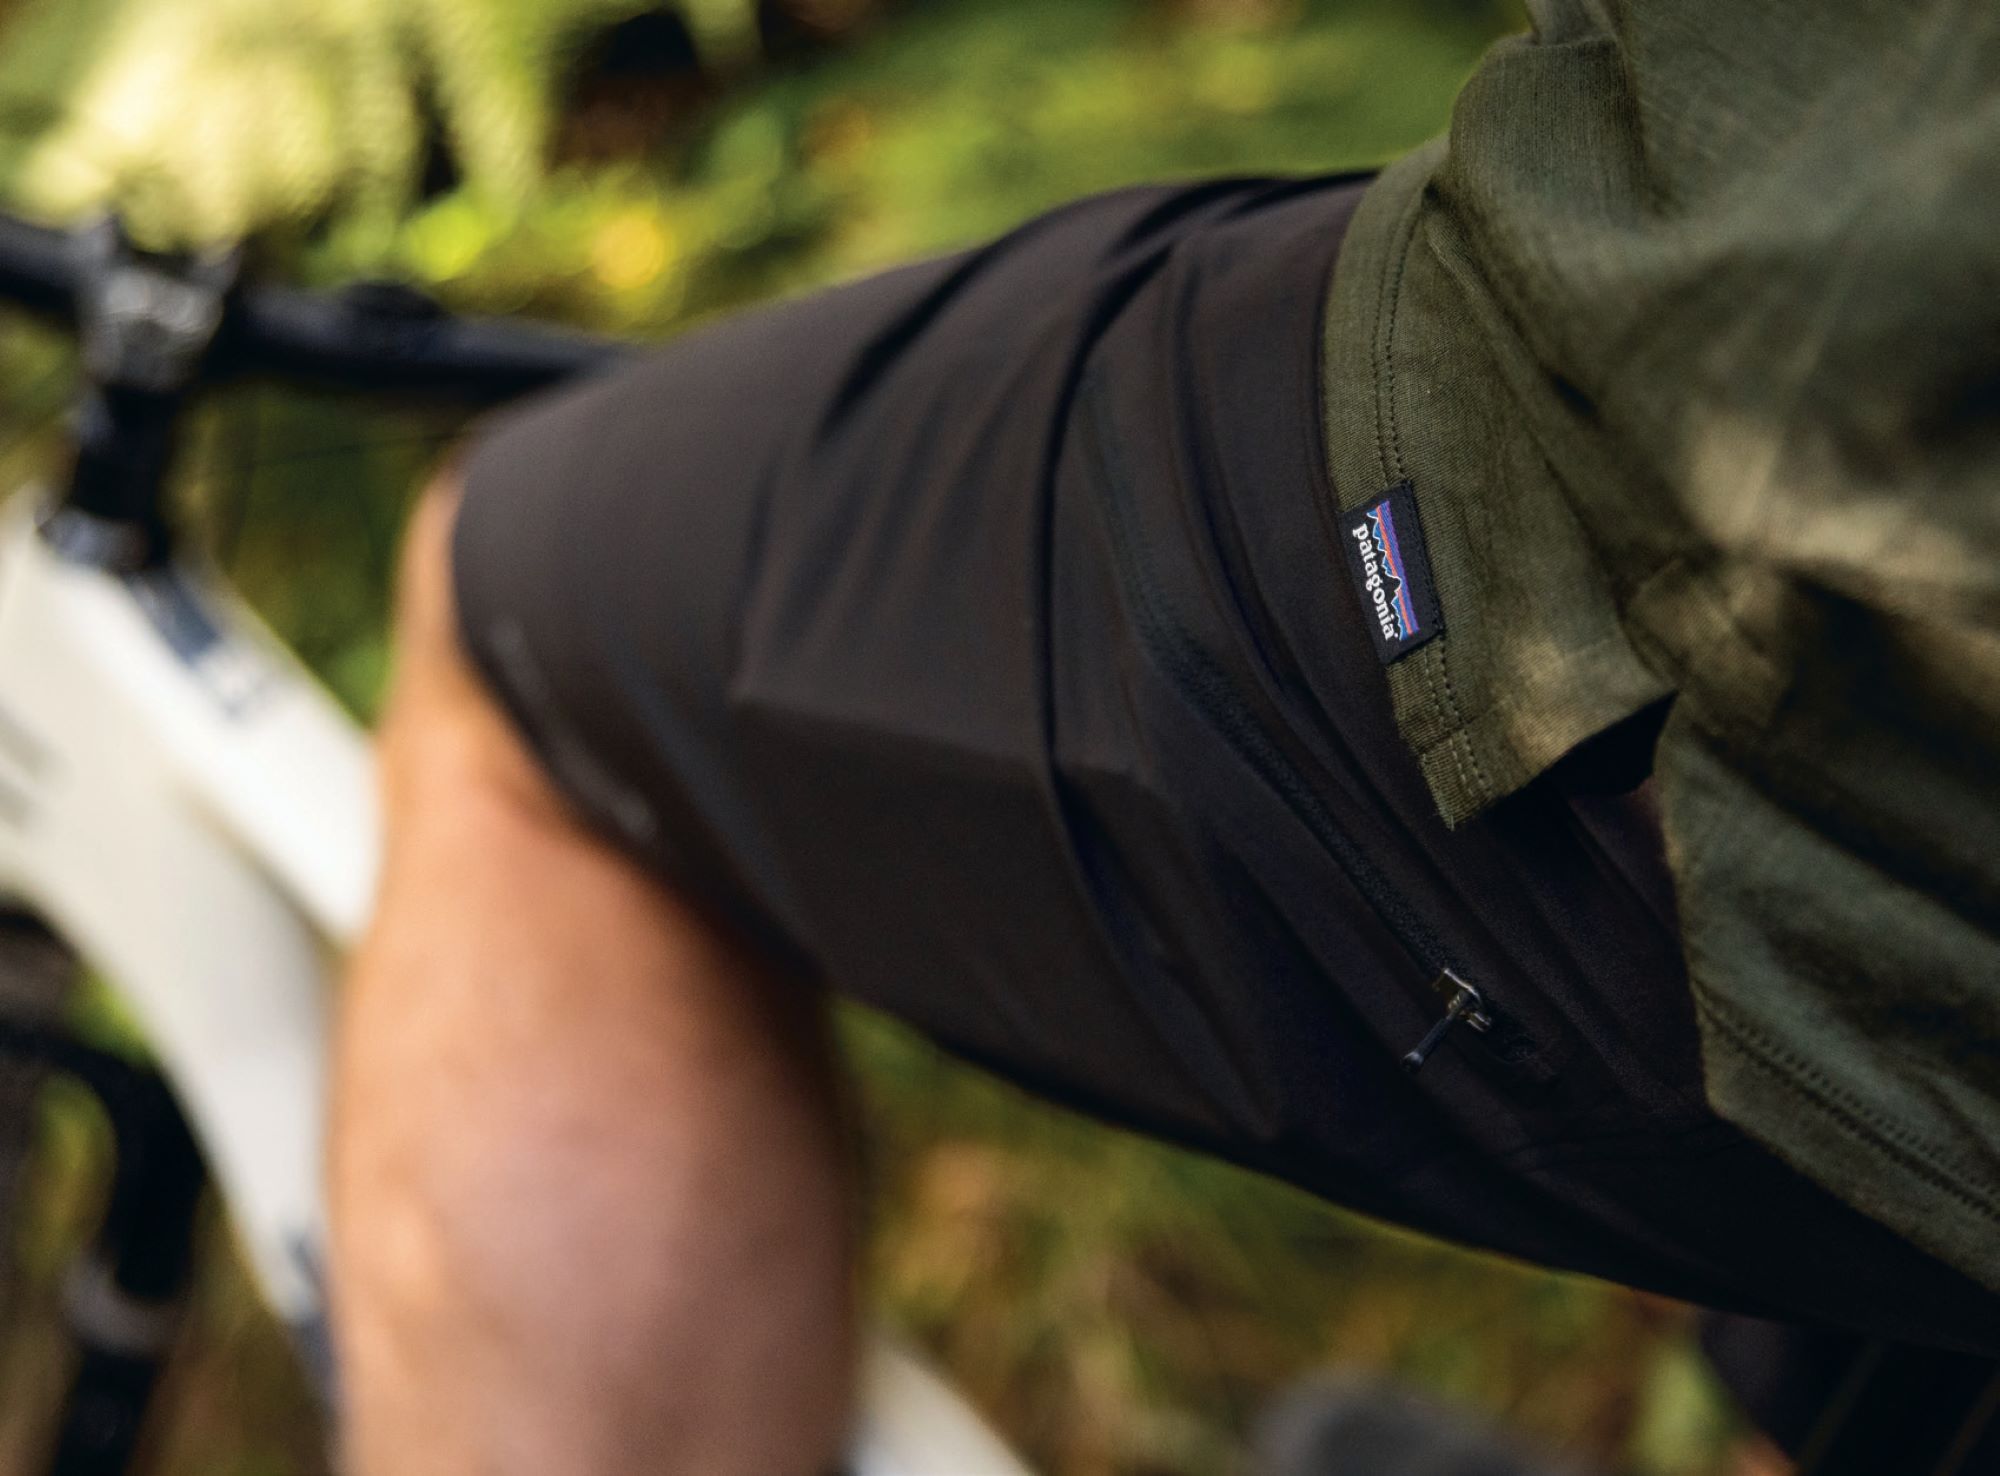
Men’s Dirt Roamer Bike Shorts – 12″
Slicing open the package, if I didn’t know better, I’d swear I’d been sent a pair of board shorts. Fortunately, I do know better, and what was in the package was in fact a pair of Patagonia Dirt Roamer 12” bike shorts. My first impressions were about the short’s weight, or lack of it, and their construction. Similar to their boardshorts, the stretch fabric is seam- welded rather than sewn, keeping the weight low and comfort high with no stitched seams rubbing.
The fit is ‘regular’ and true to size. I wear 32” pants across most brands, and these 32” shorts are right on the money. There’s an adjuster to customise the waist if required. Lengthwise, these sit partway down my kneecap, an ideal length for pedalling with or without pads.
Initially, I thought the pockets were a bit odd. Rather than being a more traditional ‘hip’ pocket, these are lower down the leg on the thigh; not wrong, just different. A zipped opening keeps belongings in place, and there’s plenty of space to load them up. Internally, there’s an envelope-style flap that gives access to pockets of a liner short. Clearly intended to be used with the Dirt Roamer Liner Bibs, the opening lines up perfectly with the liner’s cargo pockets. This is something unique that I haven’t seen before, and ideal if you’d rather stow gear in the liner, with it being firmer against the leg rather than looser and able to move around in the pockets of the baggy outer shorts.
The lightweight fabric breathes well and feels soft against the skin. As they say on the tin, these are a trail short designed to pedal in, and they’re ideal for this. I’ve put in some decent 3+ hour rides in them, and at no point did I find them lacking. The fit was spot on, just baggy enough not to appear too XC-like, but slim enough so as not to snag on the saddle or flap around unnecessarily. The welded seams look like they will continue to be sturdy and secure, and as long as the fabric continues to be wear-free, I’d see these shorts lasting a long, long time.
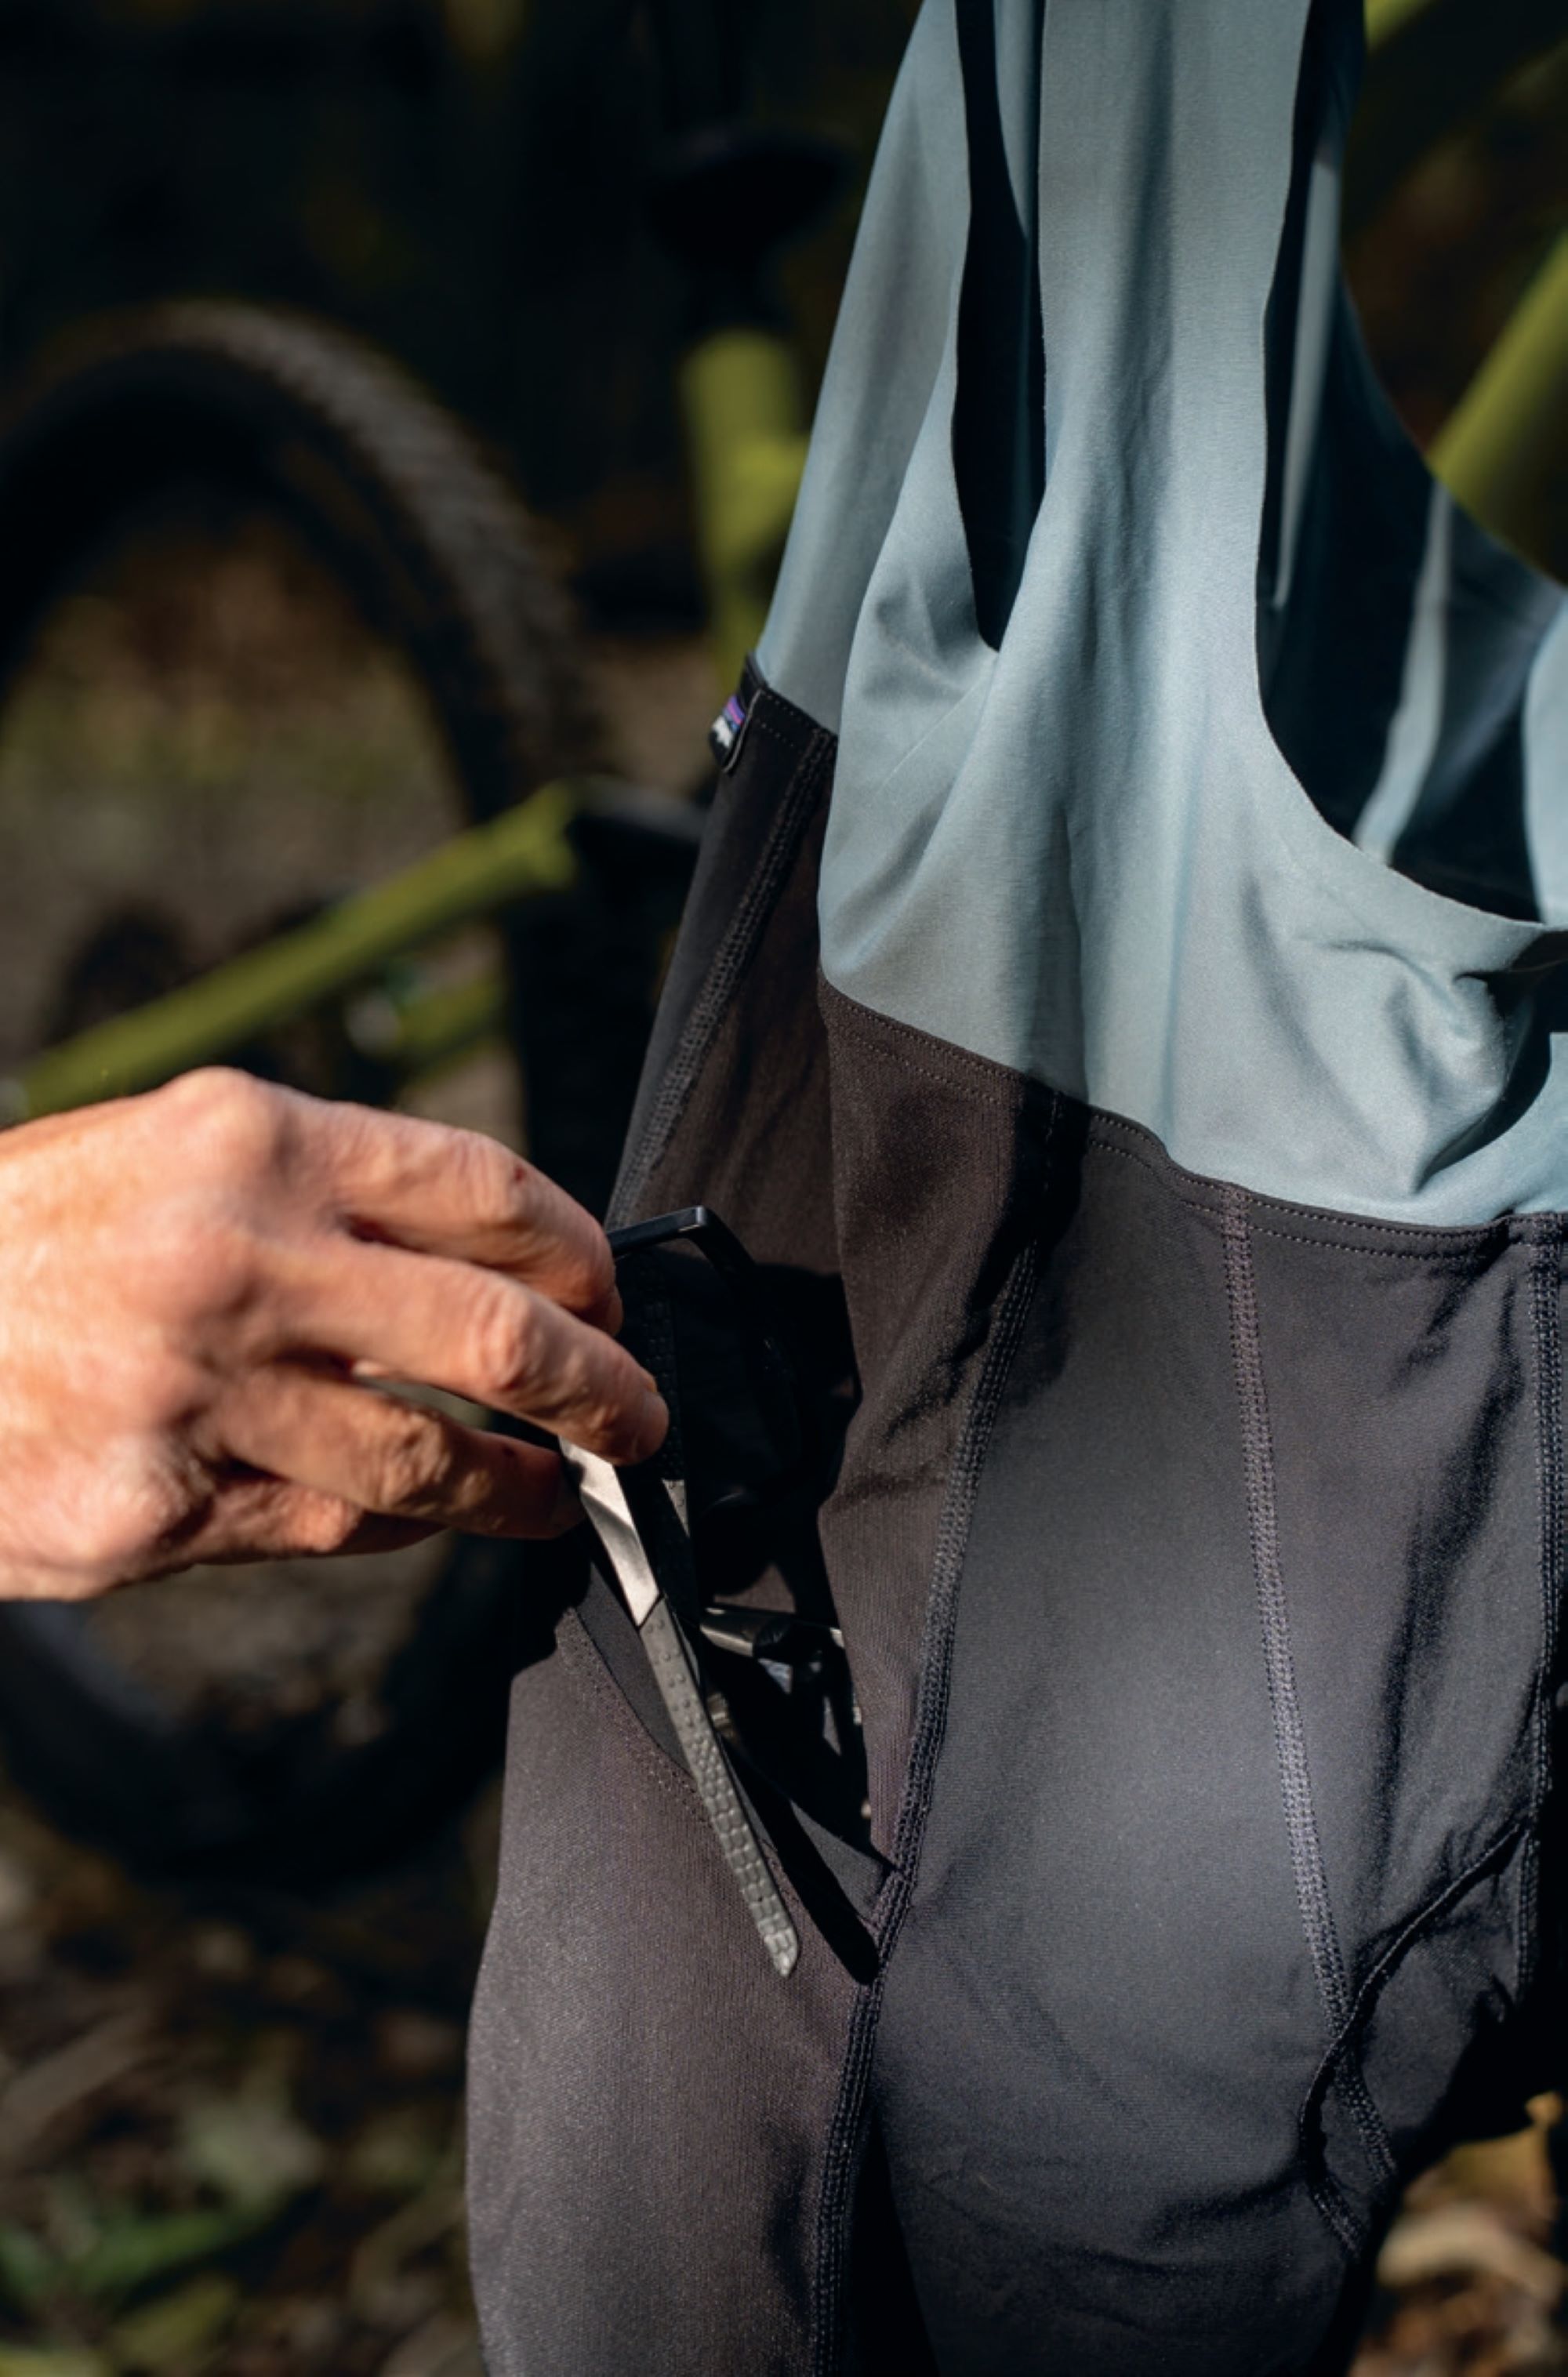
Men’s Dirt Roamer Liner Bike Bibs
I’m a huge fan of a bib-style liner, but not all are created equal. I’ve purchased no less than three pairs which, after a couple of wears, have remained in the kit drawer, just not quite right. There’s a lot that can go wrong during the design and construction processes of bibs; get one wrong and they won’t be OK to wear for lengthy periods. Fit is paramount and nailing it for all body types would be near impossible—instead, design for the middle of the bell-curve and hope for the best. The layout of the panels, straps, and their associated seams needs to be just right to get that Goldilocks fit. If the seams aren’t in the right place, not only will the fit be off, but the wearer will probably get rubbed the wrong way. The chamois choice is an area a lot of liners fall short: too thin, too thick, not the right shape, not secured in a rub-free manner; there’s a lot to consider.
The Patagonia Dirt Roamer Liner Bib shorts fit me exceptionally, fitting my middle-of-the-bell-curve, medium-sized frame to perfection. The body of the bib is lightweight, breathable, and extremely stretchy; all edges are nicely welded flat. All the stretch involved means that at least the top half of the bibs should fit a wide range of heights. On the centre back is a single vertical cargo pocket, sized to fit a water bottle.
In keeping with Patagonia’s eco-ethos, all fabrics involved are made largely from recycled nylon. Downstairs, the body of the shorts is made from a power-stretch knit fabric for a comfy, taut, supportive feel. Breathable mesh panels and cargo pockets feature on each thigh. The laser-cut leg openings have a couple of rows of silicone, which, when combined with the power-stretch fabric, keep the legs nicely in place.
The Italian-designed, 3-layer chamois is a quality addition, as it should be for the price. It’s a nice medium thickness, which I’ve found offers a good level of padding and breathability, remaining chafe-free over lengthy rides.
Temperature regulation is key when running a bib liner with outer shorts; too hot, and sweat adds to chafing and discomfort. These bibs breathe well overall, keeping the temperature in check and comfort consistent, although I did find the upper body somewhat clammy at times when sodden with sweat.
These bibs are ideally combined with the Dirt Roamer shorts to take advantage of their pass-through pockets, giving ample storage across both shorts for any-sized outing. These are one of the more expensive liner options on the market, but considering their fit, chamois, and overall performance, not to mention the repair program, they’re good value in my book and should last many seasons.
Overall thoughts
I’ve been super impressed and quietly surprised by these shorts and bibs. This isn’t a case of a massive clothing brand just throwing their label on an underdeveloped, off-the-shelf garment, but a case of careful forethought, design and manufacture. A big blue sign approved green tick from me. Although they perform exceptionally, it’s up to a buyer to determine if the after-sales service and manufacturing ethos is worth the price of admission.
If you’re a keen trail rider who’s after top-tier, long-lasting shorts and liners, then look no further; just be sure to get the most out of them by using the repair service if needed.
Shimano XT M8250 Groupset
Words Lester Perry
Images Thomas Falconer
RRP $2975
Distributor Shimano NZ
Developed in conjunction with the Yeti factory team, their team of “skunk works” riders, and feedback from riders globally, this new groupset brings Shimano to the fore—particularly in the drivetrain department. Arguably, it’s taken a very long time for this release, but it’s fair to say they’ve launched a highly competitive grouppo that, like its predecessors, is sure to become a “working man’s favourite”.
This isn’t Shimano’s first waltz with an electronic drive train, though. Back in 2016, they launched the original wired version, M8050. It worked OK and was well ahead of its time, but the mess of wires, weight, and a shifter that only a mother could love, meant it wasn’t widely adopted.
While Shimano’s red friends (that’s SRAM if you hadn’t realised) went all-in on proprietary parts, with a drivetrain requiring a complete ecosystem of components in the form of their AXS transmission. Shimano’s new XT Di2 is refreshingly simple. No need for a specific styled frame dropout; no need for a particular chain or cassette. It’s designed to easily upgrade from a mechanical system with minimal faff and far less money than needing to buy into a complete system.
For bikes running existing Shimano 12-speed drivetrains, the jump to XT Di2 is as significant as you want it to be. At its most basic, entry can begin with purchasing a shift kit consisting of a derailleur and shifter, including battery and charger, and a chain quick-link. If a new cassette and chain are required, there are a couple of tweaks to the newly released cassette, but nothing drastically different from the previous XT, and all key components are compatible across previous Shimano 12-speed ranges.
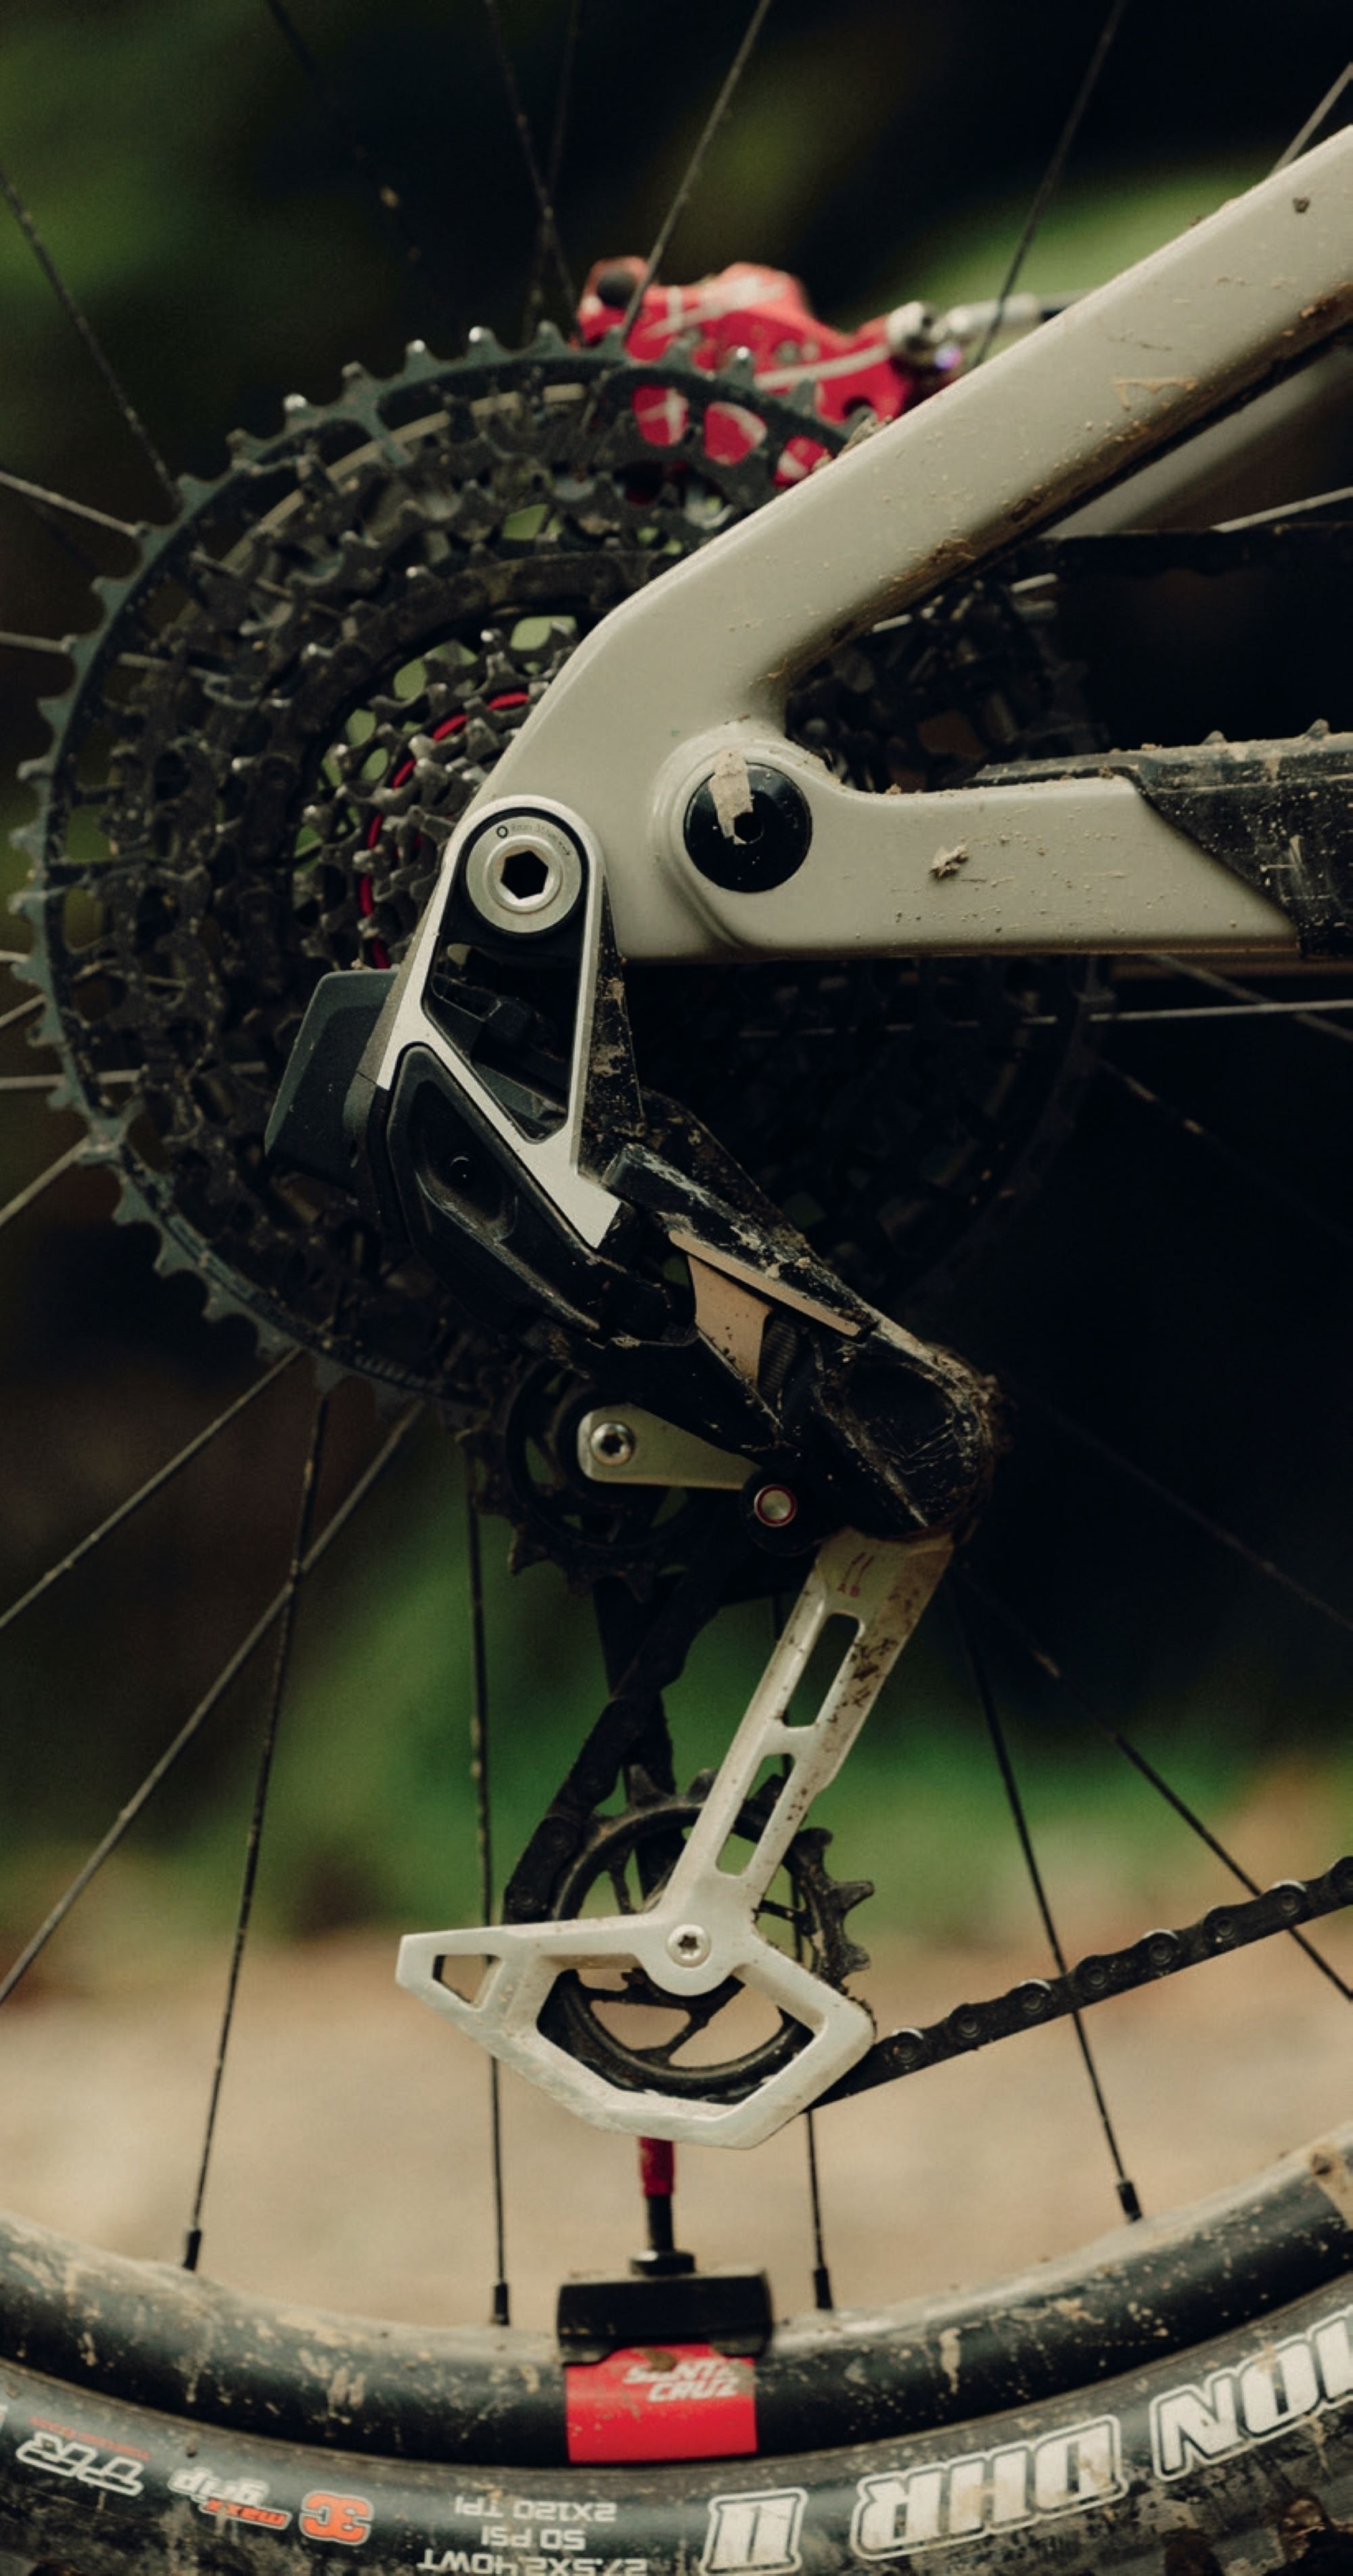
XT M8250 Drivetrain
Derailleur
Durability is one of the core elements Shimano strived for in this redesign. While they don’t promote that you stand on it, you can seemingly smash it on a rock and it will be fine. The parallelogram sits closer to the frame than the competition, and the revised chain stabiliser (previously clutch) sits a significant 16mm further inboard than the competition. The overall shape of the derailleur is wedge-like, designed to glance off an obstacle, disengage the servo, allowing it to move with an impact, then snap back into place and reengage once the obstacle passes. Given how easily the XT mechanical derailleur was bent during impact, this complete revision— and its durability—will be welcomed by anyone looking for confidence in their investment. Shimano launched the groupset to dealers at a ride camp in Queenstown in late February 2025; the ideal destination to test the real-world durability of the drivetrain and brakes before it landed in their stores. Queenstown’s rocky trails saw two bike mechanics smash derailleurs into rocks at different times. Knowing the level of impact a derailleur should be able to withstand, and how they’d just well exceeded this, they feared the worst; worried they’d be returning a smashed derailleur to the Shimano team. This wasn’t the case, though, and the units continued their ‘zit-zit’ noises and flawless shifting. The proof was in the pudding.
Because they began with a completely clean slate, rather than working with an existing battery style, the design wizards at Shimano managed to squeeze the derailleur battery into the centre of the parallelogram, keeping it well out of harm’s way. Installation and removal of the battery is unique; a cap on the base of the derailleur slides off, allowing the battery to slide out of the bottom of the derailleur body. The battery cap provides upward tension on the battery contacts and the rubber seal surrounding them. Shimano’s North American development team commented that this provides a water-tight seal around the terminals. However, the rest of the battery is open to whatever elements can make it into the battery cavity. So, while the terminals remain dry and clean, the rest of the battery can be wet and dirty after a mid-winter slop fest. I can’t see any way, unless intentionally, that the battery could be damaged in its home within the derailleur. Even the way that the battery door slides into place means that even with a hard impact, it should stay put; it also helps provide some damping to a direct blow.
The battery itself is a tidy little 310mAh versus the SRAM 300mAh. Shimano claims that during testing, their slightly larger battery, combined with a more efficient system, offers 340km of riding vs 230km of the SRAM, under identical test conditions.
What, no UDH? As much as the UDH derailleur has become commonplace—and for good reason—there are still a considerable number of frames available without one. Although this new derailleur doesn’t require a unique UDH hanger, it benefits from the UDH’s increased stiffness if it’s attached to one.
Two derailleur cage lengths are on offer, depending on which cassette it’s paired with: a 10-51t (long cage) or 9-45t (short cage). The 9-45t offers 10% less range (500%) than the 10-51t (510%) but achieves equivalent ratios with a smaller, 28 vs 32 tooth chainring. This ‘Compact drive’, with its smaller ring combined with the shorter cage derailleur and shorter chain, saves some weight but, more importantly, offers better ground clearance: some 8mm at the chainring, and 23mm at the derailleur—not insignificant, and totally worthy if it’s being threaded through rocky terrain or deep ruts over long rides.
The cassette itself is essentially unchanged, aside from some tweaks to tooth profiles increasing shifting quality a fraction, and the obvious addition of the 9-45t option with a new lockring. Yes, you’ll need a new tool for that. This updated cassette is completely backwards compatible, and fear not, if you’ve committed to a ‘Compact drive’ with its short derailleur cage but want to go back to a more ‘regular’ setup with the larger cassette and chainring, this can be achieved with a simple swap to the ‘long’ derailleur cage, rather than necessitating a completely new derailleur.
Clutches are out, springs are in. Enabling the slimline profile of the front edge of the derailleur is the change of the tensioner mechanism. Gone is the venerable clutch, replaced by a much tidier dual opposing spring stabiliser. With a claimed 72% increase in tension and better chain wrap around the cogs, there’s now better shifting and less ‘skipping’ of gears. Shimano claims this new system is service-free, and its performance won’t degrade over time. If this proves to be the case, then this change in chain stabiliser will be welcomed by anyone who’s dealt with a dicky clutch in the past.
The combination of the new chain stabiliser and a smaller b-tension gap (distance from top jockey wheel to cassette cog) has enabled increased chain wrap, meaning a faster, more positive gear shift, and less of the chain bouncing off the top jockey wheel. The jockey wheels aren’t needlessly overengineered and, with no holes in them, there’s no chance sticks or debris can go through the cog, jamming it up.
In my thinking, the new shifter is a perfect evolution of the XT mechanical shifter (it’s not even worth mentioning the previous M8050 Di2 shifter!). Rather than an entirely new and unfamiliar shifter system, Shimano have taken the familiar fixings, paddle layout and overall styling of mechanical XT- 8100 and brought it into this century with thoughtful refining and class-leading tech.
The shift paddles are in a similar position to previous, although the ‘up’ (harder) shift paddle is slightly more tucked in behind the ‘down’ paddle. Its positioning seemed odd at first, but I quickly forgot about it, never giving it another thought; it just worked as it should. Each independent paddle has a degree of adjustability and, when combined with the overall adjustment of the complete shifter unit, i.e. upward/downward and inside/ outside on the handlebar, there’s a decent level of customisation to suit all preferences.
Another nice carryover from the mechanical is the two-step multi-shift; depress either shifter paddle and there are two clicks as it moves through its travel. That’s two shifts, or hold the shifter on a stop to shift multiple gears.
The shifters light action does take some getting used to, and I initially found I was over-shifting, leaping to gears beyond where I wanted to be. It didn’t take long to become accustomed to the light action, and I found myself shifting gears on a whim. The shift speed is so fast that it’s a case of thinking about a shift, tapping the paddle and almost instantly being in the next gear. Anyone familiar with road Di2 will find the feeling familiar.
On the rider-facing edge of the shifter is a small button for on-the-fly adjustment. This button allows for a level of adjustment within the unit while riding, no need to open the e-Tube app on a phone to fine-tune a shift that’s not quite perfect, or switch into auto-shift mode (when paired to an EP-8 e-bike motor). The button can be further customised in the e-Tube app, where a host of other settings and customisations are available, from shift speed or shift paddle customisation to specific eBike functions.
Crankarms remain largely unchanged from previous, aside from tweaked graphics. The refined one-piece chainring is updated and specifically sculpted for impact resistance, particularly when feet are parallel, ensuring it can withstand larger impacts than the previous version. The new chainring has an offset, giving a 55mm chainline for better overall performance and efficiency. The cranks are now available in more sizes, right down to a 160mm length.
When asked about replacement parts for the derailleur, Shimano’s response was an interesting one. SRAM claims a fully rebuildable derailleur, offering replacement parts for a complete T-type derailleur rebuild. Shimano, on the flip side, utilise a standard derailleur hanger, relying on the redundancy of this to help protect a derailleur from significant harm during excessive impact. Shimano’s thinking is that if a derailleur is damaged enough not to function correctly, and a replacement hanger doesn’t solve it, then the mech itself has sustained damage significant enough that even if spare parts were available, it would likely require a full derailleur worth of parts to get it back to 100% shift quality.
Drivetrain on the trail
XT M8250 has a familiar feel at the pedals, and outside of the electronic shifting part, everything feels similar to the XT mechanical, and that’s a good thing. First off, as mentioned earlier, the shifter, while familiar in layout, did take a little time to adjust to; the action is just so light.
Shift speed is fantastic and totally noticeable. I find myself shifting more, and whenever I want, rather than having to think early about when I need the gear to be engaged—we’re talking fractions of a second here but it makes a difference. With this XT, it’s just a simple thought of ‘I want to be in this gear’ and quickly shifting to it, nearly instantly. In situations where shift speed is key, on unfamiliar technical trails or rolling terrain with surprise features, where a prompt shift is paramount, the XT Di2 delivers.
The new chain stabiliser does its job well. I’ve had no dropped chains and, although it’s claimed to have much higher (75% more) tension than the clutch of old, it seems much smoother through its motion. One thing I have noticed is a subtle, dull ‘thud’ at times after the bike has been near full compression. Shimano tells me this is the derailleur cage returning to its neutral position and isn’t noticeable on all bikes.
I haven’t tested the impact resistance of the system as yet, but I’ve dragged the derailleur on the side of a few ruts and nothing untoward has happened. It strikes a slim silhouette and, from the reports I’ve heard, lives up to expectations when it comes to rock impacts.
During one ride, I noticed the chain exhibited almost chain-suck-like characteristics and made a strange ticking noise in the easiest two gears. Although the chainrings’ slightly revised tooth profiles decrease chain drops, with a dirty, dry chain it appears the teeth can hold on to the chain a fraction longer than ideal as the chain is rolling off them. It’s a simple fix with a clean and lube, but interesting to note and I’d be keen to do a huge 6+ hour ride in the wet to see how it reacts.
The big question on many people’s lips is this: how does this new XT compare to a SRAM AXS transmission? Shimano’s Hyperglide+ system can shift 1-2 gears under full power with ease, although it doesn’t have as ‘sure’ of a feel and there’s a bit more noise to the shift than SRAM’s Transmission, however, the speed of change on the XT makes up for the extra noise. The slower Transmission shift means that at times, if I’m caught out or late to shift, I’m still between gears while powering up a section. Thankfully, it’s so solid while shifting under power that I can push hard on the pedals without any worries. The Shimano is quite different; in similar scenarios, the XT will be entirely shifted, its gears will already be completely engaged before I have any worries, whereas the Transmission may still be halfway through its shift. Each brand offers a different experience, but neither is better than the other.
While Transmission and XT Di2 have similarities, the reality is that they are fundamentally poles apart. Transmission requires buying into a complete system, where the XT Di2 is supremely cross-compatible, and the barrier to entry is low. The release of XT Di2 has been likened to an iPhone upgrade; sure there’s some new hardware but it’s not a monumental leap forward. In the case of Di2, it could easily be said that this release only brings it in line with SRAM’s standard, non-t-type AXS systems that have been in the market a number of years now. With XT M8250’s crisper shifting under power, better battery life, arguably superior shifter and much greater durability, I think it’s clear XT outperforms the standard AXS. It sits alongside Transmission; there’s enough difference between the two systems not to crown one a winner, but instead they’re offering two quite different experiences and will meet the needs of different riders.
XT M8220 Brakes
As much as the new Di2 has been front and centre of this recent release, the new XT brakes deserve some serious spotlight too. The previous XT brakes were the go-to for many riders, and rightly so; they were durable, powerful and generally low maintenance, if only more consistent with their much-publicised wandering bite point. While it wasn’t a deal breaker for most, the wandering bite point wasn’t something you wanted to be thinking about, or affecting your braking, while in the middle of an enduro race run.
Thankfully, as with the Di2, Shimano have rewritten the script with an almost completely revised brake. Many of the changes not only affect the consistency and performance of the brake itself, but with changes targeting ergonomics, they’re comfier and more intuitive to use.
Beginning at the lever, the master cylinder has been squared up, now nearly parallel to the handlebar; the brake line exiting in a straight line, bringing it much closer to the bar. The lever pivot point has also moved toward the bar, 5mm further in than before. This change makes the lever path through its stroke more in line with the natural finger pull direction, tracking through the same path as a forefinger would as it pulls the lever.
The Servowave lever has a reach adjust dial and a ‘free stroke’ adjuster. Servowave has been featuring on the XT brakes, as well as some Shimano road brakes, for some time. Essentially, it amplifies the lever input as it’s pulled. I’m a massive fan of the feel and power it creates. The Free Stroke adjustment is more effective than in the past, but it still doesn’t offer a lot of range.
The entire system is filled with a new low-viscosity mineral oil, and it gets a new gold colour so as not to be confused with the previous red mineral oil, which isn’t compatible with these brakes—nor is this new fluid compatible with older brakes. The new oil is said to be much more stable across a broader range of temperatures and, when combined with new piston seals, should see the end to the wandering bite point curse of the previous brakes.
The calliper is not dissimilar to the previous: a two-piece, machined unit housing a pair of 15mm and 17mm resin pistons, a switch from the ceramic of old. The differing-sized pistons enhance stopping power while retaining exceptional modulation. The new pistons are coupled with previously mentioned new seals, which are said to snap the pistons back into place more rapidly when the brake is released, assisted in part thanks to the low viscosity oil, to put the wandering bite point of old to bed finally.
The brake pads have had a slight tweak in size, helping them fit more snugly into the calliper, which eliminates the pad rattle some units previously had.
Brakes on the trail
I’ll put it out there that the old XT brakes were my favourite brakes for a long time, and if it weren’t for that pesky wandering bite point, for general use, they’d still be on my bike. I’ve been using these new M8220 brakes for a relatively short time, so I can’t speak to their true longevity, but I have gained some insights into how their upgrades differentiate them from the old XT.
First off, they have an amazingly smooth, light action. The new fluid and seals help keep the lever feeling light and consistent. The feel is less on/off than the old versions, and although you can still feel the point the pads hit the rotor, there’s more modulation there than before. This softer feel shifts the lever experience more towards that of a SRAM brake, while retaining enough of the classic Shimano feel to be familiar. So far, I’m super impressed with the consistency of the brakes, and the wandering bite point appears to be gone; every pull feels the same, even down reasonably long descents.
The lever feel is excellent; I can feel the difference in the lever path thanks to the shifted pivot point. In theory, this should make long descents more comfortable, and it is the case, although the difference is hard to quantify. The new brake line routing looks tidy, but it does increase a bit of cable slap. This is easily fixed with a little tape or a zip tie. Shimano should have angled the hoses out a tad more, maybe not to the extreme of the previous, but somewhere in the middle would have been nice. This new angle does make it easier for internal routing of the hoses, but that’s a subject for another article, and not a good one.
My stock pair of brakes came with organic pads installed, which have proved to offer a nice bite, although I’d be keen to try a set of sintered pads in them for a maximum grunt at speed.
The overall power seems fractionally better than the XT’s of old, although power means nothing without control. I feel these new brakes have far better modulation and consistency than before, so overall are a peg up on the previous XT’s across the board.
The release of the M8220 brakes puts the XT back near the top of the list for overall performance, to dollar and weight ratios. Sure, there are lighter brakes around, but they don’t have the raw power of the XT, and there are certainly more powerful brakes out there, but they’re drastically heavier. The XT strikes a sweet spot in the brake market and should continue to be the “working man’s” brake.
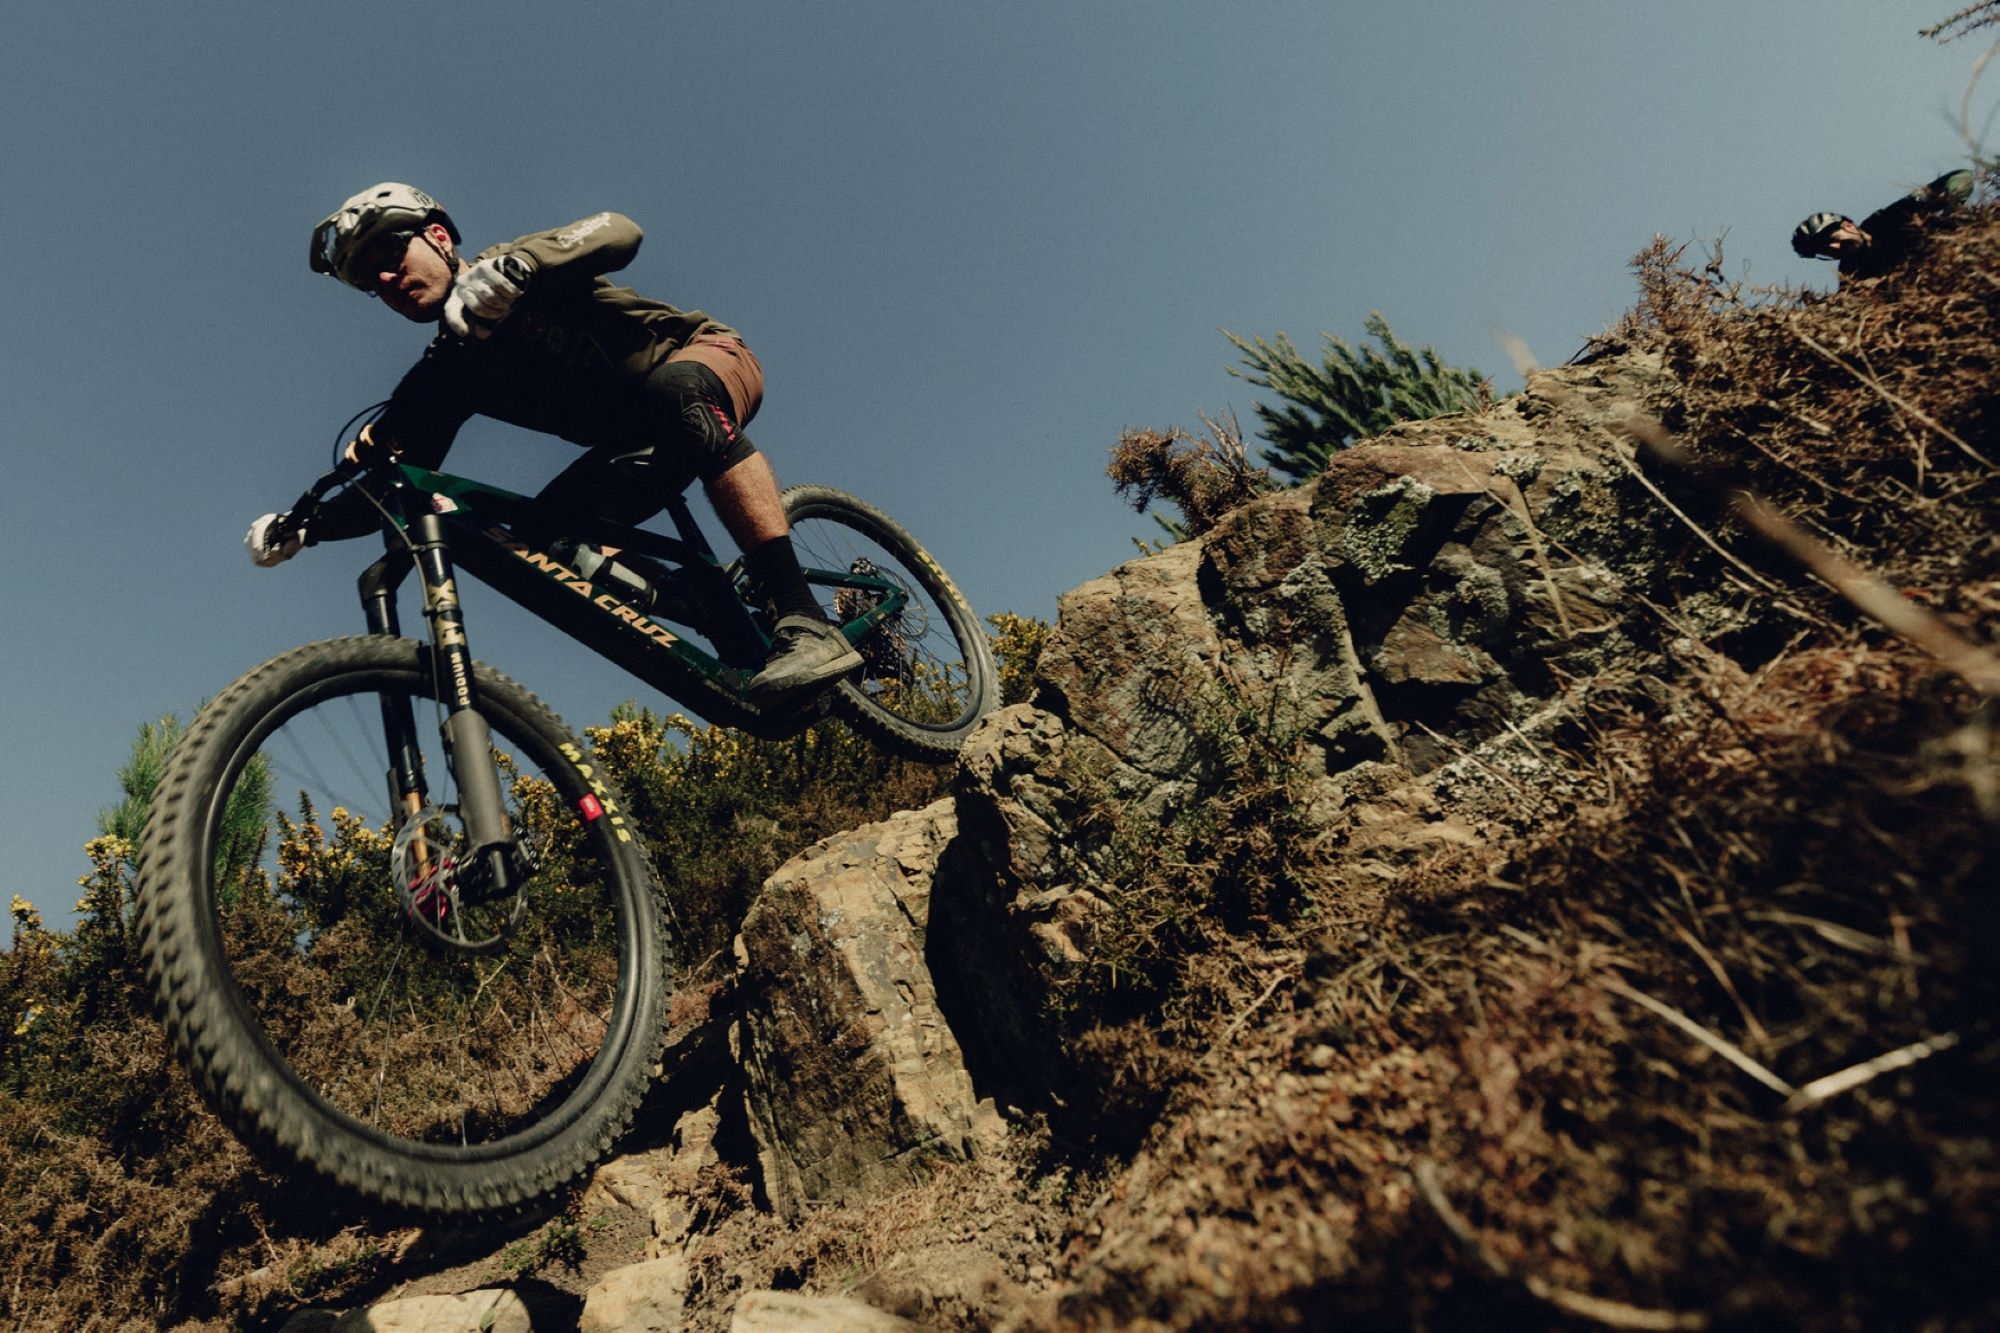
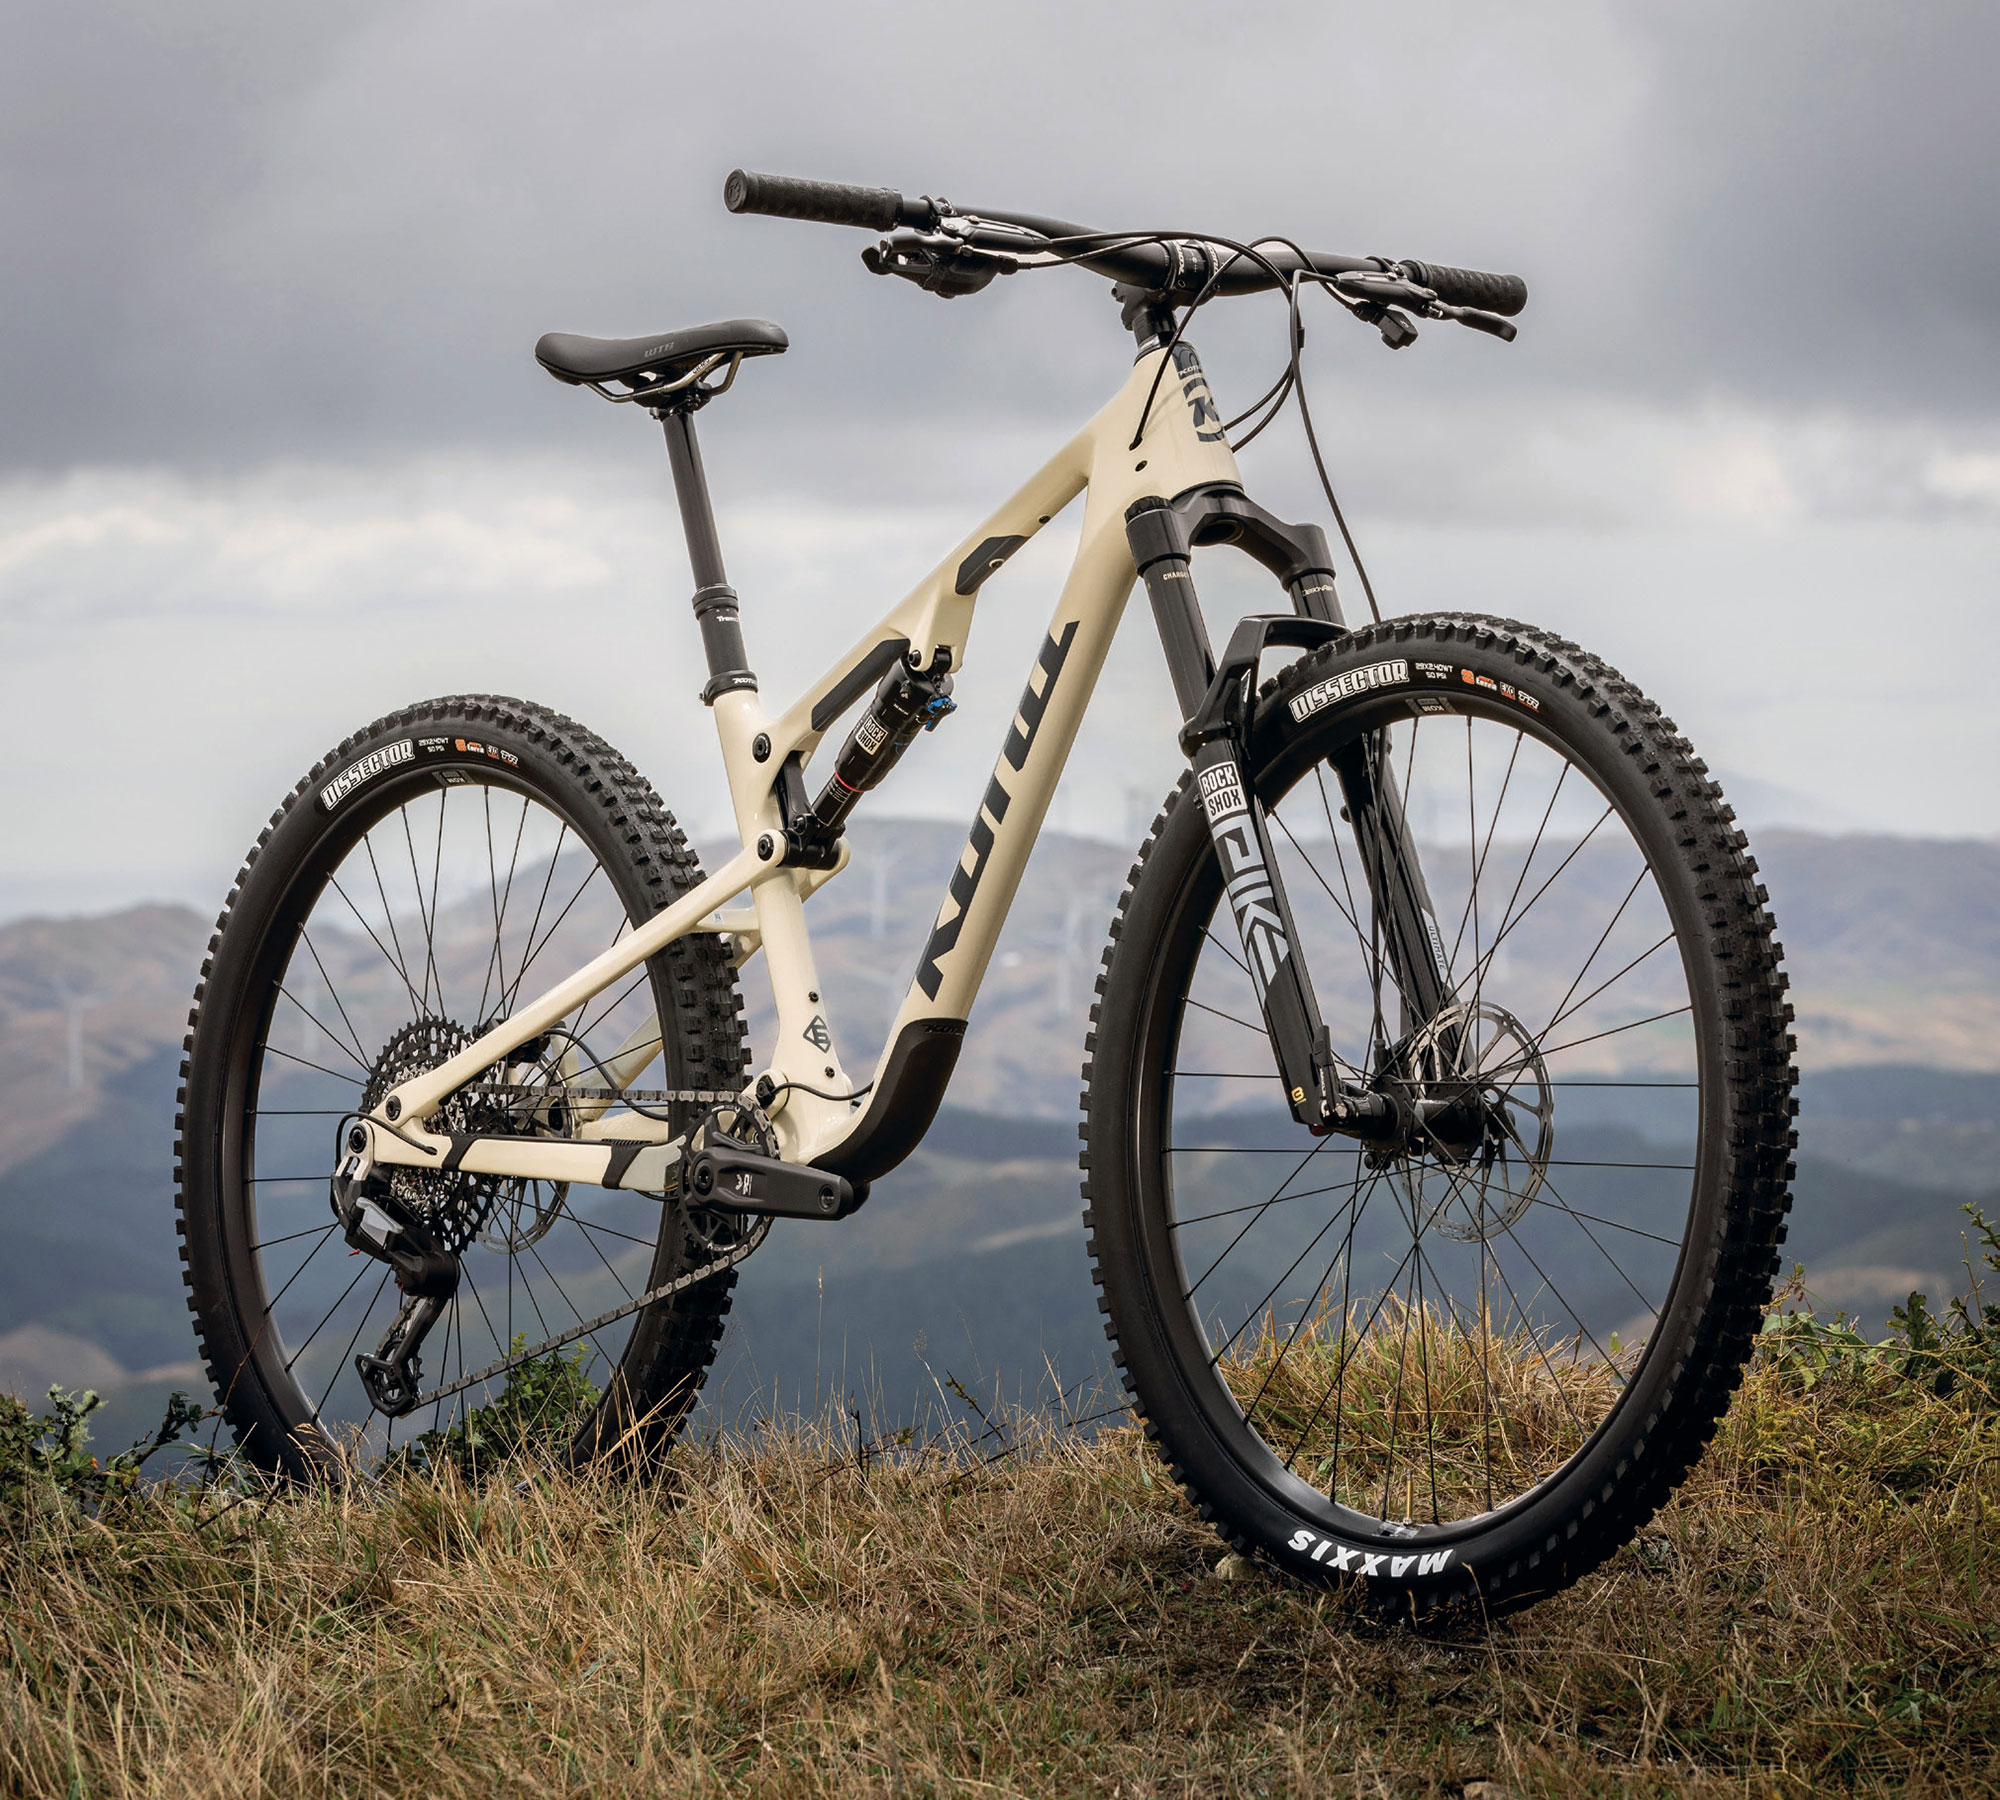
Santa Cruz Vala X0 AXS RSV
Words Liam Friary
Images Henry Jaine
RRP $22,050
Distributor Hyperformance Hardware
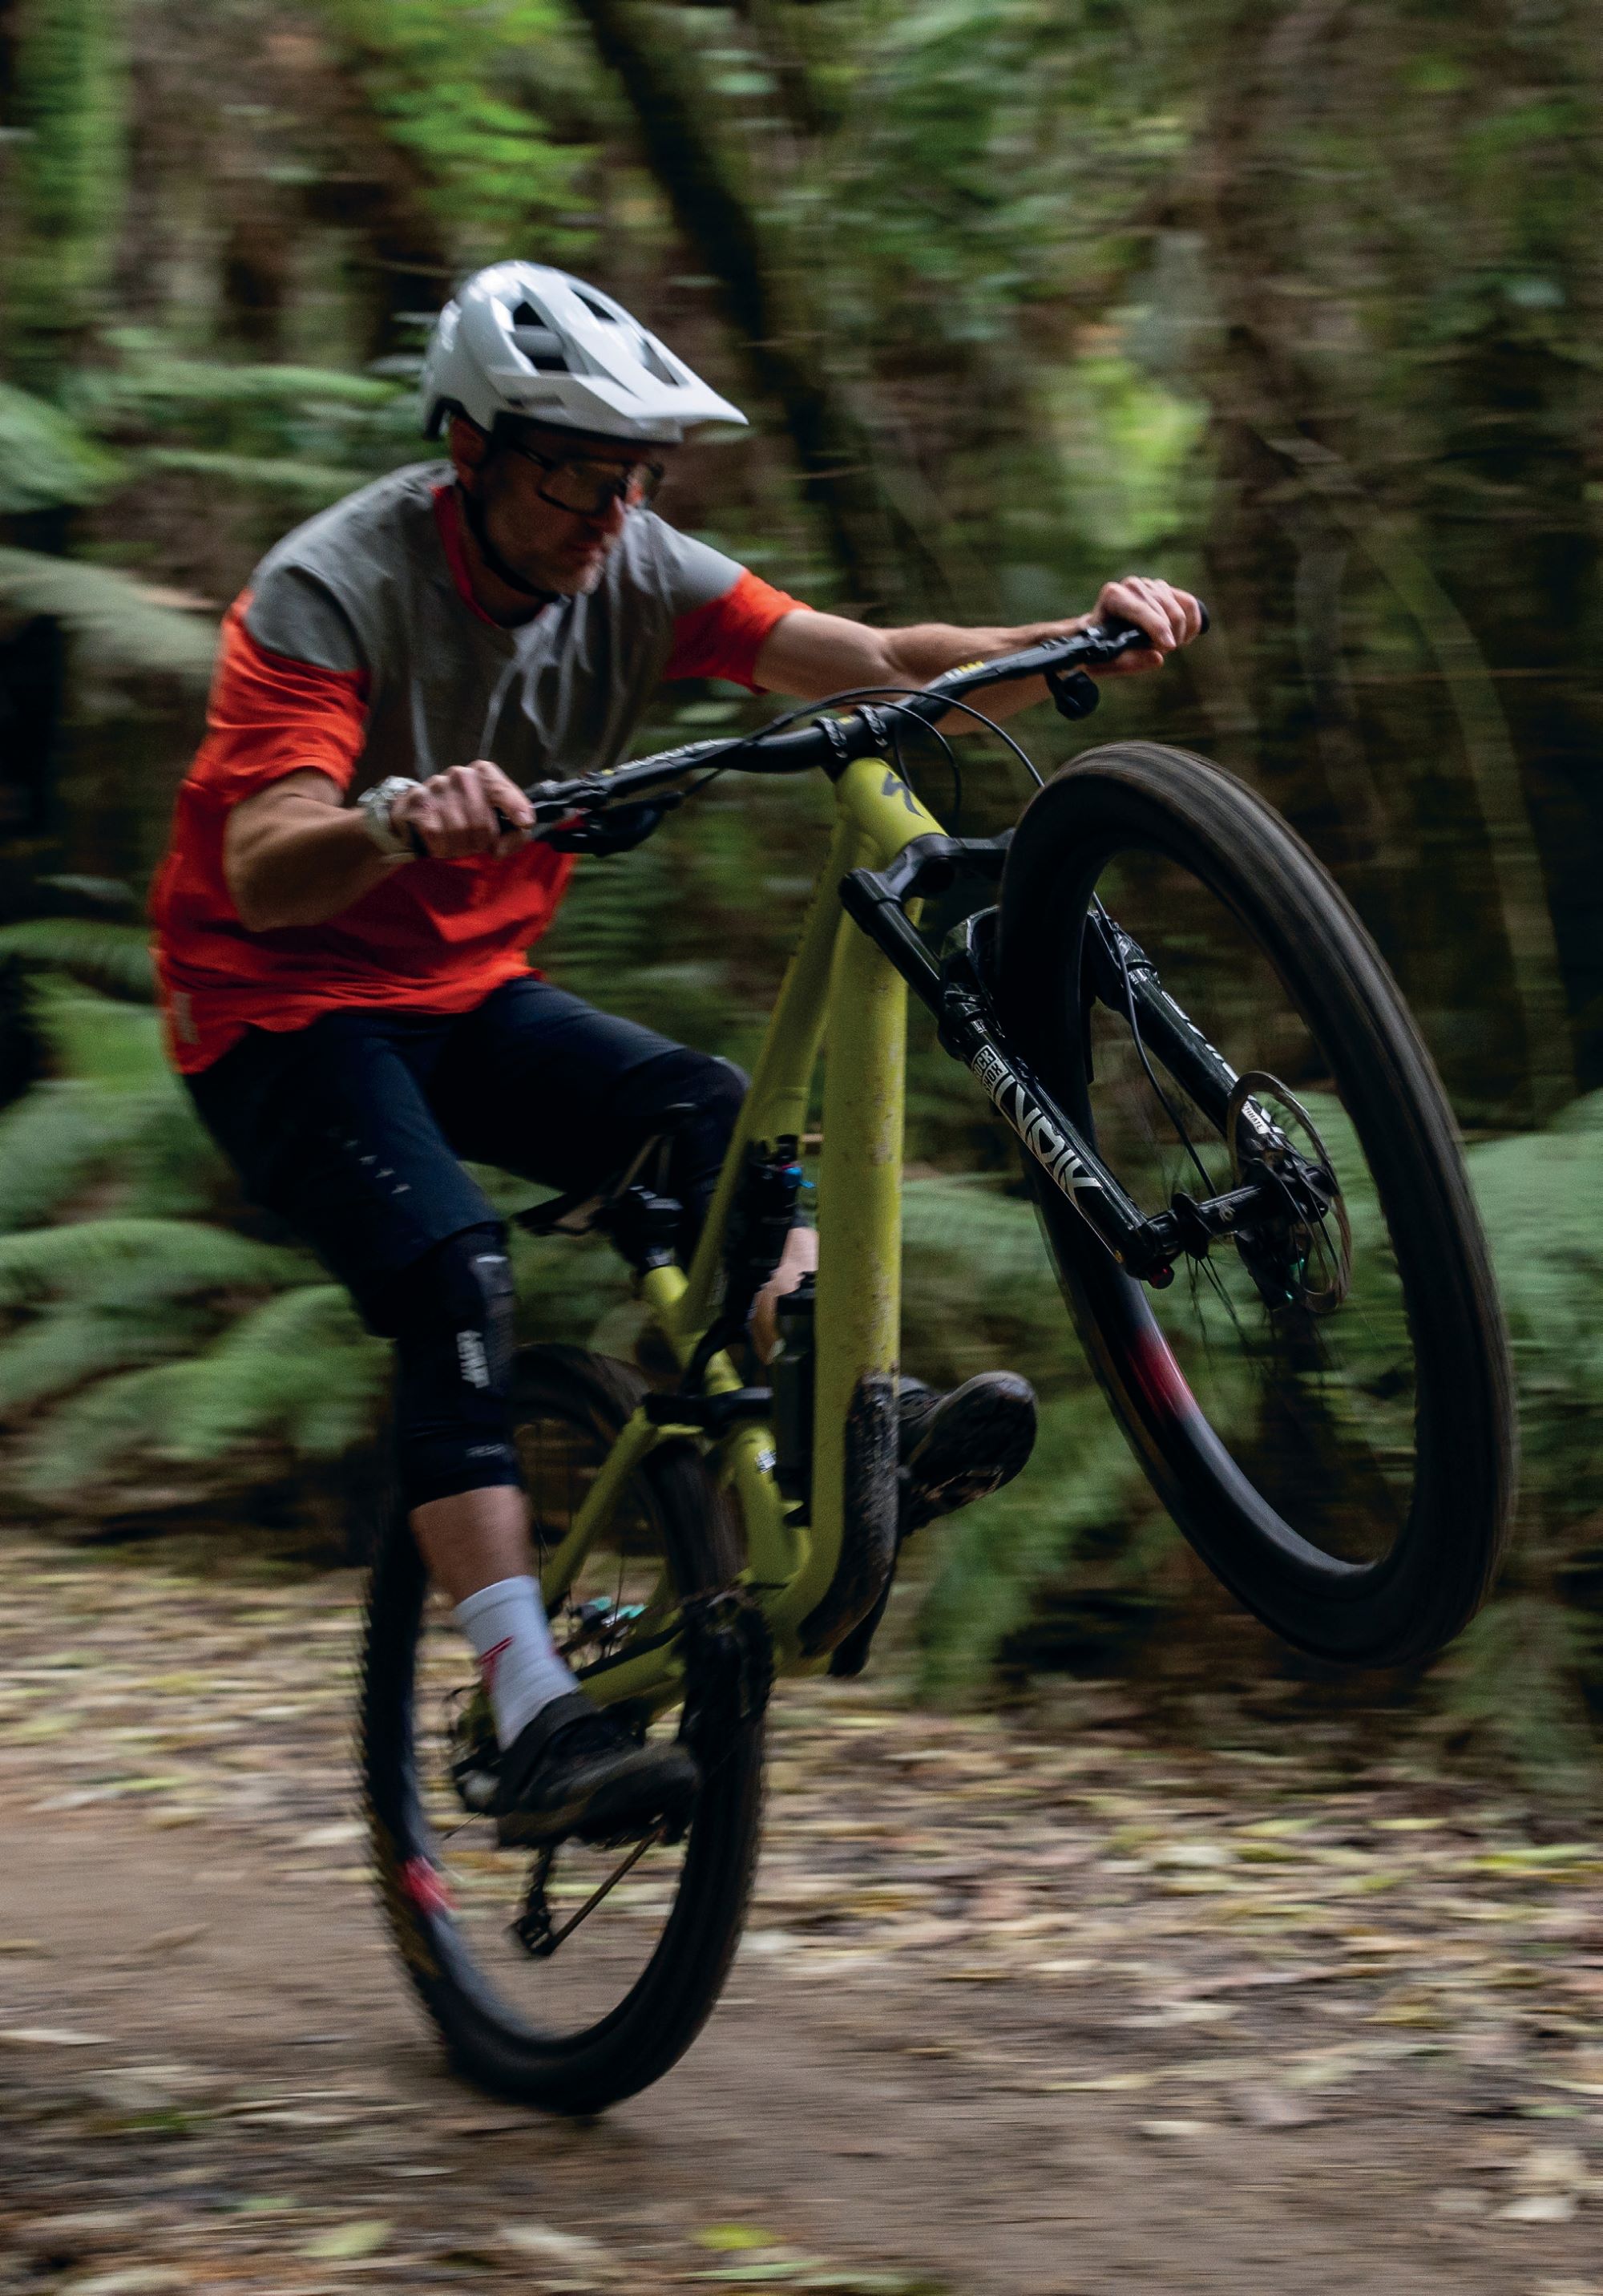
The Santa Cruz Vala is all about refined functionality and rugged reliability. The Vala is Santa Cruz’s first venture into four-bar suspension, and their inaugural partnership with Bosch motors. The Vala signifies a step away from the company’s signature VPP. With 150mm of rear travel, 160mm up front, and featuring the cutting-edge Bosch CX Gen 5 motor paired with a 600Wh battery, the Vala weighs in at a claimed 21.8kg for the XL frame.
The Vala’s design philosophy centres around versatility and refinement rather than reinvention. Santa Cruz describes it as ‘made for riders looking for focused performance on the best trails’. The frame utilises mixed wheel sizing with a 27.5″ rear and 29″ front, a 63.9° head angle, and includes high/low and progression flip chips for geometry adjustability—though not quite as extensive as some competitors.
What immediately strikes you about the Vala is how conventional it looks compared to many eMTBs on the market. It has a subtle aesthetic. There’s no funky integrated battery or radical geometry—just clean lines that wouldn’t look out of place on a non-powered trail bike. The Bosch CX Gen 5 motor delivers 100Nm of torque with a peak power output of 750 watts, while the 600Wh battery sits internally within the frame.
The Vala breaks VPP tradition. Whether it’s a trail bike like the Hightower, an enduro bike like the Megatower, or eMTB like the Heckler SL, all are distinctly recognisable as Santa Cruz bikes thanks to their signature twin-link rear suspension. Santa Cruz’s Vala takes a completely new approach to suspension. The classic VPP suspension is replaced with a four-bar Horst-Link design. This change was made because integrating the large Bosch motor into the existing VPP design proved too complex. Transferring the latest suspension optimisations from regular mountain bikes to the Vala was too difficult. Santa Cruz’s engineers opted for a Horst-Link rear suspension design, which gave them more freedom with the frame design and suspension kinematics. This allowed them to achieve the best ride feel possible.
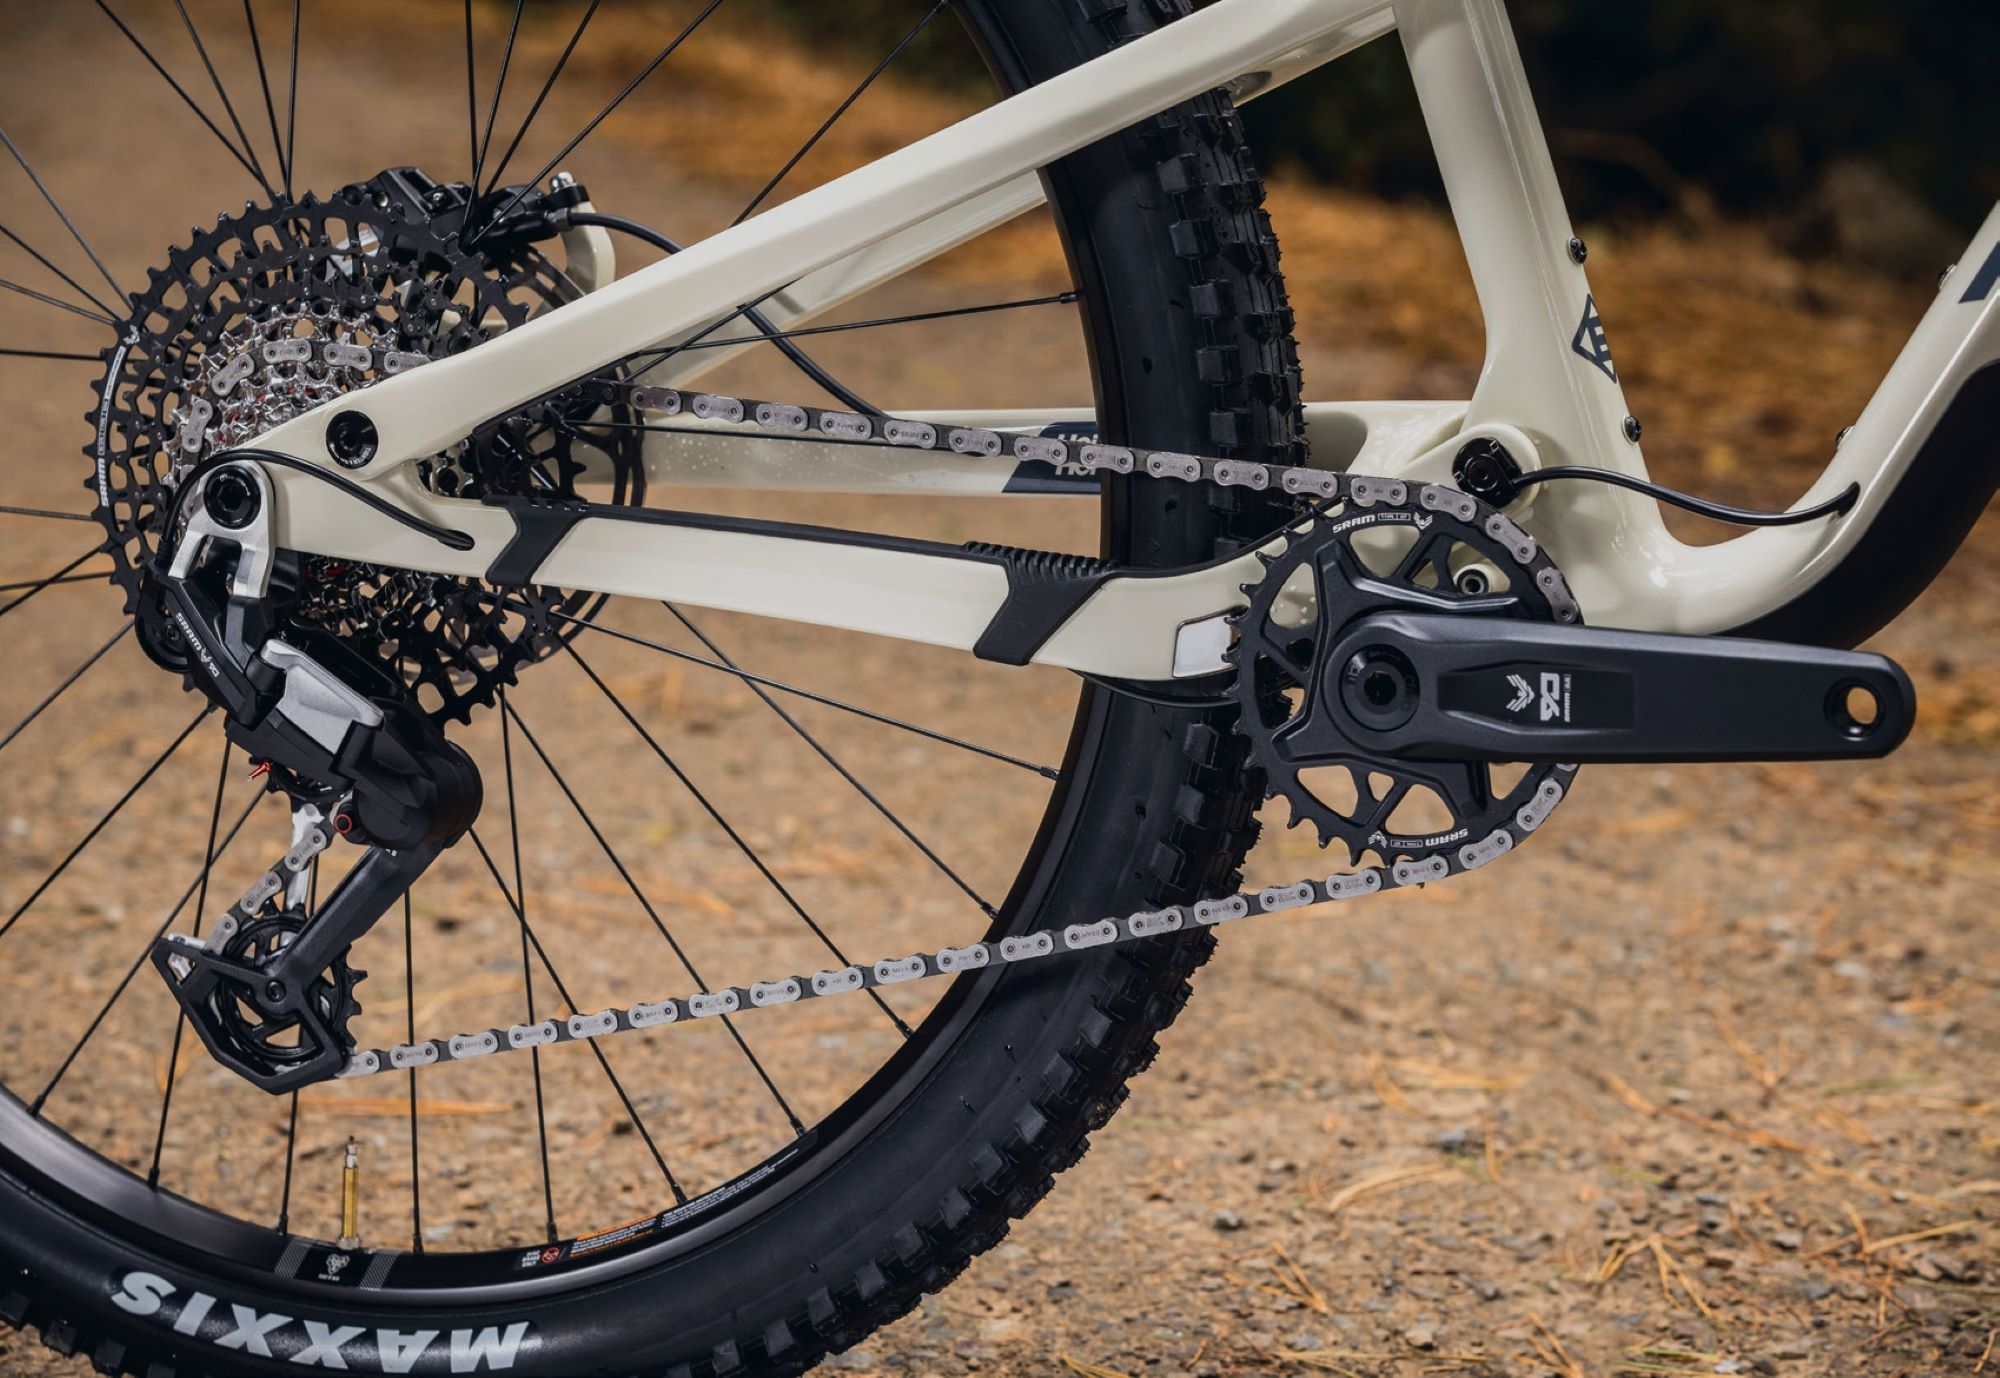
Build & Motor
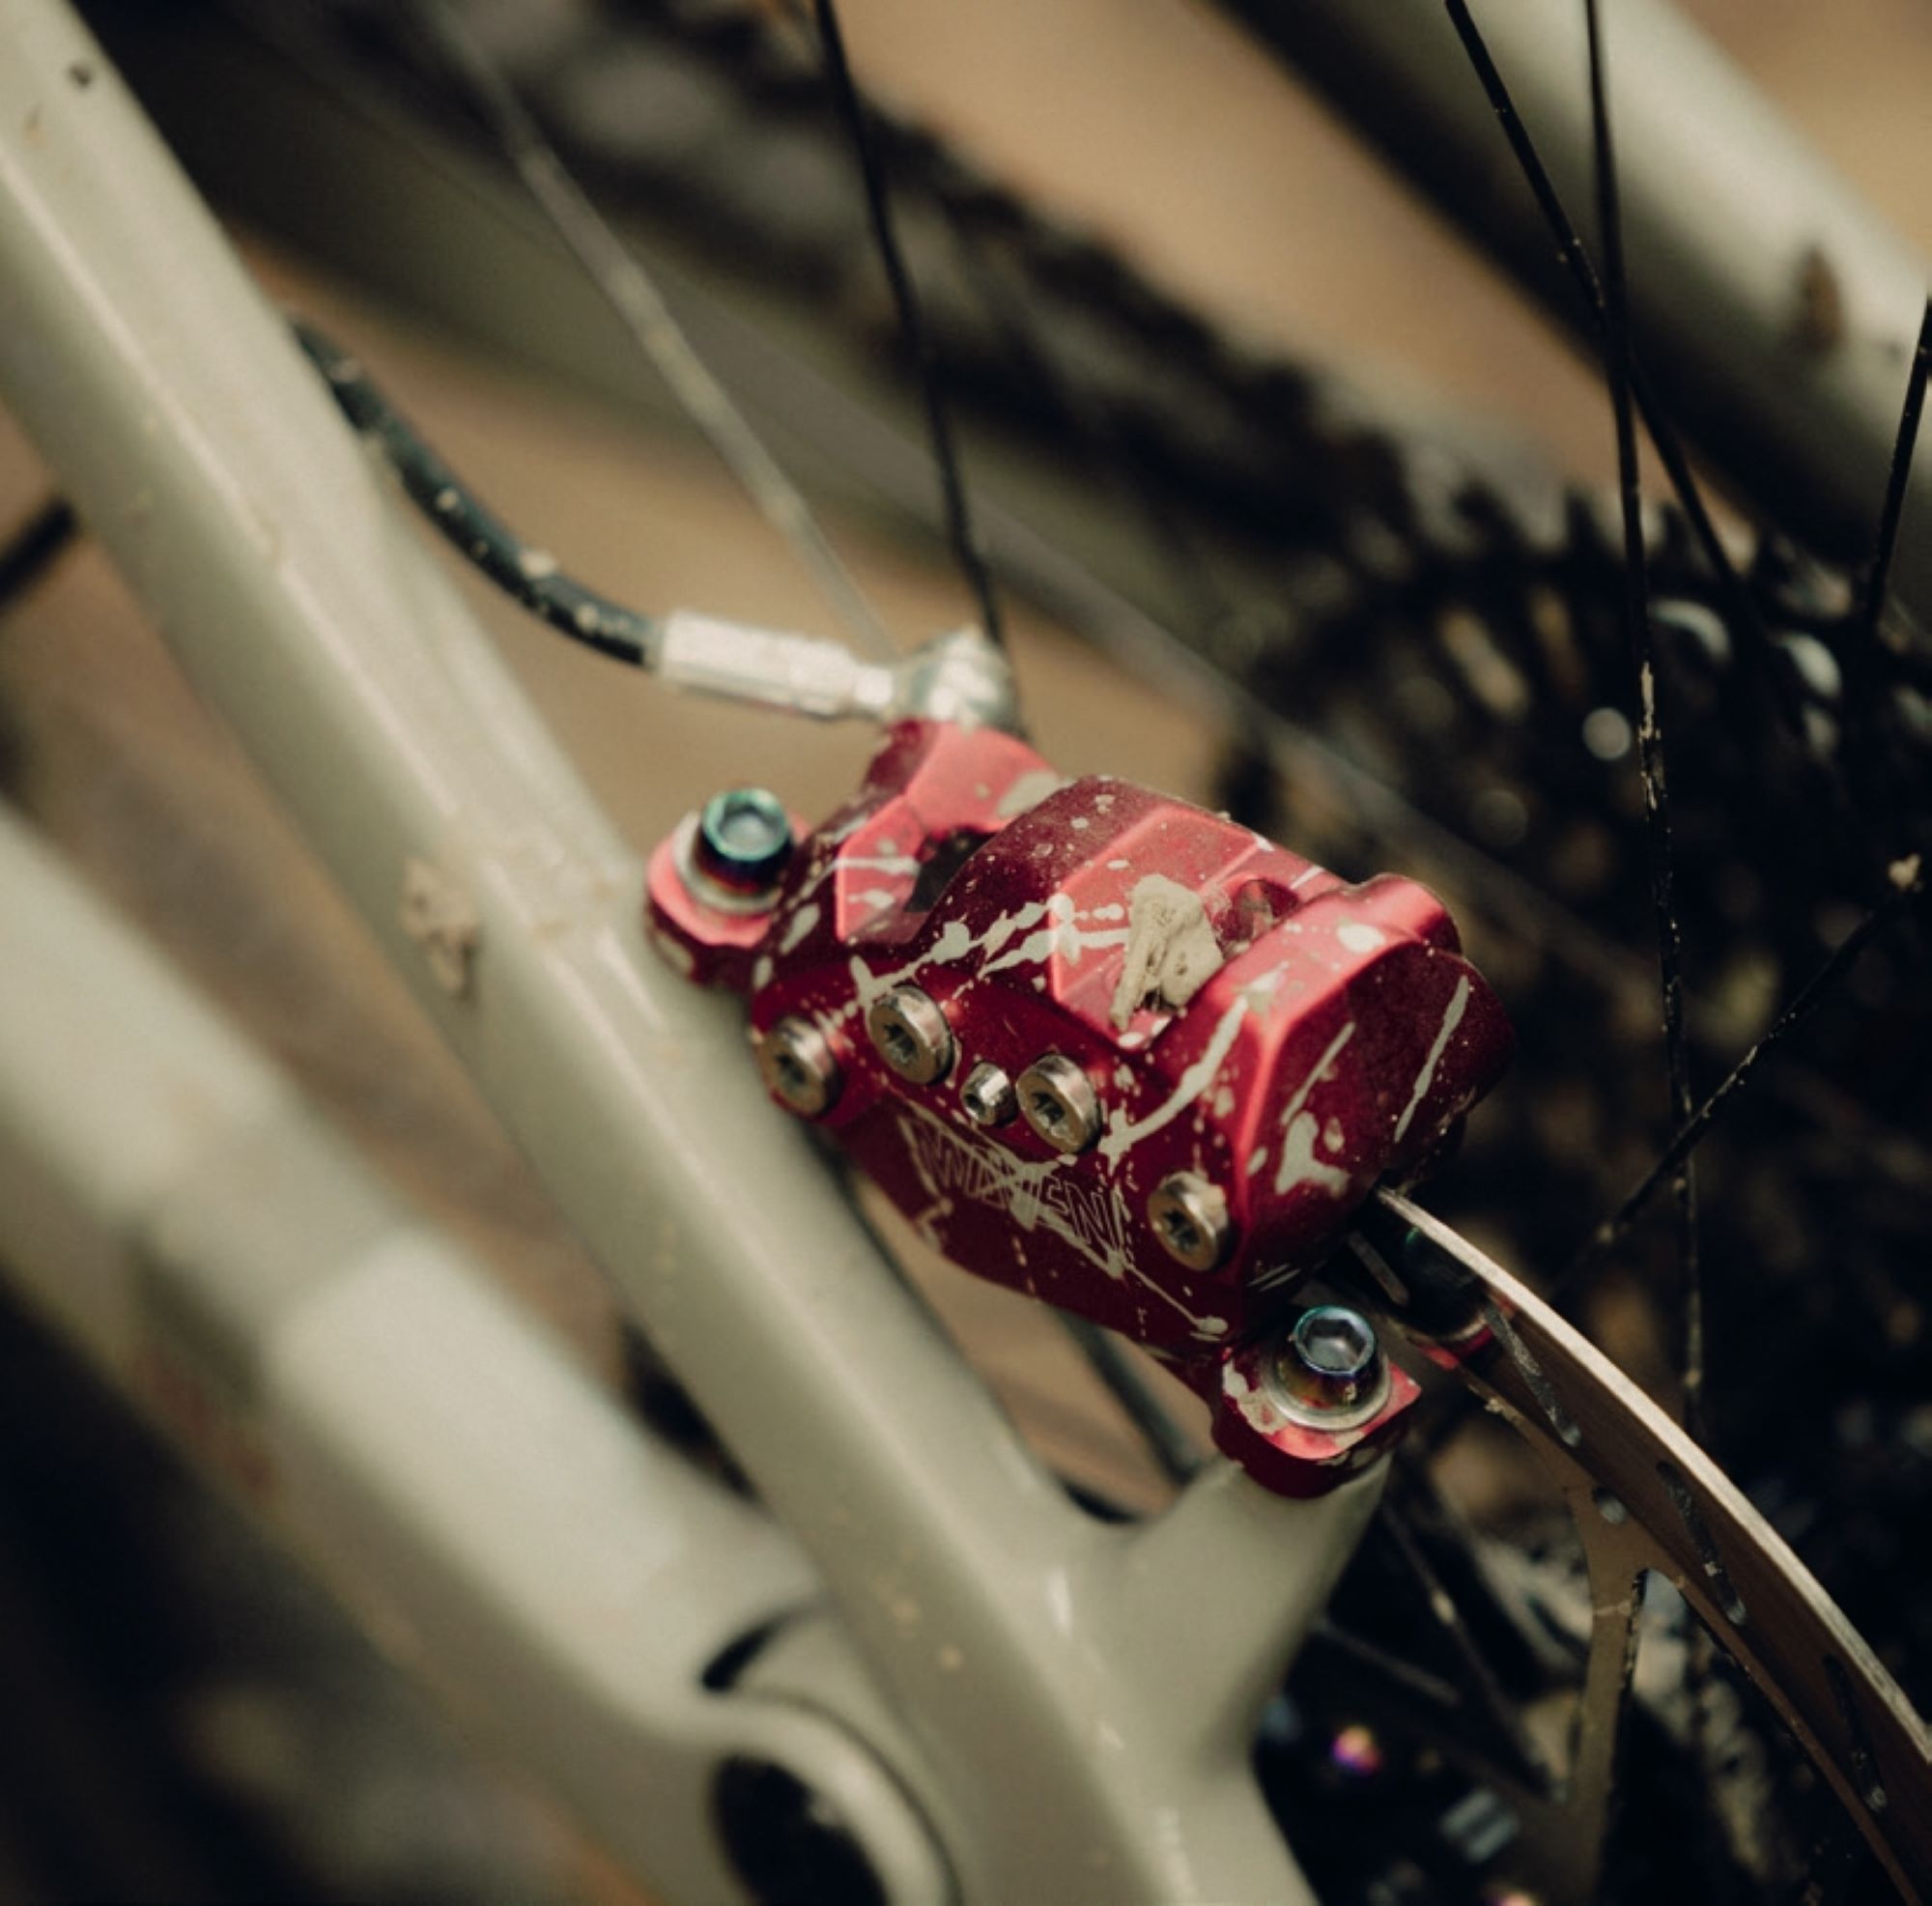
Component selection varies across the range, but the X0 AXS RSV model I tested came well-equipped. I did have non-stock components on the test bike, but for the most part, it was pretty close to factory specs. The SRAM XO transmission performed flawlessly throughout testing and works well with the extra torque from the eMTB. The Fox suspension—Fox 38 Factory, Grip X2 fork, and Fox Float X Factory shock—felt appropriately tuned for the bike’s intended use. Brake performance was more than adequate for most situations, with the SRAM Mavens delivering well-rounded stopping power.
The Bosch Performance Line CX Gen5 motor delivers its 100Nm of torque with a peak power of 750 watts, paired with the fully enclosed Bosch PowerTube 600wh battery. The battery is stored internally and is not removable, which maintains the clean aesthetics but limits flexibility for longer adventures or easy charging. The controls are refreshingly simple with basic buttons and no unnecessary screen distractions. This simplicity extends throughout the bike, there are no gimmicks or complicated systems, just a well-executed electric mountain bike that focuses on the riding experience. Bosch is also well-supported in New Zealand with a service agent, ensuring local support in case of any issues.
Battery life proved more than adequate for most full-day rides, though your km’s will vary significantly based on terrain, assistance level, body weight and riding style. Range-wise, expect anywhere from three to six hours of ride time depending on conditions and how heavily you lean on the assistance. The motor’s efficiency impressed me, it’s possible to extend range considerably by being judicious with power levels on easier sections.
Ride
During my few days of testing at Silvan Forest MTB Park, the Vala proved itself to be well-balanced across a variety of terrain. The bike pedals efficiently despite its 150mm of rear travel, never feeling sluggish on climbs or flat sections. The motor integration feels natural, intuitive – and there’s no jarring power delivery or awkward engagement. Instead, the assistance builds smoothly and predictably.
On technical climbs, the front wheel tracks with good precision, following your steering inputs exactly where you point it. This predictable handling helps build a ton of confidence—you know exactly where the bike is headed. The generous bottom bracket clearance means you’re not worried about crank strikes on rocky step-ups, while the rear suspension stays composed even wide open with minimal pedal bob interfering with your rhythm. In fact, during most of my testing I left the rear shock wide open, and it pedalled fine. The Bosch Performance CX delivers assistance that feels completely natural—it amplifies your pedal input smoothly but puts out grunt when you need to power over challenging sections. Despite running the smaller 27.5″ rear wheel, traction on steep, loose climbs is bloody excellent. The bike simply grips and goes.
Flipping the chip to the low setting changes the climbing game slightly. The seat angle slackens marginally but stays comfortably upright, while the bottom bracket drops 4mm – enough that you’ll need to pick your lines more carefully, but not so much that it feels overly low. The bike becomes more demanding on technical climbs in this setting. The front wheel needs more commitment to keep tracking properly, and overall climbing prowess takes a small hit compared to the high position. It’s a trade-off worth understanding, depending on your terrain.
The Vala’s descending capabilities are very well dialled. The 150/160mm travel package feels well suited to aggressive trail riding without venturing into an enduro overkill rig. The suspension is active and compliant, soaking up repeated hits while maintaining composure through rough sections. During my test period, I rode some of the rougher trails on offer at Silvan, and the Vala kept me upright and composed. Coming from the upper North Island, I don’t always have those sketchier, rocky, loose sections, so I was glad the bike was more than capable of handling these. It feels great descending—much closer to a regular bike feel rather than a heavier eMTB feel.

On corners is where the mullet setup comes into its own in tighter sections—you can throw the bike into turns without getting hung up, thanks to that nimble 27.5″ rear wheel. This was needed during testing on the tighter, steeper and rockier terrain, where the bike’s playful nature really comes to life. The frame feels balanced and sprightly, with the Bosch Performance CX motor delivering power so intuitively. The larger front wheel still rolls over obstacles efficiently while that smaller rear wheel allows for snappy direction changes that would challenge bikes with dual 29″ wheels.
The geometry strikes a modern balance without going to extremes. The 63.9° head angle in the low setting provides sufficient confidence for steeper terrain while remaining lively enough for tighter, more technical trails. The reach figures are contemporary without being excessive, and the effective seat tube angles keep you in an efficient pedalling position. The Vala is plenty capable across varying terrain, yet efficient enough for longer rides. The balanced character means it performs well across a broad spectrum of riding situations.
Perhaps not absolutely excelling in just one aspect of riding but rather taking a trail riding approach. I suppose you could say that the Vala plays things relatively safe. The geo, travel and spec are solid but perhaps not uber innovative. That said, the conservatism might actually be its main strength—it’s a bike that’s difficult to fault. The build quality is typically Santa Cruz: excellent attention to detail, clean cable routing, and solid construction throughout. The frame feels robust without being overbuilt, and the finish quality matches what you’d expect from a premium brand. Plus, I like that it’s engineered simply, as it means better functionality and reliability.
This Vala is bloody good fun! It’s one of the most well-rounded eMTBs I’ve ridden this year. The Vala strikes an impressive balance between capability and playfulness, efficiency and performance. It pedals everywhere well, is a very capable climber, and descends with absolute confidence. The intuition of the Bosch Performance Line CX Gen5 is dialled. The motor does what it’s supposed to and elevates the riding experience. The extra 100Nm update with Bosch Performance Line CX Gen5 rode exceptionally well, especially in eMTB mode, which I used for all testing. This update enhances sustained power, particularly at low cadences and in low gears, improving acceleration and climbing on steep terrain.
While it may not revolutionize the eMTB category, it represents a mature and thoughtful approach to eMTB that prioritizes the riding experience above all else. For riders seeking a premium eMTB that can handle diverse terrain without compromise, the Vala makes a compelling case.
Kona Hei Hei CR
Words Lester Perry
Images Caleb Smith
RRP $10,499
Distributor Solis
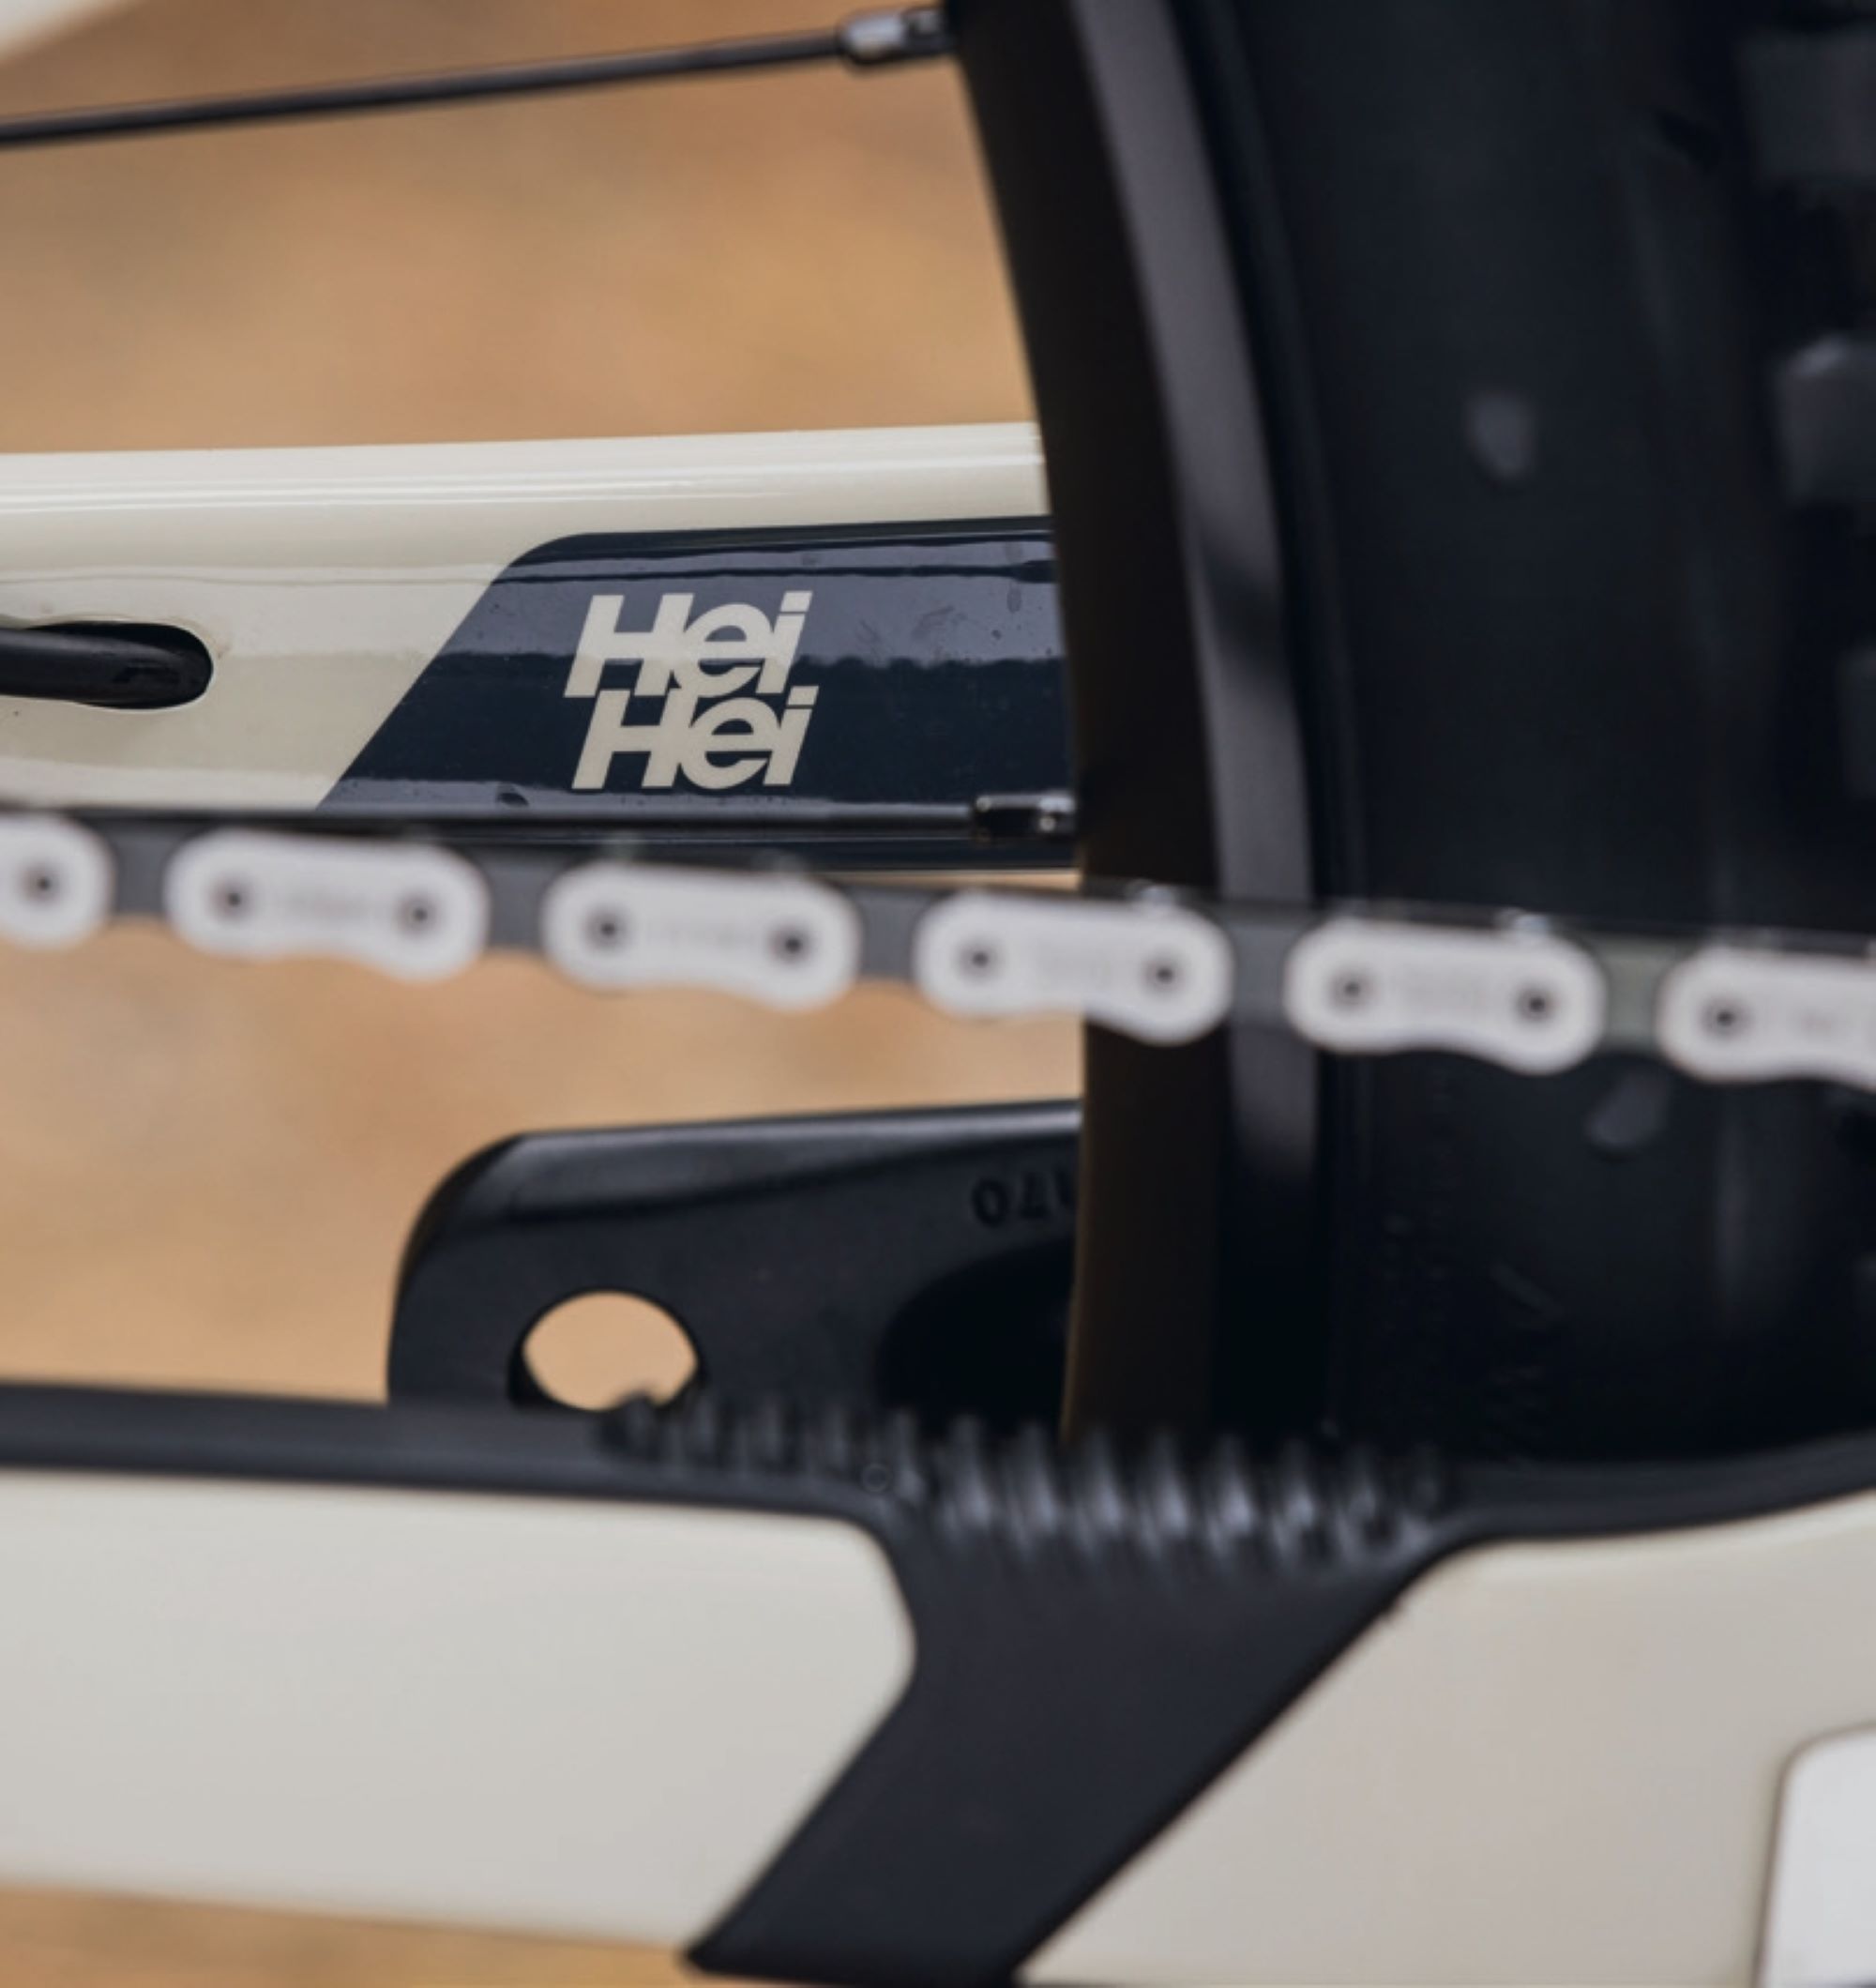
Hei Hei. We’re not talking the Christchurch suburb, or the Māori word for Chicken (Heihei), we’re talking the tenth generation of a bike that’s previously been the flagship cross-country offering from the storied US brand, Kona Bikes.
It’s no secret that the brand has been through the ringer in recent years, having been sold off to a Private Equity firm (no doubt cashing in on a post-COVID boom) only for the founders to eventually buy it back to prevent it from completely tanking. They’ve returned to what they do best, delivering solid bikes with a broad use case and grin-inducing ride qualities.
Beginning life as a much-coveted titanium hardtail, for most here in NZ, the bike existed in folklore, purely in the pages of magazines. By the early 2000s, the bike had been overhauled. It became a full suspension, still aimed at the cross-country race crowd and based around a four-bar suspension linkage, offering carbon and alloy versions, and even being one of (maybe the) first brands to mass-produce a bike with flex-stays on their 2016 Hei Hei.
Fast forward to 2020, and Kona changed things up with its ninth generation, scrapping the four- bar linkage in favour of a swinger-link style suspension. The bike had both feet firmly in the cross-country camp. With a geometry revision and 120/120mm travel, the bike was right in line with other progressive XC options, albeit it was toward the longer-travel end of the XC spectrum. I spent a couple of years on the 9th-generation Hei Hei, and although it had some quirks, I thoroughly enjoyed it; in fact, it still hangs in my shed.
For the newly launched 10th edition, Kona pulled one foot from the XC bike camp, crossing the line and putting it into the trail-bike camp, broadening the intended use of the bike. Retaining its 120mm rear travel, the frame features a refined suspension kinematic, with a more consistent rising rate and improved pedalling thanks to higher anti-squat, a result of the main pivot moving considerably higher and further forward than before.
The straight seat tube not only looks nicer than the curved one before, but it also now affords deeper seatpost insertion. The revised rear end now features straighter, more traditional-looking stays, a welcome change from the chunky flex-stays of Gen-9. The front triangle has a couple of minor visual tweaks but is largely in line with the previous, with just a few things straightened out. There’s a notable addition of a UDH hanger, allowing for the use of the full- mount T-type SRAM 90 mechanical groupset.
The swinger link style suspension remains, but has a refined link and hardware. The shock is now simpler to remove, and the swing link itself is much less industrial-looking and more svelte than before. The front triangle has plenty of mounting options for accessories or bottle cages. A total of nine bolt holes, five down the downtube, two on the seat tube and two under the top tube just in front of the front shock mount. With a small frame bag fitted to the front of the triangle, I could drop the bottle cage right down toward the bottom bracket, allowing me to fit a 900ml bottle on the down tube with proper clearance to the bag.
Cabling gets a welcome reroute too—for some reason, the cables on the previous bike popped out of the seat tube, looped up, and went down the seatstays. I’m assuming this was done to engineer the flex-stay. The resulting gear issues due to the extra bends in the cable were a real headache. For Gen-10, the cables are now all tidily routed through fully piped internal routing, making cable swaps a cinch and gear issues are a thing of the past. Unfortunately, this new frame doesn’t allow for an internally routed rear lockout. There is a suggested route for an external routing, but its execution seems like a bit of an afterthought. Thankfully, there’s no cables through the headset faffery going on here.
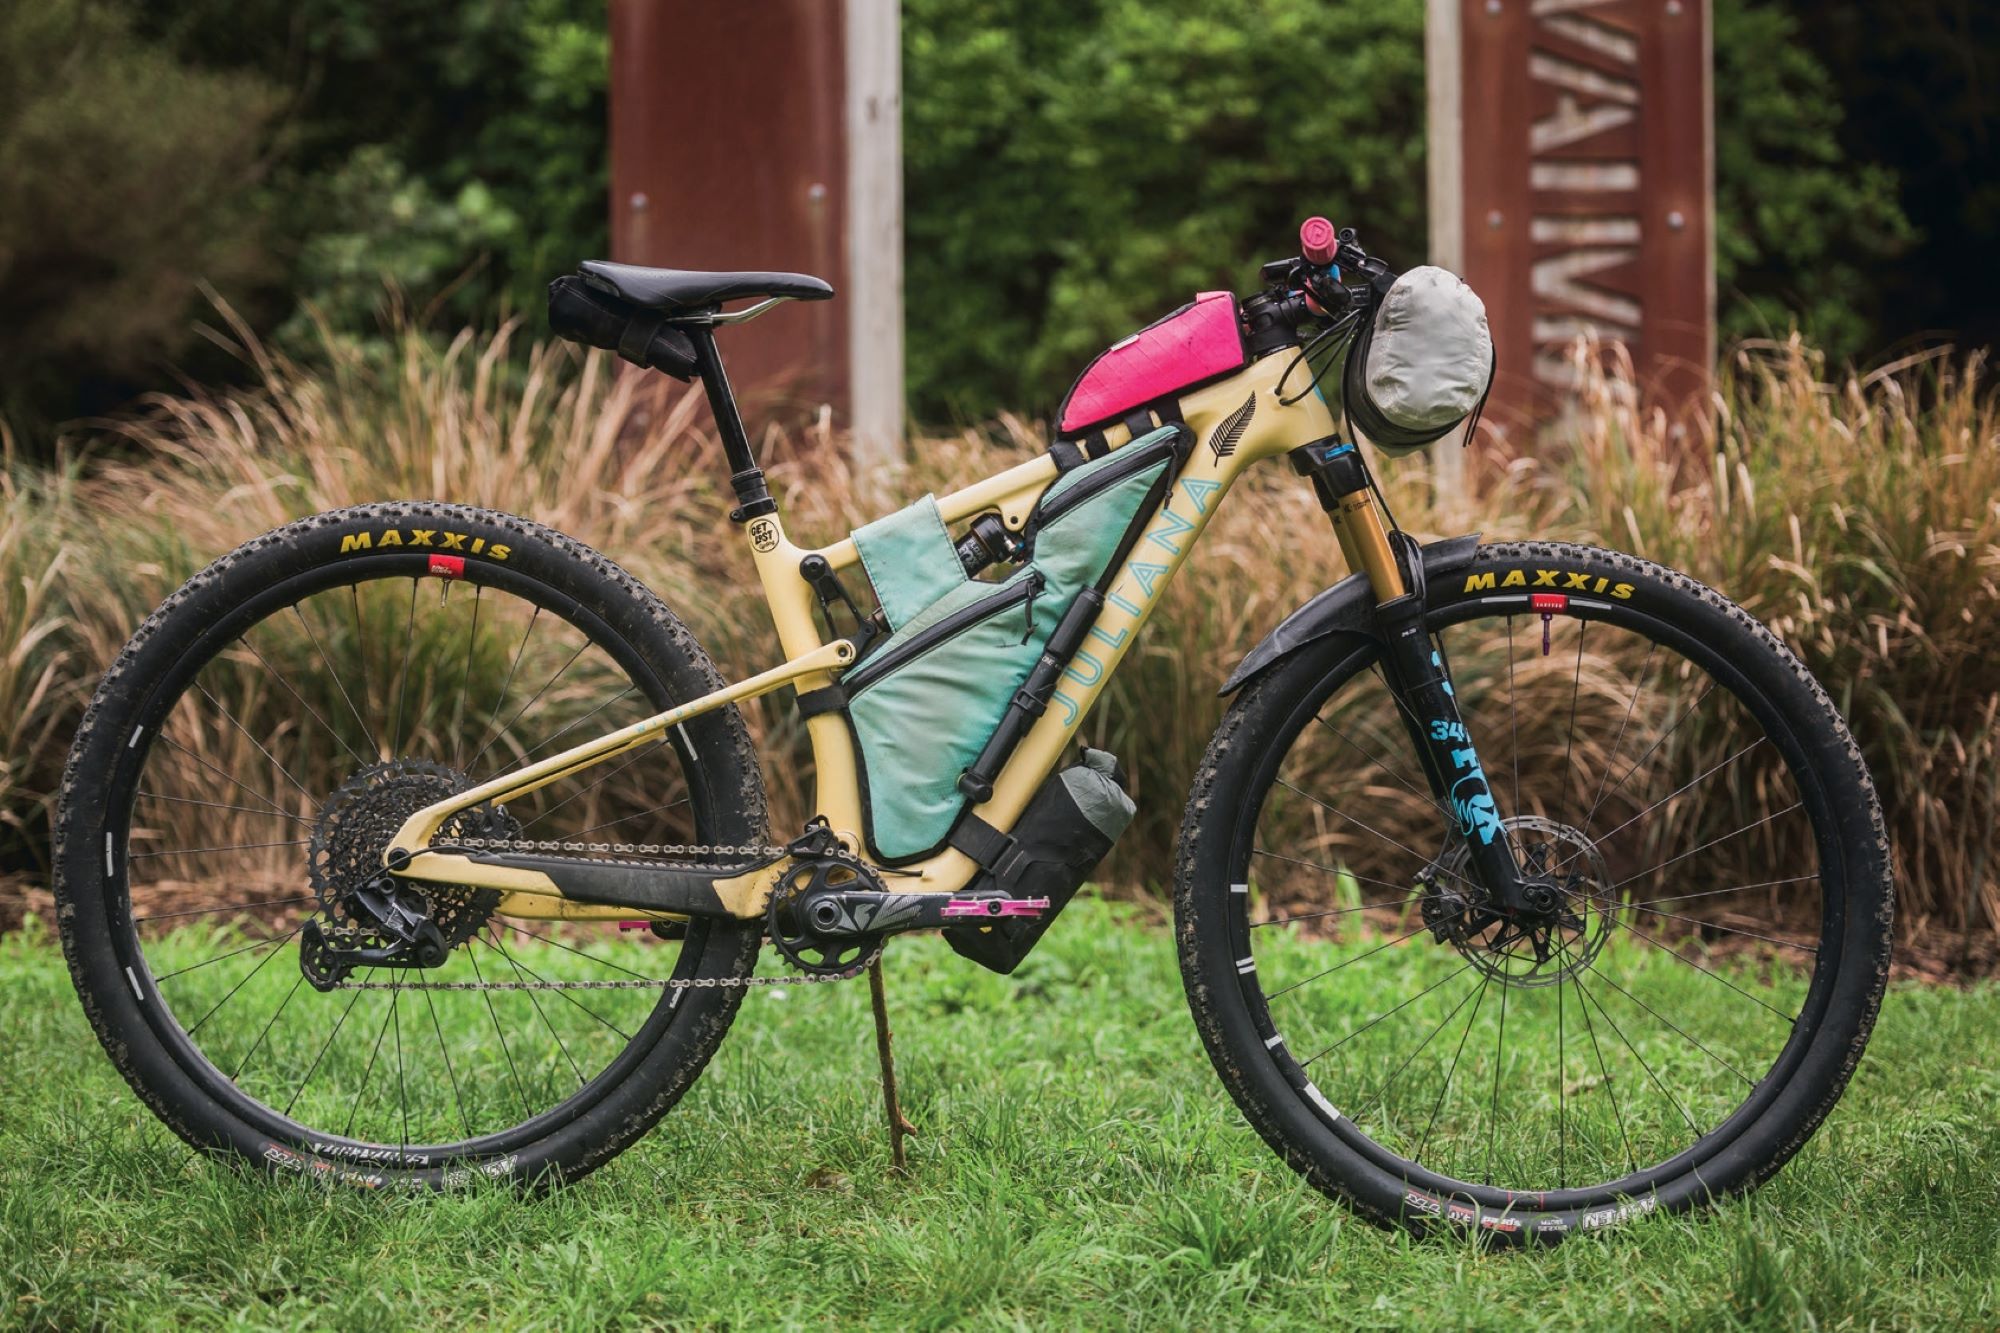
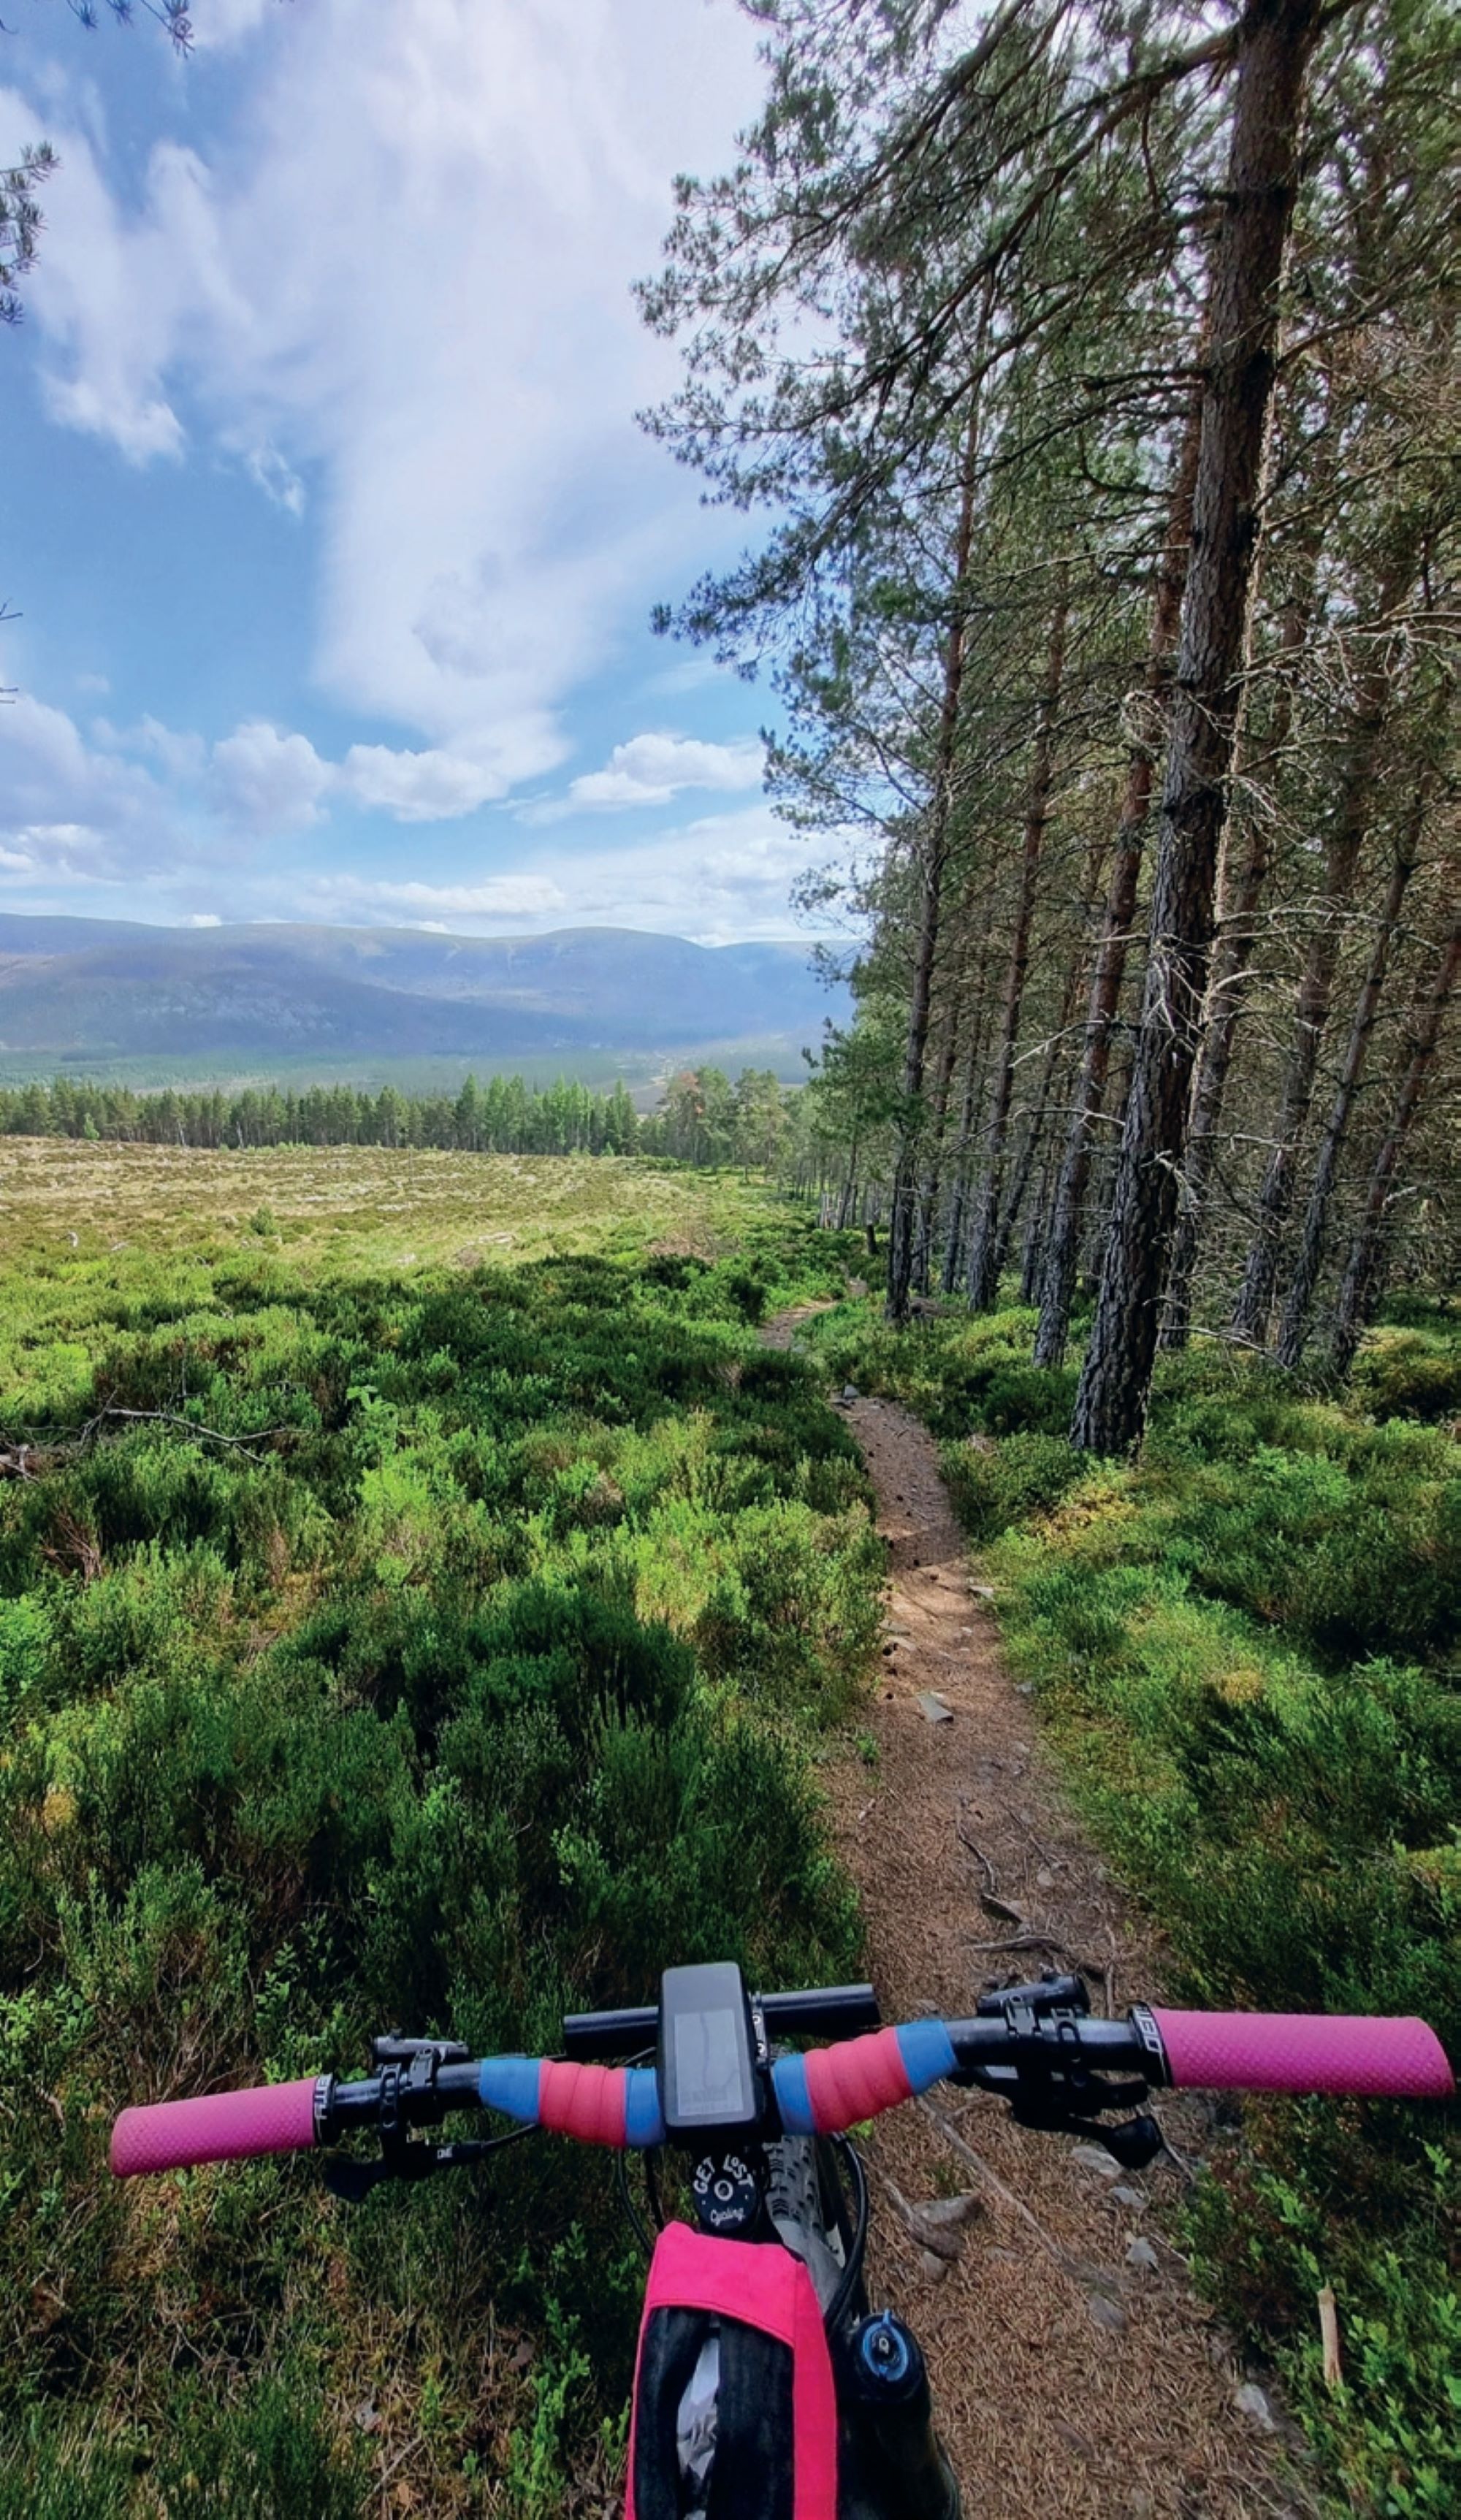
I’ve had a good few months on a size medium Hei Hei and having ridden it on a good variety of terrain, both in its stock format and with a couple of tweaks, as well as fully loaded with gear through the Kahurangi 600km Bike Packing route, I feel like I’ve got a good handle on this versatile machine.
Whats the Kahurangi 600? Ride from Nelson, over Takaka hill via Rameka Track, through the Heaphy, down the coast, over the Old Ghost Road in the ‘hard’ direction, then through Murchison, across the top of Lake Rotoroa via some gravel roads, a stop at the Tapawera 4-Square and back to Nelson via the Great Taste Trail. Our crew of four split the loop into four big days, tackling it aboard bikes loaded with everything we’d need. Fortunately, we had beds along the way for our three nights, so, although loaded, we didn’t have to carry sleeping mats, bivvies, or tents; just a sleeping bag each did the trick. This trip shone a light on just how versatile the Hei Hei is; it is equally at home on these backcountry trails and gravel roads as it is on technical singletrack.
Geometry
Tweaks across the board bring the Hei Hei’s geometry more in line with current trends, getting slacker, longer, but interestingly not lower; I’ll get to that in a bit.
Reach measures in at 449mm, and stack measures 620mm (size medium). These numbers are larger than previous but still reasonably conservative for this category of bike. The higher stack and shorter reach both assist in the bike feeling nimble and playful. All frame sizes get a 435mm chainstay length.
A 66-degree head angle is on par with similar bikes and is steep enough to give a snappy, nimble ride but slack enough that when combined with the 130mm travel of the fork, it’s able to take on the steeps and maintain relative composure through rough stuff. The 76-degree seat tube angle isn’t entirely progressive, but it’s steep enough to put the rider in a decent position for all- around riding. Up front enough for climbing, but slack enough to give a bit more room through the top-tube / cockpit when trucking along the flat.
The Gen-10 Hei Hei bottom bracket sits on the higher side of the average in this trail category, even higher than the Gen-9, with a height of 344mm and a 31mm BB drop (distance below the wheel axles). I can only assume this is due to the bike’s heritage on the technical trails of the Pacific Northwest, where roots and rocks are prevalent.
The high BB provides extra clearance for pedalling and roll-overs, and also enhances the bike’s ability to feel playful. The slightly higher centre of gravity helps a rider change direction quickly, keeping handling and maneuverability snappy and helping to thread the needle through technical features.
The Hei Hei is a prime example of the way the geometry of a bike is all interconnected, and assumptions drawn from simply looking at any one number on a geometry chart can be completely wrong when viewed in isolation. A bike like this needs to be ridden without even looking at a geometry chart, such is the likelihood that a rider could decide it’s not for them before even riding it and entirely miss out on what it’s all about.
Suspension
The most glaring change in the component package from the Gen-9 is the swap from the lightweight suspension of the 120mm RockShox SID fork and SID Luxe shock to a more trail-friendly, but not significantly heavier, 130mm RockShox Pike Ultimate Charger 3.1 fork and a Deluxe shock. This change really opens up how aggressively the 120mm chassis can be ridden.
Drivetrain
Drivetrain is taken care of by the newly launched SRAM 90 T-type mechanical groupset. An excellent option for a do-it-all bike, and although it lacks the push-button prowess of the AXS wireless system, the shifting is remarkably light and almost as accurate. No complaints here, although after months of electronic shifting recently, I was reminded that more upkeep is needed with a cable-actuated system, especially after several rides in the rain.
The Motive Bronze level brakes are basic with minimal adjustment and no frills, but with 180mm rotors front and rear, there’s ample braking power for this type of bike. The stock organic pads got blitzed pretty quickly, so an upgrade to sintered pads will take performance up a notch. Interestingly, and in line with the shift away from the bike being purely XC-focused, Kona opted for a post-mount 180 mm brake mount, eliminating the option to run 160mm rotors, a great move in my book. However, this change further removes the bike from being aimed at purist XC use.
Wheels
The WTB i30 TSC wheelset is probably not one I’d reach for as an aftermarket option, but as a stock item, it does what it’s supposed to. Sure, it’s not particularly lightweight, it doesn’t have any performance advantage, but it does what it’s supposed to. The rims are decently wide with a 30mm internal width, pairing perfectly with the supplied Maxxis Dissector 2.4” tyres. The Dissector isn’t my favourite tyre, but it is a good balance of traction and rolling speed, although not exceptional in either department. In my mind, anything less aggressive would limit the bike too much, and anything much chunkier would hamper the overall speed and pedalability.
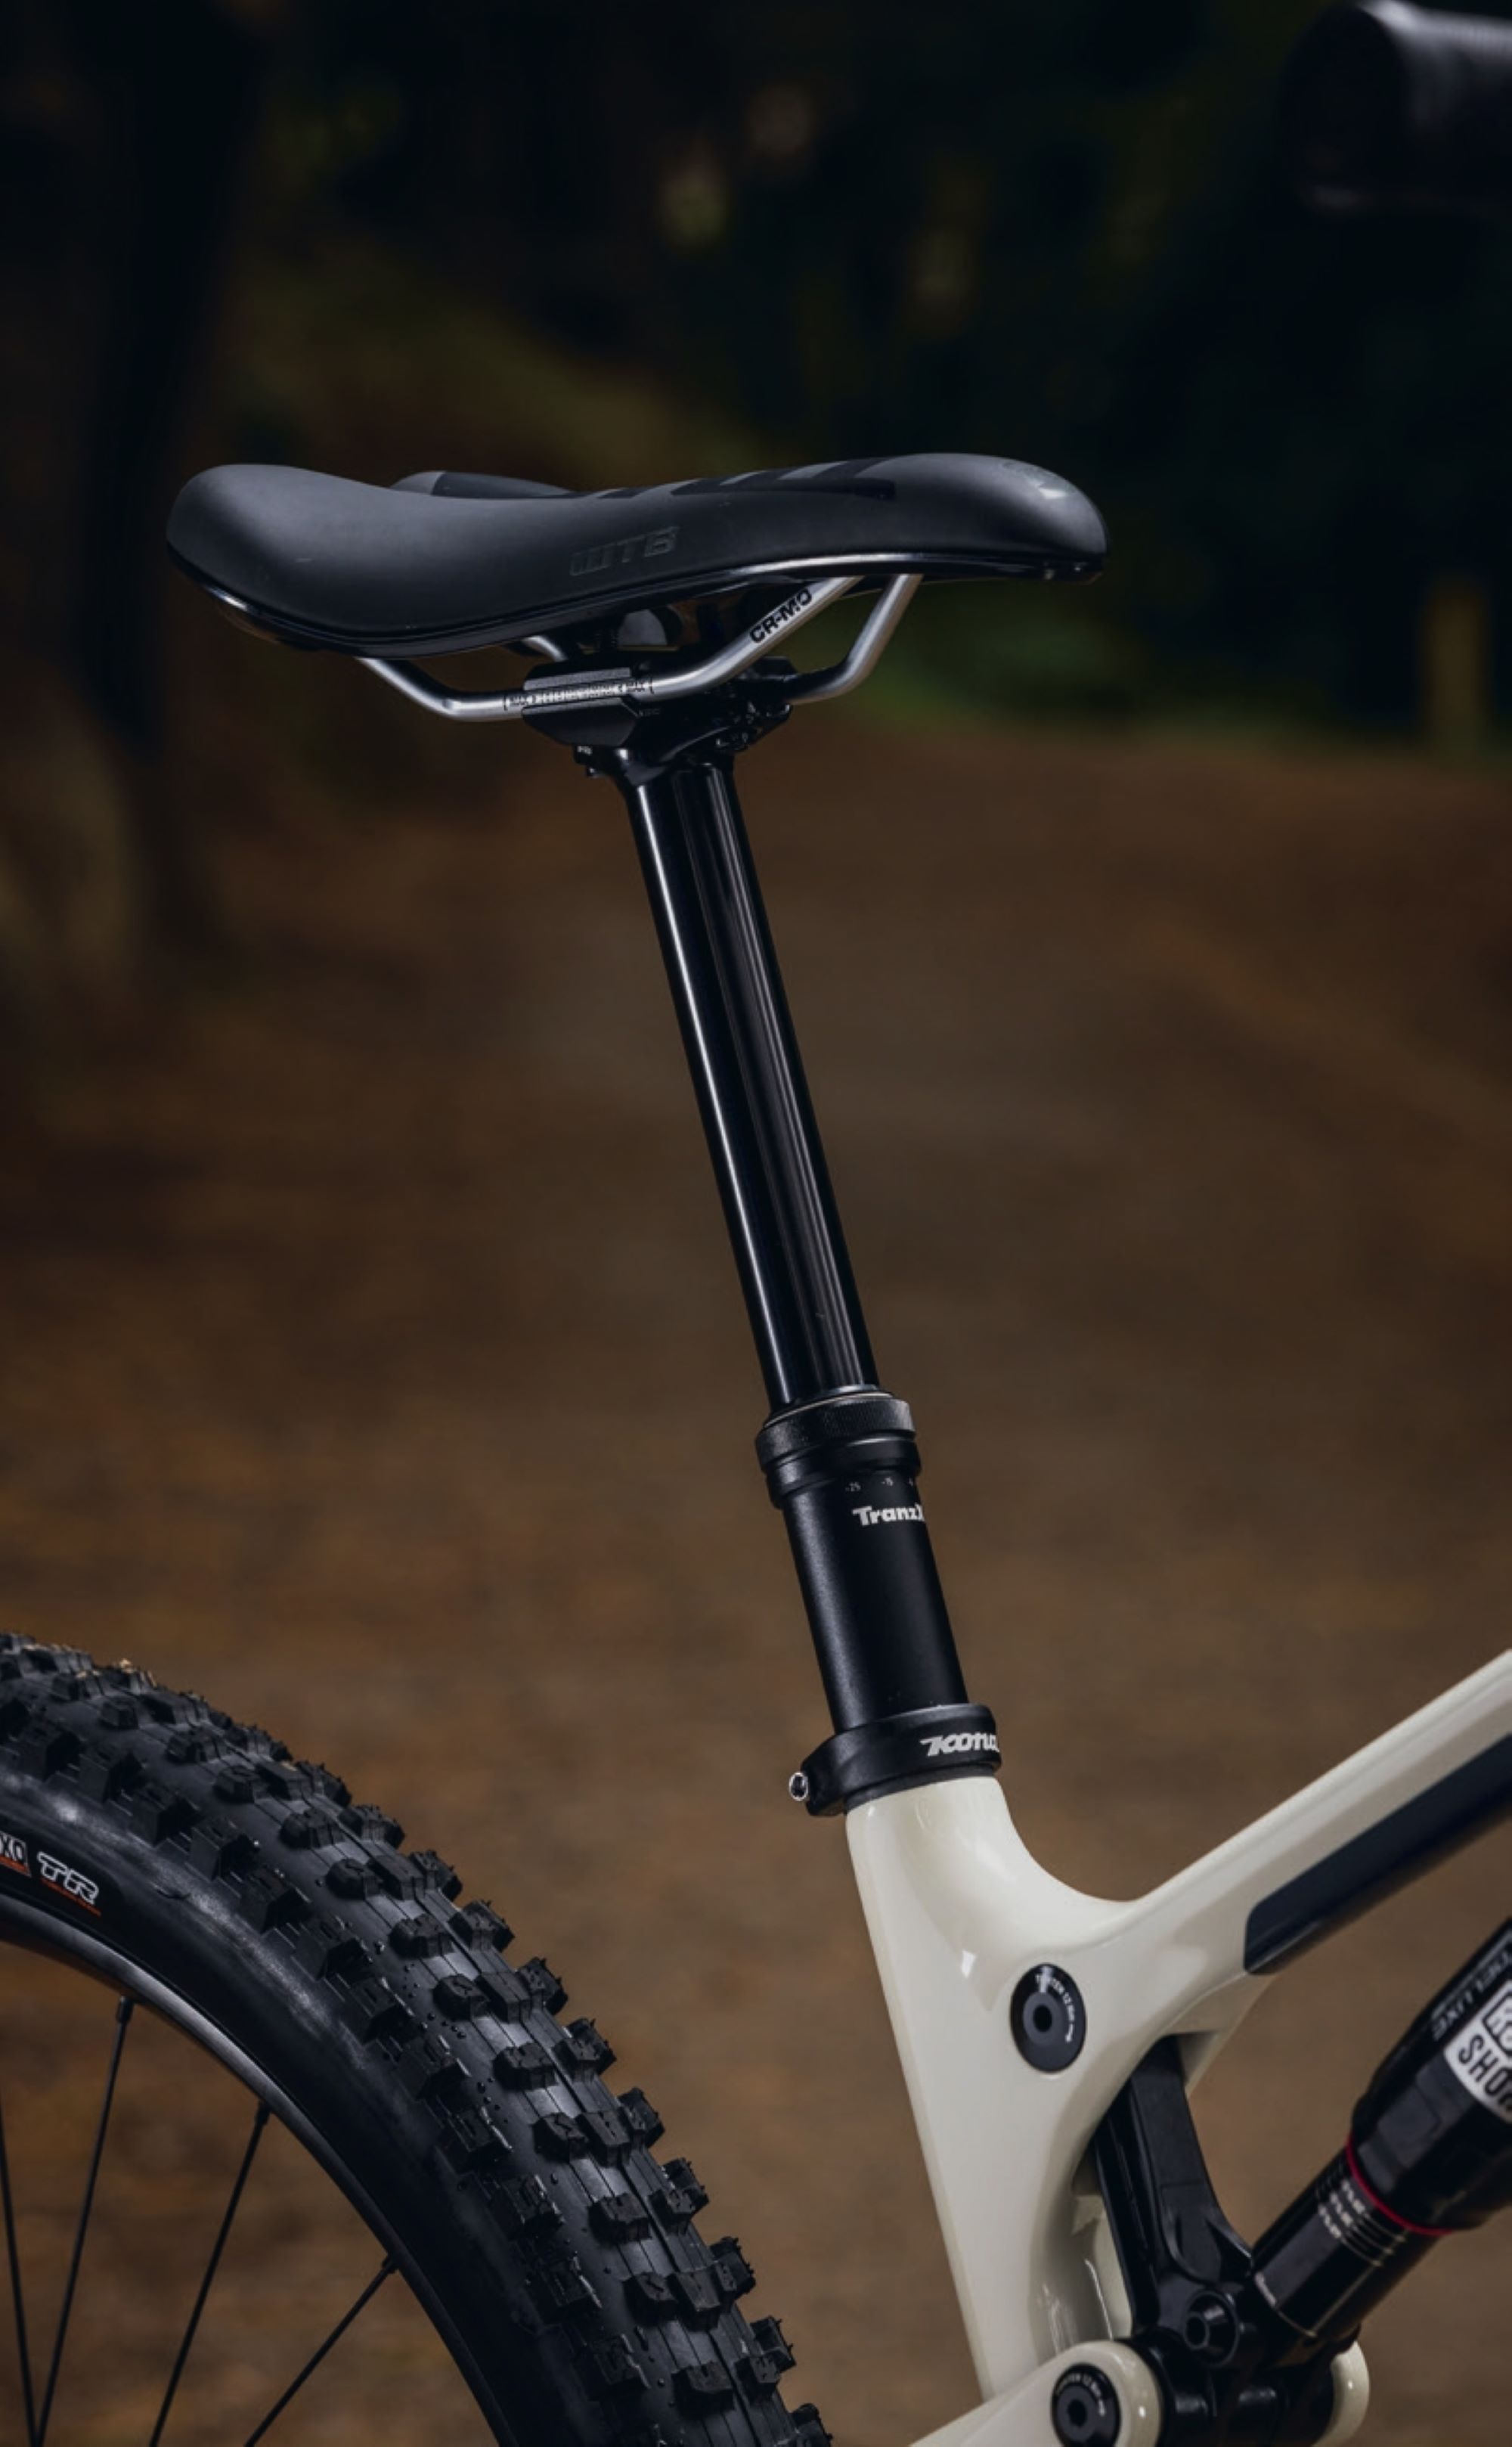
Dropper post
The TranzX Dropper +RAD dropper post has proven itself so far. Although there’s more play in the post than in many others, it hasn’t deteriorated over the test period. Unfortunately, the stock option on a medium has a measly 150mm of drop. With my 720mm seat height, a drop of up to 210mm would be ideal, and thanks to the straight seat tube, it should fit fine. The larger Hei Hei bikes do get longer drops, up to 200mm on the XL.
Cockpit
I’m not usually one to want to swap out brand-new parts, but the cockpit on the Hei Hei, or most of it, just didn’t work for me. Something seems off with the shape of the handlebar, and I couldn’t get comfortable with it. A bit more backsweep may have solved it. The grips are a total letdown; I removed them after a single ride. They’re simply too firm, and although they’re reasonably grippy, they’re not comfortable. The stem? Well, a stem is a stem is a stem, and this is a stem for sure. It stays put and does its job admirably.

The Ride
I’d like to think I was still an early 20s downhill wanna-be, cutting laps with the boys, jibbing trailside features, and hitting the dirt jumps at the end of a big day riding. Reality is that this isn’t happening nowadays, and my days lapping downhill tracks are pretty much done. Most of my riding is solo, squarely in the ‘trail’ zone, and I’ve hit one set of dirt jumps in the last five years. When I’m heading out for a ride these days, I want a bike that’s light and pedalable enough to cover a decent amount of ground, but stable and capable enough to ride almost anywhere I want.
The Hei Hei isn’t a super light XC whippet, but with a few spec tweaks, I reckon it could pivot to be an all-out race bike, particularly for technical single-track and marathon-type events. In its stock format, though, it’s up to the task, although it leans more towards a super fun trail assassin, a nice, nimble, middle ground between an all-out XC bike and a longer-legged, heavier enduro or trail bike.
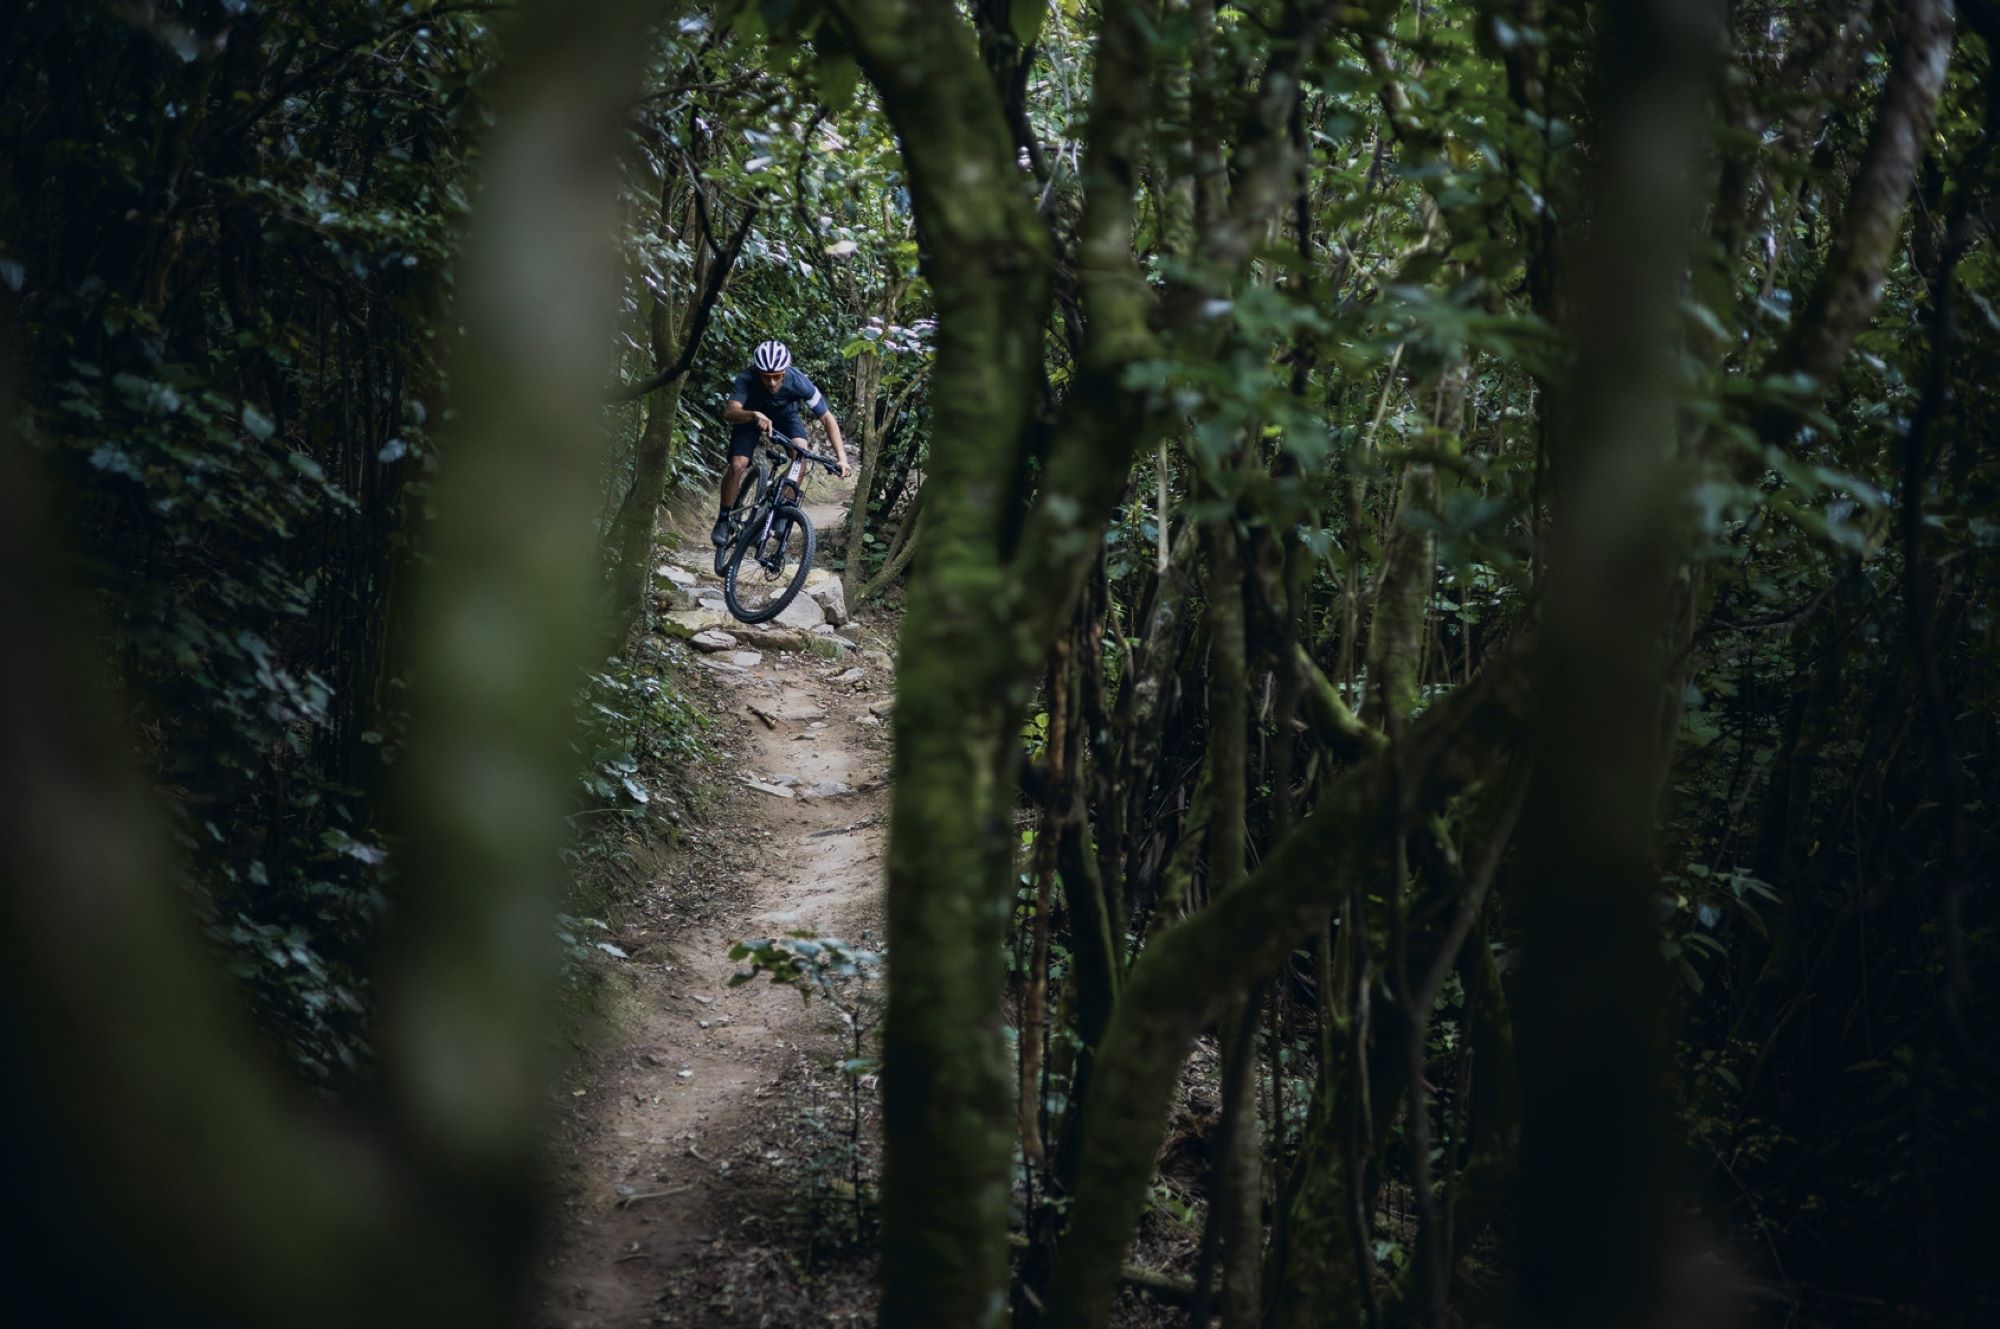
Descending on the Hei Hei dished out no surprises. On lower-grade, smoother trails, it flat-out rips, and to my surprise, I scored some Strava PRs on sections on just my first outing on it. When the trail tips down and things get a bit spicy, the Hei Hei is a bit more of a handful but can still handle steeps and drops up to the level of its pilot; just a bit more finesse is required. I found that I really had to keep a lid on my excitement, or I’d rapidly run out of talent and travel.
Thanks to the refined pivot placement, the Hei Hei is now a more efficient pedaler, particularly when out of the saddle with the power down; the suspension really pulls the rear wheel into the ground, propelling you forwards. Seated climbing is decent, thanks to the relatively steep seat tube, which puts a rider in a comfortable position with just enough weight over the front of the bike. On technical trails with steps and crux moves up or over roots, the higher-than-average bottom bracket height comes in clutch. I was able to pedal through sections where, on other bikes, I had to be more mindful of where I was placing my cranks.
The new suspension kinematic feels good, with a progressive-to-linear leverage curve that provides a nice, supple and consistent feel throughout the travel. It feels more lively and bottomless than the previous bike, which was more difficult to get feeling ’just right’ than this tenth generation.
I reached for the lockout on longer, smoother climbs or gravel roads. Once locked out, the bike sits up nicely in its travel, helping to maintain an efficient posture for spinning up lengthy climbs.
Final thoughts
If I had to have just one bike, something along the lines of the Hei Hei would suit most of the riding I do, and probably many of those reading this as well. Trail ripping, marathon racing, after-work blasts and multiday backcountry missions, it’s up for anything.
The Hei Hei is a workhorse of a bike, with no electrics, no headset routed cables, and really no frills. It’s a simple platform that performs across a wide range of terrain. I’d be happy to take the bike on the largest of missions anywhere in the world.
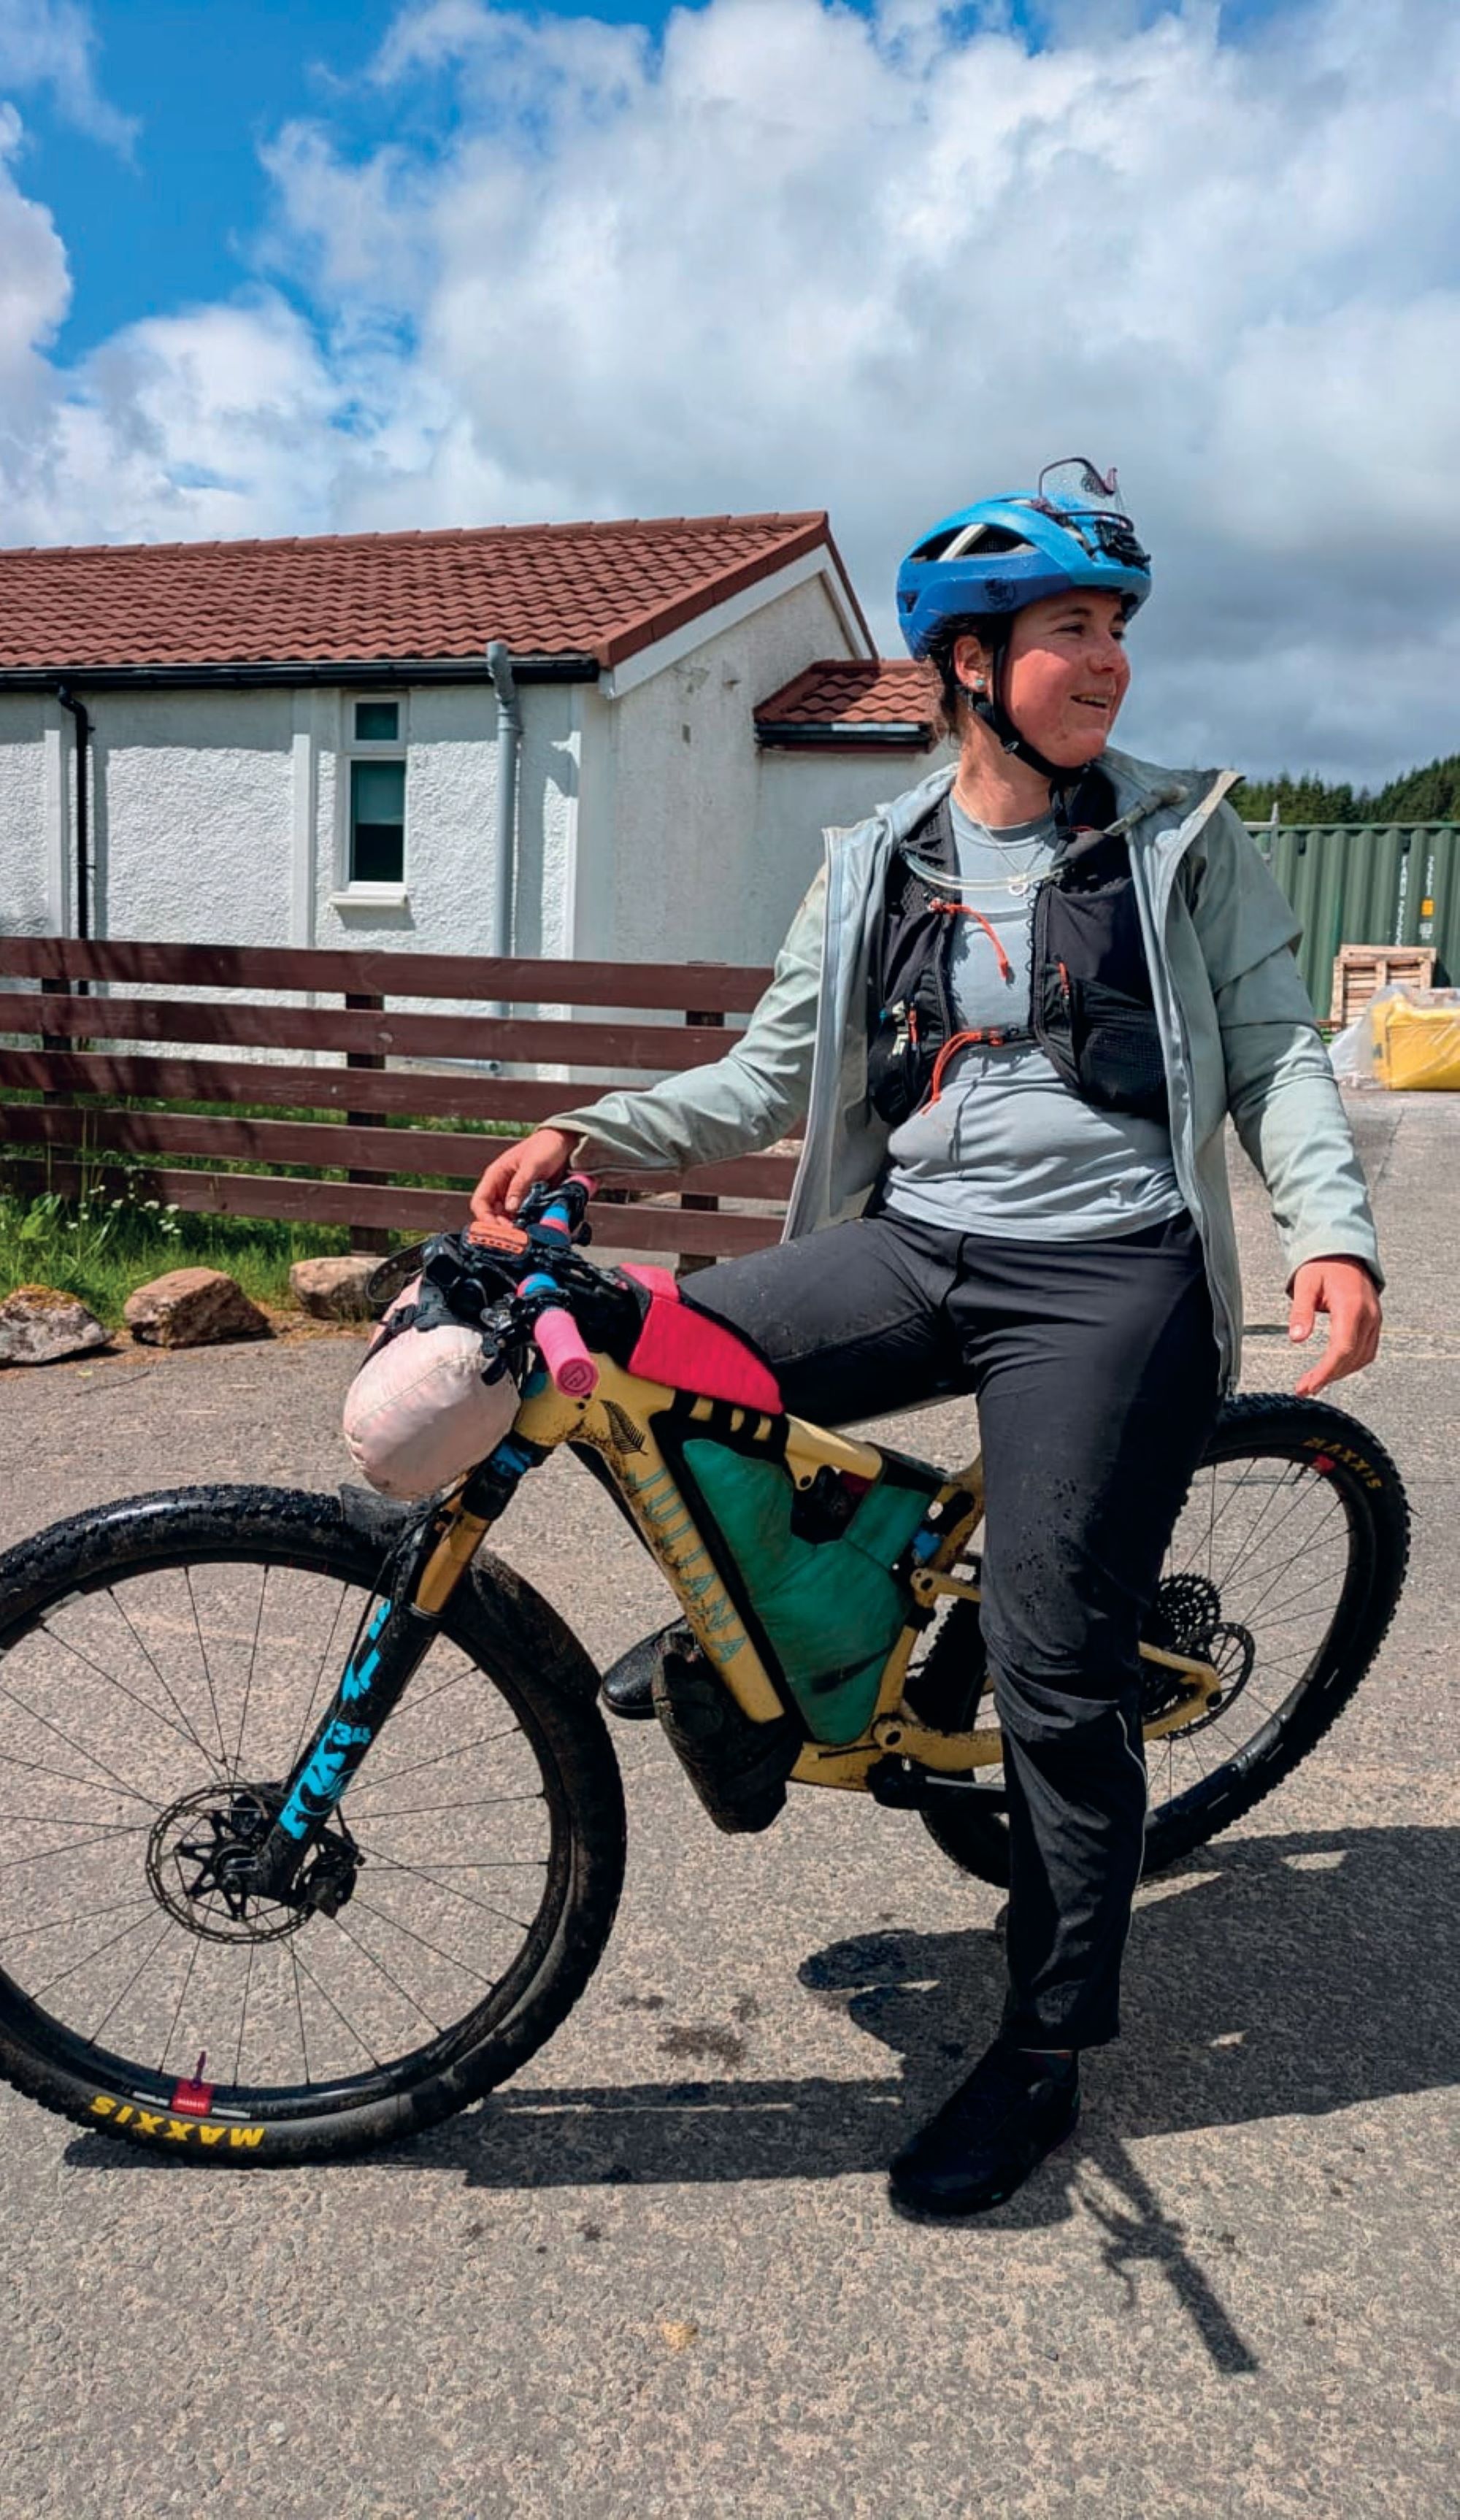
Interview: Emma Bateup Highland Trail 550 Winner
Words Liam Friary
Images Lisa Ng, Henry Jaine & Emma Bateup
Recently, Emma Bateup made history as the first woman—and seventh overall finisher—of the 2025 Highland Trail 550 in Scotland. She completed the gruelling route in an impressive four days, four hours and 27 minutes.
Mental Game.
Your recent success at the Highland Trail 550 was one for the books! At what point during those four days did you realise you weren’t just competing in the women’s category, but potentially setting an entirely new standard?
“I felt like I was riding well from the start; I was feeling good and around people I knew were fast. It was on the second afternoon that I checked the tracking and saw that I was sitting in third place, which blew my mind. Prior to that I’d mostly been focusing on myself and where the second placed woman was (Kerry MacPhee and I had such a close race until she had to pull out). Unfortunately, then I started overthinking it and made time costing mistakes. But it was very cool to feel like I was part of the whole race. As the sport is getting faster, it’s becoming more common for women to be pushing the pace too and riding into strong overall placings. It’s pretty special to be a part of that.”
Home vs. Scottish Highlands.
Coming from New Zealand’s adventure racing scene to Scotland’s Highland Trail 550, how did your experience with New Zealand’s challenging terrain prepare you for the unique demands of Scottish bikepacking, and what surprised you most about the differences?
“I knew going into the race that the terrain and weather would be similar to NZ, so it was nice to feel fairly at home straight away. To have experienced plenty of challenging river crossings with bikes proved to be valuable, a big part of which is knowing when to not attempt a crossing. Sometimes it’s better to come up with an alternative plan or wait for other riders to cross together. The weather was a big factor in this year’s race, with one of the worst editions they’ve had. Living in Wellington for the past few years set me up perfectly, the wind and rain was on a par to a stormy day back home (so just four days in a row of it!). Having experienced similar conditions frequently, I was confident in what I’ve learnt about clothing choices and trusted the gear I had. The biggest difference I found was the daylight hours, especially in the northern part of the route. One night never got completely dark, there was still a faint glow behind the clouds. This meant that riding through the night was much easier, and I never quite lined up my few sleeps with darkness; the combination of cold and light skies didn’t result in much sleeping anyway! On a lot of the trails there were drain ditches built across the trail with rocks, all varied in size, some easily hoppable and a few not so much. It took me a while to get confident on them and on a few I misjudged the size, resulting in flat tires.”
Solo Sufferfest.
The Highland Trail 550 is notorious for its hike-a-bike sections, unpredictable weather, and river crossings. Can you walk us through your lowest moment during the race and how you mentally reset to keep pushing forward?
“My lowest point was on the morning of day four; I’d missed two key resupplies the day before due to a tactical error and ended up rationing my food for over half a day. It ran out with a while to go to the next town, and the hunger kicked in. My energy levels got super low and with it, my mental state. There were a lot of tears! But I kept reminding myself that the quickest way to solve it was to get to the next town so that kept me moving forward. The motto was ‘the only way through is through’. Pulling out was never an option; the long trip from NZ is very good motivation to finish a hard race.”

Key Equipment & Statistics.
Given your completion time and the technical demands of the route, how do you balance carrying enough gear to handle emergencies, with maintaining the speed necessary to be competitive? What’s the one piece of equipment that saved your race? Do you have overall stats of race data, food, and travel to/from?
“Finding the balance between being lightweight and prepared/safe is something that’s coming with experience. After a big learning moment during an event earlier this year, a key takeaway was that being lightweight doesn’t necessarily translate to being fast. I’d had to stop and find shelter because I wasn’t carrying enough clothing to keep moving, which lost me far more time than just carrying a bit of extra weight would have. Going into the Highland Trail I knew that sleep wouldn’t be as necessary due to the length of event, so I took more clothing to use while moving instead of sleeping gear. The most important part of my kit was my Ground Effect raincoat—I pretty much lived in it! Even when it wasn’t raining the wind chill was a big factor so using it as a windbreaker kept me cosy.

Adventure Addiction.
You’re described as someone who’s “always plotting and planning the next endeavour”. With Highland Trail 550 conquered, what adventure planning is currently keeping you awake at night?
“The next big adventure on my horizon is the Tour Te Waipounamu early next year. This is the event that kicked it all off for me and it’ll be my third time racing. My brain is already swimming with ideas for gear setup and race strategy; with every event comes a heap of learning, so I’m always excited to put it into practice. There are a few local challenges that will make for a good leadup, along with a few ‘shorter’ races to keep things interesting!”
The Women’s Field.
Your victory puts a spotlight on women in ultra-endurance bikepacking. What do you want to say to women who look at events like Highland Trail 550 and think “that’s impossible for me”?
“The most important thing is just to start. Start with something small and work your way up. No one got anywhere overnight, it takes lots of small steps to get there. Push your boundaries at the pace you feel comfortable with, and with challenge comes experience and confidence. I’m a big believer of jumping into the deep end, which isn’t for everyone, but you’ll find that your limits are so much further than you think.”
Cost-Conscious Components
Words Lester Perry
Images Thomas Falconer
“Take a sad song and make it better” – Hey Jude, the Beatles. If they’d been mountain bikers, they may well have called
the song “take a new thing and make it better”.
It’s only natural that in times of rising living costs and high inflation, the tools we use for our hobby will also increase in cost – and they have! The price of new bikes continues to climb, and the cheapest way to get an improved ride is not necessarily to buy a completely new bike, but perhaps upgrade key parts on what you’re already riding, although, those too are getting more expensive.
Regardless of whether you’re looking to upgrade an aging bike or make some changes to a new but low-spec ride, we’ll take a look at some ways to get better performance by making incremental, meaningful upgrades without blowing a massive wedge of cash in one hit.
Frame
Beginning with the most expensive single part, and heart of the bike, the frame. Unless the bike is a couple of generations old, the most significant change that platform has undergone is likely a change of colour, or at best a minor tweak in geometry. Most brands run on a 3-year development cycle so, unless they’ve recently made a fundamental change to their lineup or a particular model, chances are the bike you’re riding (unless it’s over six years old or slightly unusual) then it’s likely that, with some tweaks, it could be made to ride similarly to that shiny, front-page-of-Pinkbike, rig you’ve been gawking at the price tag of.
Perhaps the frame you’re on is just not up to the task any more, but its components are still OK. If it’s time for a change, an alloy frame could be the ticket to modern geometry and tech without the price tag of an otherwise identical carbon frame. Although the most obvious difference between an alloy and a carbon frame is the price tag, there are other differences too. The weight can’t be overlooked; an alloy frame is generally at least 500g heavier than a carbon equivalent, although often that figure can be closer to 1-1.5kg. Depending on what sort of riding you’re doing, that extra weight may or may not make much of a difference. In other words, the more pedal-focused a ride, the more the weight counts. It’s worth noting that, in general, the alloy frame sits at the lower end of their range, meaning less development and construction tech goes into it. These things keep the price down, but they do impact the weight and ride quality. Frames from brands that’ve adopted an ‘alloy only’ philosophy, like Commencal, differ slightly in that they’ve put more time into tuning the bike’s feel and flex through more advanced tubing, so arguably these offer a better ride quality. These will usually cost more than a basic alloy frame, but still less than a carbon one.
There’s another glaring advantage with an alloy frame. Once the bike has been through its lifecycle and it’s been thrashed beyond recognition, the frame can be recycled, not just turfed on the scrap heap. Carbon frames aren’t recyclable in NZ, or in most of the world. Although factories have made their manufacturing processes as green as possible, the fact remains that broken or old carbon bikes don’t break down, and instead last forever at their final resting place.
Say, for example, you have an older, but still current enough, carbon frame that’s perhaps sustained some damage – for argument’s sake let’s say it has cracked around a shock mount. If the frame is under warranty, it’s worth beginning with that process as soon as possible; however, if not, all is not lost. A good carbon repair specialist, in many cases, can repair a cracked frame to be as good as new, getting you back on your bike, preventing a carbon frame from ending up in the landfill, and saving you some head scratching as to how you’ll afford a new frame. A carbon repair will almost certainly void the warranty of a frame unless it’s approved by the brand, so be sure to explore your options before committing to a repair if the frame is still in a warranty period.
Let’s say you’re happy with your frame, or you’ve saved some money by purchasing a bike with a decent frame that’s got a low spec on it, aiming to upgrade parts over a longer term. Which upgrades are worthwhile adding to your ride experience, rather than just being a change for the sake of it?
Frame Bearings
Even the latest frame from a reputable brand could have dodgy bearings, limiting how supple its suspension is after just a few rides. Rough or sticky bearings drastically affect not only the levels of grip at the tyres, but also the overall bike feel and enjoyment, as more bumps will be transmitted to the rider.
Staying on top of frame pivot axle and bearing health is key to keeping the suspension running optimally. There’s no point working on tuning or servicing a rear shock if the frame bearings aren’t running freely. A good place to start is to remove your shock and cycle the rear end through its travel. If it’s anything other than completely smooth, we’d recommend removing all pivot bolts and axles to inspect them and the bearings. Hopefully, a simple clean and grease of axles and bearings may remedy the issues. Simply use a small pick and carefully lever off the outer bearing seal. Using a degreaser on a brush or from a pressurised can, can help clean existing grease from inside a bearing if it’s not looking fresh. Pack the bearing full with a bike-specific bearing grease before pressing the seal back into place. If you’ve found a seized bearing or popped a seal off to find rust within one, then it’s time for replacement. A clean and regrease can easily be done at home if you have tools, a little know-how, and some time to watch YouTube tutorials. Bearing replacements are best undertaken by a bike mechanic, although if you have the correct bearing press already, then chances are you know what you’re doing already.
Free-running frame bearings are a simple way to help renew a frame and make the bike feel like a million bucks again.
Brakes
Effective brakes are an integral part of a ride experience, and as they can degrade slowly over time, you may not even realise how bad they’ve become. A good set of brakes with consistent power, feel, and modulation will do their job without you even thinking about them. If you have doubts about the effectiveness of your brakes, this is a great place to consider an overhaul or replacement.
New pads and larger, or unworn, rotors should provide better stopping power than you currently have. If fitting either, it’s worth bleeding the brakes at the same time. A brake bleed ensures your braking isn’t hampered by old fluid or air in the brake lines. If a bleed, fresh pads and new rotors aren’t going to be enough to resurrect a pair of brakes to their former glory, and a full service isn’t likely to help them (a good bike mechanic will know), then new brakes could be in order.
Some brakes have a limited lifespan, particularly some models that use DOT fluid, as their seals swell and degrade over time. Although they can be repaired, it’s usually more cost- effective to replace the entire brake. Don’t stress about needing top-of-the-line brakes; Often, the internals of a brake lever and calliper are identical, or close to it, across a range and in most cases, the only difference between the top level of a range and the bottom is a different finish and a small amount of weight – this of course is reflected in the price.
Fork
As with brakes, the differences between various levels of the same model are few. Weight is generally quite close between the levels, but it’s the internals where the most obvious performance differences are.
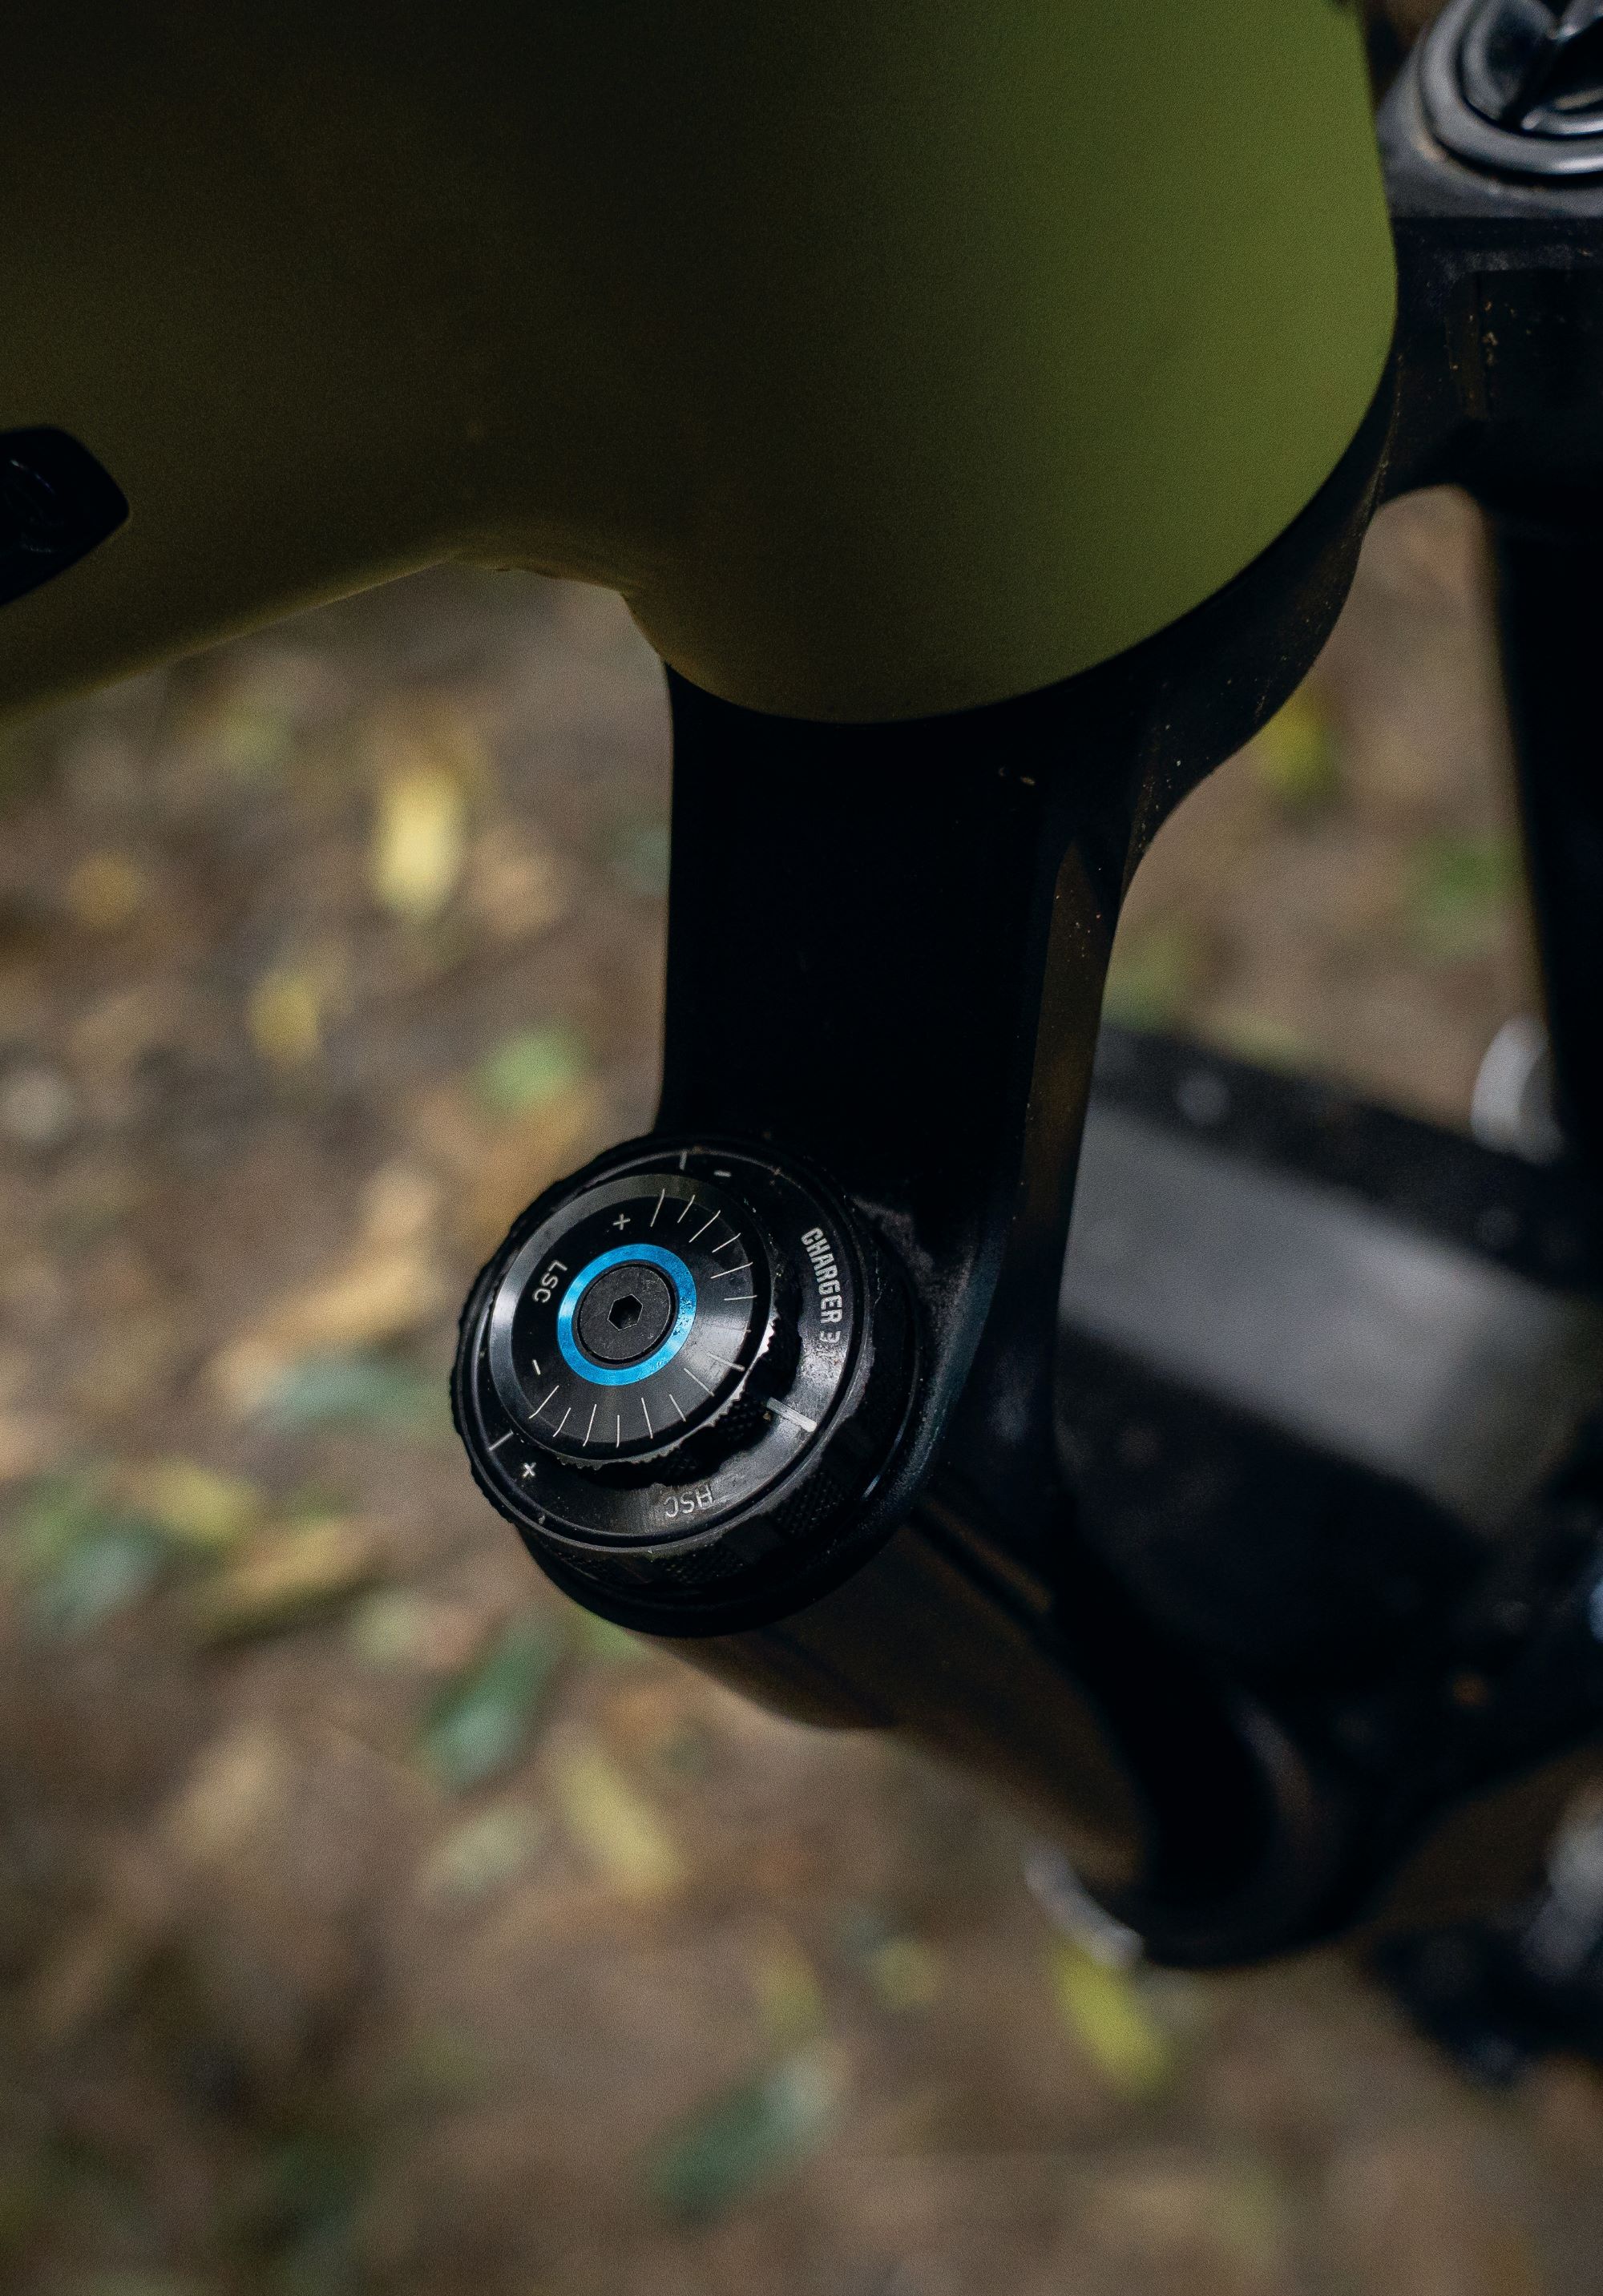
The simplest way to rejuvenate an existing fork is to give it a service and, depending on how long it has been since its last service, this could be a simple procedure or a complete tear-down. If you’re chasing performance above what the fork was capable of when it was new, a damper upgrade could be just the ticket.
A damper upgrade on a low to mid-range fork is the most significant performance gain available to a fork. In most cases, a low-end chassis can fit the top-end damper from a given model, meaning you could end up with a low-end chassis with high-end internals and performance.
One example where a damper upgrade is better than a replacement fork is on the front of a frame we’ve been using as a review mule. The fork is a couple of years old – a Rock Shox Lyrik Ultimate—and by no means a low-end offering, but technology has moved on from when this model was in the market. During a service, while the fork was in parts, a new Charger 3.1 damper was fitted. The upgrade offers wider, more useful adjustability, better small-bump compliance, and less harshness – what’s not to love? For a fraction of the price of the most recently released model, this fork was upgraded to perform identically to the new model.
Similar upgrades can be made to most brands’ forks. Although there are limitations that dictate the extent of the upgrade and the advantages gained, if your existing fork is in good condition and you’re looking for a better experience, fork upgrades are a great option.
Tyres
For under $200, you could make your bike feel completely different. Fresh tyres enhance all aspects of how a bike rides through by providing increased and more consistent traction. Depending on where you ride, a faster tyre with lower knobs than you currently have could be much quicker and still offer an acceptable level of grip for your local trails. If you’re running some OEM (original) tyres supplied on a new bike, the change to something similar but with better sidewalls and rubber compound could mean a huge step up in handling and confidence, although visually they may not look too different.
If you’re not already running a tubeless setup, this is a worthy investment, although it will likely require a new set of tyres if yours aren’t designed to run without tubes. Tubeless offers better traction, improved puncture resistance and the ability to run lower pressures for better handling and traction.
There’s a lot of subtlety with tyres, and what’s ideal for you depends on how and where you ride, as well as a certain amount of personal preference. New tyres are a great place to look for performance gains. Just be sure to spend some time experimenting with tyre pressures to find what’s optimal for you.
Wheels
Don’t overlook wheels as a place to get some simple performance advantages. Much like frame bearings, new or freshly serviced wheel bearings make a surprising difference to how a bike rolls and maintains speed. Beyond servicing what you already have, if the wheels are overly heavy or beyond repair, a fresh pair could be in order.
OEM wheelsets are continually improving and, generally, now offer a decent build quality and weight for a price point. If your wheels are reasonable, but rolling on cheap hubs, simply stepping up the bearings to something faster rolling will make a difference. Often to shave dollars, OEM hubs are spec’d with sub-par and short-lived bearings, while the rest of the wheel is pretty reasonable, so replacing them gives great bang for buck.
Depending on the style of riding you do, where you’re riding, and how much budget you have to spend, there are a lot of options available for complete wheel replacements. Lighter weight means a bike will be more nimble, but different rims and builds also have different stiffness characteristics, so there’s a bit to consider. Much of the time, it’s going to come down to a balance of price, weight, and overall quality. Don’t overlook some of the large bike companies’ aftermarket offerings when it comes to an outstanding balance of these three qualities. Particularly Specialized’s Roval or Trek’s Bontrager complete wheel sets, which offer fantastic value and are legitimately good wheels.
Dropper Post
Most bikes come out of a factory with a dropper post that is suited to the middle of the bell curve of what height rider is likely to be riding it. Unfortunately, this can mean you may end up with a post that has either too much or too little drop. Too much, and it’s too high at maximum height when extended. Too little drop and the post won’t drop the saddle as low as would be ideal.
There are multiple dropper heights available, ranging from 80mm to 240mm, so you’ll likely find one that suits you, regardless of your height. However, you may need to try a few options to find the optimal one.
There are limitations, particularly with older frames, as to what length dropper they can handle due to shaped seat tubes or hardware interfering with insertions. With a bit of research and a tape measure, you should be right. It’s not the cheapest upgrade, but the optimal length dropper is an ideal place to spend some money, particularly for those who are battling with what they’re currently running. Particularly if your current dropper needs some love, a new and better optimised unit would be money well spent.
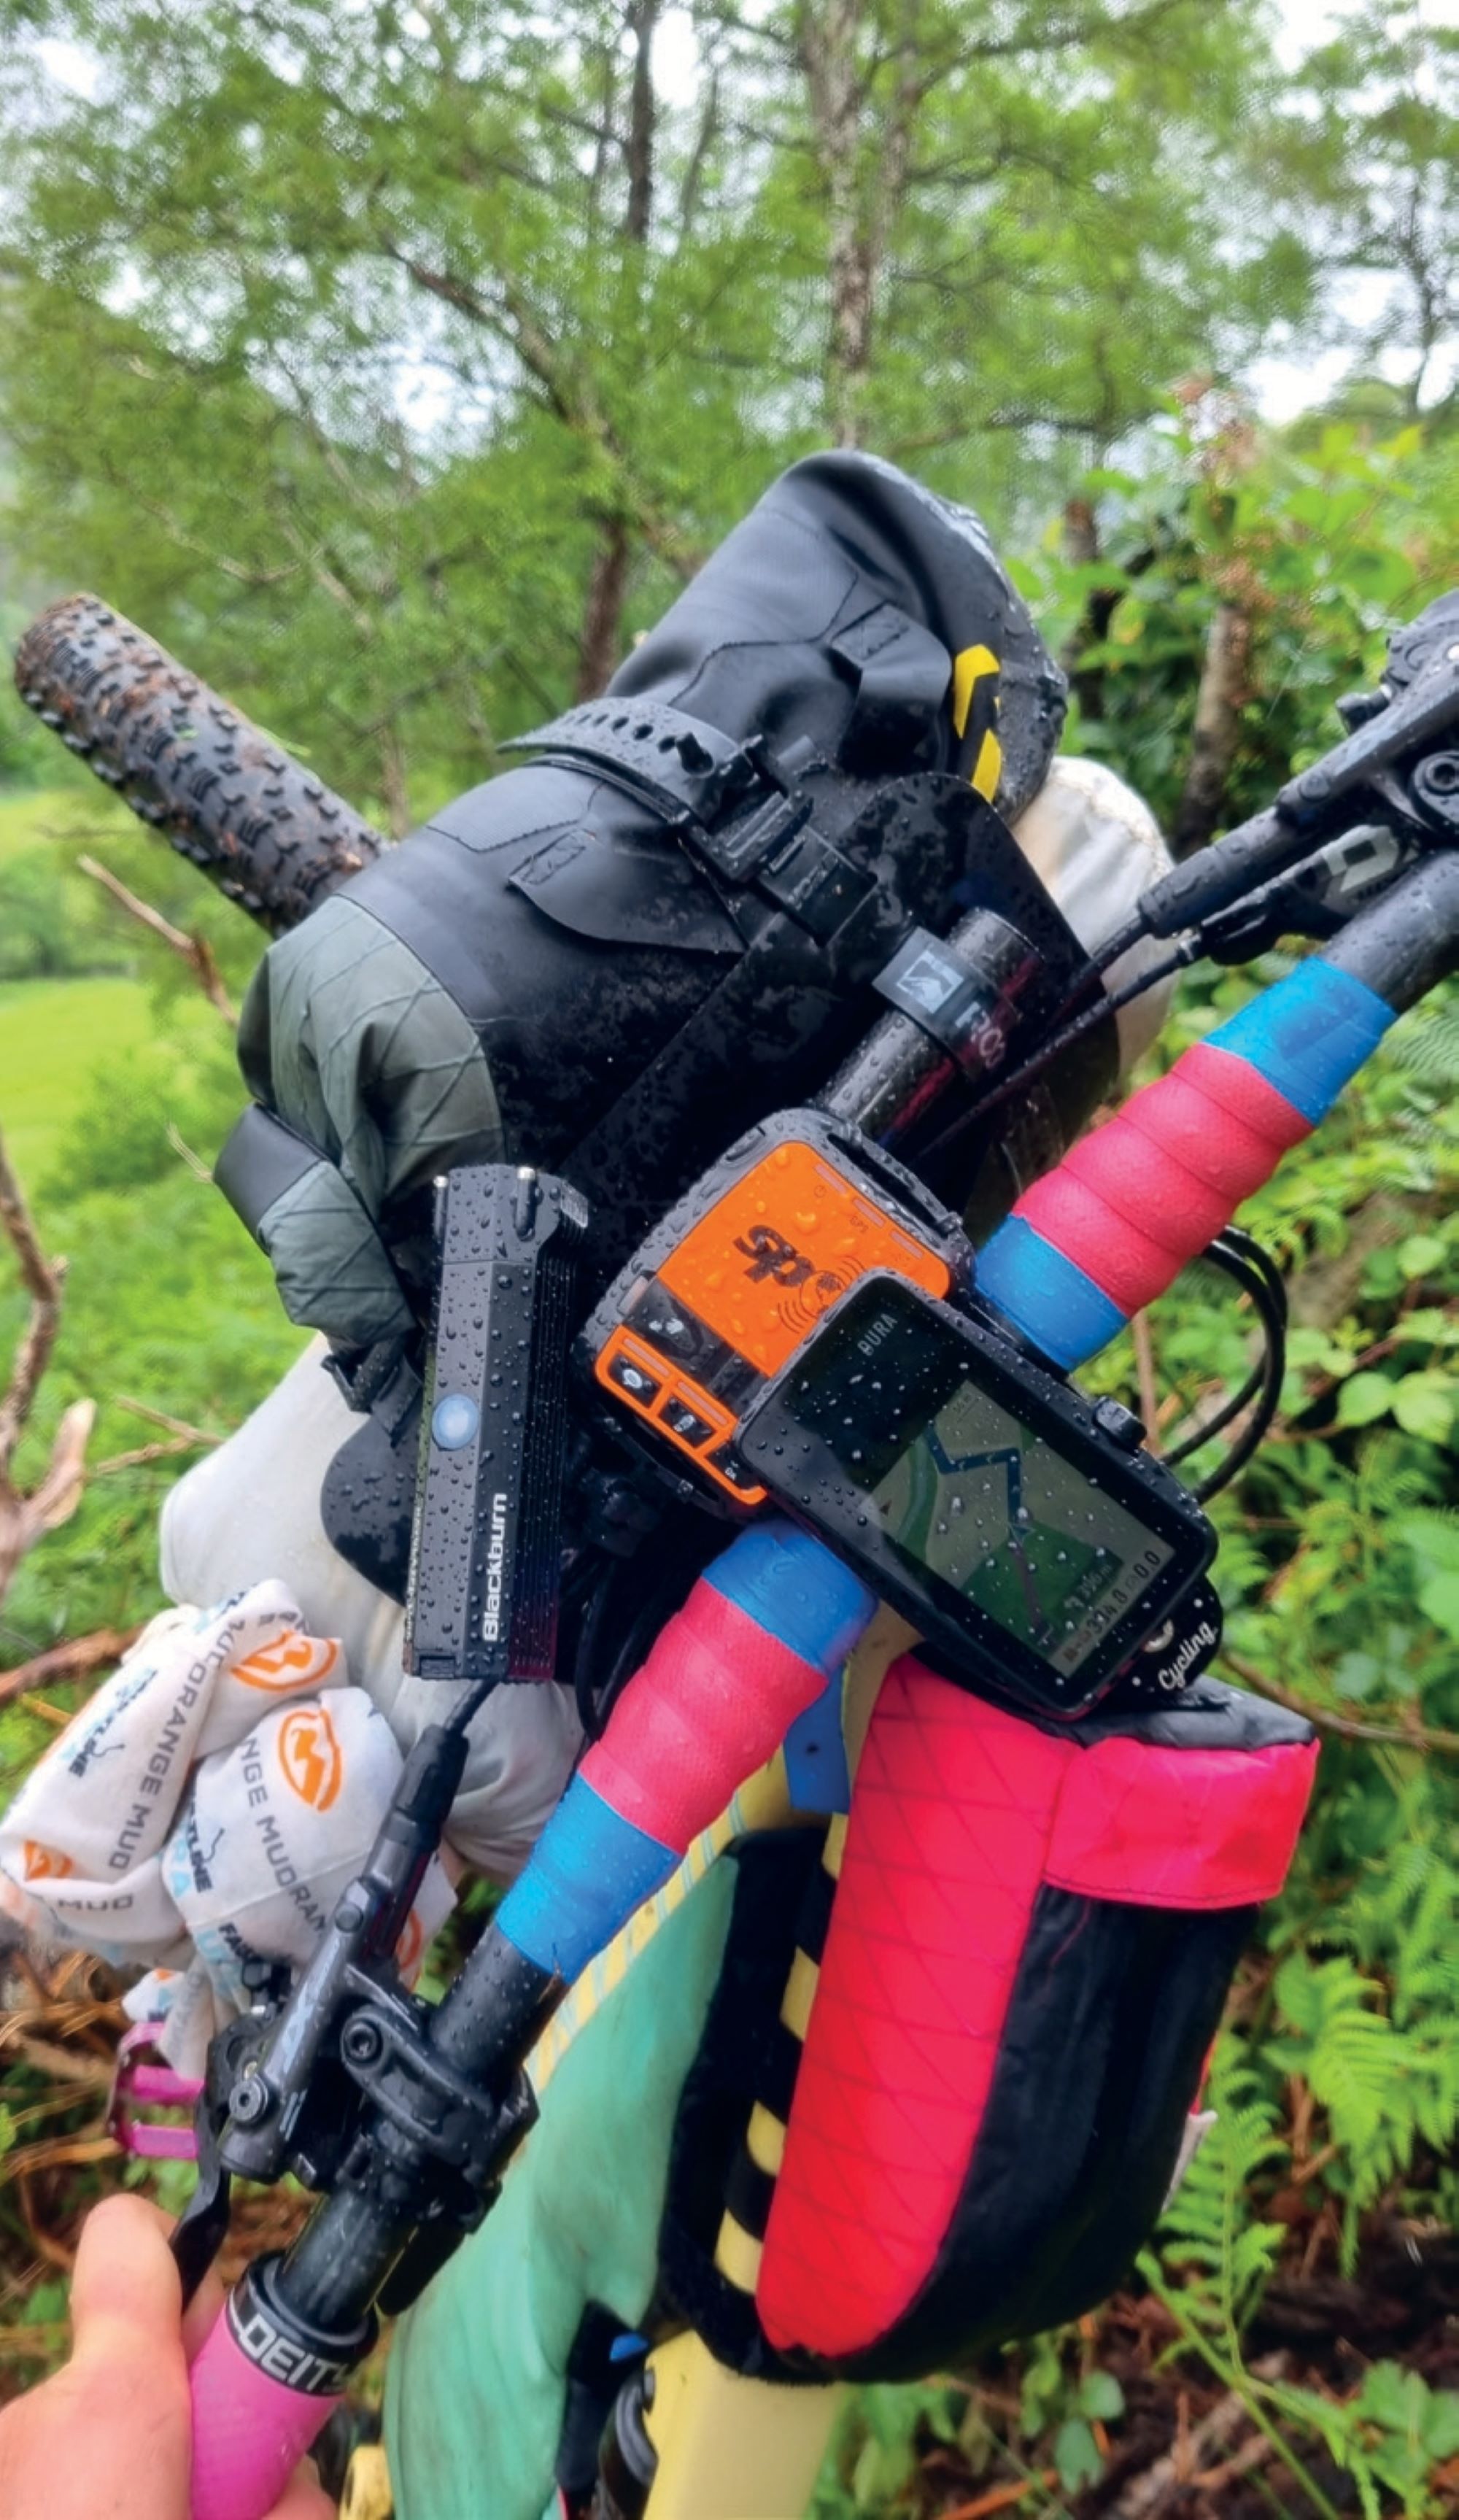
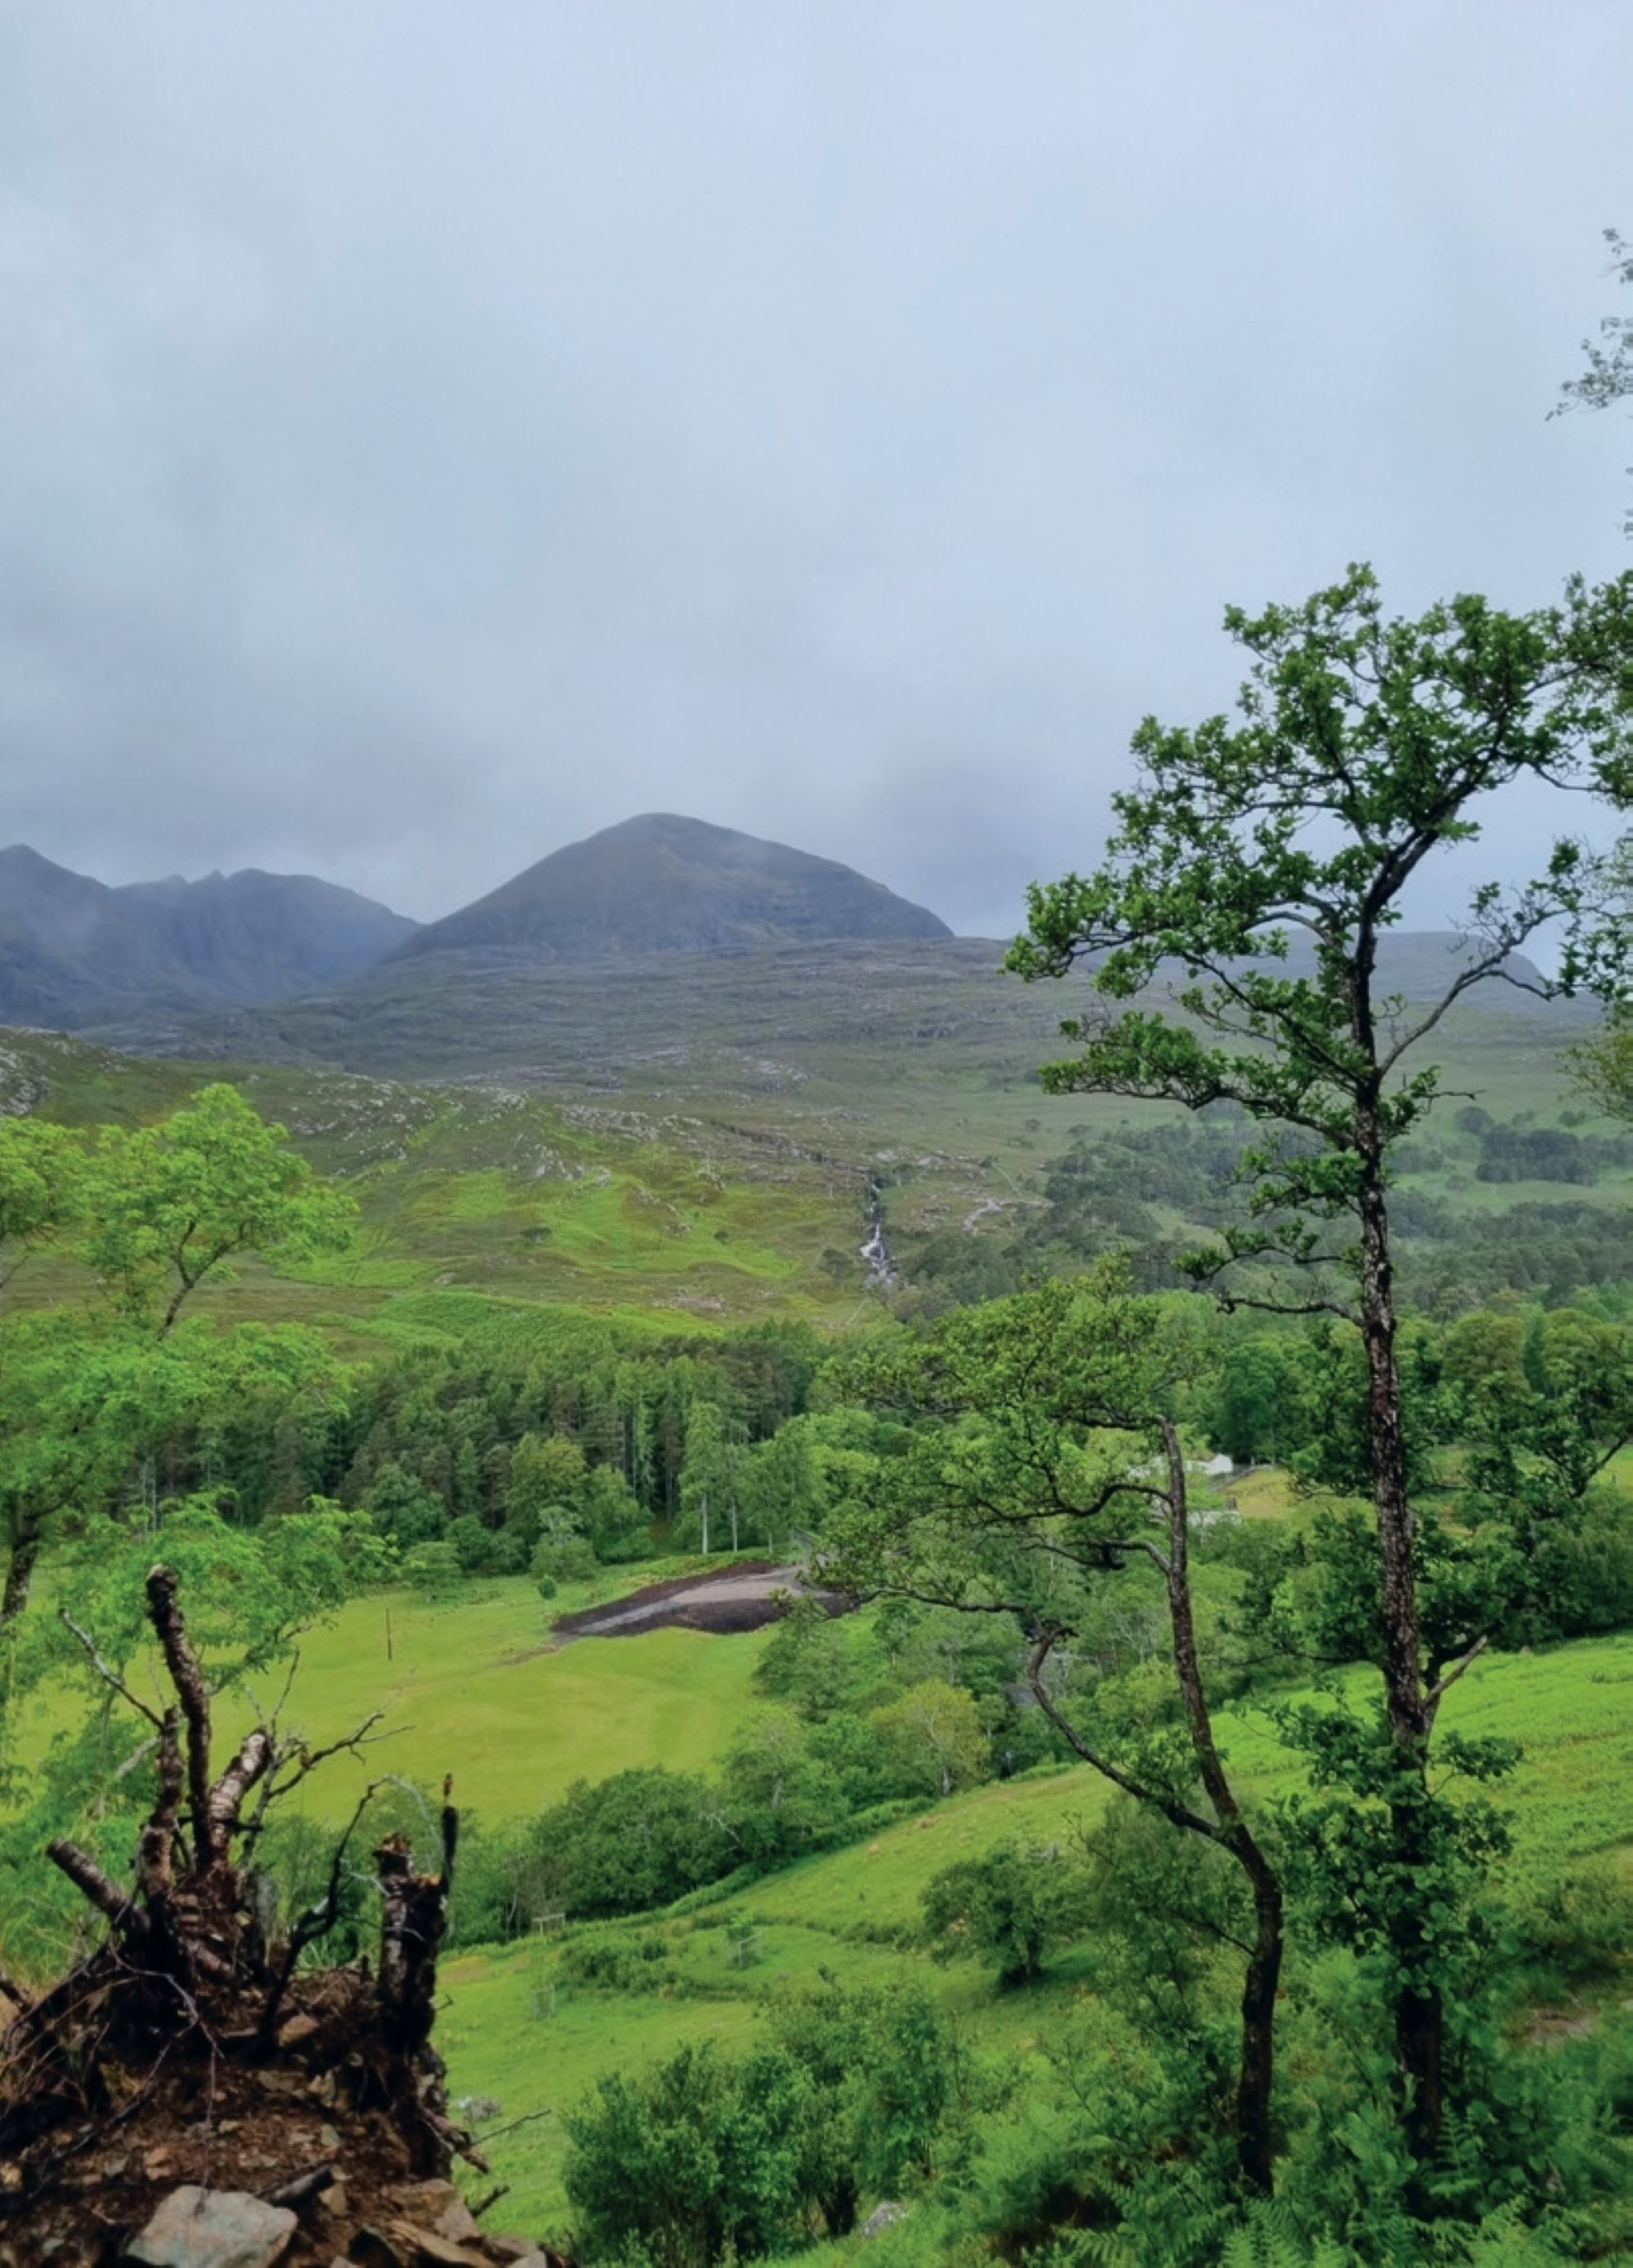
The Kahurangi 600
Words Lester Perry
Images Sam Horgan
The Kahurangi 500 is a bikepacking route on the northwestern side of NZ’s South Island, looping around the Kahurangi National Park and surrounding areas. The K5 is generally ridden from Motueka, covering around 500km. In our case, though, to ease logistics, we started and finished the ride in Nelson, pushing the lap to roughly 610km.
Riders take the K6 as everything from an FKT attempt to a week-long holiday mode cruise thanks to multiple public huts along the route. We had a varied crew, made up of has-beens and never-weres. Ex-downhillers-turned-enduro dads, an Iron Man, and even a winner of the prestigious Melbourne to Warrnambool cycle race. We wanted the best of both worlds: a solid effort without the sleep deprivation or hunger bonks of a single push. Allowing four days gave us the perfect balance of pedalling pain and long stationary stints, eating, and generally chilling, mainly talking about the good old days.
With the Kona Hei Hei in for review, I figured it could be the ideal tool for the task, as Kona had been singing its virtues as a bit of a do- it-all bike with a lean toward the XC and trail end of the spectrum. I threw on some XC tyres, strapped on some bags, and got to work.
Day 1. 168km, 2100m, 8:45hrs.
Departing Nelson just after dawn, we headed out through coastal cycle trails to Motueka for a late breakfast. Eggs on board, and some bike setup tweaks done, we climbed the main road up the Takaka Hill, a roughly 15km 800m vertical effort. Plummeting down the Rameka MTB track was only interrupted by a flat for Sam Horgan, and eventually delivered us to the Takaka supermarket for supplies. With no proper resupply for the next 24 hours, we were forced to make an unorganised and lengthy meander through unfamiliar supermarket aisles. Another few k’s up the road and we made a stop at The Mussell Inn, a roadside pub, for a large dinner and some live music. A pint each and the pub stop was done just as the night set in. Into the night and towards the head of the Heaphy track, and our bed for the night at Brown Hut. A sketchy fire dulled the blow of the autumn temperatures as we slipped into a coma for night one.
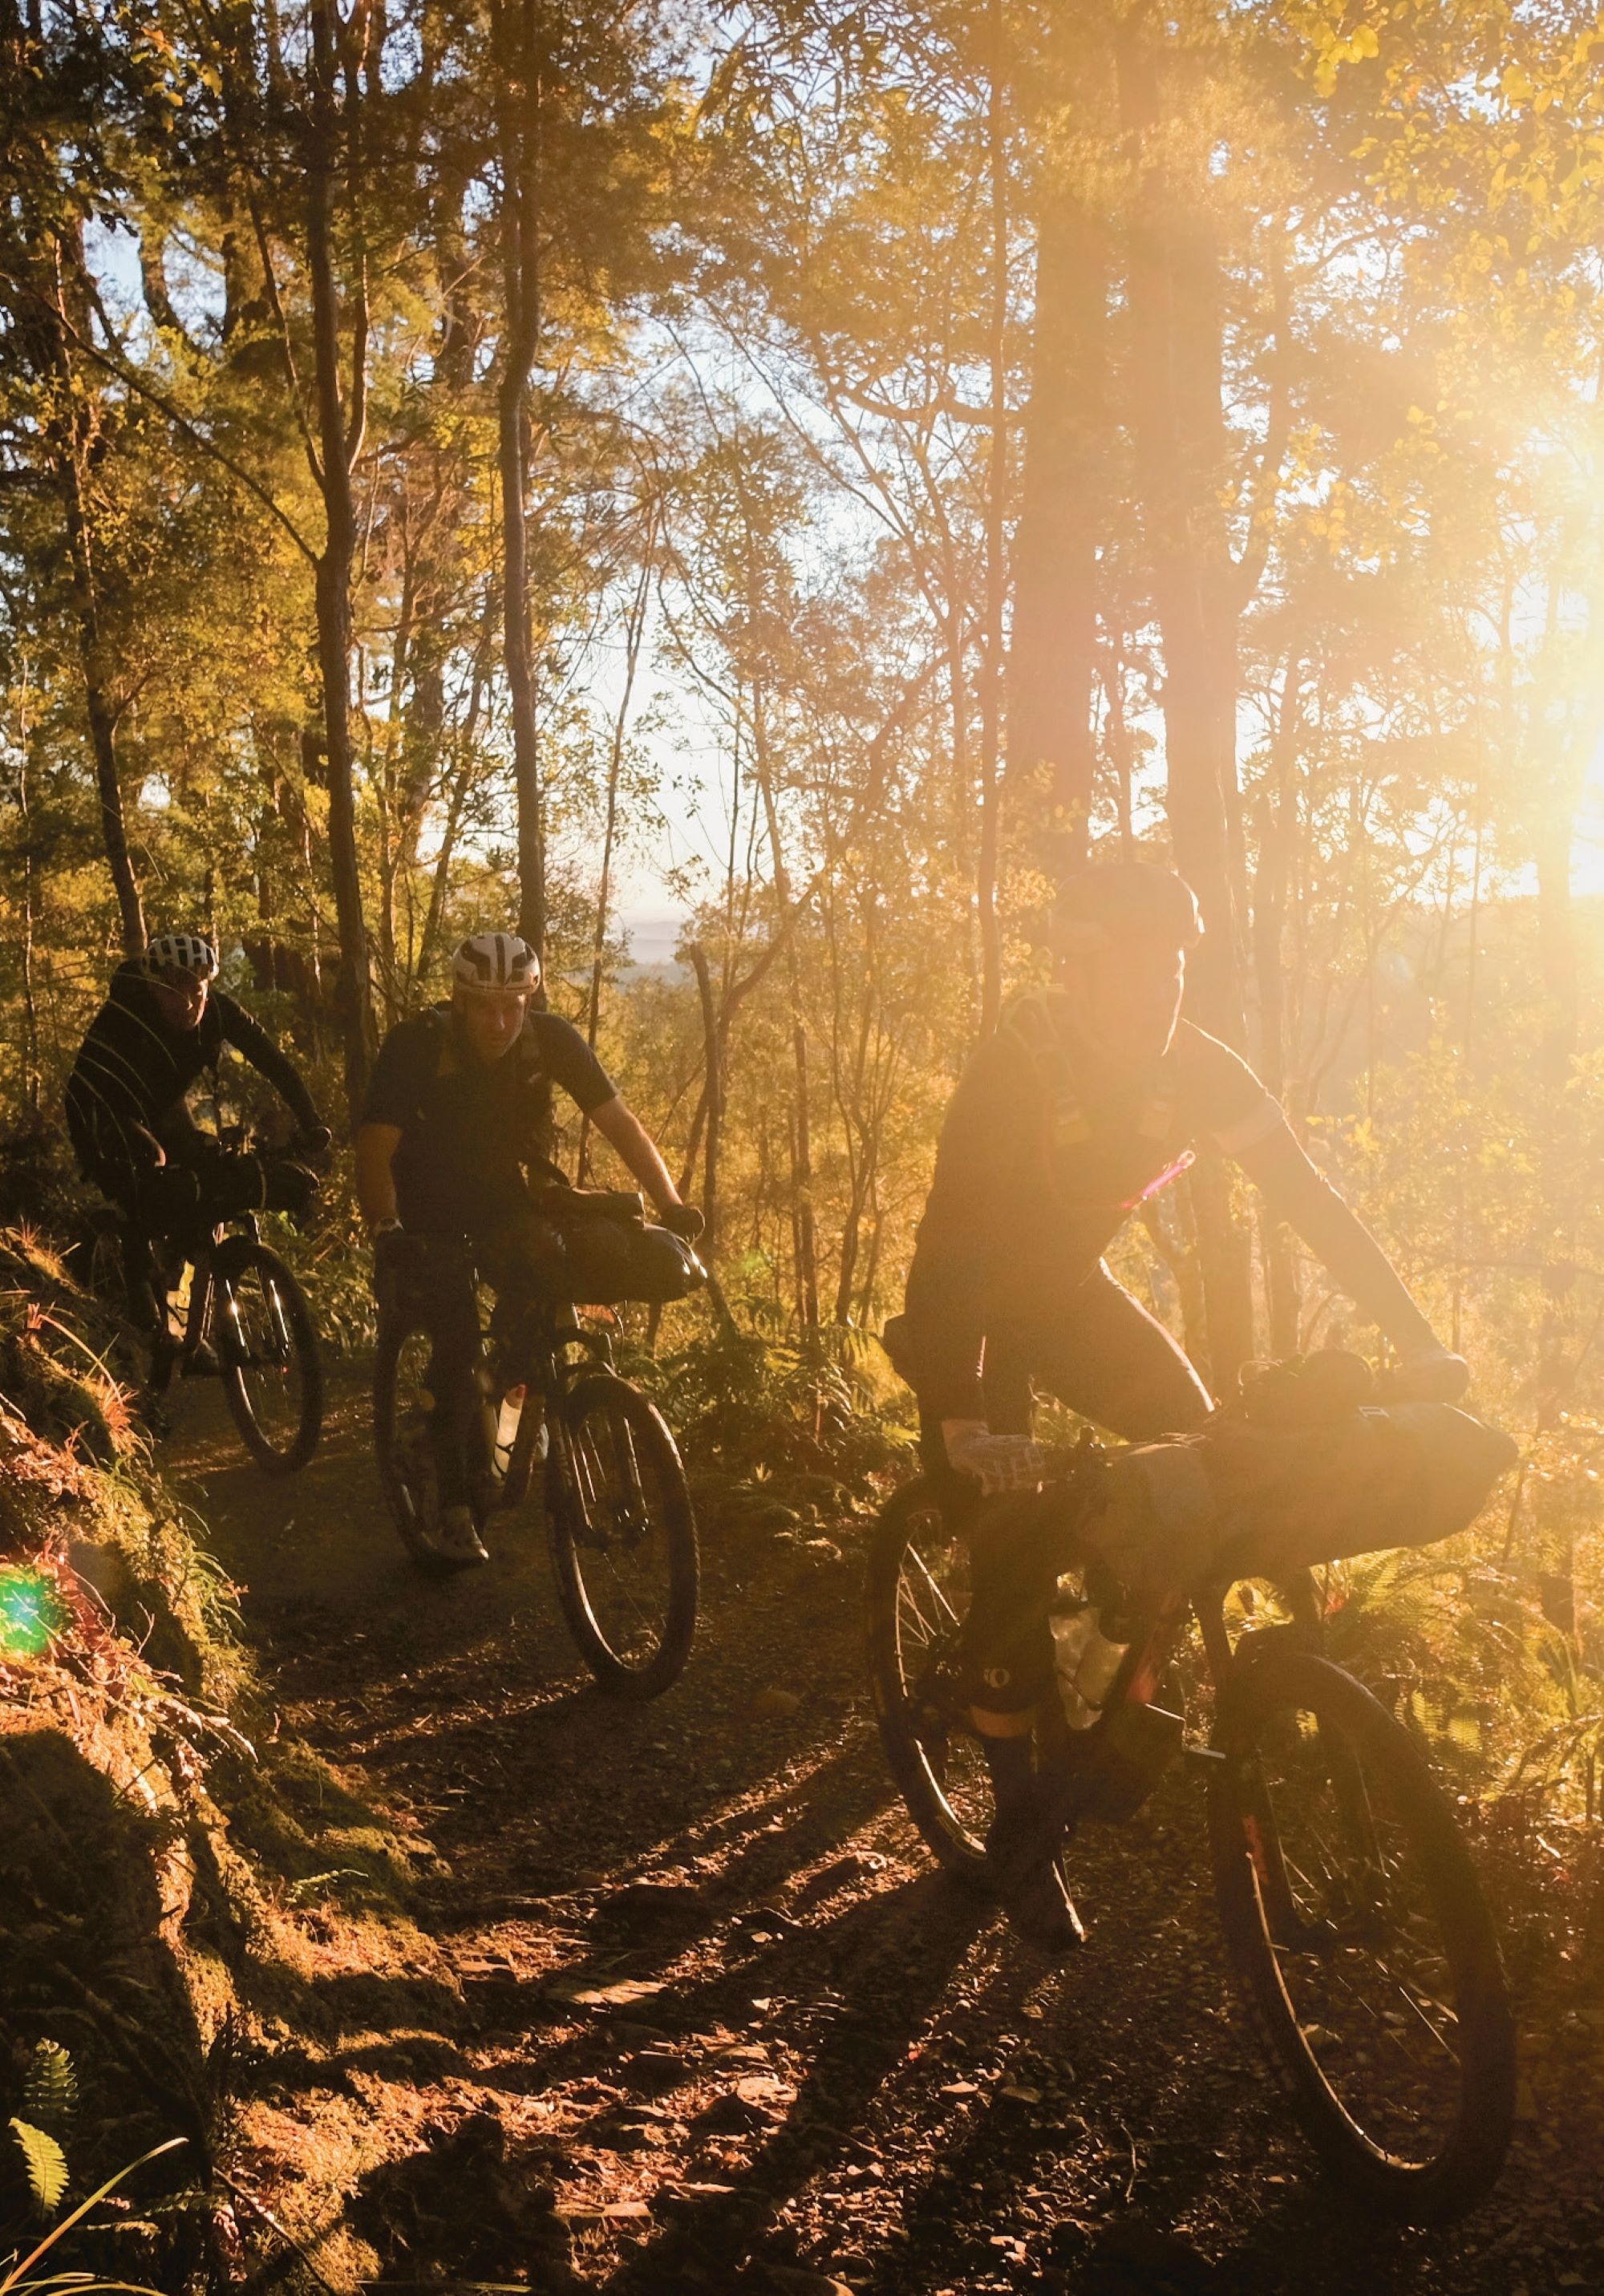
Day 2. 147km 2336m, 9:14hrs.
After a chilly tin of creamed rice and over an hour of faff, we set off into the Heaphy, only to stop metres in, to remove our lights that we’d just fitted as the sun was up, smashing our intention to be on the trail pre-dawn. The Heaphy is an underrated backcountry trail featuring some great sections of fast-flowing trail. Unweighting the bike to dodge sharp rocks was a challenge thanks to the added weight of loaded bike bags. Today was James Rennie’s turn for an issue. As the clock struck noon, James slashed his tyre, dumping all its air and most of its sealant onto the greasy rocks. Tyre plugs were ineffective, so a makeshift tyre boot was fitted, and James completed his fix with multiple wraps of duct tape around the wheel and tyre. Sure, it was unorthodox, but it held for the remainder of the trip!
The diversity of terrain through the Heaphy is unreal, from trees hung heavy with moss to stunted alpine growth and, finally, we were spat out on a Nikau palm-lined beach on the West Coast. Riding the road for a solid stretch down the coast, our only solace from the headwind was hiding behind Sam, who by some margin was the tallest and strongest of our group. The sun was slowly starting to dip as we came to our next resupply, the Karamea Four Square.
Now fully loaded with food, speculation was rife as to how many climbs—and how far—it was to our next destination and a lay down. Whatever our guesses were, we were all wrong, especially those of us who ended up riding through to Seddonville, overshooting our destination of Mohikinui, where Sam had ridden ahead to ensure the pub was open and order our dinner. With an extra 10 kilometres under our belt after the Seddonville detour, we arrived at the pub in Mohikinui to meet a somewhat concerned Sam, two beers deep, wondering where we were. All was forgotten after a deep sleep in a campground cabin’s saggy bed.
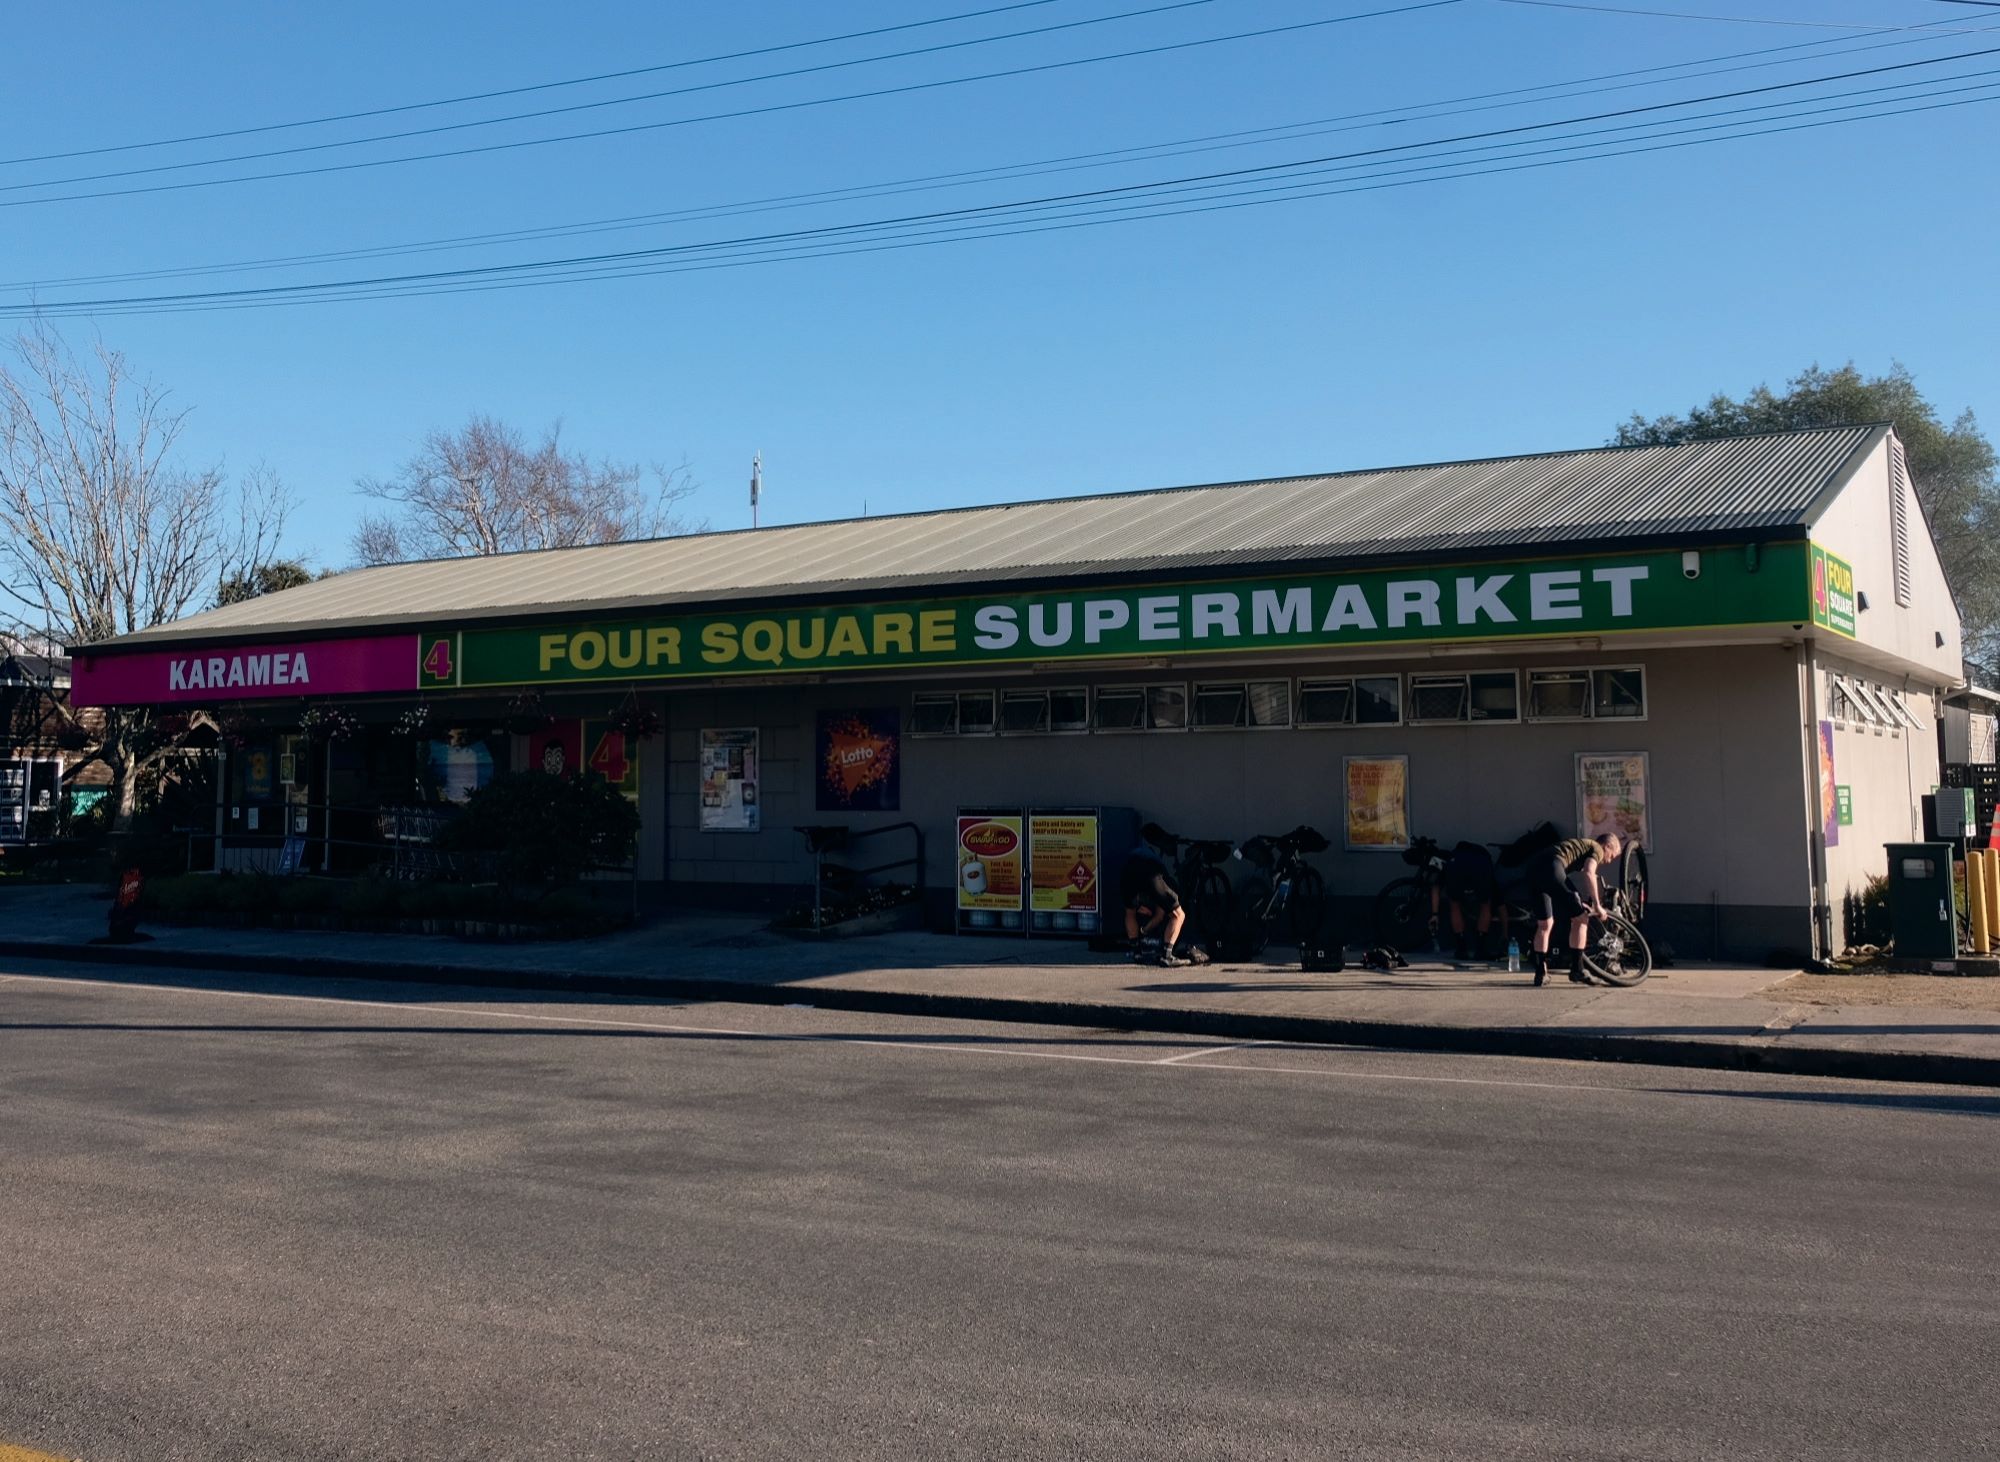
Day 3. 121.62km, 2656m, 9:16hrs.
After the debacle of day two’s extended morning faff, we rose earlier on day three, riding into the rain at 5:45 am. It’s fair to say we were all somewhat dubious about what was to come, not only with the weather but also how tough this day could be, as we would essentially ride the Old Ghost Road in the reverse of how it’s generally ridden.
Climbing from the get-go, we slogged up technical pinches and meandered through dense bush, the last couple of days riding making themself known as the trail began to get steeper as we climbed away from the river.
Skyline Ridge was an absolute highlight of the day. Even on a bike that wasn’t loaded with gear, this would be a tough climb, but add on all the gear, and it was an absolute beast. Steep, rugged switchbacks made picking a line difficult, and traction was a challenge; my legs could only take so much. I was stoked to make it much further than I expected to before detonating, resorting to walking a couple of sections. Arriving at Ghost Lake Hut for lunch, we marvelled at the view and huriedly downed whatever can of energy drink we’d brought with us, washing down yet another muesli bar. A quick top-up of our water supplies and we were climbing once again. Fortunately, it wasn’t long before we were on the main descent, which would take us all the way down to almost sea level. Partway down this descent, we realised the error of our ways. Built to be climbed, this mellow, non-technical descent seemed unending. The only real obstacles to avoid were groups of people slogging their way up towards the hut for the night.
Not far from the bottom, we came across a keen gent who’d been climbing with one of the groups we’d passed earlier. He was descending back to his car at the trailhead, with a completely snapped seat post. Turns out, loading a massive bag with what appeared to be 20kg’s worth of gear, and hanging it from your saddle is a bad idea. Fortunately, it was all coasting back to his vehicle, not a single pedal stroke needed.
Crossing the 21st, and final, bridge of the day, we were done. As the sun dipped behind the hills and we headed into the final stretch of the day, I discovered I’d punctured in the final metres of the trail. A classic pinch flat with air coming out of the tyre bead and further up the sidewall. Mint. A couple of plugs and it was game on for 30k’s of road into Murchison for another FourSquare resupply, a hot roast meal at the pub and a couple of night-caps before passing out in an ice-box of a campground cabin—although no saggy bed this time!
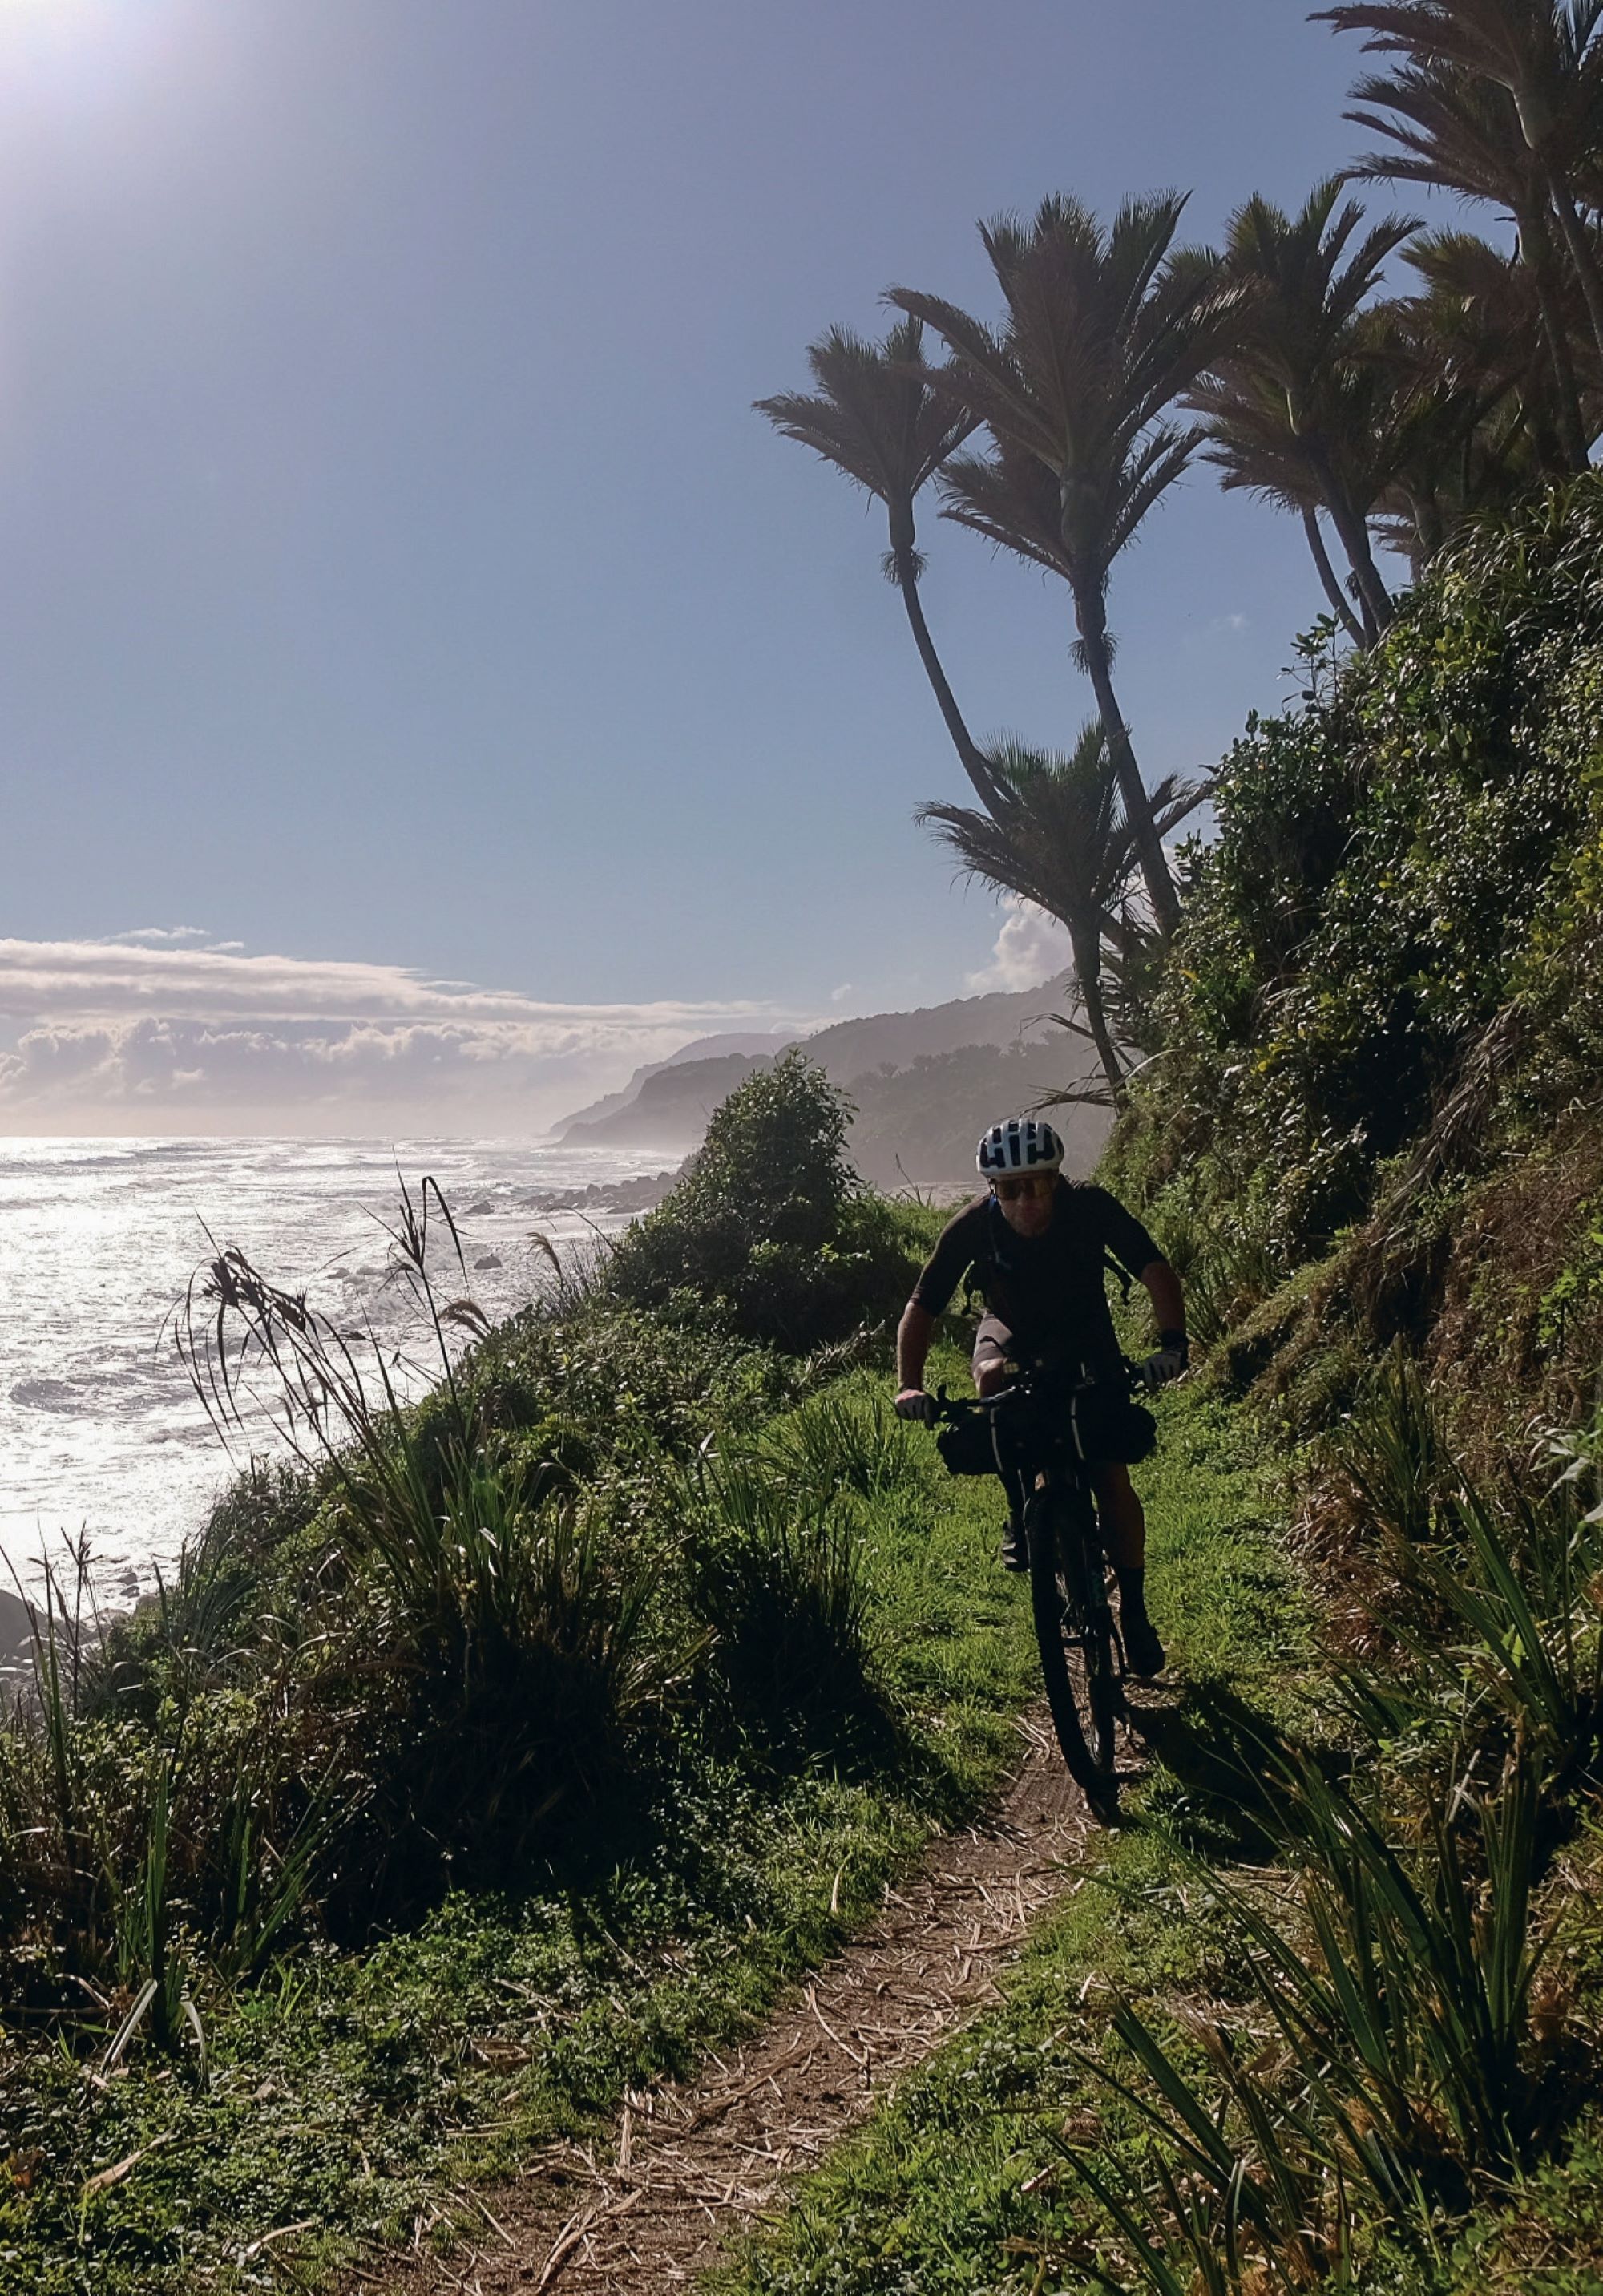
Day 4. 168.45km, 1696m, 8:06hrs
Breakfast was varied. To each their own, as some would say. A tall can of ‘V’ and Cup of Noodles; a Monster and a chocolate milk with a One Square Meal bar; creamed rice, protein milk and muesli bars; our final morning meant all the nutritional rules were out the window. We ate what we had and didn’t complain. On the road pre-dawn once again, this time to the head of Lake Rotoroa and onto the Porika Road climb. To say this climb is horrid is an understatement: 3.2 km long, gaining 454m and an average of 14% with some seriously steep stretches. My average speed was just 4.5kmph! Sam rode the entirety of it with one small dab, and the rest of us slowly dragged our carcasses to the top with a mix of knee- breakingly slow cadence and calf-destroying walking. The beauty of walking parts, though, was that we had a chance to breathe in the cracker views down the lake. Truth be told, once uploaded to Strava, we discovered we actually made good time to the top, compared to many. We’d eked out any remaining energy we had, so after Red Bull, packs of gummy snakes, yet more muesli bars, and some hearty banter, we descended for literally kilometres… right to the door of the Tapawera Four Square for pies, coffee, and lots of food my cardiologist would frown upon.
Following the Great Taste trail towards Nelson, our patience for mellow bike paths had waned, and we cracked on, swapping turns on the front. Needless to say, Sam’s pulls were the longest. Arriving back in Nelson, it was a tough decision between going directly to the pub for a huge meal or doing the responsible thing and packing our bags ready for the next morning’s flight home. Responsibility won, and dinner waited until we’d done our chores. The meal was spent reliving the previous few days, amazed at how much we packed into them and how epic the Heaphy and Old Ghost Road trails are, and all the better when linked together.
My takeaways from the trip were many, but here are a few: Big solo days in the saddle pushing hard are great, but they’re best shared with mates. Going hard and fast is fun, but it’s just as fun to chill in a camp cabin and sip whiskey while whinging about all the climbing you’d just done. It’s all good until it isn’t; being prepared is key to making big days successful and not needing to walk back to somewhere with a broken seat post. The Heaphy is underrated; it’s a fantastic ride, and although the Old Ghost sure gets more limelight, the Heaphy is equally worthy. Always remember earplugs, an eye mask, and a water filter; forgetting these can make or break a trip into the unknown.
Built on a dream
Words by Riley McLay
Images by Riley McLay & Greig Howell
In the world of big air, nowhere is more iconic than Dream Track. Nestled in the heart of the Wynyard Jump Park, the crown jewel of Queenstown’s ever-growing trail network has drawn riders from around the world to experience the massive airtime it’s become synonymous with.
The ‘world’s largest public jumps’ are instantly recognisable by their meticulously shaped lips and perfectly calculated flow. Featured in countless films, edits, and reels, this line has seen many of the sport’s top riders leave their mark, each bringing a unique style and interpretation to how the jumps can be ridden.
But Dream Track is more than an arena to showcase skill—it’s a meeting place for the Queenstown mountain biking community. An open, inclusive space where riders come to learn, share and progress together. And, like Rome, it wasn’t all built in a day. Dream Track is the product of years of evolution, fine-tuning, and relentless community passion, shaping it into what it is today.
Some people might not know that the line was originally built for a segment in the cult classic film New World Disorder 5, where Dave Watson and Grant Allen ticked off a number of freeride zones during a New Zealand and Australia tour. The line was constructed in 2005, along the remnants of an old access road to a former forestry block. It consisted of four main hits, finishing with a massive road gap step-down that landed in what was the early iteration of the Mini Dream area. This was a time well before resource consents were needed for trail building and definitely before anyone was worried about health and safety. Thankfully, the Queenstown Mountain Bike Club (QMTBC) had a solid relationship with the local Queenstown Lakes District Council (QLDC), which gave construction the green light. The mastermind behind the build was Nathan Greenwood, who did most of the digger work himself. For its time, the build was impressive, even if it was a world away from today’s standards.
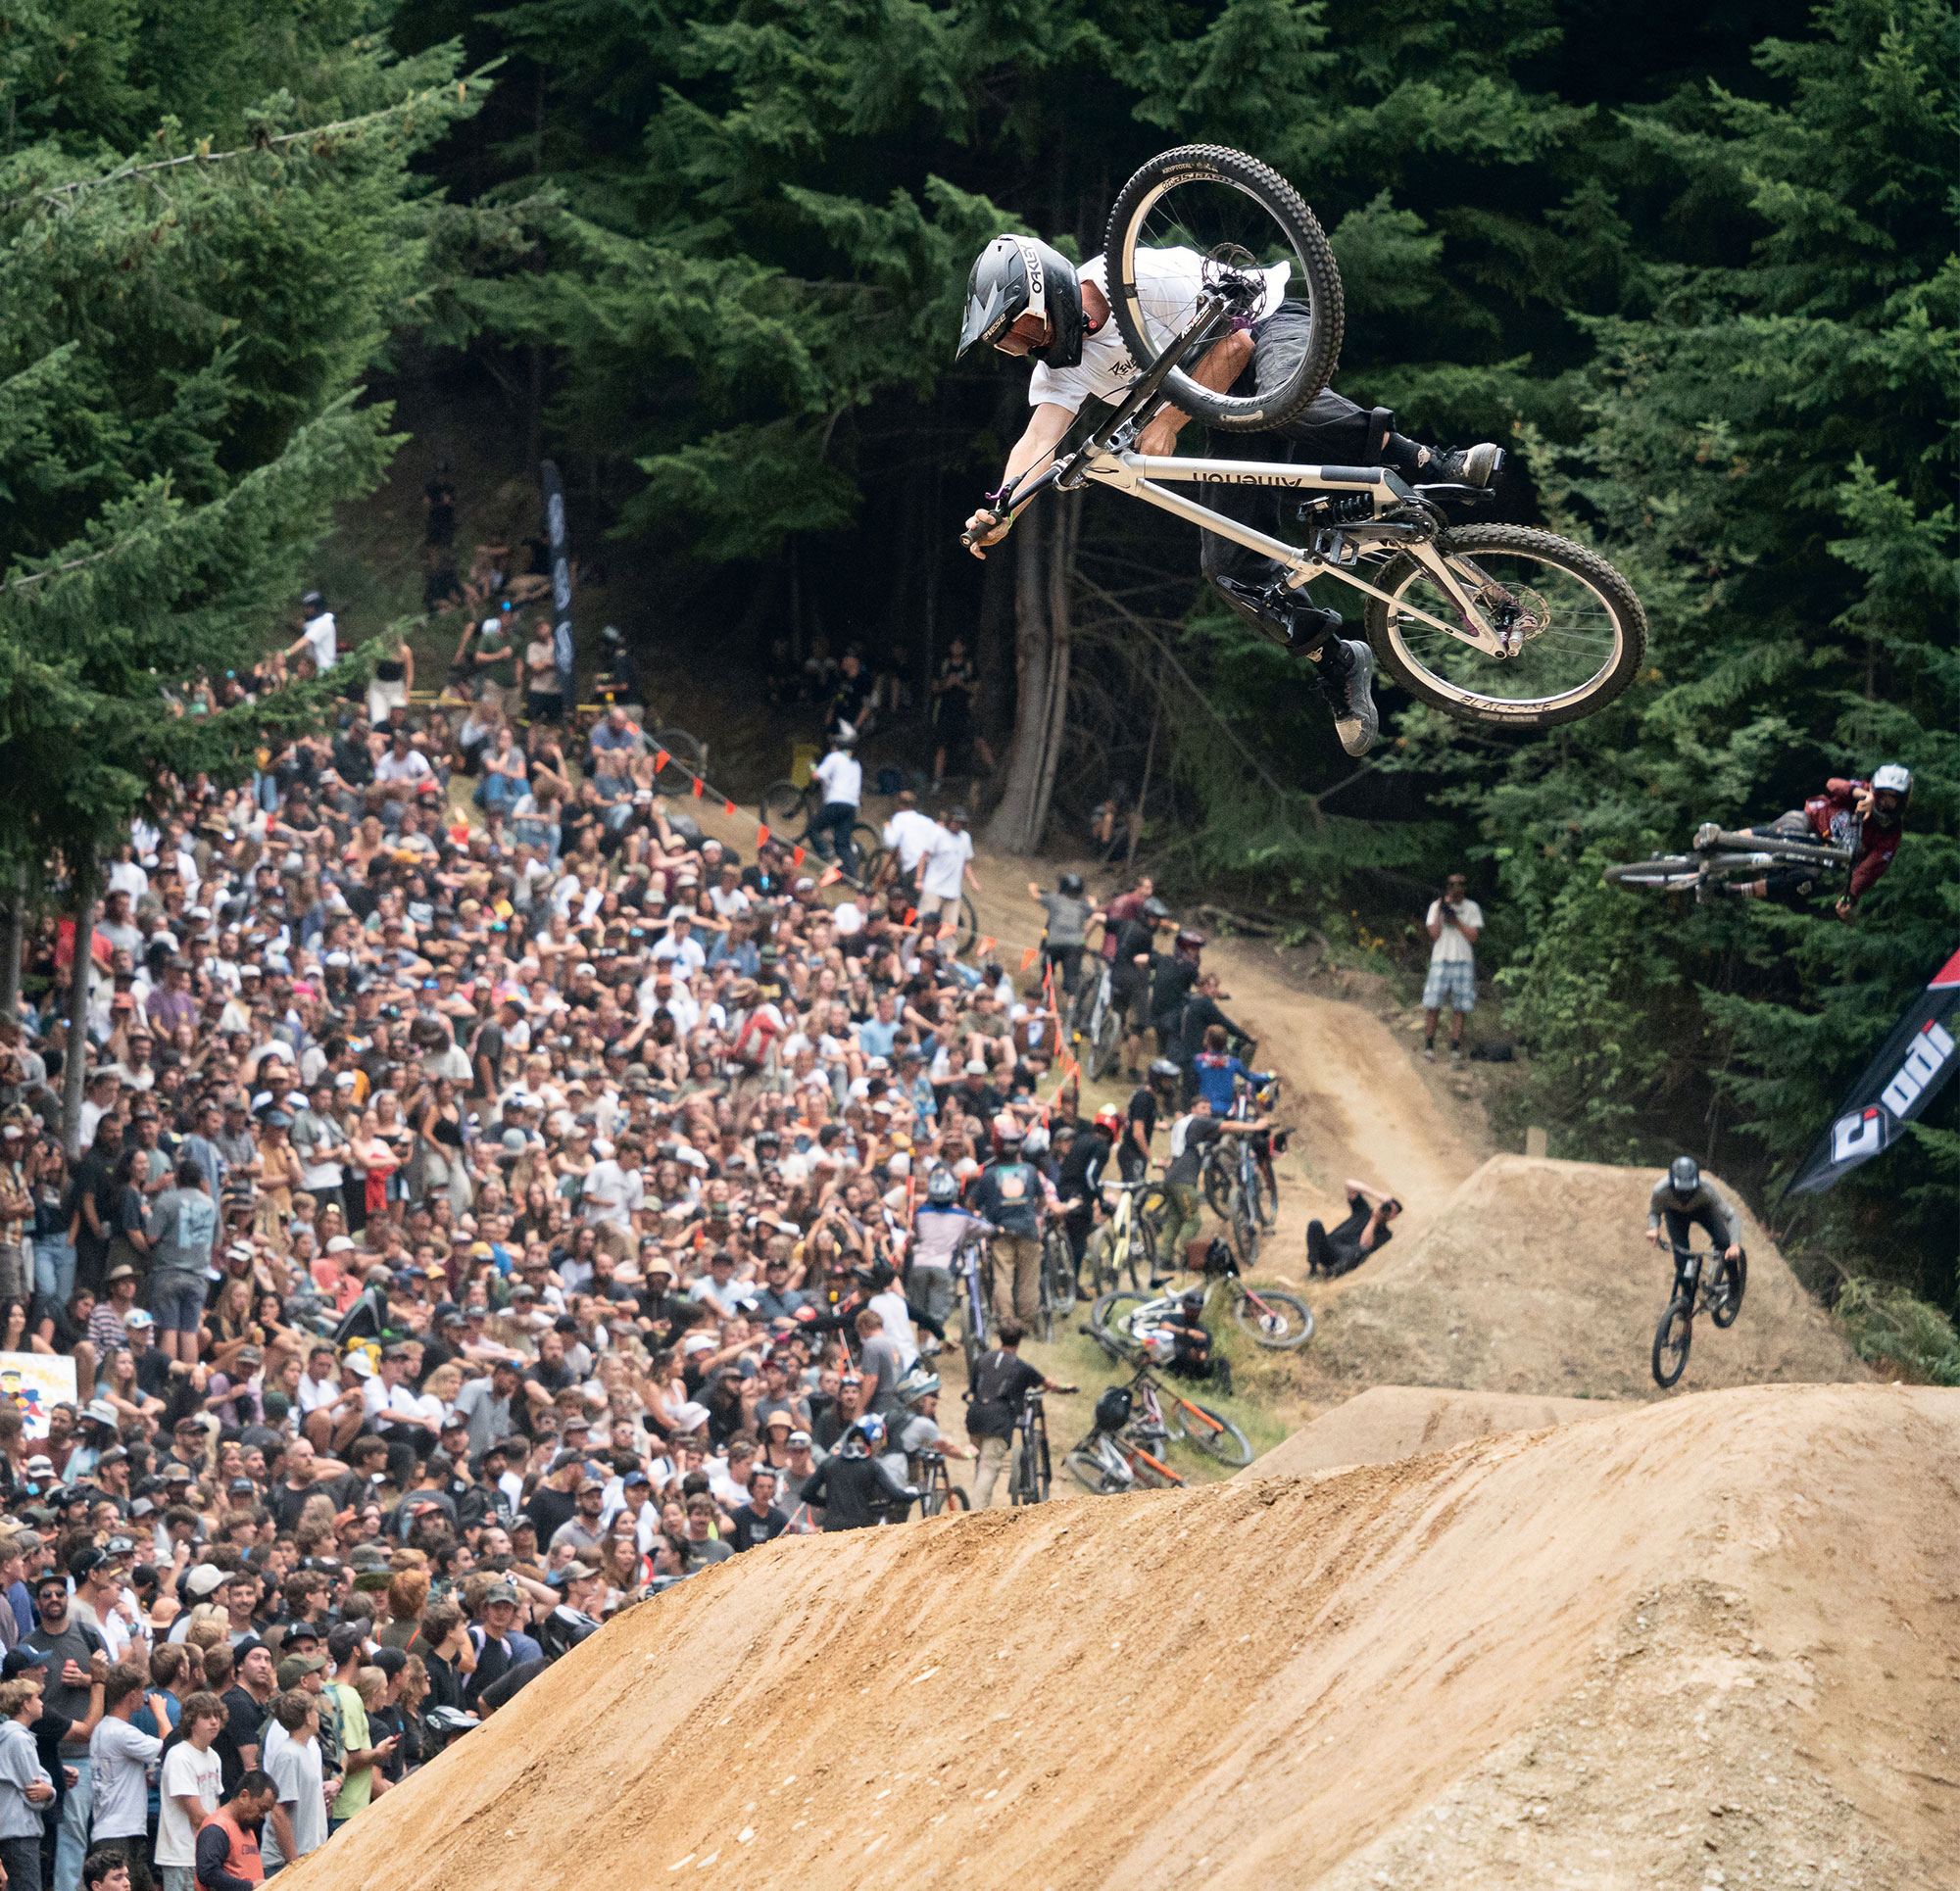
Once the film crew had moved on, only a small group of locals had the skillset to ride the jumps. Keen to keep developing the line, the club struggled to justify funding a track that only around ten people were using. So, most of the changes that followed were small tweaks, made primarily to suit those few regular riders. One of the most notable of those riders being New Zealand Freeride legend, Kelly McGarry, who made the move specifically to Queenstown to ride and train on the jumps. Knowing how much it would mean for the growth of the local scene, a plan was set in motion in 2014 to extend and improve the line. Spearheaded by Emmerson Wilken and Conor Macfarlane, the duo managed to convince QMTBC to allocate a budget for the work. A nine metre left hip into a 10-metre step- up was added, linking back into the four original jumps. This ‘new school’ layout opened the line to a wider range of riders, better suiting the bikes of the time and making it far easier to session.
With the lines growing popularity, they knew they were only scratching the surface of the area’s potential. Inspired by the impact of events like the Fest Series, and the possibility of hosting something of that caliber in Queenstown, they knew they needed to build more jumps and bring the rest up to modern standards. The goal was to build steeper jumps—more like BMX or 26-inch dirt jumps, just scaled up for downhill bikes. The vision was to hit a wall of dirt at high speed and launch to the moon! However, gaining support outside the club was difficult, as the local tourism board had yet to see biking as a worthwhile investment.
In 2016, after extensive consultation with the local scene on how best to utilise the terrain, a revised layout and cost estimate were presented to the QMTBC. A budget of $3,000 was allocated for the build, with most of it going toward diesel for a brand-new digger that was generously donated by local construction company, Veolia, for a two-month window. The rest of the effort and manpower would be entirely volunteered, with a long list of locals lining up to donate their time. The primary goal was to build three new jumps above the existing line, and if any budget remained, work would continue on the lower section of Dream Track. The two-month window to complete the build happened to align with the very first McGazza Festival—an event created to celebrate the life and legacy of Kelly McGarry. As part of the festival, a memorial jam was planned to officially open the newly revamped Dream Track, making the build feel even more meaningful for everyone involved. After over 250 hours of digger time and countless hours of volunteer work, the jumps were nearly finished and just needed the final test before they were good to go. Normally, guinea pig duties would fall to Kelly or Conor. But with Conor out, recovering from an injury, the job landed on Emmerson. Would the ol’ eyedometer prove accurate? The build wasn’t based on any exact science, just past experience. The only way to know for sure was to huck it. To their surprise, the jumps worked perfectly on the first try, and only minor tweaks were needed before the jam.
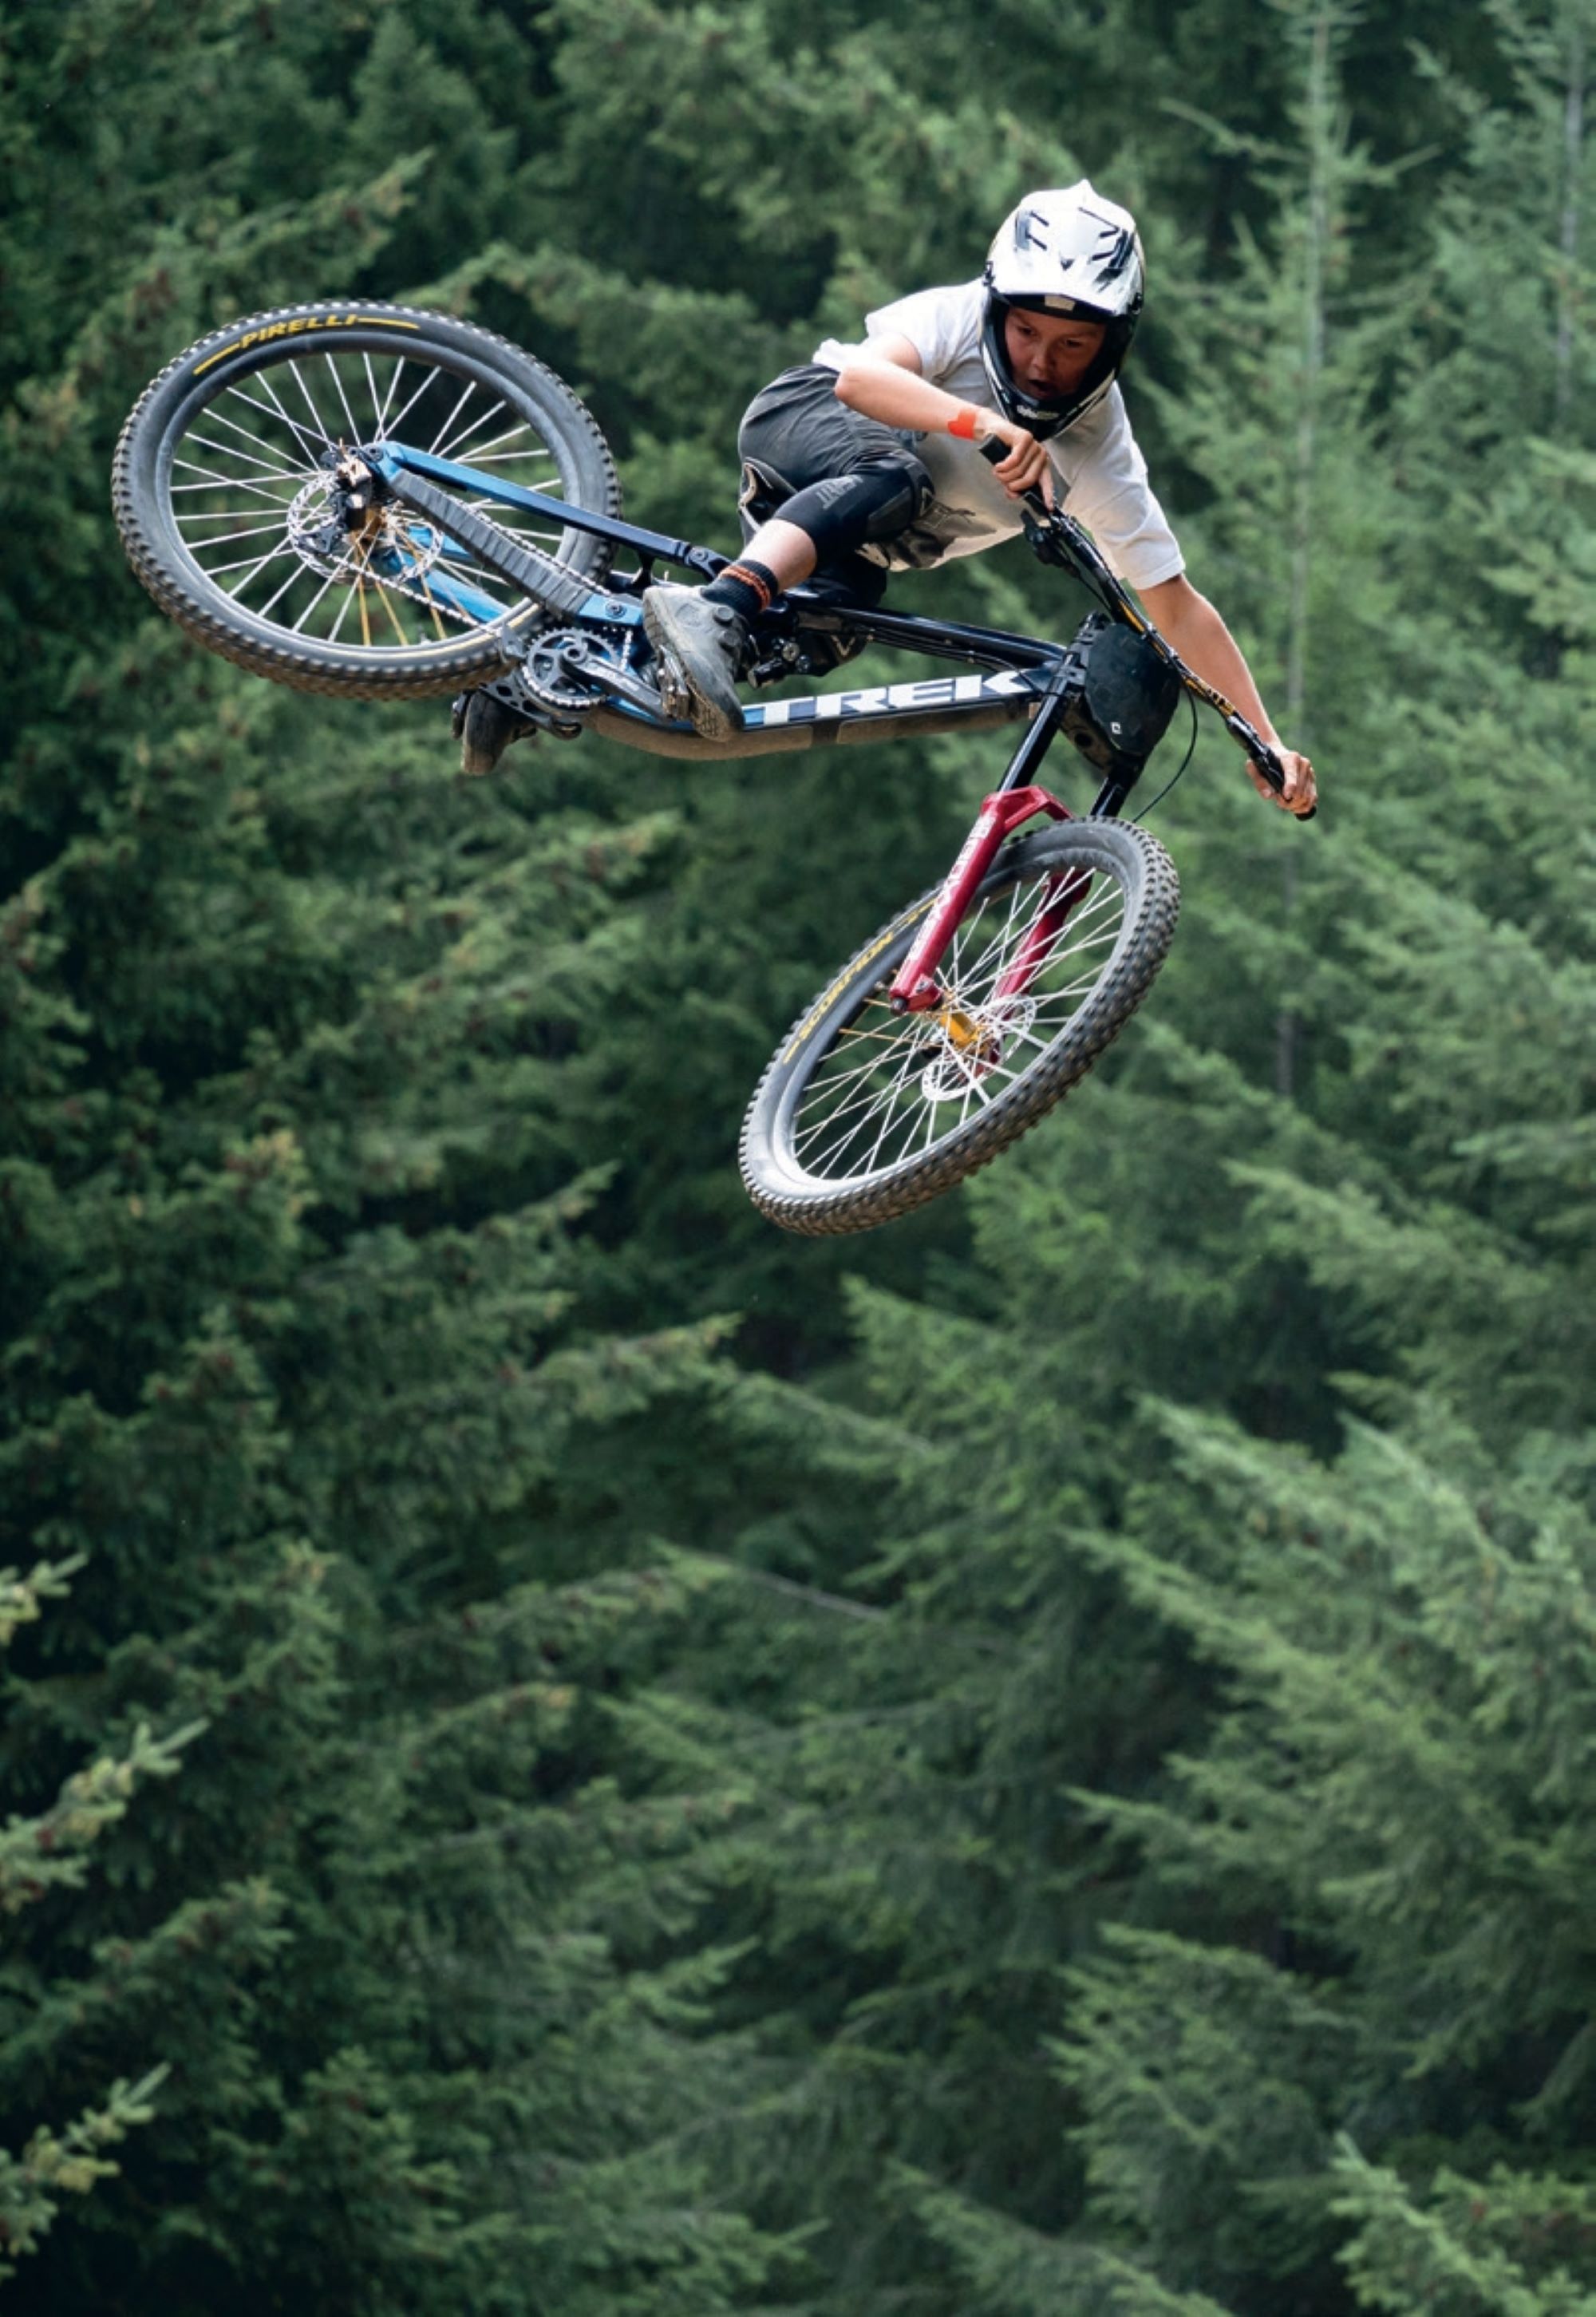
The first iteration of the McGazza Fest Dream Jam was as grassroots as it gets, just a crew of Kelly’s friends sending it huge for the big man. Since then, it’s grown into one of the most anticipated events on the mountain biking calendar – all on the back of no marketing or advertising for the event. One social media post goes out for the date of the event, and word of mouth does the rest. A major drawcard for spectators is not just the chance to watch a mix of star-studded pro riders’ session the jumps, but also the opportunity to see their local mates sending it alongside them. The club uses the event as a fundraiser, with proceeds coming from a sausage sizzle, a raffle, rider entry fees, and merch sales — including the popular McGazza tees. At the 2025 event, over 3,000 people packed the hillside to catch a glimpse of the action. It’s also become competitive to secure a spot in the lineup, with organisers capping the number of riders to 100 on a first-in, first-served basis to help manage congestion on course. This past year’s event introduced an under-19s category to open for the main show, giving talented up-and-coming groms a chance to showcase the future of the sport. Even though these young riders would be too young to know Kelly, and maybe not able to fully grasp what he accomplished, it’s inspiring to see them carrying on the culture that Kelly embodied. This upcoming event will mark 10 years of McGazza Fest, and organisers are planning to go all out for the occasion. There’ll be an even greater focus on Kelly’s memorial and legacy, along with the return of crowd favourites, like the live band — all to make it the best event yet!
Following the post-COVID boom in mountain biking, the local government has pushed to further develop Queenstown’s riding infrastructure, recognising the economic benefits the sport brings to the region. This includes attracting large-scale events like Natural Selection Bike, which even used Dream Track for its pre-qualifying round, to maintain the marketing momentum and reinforce the global push to position Queenstown as one of the world’s mountain biking meccas. Many come to ride the iconic Dream Track, but the nearby Mini Dream area and wider riding network has also become popular for riders to progress their skills and work up to the larger jumps. The club’s ‘build it and they will come’ mindset has paid off—helping foster a community that’s eager to push their limits, while minimising risk through higher-quality trail options. However, upkeep and maintenance of the Dream Track area still rely heavily on a small crew of dedicated volunteers, who are left to manage the consequences of this increased traffic. As a result, there’s been a strong emphasis on education and signage to encourage riders to use the hill’s irrigation system and water the jumps before riding.
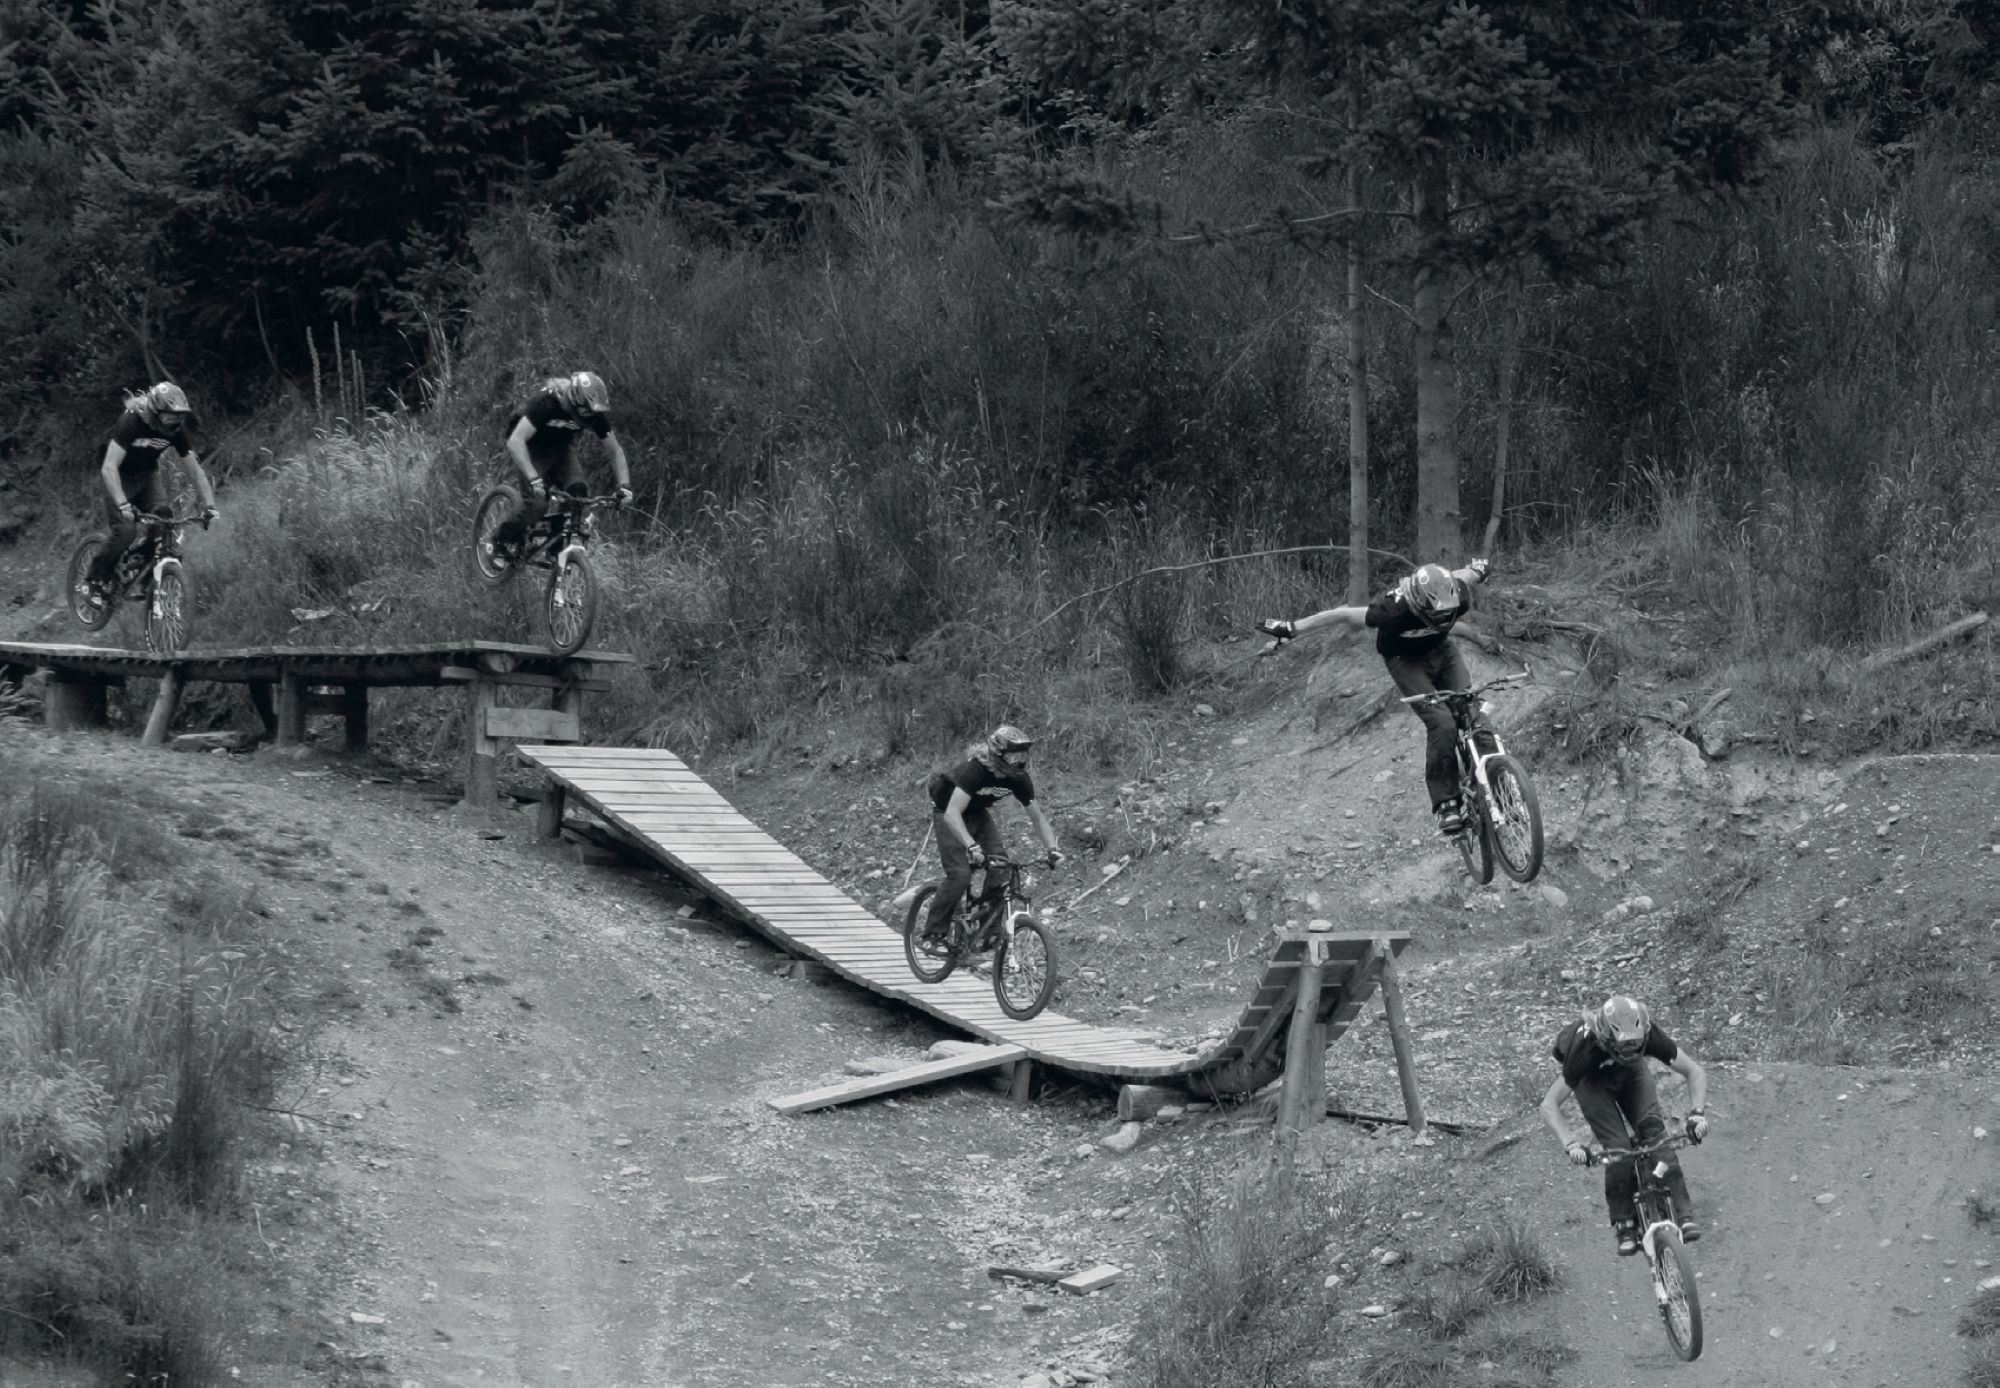
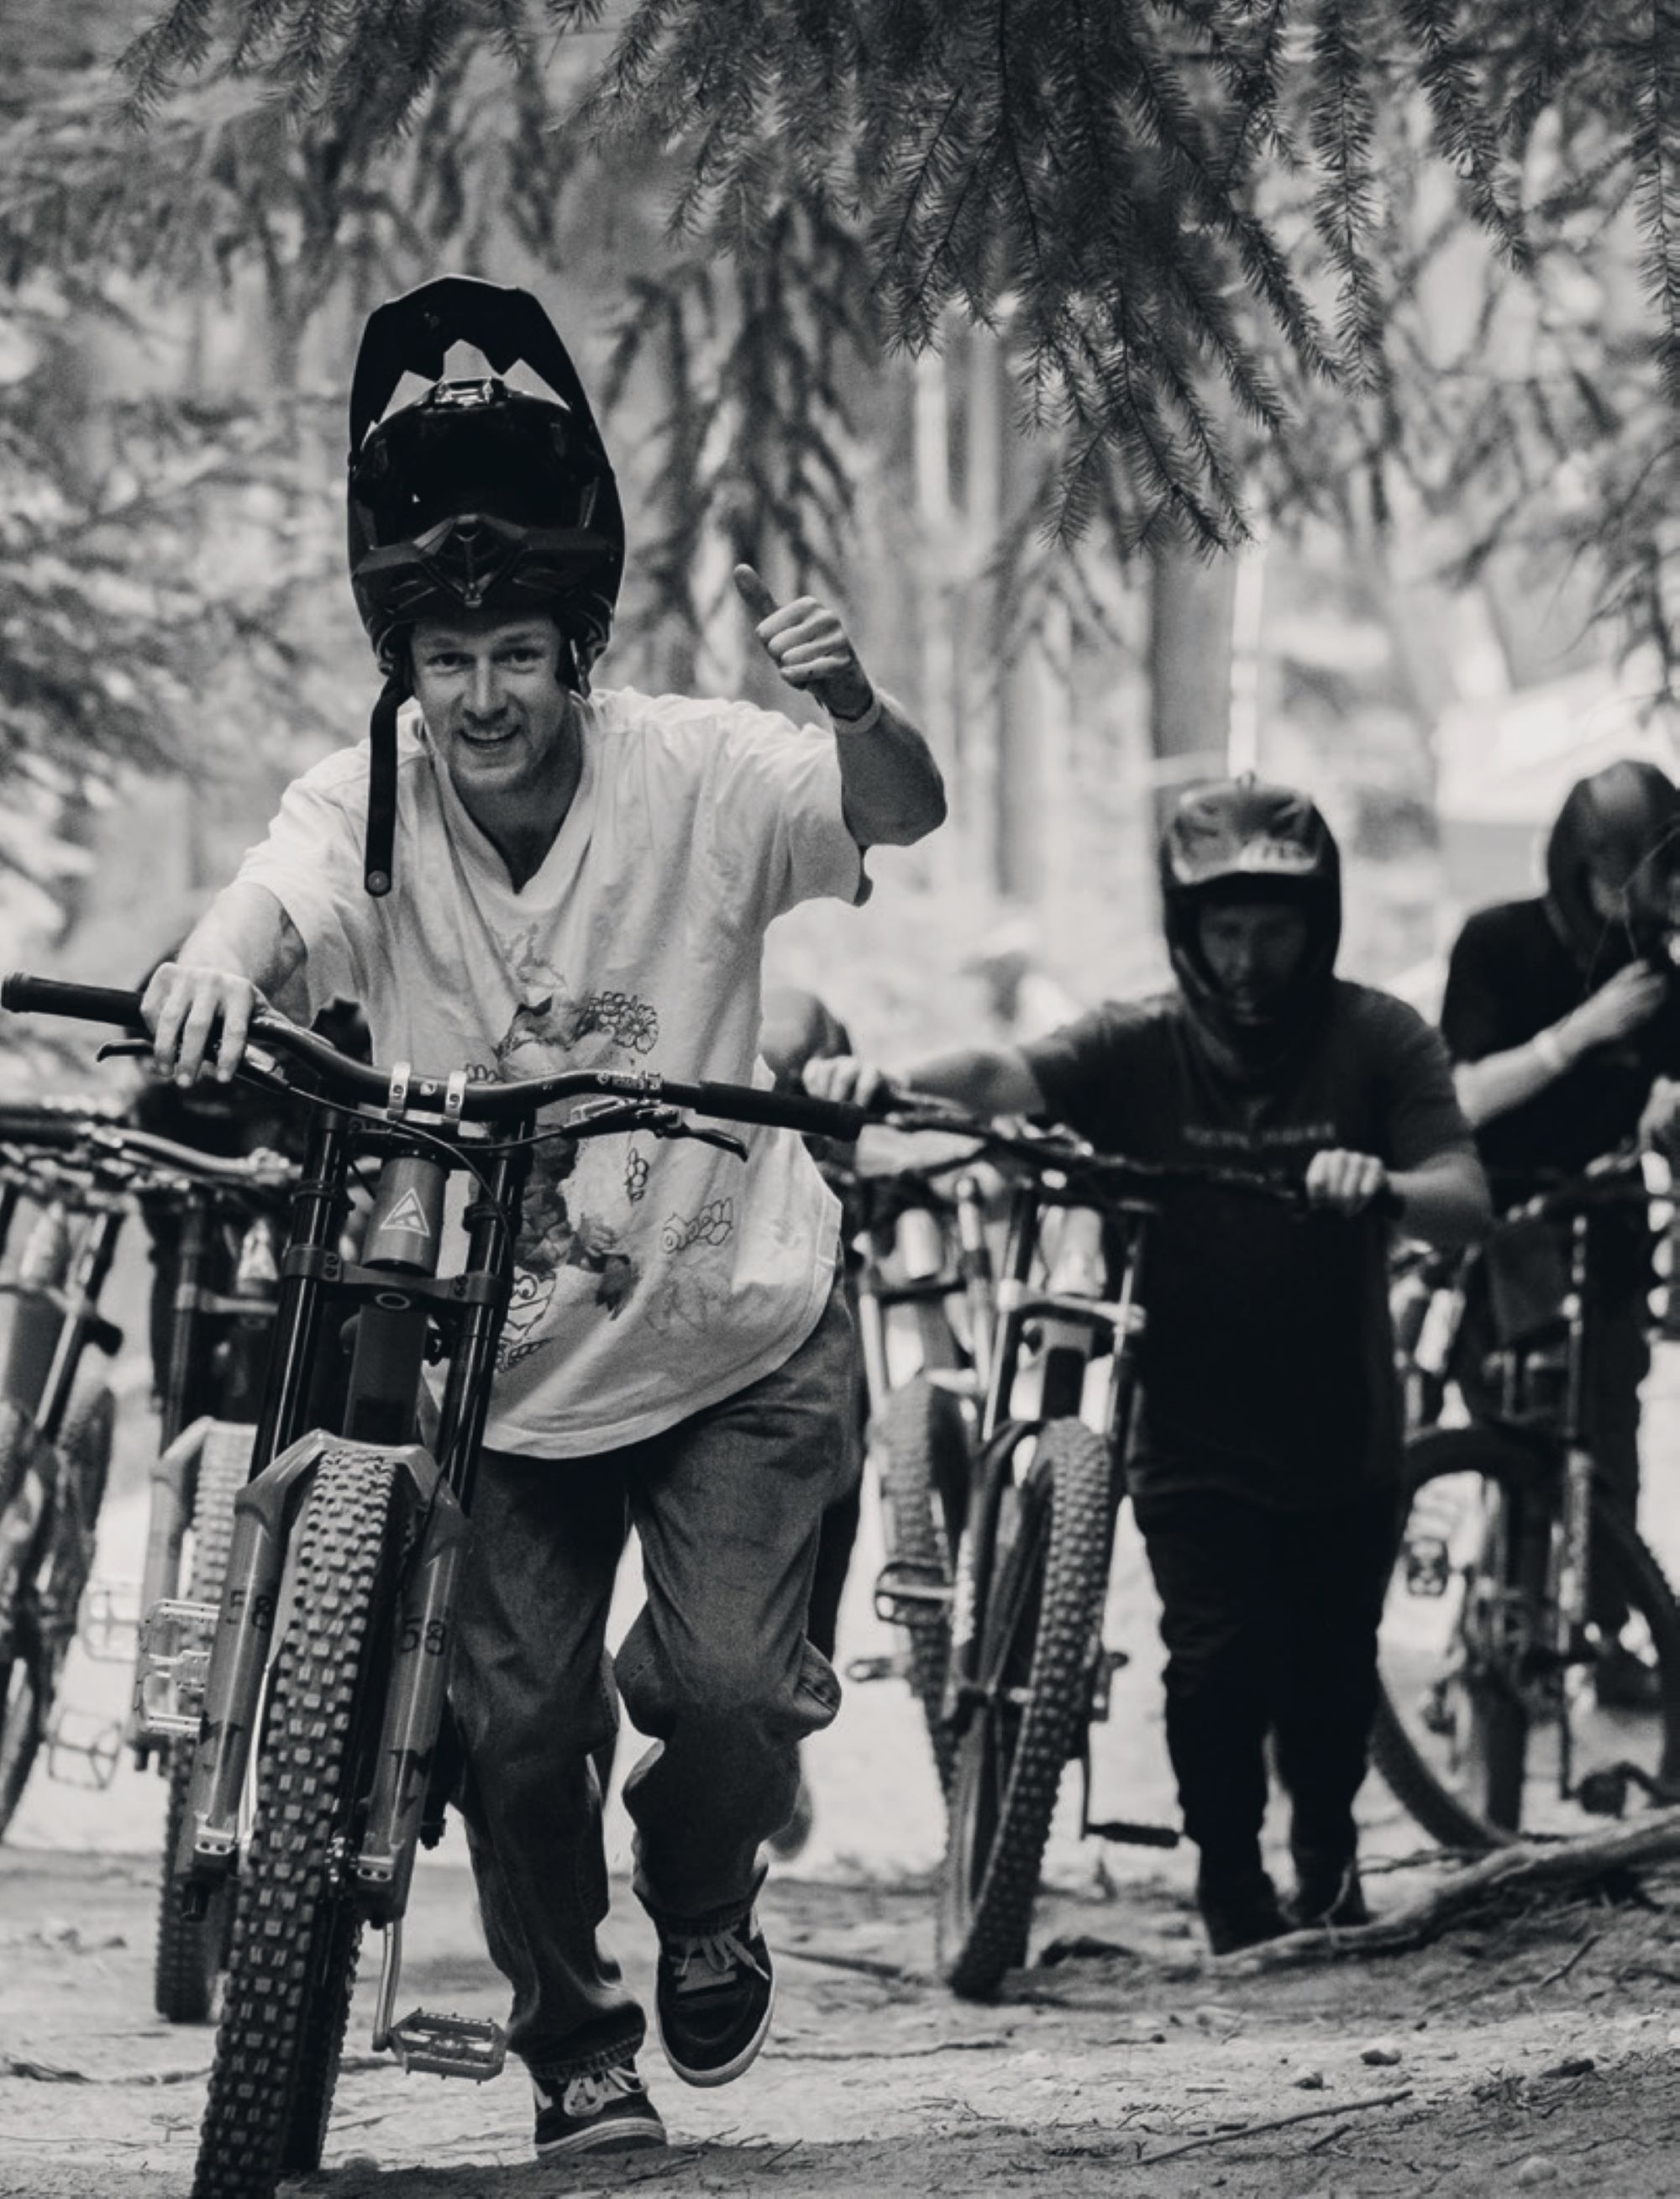
There’s also been a push to riders to not take the jumps for granted and to only ride them when they feel ready. This follows an uptick in emergency callouts across the Queenstown network. With vehicle access to Dream Track and the greater Ben Lomond area difficult at the best of times, injured riders often have to be airlifted out by helicopter. The QMTBC and QLDC are acutely aware that pushing one’s limits can lead to real-world consequences, and have committed to supporting Dream Track while doing their best to ensure it is as safe as possible. Their goal is to ensure the track thrives for generations to come. This includes future-proofing the hillside by chaining off and closing the tracks for winter to preserve the jumps and prevent inexperienced riders from riding them in poor conditions, and planting native trees alongside the jumps to replace the windbreak if the remaining pines from the original forestry block fall or are removed.
The full line currently stands with 14 features, with the biggest sending you 60 feet to the sweet spot. Spanning 570 metres, the line’s average speed is well over 50 km/h taking riders about a minute to ride top to bottom. Those involved are extremely proud of what they’ve achieved with Dream Track and admit the riding still hasn’t gotten stale. That said, there are always plans in the works to build on, with ideas to add a few new features—including a trickable step-down, a full right hip, and a spine—to really round out the line. The goal is to be the icing on the cake to what’s already one of the most complete jump lines out there. Like Rome’s Colosseum, Dream Track stands as both a monument to the riders who came before and to the community building for the future. It’s more than just lips and landings — it’s the heartbeat of Queenstown’s riding scene, proof that when a community dreams big, the world will show up to ride.
All proceeds from this project will be donated to the Queenstown Mountain Bike Club for the maintenance and upkeep of Dream Track for the 2025/2026 season.
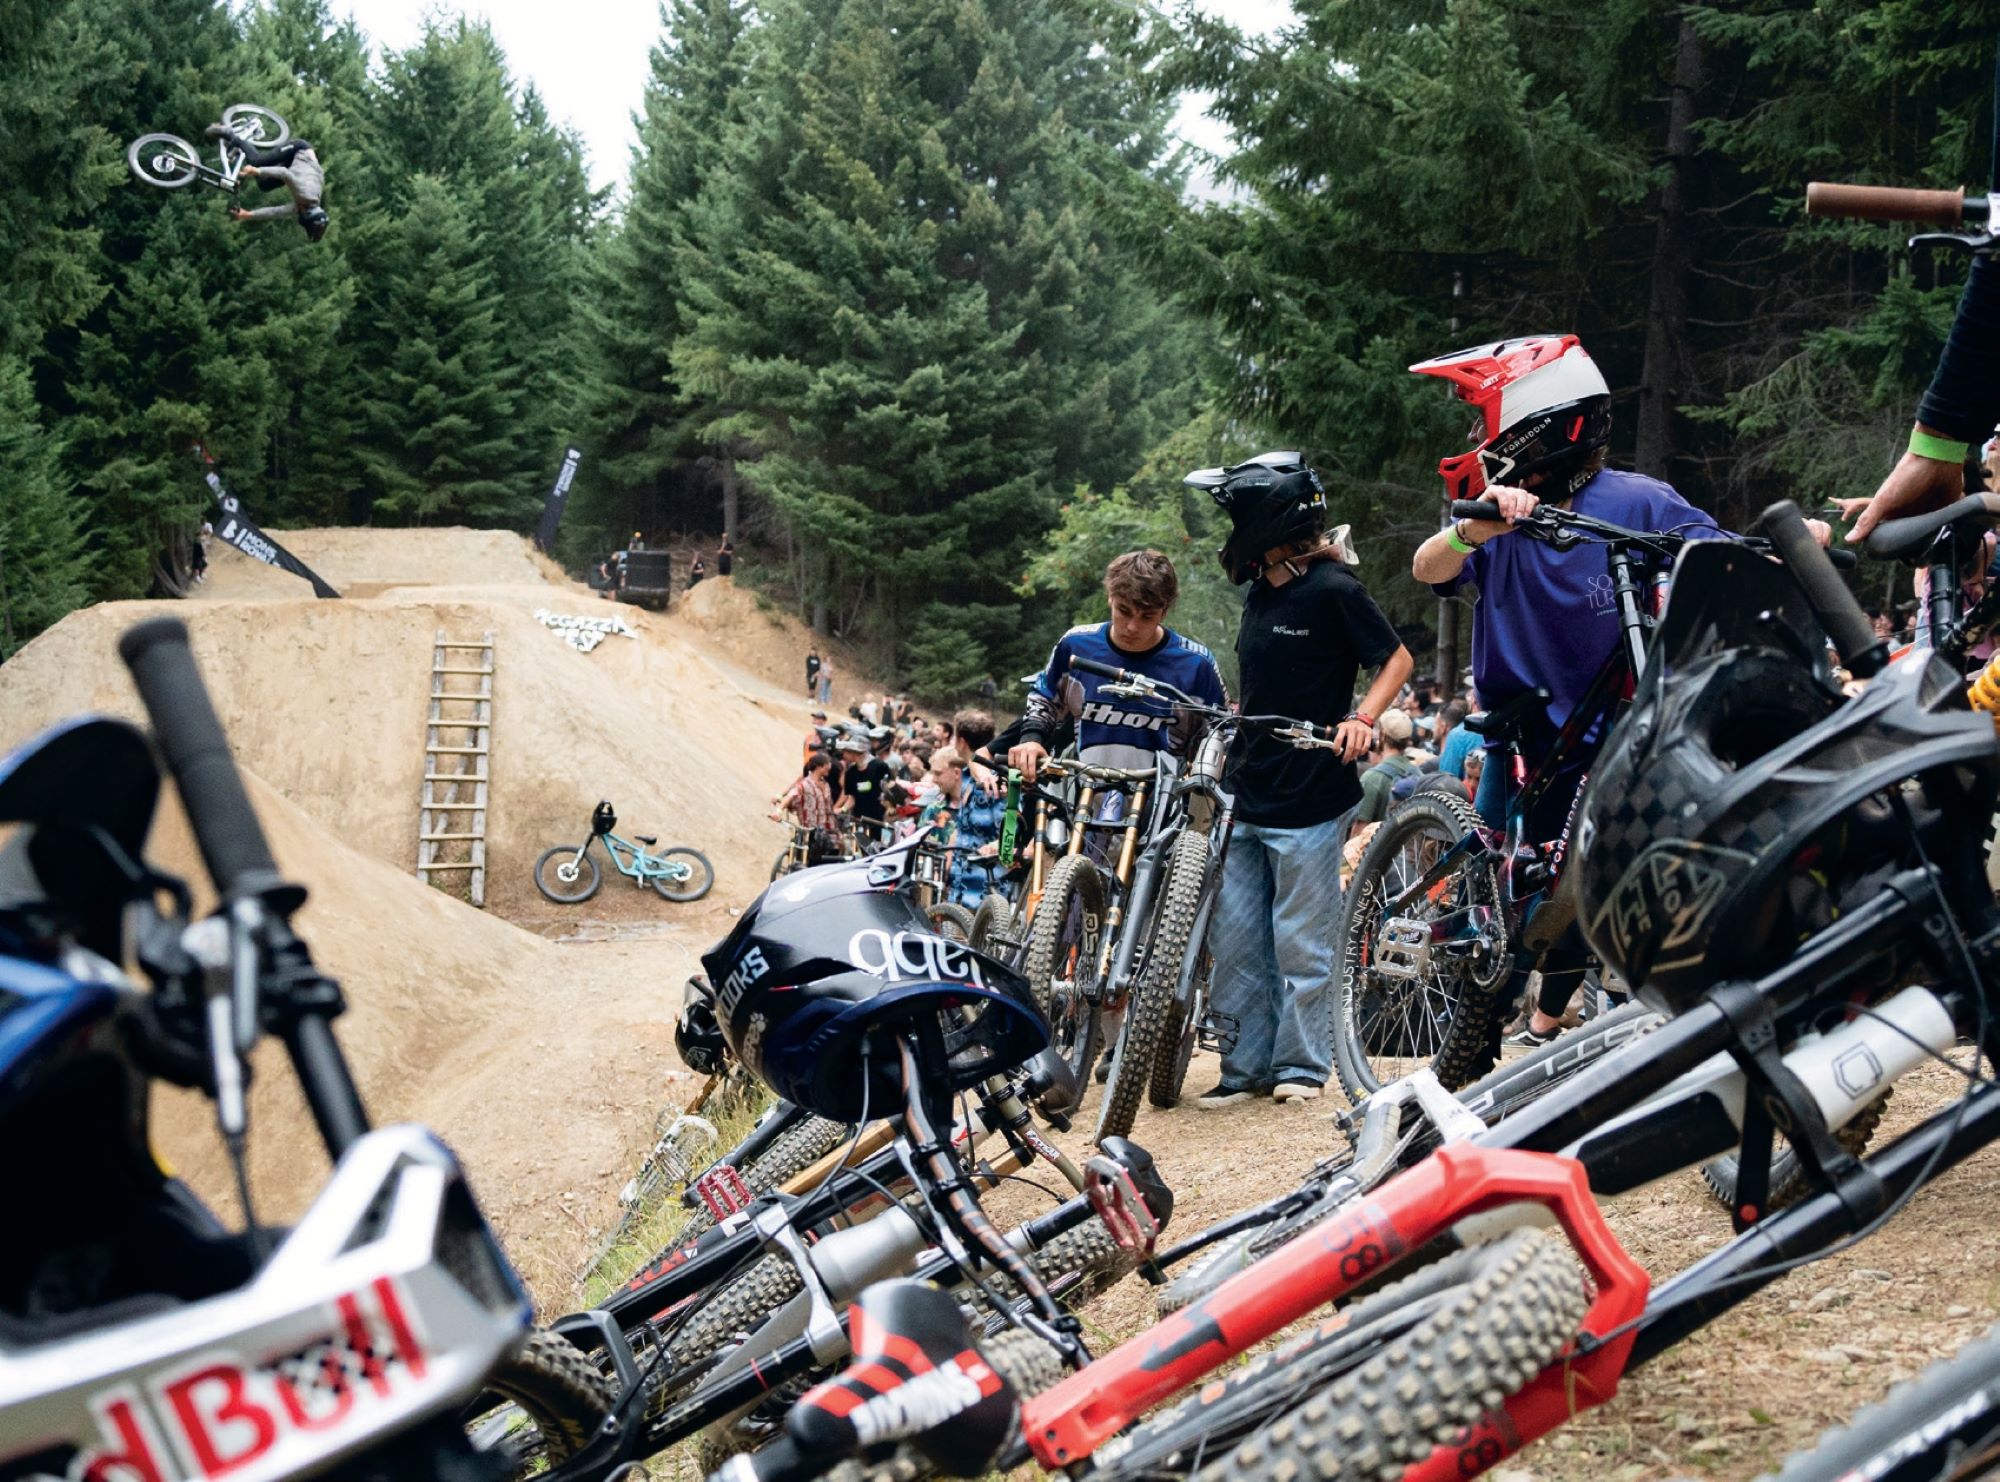
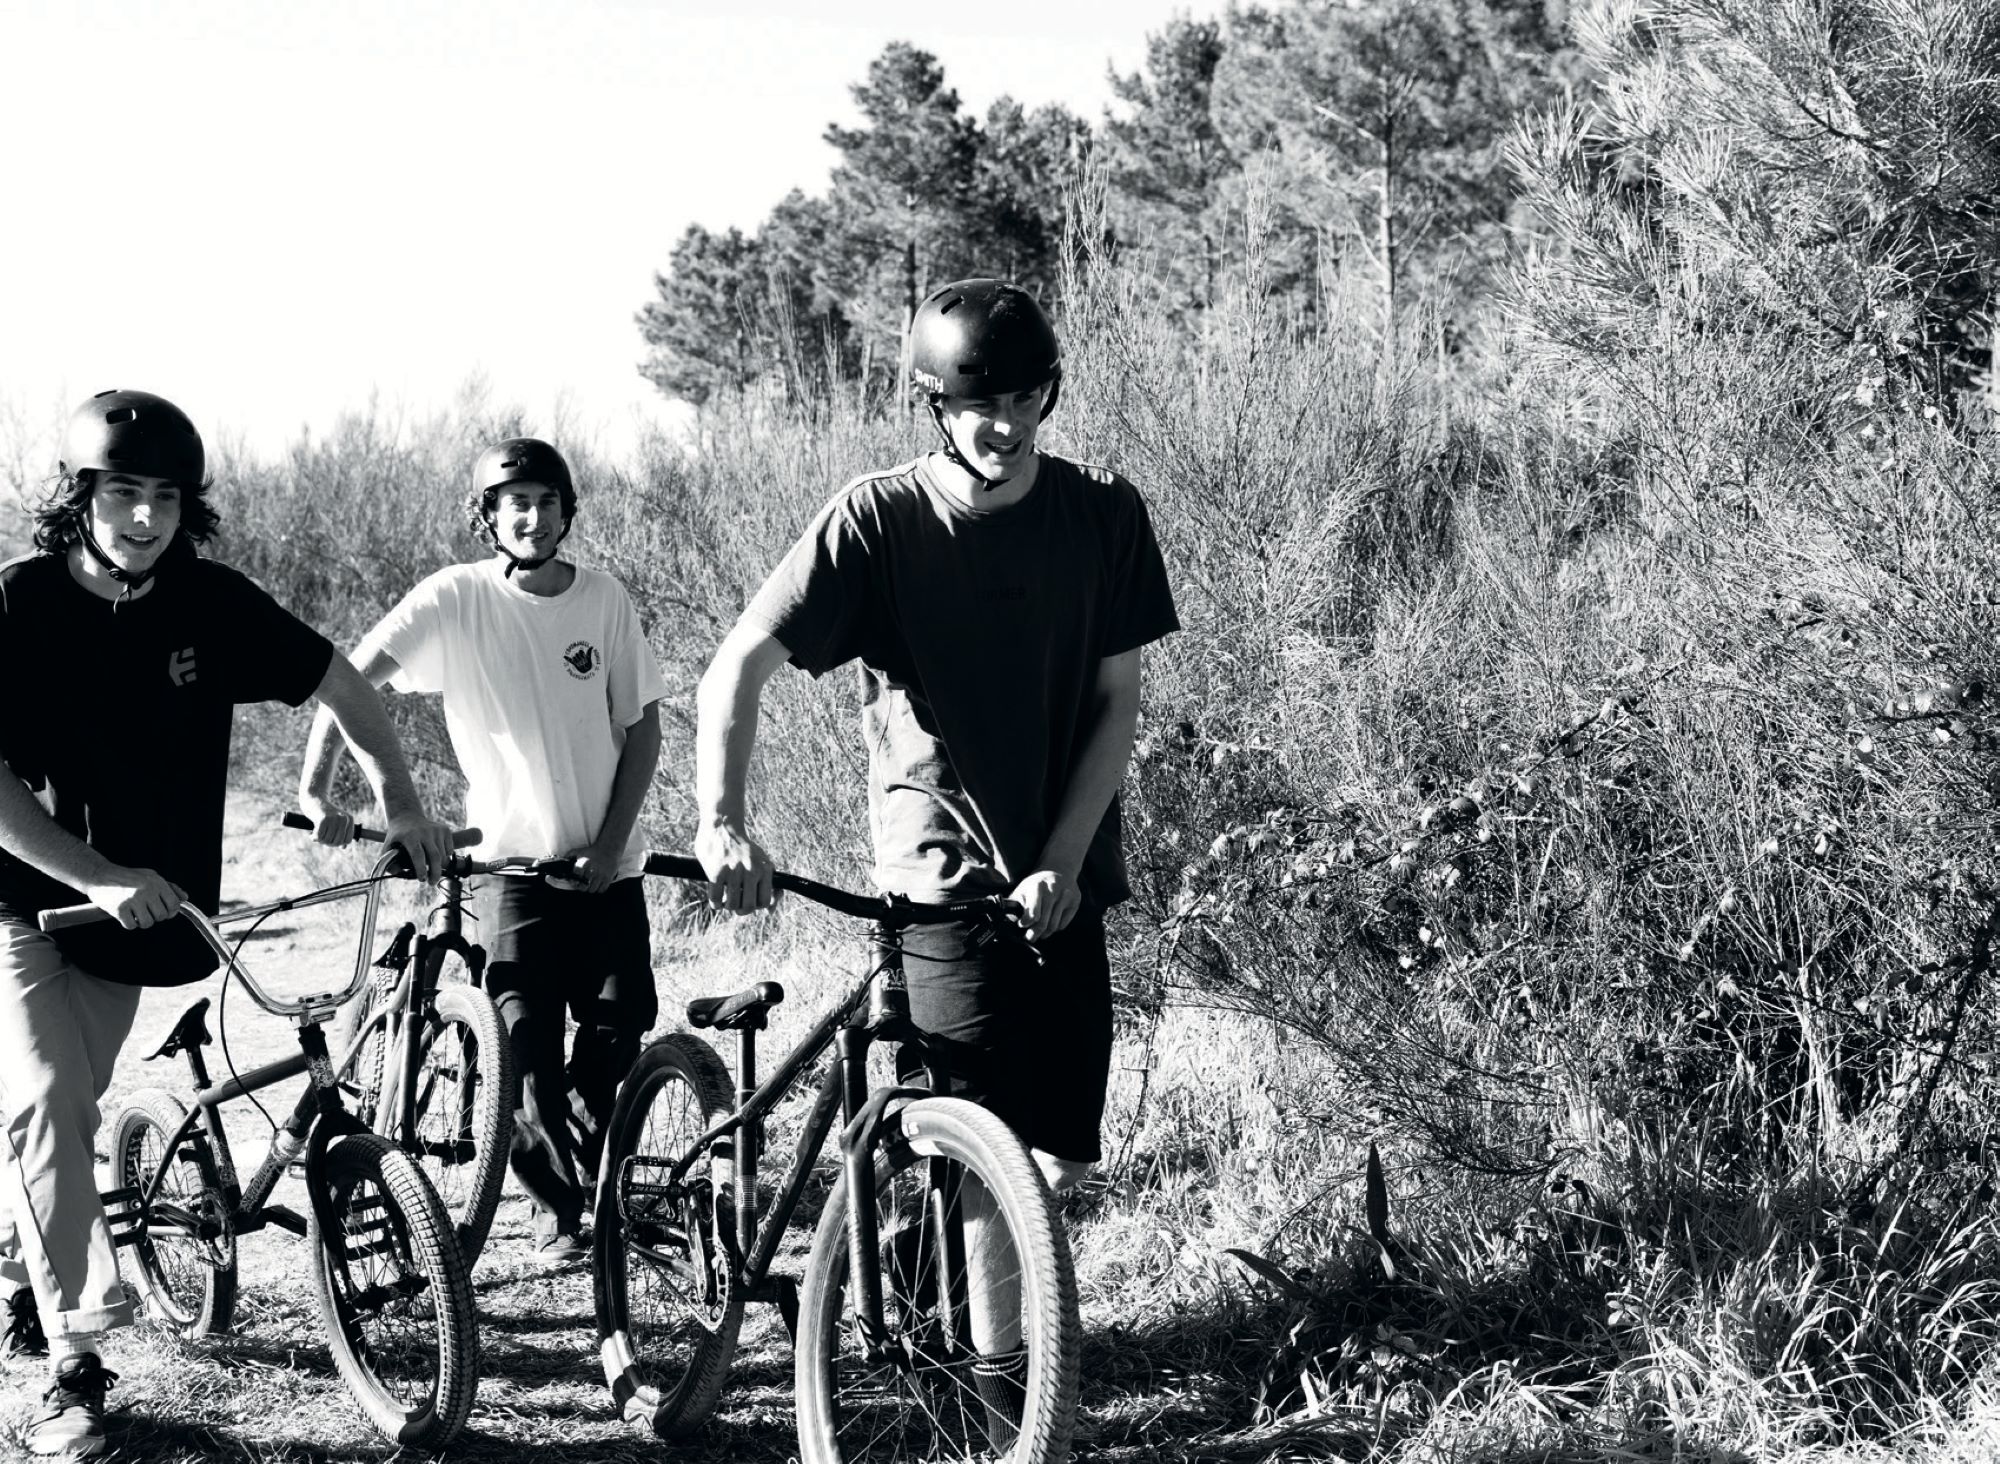
From the Naki, to the Vale (and back)
Words Lester Perry
Images Supplied
Taranaki has produced some exceptional mountain biking talent over the last 30 years. From Glenn Sisarich’s dreadlocked persona blowing up corners at downhill races through the 90’s, to Cameron Cole’s 2006 Junior World Championship downhill win in Rotorua; and Wyn and Ed Masters, taking their backyard dirt jumping skills to winning an Enduro World Series race each. Outside of these icons, countless other riders from the area have carved their own way in the race-based side of the sport. On the non-competitive side, Taranaki has produced, or been the base for, numerous dirt jump and freeriding talent, existing in their own bubble out on the West Coast. They’ve quietly gone about their business, digging and riding dirt jumps and freeride trails around the region, largely off the radar of much of the country. Daniel Cleland is one such rider and, although he’s now a key figure in the area’s dirt scene, it was outside the region where he really found his feet and fell in love with the culture behind it.
The 25-year-old has an air of humility about him, but his riding and graft speak for themselves. Dan is quick to point out others in the crew whose efforts have brought the trails or his videos together, not in a self- deprecating way, but he’s not one to put himself first; he always acknowledges those who’ve come before or are still in the game.
“I grew up riding Roto’s; a local jump park here (headed by Scott Bedford aka Beddy B), and then Mangers (Lake Mangamahoe) as well. There’s a track called Hendrix out there, and one of the local dudes, Che, did a huge amount of work on the build of that. As I grew up, I just started riding with him and digging with him a bit more. Hendrix is probably three generations deep now. It’s been through logging, been rebuilt, logged and then rebuilt again. This time around, we’re the ones building it, which is pretty rad.”
Education comes in many forms, and while we’re continually learning from the moment we’re born, the lessons learned in our late teens and early twenties help shape our identity as we find our way in the world. For Dan, education has been a theme for the last few years. His early, formative schooling was in Taranaki but, after deciding to train as a teacher, education took him south to Christchurch. Not only did Dan formally train as a secondary school teacher, he also found community amongst the local dirt jump and freeride scene.
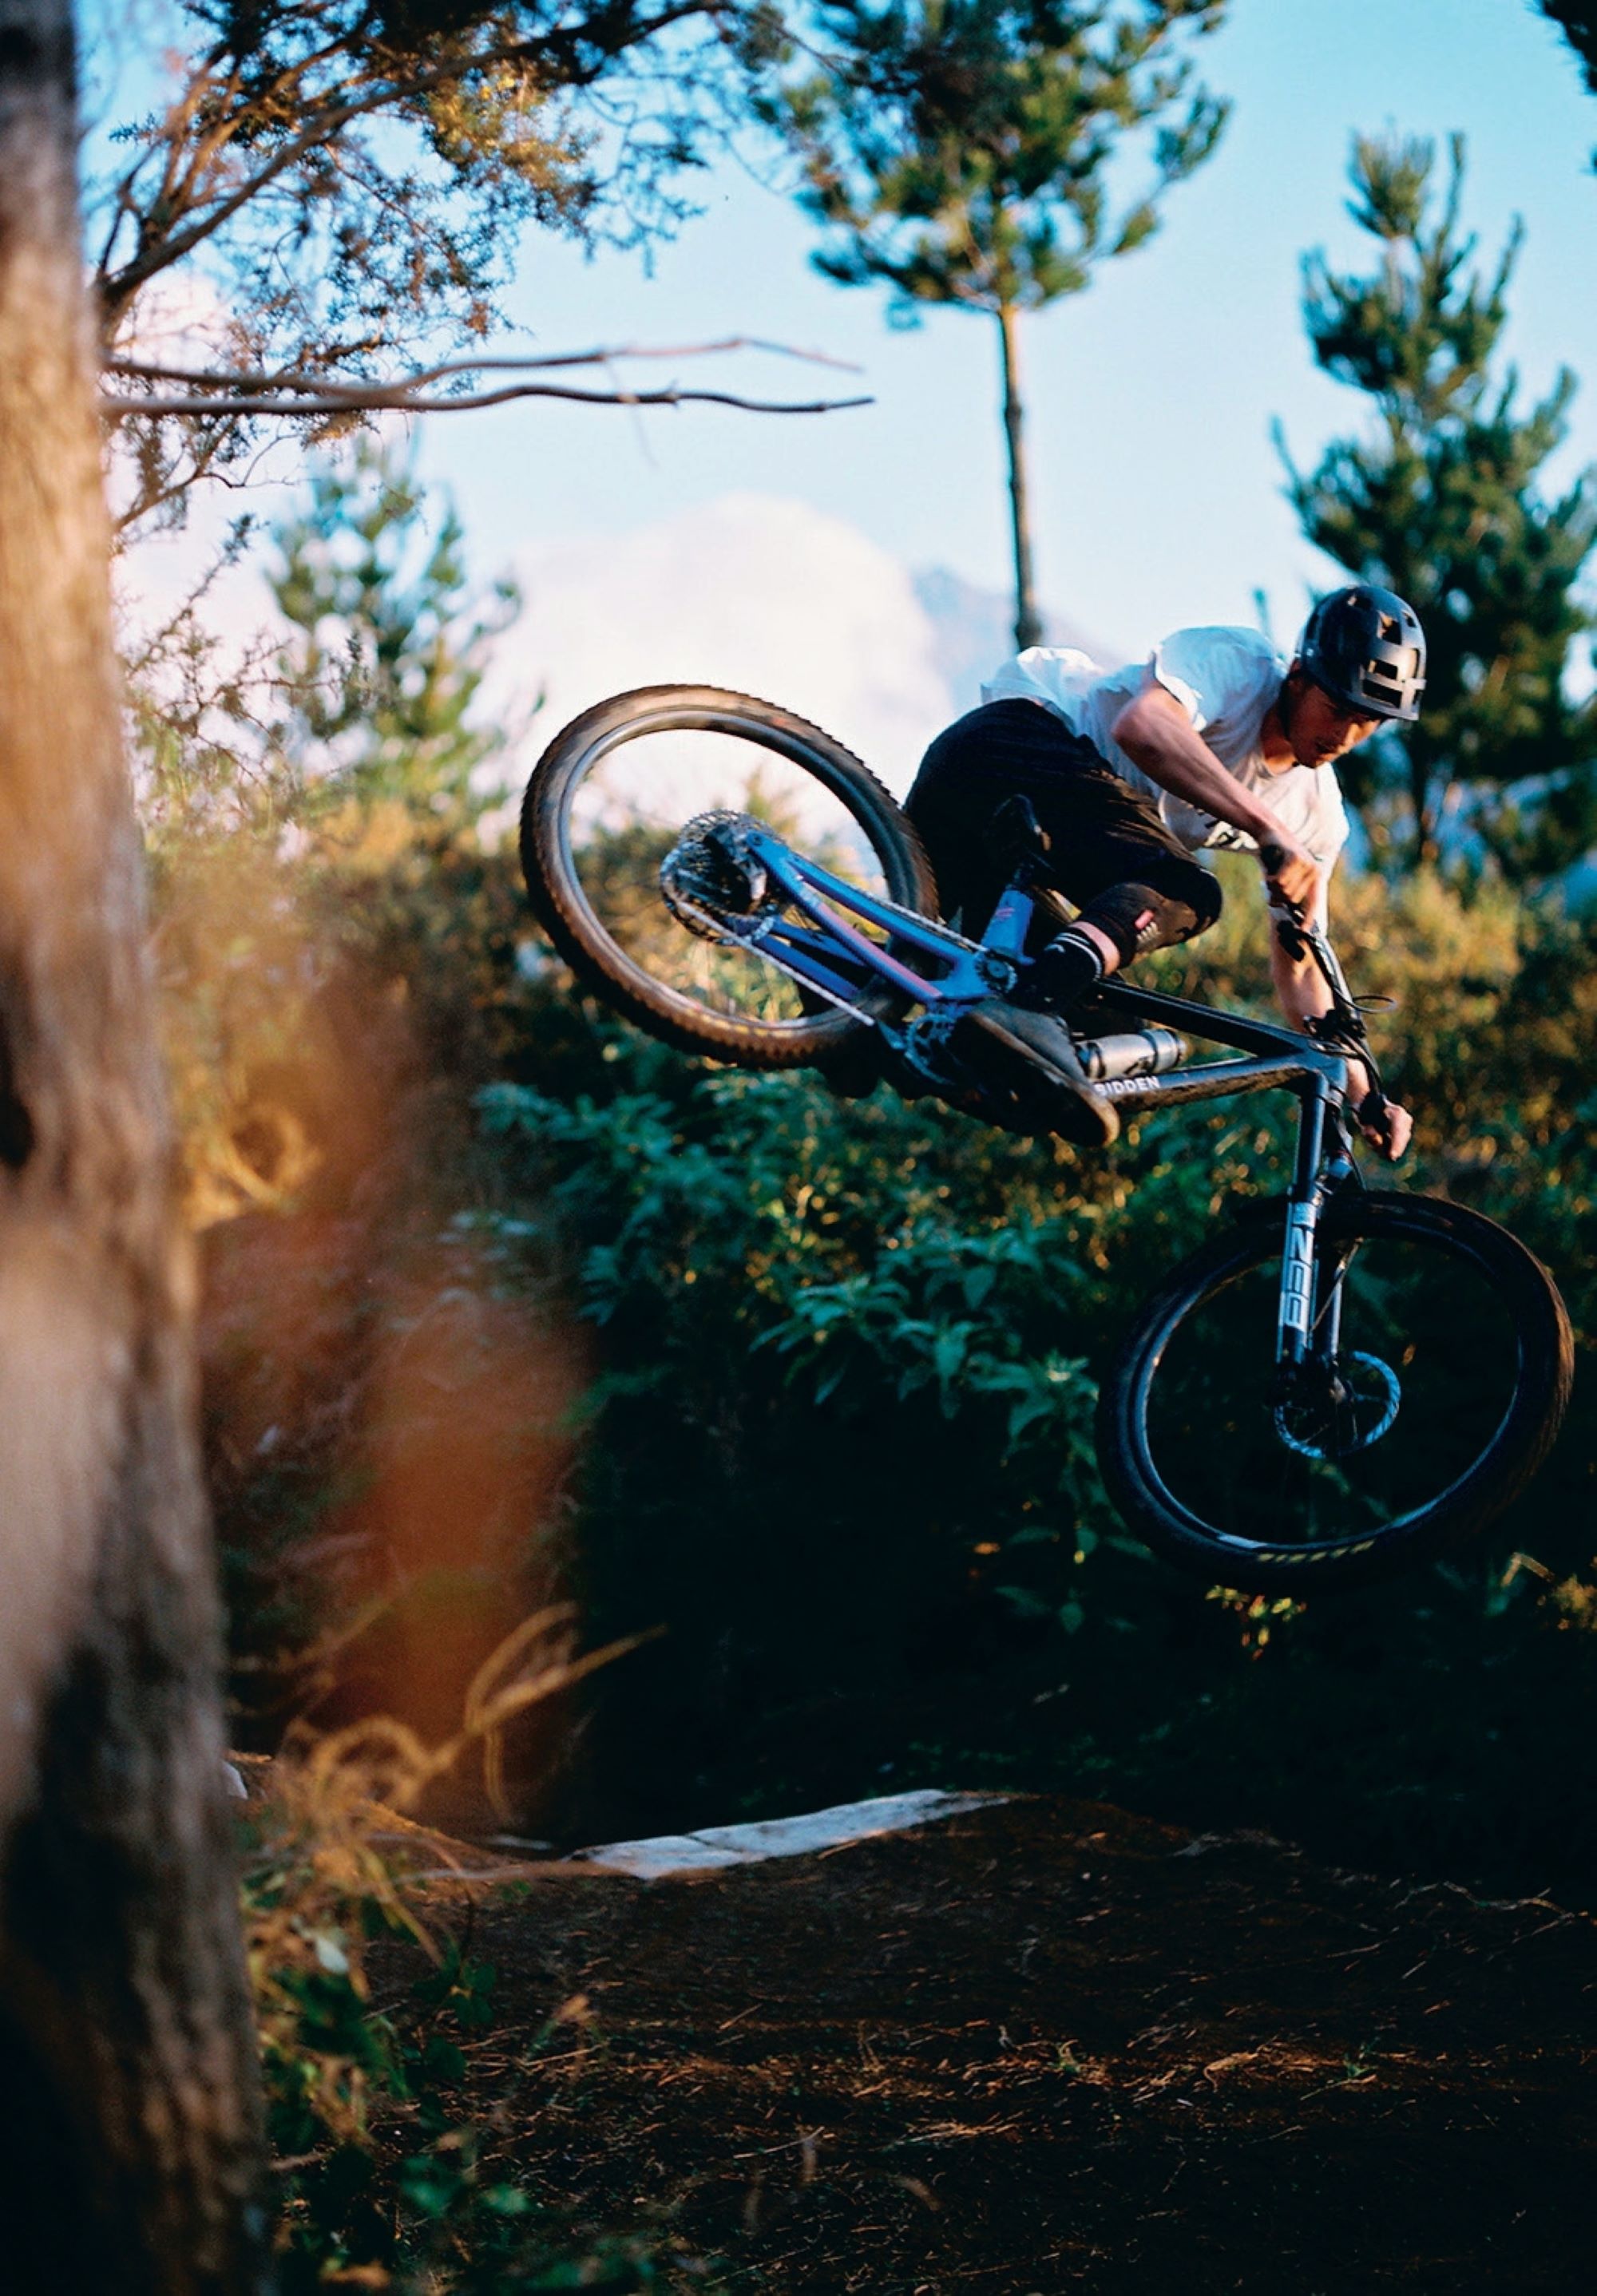
Dan began his time in Christchurch in 2018, where he studied for four years, finishing his final year online through Victoria University of Wellington during the COVID era. He now works as a secondary school teacher at Spotswood College. Most of his time is spent with Outdoor Education and Geography classes, both subjects with parallels to his dirt craft.
Although it was University that had landed him in Grid City, it was a community at the end of Bowenvale Road, right at the foot of Vic Park, where his focus lay between classes. “The Vale” was an integral part of the dirt jump scene in Christchurch for 18 years. The tales from the place are many and really warrant their own feature. Dan not only refined his craft of building trails but thrived on immersing himself in the culture, traditions, and unwritten rules of The Vale, which he would eventually take back home to Taranaki.
“Dan… D-Rock… where do I start… I met Dan when he moved to Christchurch for Uni. Like most years, there was a fresh influx of people moving to the garden city to study and, of course, there are a ton of mountain bikers mixed into that group. He showed up, was keen and motivated to ride jumps, meet new people, and most importantly, he was keen to get on the tools and move some dirt.
D Rock blended in with the Vale crew and became one of the boys super-fast; his quick wit and cheeky banter never went amiss. Dan seemed to be another dude who wanted to learn a few tricks and throw down. That’s not hard to be honest, when you have the likes of Billy Meaclem and Matt Begg to ride with and be influenced by.
He very quickly started to rip tricks on the ol’ trusty Vale step-up; 360s, Backflips, ‘No foot cans’ to name a few tricks this lad does with ease but, personally, I think Dan has one of the best ‘Suicide no handers’ on the planet. Not just NZ, but on the planet, the way he just dumps the front down, leans right off the back and just lets the hands sail behind him is timeless style. With the loss of The Vale and the boys moving on with life, it’s sad I don’t get to see him as much as I did, but I always look forward to hangs and seeing him swing off a bike. Big Up D-Rock, you’re the man.” Andrew Costain, OG Vale builder and rider.
Dan credits the riders behind the infamous Post Office jump spot in Aptos, California, as a key inspiration behind his riding in his early days. Although this focal point drew riders from around the world, it was a tight crew of locals who built and maintained it under a “no dig, no ride” ethos. Riders such as Cam and Tyler McCaul, Greg Watts, Ryan “R-Dog” Howard, Jamie Goldman and friends, were the original locals who kicked it off. Over time, the spot drew riders from around the globe seeking a dry winter escape from their northern hemisphere winters, including Brandon Semenuk, Martin Söderström, Andreu Lacondeguy, and Brett Rheeder, among many others. Although it was on the opposite side of the planet to Post Office, and far removed from most of the world’s riding population, The Vale has many parallels with it: the culture; the no-dig, no-ride philosophy; and being a beacon that attracted global talent to the area when they were down under.
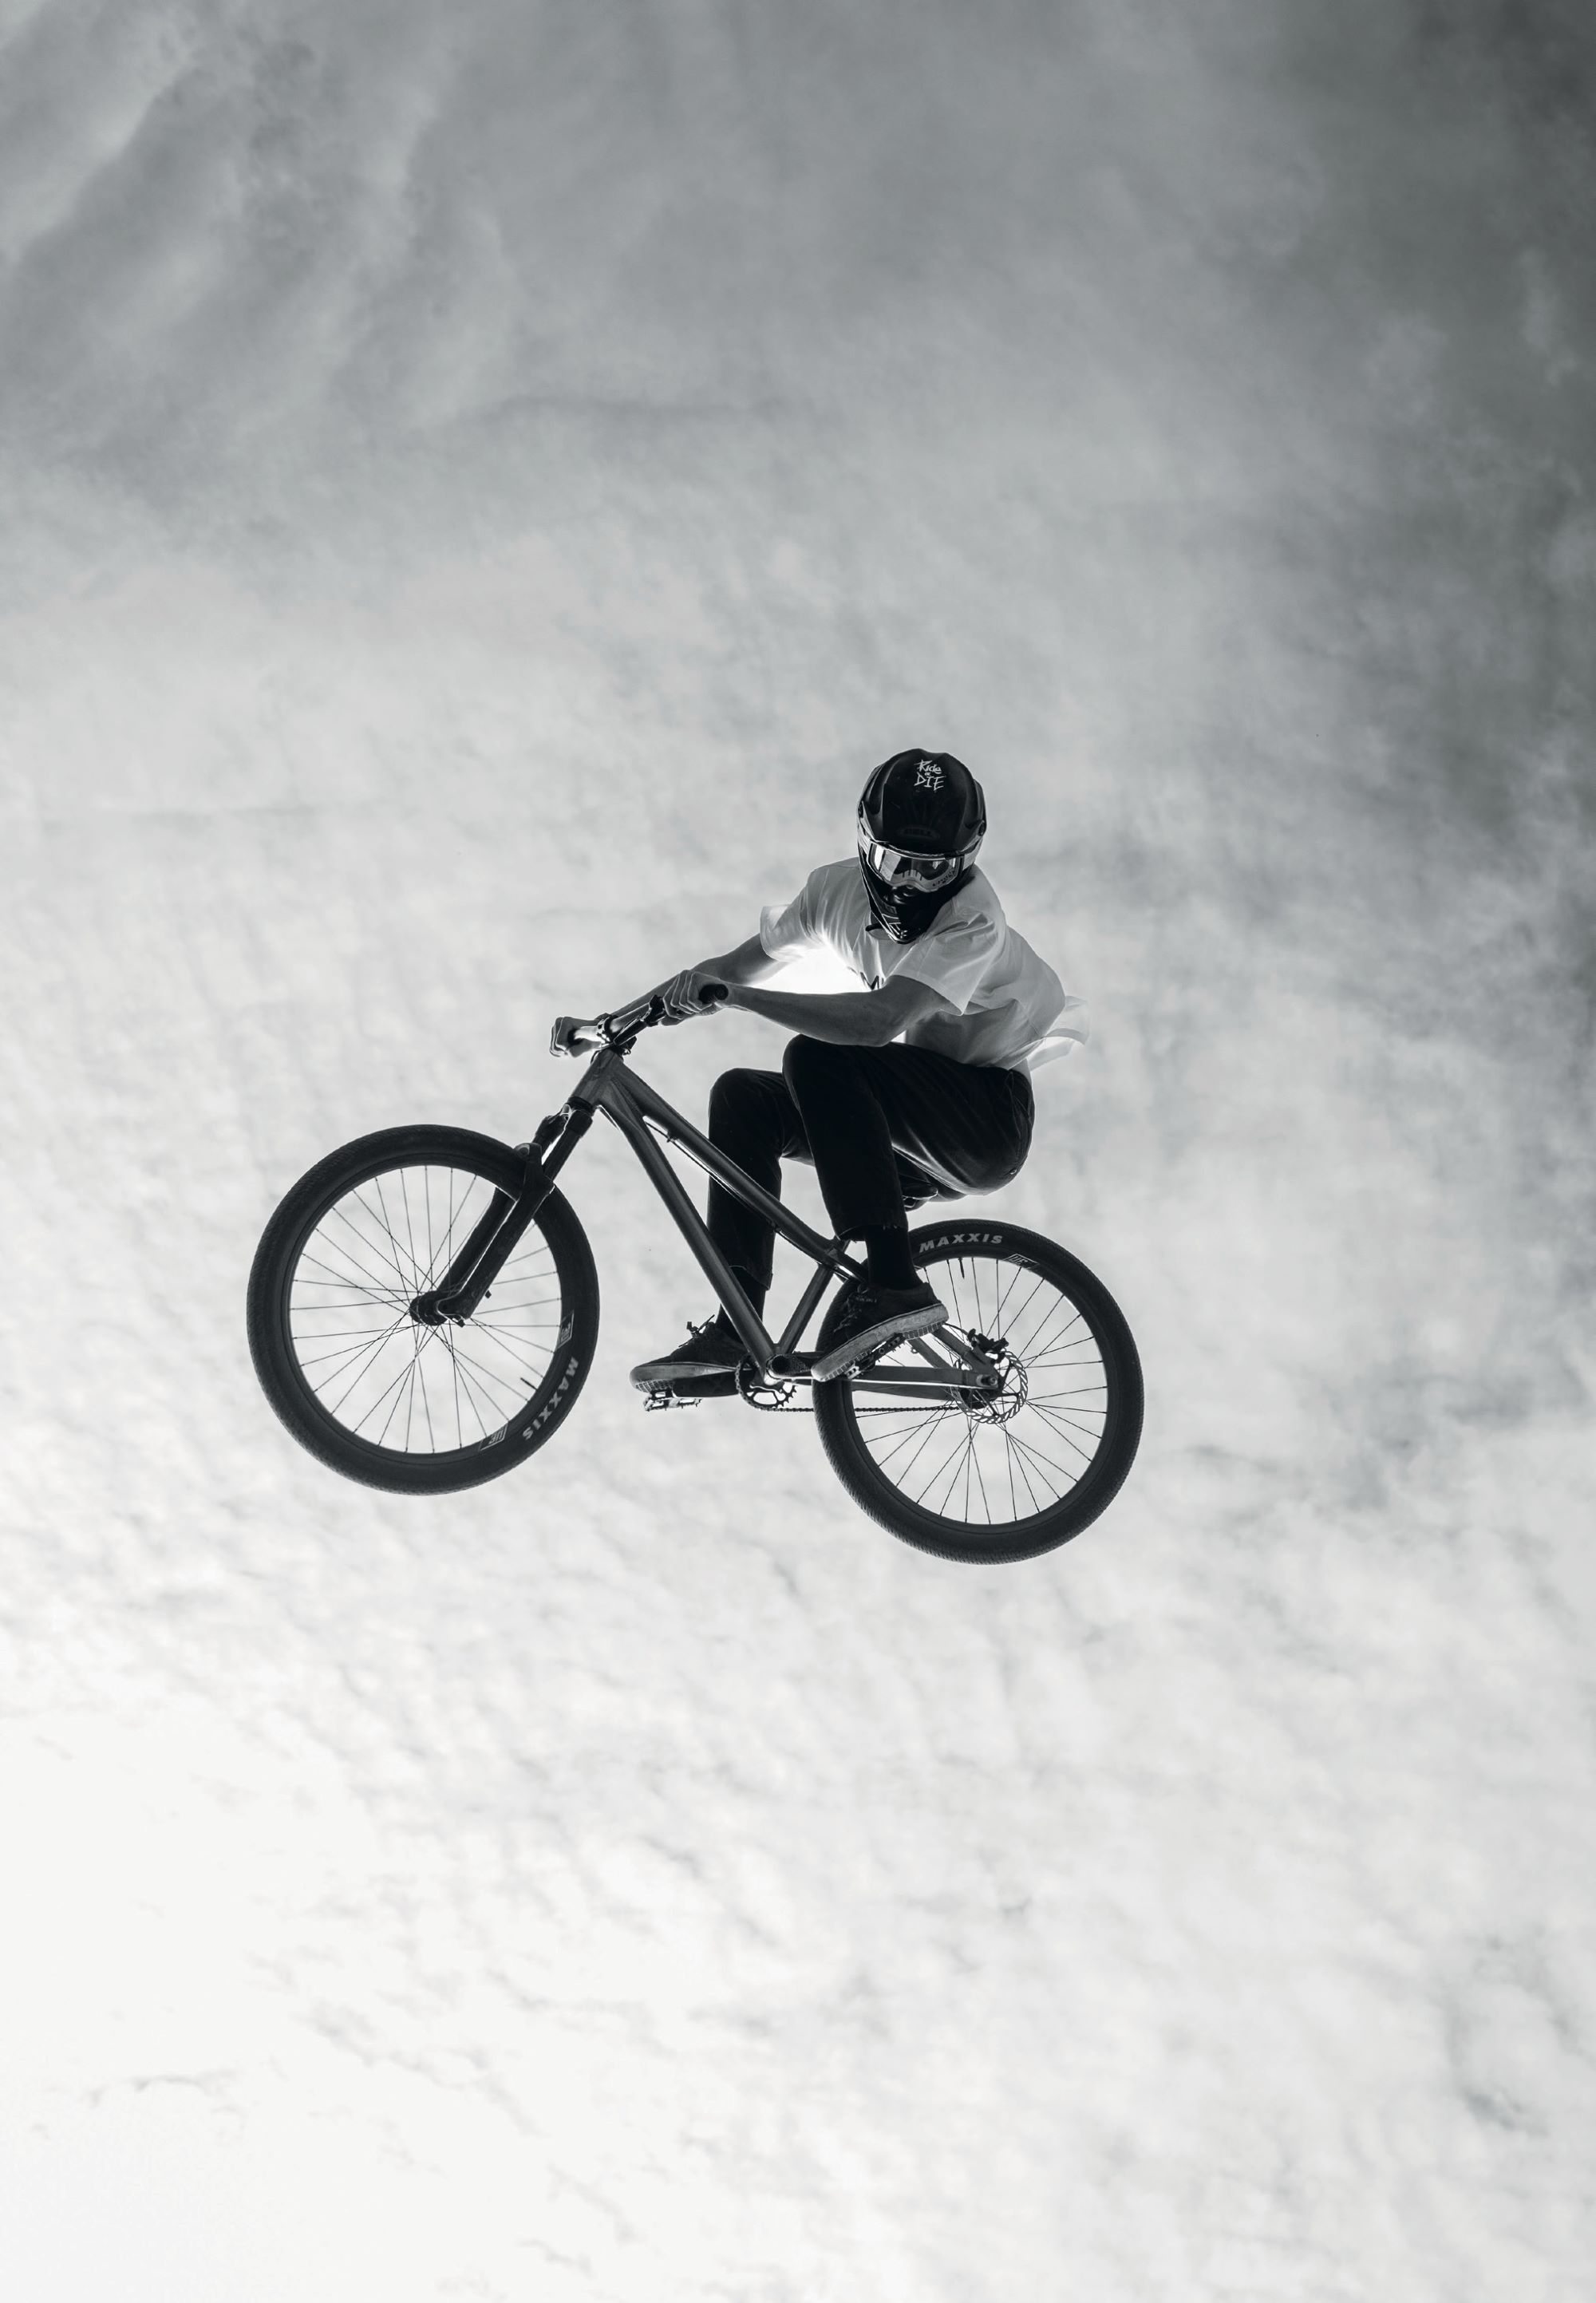
Unfortunately, there was one parallel that neither The Vale nor the Post Office crews wished could be made between the two spots; each was eventually torn down to make way for development. The Post Office trails got bowled in 2015, some 15 years after their inception, while The Vale survived from 2004 to 2022. Although these focal points are physically gone, they both live on in spirit and memories. The communities established in each location continue to evolve in their own unique ways and, even though the original crews have now dispersed and scattered around the globe, the bonds formed at each spot will last a lifetime. The population of Christchurch was a double-edged sword for Dan; he was stoked to have a solid crew to dig and ride with, but there were downsides, and these made him miss the smaller, more laidback hills of home. Many of the crisp lines and manicured berms he’d helped build in Christchurch were rapidly reduced to just lines of powder down the hillsides, blowing out due to heavy traffic, thanks to easy access and the sheer volume of riders in town.
“I can’t quite remember how we first met, but I feel like he just arrived at The Vale one day. He hit it off with everyone pretty quickly. His sarcasm fit right in with our crew’s bad humour, and when we saw he was actually just as stoked to help dig and work on the jumps as much as riding them, we all knew he was a great addition to the trails. Dudes like D-rock are few and far between in the MTB space around here. Most MTB riders just want to ride as much as they can, not caring about the quality of trails they’re riding, whereas Dan’s one of those dudes you’ll only find riding when the conditions are on, and the conditions are usually only on because he’s been the one out digging to get ‘em good. I think Beddy B and Che have played a huge part in shaping Dan into the legend he is, on and off the bike, so big up to those two Taranaki Lords! Definitely miss having him around CHCH, but the stuff he’s got going on up in the Naki looks top notch, can’t wait to come roach it mate!” Billy Meaclem, OG Vale builder and rider.
Sure, riding and digging make up most of the creative equation for Dan, but filming and shooting photos are also part of his creative expression. Teaming up with Josh Birkenhake, the pair has produced a few videos, with the most recent, Homebrew, taking Dan’s effortless style and blending it with Josh’s own unique and gritty, almost skate-inspired, filming style.
The success of these video parts for the duo isn’t about garnering the most likes or views; the success lies purely in the process. Tuning a trail, Dan interpreting its features on the bike, and Josh filming it; if other people like the result, then that’s a bonus.
“You can build stuff here and people respect it a bit more, which is kind of rad…. I kind of realised how lucky we were here when I’d just come back during my summer breaks.”
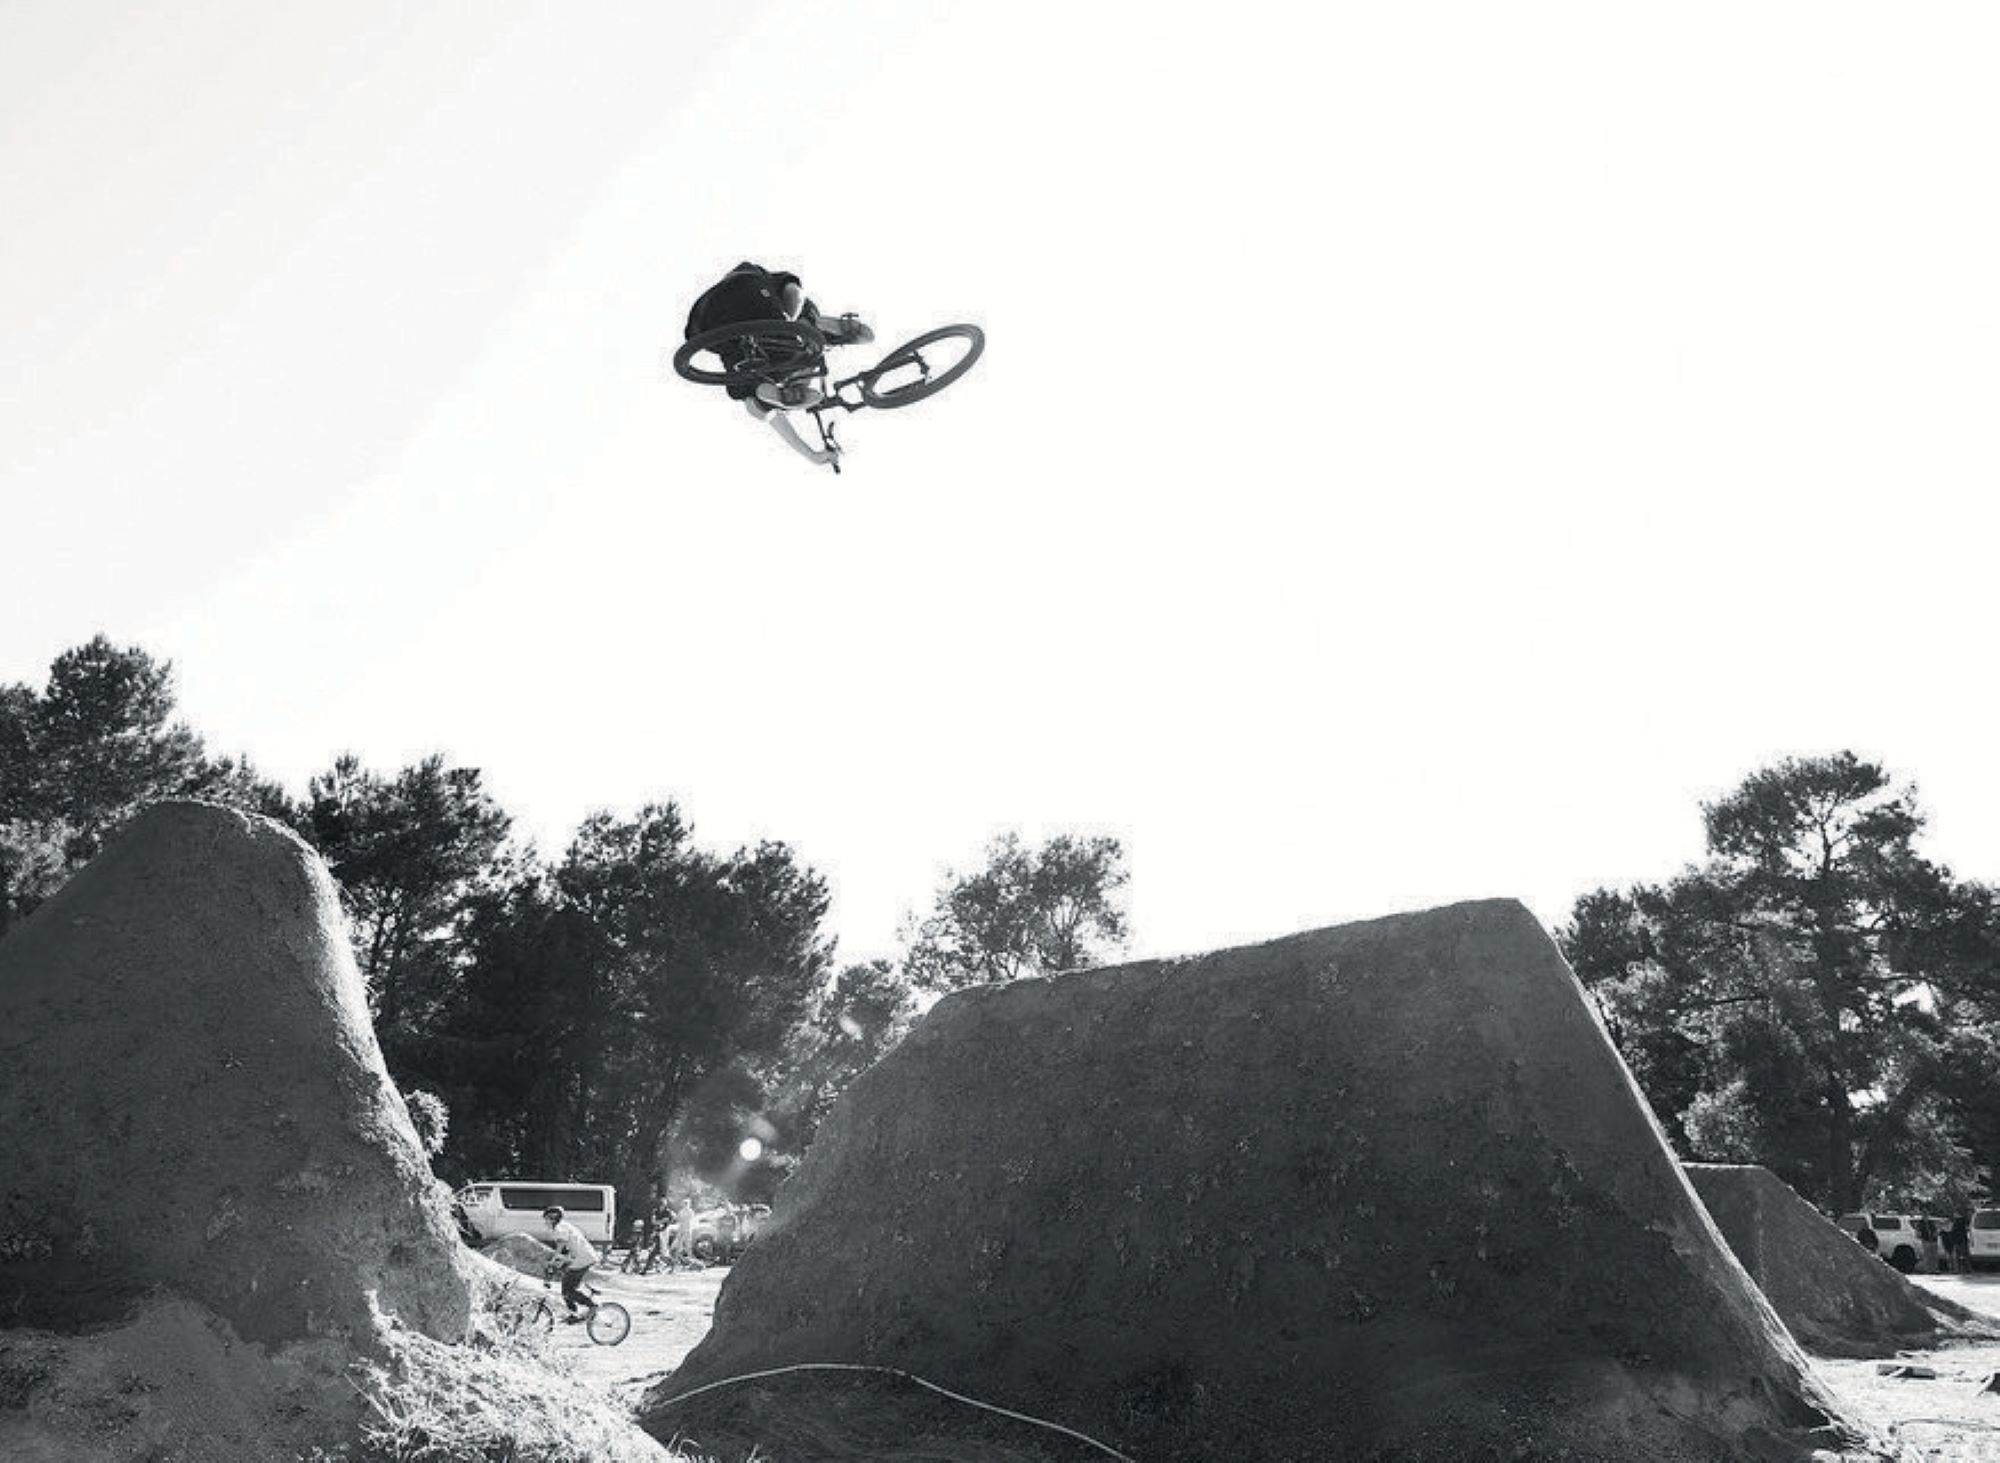
With his time in Christchurch complete, Dan headed back to Taranaki, linking up with his mates Jonty Vink and Che Evans. The small but mighty crew balanced digging and riding. Although focused on dialling in existing trails, perfecting what’s already there, after a period they needed something different, something they’d designed and built themselves and could truly call their own. The Peacock Ridge trail, Mangamahoe, fulfilled that need. Tightly linked turns separated by gaps and rollers – there’s barely a flat or straight section on the trail.
“We don’t want to dig more than we can maintain or keep running sick. So rather than just building heaps of new stuff, we’ll rebuild or tweak features. We’ll constantly be digging, but it’s kind of got to the point now where it’s just refinement rather than full-on going out and building freshies. Sometimes it’s a 100-metre section of trail that links back into the same track. We’ll kind of condense our focus into one area so we don’t have to go to more than one spot to ride, it’s all close together.”
Dan is quick to add his thoughts on the state of trail building in general. While he’s glad there are companies around that can quickly push a trail through with a digger, the speed and ease of these builds, in his eyes, mean that lots of MTB clubs end up with more trail than they can maintain, so overall quality suffers. Particularly, digger-built flow style trails are more of a liability than an asset for clubs relying on volunteers for trail maintenance. It’s evident that Dan’s focus is on ‘quality over quantity’, as he explains below:
“You see a lot of commercial builds happening these days, and it’s sick and it’s super rad for the community. But then it’s such a massive surface area to maintain and, in three months, it’s just flogged and they don’t have any maintenance plans or anything. In Queenstown, they’ve obviously got the money for it, and they (the commercial builders) can come through and redo it every year. But I know you see these smaller communities and clubs getting massive funding for trails, and then come six months’ time, all that funding spent, they’ve got like three rad new trails – and, especially bike park tracks and digger-built stuff, they just get flogged and need lots of work.
It’s almost like the clubs see them as an infinite asset. But it’s like, dude, that asset depreciates fast, you know, you’ve gotta keep investing or have a skilled community that can upkeep those trails.
Whangamata MTB Club do a good job. They’ve got lots of digger-built trails, but have committed to having a full-time builder, and they keep it running super sick. Rather than building something new all the time, it’s sick to see like a club be like, oh no, we’ll chuck that money into actually keeping what we’ve got, good.”
The next chapter is unfolding for Dan; he’s putting down roots, hoping to purchase a plot of land for a tiny home with big jumps in the front yard. Seeing the talent emerging from the scene in New Plymouth, he’s encouraging the region’s younger riders to “respect the sesh”, ensuring they take time to rebuild, repair, and dial in the jump lines, rather than just riding and leaving someone else to look after them.