

Review: Trek 2022 Top Fuel
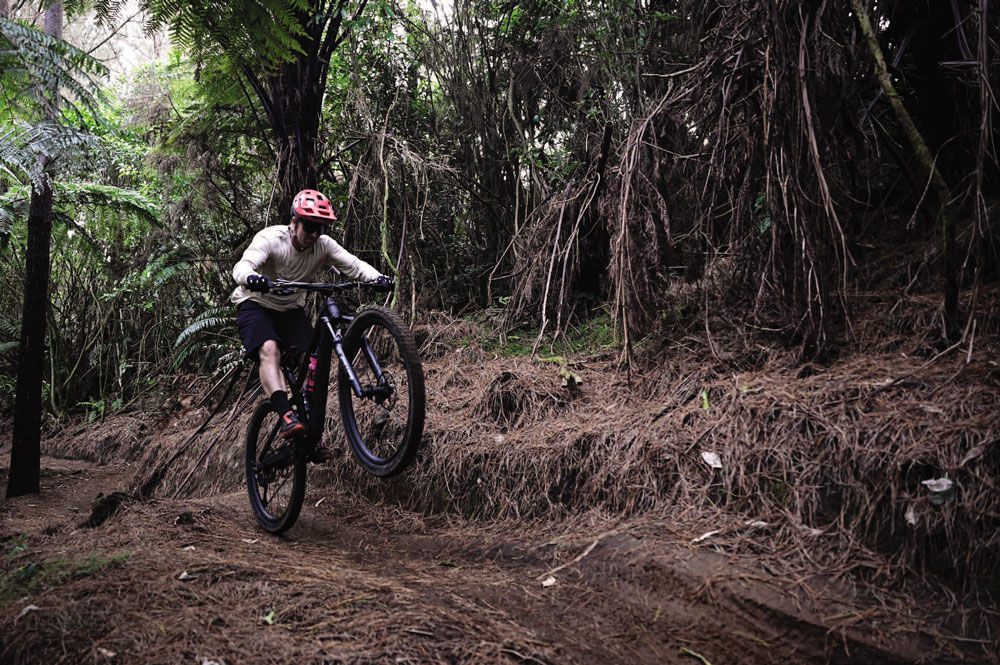
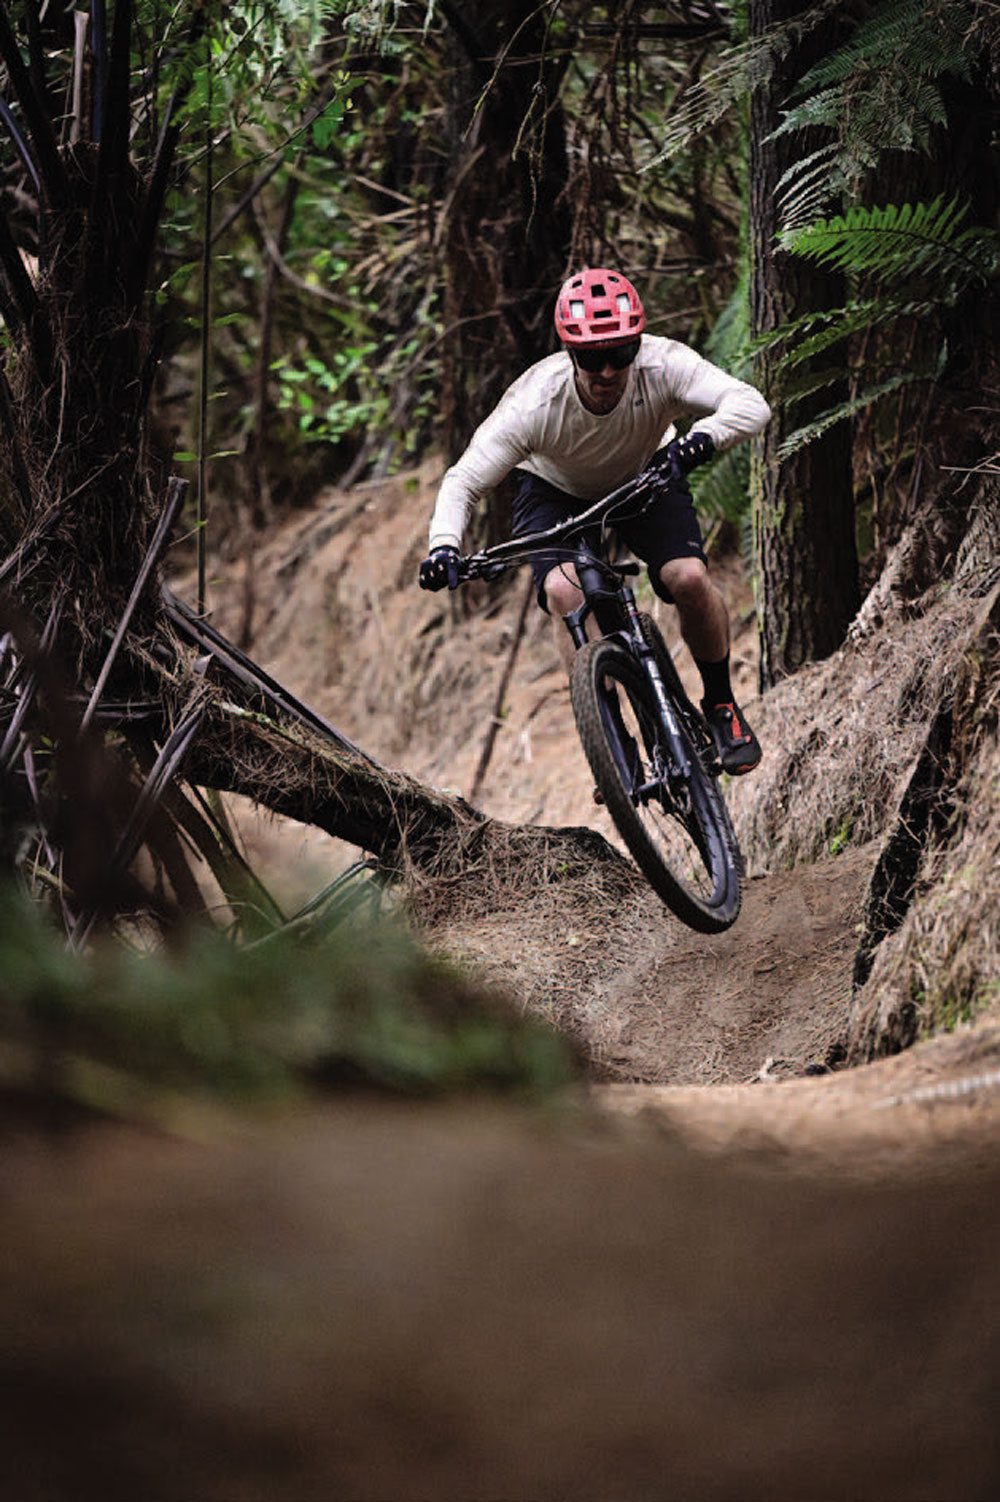
“The Trek 2022 Top Fuel responds really well to rider input and, as a result, is simply really fast.”
The process of evolution involves a series of natural changes that cause species to arise, adapt to the environment and, sometimes, to become extinct. From walking on two legs to riding bikes and now having the ability to ride bikes off cliffs at Redbull Rampage shows how far we’ve come!
Just like us, bikes tend to evolve too; the Top Fuel we’ve had on review for the last two months is a perfect example of that. Previously Trek’s XC race bike that evolved into a marathon bike, it has evolved again, and Trek fans might be wondering just what exactly the new Top Fuel is now?
Trek’s Supercaliber, with exclusive IsoStrut shock, 60mm of travel and unique pivotless seatstays, sits in the XC race seat the Top Fuel used to occupy in Trek’s stable. This has given the Top Fuel the opportunity to evolve out of that same XC space into something new, and that’s exactly what it has done.
So, is it a ‘trail bike’? Is it a ‘down country bike’? Or is it just what we also thought a ‘mountain bike’ was?
Previous Top Fuel fans might even be asking, ‘has it evolved too far?’
In New Zealand, the Top Fuel will be available at eight price points. As mentioned, we’ve had the 9.8 XT model, worth $8849, but it’s also available in two alloy models which offer the most affordable entry points; the Top Fuel 5 at $3799. Entry into the carbon options is the 9.7 ($6599), going all the way up to 9.9 XX1 AXS Project One, for $15,449.
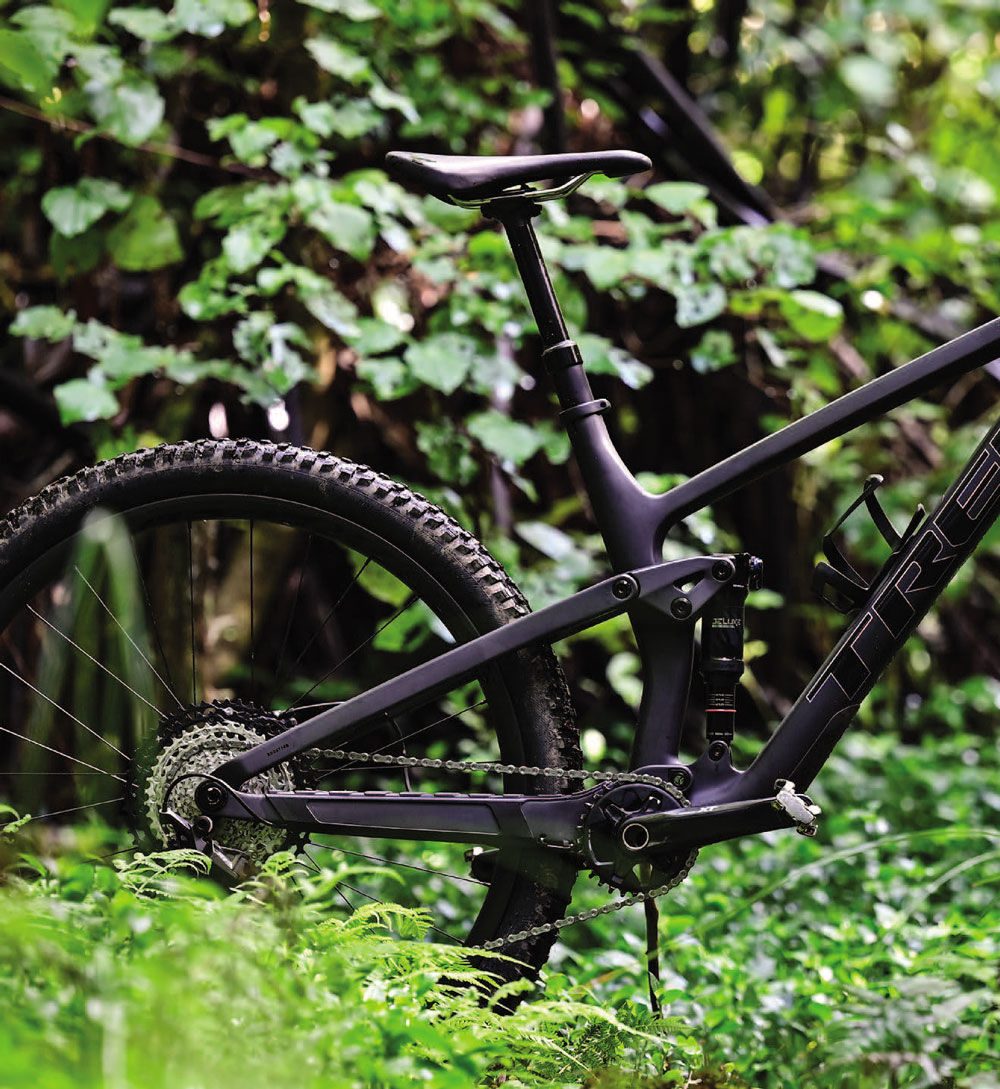
So, what are the key changes that have been made in the process of evolution? For 2022, travel in the rear ups from 115mm to 120mm.
To be fair, 5mm extra travel isn’t really much of a game-changer but upping to 120mm sends a signal that this isn’t, in fact, a slightly evolved XC bike – this is definitely an all-new Top Fuel. Making all that 120mm of travel work, is Trek’s ABP rear pivot system.
We’ve always been a fan of this system – the rear axle pivot rotates directly around the axle point, and this allows Trek to tune how the suspension reacts to acceleration and braking forces independently.
At the lower shock mount, Trek’s flip chip style geometry adjustment, the Mino Link, lets you fine tune your frame geometry ‘on the go’.
In reality, it’s not likely you’d be doing that out on the trail but in the comfort of your garage, where you aren’t worried about losing precious shock hardware in the dirt, you can flip the Mino Link. Stay in low for a slack 66-degree headtube angle. Flip it for a quicker 66.5-degree headtube angle and a 7mm higher bottom bracket for more ground clearance. All of that is driving the RockShox Deluxe Ultimate RCT shock.
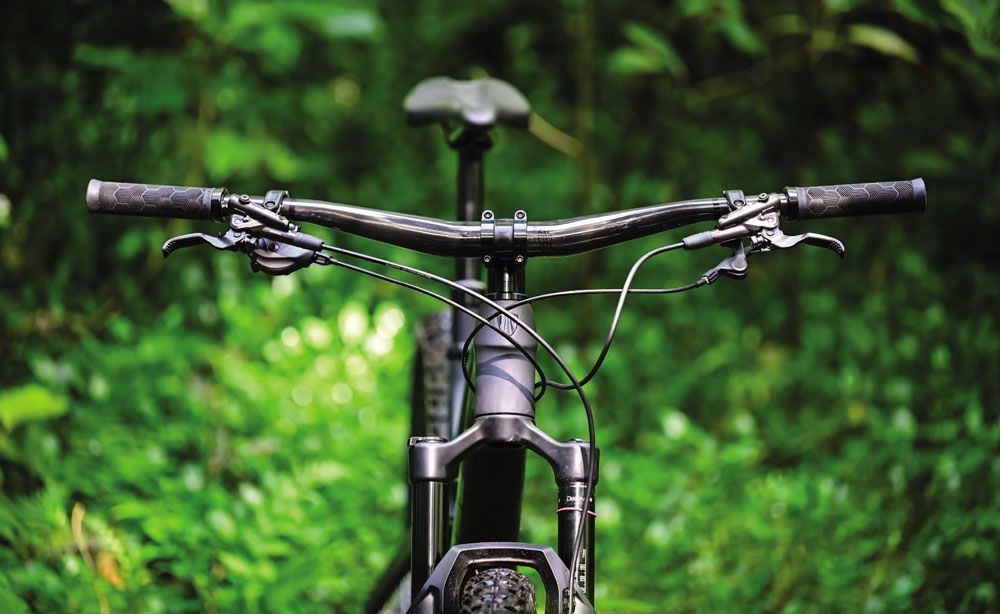
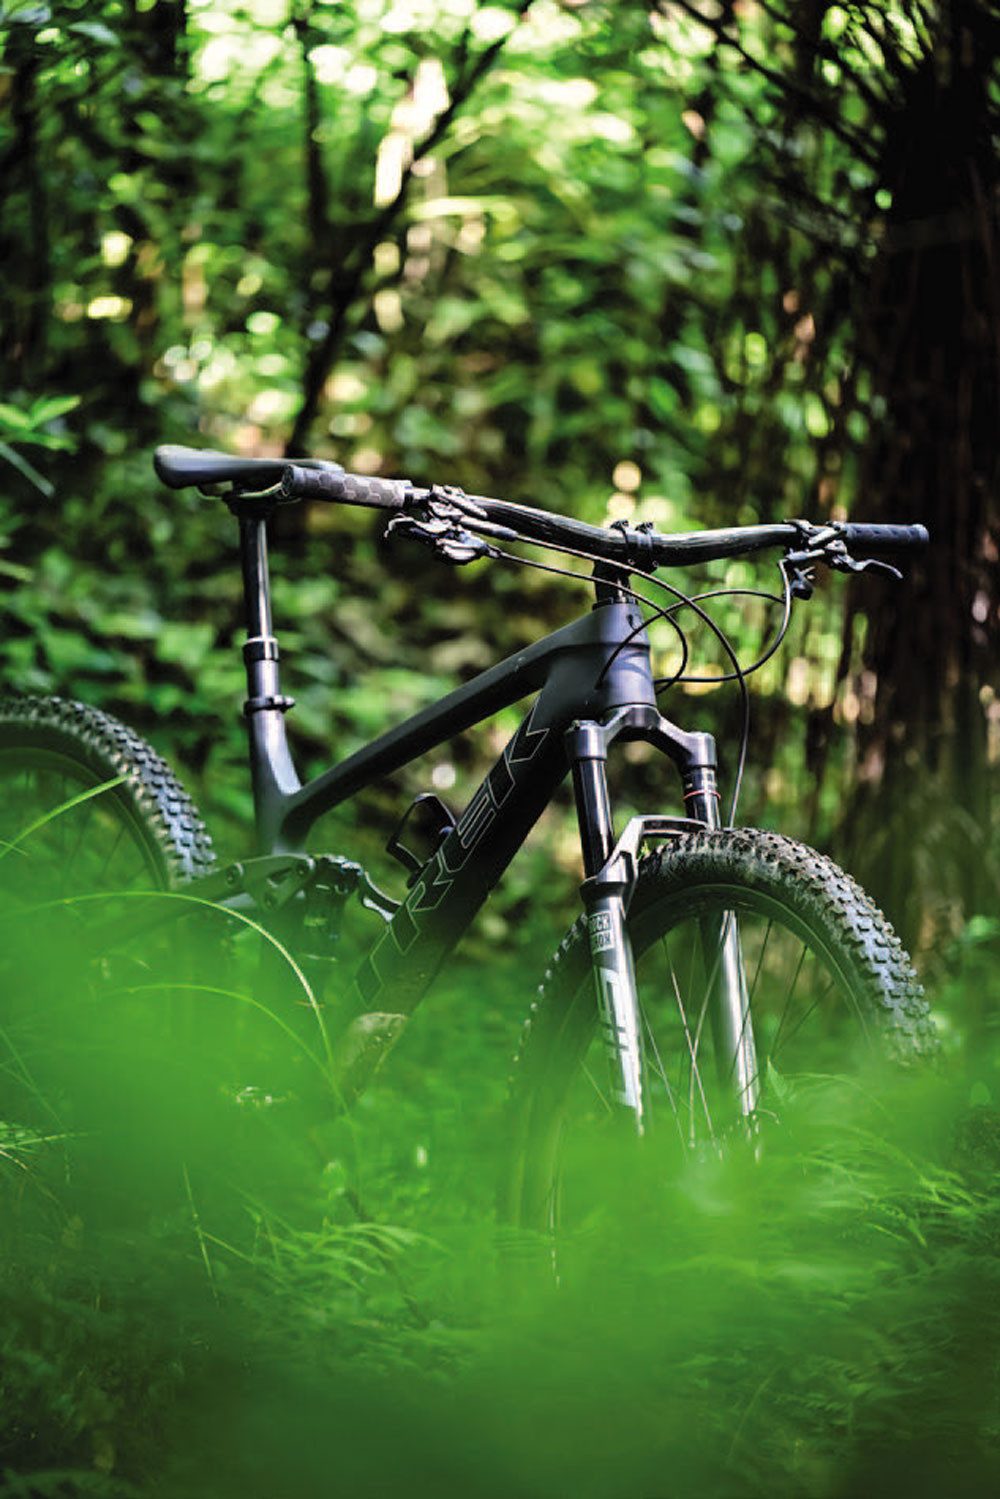
Up front sees the new Rock Shox Sid Select+ 120mm fork. At upward of $8800, we’d really love to see the Sid Ultimate, which gets the benefit of the improved Charger Race Day, over the Charger 2 RL that come on the Select+. However, you still get the full carbon OCLV frame along with Bontrager’s Line Elite carbon wheels, and a full XT build kit from tip to tail, including the superb 4-pot XT calipers and a 10-51 tooth cassette. Everyone seems quite particular about which drivetrain team they are on, so Trek offer their 9.8 and 9.9 models in either SRAM or Shimano build kits.
Out of the box, we personally liked the matte carbon look with holographic details around the edge of the logos. It’s subtle, smart and stealthy. This is the cheapest option at the 9.8 spec level. It’s also available in gloss black with a red swingarm, but this is essentially one of their Project One custom paint jobs, and you’ll pay an $1800 premium to get it. That’s some expensive paint.
For us, the pick of the bunch has to be the striking red/purple/yellow fade on the 9.8 GX build. Sadly, that one carries the $1800 paint premium too so will set you back $10,649 total. With all that in mind, the matte carbon XT option looks pretty good. To be fair, the Project One custom paint options that Trek offer are pretty amazing and their paint configurator is also a great way to kill an hour – don’t say we didn’t warn you. It’s cool to see companies allowing this kind of customisation.
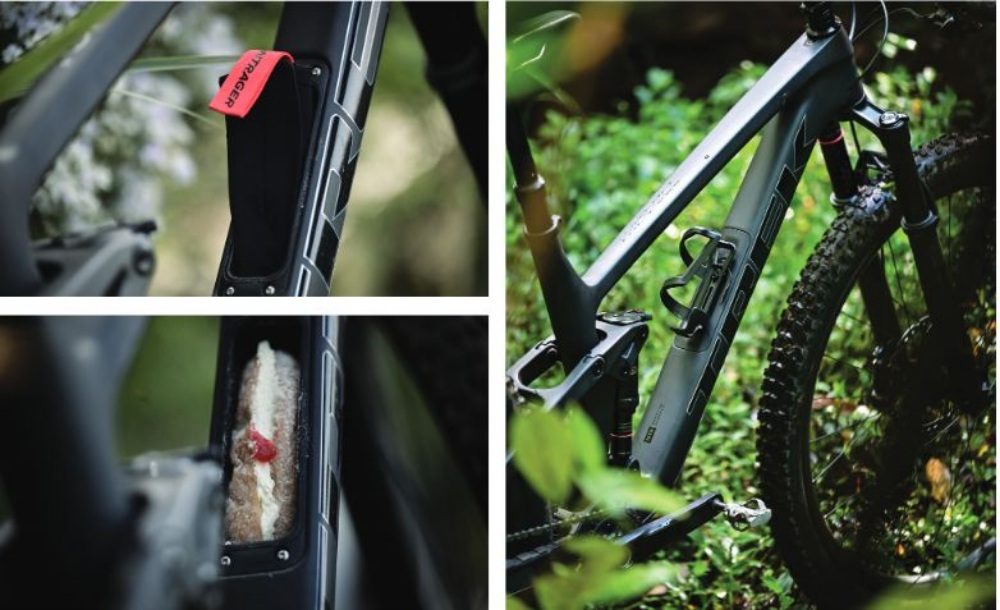
All the housing is internal, which completes the sleek look. Your tool kit is also internal! Or it can be, if you want it to be, with a handy tool storage compartment integrated under the bottle cage and a complementary Bontrager Bits pouch to wrap things in. We can now confirm that alongside a small tool kit, you can also squeeze a long cream donut – in case you’re worried about going calorie negative during a ride (who says we don’t do hard-hitting journalism here at NZ Mountain Biker?!).
At the bottom of the down tube there is a plastic armoring to protect the carbon, and a chunky rubberised chain- stay protector to keep things quiet. Trek fans will see the return of the Knock Block, now updated to the Knock Block 2.0, which keeps cables from getting yanked out in a crash and protects the top tube. The only difference being that it now provides an improved 72-degrees of turning radius.
Interestingly, for an XC- ish oriented bike, there is only one bottle cage mount. This seems strange, as this kind of bike seems perfect for longer rides and maybe even marathon races. With 120mm travel, 66.0-degree head angle, and 2.4” tyres, the Top Fuel is set (on paper at least) to be a pretty fun whip and, as we’ve been saying, firmly has its place in the ‘trail’ category. The question Trek buyers might be asking is, ‘is this basically just a new Fuel EX?’ Looking at the numbers, you certainly have to wonder if the difference is big enough? And, if you’re tossing up between the Top Fuel and the Fuel EX, which one should you buy? The Fuel EX is a 130mm travel bike with a 140mm Fox 36 fork. They’ve both got a 66-degree head angle, their wheelbase is almost identical (121.5 for Top Fuel size large, 121.1 for EX) but the reach on the Top Fuel is actually longer (48.0 for the Top Fuel vs 47.0 for the EX). If anything, this probably just signals that the EX is due for a refresh, so we would be surprised if we didn’t see that for 2023, where we expect it will get a similar treatment with a bit more travel and a bit slacker head angle. That will make you wonder if the 150mm Remedy, the last remaining 27.5 wheel bike in the lineup, really has a place any more?
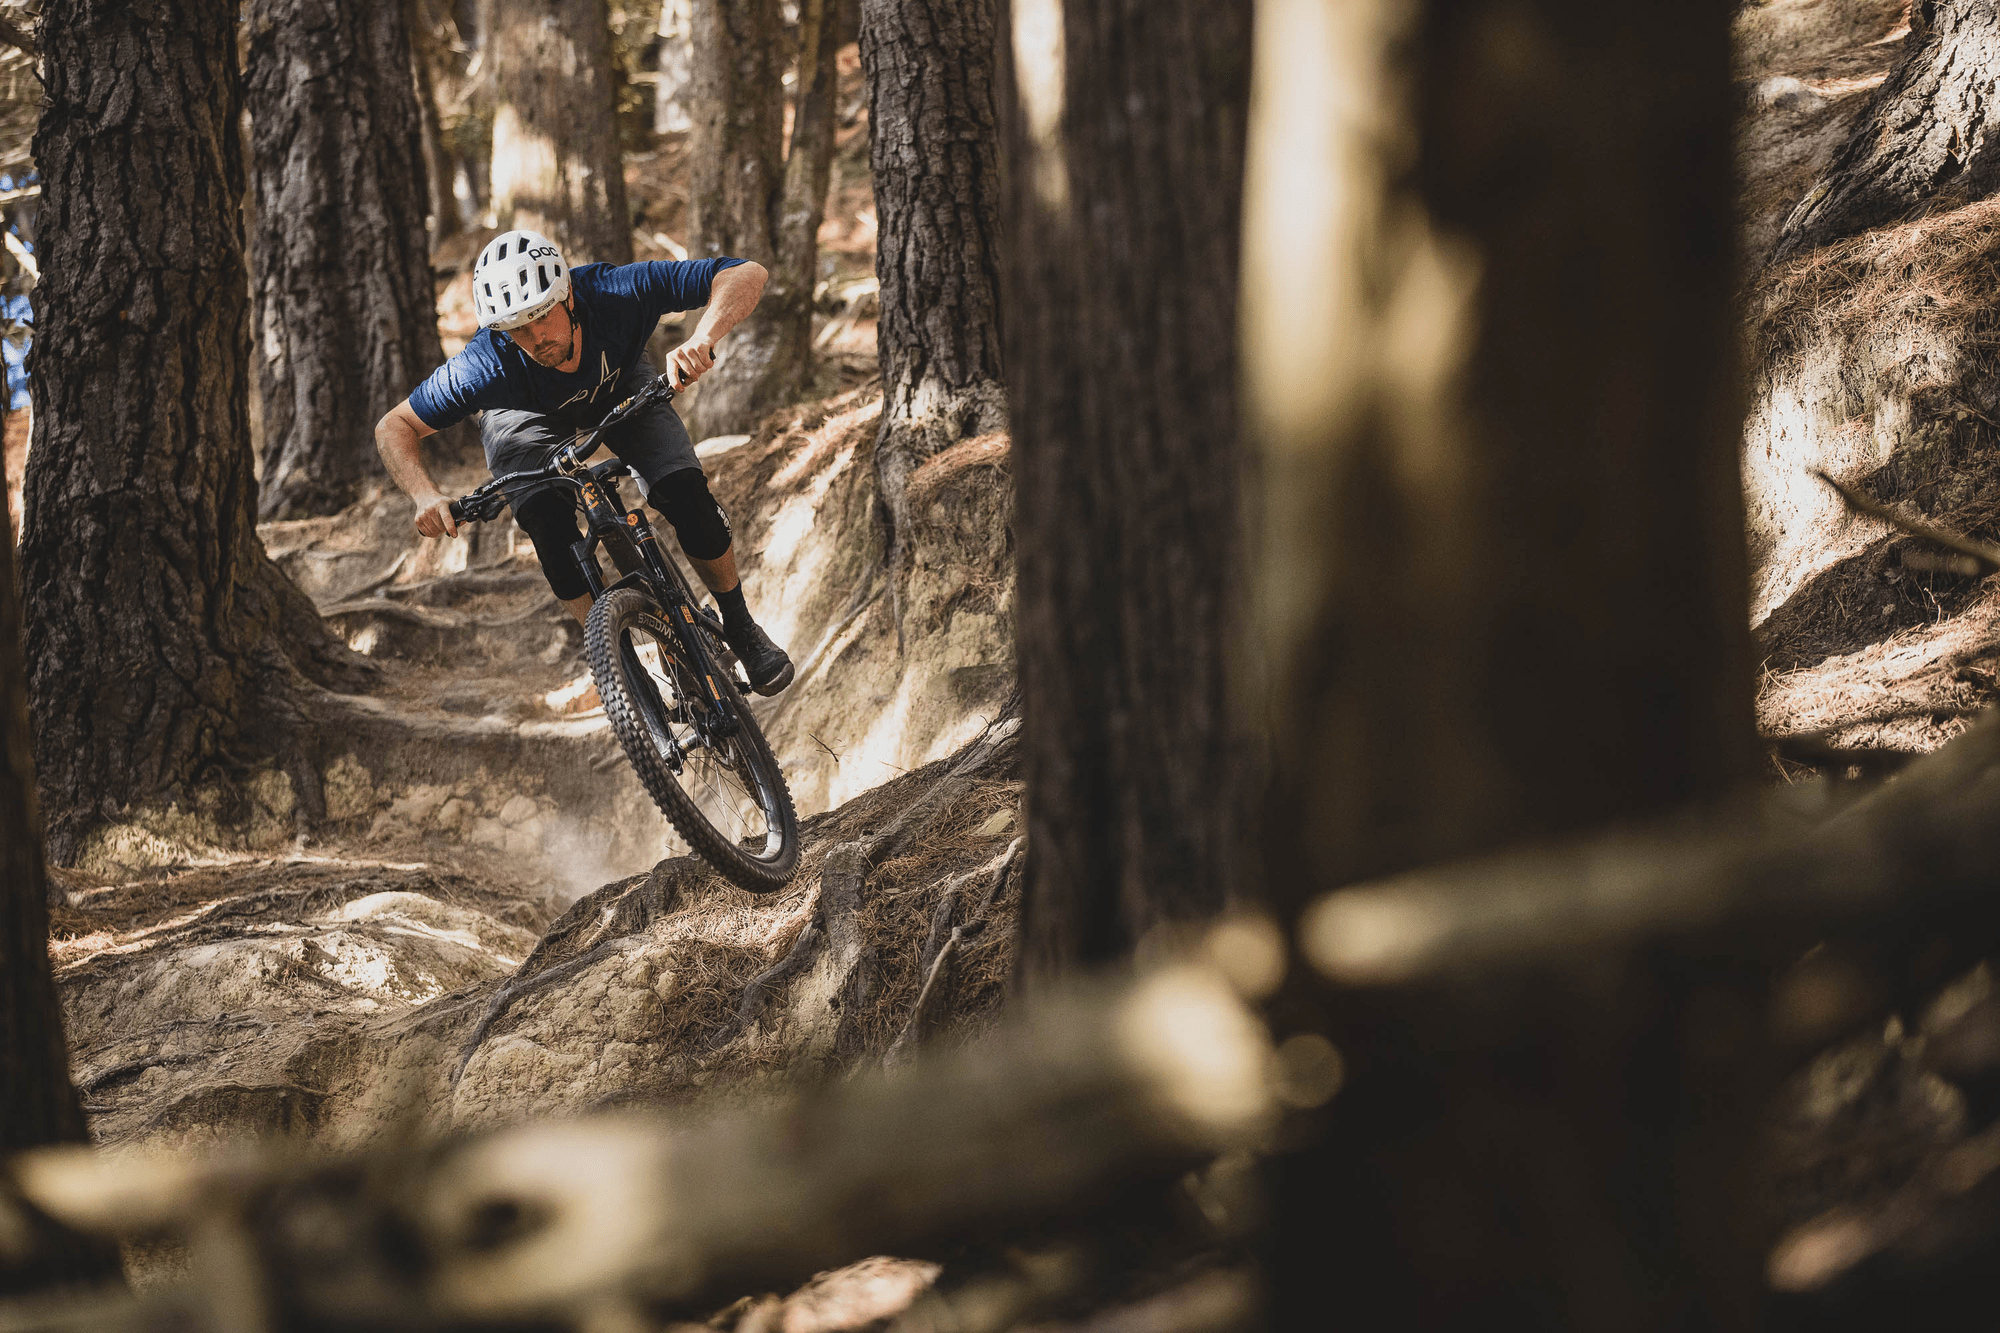
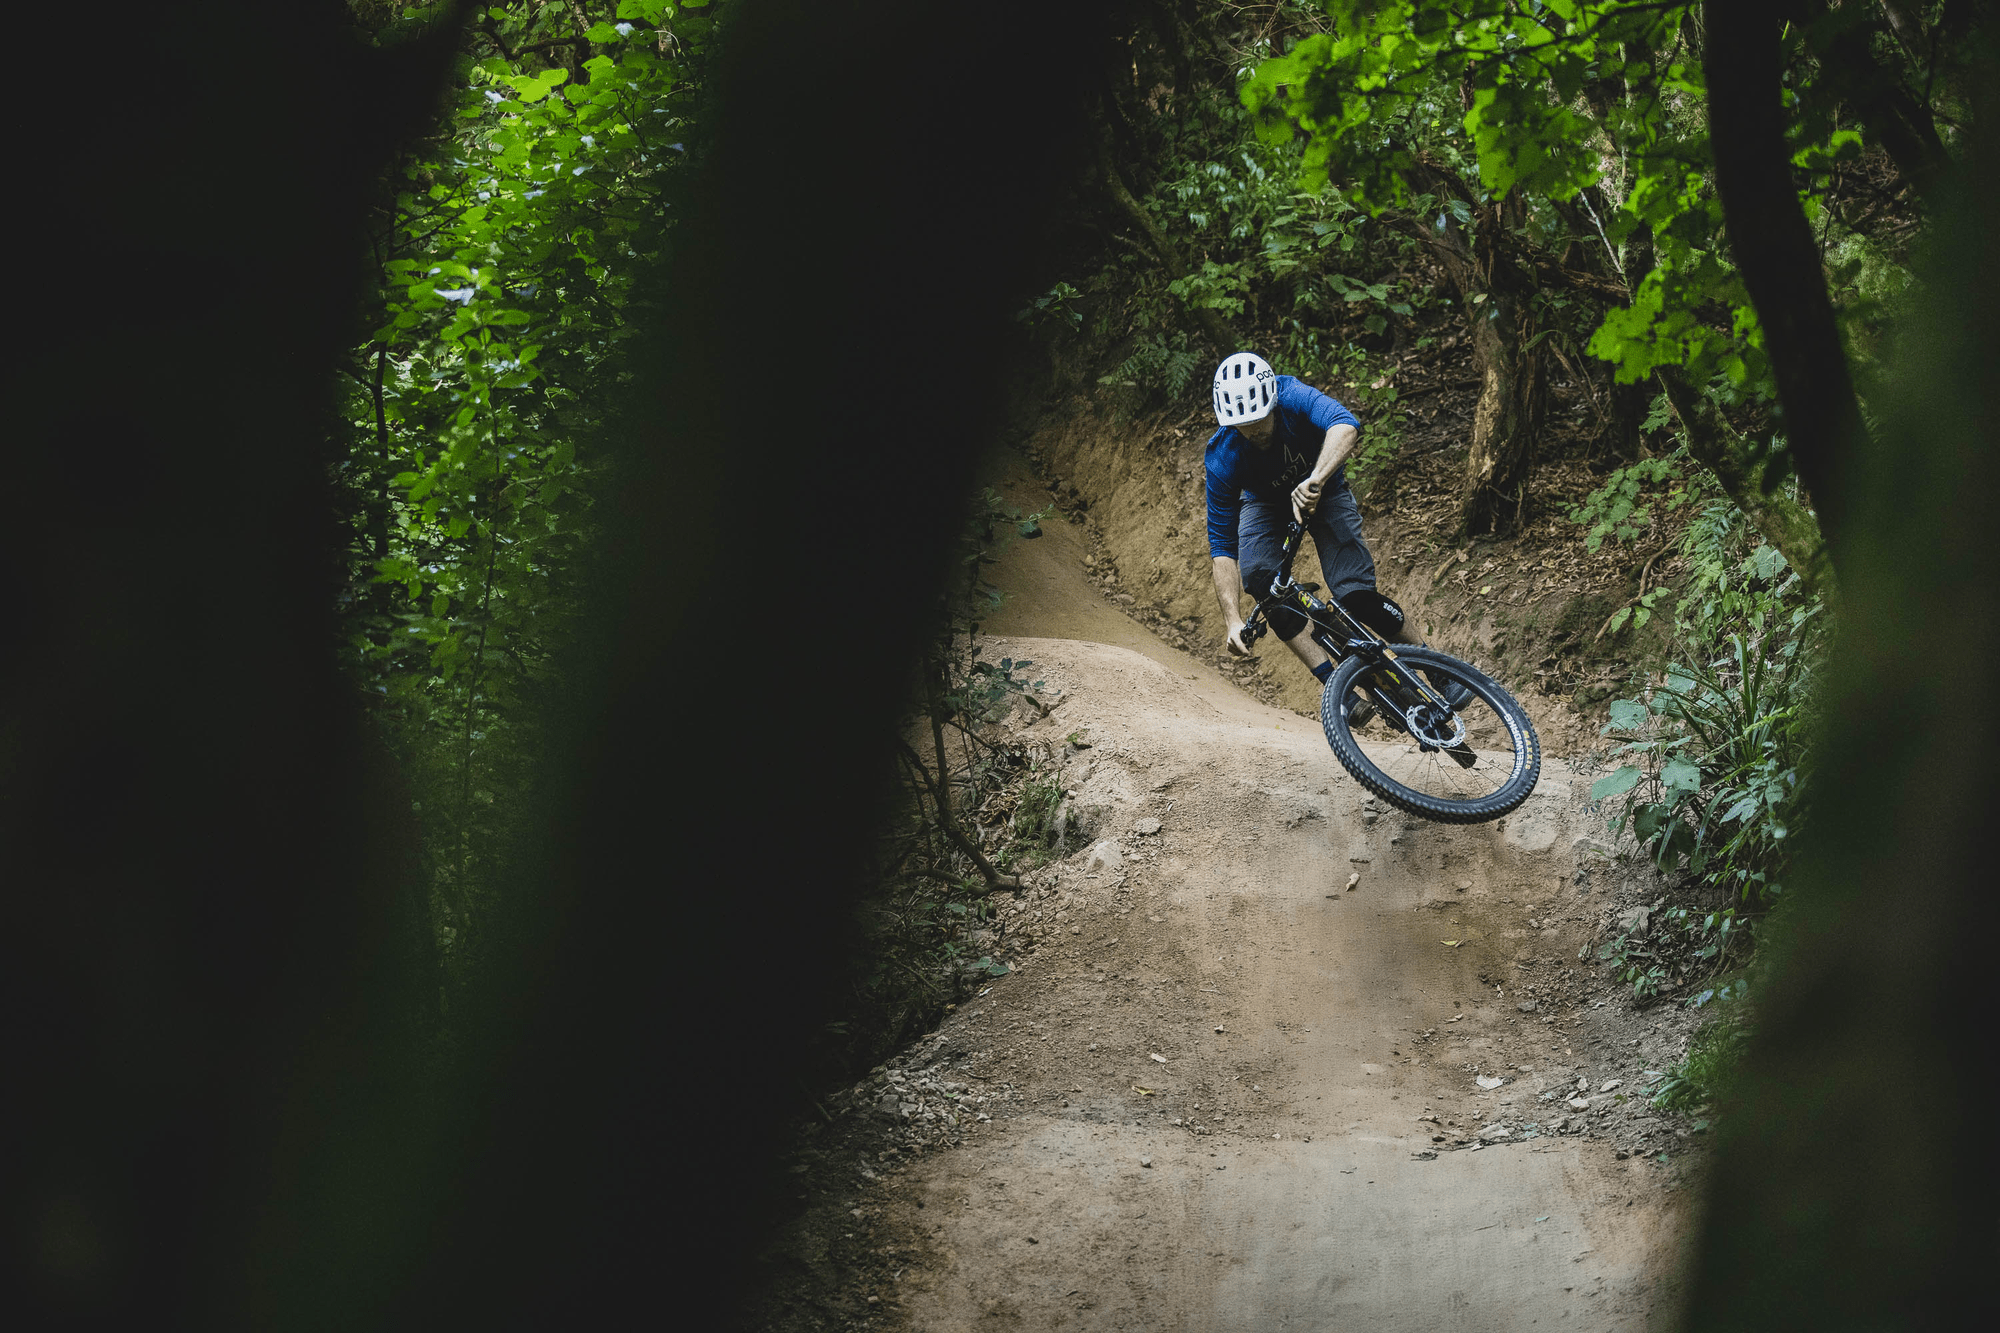
Anyway, all that is Trek’s marketing problems to worry about. Our job is to ride the Top Fuel we have today. Trek describes the Top Fuel as the perfect bike for riders who like to stay pinned both up and down the trail. The term ‘Top Fuel’ is a term associated with American drag racing, which is all about acceleration, so we were expecting this to be a bike that would draw on its XC roots and get up to speed fast – but with modern geometry and tyres that give confidence to push through the corners. Even though we spent two months on it, it didn’t take much riding at all to confirm this indeed lives up to its marketing team’s hype that the “Top Fuel loves to pedal up – lives for challenging descents”. At the end of our review period, we were left thinking, ‘this is the kind of bike a lot of people could be riding’. The Top Fuel gets so much right; the handling is sharp, and the suspension is both active and supportive. It’s the kind of bike that, when you get to the bottom of a rowdy descent and you know you’ve got a decent uphill ahead, you don’t drop your head and wish you were on an e-MTB; instead, you just get on with the pedalling – and might even find you’re kind of enjoying it. Our totally unscientific belief is that, thanks to effective marketing, more riders are riding longer-travelling, heavier, squishier (yes, it’s a technical term) bikes than perhaps the terrain actually requires, and this has really taken the shine off something we are doing a lot of the time, despite what we like to think: riding up hills. Part of this trend to longer travel and overall extra beef, has been about geometry. It has only been longer travel bikes that have had the matching geometry that inspires confidence at speed, or over steep terrain. But, with more modern geometry (read: longer, slacker) trickling into bikes like the Top Fuel, you now have the choice of riding lighter, shorter travel bikes with more confidence over technical terrain. Do you really need 160mm of travel for your everyday ride? Maybe, but probably not. Maybe you’re happy to ride a bike with less travel, but there just haven’t been shorter travel bikes with the corresponding geometry that makes riding downhills a real hoot? This is what the Top Fuel is all about.
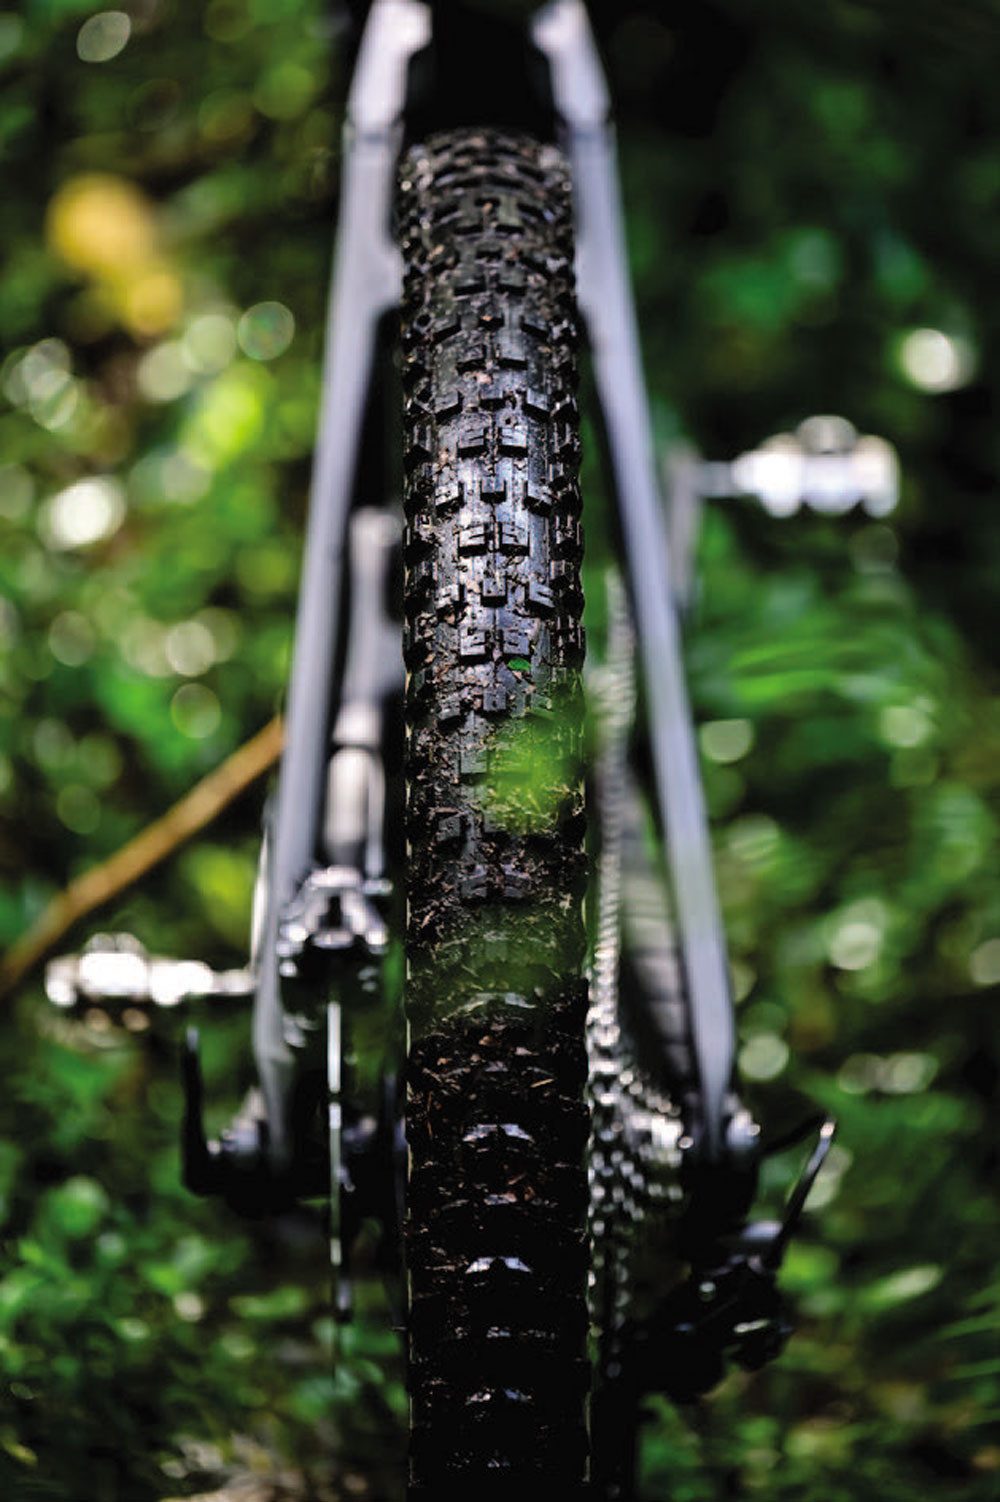
Tyre choice can be one of the most significant choices in what terrain a bike will excel on, and with Trek spec-ing the new 2.4” XR4 tyres, they clearly had this in mind. They are noticeably chunkier tyres than you might find on a 120mm travel bike, and probably reflect the kind of personal changes most riders end up making to their bikes in time. The XR4 tyres are worth pausing on for a moment, because they really are a bit of a Goldilocks tyre: not too heavy, not too light – just right. We only mention it because so often tyres seem to just miss the mark. The XR4’s do a great job of hitting just the right balance of speed and control to enable the bike to do what it was designed to do. 2.4” might sound wide but, just like the nation tuning into daily press conferences, it’s the ‘new normal’.
On the suspension front, the Deluxe Ultimate rear shock does a superb job at managing the rear travel through rowdy terrain, however, it does tend to show the limitations of the Select+ front fork. It’s not that the fork is bad – in fact, there is a lot to like – but it has an incredibly light breakaway (to minimise stiction, the SID Select+ is now using Maxima Plush damping fluid and SKF wiper seals) which means it does a superb job at absorbing small trail chatter. But, with only 120mm of travel to work with, mid-stroke damping is critical, and this is where the Select+ can’t keep up. A damper upgrade is around $300-$400, so not insignificant. It’s worth pointing out that upgrading to the SID Ultimate fork is also something you can specify in the Project One bike configurator. Interestingly, Trek say the frame is rated for a 130mm fork as well so, if this was our bike, we’d be seriously considering flicking the fork at the outset and putting that coin towards a Pike Ultimate, which would take the bike a further step away from the XC end of the spectrum. We think this better represents the kind of riding that buyers would be purchasing this for and would make better use of the bike’s capabilities as a whole.
The Bontrager carbon wheelset is worth mentioning. Rolling on the Line Elite rims, they are built from proven OCLV Elite Carbon for an optimized blend of weight, strength, and durability. They held up well during our test. The 108pt engagement freehub delivers rapid pickup at the pedals, but is definitely on the noisier end of the spectrum so you’ll either love it or hate it. There is something kind of obnoxiously satisfying about coasting up behind your riding partner while your freehub is screaming at them, just subtly letting them know that you’re coasting right now and could they please speed up?
The Top Fuel’s strength is that it just does so much of what a lot of us actually do – really well. For a lot of riders, the majority of actual hours spent riding isn’t on either an XC or Enduro race track; it’s probably spent heading out for just a few hours, with a mate or two, once or twice a week. It’s riding a bit of everything; the up and the down – and actually wanting to enjoy both.
It’s not launching five metre gap jumps, but it’s not riding around the one or two metre gap jump either.
It’s the every day, every trail fun that is in the Top Fuel’s sights. It’s responsive, gets up to speed quickly and responds really well to rider input, such as pumping through rollers and, as a result, is simply really fast. It’s fun and efficient at every task and we think it will be a really good fit for a lot of riders. •
REVIEW: LANCE PILBROW
DISTIRIBUTOR: TREKNZ
RRP: $ 8 ,849
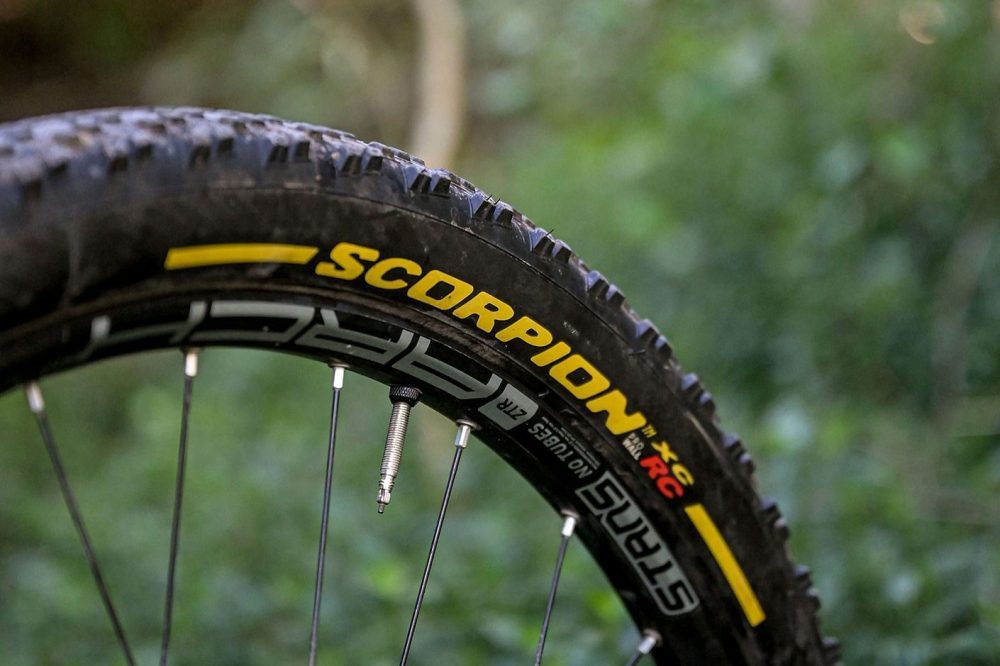
Review: Pirelli Scorpion XC RC Tyres
Pirelli are one of the world’s biggest names in tyres. You’ll see their logo on the sidewall of F1 cars, rally cars, superbikes and, strangely enough, super boats, such as the America’s Cup Prada Pirelli team. More recently, they have come into the cycling market - though their presence in New Zealand retail cycling shops has been somewhat minimal.
I’ve had the Pirelli Scorpion XC RC tyre on review since summer. The Scorpion is an XC race tyre that we tested in the 29 x 2.2 120TPI Prowall version. It comes in a 2.4 option as well, and a creatively named lighter ‘Lite’ version, which is also a 120 TPI casing. For comparison, our 29 x 2.2 ProWALL weighed in at 650g, whereas the Lite comes in at 610g.
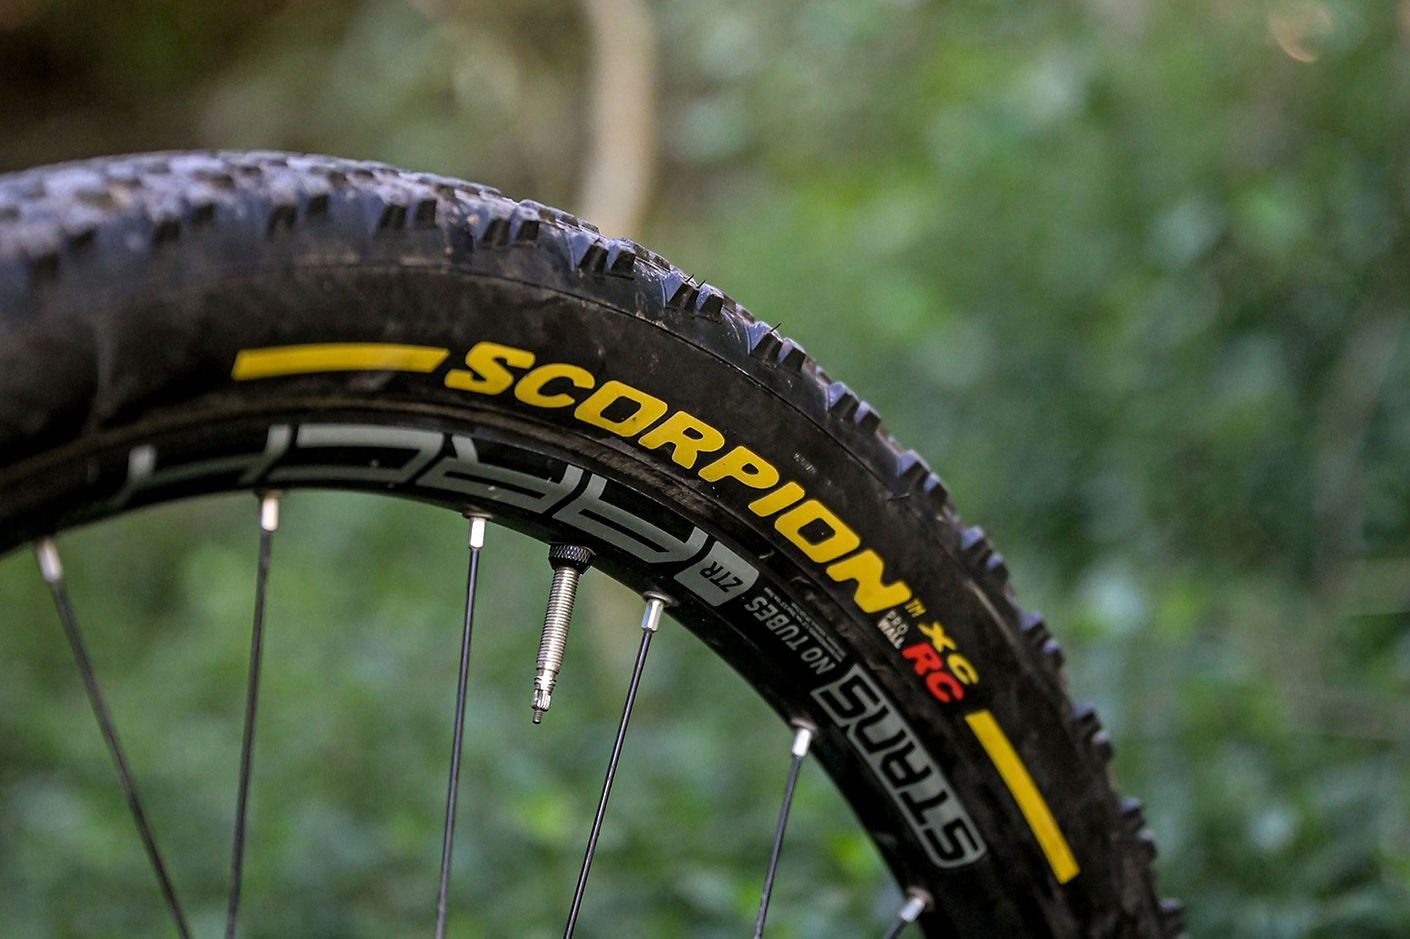
The ProWALL version benefits from sidewall reinforcement technology that increases puncture protection and improves handling at low pressures. Essentially this is an additional layer of nylon fabric applied over the casing sidewalls for extra protection and improved cornering stability. The Lite version omits this, so you save 40g and get a more supple tyre, but you lose some sidewall protection. Both versions roll on the same rubber compound that Pirelli call Smartgrip, designed to provide constant high grip performance in both wet and dry conditions. If the bright yellow Pirelli team logo doesn’t match your bike’s colour scheme, they are also available in a plain black logo too.
A quick look at the tyre and it’s obvious who the target market is for this tyre - Iow profile central knobs offer minimal rolling resistance. The side knobs are still quite decent bits of rubber, though, so I was hopeful this would still be a tyre that gave confidence when pushing through the corners.
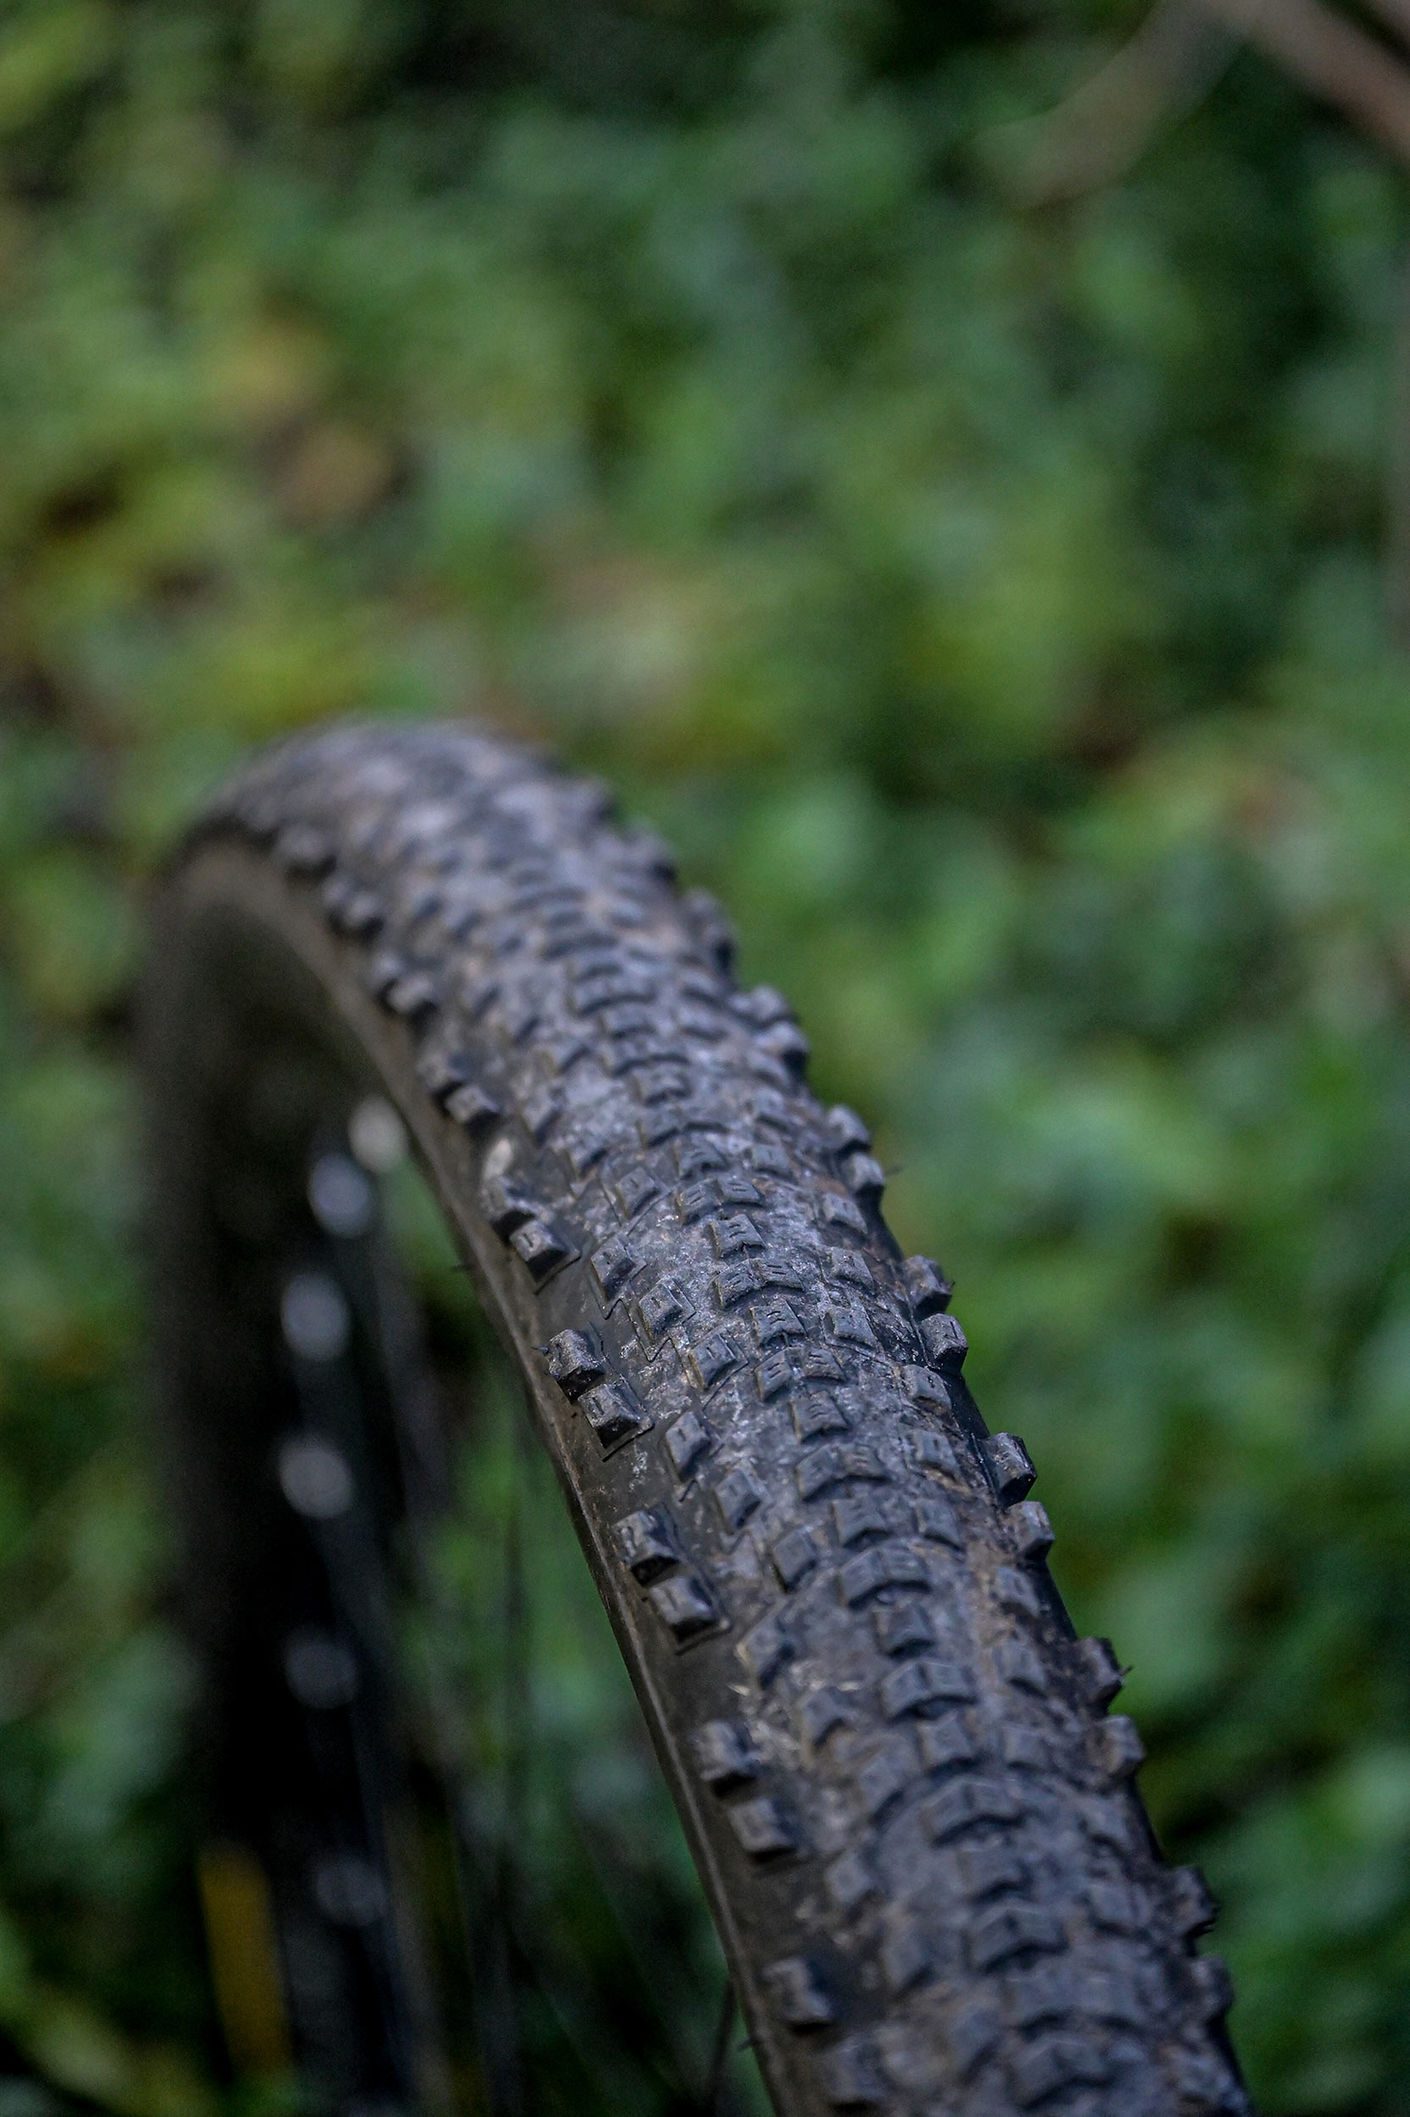
I was pleased to get these tyres a few days before I set out on the 1100km Kopiko Aotearoa bikepacking event, in February this year. I don’t have much interest in XC racing any more, but a lot of the same products - tyres especially - appeal to the bikepacking segment of our sport. I was looking for a lightweight, fast-rolling tyre that was also strong enough to give me confidence when taking them into the remote areas that the Kopiko route followed. The tyres arrived only a few days before I was due to leave, but the tread pattern looked ideal in my eyes, and squeezing and pinching the sidewalls, well, they seemed to be sturdy enough, so on the bike they went and we set off for the East Cape.
One thousand one hundred kilometres later I am really happy with these tyres. They mounted onto the rims incredibly easily, and I had them setup tubeless in no time. Unlike some other tyres, they didn’t seem to leach any sealant and held their set pressure straight away. In fact, over the nine days of riding, I didn’t top up either tyre pressure once. By the time we arrived at Cape Egmont, the rear tyre was showing some obvious sign of wear, but was still well within what I consider acceptable for 1100km of loaded bikepacking. The side walls on the front and rear tyre don’t show any signs of damage which is also encouraging. The Smartgrip compound seemed like an excellent compromise for being fast-rolling on the seal and still grippy enough to ride the more technical parts of the route, such as the Timber Trail, without holding back.
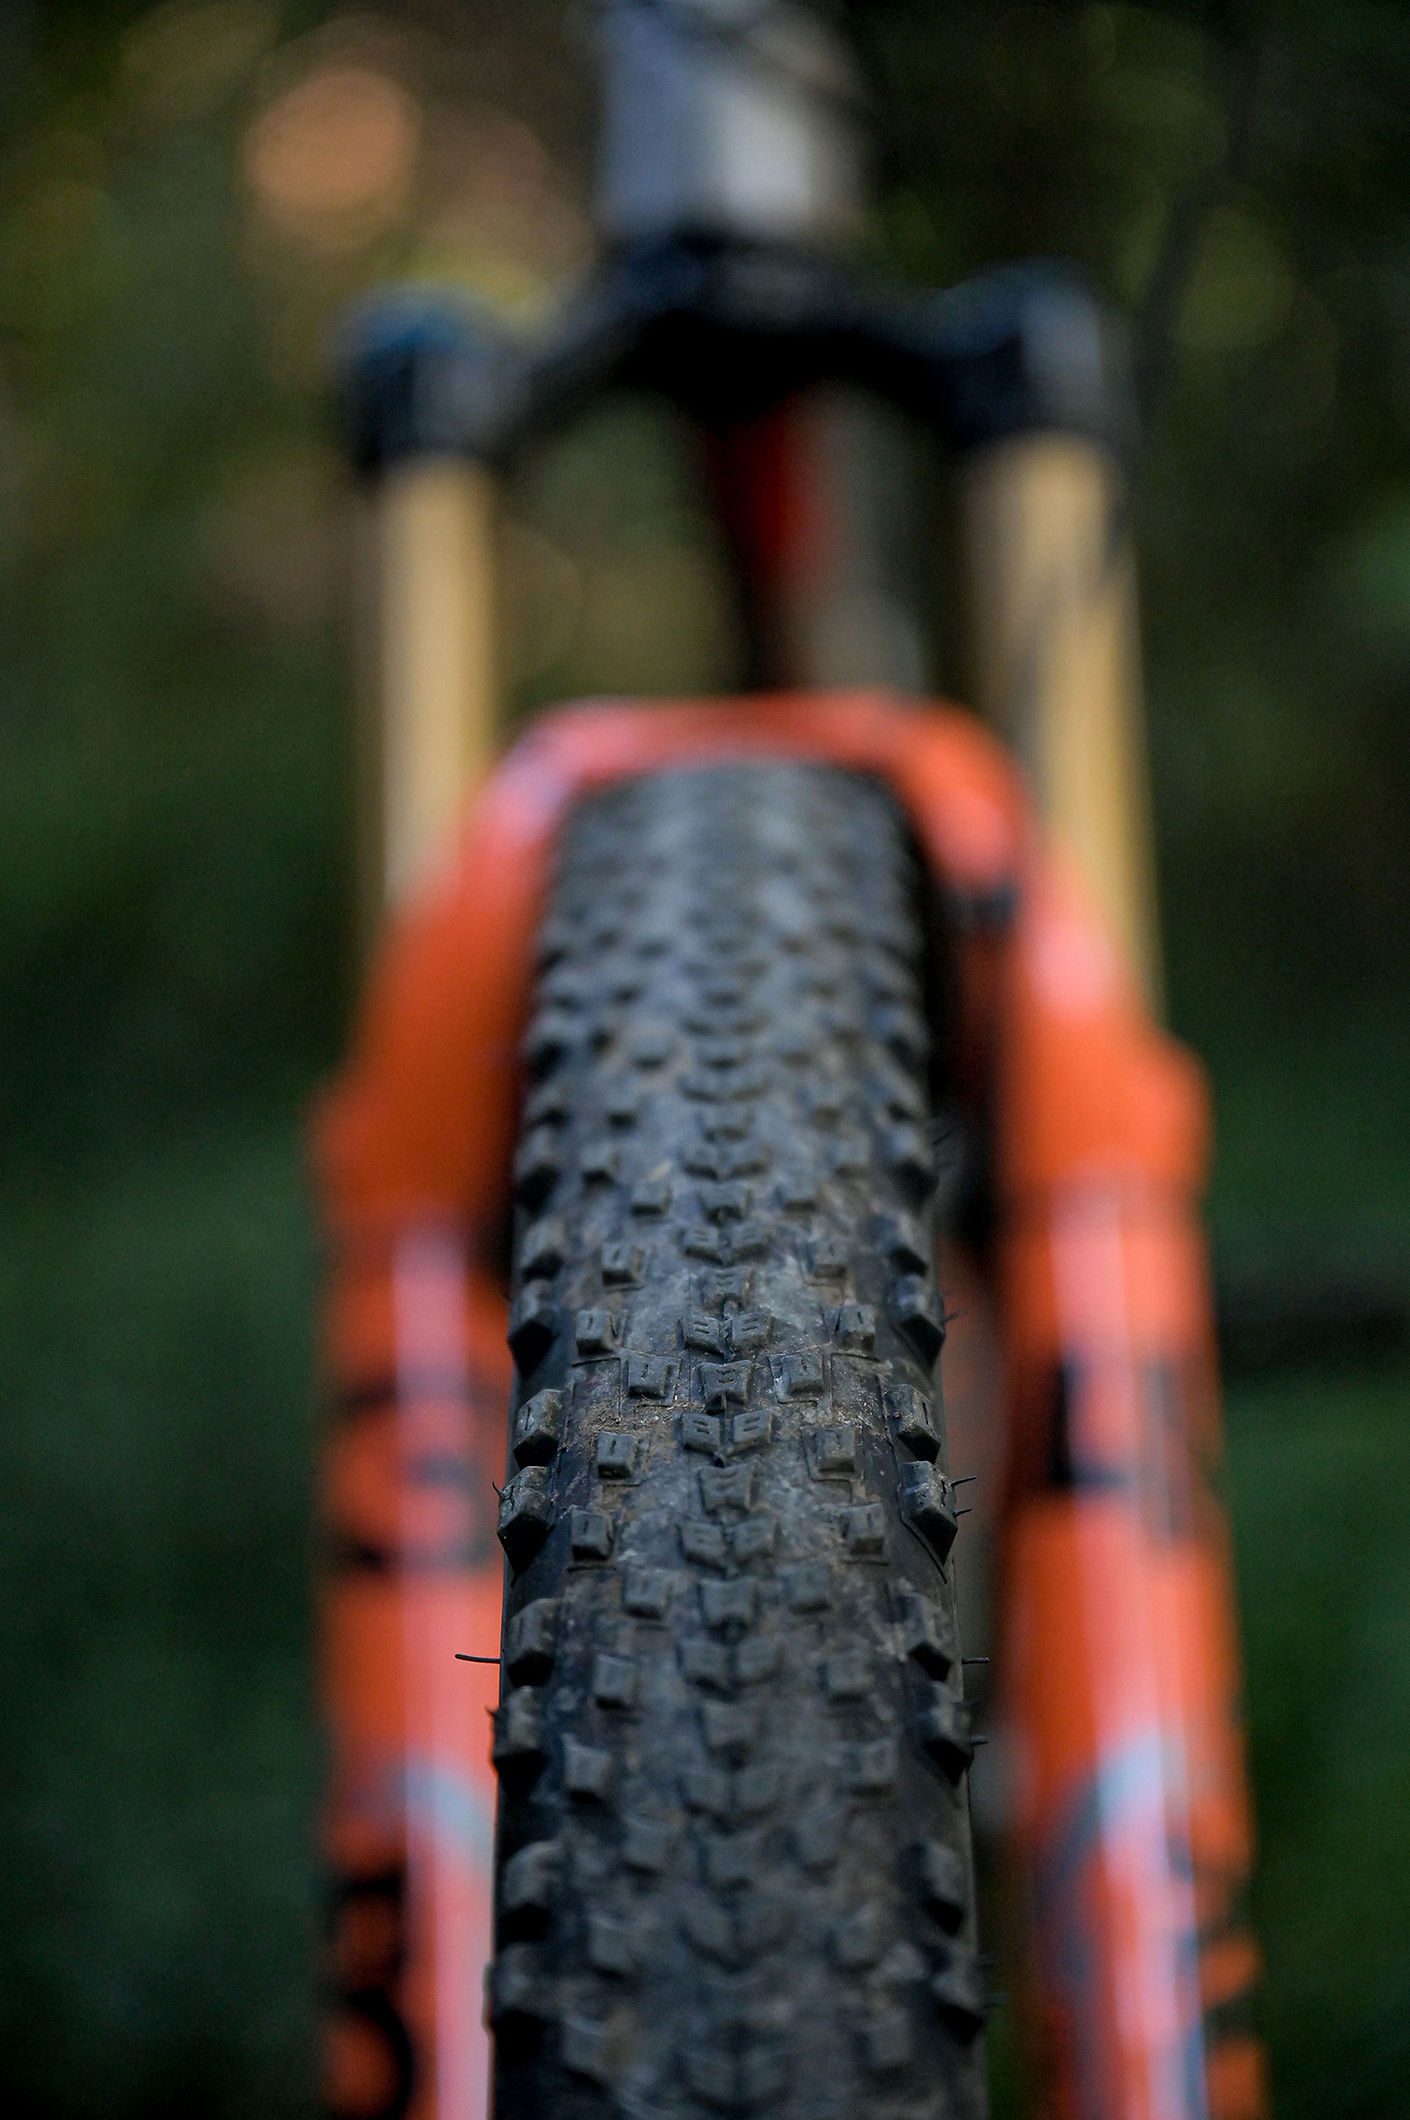
Since then, I have used them for a number of laps around our local mountain bike trails and have been impressed with their ability. Clearly a low profile tyre like this is best suited to dry, hardpack conditions - in the wet, the side knobs still offer control and confidence, however the thin centreline knobs have limited ability to support braking as soon as it gets wet.
For their intended purpose, the Scorpions are a great tyre and I think they’re especially suited to multi day bikepacking rides.
RRP: $109
Distributed by FE Sport
Reviewed by Lance Pilbrow
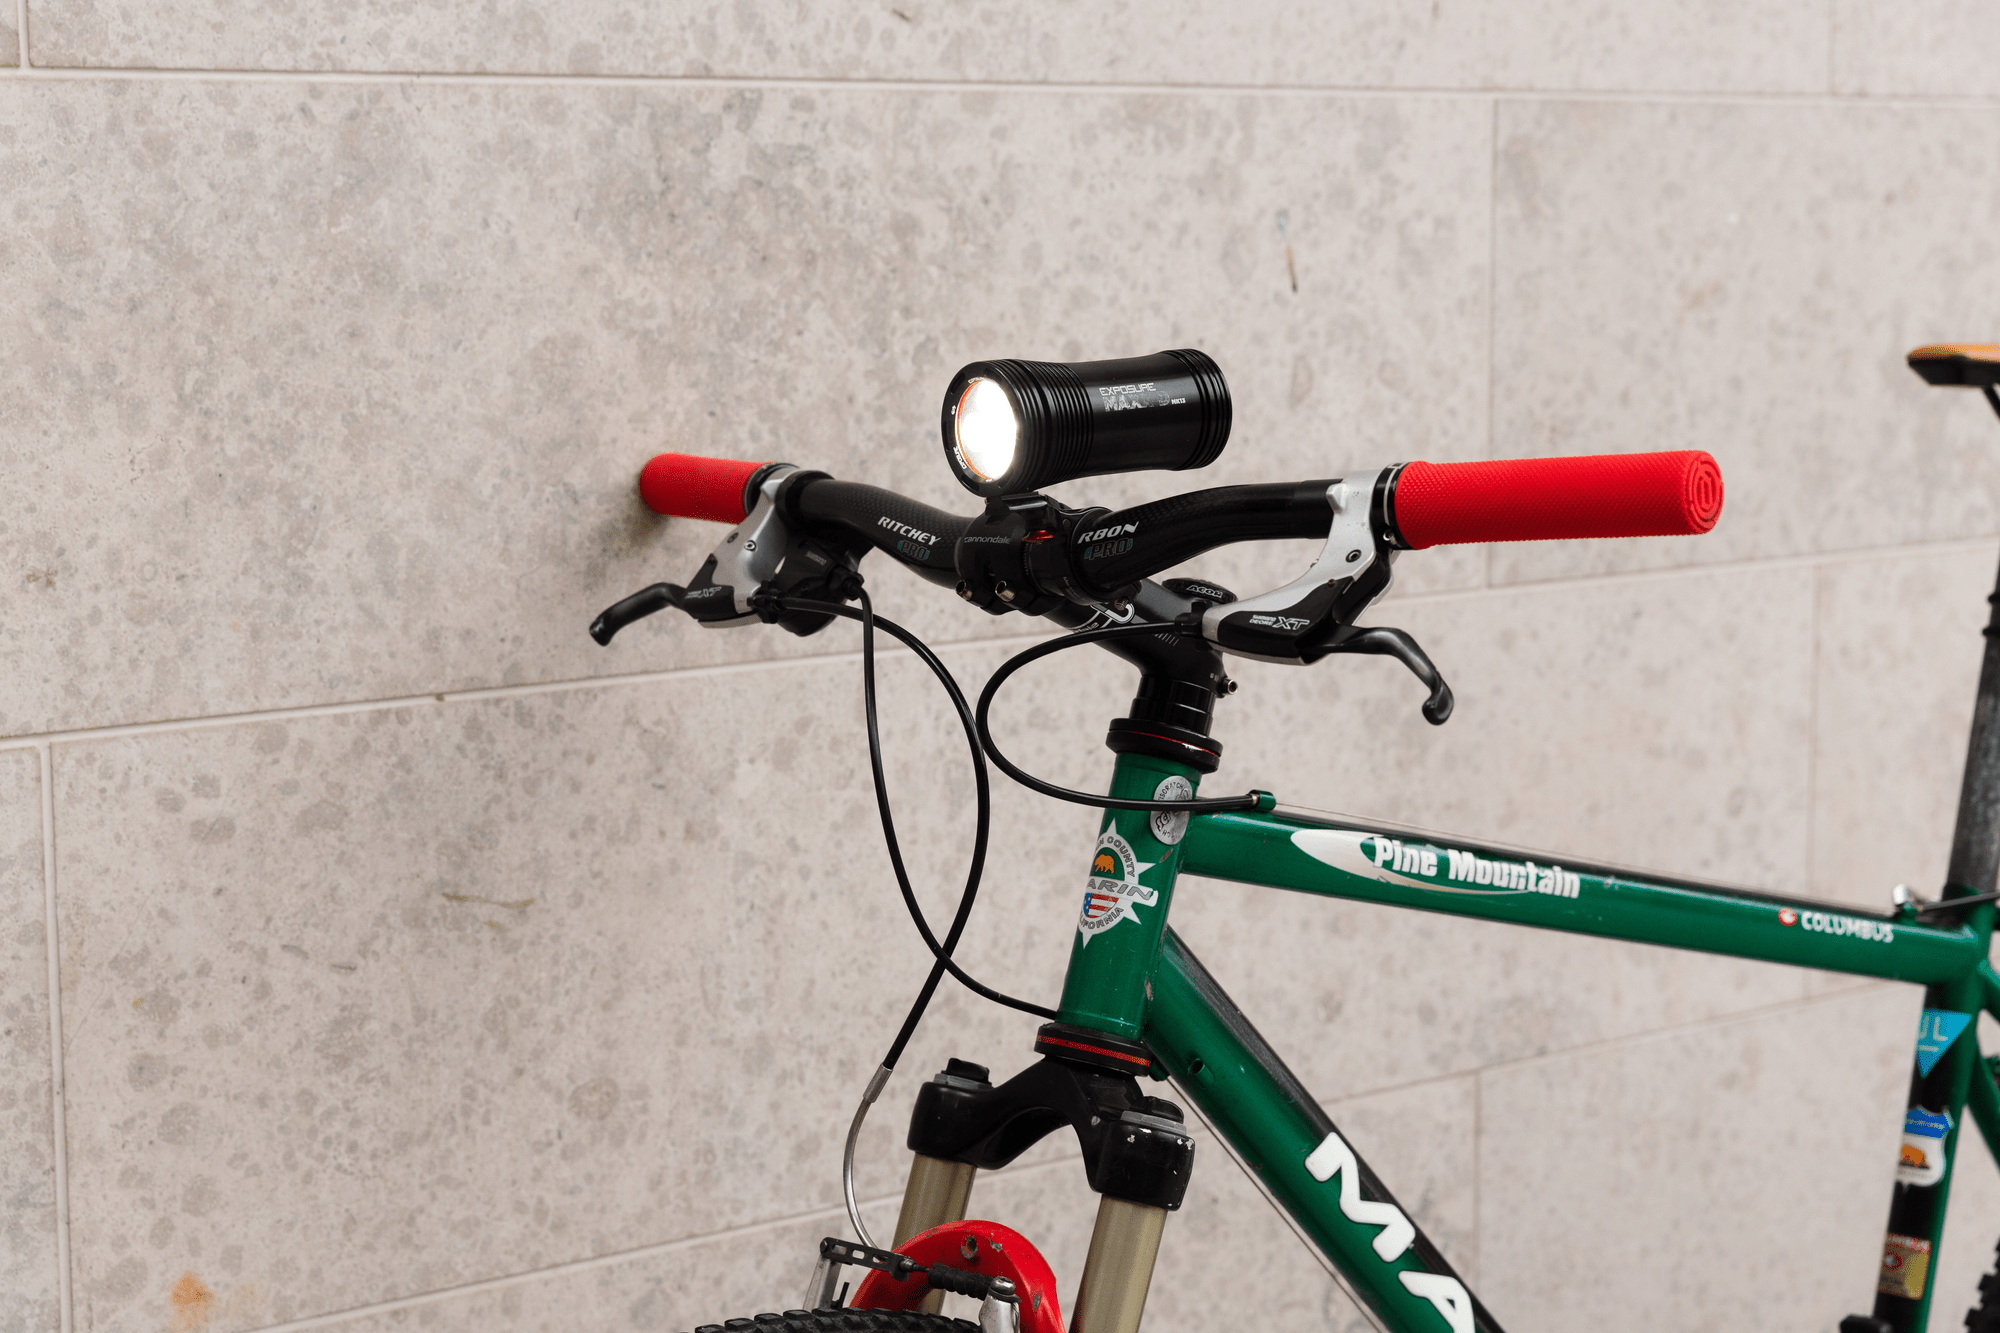
Review: Exposure MaXx D MK13 Light
Nowadays, the term ‘built to last’ feels like a phrase from a bygone era. But there are still brands out there that want to ensure ‘built to last’ is a term we use well into the future. One of those brands is Exposure Lights. Each light is machined from aluminum and uses durable, high-quality materials for the lens. Each part of the build process is done in-house, in the UK, and all lights carry a two-year warranty. There’s not much in the bike world that’s manufactured in the UK or Europe these days, so that’s saying something!
I tested the Exposure MaXx D MK13 light which offers 2500 lumens when using the clever Reflex technology and some great battery life to boot. It’s a small package but it packs plenty of punch. The 2500 lumens in the MaXx D makes for a reliable night riding pal. It throws out plenty of light, is simple to use and features Reflex++ technology that optimises light brightness depending on your speed and actions on the bike. The lumens are increased to 4000 when Reflex ++ is used. To better manage battery life, the MaXx D has three Reflex Plus modes. The very clever Reflex mode changes the light’s output depending on the trail conditions, by using in-built 3D accelerometers to measure speed and bumps. If the light senses the trail is particularly rough, it boosts output to 4000 lumens and then dims it back down once it becomes smoother again. There are large cooling fins that draw away heat from the light, and a quick-release bracket with a sprung pin that holds it in place. The clamp can fit both 31.8mm and 35mm, thanks to the shim that’s included.


Overall, the Exposure MaXx D is powerful, robust, and well thought out, which is what has impressed me most about the brand. The performance is second-to-none and it lights up the trails incredibly well. If you’re doing some super gnarly trails, you may want to consider another helmet light but, for most riders, this light is very sufficient. The price is high, but the quality is outstanding. Personally, I’d rather buy the best one once than buy multiple lights, multiple times which in the end costs more money and causes frustration. This light throws out a ton of light, is tough and ‘built to last’.
RRP: $759
Distributed by FE Sports
Reviewed by Liam Friary
Review: 100% Teratec Plus Knee Guard
Knees pads are a hard thing to get right. I’ve ridden with some great ones over the years… and some really, really bad ones that I thought would have been good. It’s hard to tell how good they’re going to be until you take a tumble. Personally, I feel naked if I don’t ride with knee pads on. My confidence just isn't there and I know that one bad crash could mean f$cked knees for the rest of my life (and knee surgery looks like a total ball ache). I’ve been close to this a couple of times.

One of my biggest pet peeves is knee pads that slip down during a crash. There is nothing worse than buying a new set of knee pads you're stoked on, only for them to slip down your leg during a tumble, doing nothing to protect your knee. It's the worst. So, where does the 100% Teratec plus come in? Well, with a massive silicone webbing covering the inside cuffs on the top and bottom of the pad, these pads stay in place even after the biggest rags. The Teratec Plus work on a tight fit versus straps. This style of tight fitting pad can be hard to put on sometimes, but 100% have been smart and added a small hand pocket/handle for helping you pull the pads up. On top of the small pocket, and around the guard itself, is a thin layer of padding which just adds a little extra protection.
I’ve been using the Teratec Plus as my daily pads for the last few months. They have been on all sorts of adventures and rides, from big hike-a-bike days in the back country to quick loops of my local trails in all sorts of different weather: wet, dry, hot or cold. I went for the medium size as it's the size I normally choose when going for knee pads. Over the first couple of rides they felt a bit tight - the big silicone cuffs caused a bit of uncomfortable friction on my lower thighs. After a few rides, though, they stretched out slightly and the friction disappeared. This seems to be a common theme with compression-fit pads.
The Teratec Plus is aimed at the Enduro end of the spectrum, promising ‘Level 1 Protection’ in a pad you can pedal all day in. I can definitely say that both these claims are true - the protection level certainly lives up to the marketing hype. I've had some massive rags with these pads on and come out the other side with only a bruised ego. I'm a really big fan of the extra bits of pad they have added around the actual knee protector, as these help with awkward little bumps that can hurt a lot more that they should - funny bone knocks but in your knee. The ventilated mesh around the back of the pads do a good job of keeping you cool, but they still run a little hot in comparison to a lot of the lighter weight pads. You can kind of notice the knee pads when you first put them on, but after about half an hour of pedalling you forget you’re even wearing them. They are low enough profile that they easily fit under your shorts, and are long enough that you don't get the dreaded twat gap. They are a good length over all, covering the area you are most likely to hit in the event of a crash.
Over all, I would say 100% Teratec Plus Knee Guards are the best pads I've used in the last few years. Offering great protection, you can ride all day in them if you don't mind a slightly hot knee, with the main thing being that they don't slip down in the event of a crash. I would happily ride laps of the bike park with these on, then head off on a three hour pedal in full confidence that if I have a crash, my knees are probably going to be fine.
Distributor: FE Sports
Words: Liam Friary
Review: Giro Xnetic Trail Gloves
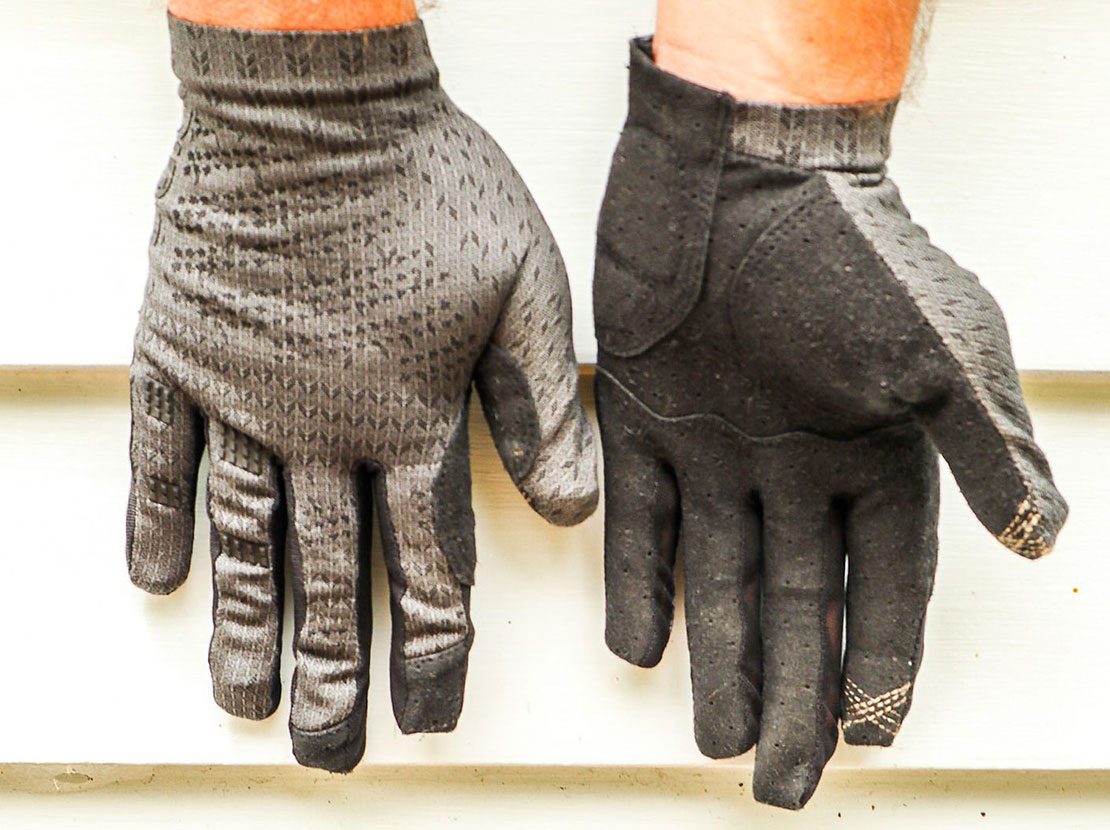
A good glove is not always super easy to find. Yes, there’s a ton on the market but they’re all not the same and riders want different things. For me, like a lighter glove, I like to get feedback from the bar. But I do want protection and need em’ to be robust. Giro has developed the new Xnetic Trail glove from techniques they pioneered in their footwear. The end product is a seamless one-piece glove. Ok, so what is Xnetic anyway? It features a TPU skeletal system bonded to a knit material. It’s sock-like comfort which offers suppleness and breathability. It’s also DWR-treated which makes it repel water and they have reinforced rubber to enhance abrasion and durability. That’s a lot packed into a glove, aye?
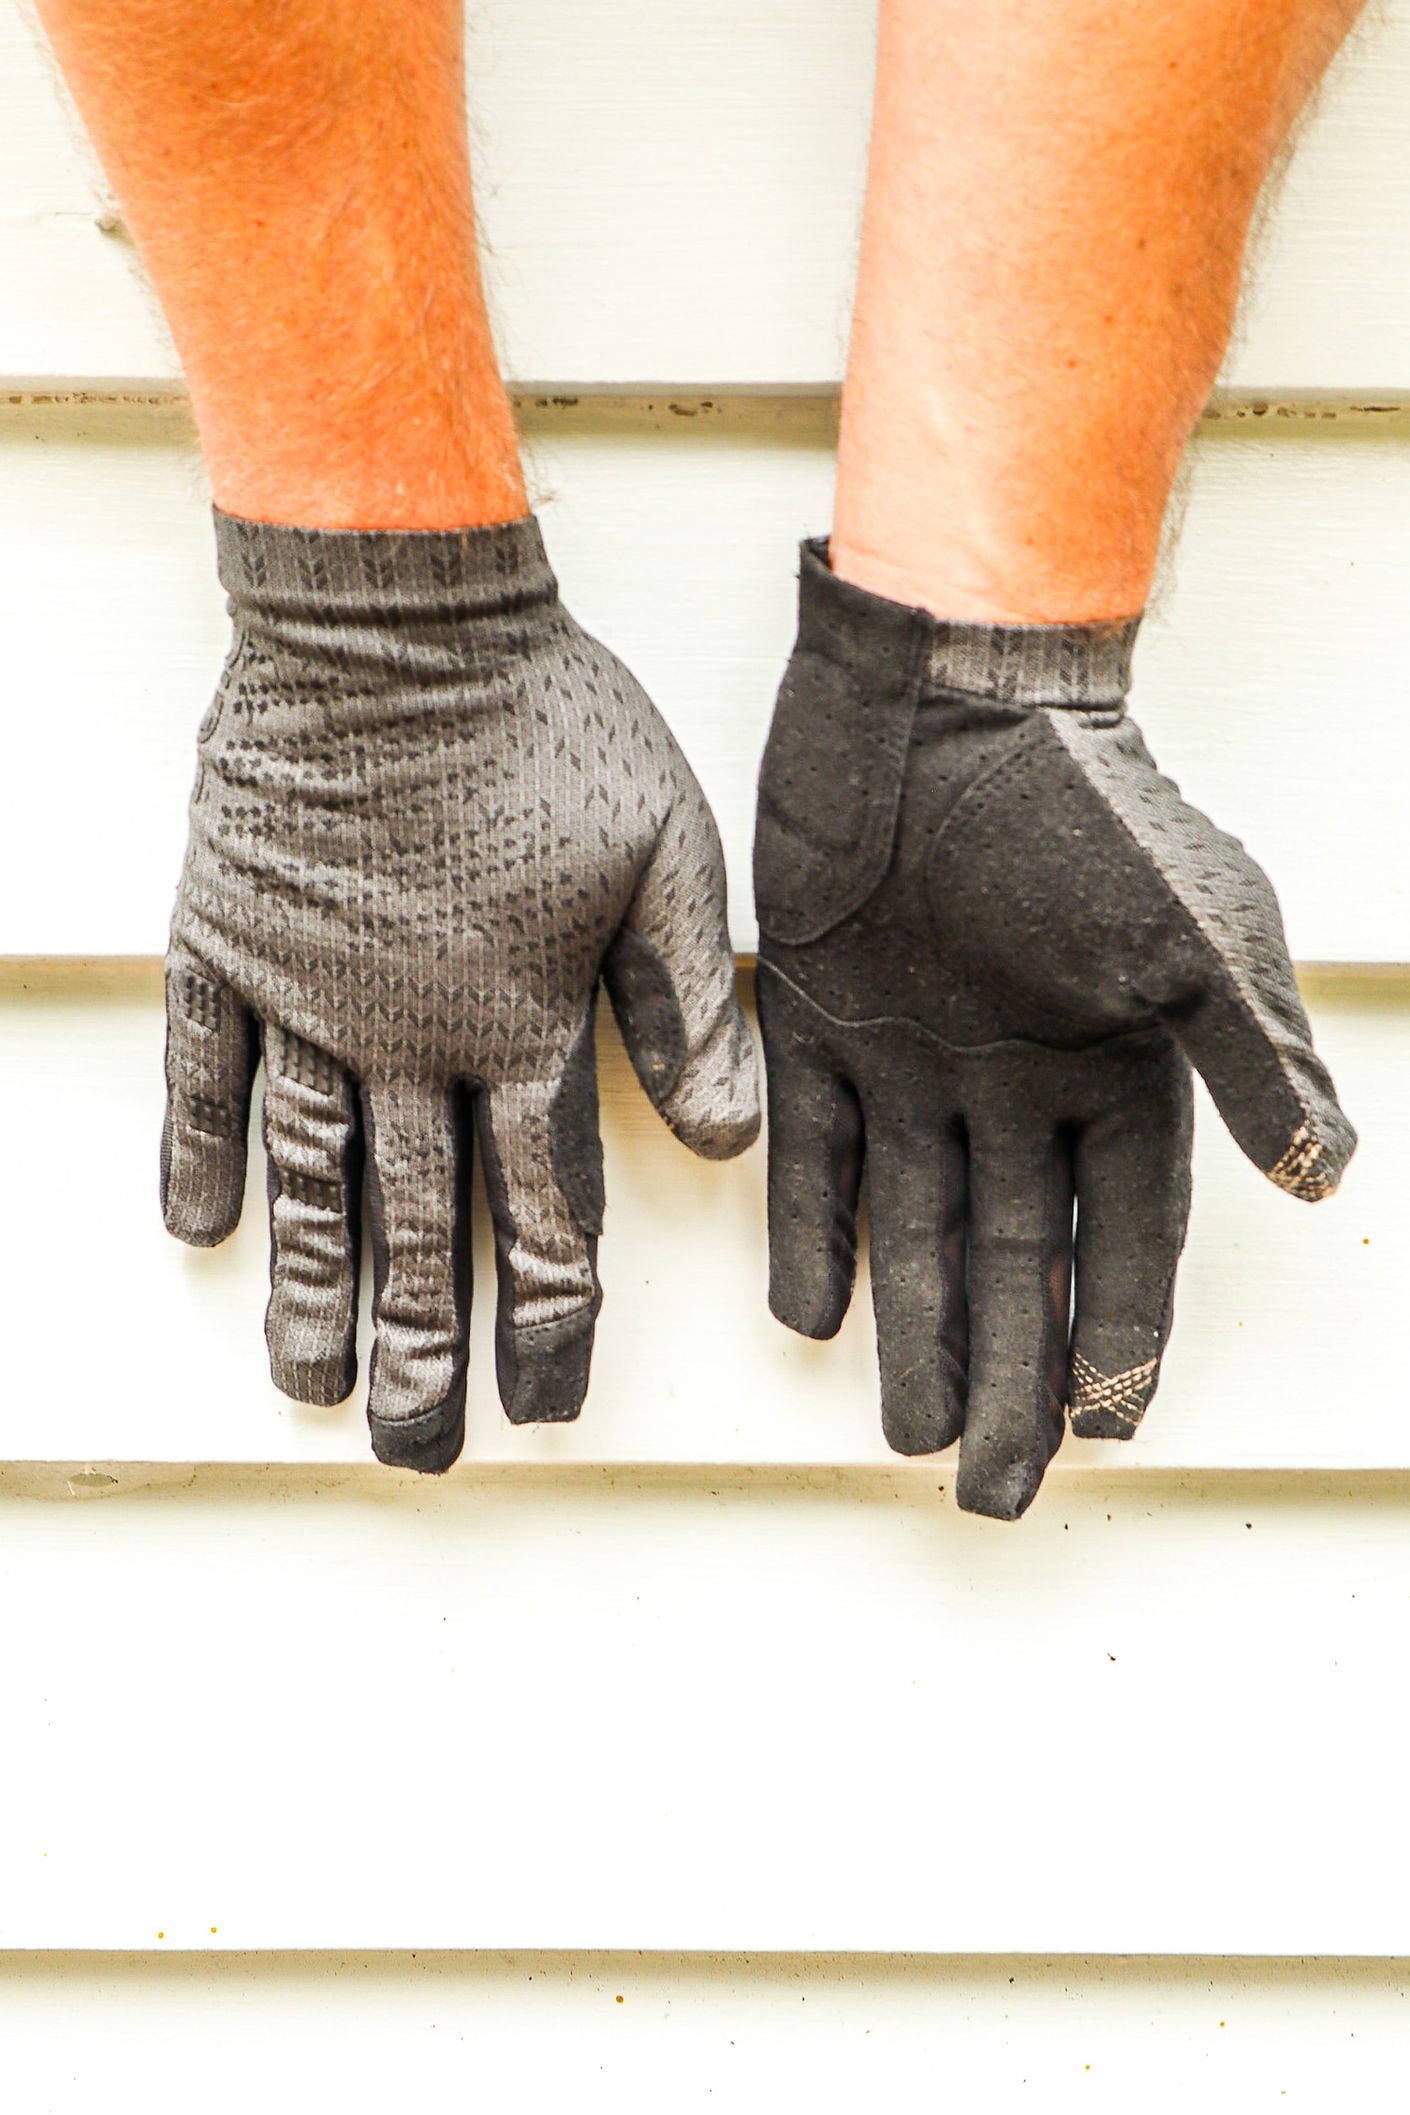
I’ve been riding with these gloves for a few months now. Firstly, they fit super well. No bunching whatsoever with these! This is down to the 3-piece palm construction that allows movement without scrunch whilst maintaining the bar feel. Secondly, they’re uber comfy. Thanks to the stretchy, strapless cuff help bolster comfort further and keep wrist movement unrestricted, plus it means there’s no Velcro to snag jersey sleeves. Thirdly, you can use your phone with them. So, now you don’t have to ignore your work calls (which you may still want to) and can take a photo. Or do whatever else we use our phones for these days.
On the trail the Xnetic gloves offered good grip, I had control whilst still keeping bar feel. The gloves felt minimal and wrapped snugly around my palm. I’d move my hand and the gloves go with them – no fuss or bunching. On (too many) occasions when I did fall, they kept my hands protected. I’d rather keep my hands scuff-free and these gloves did a solid job of that. In the wet weather, they kept my hands dry as the weather shred off them. I’ve been running these for a few months and will be using them for many more months to come. So, they might cost you, but they really are well made, damn comfortable and minimal with good protection.
Distributed by Worralls / RRP: $74.95
Reviewed by Liam Friary
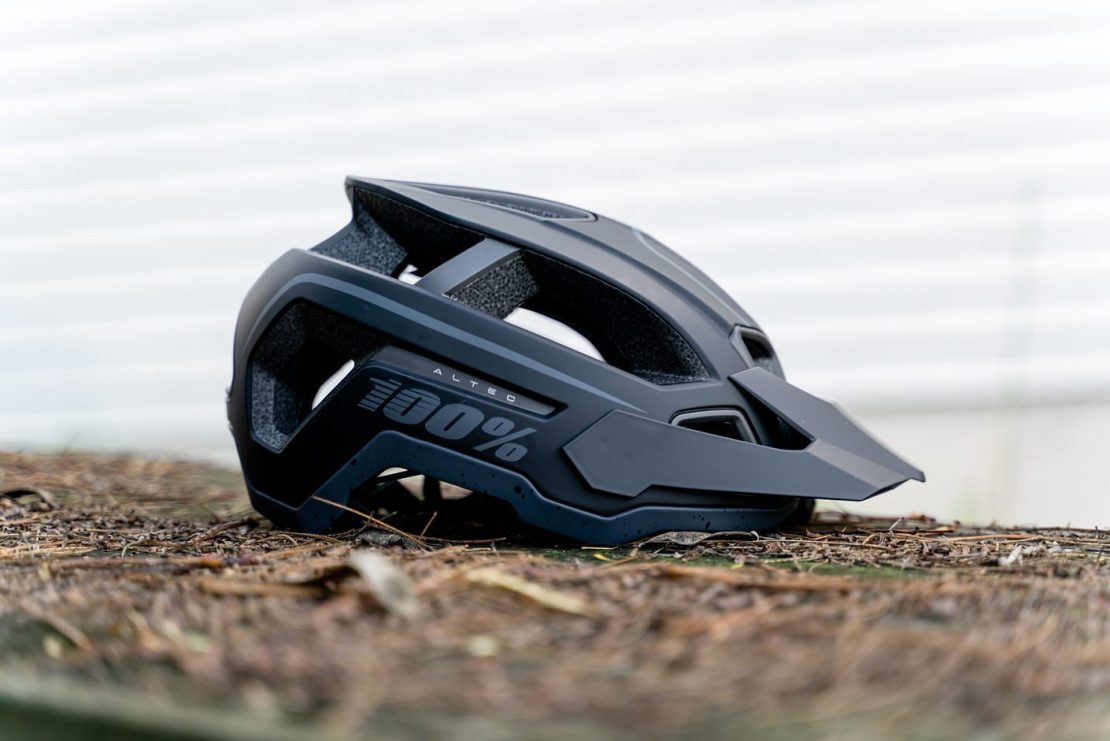
Review: 100% Altec Helmet
Helmets sit at the very top of the ‘protection pedestal’ when it comes to mountain biking. Whilst it makes choosing a helmet a little overwhelming, I’m stoked to see so many different companies pushing them out. Helmets, and protective gear, are among the only product groups in mountain biking that I can get behind when it comes to companies pushing out gear quickly - ultimately, the safer we are the further we can push, and the less likely we are to develop injuries and conditions (such as CTE) further down the line.
It seems like only yesterday that 100%, a company with roots in motocross, started pushing into our sport. They’ve for sure made their mark - and the Altec is their first foray into open-face mountain bike helmets. It features 15 vents and, whilst this number isn’t even close to industry leading, the vents are all HUGE. It also features 100%’s Smartshock Suspended Rotational System, which is essentially their answer to MIPS. The Smartshock System is designed to absorb rotational impacts by compressing and allowing the helmet liner to move independently to the helmet’s shell. The independent movement reduces force on your brain, lowering the chances of brain injury in a crash. A network of shock absorbers throughout the helmet basically mean that unlike the traditional MIPS netting you may be used to on some older MIPS helmets, the Smartshock System doesn’t look all-too-different to a set of standard, pre-MIPS helmet padding – remember those days?

I’ll start off by saying that the Altec is comfy. Not necessarily ‘write-home-about’ comfy, but it sits firmly middle of the road. The first time I tried it on, I felt a little pressure right at my temples, but after noticing that there are two mounting points for the harness, I moved it to the backmost option and found the pressure was gone. I’m a couple of months into my time with the Altec now, and have found that when I first put it on there’s a tiny amount of pressure right by the adjustment dial on the back of my head, but once I’m moving I completely forget about it. It’s worth noting that I didn’t find any info on the different mounting points for the adjustment harness, but if you pull back the foam you’ll find you have two mounting points right above your ears, and two where the adjustment dial attaches to the helmet. I’ve heard a little feedback about how some people have found the Altec doesn’t fit ‘quite right’, so if you’re trying one in-store and it doesn’t feel ‘quite right’, have a play around with the mounting options. In terms of coverage, it does a decent job. It doesn’t sit cross-country helmet high, but it doesn’t cover as far down the back of your head as some of the other trail helmets do. Less coverage also keeps the helmet lighter, and I found the combination of this and the lower weight actually felt really good around some of my local trails, where there’s not a ton of steep, rocky or rooty riding.
This helmet really shines on the ventilation front. As mentioned earlier; whilst 15 vents isn’t an impressive claim in itself, the amount of air these 15 vents let through is definitely worth mentioning. I’ve been testing this helmet over our transition from autumn to winter, and on one cold winter morning I actually rode back to the car to swap out the Altec for another helmet that doesn’t breathe as well. I can already tell the Altec will be my go-to summer helmet, given how well it breathes and the fact that the foam liner does a great job of keeping sweat off your face. The Altec also features three visor positions, so you can ramp it all the way up to stash your goggles underneath, then pull it back down once you’re ready to ride. I was actually pretty stoked on the fact the visor is stiff enough that it won’t move by itself, but not so stiff that it feels like you’re trying to rip the helmet off your head to adjust it.
All in all, would I recommend the Altec? Definitely. It’s lightweight, great ventilation means you almost forget you’re wearing it, and the Smartshock System adds that little extra peace of mind.
Distribuited by FE Sport / RRP: $299
Words: Cam Baker
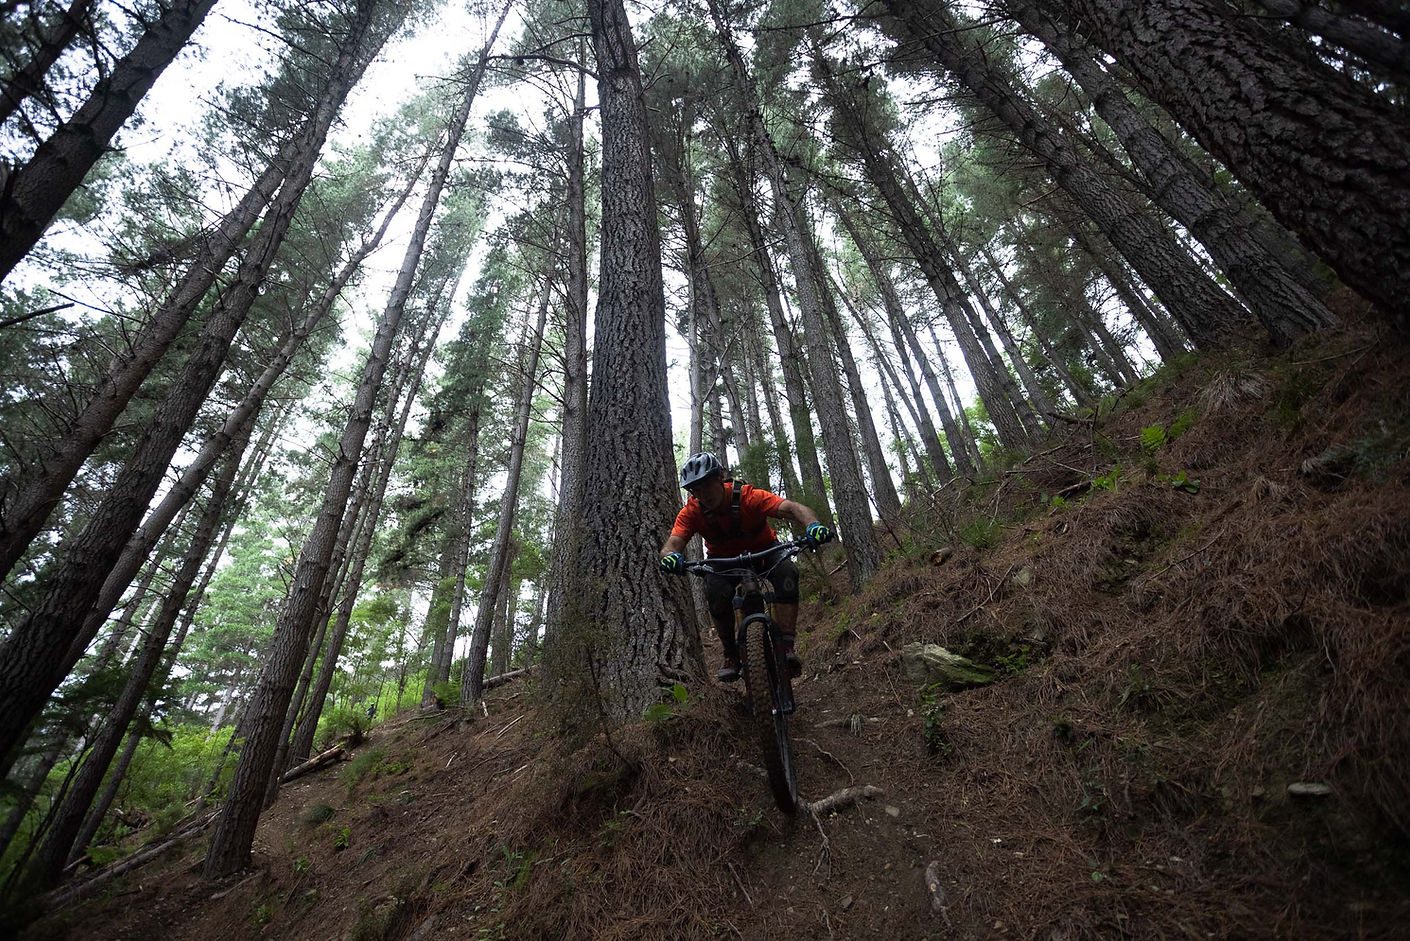
Review: Santa Cruz Bullit
I had two reference points coming into this review: the first was the original 1998-2005 Santa Cruz Bicycles Bullit; the second was Lt Frank Bullitt’s tyre-peeling, torque-monster of a Mustang Fastback from the 1968 movie of the same name. The first reference point provided a lot of context for this new version of the Bullit, given the original bike developed a bit of a cult following in freeride circles back in the day. The second reference point provided some unexpected context for how the new version of the Bullit performed on the trails.
Hyperformance Hardware (the NZ Santa Cruz Bicycles agent) set up a media camp in Nelson when the first two Bullits landed in NZ, with a brief to throw them at Nelson’s biggest hills and toughest trails. Like any good bike review, the weather was also organised just as well as the media camp schedule was, so we got the full gamut during three days of sweet riding.
So, what have we got here? In Santa Cruz Bicycle’s own words; the new Bullit takes a ‘no limits approach’, is unapologetic and with a spec and build that ‘reflect the smashability of the platform’. It is also ‘a bike for riders who seek V10 level terrain that's out of range of any chairlift or shuttle road’. Bold claims. Have they been met?
Full disclosure #1 first: I realised pretty quickly that, subconsciously, I’ve been keeping myself at arm’s length from the pedal assist, mountain e-bike evolution that we are seeing in NZ and globally - for no good reason at all. I’ve already seen and experienced a rapid evolution in mountain bike design over my years of riding and racing. From what we were riding in the 90s, to what we are riding today, is nothing short of comparing a Model T to a Shelby Mustang. So why should jumping into the pedal assist e-bike space be any different? Well, my conclusion is - it shouldn’t be. What we are seeing is the natural, technology-based evolution of the mountain bike, giving nothing but good options for the trail rider. If you’re feeling a bit apologetic that you’re riding one, and maybe feeling like you have to make excuses for riding one, I reckon you should absolutely own it instead. We’re all part of the same space and having the same type of fun, so let’s just get over it and move on.
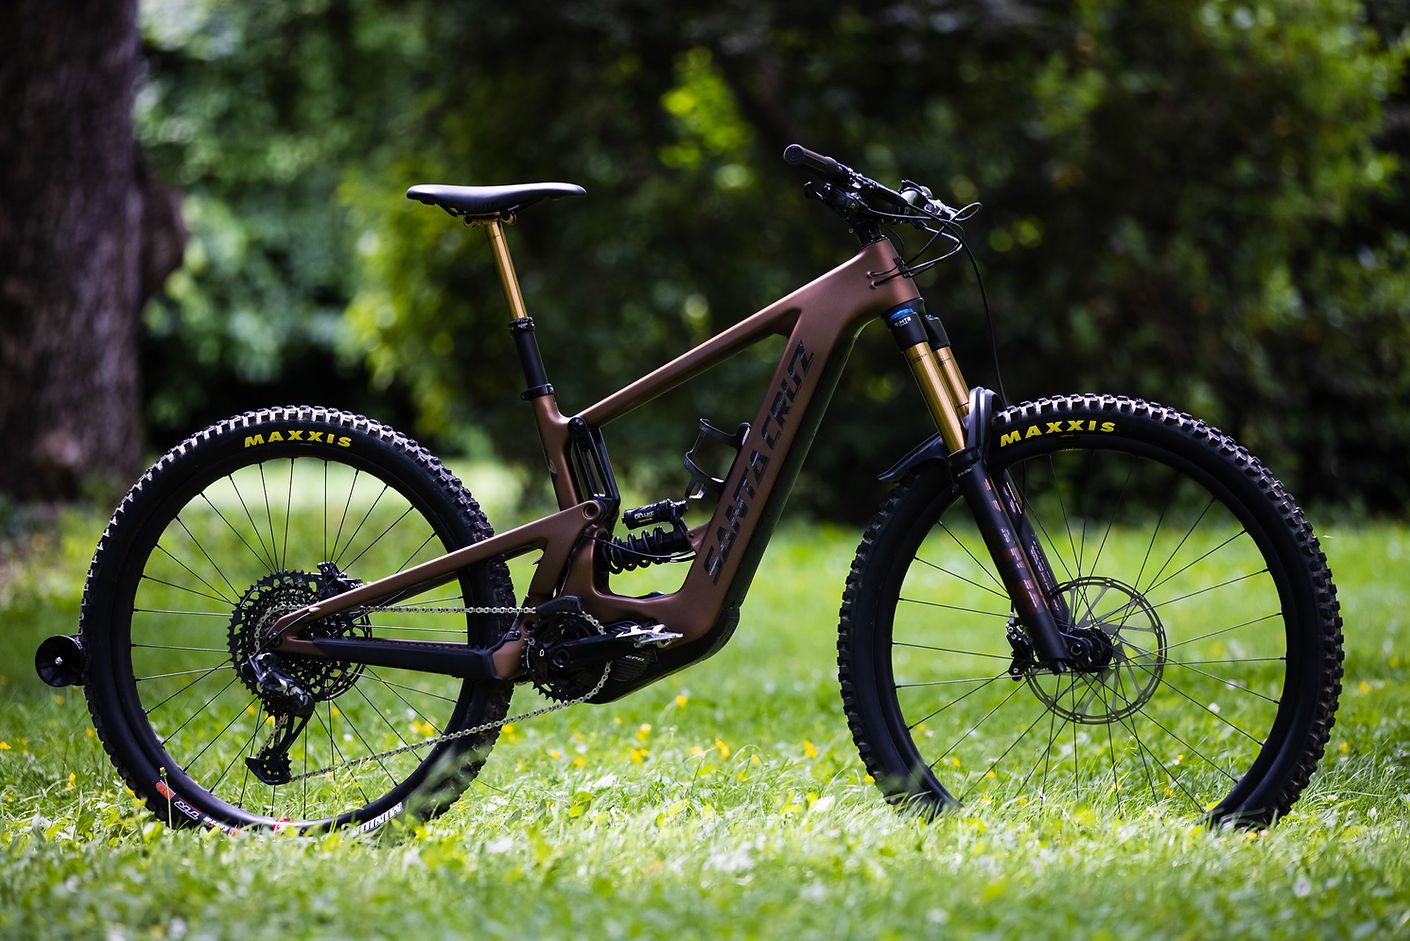
The Bullit is Santa Cruz Bicycle’s (SCB) second pedal assist e-bike. The first, the Heckler, also used a recycled model name - this is a clever approach from SCB, providing a level of continuity and connection with early models that we don’t normally see in the mountain bike industry. The Bullit embraces SCB’s MX platform (29” front, 27.5” rear), tried and proven in the World Cup downhill space with their V-10. MX is a very grown up way to describe this setup, with the informal ‘mullet’ usually the descriptor. Which brings me to full disclosure #2: I’ve been a mullet fan for several years now, and while the opportunity to rock one on my melon is long gone, the bike version absolutely fits with my riding style and the way I want a bike to perform. However, retrofitting a 27.5” or 29” bike to mullet configuration usually results in having to tolerate some level of geometry compromise, and that can be annoying. With my latest trail bike version, I have been able to get spot on with a fair bit of tweaking, so hopping on the Bullit for the first time felt immediately right and I was definitely in my happy place.
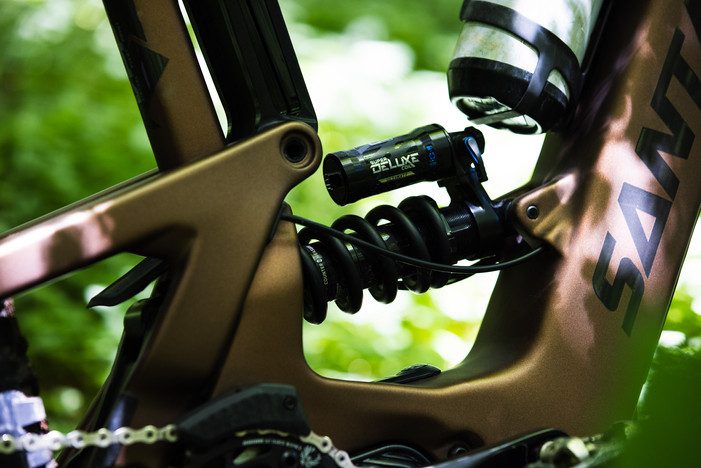
SCB have built the geometry of the Bullit around this MX style configuration, and that really is the only way to get the full roll-over, stability and increased traction benefits of the 29” front wheel, together with the cornering performance and flickability of the 27.5” rear wheel. The parts spec on the XO1 Coil build that I rode, was spot-on. Every component has been spec’d to support the desired use of the bike, and not a single component should need to be swapped out before throwing this bike at the trails. There will always be personal preference items that riders like to bring with them between bikes but, in this case, and even with my own little foibles in mind, there wasn’t anything I changed - or even remotely needed to change - before getting rowdy on this bronze machine.
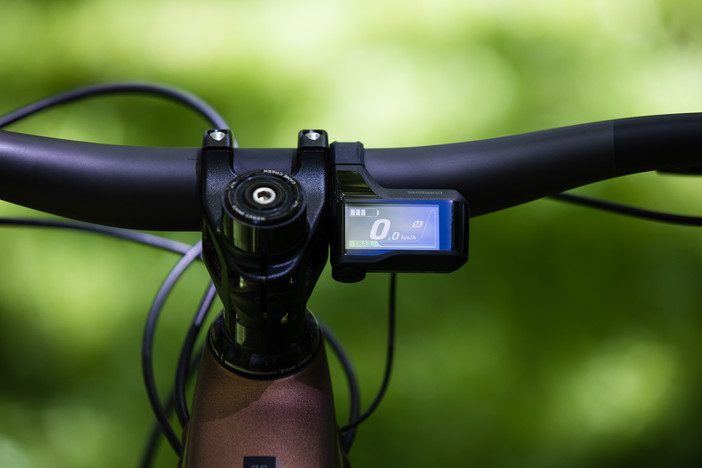
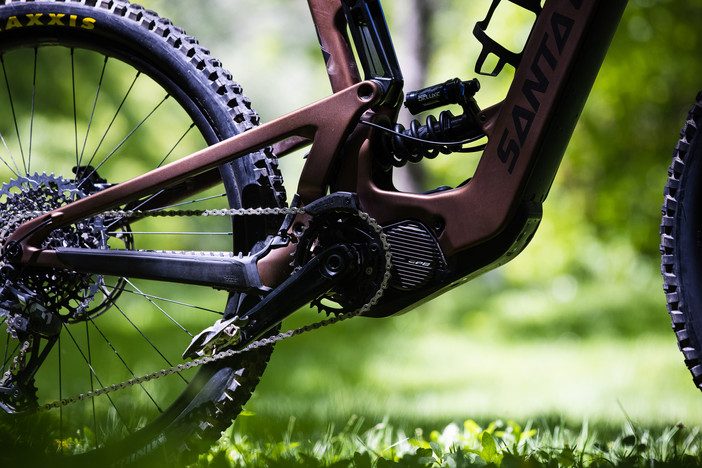
The drive unit is Shimano’s latest EP8 motor with 630wh battery. This review alone could cover the full capability of this technology, but that’s not going to make for the sort of reading I suspect will fly. In summary though, this drive unit can be set to three modes – Eco, Trail and Boost – which are exactly as they look. Together with Shimano’s E-Tube phone app, using Bluetooth connection, each of those three power levels can be custom tuned around Assist Characteristics (eco through to powerful); Max Torque (20-85Nm) and Assist Start (mild through to quick). The permutations are endless, and setting the app up and changing any of those parameters is, thankfully, completely intuitive. Two full profiles can be setup as well, so it is simple to have something like a more flowing, full power/torque trail riding profile and a more gentle beech forest/technical riding profile stored- or even a dry roots and wet roots profile ready to go. This capability to custom tune settings is sure to provide endless fun for EP8 Bullit owners, and equates to a valuable trail-side tool giving the ability to tune the drive characteristics to the conditions. SCB went with Shimano drive units for the Heckler, and now the Bullit, due to the high level of international support, the natural/instinctive way they work, and their proven reliability. There is very little adaption time for the rider when hopping on one of these for the first time.
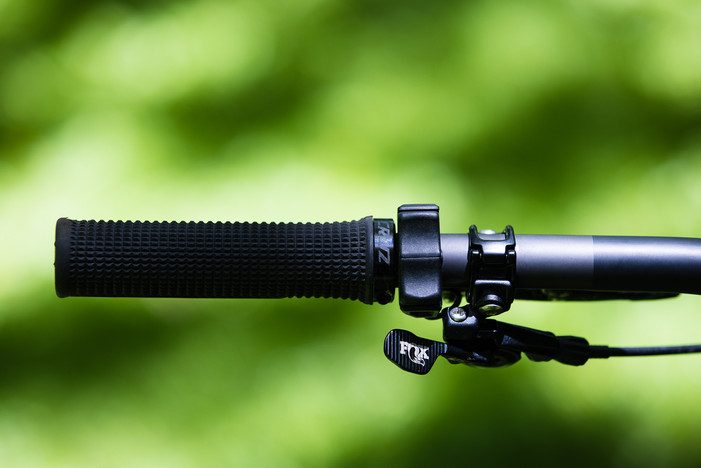


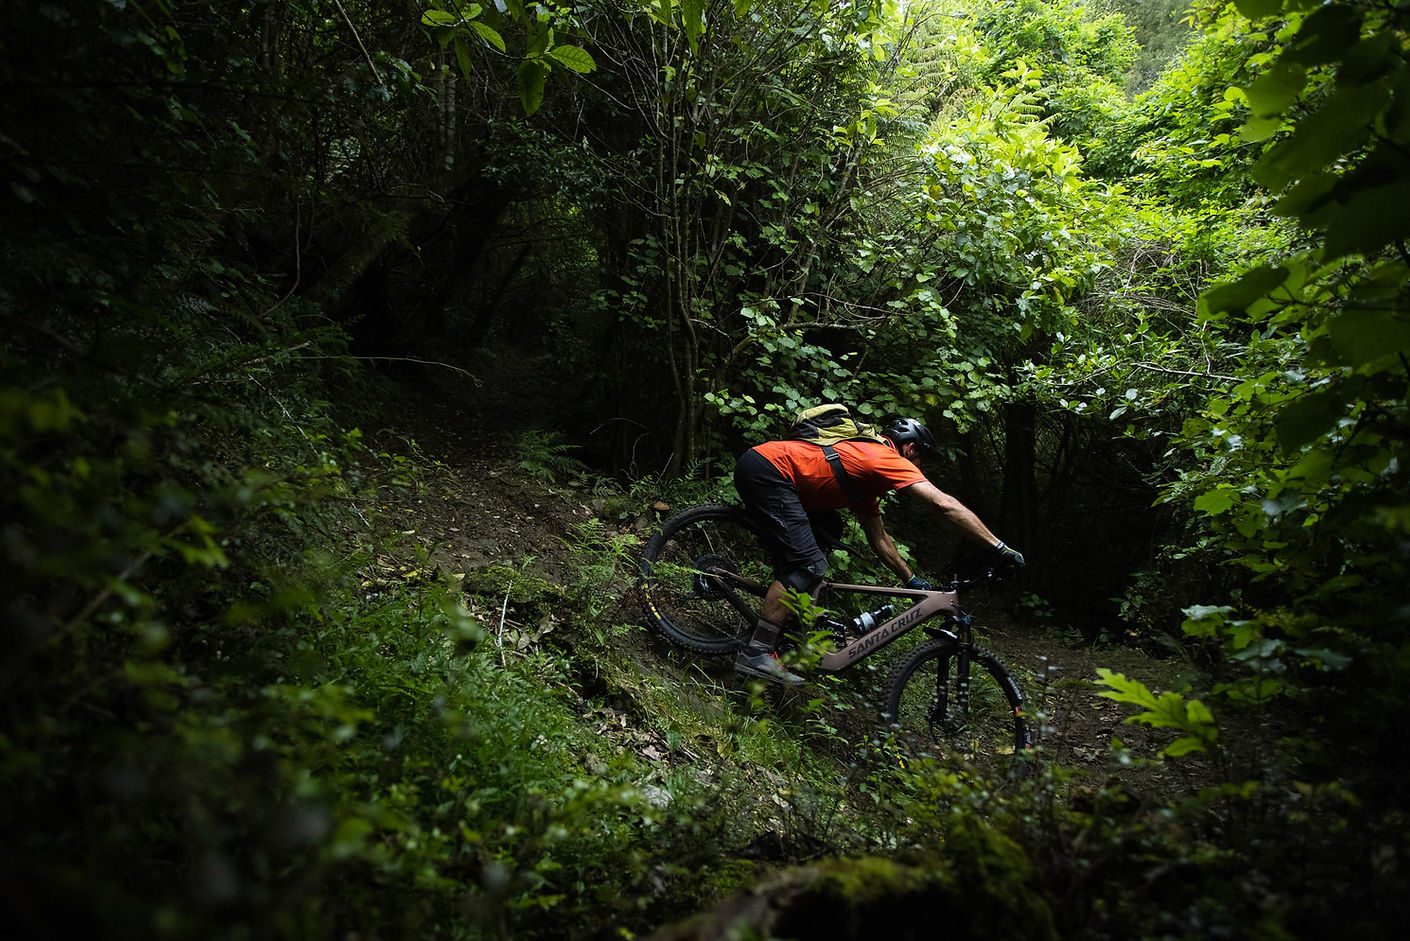
Our first day of riding was a bit of a shake down. Trails were reasonably dry and we hit some progressively harder trails as the afternoon wore on, including sessioning nasty, technical climbing sections that on a normal bike wouldn’t even be considered. My initial introduction and natural acceptance of the EP8 setup happened so quickly I was caught by surprise. Once I found the sweet spot around cadence, I was all over it. And that was a theme that ran through the media camp, regardless of what type of trail we were riding – when you’re working around that 80rpm cadence level, the world spins a bit slower. The first nasty, technical climbing section showed me that anticipation of gear selection, including using the single click shifter, needs to be slightly more advanced than on a non e-bike, to keep the motor working to deliver the right amount of torque and power through the drivetrain, to keep things surging forward. That learning again happened extremely quickly, and once sorted meant that ridiculously steep, rooty and slippery climbing sections of trail could be dealt with. It was relatively easy to get a feel for the torque assistance on these steep sections of trail too – constant pedalling pressure yielded great results, however, when climbing over steep, greasy root-infested sections of trail, some gentleness was needed to manage the torque. If front-back weight distribution was not quite right, even for the briefest of moments, things moved pretty quickly into Bullitt Fastback territory, with only the blue smoke missing! This is where the tuning capability of the motor really comes into its own, and dialling down the Torque, and possibly the Assist Start functions, will tailor the motor’s performance to the trail conditions, and desired performance. The bike does require a more deliberate technique with front/back weighting when climbing the technical, steep stuff though, with the drive system torque and power meshed in to provide more go-forward. It’s exactly the same technique as used on a non e-bike, but on steroids – the more deliberate the technique, the better the bike climbs. You definitely can’t just be a passenger on this bike and simply rely on the drive system to deliver in that sort of climbing terrain.
Our second day of riding kicked in after five hours of the sort of heavy spring rain we have had a lot of in Nelson this year. Trail plans were changed a wee bit as a result, with more of a focus on the lower areas of Fringed Hill to explore what the bike would do across a wider range of trail type. Day three took us to exactly the type of terrain this bike is designed for: steep, long climbs; technical, rooty and rocky linking tracks; and steep, rooty grade five goodness.
For me, slamming the bars on the large size bike was the only structural change I made, and it put me straight into a familiar mode of riding that usually only comes with a triple clamp fork setup. The front end of the Bullit encouraged that approach, with the Fox 38’s proving to be ridiculously solid and composed under severe front-end weighting and aggression. Non-plus size Double Down Assegai (2.5 front) and DHR II (2.4 rear) tyres give an obvious signal of the intentions of the bike, and are a welcome, important and entirely appropriate part of the overall spec, absolutely supporting the aggressive intentions of the bike. These same tyres are specced on all the different models of Bullit (as is the same CC carbon frame and EP8 drive unit), so SCB aren’t scrimping in that department.
Carrying on the front-of-the-bike theme, two areas in particular stood out. How the bike took and held a line across off-camber, root infested trail sections was stunning – the combo of a fork with minimal lateral deflection, good damping performance and the super aggressive front tyre all working together to encourage line choice that would otherwise be off the table. Also, pushing the front of the bike through steep, deep holes and transitions was rock solid. No suggestion of the front of the bike ever getting hung up on even the nastiest of trail sections was a real confidence-inspiring characteristic. Big rotor Code brakes (220mm front, 200 rear) were right at home in that steep environment, with oodles of power modulation always on tap, and no fading to speak of at all – that says a lot about SCB’s approach to parts spec on these bikes.
Our wet day of riding showed two surprising traits with this bike that are well worth mentioning. The first is how receptive the bike is to hooking up on slippery surfaces when feeding constant weight through the middle of the bike – it was amazing. This trait alone yielded a lot of riding joy, and epitomised the ‘ride it like its dry’ mantra that is always the go-to for riding the slippery stuff. The weight of the bike and its low centre of mass sitting on those aggressive tyres worked in complete harmony to provide gobs of traction. The other trait that popped up in these conditions, that was a little unexpected, was how well the bike responded to being weighted and unweighted – natural trail pumping. The suspension platform provided plenty of support when getting aggressive in this area, and the bike responded in kind with making massive amounts of traction where needed, but also when getting its float on to glide over those sections of trail that required lightness. This was unexpected for me, as the weight of the bike had no real detrimental effects on this playful style of riding.
When the fickle Nelson weather took a break, it opened up a last minute opportunity to give the Bullit a run on some more open style, flowy type trails. Nelson’s classic ‘riding on marbles’ dry surface was the connection for this, and it showed some traits of the bike that might not have been fully evident in the technical style of riding we had been doing. Stability at speed was no problem at all, as was making traction where needed (see above), but the open stuff highlighted the need to get really aggressive with the body English to make this bike sing. A soft approach doesn’t gel with the Bullit – it begs you, as the pilot, to give it the firm prompts it requires to do its thing. The harder it is thrown, pushed and directed at the trail, the more the overall package responds.
Of course, a bit of jumping had to be factored in during our riding days - it would have been rude not to. E-mountain bike riders who like a bit of air time usually tell the same story when asked how their bikes perform in the air, and it was great to be able to confirm that on the Bullit. Not only does normal jumping technique apply, but the weight of the bike adds a ramped up level of stability when in the air. It sort of makes a lightweight trail bike feel just a wee bit sensitive! So jumping performance gets the big tick too. And – just a quick comment on the bike’s weight: SCB quote just under 23kg for the XO1 Coil we rode. That is a true weight, and considering the coil shock and downhill tyre spec, it reflects very favourably on the overall package. Compared to most other bikes in this category, it is definitely at the lighter end of the scale.
Without getting all tied up in watt hours, power settings etc, a five hour hard ride took us into one-bar-battery-remaining territory which, depending on power setting to get you home, was in the realm of about a 15km back-up range. That was after five hours of hard riding and climbing at pace. For my legs and lungs, the load we were climbing at was very close to my normal riding, but at three to four times the pace. That surprised me too, and I’ve come away from this review having dispelled any suspicion that pedal assist mountain bike riding might be too easy. Of course you can cruise, but using the drive system to its full capability becomes a new normal very quickly. I honestly didn’t realise just how quick we were climbing on these bikes until we came up behind non e-bikes.
I’d say Santa Cruz Bicycles have met their claims with the Bullit. They are bold claims, but so is this bike. Yes, it’s got some weight to it, but it didn’t take much time on the bike for that weight to be pretty much forgotten; the overall package just works so well. Yes, it’s a lot of coin too, but it’s also an awful lot of bike and probably represents the sharp edge of where this technology is at. The spirit of the original Bullit lives strong in this new model, and I reckon that the King of Cool, Steve McQueen, would have approved if this Bullit had been around in his time.
Distributed by Hyperformance
Words: Chris Mildon
Images: Henry Jaine
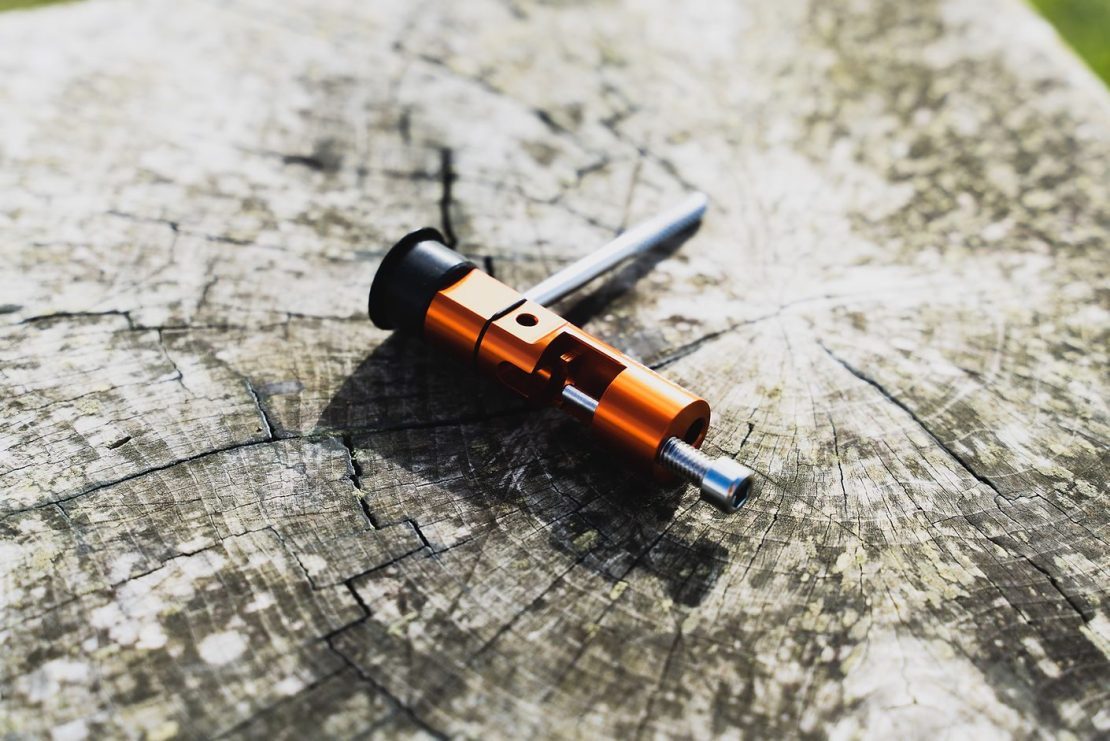
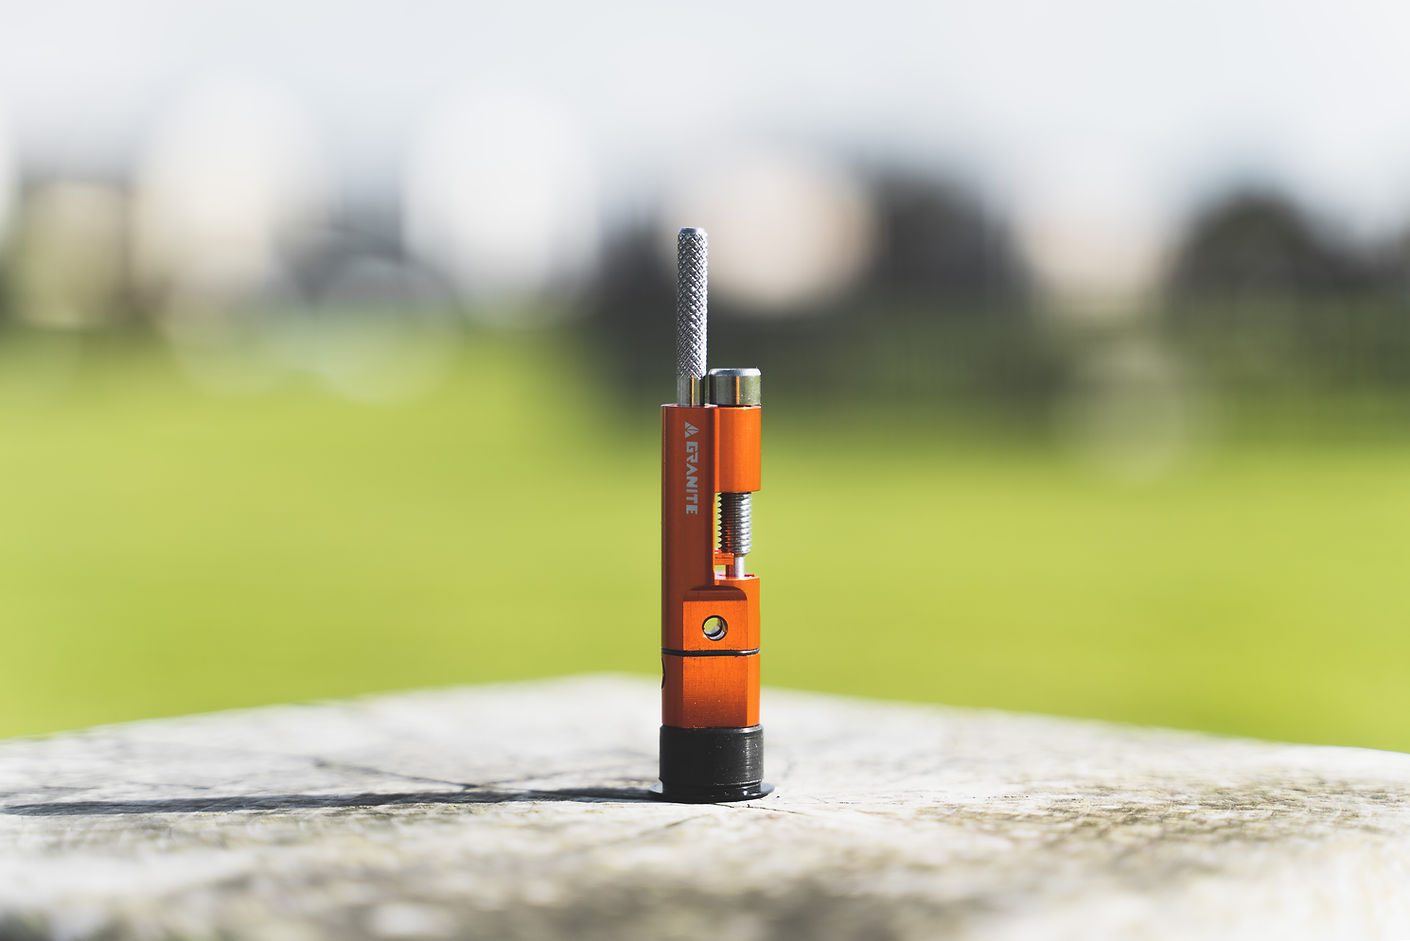
Review: Granite Design Stash Chain Tool
Granite Design’s Stash Tool offers everything you need for a quick fix, but it’s lacking one thing: a chain breaker. The Granite Design Stash Chain Tool is a chain tool that hides away inside your bar-end, and is their solution to the Stash’s lack of chain breaker. When combined with the Stash Tyre Plug and Stash Steerer Tool, it gives you the ability to carry everything you need on the trails, integrated on your bike.
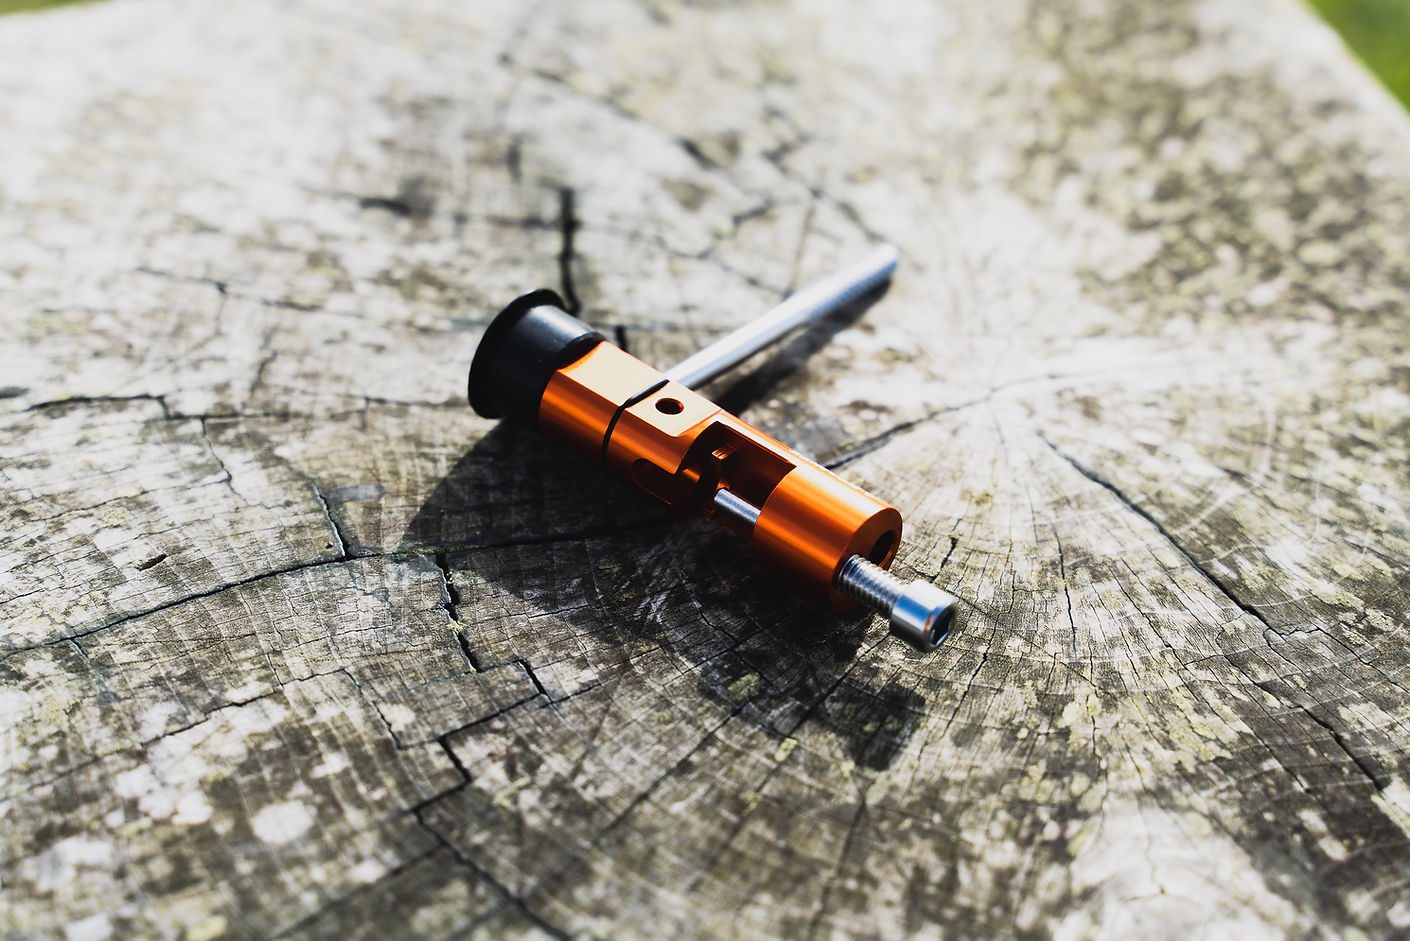
The Stash Chain Tool consists of a few parts: the breaker body, the driving pin and a steel handle. All of the parts are stored within the tool body itself, which also features a spot to stash a quick link. Something that had impressed me with the Granite Design products I’ve tested so far, is the build quality - and the case is no different here. All the threads are well formed and secure, and the actual material used feels nicer in hand than some multi-tools out there. The Stash Chain Tool is secured inside your bar by a 3mm bolt. Tightening this bolt compresses, and therefore expands, a rubber bushing on the tool that wedges up against the bar, providing a solid, rattle-free fit.
When it comes to operation, the Stash Chain Tool is a breeze and partners up well with the Stash Steerer Tool or the RocknRoll (both of which you’ll find reviewed in this issue). Undo the 3mm bolt on the cap until you can remove the tool from your handlebars, unscrew the handle from the tool body and screw it into its mount, then break out the 5mm on your multi-tool to drive the pin. There ya go, ready to break any 9-12 speed chain that finds its way into your tool.
Emergency chain breakers are exactly that, meant to break chains in emergencies. As a result, they are often just good enough to get the job done, so I was surprised by the amount of leverage provided by the Stash Chain Tool, and how solid it felt in hand. The teeth that retain the chain in the tool are smaller than a typical chain breaker, so you do need to spend some extra time making sure everything is lined up before you go cranking on the tool. As far as a compact chain breaker you can carry with you on the trails goes, it’s about as good as you’ll get.
It’d be nice to see another handle integrated somehow, to drive the breaking pin, but this is by no means a deal breaker and I can say that whether you intend on using the rest of Granite’s Stash range or not, the Chain Tool is definitely a worthwhile purchase. Especially if you want a solid chain breaker that you can leave on your bike and forget about.
Distributor: Everoutdoor / RRP: $49.99
Words: Cam Baker

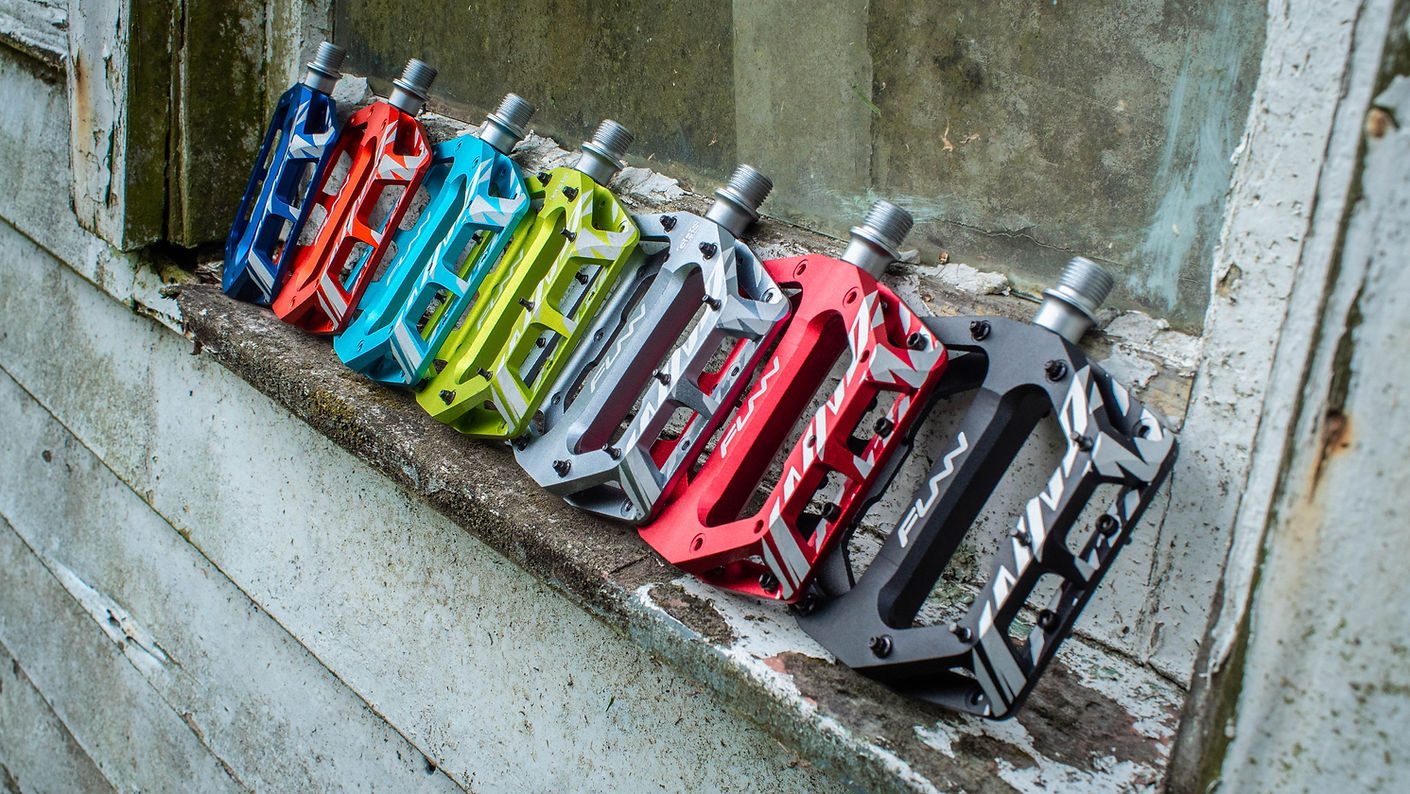
Review: Funn Funndamental Flat Pedals
The FUNN Funndamental pedals are a 6061 alloy flat pedal, featuring 11 replaceable pins per side, a GRS grease port, and a nice big platform. There come with long and short pins and a couple of little tools to remove/fit them as, out of the box, no pins are installed, allowing you to place as few or as many as you like in different patterns. They feel pretty flat underfoot, and are possibly less concave than the BlackKats I usually run, and feel very solid.
Pros:
The pins are needle sharp which gives a heap of grip, but will probably open my shins up next time I muck up a crank flip. The nifty grease port is a good idea, and the pedals run nice and smooth right out of the box on a cartridge bearing and DU bushing. I haven’t used the port yet, but it looks like an easy way to maintain the pedals without rebuilding.
These are a tough looking pedal and, so far, have handled pedal strikes well, with no scuffing or bent pins. There is a feeling of less foot fatigue compared to the BlackKats; I didn’t have to try grip my feet on as hard and they stayed put wherever I placed them over rough terrain, while allowing fine tuning of my shoe position with a gentle lift and slide technique.
The choice of seven colours is cool, especially if you're into matching every component on your bike - or contrasting them. I tested the silver ones, so can’t speak for how well the anodising stays on after smashing rocks - yet.
Cons: It’s a hassle to put the pins in yourself (seeing as no one will ever run them without pins) but it does allow personal tuning and set-up, so that could also be seen as a ‘pro’. You decide, while you're screwing the pins in!
There are no spare pins included, but they are supplied with long and short pins, washers and tools.
The less pointy outer pins are kinda pointless (pun intended) as they don’t really grip at all. It would have been cool for them to still have a sharp end. Overall, I prefer the Funndamentals to my regular pedals, and they will be staying on my bike. They feel like a solid, modern pedal yet offer nothing extreme or ground-breaking - which can be a good thing for a component that needs to do one job and do it well. At $170 retail, I would consider them fundamentally good value as well.
Words and Images: Finn Lloyd
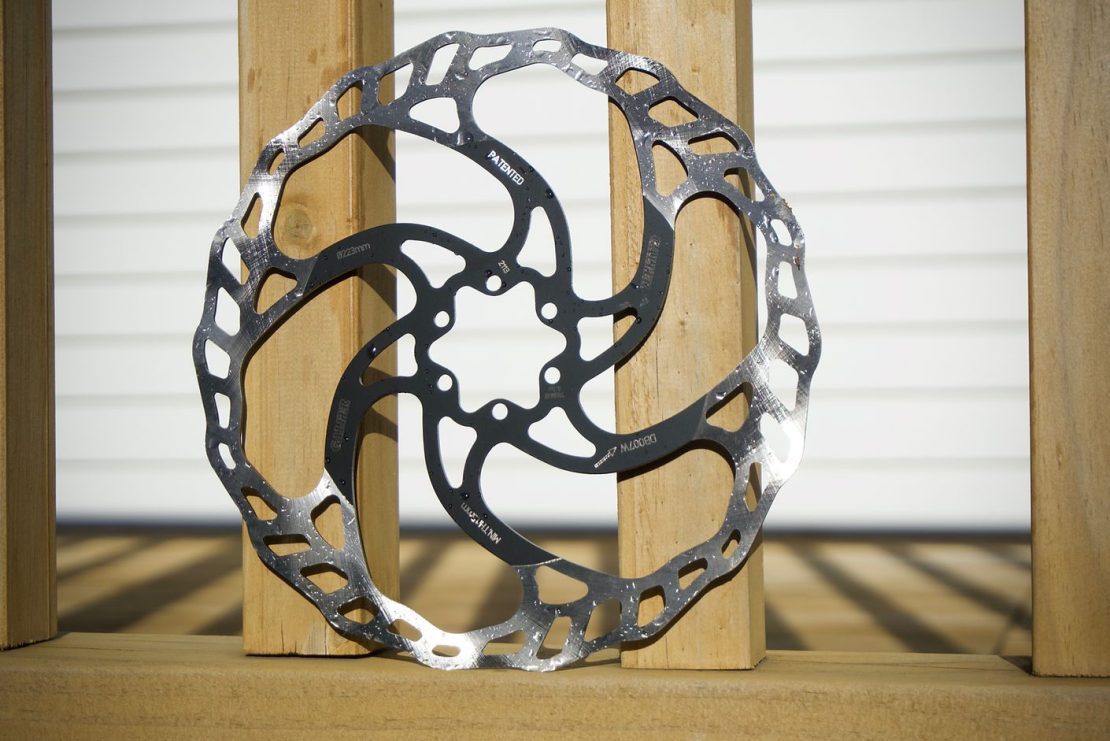
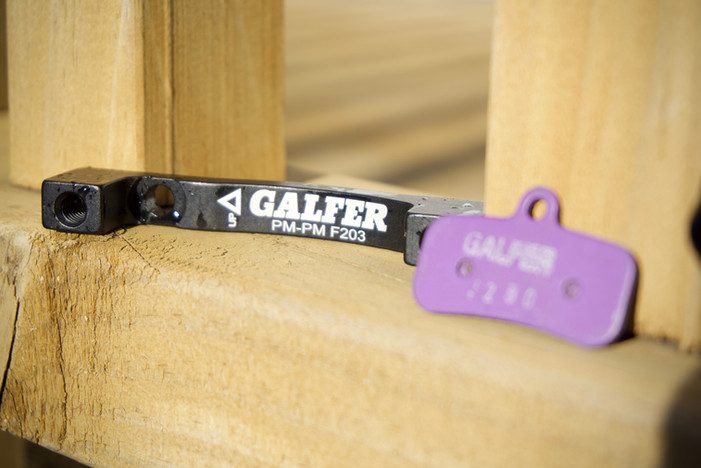
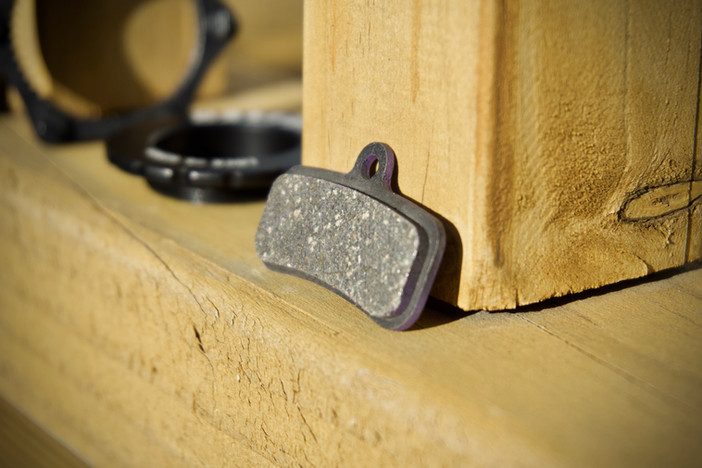
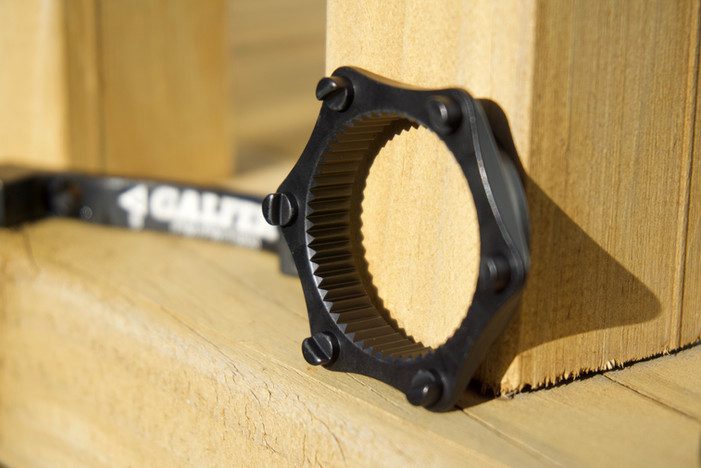
Review: Galfer Brake Rotors, Adapters, and Pads
A wise man once told me, in the context of going fast on two-wheeled machines, that “brakes just slow you down”. Never a truer word was spoken, albeit delivered with the intention that you should do whatever it takes to stay off them and keep the throttle twisted/pedals turning for as long as possible, with the levers only deployed as a last-minute resort. In a way, the wise man wasn't only championing not braking, but having good brakes to call on to do their job strongly and instantly. It's somewhat ironic that, at the time of the imparted wisdom, disc brakes were still new tech in the moto world, and coaster and caliper brakes would continue to rule the bicycle realm for a good couple of decades yet. How the times have changed.

Today, those words still ring true, and we are blessed that we can “lay off the stoppers” until the very last instance, as the power of modern mountain bike brakes is far superior to anything we tried to stop our two-strokes with back then. It's inevitable that crossover between the two sports has taken place, with moto companies either having influenced development within the bicycle industry, or jumping into the pool completely and applying their experience to the testing waters. Spanish company Galfer has taken the latter approach and is offering a wide range of braking options for the pedal set.
If you've never heard of Galfer you're probably not alone, yet they are not exactly a new player in MTB, having developed brake pads for bicycles since 1990. Their automotive history goes back as far as 1952, so they know what they're doing. Being mainly marketed in Europe for most of that time, they are now expanding into the international market in a big way. I was excited to see their name here in NZ and, serendipitously, I was looking to upgrade my eMTB brakes when I saw that FE Sports were distributing Galfer down under. A set of 223mm rotors, eMTB specific pads, and the necessary adapters were soon on their way.
The stock brakes on my eMTB were not bad, but not outstanding either, so I thought it would be a good test to see how much difference bigger rotors and special pads would make. The Shimano 4-piston calipers I was using were at the lower/mid-end of their range, so could they be made to work like a high-end calliper? Short answer, yes! Immediately the power was increased, noticeably, and the feel at the lever was definitely more 'grabby' - in a good way, like a sensation of the pads biting the rotor rather than dragging on it to slow the wheel. Whether this is due to the semi-organic/metallic compound or the bigger rotors, well, I'm not sure, but I'd say a combination of both is likely the answer. There is no noticeable increase in rotor flex over a 200mm disc, as the 223 uses a thicker 2.0mm steel which keeps them straight and resists/dissipates heat build-up better. The Centrelock to 6-Bolt adapters are beautifully made, by the way, and the tight interface between them and the rotors no doubt helps with the solid feel also.

Having recently upgraded the callipers to Shimano's Saint model has stepped up the power even more, as you'd expect. The bite, modulation and precision of the braking is as good as anything out there, and the Galfer components are a worthy enhancement to any brakes, from low- to high-end. If you want to go fast, you need to stop quickly and consistently, and these Spanish brake guru’s bits will have you flying with the confidence to stop. Wise words indeed.
Distributed by FE Sports
Reviewed by Brett Kennedy